
Document Operation (27)
How to Mark a Presentation as Final using Spire.Presentation in C#, VB.NET
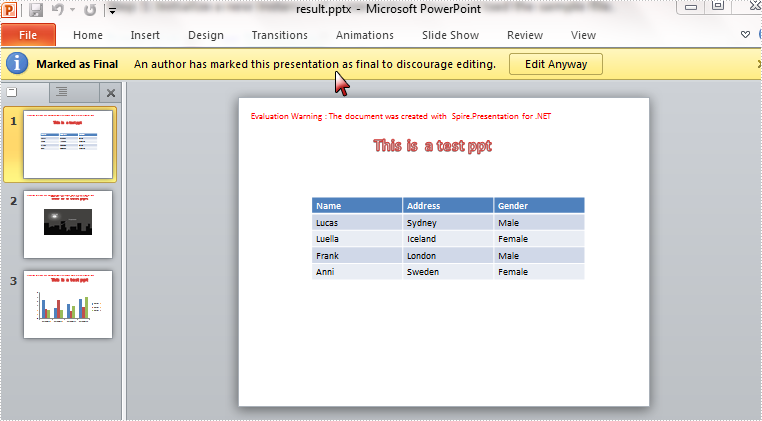
2015-08-06 05:54:52 Written by KoohjiThe Mark as Final command makes a presentation read-only and prevents changes to the document. When you share a presentation that is marked as final, you're telling viewers the presentation is final and no changes on it are wanted. In this article, I'll make a brief introduction about how to mark a presentation as final using Spire.Presentation in C#, VB.NET.
In Spire.Presentation, the presentation class contains a property of DocumentProperty which enables developers to set document properties easily. Here in this case, you are able to mark a presentation as final by setting the Boolean value of MarkAsFinal as true.
Code Snippet:
Step 1: Initialize a new instance of presentation class and load the sample file.
Presentation ppt = new Presentation();
ppt.LoadFromFile("sample.pptx",FileFormat.Pptx2010);
Step 2: Set the value of MarkAsFinal property as true.
ppt.DocumentProperty["_MarkAsFinal"] =true;
Step 3: Save and launch the file.
ppt.SaveToFile("result.pptx",FileFormat.Pptx2010);
System.Diagnostics.Process.Start("result.pptx");
Effect:
Full Code:
using Spire.Presentation;
namespace MarkPPT
{
    class Program
    {
        static void Main(string[] args)
        {
            Presentation ppt = new Presentation();
            ppt.LoadFromFile("sample.pptx", FileFormat.Pptx2010);

            ppt.DocumentProperty["_MarkAsFinal"] = true;

            ppt.SaveToFile("result.pptx", FileFormat.Pptx2010);
            System.Diagnostics.Process.Start("result.pptx");
            System.Diagnostics.Process.Start("result.pptx");

            }
        }
    }
Imports Spire.Presentation
Namespace MarkPPT
	Class Program
		Private Shared Sub Main(args As String())
			Dim ppt As New Presentation()
			ppt.LoadFromFile("sample.pptx", FileFormat.Pptx2010)

			ppt.DocumentProperty("_MarkAsFinal") = True

			ppt.SaveToFile("result.pptx", FileFormat.Pptx2010)
			System.Diagnostics.Process.Start("result.pptx")
			System.Diagnostics.Process.Start("result.pptx")

		End Sub
	End Class
End Namespace
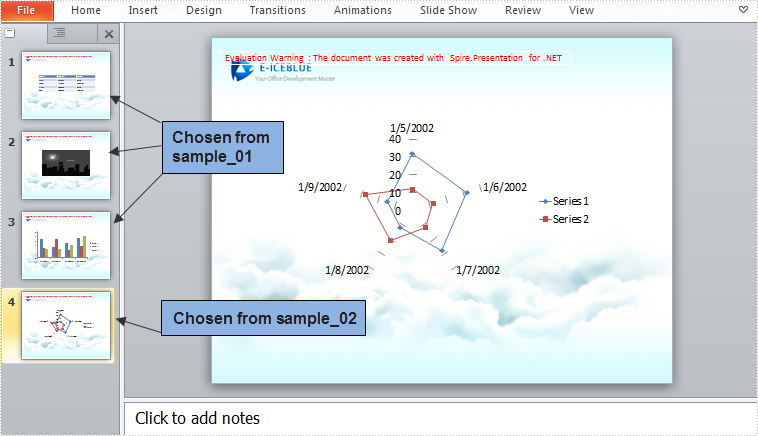
Slide cloning feature provided by Spire.Presentation enables developers to clone one or several slides within one PowerPoint presentation or among multiple presentations. By cloning slide from source presentation to target document, we can easily split a large presentation into small ones and merge multiple presentations to one presentation in reverse. This article presents how to merge selected slides from multiple PowerPoint presentations into one single presentation.
Main Steps
Step 1: Create a new PowerPoint document and remove the default blank slide.
Presentation ppt = new Presentation();
ppt.Slides.RemoveAt(0);
Step 2: Initialize two instances of Presentation class and load the sample PowerPoint file respectively.
Presentation ppt1 = new Presentation("sample_01.pptx",FileFormat.Pptx2010);
Presentation ppt2 = new Presentation("sample_02.pptx", FileFormat.Pptx2010);
Step 3: Append all slides in sample_01 to the new PowerPoint document using method Append(ISlide slide).
for (int i = 0; i < ppt1.Slides.Count; i++)
{
    ppt.Slides.Append(ppt1.Slides[i]);
}
Step 4: Append the second slide in sample_02 to the new presentation.
ppt.Slides.Append(ppt2.Slides[1]);
Step 5: Save and launch the file.
ppt.SaveToFile("result.pptx", FileFormat.Pptx2010);
System.Diagnostics.Process.Start("result.pptx");
Output
Entire Code
using Spire.Presentation;
namespace MergeSlides
{
    class Program
    {
        static void Main(string[] args)
        {
            Presentation ppt = new Presentation();
            Presentation ppt1 = new Presentation("sample_01.pptx", FileFormat.Pptx2010);
            Presentation ppt2 = new Presentation("sample_02.pptx", FileFormat.Pptx2010);
            ppt.Slides.RemoveAt(0);
            //append all slides in ppt1 to ppt
            for (int i = 0; i < ppt1.Slides.Count; i++)
            {
                ppt.Slides.Append(ppt1.Slides[i]);
            }
            //append the second slide in ppt2 to ppt
            ppt.Slides.Append(ppt2.Slides[1]);
            //save and launch the file
            ppt.SaveToFile("result.pptx", FileFormat.Pptx2010);
            System.Diagnostics.Process.Start("result.pptx");

            }
        }
    }
Imports Spire.Presentation
Namespace MergeSlides
	Class Program
		Private Shared Sub Main(args As String())
			Dim ppt As New Presentation()
			Dim ppt1 As New Presentation("sample_01.pptx", FileFormat.Pptx2010)
			Dim ppt2 As New Presentation("sample_02.pptx", FileFormat.Pptx2010)
			ppt.Slides.RemoveAt(0)
			'append all slides in ppt1 to ppt
			For i As Integer = 0 To ppt1.Slides.Count - 1
				ppt.Slides.Append(ppt1.Slides(i))
			Next
			'append the second slide in ppt2 to ppt
			ppt.Slides.Append(ppt2.Slides(1))
			'save and launch the file
			ppt.SaveToFile("result.pptx", FileFormat.Pptx2010)
			System.Diagnostics.Process.Start("result.pptx")

		End Sub
	End Class
End Namespace
If you are preparing a large number of presentations, cloning slides can help you save resources. Instead of creating new slides from scratch for each presentation, it is more efficient and less time-consuming to modify existing slides. In this article, you will learn how to copy slides in PowerPoint presentations in C# using Spire.Presentation for .NET.
Install Spire.Presentation for .NET
To begin with, you need to add the DLL files included in the Spire.Presentation for.NET package as references in your .NET project. The DLL files can be either downloaded from this link or installed via NuGet.
PM> Install-Package Spire.Presentation
Copy Slides Within the Same Presentation in C#
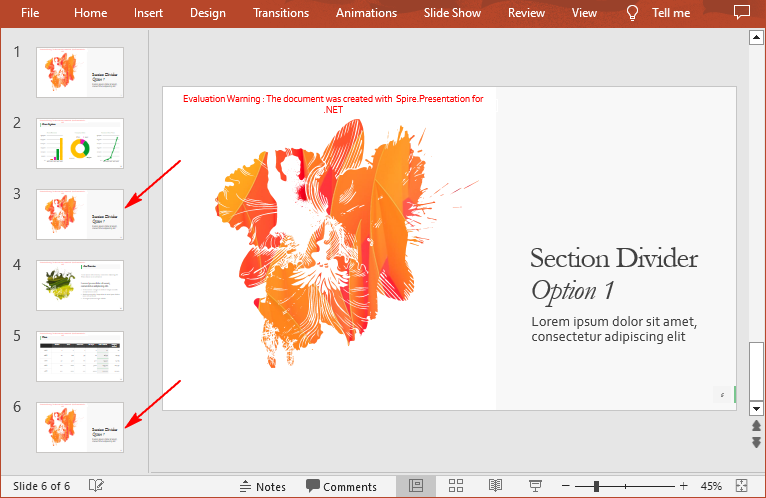
You can clone a slide either at a specified location or at the end of a PowerPoint presentation through the Presentation.Slides.Insert(intIndex, ISlide slide) or Presentation.Slides.Append(ISlide slide) methods. The following are the detailed steps.
- Create a Presentation instance.
- Load a PowerPoint presentation using Presentation.LoadFromFile() method.
- Get a specified slide using Prenstion.Slides[] property.
- Clone the slide to the end of the same presentation using Presentation.Slides.Append() method.
- Clone the slide to a specific position within the same presentation using Presentation.Slides.Insert() method.
- Save the result file using Presentation.SaveToFile() method.
- C#
using Spire.Presentation;

namespace CopySlides
{
    class Program
    {
        static void Main(string[] args)
        {
            //Create a Presentation instance
            Presentation ppt = new Presentation();

            //Load a PowerPoint presentation
            ppt.LoadFromFile("Input1.pptx");

            //Get the first slide in the presentation
            ISlide slide = ppt.Slides[0];

            //Clone the slide to the end of the presentation
            ppt.Slides.Append(slide);

            //Clone the slide to the third position within the presentation
            ppt.Slides.Insert(2, slide);

            //Save the result file
            ppt.SaveToFile("CloneSlidesWithinTheSame.pptx", FileFormat.Pptx2013);

        }
    }
}
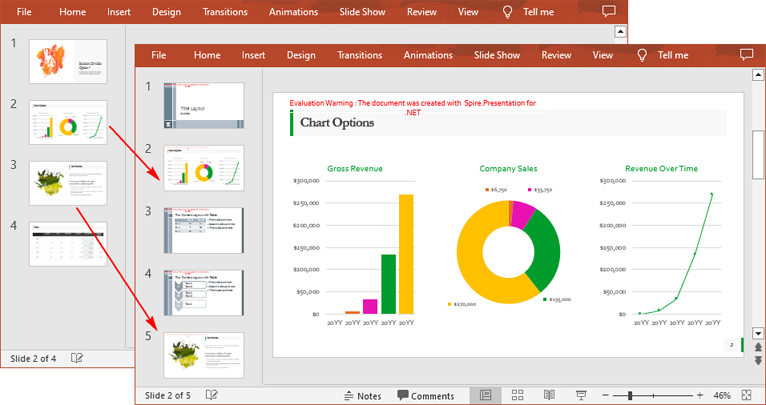
Copy Slides to Another Presentation in C#
Spire.Presentation for .NET also allows you to load two PowerPoint files and then clone the slides from one presentation to another presentation. The following are the detailed steps.
- Create a Presentation instance.
- Load two PowerPoint presentations using Presentation.LoadFromFile() method.
- Get two slides in the first presentation using Prenstion.Slides[] property.
- Clone the first slide to a specific position in the second presentation using Presentation.Slides.Insert() method.
- Clone the second slide to the end of the second presentation using Presentation.Slides.Append() method.
- Save the result file using Presentation.SaveToFile() method.
- C#
using Spire.Presentation;

namespace CopySlidesToAnother
{
    class Program
    {
        static void Main(string[] args)
        {
            //Load the first PowerPoint presentation
            Presentation sourcePPT = new Presentation();
            sourcePPT.LoadFromFile("Input1.pptx");

            //Load the second PowerPoint presentation
            Presentation destPPT = new Presentation();
            destPPT.LoadFromFile("Input2.pptx");

            //Get two slides in the first presentation
            ISlide slide1 = sourcePPT.Slides[1];
            ISlide slide2 = sourcePPT.Slides[2];

            //Clone slide1 to the second position in the second presentation
            destPPT.Slides.Insert(1, slide1);

            //Clone slide2 to the end of the second presentation
            destPPT.Slides.Append(slide2);

            //Save the result file
            destPPT.SaveToFile("CloneSlidesToAnother.pptx", FileFormat.Pptx2013);

        }
    }
}
Apply for a Temporary License
If you'd like to remove the evaluation message from the generated documents, or to get rid of the function limitations, please request a 30-day trial license for yourself.
PowerPoint presentations are a fundamental tool for communication across various fields. As these presentations grow in size and complexity, managing them effectively becomes crucial. One practical solution is to split larger presentations into smaller and more manageable ones. Whether for adapting presentations to specific audiences, breaking down training modules, or optimizing file sizes for distribution, the ability to split PowerPoint presentations using C# in .NET significantly enhances workflow efficiency. This article will show how to split PowerPoint presentations by slides, slide ranges, and sections with C# using Spire.Presentation for .NET.
- Split PowerPoint Presentations by Slides using C#
- Split PowerPoint Presentations by Slide Ranges using C#
- Split PowerPoint Presentations by Sections using C#
Install Spire.Presentation for .NET
To begin with, you need to add the DLL files included in the Spire.Presentation for.NET package as references in your .NET project. The DLL files can be either downloaded from this link or installed via NuGet.
PM> Install-Package Spire.Presentation
Split PowerPoint Presentations by Slides using C#
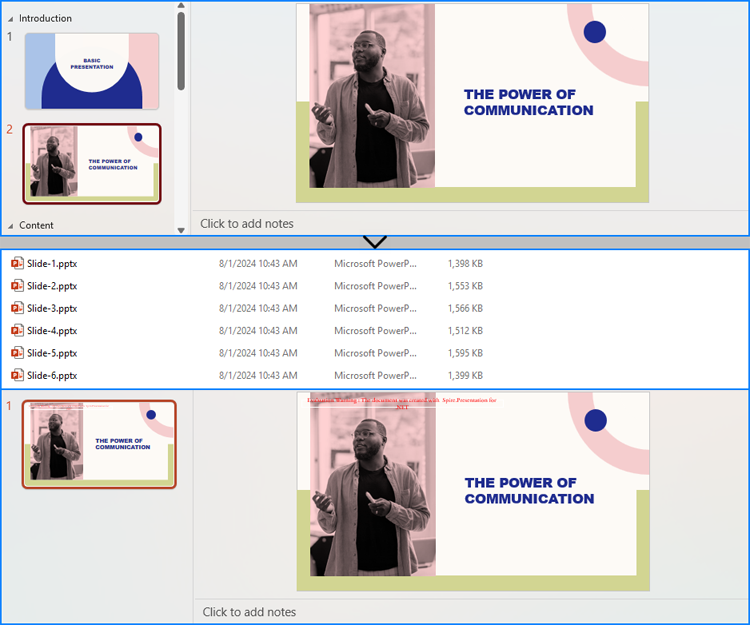
Using Spire.Presentation for .NET, developers can split a presentation into individual slide presentations by iterating through the slides in the original presentation, adding each slide to a new presentation, and then saving it.
Here are the detailed steps:
- Create an instance of Presentation class.
- Load a PowerPoint file using Presentation.LoadFromFile() method.
- Iterate through the slides in the presentation:
- Get a slide through Presentation.Slides[] property.
- Create a new instance of Presentation class and remove the default slide using Presentation.Slides.RemoveAt(0) method.
- Append the slide to the new presentation using Presentation.Slides.Append() method.
- Save the new presentation using ISlide.SaveToFile() method.
- C#
using Spire.Presentation;

namespace SplitPresentationSlide
{
    class Program
    {
        static void Main(string[] args)
        {
            // Create an instance of Presentation class
            Presentation presentation = new Presentation();

            // Load a PowerPoint presentation
            presentation.LoadFromFile("Sample.pptx");

            // Iterate through all slides
            for (int i = 0; i < presentation.Slides.Count; i++)
            {
                // Get a slide
                ISlide slide = presentation.Slides[i];
                // Create a new presentation and remove the default slide
                Presentation newPresentation = new Presentation();
                newPresentation.Slides.RemoveAt(0);
                // Append the slide to the new presentation
                newPresentation.Slides.Append(slide);
                // Save the new presentation
                newPresentation.SaveToFile("output/Presentations/Slide-" + (i +1).ToString() + ".pptx", FileFormat.Pptx2013);
                newPresentation.Dispose();
            }
            presentation.Dispose();
        }
    }
}
Split PowerPoint Presentations by Slide Ranges using C#
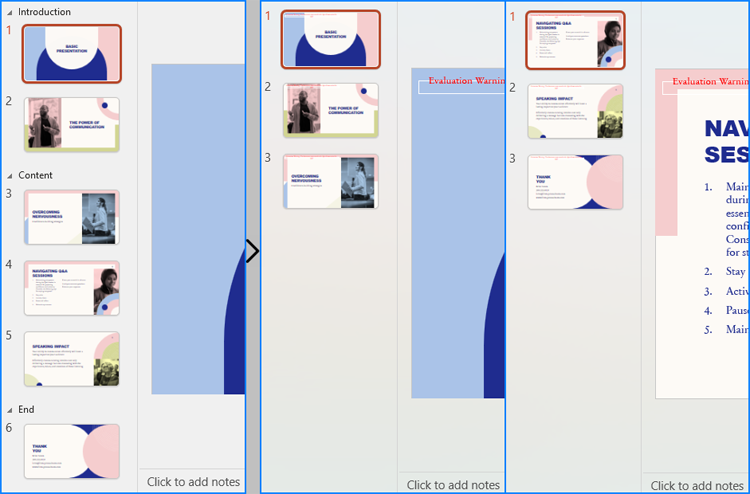
In addition to splitting PowerPoint presentations into individual slide presentations, developers can also split presentations into slide ranges by copying specified ranges of slides to new presentations and saving them.
Here are the detailed steps:
- Create an instance of Presentation class.
- Load a PowerPoint presentation using Presentation.LoadFromFile() method.
- Create new instances of Presentation class and remove the default slides.
- Append specified ranges of slides to the new presentations using Presentation.Slides.Append() method.
- Save the new presentations using Presentation.SaveToFile() method.
- C#
using Spire.Presentation;

namespace SplitPresentationSlide
{
    class Program
    {
        static void Main(string[] args)
        {
            // Create an instance of Presentation class
            Presentation presentation = new Presentation();

            // Load the original PowerPoint presentation
            presentation.LoadFromFile("Sample.pptx");

            // Create two new instances of Presentation class
            Presentation presentation1 = new Presentation();
            Presentation presentation2 = new Presentation();

            // Remove the default blank slides
            presentation1.Slides.RemoveAt(0);
            presentation2.Slides.RemoveAt(0);

            // Append specific ranges of slides to the new presentations
            for (int i = 0; i < 3; i++)
            {
                presentation1.Slides.Append(presentation.Slides[i]);
            }
            for (int i = 3; i < presentation.Slides.Count; i++)
            {
                presentation2.Slides.Append(presentation.Slides[i]);
            }

            // Save the new presentation
            presentation1.SaveToFile("output/Presentations/SLideRange1.pptx", FileFormat.Pptx2013);
            presentation2.SaveToFile("output/Presentations/SLideRange2.pptx", FileFormat.Pptx2013);

            presentation1.Dispose();
            presentation2.Dispose();
            presentation.Dispose();
        }
    }
}
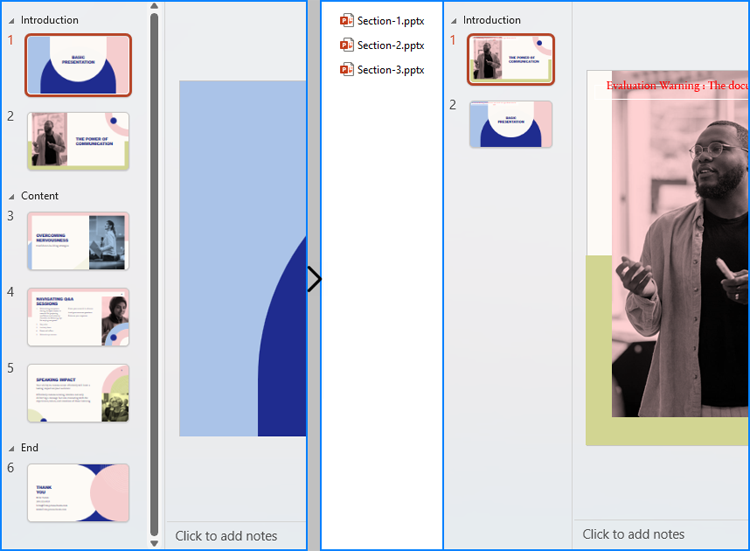
Split PowerPoint Presentations by Sections using C#
Developers also can split a presentation into sections by iterating through the sections in the presentation, adding each slide within those sections to a new PowerPoint presentation, and then saving it.
Here are the detailed steps:
- Create an instance of Presentation class and load a PowerPoint presentation using Presentation.LoadFromFile() method.
- Iterate through the sections in the presentation:
- Get a section through Presentation.SectionList[] property.
- Create a new Presentation instance and remove the default slide.
- Add a section to the new presentation with the same name using Presentation.SectionList.Append() method.
- Get the slides in the original section using Section.GetSlides() method.
- Iterate through the slides and add them to the new section using Presentation.SectionList[].Insert() method.
- Save the new presentation using Presentation.SaveToFile() method.
- C#
using Spire.Presentation;

namespace SplitPresentationSlide
{
    class Program
    {
        static void Main(string[] args)
        {
            // Create an instance of Presentation class
            Presentation presentation = new Presentation();

            // Load a PowerPoint presentation
            presentation.LoadFromFile("Sample.pptx");

            for (int i = 0; i < presentation.SectionList.Count; i++)
            {
                // Get the current section
                Section section = presentation.SectionList[i];
                // Create a new instance of Presentation class and remove the default slide
                Presentation newPresentation = new Presentation();
                newPresentation.Slides.RemoveAt(0);
                // Add a section to the new presentation
                newPresentation.SectionList.Append(section.Name);
                // Get the slides in the section
                ISlide[] slides = section.GetSlides();
                foreach (ISlide slide in slides)
                {
                    // Insert the slide to the new section in the new presentation
                    newPresentation.SectionList[0].Insert(0, slide);
                }
                // Save the new presentation
                newPresentation.SaveToFile("output/Presentations/Section-" + (i + 1).ToString() + ".pptx", FileFormat.Pptx2019);
                newPresentation.Dispose();
            }
            presentation.Dispose();
        }
    }
}
Apply for a Temporary License
If you'd like to remove the evaluation message from the generated documents, or to get rid of the function limitations, please request a 30-day trial license for yourself.
Layout of PPT concerns visual effect directly. PPT Viewer may have different feelings and thoughts such as tense, confused or anxious about different layouts. We can make our PPT files show main information and weaken minor information. This article will show how to set the layout for your slide via Spire.Presentation. Here are the steps:
Step 1: Create a PPT document.
Presentation ppt = new Presentation();
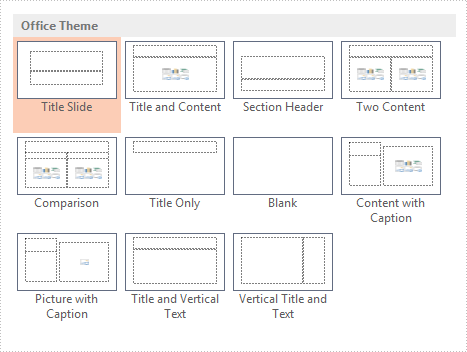
Step2: Set the layout for slide. Spire.Presentation offers 11 kinds of layout just as Microsoft PowerPoint supports.
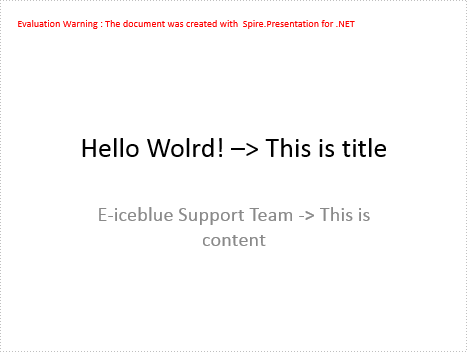
ISlide slide = ppt.Slides.Append(SlideLayoutType.Title);
Step 3: Add content for Title and Text.
IAutoShape shape = slide.Shapes[0] as IAutoShape;
shape.TextFrame.Text = "Hello Wolrd! –> This is title";

shape = slide.Shapes[1] as IAutoShape;
shape.TextFrame.Text = "E-iceblue Support Team -> This is content";
Step 4: Save and review.
ppt.SaveToFile("Result.PPTx", FileFormat.PPTx2010);
System.Diagnostics.Process.Start("Result.PPTx");
Here is the result:
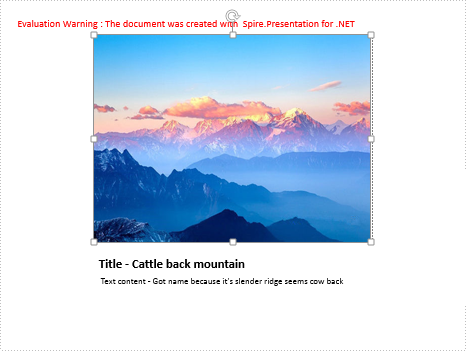
Then change another layout (Picture With Caption) to show: PictureAndCaption
Use function AppendEmbedImage to add image, and notice the order of the shape in PictureAndCaption is Shapes[1], Shapes[0] and Shapes[2].
Full code:
using Spire.Presentation;
namespace SetLayout
{
    class Program
    {
        static void Main(string[] args)
        {
            Presentation ppt = new Presentation();
            ISlide slide = ppt.Slides.Append(SlideLayoutType.PictureAndCaption);

            string ImageFile2 = "1.jpg";
            IAutoShape shape0 = slide.Shapes[1] as IAutoShape;

            slide.Shapes.AppendEmbedImage(ShapeType.Rectangle, ImageFile2, shape0.Frame.Rectangle);


            IAutoShape shape = slide.Shapes[0] as IAutoShape;
            shape.TextFrame.Text = "Title - Cattle back mountain";

            IAutoShape shape2 = slide.Shapes[2] as IAutoShape;
            shape2.TextFrame.Text = " Text content - Got name because it's slender ridge seems cow back";


            ppt.SaveToFile("Sample.pptx", FileFormat.Pptx2010);
            System.Diagnostics.Process.Start("Sample.PPTx");


        }
    }
}
Result:
The transition of Slide can make presentation of PPT files more attractive. Spire.Presentation for .NET allows developers to manage or customize the slide transition of the slides. Developers can not only apply different slide transitions on the slides, but also customize the behavior of these transition.
To create simple slide transition and set speed and sound mode for transition, follow the steps below:
Step 1: Download Spire.Presentation and add references in VS.
Step 2: Create an instance of Presentation and add a new presentation file.
Presentation ppt = new Presentation();
ppt.LoadFromFile(fp.TestPath + "first_quarter_business_upd.ppt");
Step 3: There are 23 transition types can be set by Spire.Presentation, such as Circle, Cover, Plus, Push, etc. These transitions can be found in TransitionType enum.
ppt.Slides[0].SlideShowTransition.Type = TransitionType.Push;

Step 4: We just applied a simple transition on the slide. Now, to make that even better and controlled, we can set the speed of the transition to create a more customized effect. Spire.Presentation offers Fast, Medium, None, Slow 4 options.
ppt.Slides[0].SlideShowTransition.Speed = TransitionSpeed.Slow;
Step 5: Set the transition sound mode such as None, StartSound, StopPreviousSound.
ppt.Slides[0].SlideShowTransition.SoundMode = TransitionSoundMode.StartSound;
Step 6: Finally write the modified presentation as a PPTX file.
ppt.SaveToFile("setTransitons.pptx", FileFormat.Pptx2010);
Optimizing the order of slides in a PowerPoint presentation is a simple skill. By rearranging slides, you can refine the logic and flow of your presentation, group related points together, or move slides to more impactful locations. This flexibility enables you to create a cohesive, engaging narrative that captivates your audience.
This article demonstrates how to programmatically change the slide order in a PowerPoint document in C# by using the Spire.Presentation for .NET library.
Install Spire.Presentation for .NET
To begin with, you need to add the DLL files included in the Spire.Presentation for .NET package as references in your .NET project. The DLL files can be either downloaded from this link or installed via NuGet.
PM> Install-Package Spire.Presentation
Change the Slide Order in a PowerPoint Document in C#
To reorder slides in a PowerPoint presentation, create two Presentation objects - one to load the original document and another to create a new document. By copying the slides from the original document to the new one in the desired sequence, you can easily rearrange the slide order.
The steps to rearrange slides in a PowerPoint document using C# are as follows.
- Create a Presentation object.
- Load a PowerPoint document using Presentation.LoadFromFile() method.
- Specify the slide order within an array.
- Create another Presentation object for creating a new presentation.
- Add the slides from the original document to the new presentation in the specified order using Presentation.Slides.Append() method.
- Save the new presentation to a PPTX file using Presentation.SaveToFile() method.
- C#
using Spire.Presentation;
namespace ChangeSlideOrder
{
class Program
{
static void Main(string[] args)
{
// Create a Presentation object
Presentation presentation = new Presentation();
// Load a PowerPoint file
presentation.LoadFromFile("C:\\Users\\Administrator\\Desktop\\input.pptx");
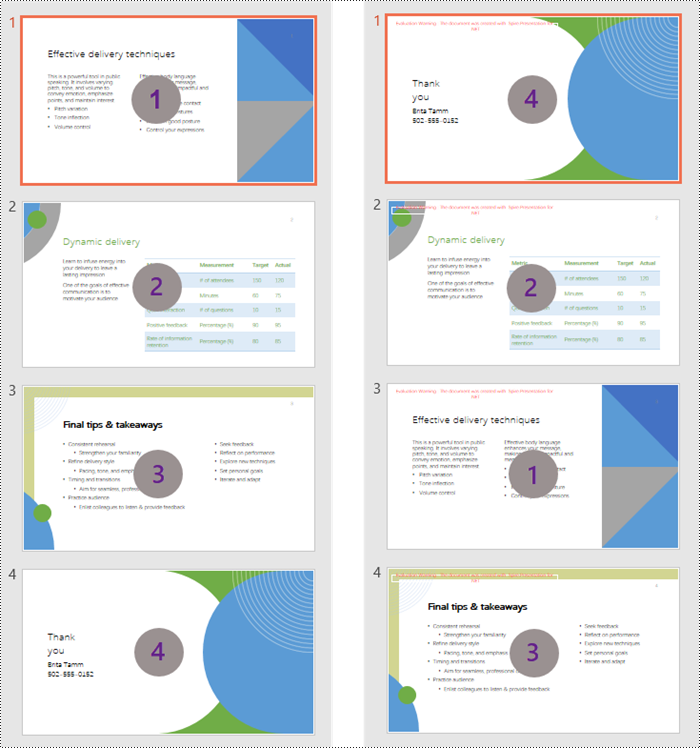
// Specify the new slide order within an array
int[] newSlideOrder = new int[] { 4, 2, 1, 3 };
// Create another Presentation object
Presentation new_presentation = new Presentation();
// Remove the default slide
new_presentation.Slides.RemoveAt(0);
// Iterate through the array
for (int i = 0; i < newSlideOrder.Length; i++)
{
// Add the slides from the original PowerPoint file to the new PowerPoint document in the new order
new_presentation.Slides.Append(presentation.Slides[newSlideOrder[i] - 1]);
}
// Save the new presentation to file
new_presentation.SaveToFile("NewOrder.pptx", FileFormat.Pptx2019);
// Dispose resources
presentation.Dispose();
new_presentation.Dispose();
}
}
}
Apply for a Temporary License
If you'd like to remove the evaluation message from the generated documents, or to get rid of the function limitations, please request a 30-day trial license for yourself.
Save PowerPoint file to Stream and Load PowerPoint file from Stream
2014-06-12 02:48:45 Written by KoohjiSpire.Presentation is a powerful and easy-to-use .NET component, especially designed for developers. Using Spire.Presentation you can generate, modify, convert, render, and print documents without installing Microsoft PowerPoint on your machine. In this document, I will introduce you how to create PowerPoint file and save it to stream. I also introduce you how to load PowerPoint file from stream. Check it below.
Create PowerPoint file and save it to Stream
Step 1: Create Presentation instance.
Presentation presentation = new Presentation();
Step 2: Set background image.
string ImageFile = "bg.png";
RectangleF rect = new RectangleF(0, 0, presentation.SlideSize.Size.Width, presentation.SlideSize.Size.Height);
presentation.Slides[0].Shapes.AppendEmbedImage(ShapeType.Rectangle, ImageFile, rect);
presentation.Slides[0].Shapes[0].Line.FillFormat.SolidFillColor.Color = Color.FloralWhite;
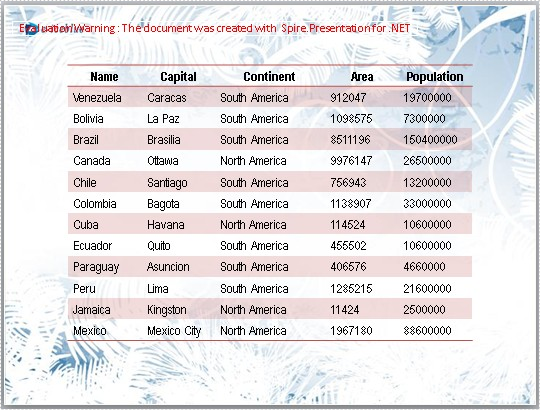
Step 3: Add text to PowerPoint document.
IAutoShape shape = presentation.Slides[0].Shapes.AppendShape(ShapeType.Rectangle, new RectangleF(50, 70, 450, 150));
shape.Fill.FillType = FillFormatType.None;
shape.ShapeStyle.LineColor.Color = Color.White;

//add text to shape
shape.TextFrame.Text = "This demo shows how to Create PowerPoint file and save it to Stream.";
shape.TextFrame.Paragraphs[0].TextRanges[0].Fill.FillType = FillFormatType.Solid;
shape.TextFrame.Paragraphs[0].TextRanges[0].Fill.SolidColor.Color = Color.Black;
Step 4: Save document to stream.
FileStream to_stream = new FileStream("To_stream.pptx", FileMode.Create);
presentation.SaveToFile(to_stream, FileFormat.Pptx2010);
to_stream.Close();
Preview the generated PowerPoint file:

Load PowerPoint file from stream.
Step 1: Create Presentation instance.
Presentation presentationLoad = new Presentation();
Step 2: Load PowerPoint file from stream.
FileStream from_stream = File.OpenRead("sample.pptx");
presentationLoad.LoadFromStream(from_stream, FileFormat.Pptx2010);
Step 3: Save the document.
presentationLoad.SaveToFile("From_stream.pptx",FileFormat.Pptx2010);
from_stream.Dispose();
Preview the PowerPoint file:
Full code:
using Spire.Presentation;
using Spire.Presentation.Drawing;
using System.Drawing;
using System.IO;
namespace SavePPTtoStream
{
    class Program
    {
        static void Main(string[] args)
        {

            //A: create PowerPoint file and save it to stream
            Presentation presentation = new Presentation();

            //set background Image
            string ImageFile = "bg.png";
            RectangleF rect = new RectangleF(0, 0, presentation.SlideSize.Size.Width, presentation.SlideSize.Size.Height);
            presentation.Slides[0].Shapes.AppendEmbedImage(ShapeType.Rectangle, ImageFile, rect);
            presentation.Slides[0].Shapes[0].Line.FillFormat.SolidFillColor.Color = Color.FloralWhite;

            //append new shape
            IAutoShape shape = presentation.Slides[0].Shapes.AppendShape(ShapeType.Rectangle, new RectangleF(50, 70, 450, 150));
            shape.Fill.FillType = FillFormatType.None;
            shape.ShapeStyle.LineColor.Color = Color.White;

            //add text to shape
            shape.TextFrame.Text = "This demo shows how to Create PowerPoint file and save it to Stream.";
            shape.TextFrame.Paragraphs[0].TextRanges[0].Fill.FillType = FillFormatType.Solid;
            shape.TextFrame.Paragraphs[0].TextRanges[0].Fill.SolidColor.Color = Color.Black;

            //save to Stream
            FileStream to_stream = new FileStream("To_stream.pptx", FileMode.Create);
            presentation.SaveToFile(to_stream, FileFormat.Pptx2010);
            to_stream.Close();

            System.Diagnostics.Process.Start("To_stream.pptx");


            //B: Load PowerPoint file from Stream
            Presentation presentationLoad = new Presentation();

            //load PowerPoint file from stream
            FileStream from_stream = File.OpenRead("sample.pptx");
            presentationLoad.LoadFromStream(from_stream, FileFormat.Pptx2010);

            //save the document
            presentationLoad.SaveToFile("From_stream.pptx", FileFormat.Pptx2010);
            from_stream.Dispose();

            System.Diagnostics.Process.Start("From_stream.pptx");


        }
    }
}
If you couldn't successfully use Spire.Presentation, please refer Spire.Presentation Quick Start which can guide you quickly use Spire.Presentation.
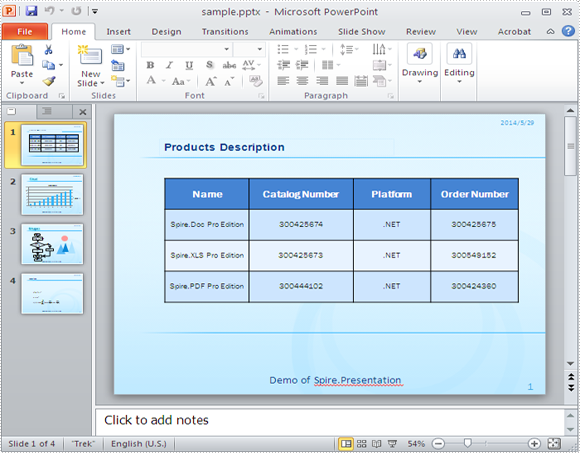
Sometimes, we may need to delete specific slide in a PowerPoint presentation due to any reason. This section will illustrate that how we can accomplish that task using Spire.Presentation for .NET.
As a matter of fact, it is quite easy and convenient to remove slides by only one line of core code if you have Spire.Presentation.Dll installed as a reference in your .NET project assemblies. Here is the method:
Step 1: Create an instance of presentation class and load PPT documents
Presentation presentation = new Presentation();
presentation.LoadFromFile("sample.pptx");
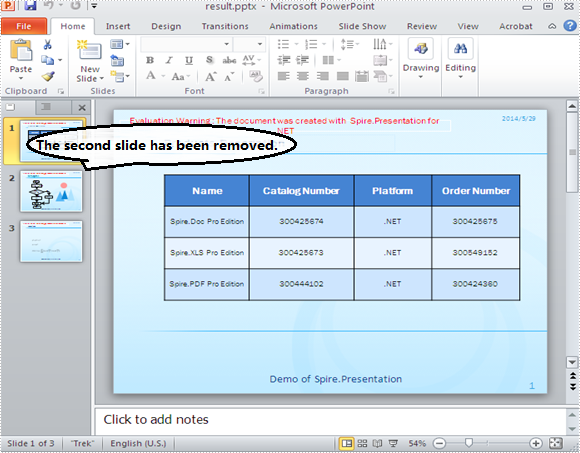
Step 2: Remove the second slide from the presentation by using its index position
presentation.Slides.RemoveAt(1);
Step 3: Save and review
presentation.SaveToFile("result.pptx",FileFormat.Pptx2010);
System.Diagnostics.Process.Start("result.pptx");
Original layout:
Result:
Full C# code:
using System;
using System.Collections.Generic;
using System.Linq;
using System.Text;
using Spire.Presentation;

namespace RemoveSlide
{
    class Program
    {
        static void Main(string[] args)
        {
            Presentation presentation = new Presentation();
            presentation.LoadFromFile("sample.pptx");

            //remove the second slide
            presentation.Slides.RemoveAt(1);

             presentation.SaveToFile("result.pptx",FileFormat.Pptx2010);
            System.Diagnostics.Process.Start("result.pptx");
        }
    }
}
Changing slide size is one way to maintain the visual integrity of your PowerPoint presentation. By adjusting the slide size to the specific aspect ratio and dimensions of the target screen or projection device, you can avoid issues such as content appearing cropped, stretched, or distorted. In this article, you will learn how to change the slide size of a PowerPoint presentation in C# using Spire.Presentation for .NET.
Install Spire.Presentation for .NET
To begin with, you need to add the DLL files included in the Spire.Presentation for.NET package as references in your .NET project. The DLL files can be either downloaded from this link or installed via NuGet.
PM> Install-Package Spire.Presentation
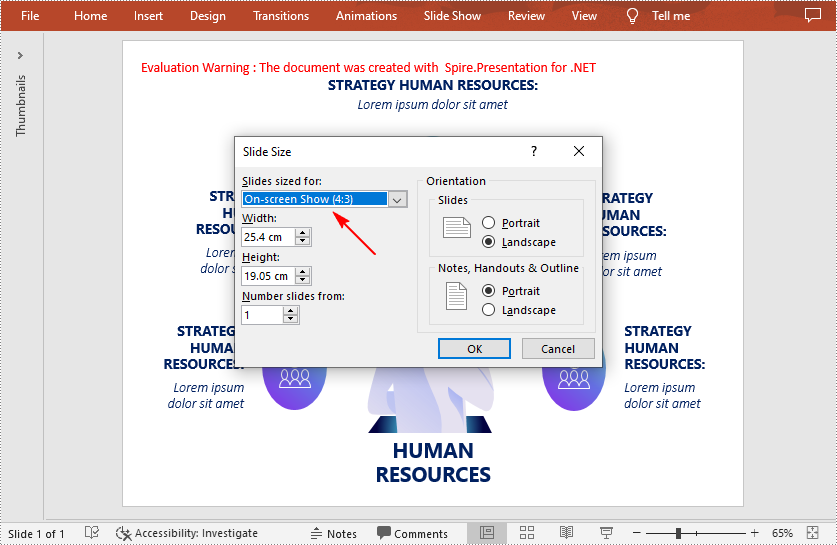
Change the Slide Size to a Preset Size in C#
Spire.Presentation for .NET provides the Presentation.SlideSize.Type property to set or change the slide size to a preset size. The following are the detailed steps.
- Create a Presentation instance.
- Load a PowerPoint presentation using Presentation.LoadFromFile() method.
- Change the slide type of the presentation using Presentation.SlideSize.Type property.
- Save the result document using Presentation.SaveToFile() method.
- C#
using Spire.Presentation;

namespace CreateCombination
{
    class Program
    {
        static void Main(string[] args)
        {
            //Create a Presentation instance
            Presentation ppt = new Presentation();

            //Load a presentation file
            ppt.LoadFromFile("sample.pptx");

            //Change the slide size of the presentation
            ppt.SlideSize.Type = SlideSizeType.Screen4x3;

            //Save the result file
            ppt.SaveToFile("SlideSize.pptx", FileFormat.Pptx2013);
            ppt.Dispose();
        }
    }
}
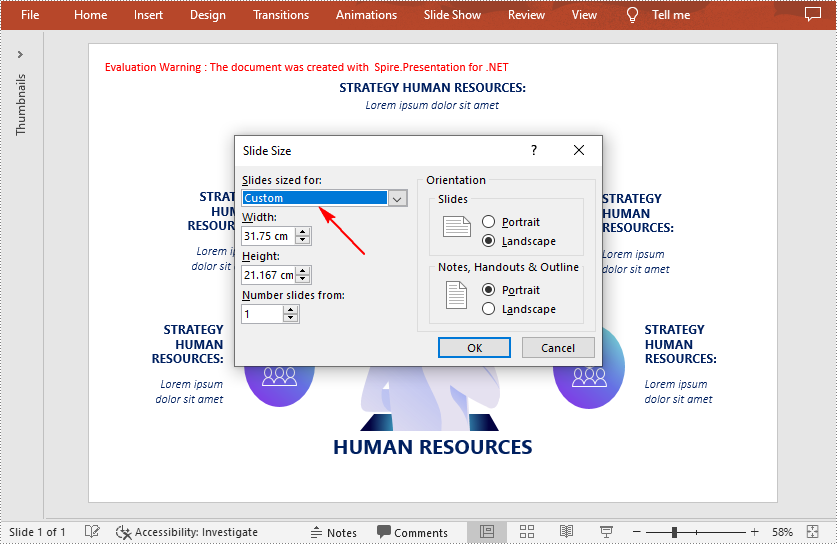
Change the Slide Size to a Custom Size in C#
Customizing the size of slides requires changing the slide size type to Custom first, and then you can set a desired size through the Presentation.SlideSize.Size property. The following are the detailed steps.
- Create a Presentation instance.
- Load a PowerPoint presentation using Presentation.LoadFromFile() method.
- Change the slide size type to custom using Presentation.SlideSize.Type property.
- Customize the slide size using Presentation.SlideSize.Size property.
- Save the result document using Presentation.SaveToFile() method.
- C#
using Spire.Presentation;
using System.Drawing;

namespace CreateCombination
{
    class Program
    {
        static void Main(string[] args)
        {
            //Create a Presentation instance
            Presentation ppt = new Presentation();

            //Load a presentation file
            ppt.LoadFromFile("sample.pptx");

            //Change the slide size type to custom
            ppt.SlideSize.Type = SlideSizeType.Custom;

            //Set the slide size
            ppt.SlideSize.Size = new SizeF(900, 600);

            //Save the presentation file
            ppt.SaveToFile("CustomSize.pptx", FileFormat.Pptx2013);
            ppt.Dispose();
        }
    }
}
Apply for a Temporary License
If you'd like to remove the evaluation message from the generated documents, or to get rid of the function limitations, please request a 30-day trial license for yourself.
