Watermarking is a critical technique for securing documents, indicating ownership, and preventing unauthorized copying. Whether you're distributing drafts or branding final deliverables, applying watermarks helps protect your content effectively. In this tutorial, you’ll learn how to add watermarks to a PDF in Python using the powerful and easy-to-use Spire.PDF for Python library.
We'll walk through how to insert both text and image watermarks , handle transparency and positioning, and resolve common issues — all with clean, well-documented code examples.
Table of Contents:
- Python Library for Watermarking PDFs
- Adding a Text Watermark to a PDF
- Adding an Image Watermark to a PDF
- Troubleshooting Common Issues
- Wrapping Up
- FAQs
Python Library for Watermarking PDFs
Spire.PDF for Python is a robust library that provides comprehensive PDF manipulation capabilities. For watermarking specifically, it offers:
- High precision in watermark placement and rotation.
- Flexible transparency controls.
- Support for both text and image watermarks.
- Ability to apply watermarks to specific pages or entire documents.
- Preservation of original PDF quality.
Before proceeding, ensure you have Spire.PDF installed in your Python environment:
pip install spire.pdf
Adding a Text Watermark to a PDF
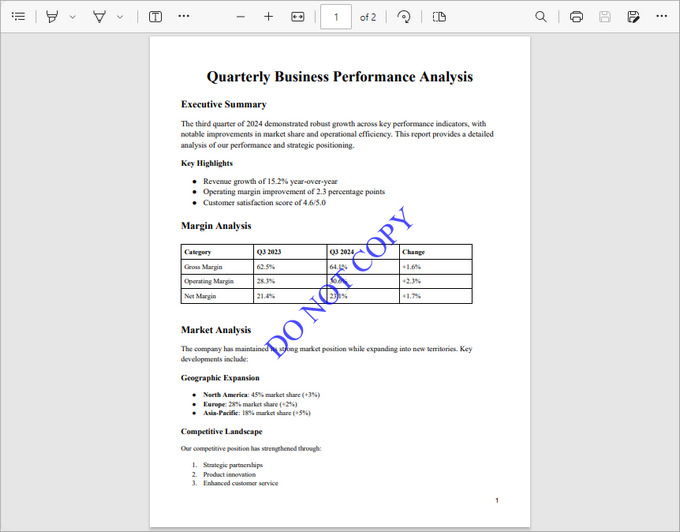
This code snippet demonstrates how to add a diagonal "DO NOT COPY" watermark to each page of a PDF file. It manages the size, color, positioning, rotation, and transparency of the watermark for a professional result.
from spire.pdf import *
from spire.pdf.common import *
import math

# Create an object of PdfDocument class
doc = PdfDocument()

# Load a PDF document from the specified path
doc.LoadFromFile("C:\\Users\\Administrator\\Desktop\\Input.pdf")

# Create an object of PdfTrueTypeFont class for the watermark font
font = PdfTrueTypeFont("Times New Roman", 48.0, 0, True)

# Specify the watermark text
text = "DO NOT COPY"

# Measure the dimensions of the text to ensure proper positioning
text_width = font.MeasureString(text).Width
text_height = font.MeasureString(text).Height

# Loop through each page in the document
for i in range(doc.Pages.Count):

    # Get the current page
    page = doc.Pages.get_Item(i)

    # Save the current canvas state
    state = page.Canvas.Save()

    # Calculate the center coordinates of the page
    x = page.Canvas.Size.Width  / 2
    y = page.Canvas.Size.Height / 2

    # Translate the coodinate system to the center so that the center of the page becomes the origin (0, 0)
    page.Canvas.TranslateTransform(x, y)

    # Rotate the canvas 45 degrees counterclockwise for the watermark
    page.Canvas.RotateTransform(-45.0)

    # Set the transparency of the watermark
    page.Canvas.SetTransparency(0.7)

    # Draw the watermark text at the centered position using negative offsets
    page.Canvas.DrawString(text, font, PdfBrushes.get_Blue(), PointF(-text_width / 2, -text_height / 2))

    # Restore the canvas state to prevent transformations from affecting subsequent drawings
    page.Canvas.Restore(state)

# Save the modified document to a new PDF file
doc.SaveToFile("output/TextWatermark.pdf")

# Dispose resources
doc.Dispose()
Breakdown of the Code :
- Load the PDF Document : The script loads an input PDF file from a specified path using the PdfDocument class.
- Configure Watermark Text : A watermark text ("DO NOT COPY") is set with a specific font (Times New Roman, 48pt) and measured for accurate positioning.
- Apply Transformations : For each page, the script:
- Centers the coordinate system.
- Rotates the canvas by 45 degrees counterclockwise.
- Sets transparency (70%) for the watermark.
- Draw the Watermark : The text is drawn at (-text_width / 2, -text_height / 2), which aligns the text perfectly around the center point of the page, regardless of the rotation applied.
- Save the Document : The modified document is saved to a new PDF file.
Output:
Adding an Image Watermark to a PDF
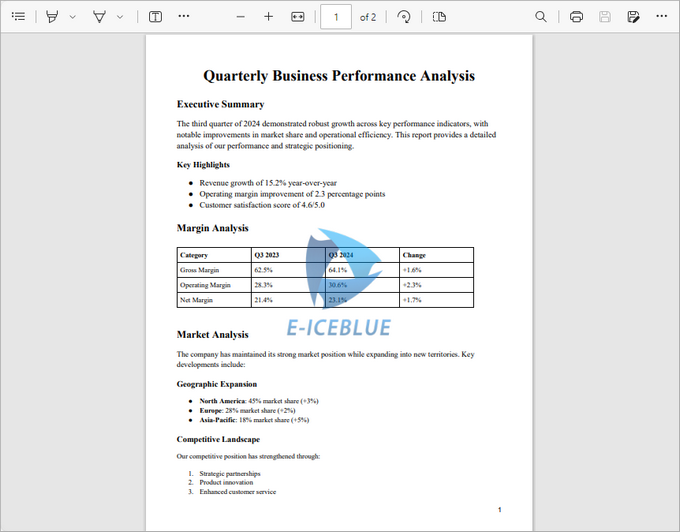
This code snippet adds a semi-transparent image watermark to each page of a PDF, ensuring proper positioning and a professional appearance.
from spire.pdf import *
from spire.pdf.common import *

# Create an object of PdfDocument class
doc = PdfDocument()

# Load a PDF document from the specified path
doc.LoadFromFile("C:\\Users\\Administrator\\Desktop\\Input.pdf")

# Load the watermark image from the specified path
image = PdfImage.FromFile("C:\\Users\\Administrator\\Desktop\\logo.png")

# Get the width and height of the loaded image for positioning
imageWidth = float(image.Width)
imageHeight = float(image.Height)

# Loop through each page in the document to apply the watermark
for i in range(doc.Pages.Count):
    # Get the current page
    page = doc.Pages.get_Item(i)

    # Set the transparency of the watermark to 50%
    page.Canvas.SetTransparency(0.5)

    # Get the dimensions of the current page
    pageWidth = page.ActualSize.Width
    pageHeight = page.ActualSize.Height

    # Calculate the x and y coordinates to center the image on the page
    x = (pageWidth - imageWidth) / 2
    y = (pageHeight - imageHeight) / 2

    # Draw the image at the calculated center position on the page
    page.Canvas.DrawImage(image, x, y, imageWidth, imageHeight)

# Save the modified document to a new PDF file
doc.SaveToFile("output/ImageWatermark.pdf")

# Dispose resources
doc.Dispose()
Breakdown of the Code :
- Load the PDF Document : The script loads an input PDFfile from a specified path using the PdfDocument class.
- Configure Watermark Image : The watermark image is loaded from a specified path, and its dimensions are retrieved for accurate positioning.
- Apply Transformations : For each page, the script:
- Sets the watermark transparency (50%).
- Calculates the center position of the page for the watermark.
- Draw the Watermark : The image is drawn at the calculated center coordinates, ensuring it is centered on each page.
- Save the Document : The modified document is saved to a new PDF file.
Output:
Apart from watermarks, you can also add stamps to PDFs. Unlike watermarks, which are fixed in place, stamps can be freely moved or deleted, offering greater flexibility in document annotation.
Troubleshooting Common Issues
- Watermark Not Appearing :
- Verify file paths are correct.
- Check transparency isn't set to 0 (fully transparent).
- Ensure coordinates place the watermark within page bounds.
- Quality Issues :
- For text, use higher-quality fonts.
- For images, ensure adequate resolution.
- Rotation Problems :
- Remember that rotation occurs around the current origin point.
- The order of transformations matters (translate then rotate).
Wrapping Up
With Spire.PDF for Python, adding watermarks to PDF documents becomes a simple and powerful process. Whether you need bold "Confidential" text across every page or subtle branding with logos, the library handles it all efficiently. By combining coordinate transformations, transparency settings, and drawing commands, you can create highly customized watermarking workflows tailored to your document's purpose.
FAQs
Q1. Can I add both text and image watermarks to the same PDF?
Yes, you can combine both approaches in a single loop over the PDF pages.
Q2. How can I rotate image watermarks?
Use Canvas.RotateTransform(angle) before drawing the image, similar to the text watermark example.
Q3. Does Spire.PDF support transparent PNGs for watermarks?
Yes, Spire.PDF preserves the transparency of PNG images when used as watermarks.
Q4. Can I apply different watermarks to different pages?
Absolutely. You can implement conditional logic within your page loop to apply different watermarks based on page number or other criteria.
Get a Free License
To fully experience the capabilities of Spire.PDF for Python without any evaluation limitations, you can request a free 30-day trial license.
