PowerPoint presentations often contain sensitive or confidential information — business reports, marketing plans, or academic research that you don’t want others to access or modify freely. Fortunately, PowerPoint provides several ways to secure your presentations with passwords or encryption.
In this guide, you’ll learn five effective ways to password protect PowerPoint files, from built-in encryption to automated protection using C#. We’ll also compare the methods so you can choose the right level of security for your needs.
Method Overview:
- Method 1. Encrypt the Presentation with a Password
- Method 2. Add an Open or Modify Password via Save Options
- Method 3. Protect PowerPoint with a ZIP Password
- Method 4. Convert to PDF with Password
- Method 5. Automate Password Protection via Code
Why Protect PowerPoint with a Password
While PowerPoint is widely used for creating and sharing presentations, few users realize how easy it is for unauthorized people to open, edit, or copy content if the file isn’t protected. Password protection helps you control who can view, edit, or reuse your work.
Reasons to secure your PowerPoint files with a password:
- Confidentiality: Prevent unauthorized users from viewing sensitive data such as internal financial reports or strategic plans.
- Integrity: Stop others from modifying your slides or altering content without permission.
- Professionalism: Ensure that only finalized versions of presentations are distributed.
- Compliance: Some organizations or clients require password protection to meet data security policies.
PowerPoint protection levels:
- Open protection: Requires a password to open the file.
- Modify protection: Allows viewing but prevents editing without a password.
Now let’s explore five practical ways to apply these protections.
Method 1. Encrypt the Presentation with a Password
The simplest and most secure way to protect your PowerPoint file is by encrypting it with a password using PowerPoint’s built-in Encrypt with Password feature. This method ensures that no one can open the file without entering the correct password.
How to do it:
Step 1: Open your PowerPoint file.
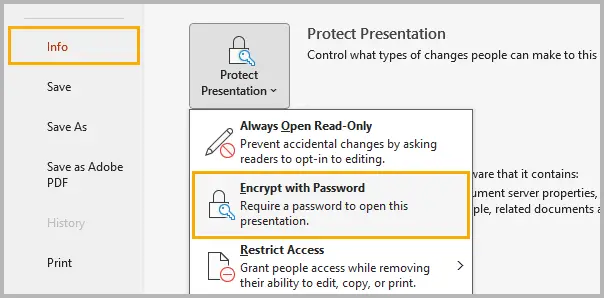
Step 2: Click File → Info → Protect Presentation → Encrypt with Password .
Step 3: Enter a strong password combining uppercase and lowercase letters, numbers, and special characters.
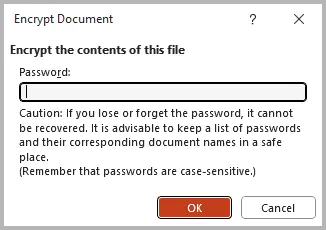
Step 4: Click OK , then save your presentation to apply the password protection.
Next time anyone tries to open the presentation, PowerPoint will prompt for the password before loading any content.
Tips:
- Use a password that’s at least 8–12 characters long.
- Avoid saving the password in the same folder as your presentation.
- If you lose the password, Microsoft cannot recover it.
Method 2. Add an Open or Modify Password via Save Options
PowerPoint’s Save Options feature allows you to apply both open and modify passwords directly while saving your presentation. This built-in protection lets you decide whether others can view the file, edit it, or both.
Step-by-step instructions:
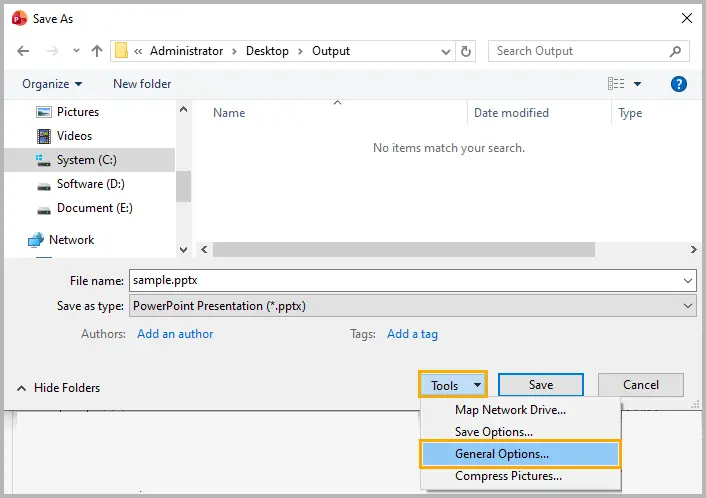
Step 1: Click File → Save As and select your desired location.
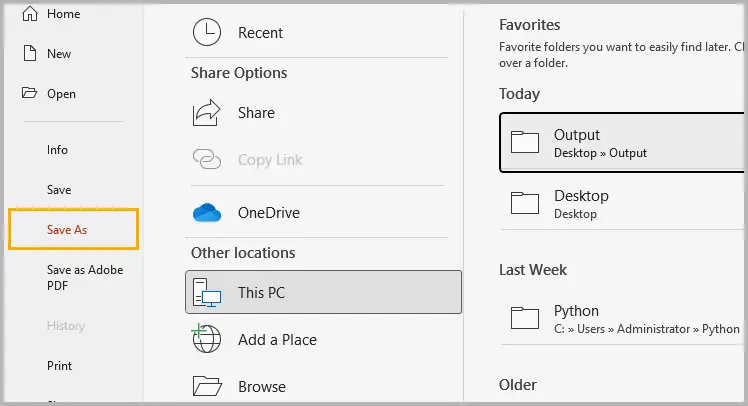
Step 2: In the Save As dialog, click Tools → General Options (Windows) or Options (Mac) .
Step 3: Enter a password in the Password to open field to restrict access entirely, or in Password to modify to allow viewing but prevent editing.
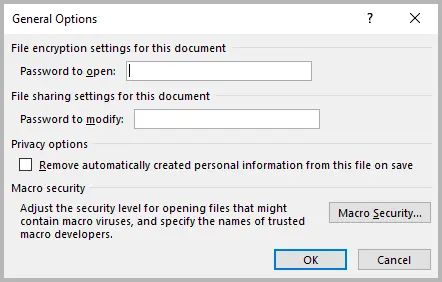
Step 4: Click OK , then save the file to apply the protection.
Tips:
- Use a strong, unique password for each presentation.
- Clearly differentiate between open and modify passwords to avoid confusion.
Method 3. Protect PowerPoint with a ZIP Password
If you frequently share presentations via email or cloud storage, compressing and encrypting them in a ZIP file adds an extra layer of protection. This method secures the file even before it’s opened in PowerPoint.
Steps (using 7-Zip or WinRAR):
Step 1: Select one or more PowerPoint files on your computer.
Step 2: Right-click on the selected files and select 7-Zip → Add to archive (or Compress on macOS).
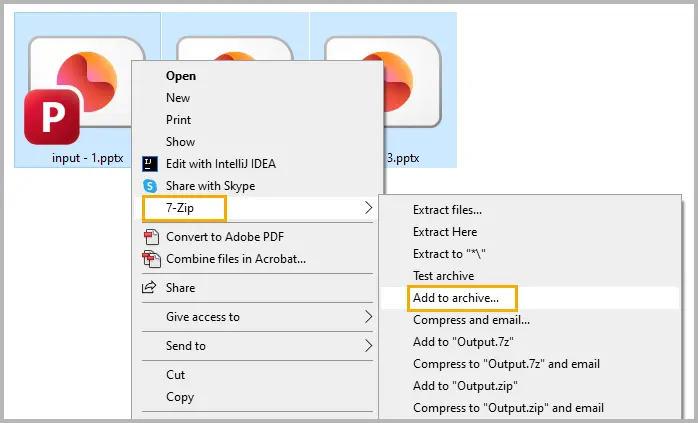
Step 3: Choose the ZIP or RAR format.
Step 4: Enter a strong password, and enable AES-256 encryption if available.
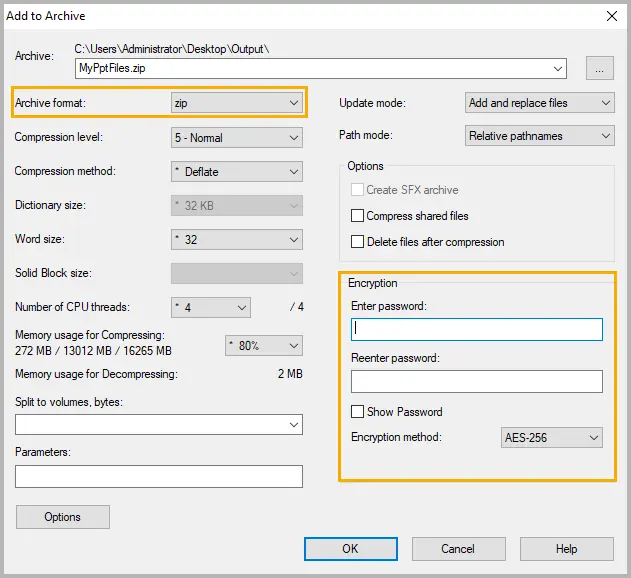
Step 5: Save the archive and share it instead of the original file.
Tips:
- Keep the password separate from the file to prevent unauthorized access.
- For shared projects, create unique passwords per archive to minimize risk.
Method 4. Convert to PDF with Password
If you only need to share your PowerPoint slides in read-only form, converting them to a PDF with password protection is a practical choice. Recipients can view the slides but cannot edit or copy them without permission.
Follow these steps:
Step 1: Open your PowerPoint file and go to File → Export → Create PDF/XPS Document → Create PDF/XPS .
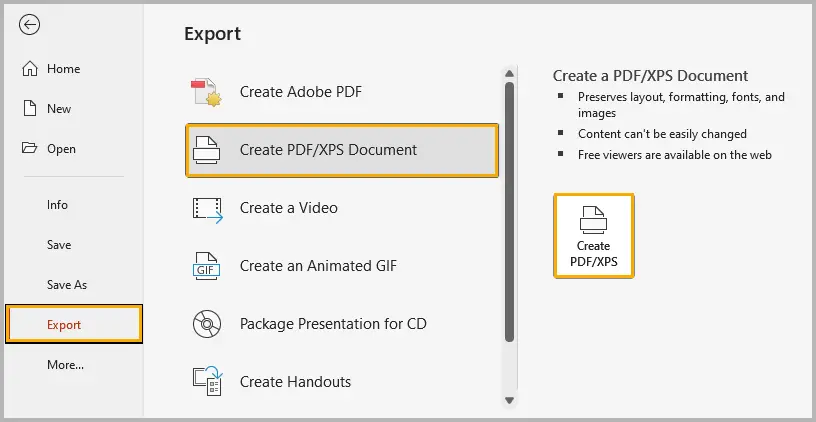
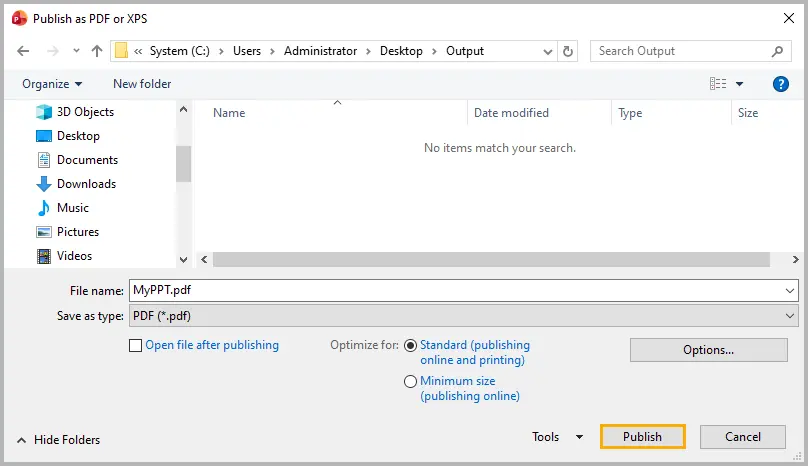
Step 2: Select export options and click Publish to generate the PDF.
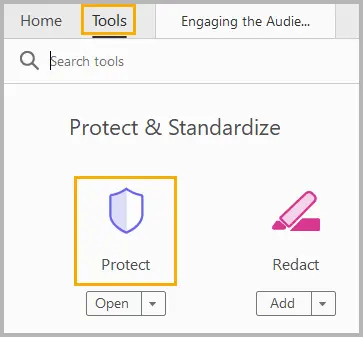
Step 3: Open the PDF in Adobe Acrobat or another PDF editor.
Step 4: Select Tools , then click Protect .
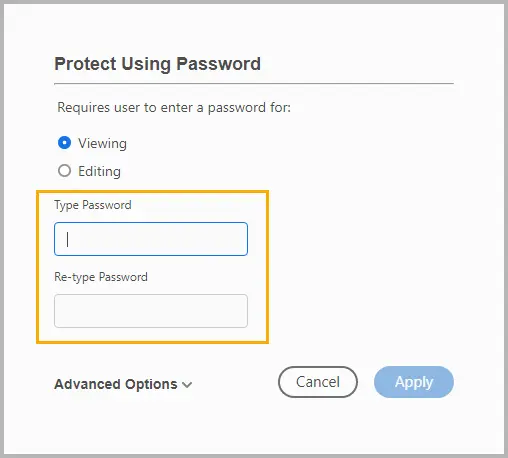
Step 5: Click Protect Using Password to set a password to view or edit the PDF, and then click Apply .
Tips:
- Set both user (open) and owner (edit) passwords for stronger protection.
- If sharing widely, consider applying print and copy restrictions in your PDF tool.
If you frequently export presentations as encrypted PDFs, you can automate this process with code. Check out our tutorial: Convert PowerPoint to Password-Protected PDF in C#
Method 5. Automate Password Protection via Code
For organizations that generate presentations automatically — such as reports, dashboards, or client proposals — manual password setting isn’t scalable. Instead, you can automate PowerPoint encryption using C# .
With the Spire.Presentation for .NET library, you can apply password protection to one or multiple files programmatically.
Step-by-step instructions:
Step 1: Install Spire.Presentation via NuGet.
PM> Install-Package Spire.Presentation
Step 2: Load your PowerPoint file in C#.
Step 3: Apply password protection using the Encrypt() method.
Step 4: Save the encrypted presentation.
Full code example:
using Spire.Presentation;

namespace ProtectPPTWithPassword
{
    class Program
    {
        static void Main(string[] args)
        {
            // Create a new Presentation instance
            Presentation presentation = new Presentation();

            // Load the PowerPoint document from file
            presentation.LoadFromFile("sample.pptx");

            // Encrypt the presentation using a specified password
            presentation.Encrypt("your password");

            // Save the encrypted presentation to a new file in PPTX format
            presentation.SaveToFile("Encrypted.pptx", FileFormat.Pptx2013);
            presentation.Dispose();
        }
    }
}
Benefits:
Automating password protection with C# ensures consistency and accuracy, reduces the risk of human error, and allows batch encryption of multiple presentations. It also integrates easily with other automated tasks, streamlining your workflow and saving time.
Read further: Protect or Unprotect PowerPoint Presentations Using C#
Comparison Table: Choose the Right Way to Protect Your Presentation
| Method | Protection Type | Encryption Strength | Difficulty | Best For | Pros | Cons |
|---|---|---|---|---|---|---|
| Encrypt with Password | Full encryption | AES 128-bit or higher | Easy | Confidential or sensitive presentations | Built-in strong security | Password recovery impossible |
| Save Options | File-level password | Moderate (legacy RC4 or partial) | Easy | Shared editable files | Flexible open/modify options | Weaker encryption for older formats |
| Third-Party Encryption Tools | Archive-level protection | AES 256-bit (depends on tool) | Medium | File sharing and storage | Works for multiple files | Requires extraction software |
| PDF with Password | Read-only protection | AES 128-bit (Adobe standard) | Medium | Sharing finalized content | Locks content, prevents edits | Original PPT remains unprotected |
| Automation via C# | Programmatic full encryption | AES 128-bit (Spire.Presentation) | Advanced | Batch protection or enterprise use | Scalable and efficient | Requires coding knowledge |
Summary
Password protection is one of the most effective ways to safeguard PowerPoint presentations against unauthorized access or modification. Whether you need to encrypt confidential slides, control editing permissions, or distribute a secure read-only version, PowerPoint provides flexible options for every situation.
The built-in encryption feature offers strong, immediate protection; the Save As password options let you decide who can open or edit the file; third-party encryption tools add an extra layer of security for shared archives; PDF conversion ensures your audience can only view the content; and automation with C# simplifies protection for large-scale or repetitive tasks.
By choosing the right password protection method for your workflow, you can keep your presentations private, professional, and secure at every stage of use.
FAQs
Q1. Can I remove a password from a PowerPoint file?
Yes. Open the presentation using the correct password, go to File → Info → Protect Presentation → Encrypt with Password , and clear the password field, then save the file.
Q2. What happens if I forget my PowerPoint password?
Microsoft doesn’t offer a recovery method for encrypted presentations. You must re-create the file or restore a backup. Always store passwords securely in a password manager.
Q3. Is PowerPoint password protection secure?
Yes. Modern PowerPoint versions (2010 and later) use AES 128-bit encryption, which provides strong security when a complex password is used.
Q4. Can I use VBA or macros to set a PowerPoint password?
Yes, you can use VBA to set or remove passwords automatically, but C# libraries like Spire.Presentation offer more flexible and modern options.
Q5. What’s the difference between open and modify passwords?
An open password prevents anyone from opening the file without it, while a modify password allows opening but restricts editing.