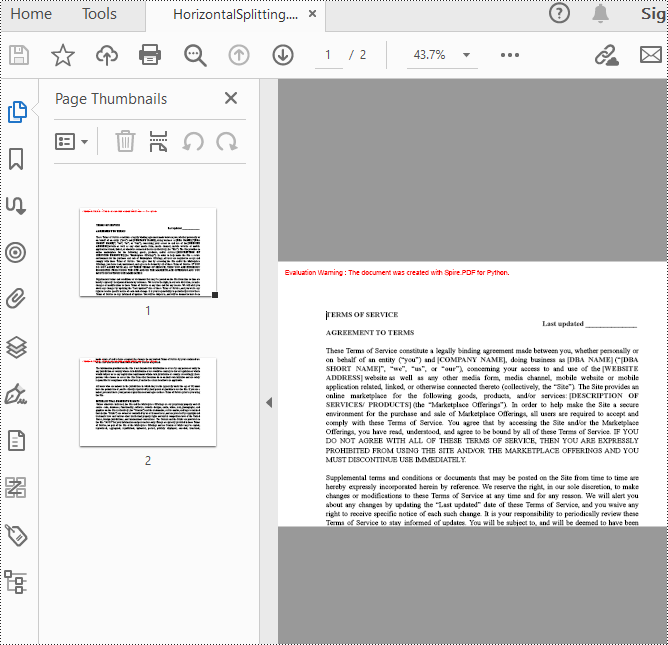
Python: Split a PDF Page into Multiple Pages
Sometimes, when dealing with PDF documents, there is a need to split a page into different sections based on content or layout. For instance, splitting a mixed-layout page with both horizontal and vertical content into two separate parts. This type of splitting is not commonly available in basic PDF management functions but can be important for academic papers, magazine ads, or mixed-layout designs. This article explains how to use Spire.PDF for Python to perform horizontal or vertical PDF page splitting.
Install Spire.PDF for Python
This scenario requires Spire.PDF for Python and plum-dispatch v1.7.4. They can be easily installed in your Windows through the following pip command.
pip install Spire.PDF
If you are unsure how to install, please refer to this tutorial: How to Install Spire.PDF for Python on Windows
Split PDF Page Horizontally or Vertically with Python
Spire.PDF for Python not only supports splitting a PDF document into multiple PDF documents, but also allows splitting a specific page within a PDF into two or more pages. Here are the detailed steps to split a page:
- Create an instance of the PdfDocument class.
- Load the source PDF document using the PdfDocument.LoadFromFile() method.
- Retrieve the page(s) to be split using PdfDocument.Pages[].
- Create a new PDF document and set its page margins to 0.
- Set the width or height of the new document to half of the source document.
- Add a page to the new PDF document using the PdfDocument.Pages.Add() method.
- Create a template for the source document's page using the PdfPageBase.CreateTemplate() method.
- Draw the content of the source page onto the new page using the PdfTemplate.Draw() method.
- Save the split document using the PdfDocument.SaveToFile() method.
- Python
from spire.pdf.common import *
from spire.pdf import *

# Create a PdfDocument object
pdf = PdfDocument()

# Load the PDF document
pdf.LoadFromFile("Terms of service.pdf")

# Get the first page
page = doc.Pages.get_Item(0)

# Create a new PDF document and remove the page margins
newpdf = PdfDocument()
newpdf.PageSettings.Margins.All=0

# Horizontal splitting: Set the width of the new document's page to be the same as the width of the first page of the original document, and the height to half of the first page's height
newpdf.PageSettings.Width=page.Size.Width
newpdf.PageSettings.Height=page.Size.Height/2

'''
# Vertical splitting: Set the width of the new document's page to be half of the width of the first page of the original document, and the height to the same as the first page's height
newpdf.PageSettings.Width=page.Size.Width/2
newpdf.PageSettings.Height=page.Size.Height
'''

# Add a new page to the new PDF document
newPage = newpdf.Pages.Add()

# Set the text layout format
format = PdfTextLayout()
format.Break=PdfLayoutBreakType.FitPage
format.Layout=PdfLayoutType.Paginate

# Create a template based on the first page of the original document and draw it onto the new page of the new document, automatically paginating when the page is filled
page.CreateTemplate().Draw(newPage, PointF(0.0, 0.0), format)

# Save the document
newpdf.SaveToFile("HorizontalSplitting.pdf")

# Close the objects
newpdf.Close()
pdf.Close()
The result of horizontal splitting is as follows:
The result of vertical splitting is as follows:
Apply for a Temporary License
If you'd like to remove the evaluation message from the generated documents, or to get rid of the function limitations, please request a 30-day trial license for yourself.
Python: Create Ordered, Unordered, and Nested Lists in PDF
Lists are a fundamental data structure in PDF documents as they allow users to efficiently store and arrange collections of items. The three most commonly utilized list types in PDFs are ordered lists, unordered lists (also known as bulleted lists), and nested lists. These lists facilitate the presentation of information in a well-organized and visually appealing manner within PDF documents. In this article, we will explore how to use Spire.PDF for Python to create ordered, unordered, and nested lists in PDF documents for generating professional-looking PDF documents.
- Create Ordered Lists in PDF with Python
- Create Unordered Lists with Symbol Markers in PDF Using Python
- Create Unordered Lists with Image Markers in PDF Using Python
- Create Nested Lists in PDF with Python
In Spire.PDF for Python, the PdfSortedList class and PdfList class are available for generating various types of lists in PDF documents, such as ordered lists, unordered lists, and nested lists. By utilizing the functionalities provided by Spire.PDF for Python, developers can easily format and incorporate these lists into their PDF pages. The following are the key classes and properties that are particularly useful for creating lists within PDF documents:
| Class or property | Description |
| PdfSortedList class | Represents an ordered list in a PDF document. |
| PdfList class | Represents an unordered list in a PDF document. |
| Brush property | Gets or sets a list's brush. |
| Font property | Gets or sets a list's font. |
| Indent property | Gets or sets a list's indent. |
| TextIndent property | Gets or sets the indent from the marker to the list item text. |
| Items property | Gets items of a list. |
| Marker property | Gets or sets the marker of a list. |
| Draw() method | Draw list on the canvas of a page at the specified location. |
| PdfOrderedMarker class | Represents the marker style of an ordered list, such as numbers, letters, and roman numerals. |
| PdfMarker class | Represents bullet style for an unordered list. |
Install Spire.PDF for Python
This scenario requires Spire.PDF for Python and plum-dispatch v1.7.4. They can be easily installed in your Windows through the following pip commands.
pip install Spire.PDF
If you are unsure how to install, please refer to this tutorial: How to Install Spire.PDF for Python on Windows
Create Ordered Lists in PDF with Python
Developers can use the PdfSortedList class in Spire.PDF for Python to create ordered lists and format them using the properties available under this class. Afterwards, the list can be drawn on a PDF page using the PdfSortedList.Draw() method. Here is a detailed step-by-step guide for how to create ordered lists in PDF documents:
- Create an object of PdfDocument class and load a PDF document using PdfDocument.LoadFromFile() method.
- Add a page to the document using PdfDocument.Pages.Add() method.
- Create fonts and the brush for the title and the list and draw the list title on the page using PdfPageBase.Canvas.DrawString() method.
- Initialize an instance of PdfSortedList class to create an ordered list with specified items.
- Initialize an instance of PdfOrderedMarker class to create an ordered marker for the list.
- Set the font, item indent, text-indent, brush, and marker for the list using properties under PdfSortedList class.
- Draw the list on the page using PdfSortedList.Draw() method.
- Save the document using PdfDocument.SaveToFile() method.
- Python
from spire.pdf import *
from spire.pdf.common import *
# Create an object of PdfDocument class
pdf = PdfDocument()
# Add a page to the document with specified page size and margins
page = pdf.Pages.Add()
# Create tile font and list font
titleFont = PdfTrueTypeFont("HarmonyOS Sans SC", 14.0, 1, True)
listFont = PdfTrueTypeFont("HarmonyOS Sans SC", 12.0, 0, True)
# Create a brush to draw the list
brush = PdfBrushes.get_Black()
# Specify the initial coordinate
x = 10.0
y = 20.0
# Draw the title
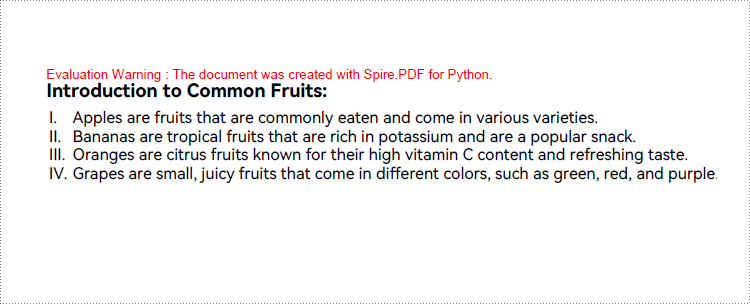
title = "Introduction to Common Fruits:"
page.Canvas.DrawString(title, titleFont, brush, x, y)
# Create a numbered list
listItems = "Apples are fruits that are commonly eaten and come in various varieties.\n" \
+ "Bananas are tropical fruits that are rich in potassium and are a popular snack.\n" \
+ "Oranges are citrus fruits known for their high vitamin C content and refreshing taste.\n"\
+ "Grapes are small, juicy fruits that come in different colors, such as green, red, and purple."
list = PdfSortedList(listItems)
# Create a marker for the list
marker = PdfOrderedMarker(PdfNumberStyle.UpperRoman, listFont)
# Format the list
list.Font = listFont
list.Indent = 2
list.TextIndent = 4
list.Brush = brush
list.Marker = marker
# Draw the list on the page
list.Draw(page.Canvas, x, y + float(titleFont.MeasureString(title).Height + 5))
# Save the document
pdf.SaveToFile("output/CreateNumberedList.pdf")
pdf.Close()
Create Unordered Lists with Symbol Markers in PDF Using Python
Creating an unordered list in a PDF document with Spire.PDF for Python involves PdfList class and the properties under this class. When creating an unordered list, developers need to set the marker style and font for the unordered list using the PdfList.Marker.Style and PdfList.Marker.Font properties. The detailed steps are as follows:
- Create an object of PdfDocument class and load a PDF document using PdfDocument.LoadFromFile() method.
- Add a page to the document using PdfDocument.Pages.Add() method.
- Create fonts and the brush for the title, the marker, and the list, and draw the list title on the page using PdfPageBase.Canvas.DrawString() method.
- Initialize an instance of PdfList class to create an unordered list with specified items.
- Set the font, item indent, text indent, and brush for the list using properties under PdfList class.
- Set the marker style and font through PdfList.Marker.Style property and PdfList.Marker.Font property.
- Draw the list on the page using PdfList.Draw() method.
- Save the document using PdfDocument.SaveToFile() method.
- Python
from spire.pdf import *
from spire.pdf.common import *
# Create an object of PdfDocument class
pdf = PdfDocument()
# Add a page to the document with specified page size and margins
page = pdf.Pages.Add()
# Create tile font and list font
titleFont = PdfTrueTypeFont("HarmonyOS Sans SC", 14.0, 1, True)
listFont = PdfTrueTypeFont("HarmonyOS Sans SC", 12.0, 0, True)
markerFont = PdfTrueTypeFont("HarmonyOS Sans SC", 8.0, 0, True)
# Create a brush to draw the list
brush = PdfBrushes.get_Black()
# Specify the initial coordinate
x = 10.0
y = 20.0
# Draw the title
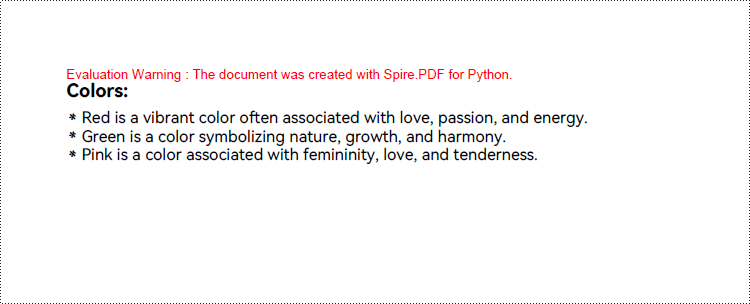
title = "Colors:"
page.Canvas.DrawString(title, titleFont, brush, x, y)
# Create an unordered list
listContent = "Red is a vibrant color often associated with love, passion, and energy.\n" \
+ "Green is a color symbolizing nature, growth, and harmony.\n" \
+ "Pink is a color associated with femininity, love, and tenderness."
list = PdfList(listContent)
# Format the list
list.Font = listFont
list.Indent = 2
list.TextIndent = 4
list.Brush = brush
# Format the marker
list.Marker.Style = PdfUnorderedMarkerStyle.Asterisk
list.Marker.Font = markerFont
# Draw the list on the page
list.Draw(page.Canvas, x, float(y + titleFont.MeasureString(title).Height + 5))
# Save the document
pdf.SaveToFile("output/CreateSymbolBulletedList.pdf")
pdf.Close()
Create Unordered Lists with Image Markers in PDF Using Python
Creating an unordered list with image markers follows similar steps to creating a list with symbol markers. Developers just need to set the item marker style to an image through PdfList.Marker.Style property. Here are the detailed steps:
- Create an object of PdfDocument class and load a PDF document using PdfDocument.LoadFromFile() method.
- Add a page to the document using PdfDocument.Pages.Add() method.
- Create fonts and the brush for the title, the marker, and the list, and draw the list title on the page using PdfPageBase.Canvas.DrawString() method.
- Initialize an instance of PdfList class to create an unordered list with specified items.
- Set the font, item indent, text-indent, and brush for the list using properties under PdfList class.
- Load an image using PdfImage.LoadFromFile() method.
- Set the marker style as PdfUnorderedMarkerStyle.CustomImage through PdfList.Marker.Style property and set the loaded image as the marker through PdfList.Marker.Image property.
- Draw the list on the page using PdfList.Draw() method.
- Save the document using PdfDocument.SaveToFile() method.
- Python
from spire.pdf import *
from spire.pdf.common import *
# Create an object of PdfDocument class
pdf = PdfDocument()
# Add a page to the document with specified page size and margins
page = pdf.Pages.Add()
# Create tile font and list font
titleFont = PdfFont(PdfFontFamily.Helvetica, 14.0, PdfFontStyle.Bold)
listFont = PdfFont(PdfFontFamily.Helvetica, 12.0, PdfFontStyle.Regular)
# Create a brush to draw the list
brush = PdfBrushes.get_Black()
# Specify the initial coordinate
x = 10.0
y = 20.0
# Draw the title
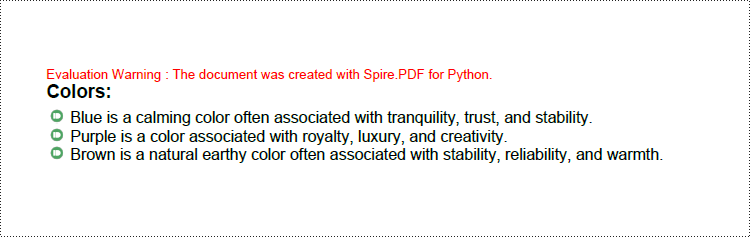
title = "Colors:"
page.Canvas.DrawString(title, titleFont, brush, x, y)
# Create an unordered list
listContent = "Blue is a calming color often associated with tranquility, trust, and stability.\n" \
+ "Purple is a color associated with royalty, luxury, and creativity.\n" \
+ "Brown is a natural earthy color often associated with stability, reliability, and warmth."
list = PdfList(listContent)
# Format the list
list.Font = listFont
list.Indent = 2
list.TextIndent = 4
list.Brush = brush
# Load an image
image = PdfImage.FromFile("Marker.png")
# Set the marker as a custom image
list.Marker.Style = PdfUnorderedMarkerStyle.CustomImage
list.Marker.Image = image
# Draw the list on the page
list.Draw(page.Canvas, x, float(y + titleFont.MeasureString(title).Height + 5))
# Save the document
pdf.SaveToFile("output/CreateImageBulletedList.pdf")
pdf.Close()
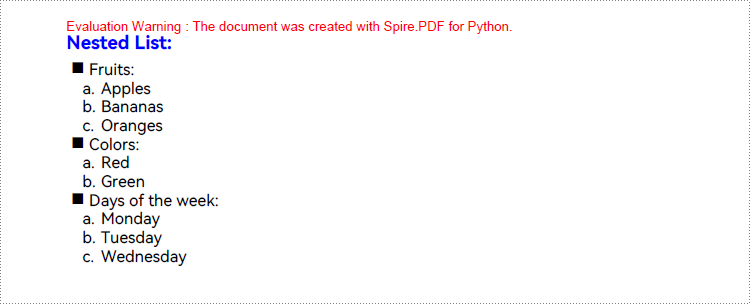
Create Nested Lists in PDF with Python
When creating a nested list, both the parent list and each level of sublists can be created as either unordered or ordered lists. Once the lists at each level are created, the PdfListItem.Sublist property can be used to set a list as the sublist of a corresponding item in the parent list. Here are the steps to create a nested list:
- Create an object of PdfDocument class and load a PDF document using PdfDocument.LoadFromFile() method.
- Add a page to the document using PdfDocument.Pages.Add() method.
- Create fonts and the brush for the title, the marker, and the list, and draw the list title on the page using PdfPageBase.Canvas.DrawString() method.
- Create an unordered list as the parent list and format the list and the marker.
- Create three sublists for the items in the parent list and format the list.
- Get an item in the parent list using PdfList.Items.get_Item() method.
- Set a specified list as the sublist of the item through PdfListItem.SubList property.
- Draw the list on the page using PdfList.Draw() method.
- Save the document using PdfDocument.SaveToFile() method.
- Python
from spire.pdf import *
from spire.pdf.common import *

# Create an object of PdfDocument class
pdf = PdfDocument()

# Add a page to the document with specified page size and margins
page = pdf.Pages.Add()

# Create tile font and list font
titleFont = PdfTrueTypeFont("HarmonyOS Sans SC", 14.0, 1, True)
listFont = PdfTrueTypeFont("HarmonyOS Sans SC", 12.0, 0, True)
markerFont = PdfTrueTypeFont("HarmonyOS Sans SC", 12.0, 0, True)

# Create brushs to draw the title and lists
titleBrush = PdfBrushes.get_Blue()
firstListBrush = PdfBrushes.get_Purple()
secondListBrush = PdfBrushes.get_Black()

# Specify the initial coordinate
x = 10.0
y = 20.0

# Draw the title
title = "Nested List:"
page.Canvas.DrawString(title, titleFont, titleBrush, x, y)

# Create a parent list
parentListContent = "Fruits:\n" + "Colors:\n" + "Days of the week:"
parentList = PdfList(parentListContent)

# Format the parent list
indent = 4
textIndent = 4
parentList.Font = listFont
parentList.Indent = indent
parentList.TextIndent = textIndent
# Set the parent list marker
parentList.Marker.Style = PdfUnorderedMarkerStyle.Square
parentList.Marker.Font = markerFont

# Create nested sublists and format them
subListMarker = PdfOrderedMarker(PdfNumberStyle.LowerLatin, markerFont)
subList1Content = "Apples\n" + "Bananas\n" + "Oranges"
subList1 = PdfSortedList(subList1Content, subListMarker)
subList1.Font = listFont
subList1.Indent = indent * 2
subList1.TextIndent = textIndent

subList2Content = "Red\n" + "Green"
subList2 = PdfSortedList(subList2Content, subListMarker)
subList2.Font = listFont
subList2.Indent = indent * 2
subList2.TextIndent = textIndent

subList3Content = "Monday\n" + "Tuesday\n" + "Wednesday"
subList3 = PdfSortedList(subList3Content, subListMarker)
subList3.Font = listFont
subList3.Indent = indent * 2
subList3.TextIndent = textIndent

# Set the created list as the nested sublist of each item in the parent list
item1 = parentList.Items.get_Item(0)
item1.SubList = subList1

item2 = parentList.Items.get_Item(1)
item2.SubList = subList2

item3 = parentList.Items.get_Item(2)
item3.SubList = subList3

# Draw the list
parentList.Draw(page.Canvas, x, float(y + titleFont.MeasureString(title).Height + 5))

# Save the document
pdf.SaveToFile("output/CreateNestedList.pdf")
pdf.Close()
Apply for a Temporary License
If you'd like to remove the evaluation message from the generated documents, or to get rid of the function limitations, please request a 30-day trial license for yourself.
Python: Set Background Color or Picture for PowerPoint Slides
Setting an appropriate background is a crucial step when creating visually captivating and impactful PowerPoint presentations. The background serves as the foundation upon which your content is displayed, and choosing the right background can greatly enhance the overall aesthetic and effectiveness of your slides. Whether you are presenting at a business meeting, educational seminar, or social event, a well-designed background can engage your audience and effectively convey your message. In this article, we will explain how to set background color or picture for PowerPoint slides in Python using Spire.Presentation for Python.
- Set a Background Color for a PowerPoint Slide in Python
- Set a Gradient Background for a PowerPoint Slide in Python
- Set a Background Picture for a PowerPoint Slide in Python
- Set a Background for a Slide Master in PowerPoint in Python
Install Spire.Presentation for Python
This scenario requires Spire.Presentation for Python and plum-dispatch v1.7.4. They can be easily installed in your Windows through the following pip command.
pip install Spire.Presentation
If you are unsure how to install, please refer to this tutorial: How to Install Spire.Presentation for Python on Windows
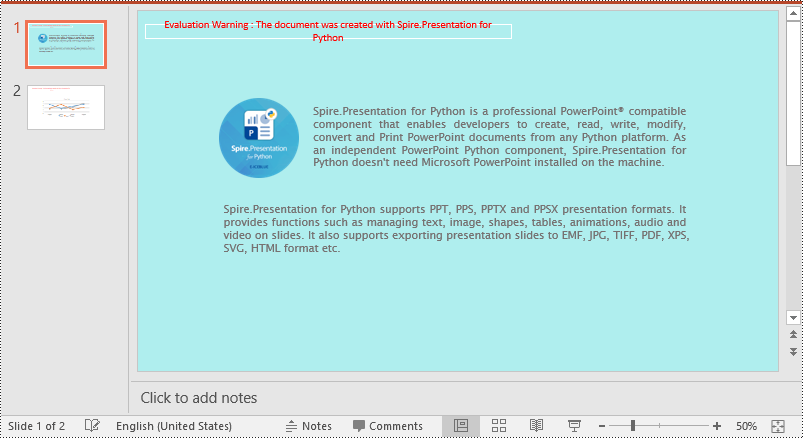
Set a Background Color for a PowerPoint Slide in Python
Adding a background color for a PowerPoint slide is very simple. You just need to set the fill mode of the slide's background as a solid fill and then set a color for the slide’s background. The detailed steps are as follows.
- Create an object of the Presentation class.
- Load a PowerPoint presentation using Presentation.LoadFromFile() method.
- Get a specific slide using Presentation.Slides[index] property.
- Access the background of the slide using ISlide.SlideBackground property.
- Set the type of the slide's background as a custom type using SlideBackground.Type property.
- Set the fill mode of the slide’s background as a solid fill using SlideBackground.Fill.FillType property.
- Set a color for the slide’s background using SlideBackground.Fill.SolidColor.Color property.
- Save the result presentation using Presentation.SaveToFile() method.
- Python
from spire.presentation import *

# Create a Presentation object
ppt = Presentation()
# Load a PowerPoint presentation
ppt.LoadFromFile("Input.pptx")

# Get the first slide
slide = ppt.Slides[0]

# Access the background of the slide
background = slide.SlideBackground

# Set the type of the slide's background as a custom type
background.Type = BackgroundType.Custom
# Set the fill mode of the slide's background as a solid fill
background.Fill.FillType = FillFormatType.Solid
# Set a color for the slide's background
background.Fill.SolidColor.Color = Color.get_PaleTurquoise()

# Save the result presentation
ppt.SaveToFile("Solidbackground.pptx", FileFormat.Pptx2013)
ppt.Dispose()
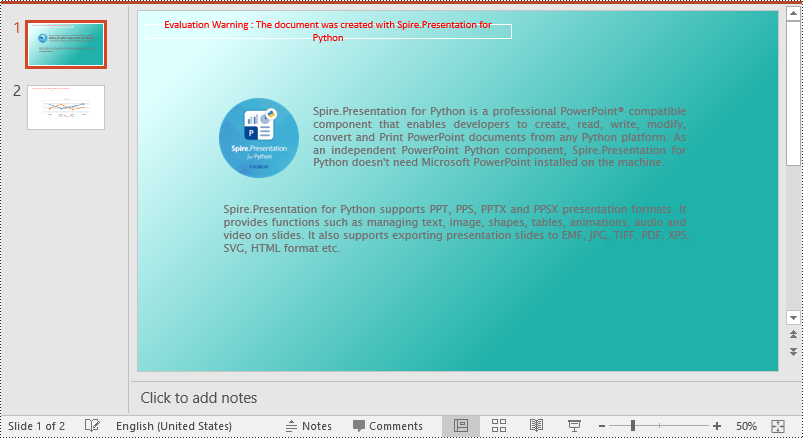
Set a Gradient Background for a PowerPoint Slide in Python
Adding a gradient background is a little complex. You need to set the fill mode of the slide’s background as a gradient fill and then set the gradient stops and colors. The detailed steps are as follows.
- Create an object of the Presentation class.
- Load a PowerPoint presentation using Presentation.LoadFromFile() method.
- Get a specific slide using Presentation.Slides[index] property.
- Access the background of the slide using ISlide.SlideBackground property.
- Set the type of the slide's background as a custom type using SlideBackground.Type property.
- Set the fill mode of the slide’s background as a gradient fill using SlideBackground.Fill.FillType property.
- Set gradient stops and colors for the slide’s background using SlideBackground.Fill.Gradient.GradientStops.AppendByColor() method.
- Set the shape type and angle for the gradient fill.
- Save the result presentation using Presentation.SaveToFile() method.
- Python
from spire.presentation import *

# Create a Presentation object
ppt = Presentation()
# Load a PowerPoint presentation
ppt.LoadFromFile("Input.pptx")

# Get the first slide
slide = ppt.Slides[0]

# Access the background of the slide
background = slide.SlideBackground

# Set the type of the slide's background as a custom type
background.Type = BackgroundType.Custom

# Set the fill mode of the slide's background as a gradient fill
background.Fill.FillType = FillFormatType.Gradient

# Set gradient stops and colors
background.Fill.Gradient.GradientStops.AppendByColor(0.1, Color.get_LightCyan())
background.Fill.Gradient.GradientStops.AppendByColor(0.7, Color.get_LightSeaGreen())

# Set the shape type of the gradient fill
background.Fill.Gradient.GradientShape = GradientShapeType.Linear
# Set the angle of the gradient fill
background.Fill.Gradient.LinearGradientFill.Angle = 45

# Save the result presentation
ppt.SaveToFile("Gradientbackground.pptx", FileFormat.Pptx2013)
ppt.Dispose()
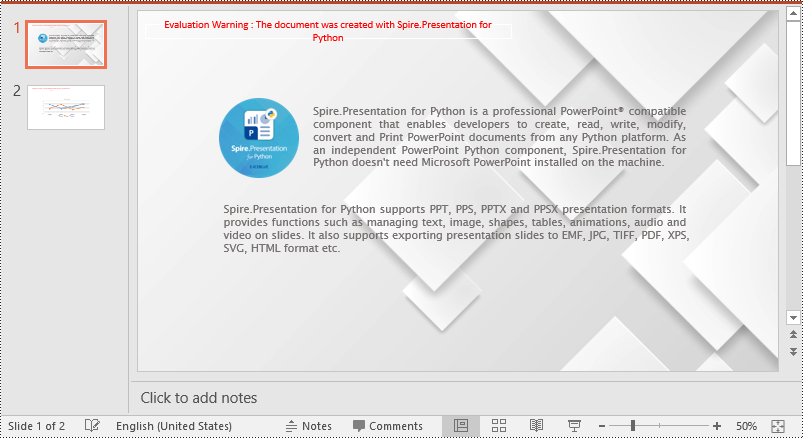
Set a Background Picture for a PowerPoint Slide in Python
To add a background picture for a PowerPoint slide, you need to set the fill mode of the slide's background as a picture fill, then add a picture to the image collection of the presentation and set it as the slide’s background. The detailed steps are as follows:
- Create an object of the Presentation class.
- Load a PowerPoint presentation using Presentation.LoadFromFile() method.
- Get a specific slide using Presentation.Slides[index] property.
- Access the background of the slide using ISlide.SlideBackground property.
- Set the type of the slide's background as a custom type using SlideBackground.Type property.
- Set the fill mode of the slide’s background as a picture fill using SlideBackground.Fill.FillType property.
- Add an image to the image collection of the presentation using Presentation.Images.AppendStream() method.
- Set the image as the slide’s background using SlideBackground.Fill.PictureFill.Picture.EmbedImage property.
- Save the result presentation using Presentation.SaveToFile() method.
- Python
from spire.presentation import *

# Create a Presentation object
ppt = Presentation()
# Load a PowerPoint presentation
ppt.LoadFromFile("Input.pptx")

# Get the first slide
slide = ppt.Slides[0]

# Access the background of the slide
background = slide.SlideBackground

# Set the type of the slide's background as a custom type
background.Type = BackgroundType.Custom

# Set the fill mode of the slide's background as a picture fill
background.Fill.FillType = FillFormatType.Picture

# Add an image to the image collection of the presentation
stream = Stream("background.jpg")
imageData = ppt.Images.AppendStream(stream)
# Set the image as the slide's background
background.Fill.PictureFill.FillType = PictureFillType.Stretch
background.Fill.PictureFill.Picture.EmbedImage = imageData

# Save the result presentation
ppt.SaveToFile("Picturebackground.pptx", FileFormat.Pptx2013)
ppt.Dispose()
Set a Background for a Slide Master in PowerPoint in Python
If you don't wish to set backgrounds for slides one by one, you can set a background for the slide master, then all slides using the same slide master will be applied with the background automatically. The following steps show how to set a solid background color for a slide master.
- Create an object of the Presentation class.
- Load a PowerPoint presentation using Presentation.LoadFromFile() method.
- Get a specific slide master using Presentation.Masters[index] property.
- Access the background of the slide master using IMasterSlide.SlideBackground property.
- Set the type of the slide master's background as a custom type using SlideBackground.Type property.
- Set the fill mode of the slide master's background as a solid fill using SlideBackground.Fill.FillType property.
- Set a color for the slide master's background using SlideBackground.Fill.SolidColor.Color property.
- Save the result presentation using Presentation.SaveToFile() method.
- Python
from spire.presentation import *

# Create a Presentation object
ppt = Presentation()
# Load a PowerPoint presentation
ppt.LoadFromFile("Input.pptx")

# Get the first slide master
slideMaster = ppt.Masters[0]

# Access the background of the slide master
background = slideMaster.SlideBackground

# Set the type of the slide master's background as a custom type
background.Type = BackgroundType.Custom

# Set the fill mode of the slide master's background as a solid fill
background.Fill.FillType = FillFormatType.Solid
# Set a color for the slide master's background
background.Fill.SolidColor.Color = Color.get_PeachPuff()

# Save the result presentation
ppt.SaveToFile("AddBackgroundToSlideMaster.pptx", FileFormat.Pptx2013)
ppt.Dispose()
Apply for a Temporary License
If you'd like to remove the evaluation message from the generated documents, or to get rid of the function limitations, please request a 30-day trial license for yourself.
Python: Create and Identify PDF Portfolios
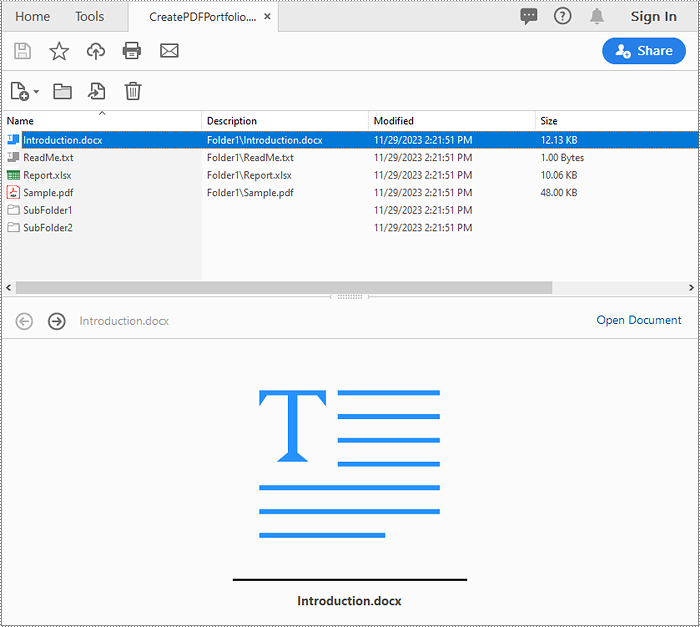
A PDF portfolio is a collection of files assembled into a single PDF document. It serves as a comprehensive and interactive showcase of various types of content, such as documents, images, presentations, videos, and more. Unlike a traditional PDF document, a PDF portfolio allows you to present multiple files in a cohesive and organized manner, providing a seamless browsing experience for the viewer. In this article, we will demonstrate how to create a PDF portfolio and how to identify if a PDF is a portfolio in Python using Spire.PDF for Python.
Install Spire.PDF for Python
This scenario requires Spire.PDF for Python and plum-dispatch v1.7.4. They can be easily installed in your Windows through the following pip command.
pip install Spire.PDF
If you are unsure how to install, please refer to this tutorial: How to Install Spire.PDF for Python on Windows
Create a PDF Portfolio with Python
Spire.PDF for Python allows you to generate a PDF portfolio by adding files to a PDF using the PdfDocument.Collection.AddFile() method. Furthermore, you can organize the files within the PDF portfolio by adding folders using the PdfDocument.Collection.Folders.CreateSubfolder() method. The detailed steps are as follows.
- Specify the output file path and the folders where the files to be included in the PDF portfolio are located.
- Create a PdfDocument object.
- Iterate through the files in the first folder and add them to the PDF portfolio using the PdfDocument.Collection.AddFile() method.
- Iterate through the files in the second folder. For each file, create a separate folder within the PDF portfolio using the PdfDocument.Collection.Folders.CreateSubfolder() method, and then add the file to the corresponding folder using the PdfFolder.AddFile() method.
- Save the resulting PDF portfolio using the PdfDocument.SaveToFile() method.
- Python
from spire.pdf.common import *
from spire.pdf import *
import glob

# Specify the folders where the files to be included in the PDF portfolio are located
input_folder1 = "Folder1/*"
input_folder2 = "Folder2/*"
# Specify the output file path
output_file = "CreatePDFPortfolio.pdf"

# Create a PdfDocument object
doc = PdfDocument()

# Get the list of file paths in the first folder
files1 = glob.glob(input_folder1)
# Loop through the files in the list
for i, file in enumerate(files1):
    # Add each file to the PDF portfolio
    doc.Collection.AddFile(file)

# Get the list of file paths in the second folder
files2 = glob.glob(input_folder2)
# Loop through the files in the list
for j, file in enumerate(files2):
    # Create a separate folder for each file
    folder = doc.Collection.Folders.CreateSubfolder(f"SubFolder{j + 1}")
    # Add the file to the folder
    folder.AddFile(file)

# Save the resulting PDF portfolio to the specified file path
doc.SaveToFile(output_file)

# Close the PdfDocument object
doc.Close()
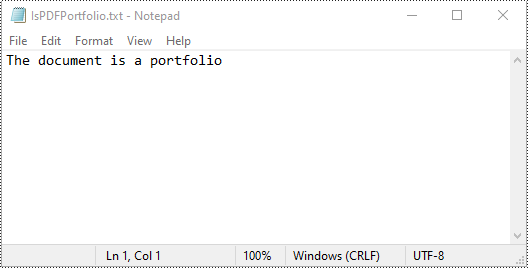
Identify if a PDF is a Portfolio with Python
You can use the PdfDocument.IsPortfolio property to easily identify whether a PDF document is a portfolio or not. The detailed steps are as follows.
- Specify the input and output file paths.
- Create a PdfDocument object.
- Load a PDF document using the PdfDocument.LoadFromFile() method.
- Identify whether the document is a portfolio or not using the PdfDocument.IsPortfolio property.
- Save the result to a text file.
- Python
from spire.pdf.common import *
from spire.pdf import *

# Specify the input and output file paths
input_file = "CreatePDFPortfolio.pdf"
output_file = "IsPDFPortfolio.txt"

# Create a PdfDocument object
doc = PdfDocument()
# Load a PDF document
doc.LoadFromFile(input_file)

# Identify whether the document is a portfolio or not
if doc.IsPortfolio:
    st = "The document is a portfolio"
else:
    st = "The document is not a portfolio"

# Save the result to a text file
with open(output_file, "w") as text_file:
    text_file.write(st)

# Close the PdfDocument object
doc.Close()
Apply for a Temporary License
If you'd like to remove the evaluation message from the generated documents, or to get rid of the function limitations, please request a 30-day trial license for yourself.
Python: Add Hyperlinks to PDF
Hyperlinks in PDF are interactive elements that, when clicked, can jump to a specific location in the document, to an external website, or to other resources. By inserting hyperlinks in a PDF document, you can provide supplementary information and enhance the overall integrity of the document. This article will demonstrate how to add hyperlinks to PDF files in Python using Spire.PDF for Python.
Install Spire.PDF for Python
This scenario requires Spire.PDF for Python and plum-dispatch v1.7.4. They can be easily installed in your Windows through the following pip command.
pip install Spire.PDFIf you are unsure how to install, please refer to this tutorial: How to Install Spire.PDF for Python on Windows
Add Hyperlinks to a PDF Document in Python
With Spire.PDF for Python, you can add web links, email links and file links to a PDF document. The following are the detailed steps:
- Create a pdf document and add a page to it.
- Specify a URL address and draw it directly on the page using PdfPageBase.Canvas.DrawString() method.
- Create a PdfTextWebLink object.
- Set the link's display text, URL address, and the font and brush used to draw it using properties of PdfTextWebLink class.
- Draw the link on the page using PdfTextWebLink.DrawTextWebLink() method.
- Create a PdfFileLinkAnnotation object and with a specified file.
- Add the file link to the page annotations using PdfPageBase.AnnotationsWidget.Add(PdfFileLinkAnnotation) method.
- Draw hypertext of the file link using PdfPageBase.Canvas.DrawString() method.
- Save the result file using PdfDocument.SaveToFile() method.
- Python
from spire.pdf.common import *
from spire.pdf import *

# Create a PdfDocument instance
pdf = PdfDocument()

# Add a page
page = pdf.Pages.Add()

# Initialize x, y coordinates
y = 30.0
x = 10.0

# Create true type fonts
font = PdfTrueTypeFont("Arial", 14.0,PdfFontStyle.Regular,True)
font1 = PdfTrueTypeFont("Arial", 14.0, PdfFontStyle.Underline,True)

# Add a simply link
label = "Simple Text Link: "
format = PdfStringFormat()
format.MeasureTrailingSpaces = True
page.Canvas.DrawString(label, font, PdfBrushes.get_Orange(), 0.0, y, format)
x = font.MeasureString(label, format).Width
url = "http://www.e-iceblue.com"
page.Canvas.DrawString(url, font1, PdfBrushes.get_Blue(), x, y)
y = y + 28

# Add a hypertext link
label = "Hypertext Link: "
page.Canvas.DrawString(label, font, PdfBrushes.get_Orange(), 0.0, y, format)
x = font.MeasureString(label, format).Width
webLink = PdfTextWebLink()
webLink.Text = "Home Page"
webLink.Url = url
webLink.Font = font1
webLink.Brush = PdfBrushes.get_Blue()
webLink.DrawTextWebLink(page.Canvas, PointF(x, y))
y = y + 28

# Add an Email link
label = "Email Link:  "
page.Canvas.DrawString(label, font, PdfBrushes.get_Orange(), 0.0, y, format)
x = font.MeasureString(label, format).Width
link = PdfTextWebLink()
link.Text = "Contact Us"
link.Url = "mailto:support@e-iceblue.com"
link.Font = font1
link.Brush = PdfBrushes.get_Blue()
link.DrawTextWebLink(page.Canvas, PointF(x, y))
y = y + 28

# Add a file link
label = "Document Link: "
page.Canvas.DrawString(label, font, PdfBrushes.get_Orange(), 0.0, y, format)
x = font.MeasureString(label, format).Width
text = "Open File"
location = PointF(x, y)
size = font1.MeasureString(text)
linkBounds = RectangleF(location, size)
fileLink = PdfFileLinkAnnotation(linkBounds,"C:\\Users\\Administrator\\Desktop\\Report.xlsx")
fileLink.Border = PdfAnnotationBorder(0.0)
page.AnnotationsWidget.Add(fileLink)
page.Canvas.DrawString(text, font1, PdfBrushes.get_Blue(), x, y)

#Save the result pdf file
pdf.SaveToFile("AddLinkstoPDF.pdf")
pdf.Close()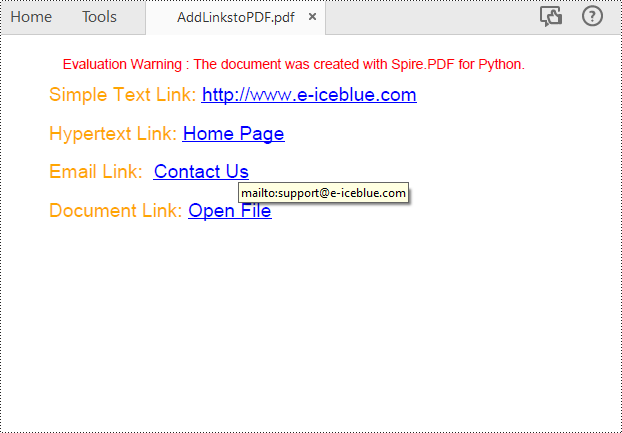
Insert Hyperlinks into Existing Text in PDF in Python
Adding a hyperlink to existing text in a PDF document requires locating the text first. Once the location has been obtained, an object of PdfUriAnnotation class with the link can be created and added to the position. The following are the detailed steps:
- Create a PdfDocument instance.
- Load a PDF file using PdfDocument.LoadFromFile() method.
- Get the first page using PdfDocument.Pages.get_Item() method.
- Create a PdfTextFinder object for the page and set the search parameter using finds.Options.Parameter.
- Find all occurrences of the specified text on the page using PdfTextFinder.Find() method.
- Loop through all occurrences of the found text and create a PdfUriAnnotation instance based on the bounds of each occurrence.
- Set the hyperlink URL, border, and border color using properties under PdfUriAnnotation class.
- Insert the hyperlink to the page annotations using PdfPageBase.AnnotationsWidget.Add(PdfUriAnnotation) method.
- Save the PDF file using PdfDocument.SaveToFile() method.
- Python
from spire.pdf.common import *
from spire.pdf import *

# Create a PdfDocument instance
pdf = PdfDocument()

# Load a PDF file
pdf.LoadFromFile("input.pdf")

# Get the first page
page = pdf.Pages.get_Item(0)

# Create a PdfTextFinder object for the current page
finds = PdfTextFinder(page)

# Set the search parameter to find exact matches
finds.Options.Parameter = TextFindParameter.IgnoreCase

# Find all occurrences of the specified text in the page
fragments  = finds.Find("big O notation")

# Iterate through the found text fragments and create hyperlink annotations for each occurrence
for fragment in fragments:
    # Get the bounds of the found text
    bounds = fragment.Bounds
    for bound in bounds:
        # Create a PdfUriAnnotation for the found text and set its properties
        uri = PdfUriAnnotation(bound)
        uri.Uri = "https://en.wikipedia.org/wiki/Big_O_notation"
        uri.Border = PdfAnnotationBorder(1.0)
        uri.Color = PdfRGBColor(Color.get_Blue())
        page.AnnotationsWidget.Add(uri)

#Save the result file
pdf.SaveToFile("SearchTextAndAddHyperlink1.pdf")
pdf.Close()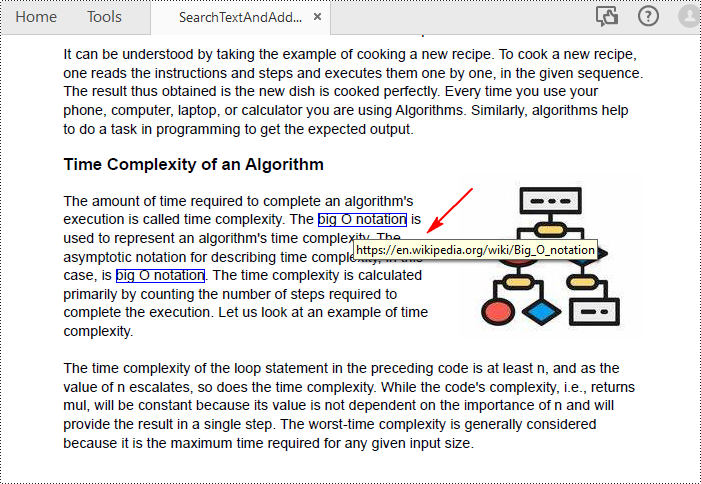
Apply for a Temporary License
If you'd like to remove the evaluation message from the generated documents, or to get rid of the function limitations, please request a 30-day trial license for yourself.
Python: Add, Hide, or Remove Layers in PDF
Layers in PDF are similar to layers in image editing software, where different elements of a document can be organized and managed separately. Each layer can contain different content, such as text, images, graphics, or annotations, and can be shown or hidden independently. PDF layers are often used to control the visibility and positioning of specific elements within a document, making it easier to manage complex layouts, create dynamic designs, or control the display of information. In this article, you will learn how to add, hide, remove layers in a PDF document in Python using Spire.PDF for Python.
- Add a Layer to PDF in Python
- Set Visibility of a Layer in PDF in Python
- Remove a Layer from PDF in Python
Install Spire.PDF for Python
This scenario requires Spire.PDF for Python and plum-dispatch v1.7.4. They can be easily installed in your Windows through the following pip commands.
pip install Spire.PDF
If you are unsure how to install, please refer to this tutorial: How to Install Spire.PDF for Python on Windows
Add a Layer to PDF in Python
A layer can be added to a PDF document using the Document.Layers.AddLayer() method. After the layer object is created, you can draw text, images, fields, or other elements on it to form its appearance. The detailed steps to add a layer to PDF using Spire.PDF for Java are as follows.
- Create a PdfDocument object.
- Load a PDF file using PdfDocument.LoadFromFile() method.
- Create a layer using Document.Layers.AddLayer() method.
- Get a specific page through PdfDocument.Pages[index] property.
- Create a canvas for the layer based on the page using PdfLayer.CreateGraphics() method.
- Draw text on the canvas using PdfCanvas.DrawString() method.
- Save the document to a different PDF file using PdfDocument.SaveToFile() method.
- Python
from spire.pdf.common import *
from spire.pdf import *

def AddLayerWatermark(doc):

    # Create a layer named "Watermark"
    layer = doc.Layers.AddLayer("Watermark")

    # Create a font
    font = PdfTrueTypeFont("Bodoni MT Black", 50.0, 1, True)

    # Specify watermark text
    watermarkText = "DO NOT COPY"

    # Get text size
    fontSize = font.MeasureString(watermarkText)

    # Get page count
    pageCount = doc.Pages.Count

    # Loop through the pages
    for i in range(0, pageCount):

        # Get a specific page
        page = doc.Pages.get_Item(i)

        # Create canvas for layer
        canvas = layer.CreateGraphics(page.Canvas)

        # Draw sting on the graphics
        canvas.DrawString(watermarkText, font, PdfBrushes.get_Gray(), (canvas.Size.Width - fontSize.Width)/2, (canvas.Size.Height - fontSize.Height)/2 )

# Create a PdfDocument instance
doc = PdfDocument()

# Load a PDF file
doc.LoadFromFile("C:\\Users\\Administrator\\Desktop\\input.pdf")

# Invoke AddLayerWatermark method to add a layer
AddLayerWatermark(doc)

# Save to file
doc.SaveToFile("output/AddLayer.pdf", FileFormat.PDF)
doc.Close()
Set Visibility of a Layer in PDF in Python
To control the visibility of layers in a PDF document, you can use the PdfDocument.Layers[index].Visibility property. Set it to off to hide a layer, or set it to on to unhide a layer. The detailed steps are as follows.
- Create a PdfDocument object.
- Load a PDF file using PdfDocument.LoadFromFile() method.
- Set the visibility of a certain layer through Document.Layers[index].Visibility property.
- Save the document to a different PDF file using PdfDocument.SaveToFile() method.
- Python
from spire.pdf.common import *
from spire.pdf import *

# Create a PdfDocument instance
doc = PdfDocument()

# Load a PDF file
doc.LoadFromFile("C:\\Users\\Administrator\\Desktop\\Layer.pdf")

# Hide a layer by setting the visibility to off
doc.Layers.get_Item(0).Visibility = PdfVisibility.Off

# Save to file
doc.SaveToFile("output/HideLayer.pdf", FileFormat.PDF)
doc.Close()
Remove a Layer from PDF in Python
If a layer is no more wanted, you can remove it using the PdfDocument.Layers.RmoveLayer() method. The following are the detailed steps.
- Create a PdfDocument object.
- Load a PDF file using PdfDocument.LoadFromFile() method.
- Get a specific layer through PdfDocument.Layers[index] property.
- Remove the layer from the document using PdfDcument.Layers.RemoveLayer(PdfLayer.Name) method.
- Save the document to a different PDF file using PdfDocument.SaveToFile() method.
- Python
from spire.pdf.common import *
from spire.pdf import *

# Create a PdfDocument instance
doc = PdfDocument()

# Load a PDF file
doc.LoadFromFile("C:\\Users\\Administrator\\Desktop\\Layer.pdf")

# Delete the specific layer
doc.Layers.RemoveLayer(doc.Layers.get_Item(0).Name)

# Save to file
doc.SaveToFile("output/RemoveLayer.pdf", FileFormat.PDF)
doc.Close()
Apply for a Temporary License
If you'd like to remove the evaluation message from the generated documents, or to get rid of the function limitations, please request a 30-day trial license for yourself.
Python: Apply Different Fonts in PDF
The use of appropriate fonts in PDF can greatly improve the overall readability and aesthetics of the document. In addition to the commonly used standard fonts, sometimes you may also need to embed private fonts. In this article, you will learn how to use different fonts in PDF in Python using Spire.PDF for Python.
Install Spire.PDF for Python
This scenario requires Spire.PDF for Python and plum-dispatch v1.7.4. They can be easily installed in your Windows through the following pip command.
pip install Spire.PDF
If you are unsure how to install, please refer to this tutorial: How to Install Spire.PDF for Python on Windows
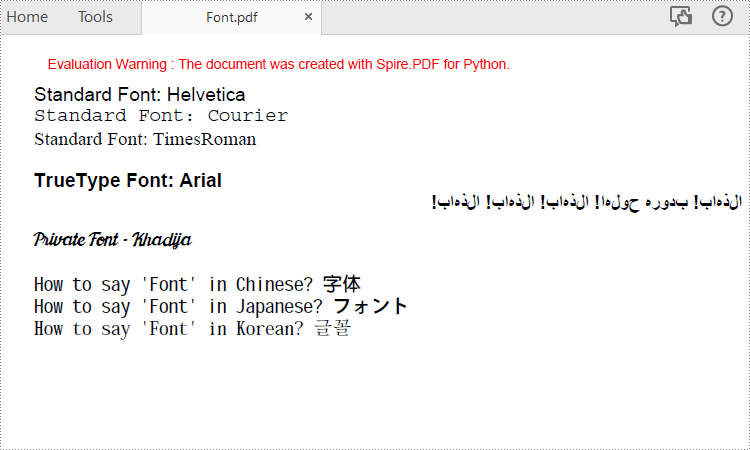
Apply Different Fonts in a PDF Document in Python
Spire.PDF for Python supports standard PDF fonts, TrueType fonts, private fonts as well as CJK font. The following are the steps to draw text in PDF using these fonts.
- Create a PdfDocument instance.
- Add a page and then create a brush.
- Create an instance of the PdfFont class with a standard PDF font, and then use the PdfPageBase.getCanvas().drawString() method to draw text on the page with the standard font.
- Create an instance of the PdfTrueTypeFont class with a specified font, and then draw text on the page with the TrueType font.
- Load a private font and create an instance of the PdfTrueTypeFont class with it. Then draw text on the page with the private font.
- Create an instance of PdfCjkStandardFont class with a CJK font, and then draw text on the page with the CJK font.
- Save the result document using PdfDocument.SaveToFile() method.
- Python
from spire.pdf.common import *
from spire.pdf import *

# Create a PdfDocument object
pdf = PdfDocument()

# Add a page
page = pdf.Pages.Add()

# Create a brush
brush = PdfBrushes.get_Black()

# Initialize y coordinate
y = 30.0

# Draw text using standard fonts
font = PdfFont(PdfFontFamily.Helvetica, 14.0)
page.Canvas.DrawString("Standard Font: Helvetica", font, brush, 0.0, y)
font = PdfFont(PdfFontFamily.Courier, 14.0)
page.Canvas.DrawString("Standard Font: Courier", font, brush, 0.0, (y := y + 16.0))
font = PdfFont(PdfFontFamily.TimesRoman, 14.0)
page.Canvas.DrawString("Standard Font: TimesRoman", font, brush, 0.0, (y := y + 16.0))

#Draw text using truetype font
trueTypeFont = PdfTrueTypeFont("Arial", 14.0, PdfFontStyle.Bold,True)
page.Canvas.DrawString("TrueType Font: Arial", trueTypeFont, brush, 0.0, (y := y + 30.0))

# Draw Arabic text from right to left
arabicText = "\u0627\u0644\u0630\u0647\u0627\u0628\u0021\u0020" + "\u0628\u062F\u0648\u0631\u0647\u0020\u062D\u0648\u0644\u0647\u0627\u0021\u0020" + "\u0627\u0644\u0630\u0647\u0627\u0628\u0021\u0020" + "\u0627\u0644\u0630\u0647\u0627\u0628\u0021\u0020" + "\u0627\u0644\u0630\u0647\u0627\u0628\u0021"
trueTypeFont = PdfTrueTypeFont("Arial", 14.0, PdfFontStyle.Bold,True)
rctg = RectangleF(PointF(0.0, (y := y + 16.0)), page.Canvas.ClientSize)
strformat = PdfStringFormat(PdfTextAlignment.Right)
strformat.RightToLeft = True
page.Canvas.DrawString(arabicText, trueTypeFont, brush, rctg, strformat)

# Draw text using private font
trueTypeFont = PdfTrueTypeFont("Khadija.ttf", 14.0)
page.Canvas.DrawString("Private Font - Khadija", trueTypeFont, brush, 0.0, (y := y + 30.0))

# Draw text using cjk fonts
cjkFont = PdfCjkStandardFont(PdfCjkFontFamily.MonotypeHeiMedium, 14.0)
page.Canvas.DrawString("How to say 'Font' in Chinese? \u5B57\u4F53", cjkFont, brush, 0.0, (y := y + 30.0))
cjkFont = PdfCjkStandardFont(PdfCjkFontFamily.HanyangSystemsGothicMedium, 14.0)
page.Canvas.DrawString("How to say 'Font' in Japanese? \u30D5\u30A9\u30F3\u30C8", cjkFont, brush, 0.0, (y := y + 16.0))
cjkFont = PdfCjkStandardFont(PdfCjkFontFamily.HanyangSystemsShinMyeongJoMedium, 14.0)
page.Canvas.DrawString("How to say 'Font' in Korean? \uAE00\uAF34", cjkFont, brush, 0.0, (y := y + 16.0))

#Save the result document
pdf.SaveToFile("Font.pdf")
pdf.Close()
Apply for a Temporary License
If you'd like to remove the evaluation message from the generated documents, or to get rid of the function limitations, please request a 30-day trial license for yourself.
Python: Set and Retrieve PDF Properties
PDF properties refer to the information embedded within the document that provides detailed information about the documents, such as author, creation date, last modification date, etc. Users can check the properties of a PDF document in PDF viewers to quickly grasp the key information of the document. Apart from the built-in properties, PDF documents also offer the feature of customizing properties to help provide additional information about the document. Understanding how to specify and access this document information facilitates the creation of user-friendly documents and the processing of documents in large quantities. In this article, we will explore how to set and retrieve PDF properties through Python programs using Spire.PDF for Python.
Install Spire.PDF for Python
This scenario requires Spire.PDF for Python and plum-dispatch v1.7.4. They can be easily installed in your Windows through the following pip commands.
pip install Spire.PDF
If you are unsure how to install, please refer to this tutorial: How to Install Spire.PDF for Python on Windows
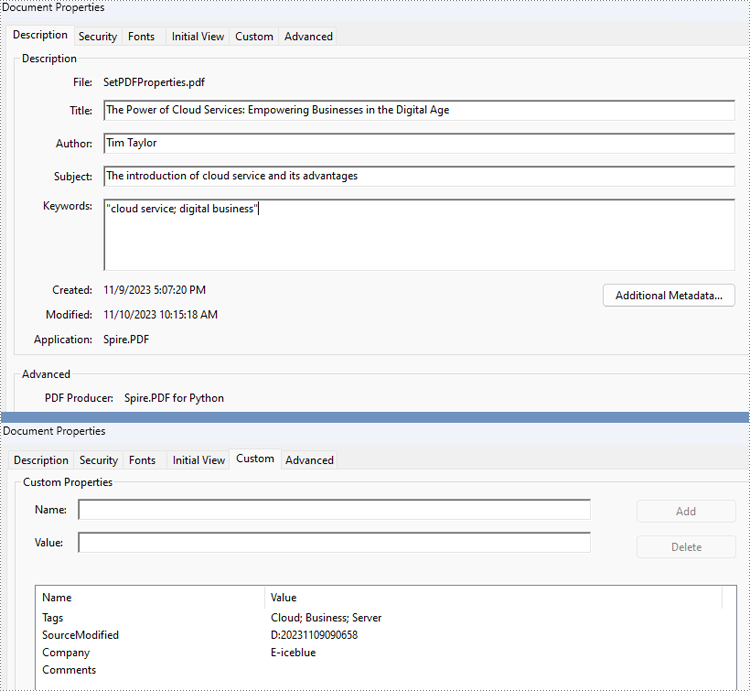
Set PDF Properties with Python
Spire.PDF for Python provides several properties under the PdfDocumentInformation class for setting built-in document properties, such as author, subject, keywords. Besides, it also provides the PdfDocumentInformation.SetCustomProperty() method to set custom properties. The following are the detailed steps to set PDF properties:
- Create an object of PdfDocument class and load a PDF document using PdfDocument.LoadFromFile() method.
- Get the properties of the document through PdfDocument.DocumentInformation property.
- Set the built-in properties through properties under PdfDocumentInformation class.
- Set custom properties using PdfDocumentInformation.SetCustomProperty() method.
- Save the document using PdfDocument.SaveToFile() method.
- Python
from spire.pdf import *
from spire.pdf.common import *
# Create an object of PdfDocument class and load a PDF document
pdf = PdfDocument()
pdf.LoadFromFile("Sample.pdf")
# Get the properties of the document
properties = pdf.DocumentInformation
# Set built-in properties
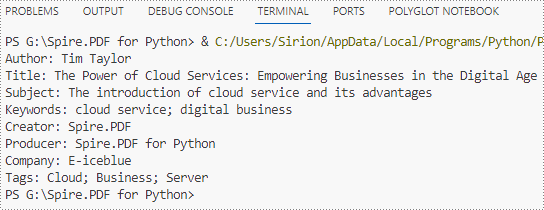
properties.Author = "Tim Taylor"
properties.Creator = "Spire.PDF"
properties.Keywords = "cloud service; digital business"
properties.Subject = "The introduction of cloud service and its advantages"
properties.Title = "The Power of Cloud Services: Empowering Businesses in the Digital Age"
properties.Producer = "Spire.PDF for Python"
# Set custom properties
properties.SetCustomProperty("Company", "E-iceblue")
properties.SetCustomProperty("Tags", "Cloud; Business; Server")
# Save the document
pdf.SaveToFile("output/SetPDFProperties.pdf")
pdf.Close()
Retrieve PDF Properties with Python
Information in built-in PDF properties can be obtained using the properties under the PdfDocumentInformation class, while that in custom PDF properties can be obtained using PdfDocumentInformation.GetCustomProperty() method. The detailed steps are as follows:
- Create an object of PdfDocument class and load a PDF document using PdfDocument.LoadFromFile() method.
- Get the properties of the document through PdfDocument.DocumentInformation property.
- Retrieve the built-in properties through properties under PdfDocumentInformation class and custom properties using PdfDocumentInformation.GetCustomProperty() method and print them.
- Python
from spire.pdf import *
from spire.pdf.common import *

# Create an object of PdfDocument class and load a PDF document
pdf = PdfDocument()
pdf.LoadFromFile("output\SetPDFProperties.pdf")

# Get the properties of the document
properties = pdf.DocumentInformation

# Create a StringBuilder object
information = ""

# Retrieve the built-in properties
information += "Author: " + properties.Author
information += "\nTitle: " + properties.Title
information += "\nSubject: " + properties.Subject
information += "\nKeywords: " + properties.Keywords
information += "\nCreator: " + properties.Creator
information += "\nProducer: " + properties.Producer

# Retrieve the custom properties
information += "\nCompany: " + properties.GetCustomProperty("Company")
information += "\nTags: " + properties.GetCustomProperty("Tags")

# Print the document properties
print(information)
pdf.Close()
Apply for a Temporary License
If you'd like to remove the evaluation message from the generated documents, or to get rid of the function limitations, please request a 30-day trial license for yourself.
Python: Split a PDF File into Multiple PDFs
Large PDF files can sometimes be cumbersome to handle, especially when sharing or uploading them. Splitting a large PDF file into multiple smaller PDFs reduces the file size, making it more manageable and quicker to open and process. In this article, we will demonstrate how to split PDF documents in Python using Spire.PDF for Python.
Install Spire.PDF for Python
This scenario requires Spire.PDF for Python and plum-dispatch v1.7.4. They can be easily installed in your Windows through the following pip command.
pip install Spire.PDF
If you are unsure how to install, please refer to this tutorial: How to Install Spire.PDF for Python on Windows
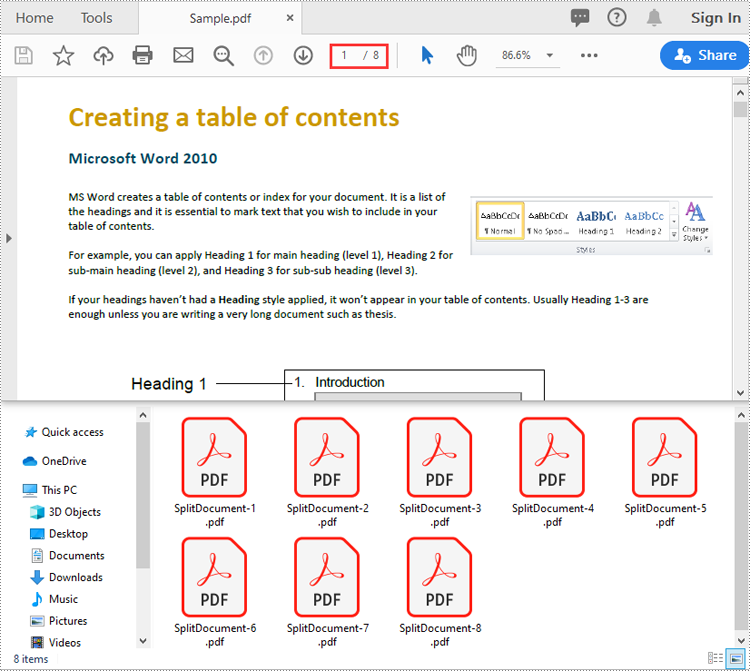
Split a PDF File into Multiple Single-Page PDFs in Python
Spire.PDF for Python offers the PdfDocument.Split() method to divide a multi-page PDF document into multiple single-page PDF files. The following are the detailed steps.
- Create a PdfDocument object.
- Load a PDF document using PdfDocument.LoadFromFile() method.
- Split the document into multiple single-page PDFs using PdfDocument.Split() method.
- Python
from spire.pdf.common import *
from spire.pdf import *

# Create a PdfDocument object
doc = PdfDocument()
# Load a PDF file
doc.LoadFromFile("Sample.pdf")

# Split the PDF file into multiple single-page PDFs
doc.Split("Output/SplitDocument-{0}.pdf", 1)

# Close the PdfDocument object
doc.Close()
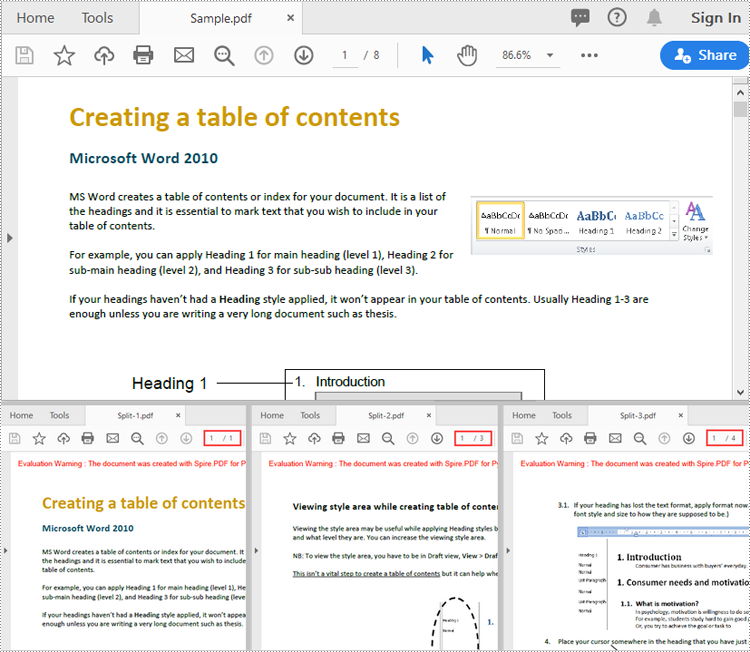
Split a PDF File by Page Ranges in Python
To split a PDF file into two or more PDF files by page ranges, you need to create two or more new PDF files, and then import the specific page or range of pages from the source PDF into the newly created PDF files. The following are the detailed steps.
- Create a PdfDocument object.
- Load a PDF document using PdfDocument.LoadFromFile() method.
- Create three PdfDocument objects.
- Import the first page from the source file into the first document using PdfDocument.InsertPage() method.
- Import pages 2-4 from the source file into the second document using PdfDocument.InsertPageRange() method.
- Import the remaining pages from the source file into the third document using PdfDocument.InsertPageRange() method.
- Save the three documents using PdfDocument.SaveToFile() method.
- Python
from spire.pdf.common import *
from spire.pdf import *

# Create a PdfDocument object
doc = PdfDocument()
# Load a PDF file
doc.LoadFromFile("Sample.pdf")

# Create three PdfDocument objects
newDoc_1 = PdfDocument()
newDoc_2 = PdfDocument()
newDoc_3 = PdfDocument()

# Insert the first page of the source file into the first document
newDoc_1.InsertPage(doc, 0)

# Insert pages 2-4 of the source file into the second document
newDoc_2.InsertPageRange(doc, 1, 3)

# Insert the rest pages of the source file into the third document
newDoc_3.InsertPageRange(doc, 4, doc.Pages.Count - 1)

# Save the three documents
newDoc_1.SaveToFile("Output1/Split-1.pdf")
newDoc_2.SaveToFile("Output1/Split-2.pdf")
newDoc_3.SaveToFile("Output1/Split-3.pdf")

# Close the PdfDocument objects
doc.Close()
newDoc_1.Close()
newDoc_2.Close()
newDoc_3.Close()
Apply for a Temporary License
If you'd like to remove the evaluation message from the generated documents, or to get rid of the function limitations, please request a 30-day trial license for yourself.
Merge PDF Files in Python - Complete Tutorial
Merging PDF files is a common task in many applications, from combining report sections to creating comprehensive document collections. For developers, using Python to merge PDF files programmatically can significantly streamline the process and help build automated workflows.
This article explores how to merge PDFs in Python using Spire.PDF for Python - a robust library designed for efficient PDF manipulation.
Table of Contents:
- 5 Reasons Why You Should Use Python to Combine PDFs
- Step-by-Step: Merge PDF Files in Python
- Advanced: Merge Selected Pages from PDFs in Python
- Batch Processing: Merge Multiple PDF Files in a Folder
- Frequently Asked Questions
- Conclusion
5 Reasons Why You Should Use Python to Combine PDFs
While GUI tools like Adobe Acrobat offer PDF merging capabilities, Python provides distinct advantages for developers and enterprises. Python’s PDF merging feature shines when you need to:
- Process documents in bulk
- Schedule scripts to run automatically (e.g., daily report merging).
- Integrate with data workflows
- Implement business-specific logic
- Deploy in server/cloud environments
Step-by-Step: Merge PDF Files in Python
Step 1: Install Spire.PDF for Python
Before you can start combining PDFs with Spire.PDF for Python, you need to install the library. You can do this using pip, the Python package manager. Open your terminal and run the following command:
pip install Spire.PDF
Step 2: Merge Multiple PDF Files into One
Now, let's dive into the Python code for merging multiple PDF files into a single PDF.
1. Import the Required Classes
First, import the necessary classes from the Spire.PDF library:
from spire.pdf.common import *
from spire.pdf import *
2. Define Paths of PDFs to Merge
Define three PDF file paths and stored them in a list. You can modify these paths or adjust the number of files according to your needs.
inputFile1 = "Sample1.pdf"
inputFile2 = "Sample2.pdf"
inputFile3 = "Sample3.pdf"
files = [inputFile1, inputFile2, inputFile3]
3. Merge PDF Files
The MergeFiles() method combines all PDFs in the list into a new PDF document object.
pdf = PdfDocument.MergeFiles(files)
4. Save the Merged PDF Finally, save the combined PDF to a specified output path.
pdf.Save("output/MergePDF.pdf", FileFormat.PDF)
Full Python Code to Combine PDFs:
from spire.pdf.common import *
from spire.pdf import *

# Create a list of the PDF file paths
inputFile1 = "Sample1.pdf"
inputFile2 = "Sample2.pdf"
inputFile3 = "Sample3.pdf"
files = [inputFile1, inputFile2, inputFile3]

# Merge the PDF documents
pdf = PdfDocument.MergeFiles(files)

# Save the result document
pdf.Save("output/MergePDF.pdf", FileFormat.PDF)
pdf.Close()
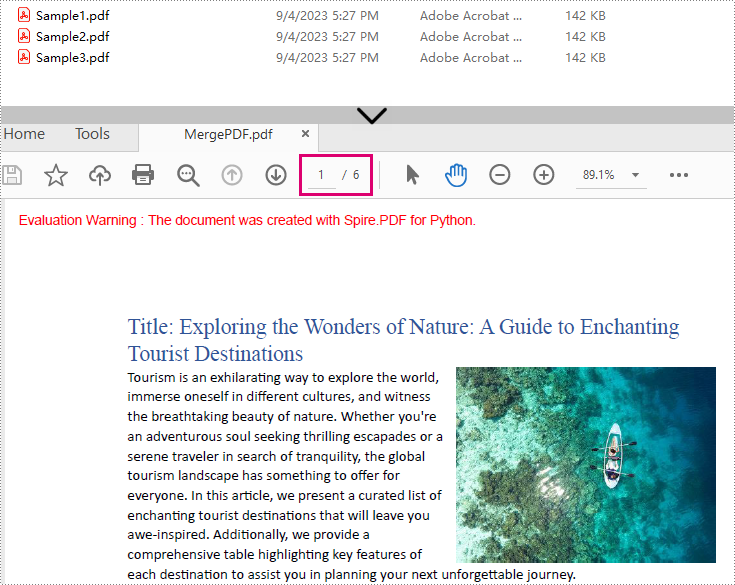
Result: Combine three PDF files (total of 6 pages) into one PDF file.
Advanced: Merge Selected Pages from PDFs in Python
In some cases, you may only want to merge specific pages of multiple PDFs. Spire.PDF for Python makes this easy by allowing you to select pages from different PDF documents and insert them into a new PDF file.
from spire.pdf import *
from spire.pdf.common import *

# Create a list of the PDF file paths
file1 = "Sample1.pdf"
file2 = "Sample2.pdf"
file3 = "Sample3.pdf"
files = [file1, file2, file3]

# Load each PDF file as an PdfDocument object and add them to a list
pdfs = []
for file in files:
    pdfs.append(PdfDocument(file))

# Create an object of PdfDocument class
newPdf = PdfDocument()

# Insert the selected pages from the loaded PDF documents into the new document
newPdf.InsertPage(pdfs[0], 0)
newPdf.InsertPage(pdfs[1], 1)
newPdf.InsertPageRange(pdfs[2], 0, 1)

# Save the new PDF document
newPdf.SaveToFile("output/SelectedPages.pdf")
Explanation:
- PdfDocument(): Initializes a new PDF document object.
- InsertPage(): Insert a specified page to the new PDF (Page index starts at 0).
- InsertPageRange(): Inserts a range of pages to the new PDF.
- SaveToFile(): Save the combined PDF to the specified output path.
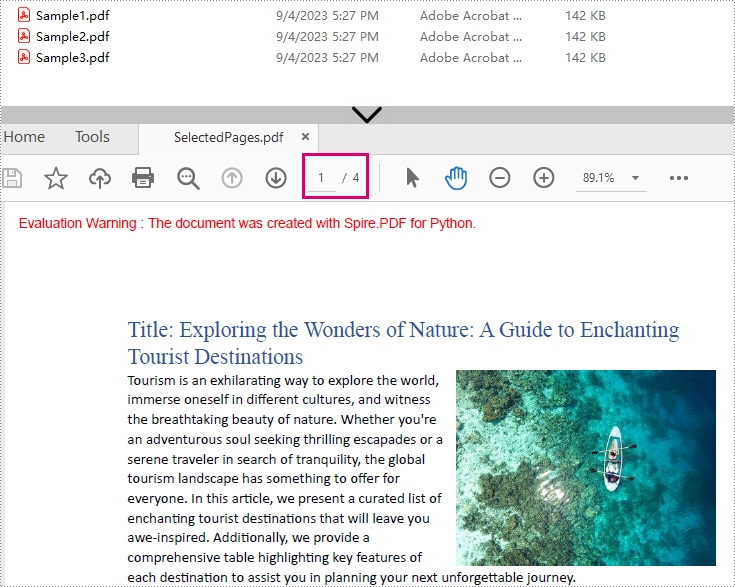
Result: Combine selected pages from three separate PDF files into a new PDF.
Batch Processing: Merge Multiple PDF Files in a Folder
The Python script loops through each source PDF in a specified folder, then appends all pages from the source PDFs to a new PDF file.
import os
from spire.pdf.common import *
from spire.pdf import *

# Specify the directory where the source PDFs are stored
folder = "pdf_folder/"

# Create a new PDF to hold the combined content.
merged_pdf = PdfDocument()

# Loop through each source PDF
for file in os.listdir(folder):
    if file.endswith(".pdf"):
        pdf = PdfDocument(os.path.join(folder, file))
        # Appends all pages from each source PDF to the new PDF
        merged_pdf.AppendPage(pdf)
        pdf.Close()  # Close source PDF

# Save the merged PDF after processing all files
merged_pdf.SaveToFile("BatchCombinePDFs.pdf")
merged_pdf.Close()  # Release resources
Frequently Asked Questions
Q1: Is Spire.PDF for Python free?
A: Spire.PDF for Python offers a 30-day free trial with full features. There’s also a free version available but with page limits.
Q2: Can I merge scanned/image-based PDFs?
A: Yes, Spire.PDF handles image-only PDFs. However, OCR/text extraction requires the Spire.OCR for Python library.
Q3: How to add page numbers to the merged PDF?
A: Refer to this comprehensive guide: Add Page Numbers to PDF in Python
Q4: How to reduce the size of the merged PDF?
A: You can compress the high-resolution images and fonts contained in the merged PDF file. A related tutorial: Compress PDF Documents in Python.
Conclusion
Merging PDFs with Python doesn't have to be a complex task. With Spire.PDF for Python, you can efficiently combine multiple PDF files into a single document with just a few lines of code. Whether you need to merge entire documents, specific pages, or a batch merge, this guide outlines step-by-step instructions to help you automate the PDF merging process.
Explore Spire.PDF's online documentation for more PDF prcessing features with Python.