How to Integrate Spire.PDF for JavaScript in a React Project
In the modern web development landscape, React has become the go-to framework for building dynamic and interactive user interfaces. When it comes to handling PDF documents within a React application, Spire.PDF for JavaScript stands out as a powerful tool.
This guide will walk you through how to integrate Spire.PDF for JavaScript into your React project, explore its benefits, and provide actionable insights to optimize your implementation.
- Benefits of Using Spire.PDF for JavaScript in React
- Set Up Your Environment
- Integrate Spire.PDF for JavaScript in Your Project
- Create and Save PDF Files Using JavaScript
Benefits of Using Spire.PDF for JavaScript in React
React, a widely used JavaScript library for crafting dynamic user interfaces, has become essential in modern web development. In tandem, Spire.PDF for JavaScript is a robust library tailored to enhance PDF document processing in web applications.
By incorporating Spire.PDF for JavaScript into your React project, you can introduce advanced PDF manipulation capabilities to your application. Here are some of the key advantages:
- Effortless PDF Generation: Spire.PDF for JavaScript facilitates the creation and editing of PDF documents directly within React, allowing for efficient management without the need for external applications.
- Cross-Platform Functionality: With Spire.PDF for JavaScript, you can generate PDFs that are accessible across various platforms, enabling users to view and edit documents from any location.
- Comprehensive Features: Spire.PDF for JavaScript provides a wide array of features, including text formatting, image embedding, and annotation capabilities, making it perfect for applications that require detailed PDF manipulation.
- Smooth Integration: Designed to work seamlessly with various JavaScript frameworks, including React, Spire.PDF for JavaScript integrates effortlessly into existing projects, ensuring a smooth development process.
Set Up Your Environment
Step 1. Install React and npm
Download and install Node.js from the official website. Make sure to choose the version that matches your operating system.
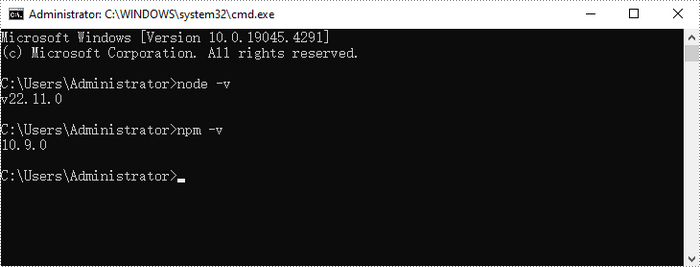
After the installation is complete, you can verify that Node.js and npm are working correctly by running the following commands in your terminal:
Step 2. Create a New React Project
Create a new React project named my-app using Create React App from terminal:
npx create-react-app my-app

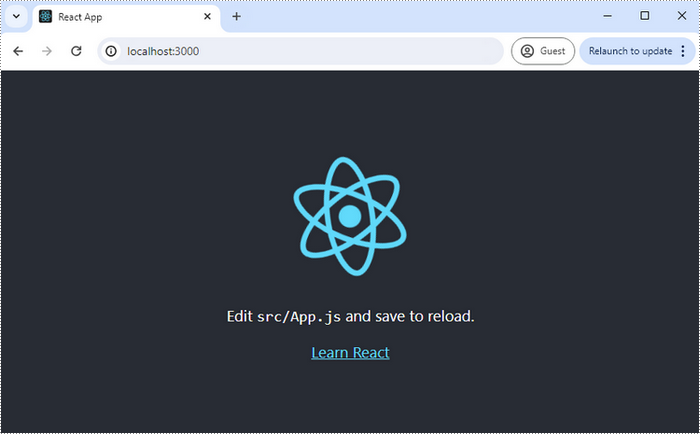
If your React project is compiled successfully, the app will be served at http://localhost:3000, allowing you to view and test your application in a browser.
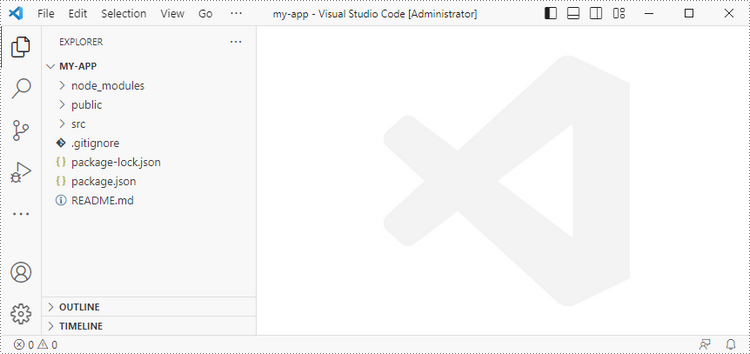
To visually browse and manage the files in your project, you can open the project using VS Code.
Integrate Spire.PDF for JavaScript in Your Project
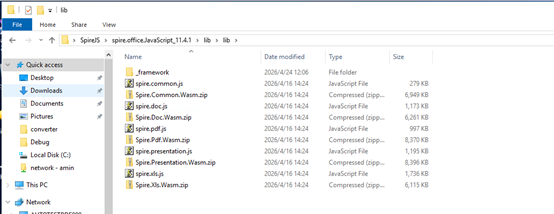
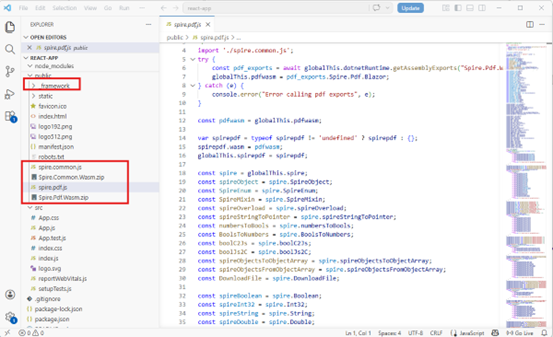
Download Spire.PDF for JavaScript from our website and unzip it to a location on your disk. The downloaded product package integrates Spire.Doc for JavaScript, Spire.XLS for JavaScript, Spire.PDF for JavaScript, and Spire.Presentation for JavaScript. When using the features of Spire.PDF for JavaScript, the required files are: spire.pdf.js, Spire.Pdf.Wasm.zip, spire.common.js, Spire.Common.Wasm.zip, and the _framework folder.
Alternatively, you can download Spire.PDF for JavaScript using npm. In the terminal within VS Code, run the following command:
npm i spire.office
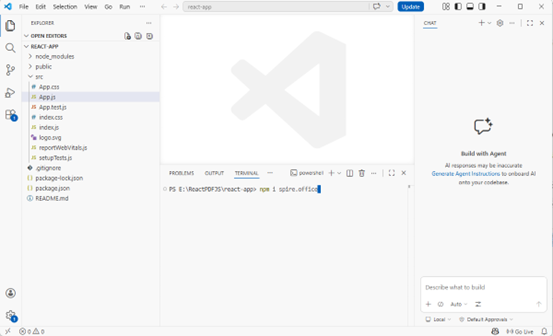
Once the installation is complete, the product packages will be saved in the node_modules/spire.office path of your project.
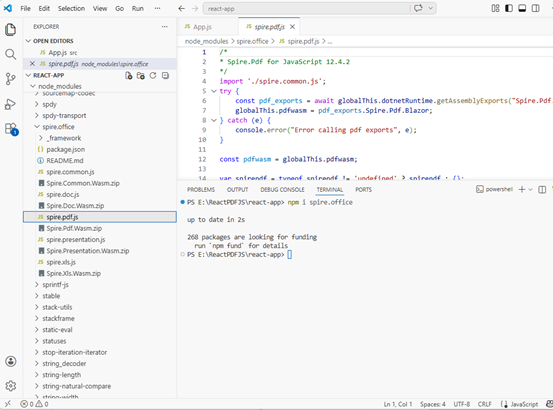
Copy the spire.pdf.js, Spire.Pdf.Wasm.zip, spire.common.js, Spire.Common.Wasm.zip, and the _framework folder five files into the "public" folder in your React project.
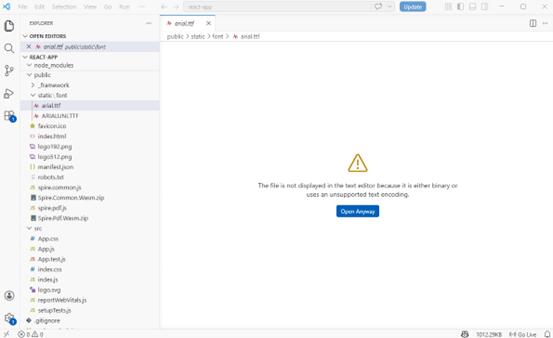
Add font files you plan to use to the "public/static/font" folder in your project. (Not always necessary)
Create and Save PDF Files Using JavaScript
Modify the code in the "App.js" file to generate a PDF file using the WebAssembly (WASM) module.
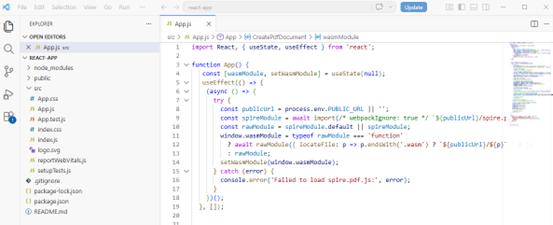
Here is the entire code:
- JavaScript
import React, { useState, useEffect } from 'react';

function App() {
   const [wasmModule, setWasmModule] = useState(null);
   useEffect(() => {
    (async () => {
      try {
        const publicUrl = process.env.PUBLIC_URL || '';
        const spireModule = await import(/* webpackIgnore: true */ `${publicUrl}/spire.pdf.js`);
        const rawModule = spireModule.default || spireModule;
        window.wasmModule = typeof rawModule === 'function'
          ? await rawModule({ locateFile: p => p.endsWith('.wasm') ? `${publicUrl}/${p}` : p })
          : rawModule;
        setWasmModule(window.wasmModule);
      } catch (error) {
        console.error('Failed to load spire.pdf.js:', error);
      }
    })();
  }, []);


  const CreatePdfDocument = async () => {
    const wasmModule = window.wasmModule.spirepdf;

    if (wasmModule) {
      // Load the ARIALUNI.TTF font file into the virtual file system (VFS)
      await window.spire.FetchFileToVFS("ARIALUNI.TTF", "/Library/Fonts/", `${import.meta.env.BASE_URL}static/font/`);

      // Create a pdf instance
      let doc = new wasmModule.PdfDocument();

      // Create one page
      let pagebase = doc.Pages.Add();

      const text = "Hello World";
      let pdffont = new wasmModule.PdfFont({fontFamily:wasmModule.PdfFontFamily.Helvetica, size:30.0});
      let pdfBrush = new wasmModule.PdfSolidBrush({pdfRGBColor: new wasmModule.PdfRGBColor({color: wasmModule.Color.get_Black()})});
      // Draw the text
      pagebase.Canvas.DrawString({s: text, font: pdffont, brush: pdfBrush, x: 10, y: 10});

      // Define the output file name
      const outputFileName = "HelloWorld_out.pdf";

      // Save the document to the specified path
      doc.SaveToFile(outputFileName);
      doc.Close();

      // Read the saved file and convert to a Blob object
      const modifiedFileArray = window.dotnetRuntime.Module.FS.readFile(outputFileName);
      const modifiedFile = new Blob([modifiedFileArray], { type: "application/pdf" });

      // Clean up resources
      doc.Dispose();

      // Create a URL for the Blob
      const url = URL.createObjectURL(modifiedFile);

      // Create an anchor element to trigger the download
      const a = document.createElement('a');
      a.href = url;
      a.download = outputFileName;
      document.body.appendChild(a);
      a.click();
      document.body.removeChild(a);
      URL.revokeObjectURL(url);

    }
  };

  return (
    <div style={{ textAlign: 'center', height: '300px' }}>
      <h1>Create a PDF Document in React</h1>
      <button onClick={CreatePdfDocument} disabled={!wasmModule}>
        Generate
      </button>
    </div>
  );
}

export default App;
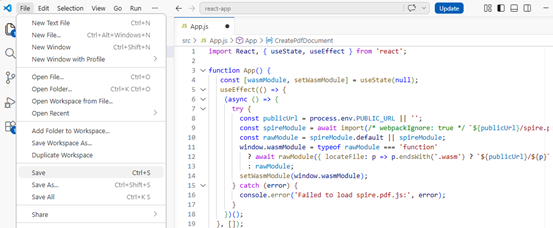
Save the changes by clicking "File" - "Save".
Start the development server by entering the following command in the terminal within VS
npm start
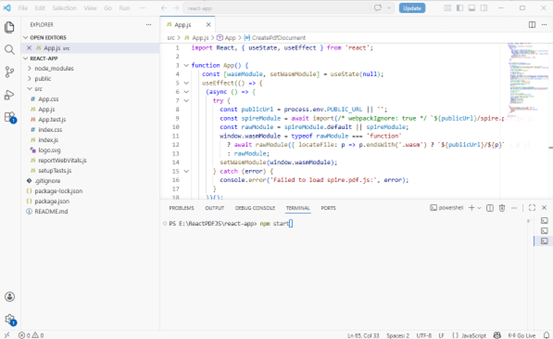
Once the React app is successfully compiled, it will open in your default web browser, typically at http://localhost:3000.

Click "Generate," and a "Save As" window will prompt you to save the output file in the designated folder.

Apply for a Temporary License
If you'd like to remove the evaluation message from the generated documents, or to get rid of the function limitations, please request a 30-day trial license for yourself.