How to create Code39 barcodes in C#
Code39 is also known as Alpha39, Code 3 of 9, Code 3/9, Type 39, USS Code 39, USD-3. This article will show you how to use Spire.Barcode to create Code39 barcode. It supports 43 characters, consisting of uppercase letters (A through Z), numeric digits (0 through 9) and a number of special characters (*, -, $, /, +, %, and space). Usually Code39 starts and ends with “*”. Here comes to the steps of how to create Code39 barcodes.
Step 1: Create a BarcodeSettings instance.
BarcodeSettings bs = new BarcodeSettings();
Step 2: Set the BarcodeType property to Code39
bs.Type = BarCodeType.Code39;
Step 3: Set the data for the barcode.
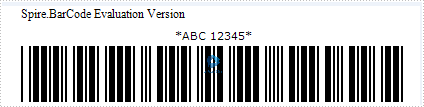
bs.Data = "*ABC 12345* ";
Step 4: Generate barcode image using BarCodeGenerator.
BarCodeGenerator bg = new BarCodeGenerator(bs);
bg.GenerateImage().Save("Code39Code.png");
Effective screenshot of Code39 barcode image:
Full codes:
using Spire.Barcode;


namespace Code39
{
    class Program
    {
        static void Main(string[] args)
        {
            BarcodeSettings bs = new BarcodeSettings();

            bs.Type = BarCodeType.Code39;
            bs.Data = "*ABC 12345* ";


            BarCodeGenerator bg = new BarCodeGenerator(bs);

            bg.GenerateImage().Save("Code39Code.png");
            System.Diagnostics.Process.Start("Code39Code.png");
        }
    }
}
How to Set TopText of Barcode in WinForm
A barcode is a small image of lines and spaces that is often used in a store to reflect the description and price of a product, moreover, barcodes can be used in many other aspects in our daily life, such as tickets, medicine prescriptions, library books. In this article, I'll introduce you a way to add extra information in TopText of a barcode using Spire.Barcode in WinForm.
By default, 'E-iceblue' will be shown as TopText in a barcode if you don't request a key to remove it. Click here to see how to remove 'E-iceblue' logo in barcode. In this sample, more than one line of text will be added in TopText to replace 'E-iceblue'. Let's see detailed steps.
Step 1: Add Spire.Barcode controls to Visual Studio Toolbox.
Step 2: Create a Windows Forms project. Drag 'BarCodeControl' to your Form1. Here I changed the barcode type as EAN13.

Step 3: Double click 'button1' to write code. Customized TopText can be saved in BarCodeControl.TopText string.
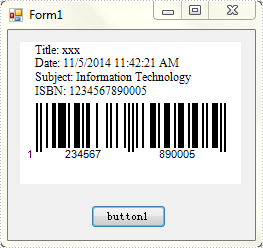
string title = "Title: xxx" + Environment.NewLine;
string subject = "Subject: Information Technology" + Environment.NewLine;
string date = "Date: " + DateTime.Now.ToString() + Environment.NewLine;
string isbn = "ISBN: 1234567890005";
this.barCodeControl1.TopText = title + date + subject + isbn;
Step 4: Run the sample code and click 'button1' to get the new barcode. In addition, you can call BarCodeControl.SaveToFile() method to save the barcode as an image.
Full Code:
using System;
using System.Collections.Generic;
using System.ComponentModel;
using System.Data;
using System.Drawing;
using System.Linq;
using System.Text;
using System.Windows.Forms;
using System.Drawing.Imaging;

namespace SetTopText
{
    public partial class Form1 : Form
    {
        public Form1()
        {
            InitializeComponent();
        }

        private void button1_Click(object sender, EventArgs e)
        {
            string title = "Title: xxx" + Environment.NewLine;
            string date = "Date: " + DateTime.Now.ToString() + Environment.NewLine;
            string subject = "Subject: Information Technology" + Environment.NewLine;
            string isbn = "ISBN: 1234567890005";
            this.barCodeControl1.TopText = title + date + subject + isbn;

        }
    }
}
Set X dimension of Barcode
Spire.Barcode is a free .NET component specially designed for developers. It can generate many kinds of barcode such as EAN128, Codabar, DataMatrix, PostNet and so on. It can also scan the barcode images. X dimension is the measure of the narrowest bar in a barcode. Barcodes and scanners have different X dimensions, so they must be matched. Using Spire.Barcode, it is quiet an easy job to do this.
In this document, I will introduce you how to so.
Step 1: Create a BarcodeSettings instance.
BarcodeSettings setting = new BarcodeSettings();
Step 2: Set the data to render.
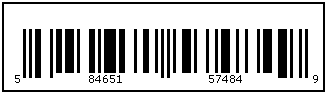
setting.Data = "58465157484";
setting.Data2D = "58465157484";
Step 3: Set the type of barcode to generate.
setting.Type = BarCodeType.UPCA;
Step 4: Set the value of X dimension.
setting.Unit = GraphicsUnit.Millimeter;
setting.X = 0.8F;
The property Unit specifies the measurement unit. In this sample, the measurement unit is millimeter.
Step 5: Generate barcode image using BarCodeGenerator.
BarCodeGenerator gen = new BarCodeGenerator(setting);
Image img = gen.GenerateImage();
img.Save("barcode.png");
Screenshot and Full Code:
using Spire.Barcode;
using System.Drawing;


namespace SetXDimension
{
    class Program
    {
        static void Main(string[] args)
        {
            BarcodeSettings barsetting = new BarcodeSettings();

            //set the x dimension
            barsetting.X = 0.8f;
            barsetting.Unit = GraphicsUnit.Millimeter;

            barsetting.HasBorder = true;
            barsetting.BorderWidth = 0.5F;

            //set the data
            barsetting.Data = "58465157484";
            barsetting.Data2D = "58465157484";

            //generate UPCA barcode
            barsetting.Type = BarCodeType.UPCA;

            BarCodeGenerator bargenerator = new BarCodeGenerator(barsetting);
            Image barcodeimage = bargenerator.GenerateImage();
            barcodeimage.Save("barcode.png");

            System.Diagnostics.Process.Start("barcode.png");
        }
    }
}
Imports Spire.Barcode
Imports System.Drawing


Namespace SetXDimension
	Class Program
		Private Shared Sub Main(args As String())
			Dim barsetting As New BarcodeSettings()

			'set the x dimension
			barsetting.X = 0.8F
			barsetting.Unit = GraphicsUnit.Millimeter

			barsetting.HasBorder = True
			barsetting.BorderWidth = 0.5F

			'set the data
			barsetting.Data = "58465157484"
			barsetting.Data2D = "58465157484"

			'generate UPCA barcode
			barsetting.Type = BarCodeType.UPCA

			Dim bargenerator As New BarCodeGenerator(barsetting)
			Dim barcodeimage As Image = bargenerator.GenerateImage()
			barcodeimage.Save("barcode.png")

			System.Diagnostics.Process.Start("barcode.png")
		End Sub
	End Class
End Namespace
How to add Controls to Toolbox in C#
In this document, I will introduce you how to add Spire. Barcode controls to Toolbox for Windows Forms application.
If you have already installed Spire.Barcode, you can add controls this way:
"Start" → "Programs" → "e-iceblue" → "Spire.Barcode": Click "Add Controls into VS Toolbox".
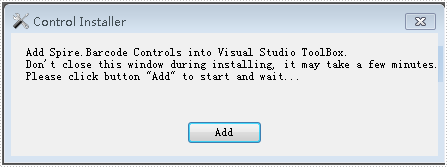
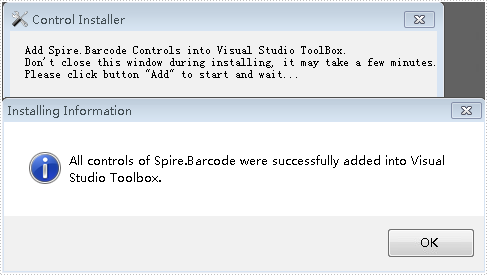
Click "Add" to add controls.
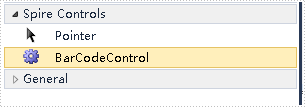
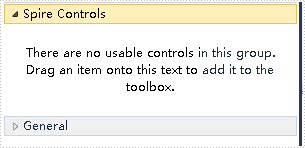
Right-click on the blank part of the Toolbox - "Add Ta" - name the new Tab "Spire Controls":
Right-click on the blank part below "Spire Controls" → "Choose Items" → ".NET Framework Components" → "Browse" to the "Bin" folder → find the file "Spire.Barcode.dll" → "Open".
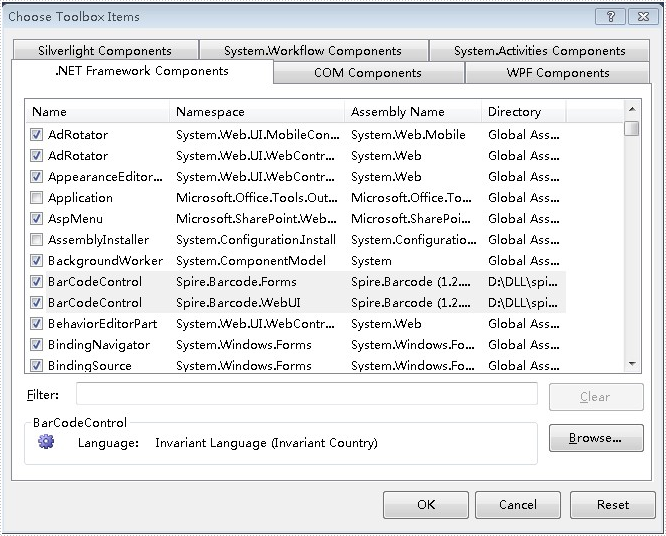
Click "OK". Then you have added controls to Toolbox successfully.