
Cloud (13)
Charts are an essential tool for visualizing data stored in Excel spreadsheets. Creating charts from your spreadsheet data can reveal trends, patterns, and insights that might be missed in a simple table of numbers. With Spire.Cloud.Excel, an online spreadsheet editor, you can easily convert your Excel data to various types of charts. This guide will walk you through the process of how to convert Excel data with charts online using Spire.Cloud.Excel.
- Spire.Cloud.Excel Spreadsheet Editor
- Chart Types Supported by Spire.Cloud.Excel Spreadsheet Editor
- Convert Excel Data to Charts Online
Spire.Cloud.Excel Spreadsheet Editor
Spire.Cloud.Excel is one of the key components of the Spire.Cloud.Office online suite. This robust online spreadsheet editor empowers users to create, view, edit, convert and collaborate on Excel-compatible spreadsheets directly in their web browsers. It offers a wide range of features, including data analysis tools, formula support, chart creation, and formatting options. With a variety of chart types and customization options, Spire.Cloud.Excel makes data visualization straightforward and effective.
To utilize the services offered by Spire.Cloud.Excel, you first need to install Spire.Cloud.Office on your system:
- Install Spire.Cloud.Office for .NET on Windows
- Install Spire.Cloud.Office for Linux on Ubuntu
- Install Spire.Cloud.Office for Linux on CentOS
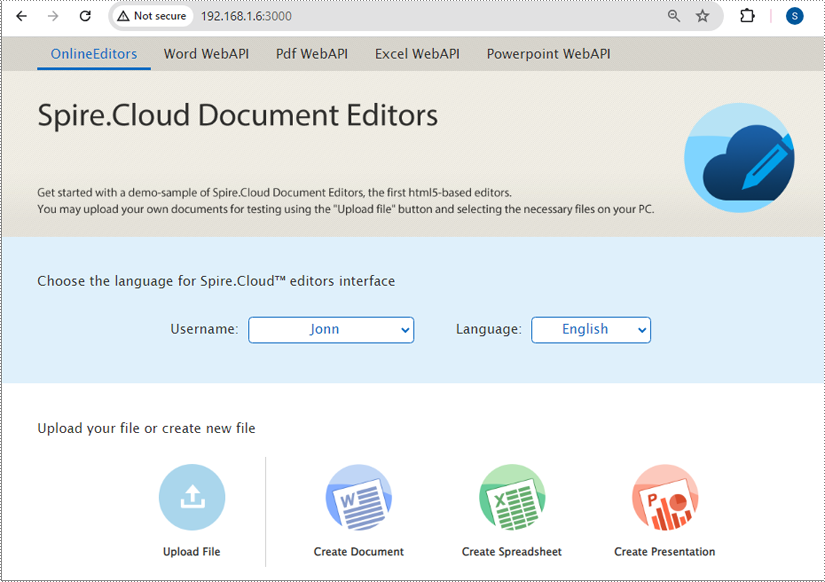
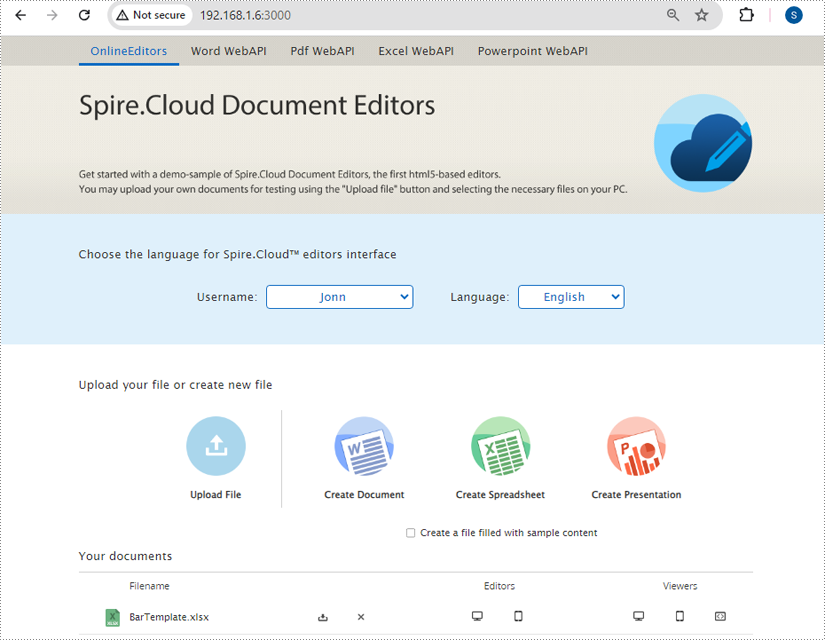
After the installation is complete, you can integrate Spire.Cloud.Office in your own web application or visit the example application hosted on port 3000 (as shown in the image below) to explore the editor's functionality.
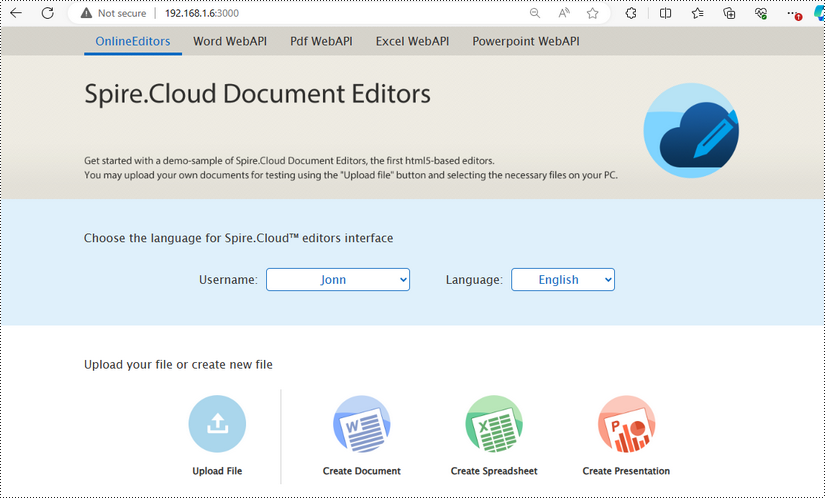
Chart Types Supported by Spire.Cloud.Excel Spreadsheet Editor
Spire.Cloud.Excel Spreadsheet Editor supports a wide range of chart types, allowing you to choose the best visual representation for your data. Here are some of the chart types you can use:
- Column Chart: Ideal for comparing quantities across different categories. Each category is represented by a vertical bar, making it easy to see differences at a glance. This type of chart is perfect for displaying data like sales figures or population statistics.
- Line Chart: Perfect for showing trends over time. Line charts plot data points connected by a straight line, making them great for tracking changes over periods such as months or years. They are commonly used for financial data, such as stock prices or revenue growth.
- Pie Chart: Useful for displaying proportions and percentages. A pie chart divides a circle into slices to illustrate numerical proportions. Each slice represents a category's contribution to the whole, making it easy to compare parts of a whole.
- Bar Chart: Similar to column charts but with horizontal bars. Bar charts are useful for comparing quantities across categories, especially when the category names are long or there are many categories. They are often used for survey data or inventory levels.
- Area Chart: Great for emphasizing the magnitude of change over time. Area charts are similar to line charts, but the area below the line is filled with color, highlighting the volume of change. They are ideal for showing cumulative totals over time, such as total sales or production levels.
- XY (Scatter) Chart: Used for showing the relationship between two variables. Scatter charts plot individual data points on a grid, with one variable on the x-axis and the other on the y-axis. This type of chart is excellent for identifying correlations or trends between two datasets, such as height versus weight.
- Stock Chart: Suitable for financial data, representing stock prices and market trends. Stock charts can display various financial metrics, such as opening, closing, high, and low prices for a particular period. They are essential for investors and analysts who need to track market movements and make informed decisions.
Each chart type comes with customization options to enhance your data visualization further, allowing you to adjust colors, labels, and other elements to create the most informative and visually appealing charts for your needs.
Convert Excel Data to Chart Online
To convert Excel data to charts online using Spire.Cloud.Excel, you can follow the steps below.
1. Open Your Excel File
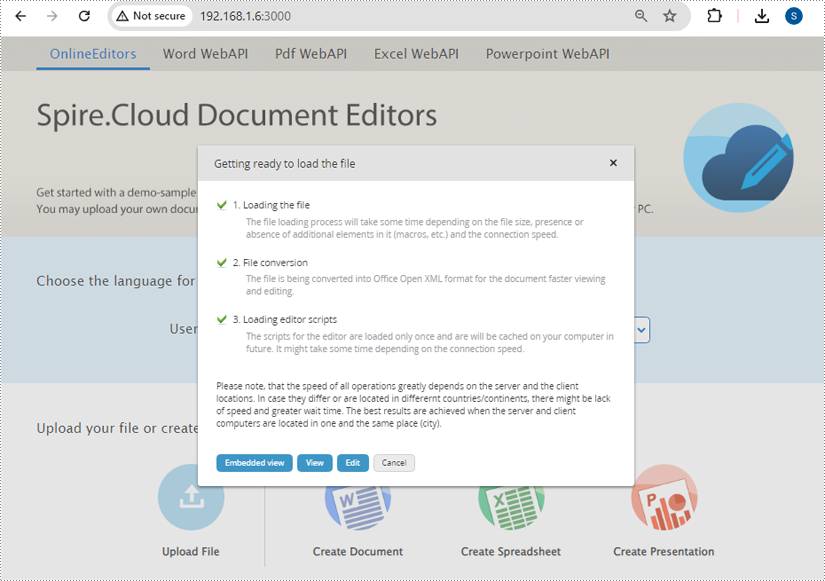
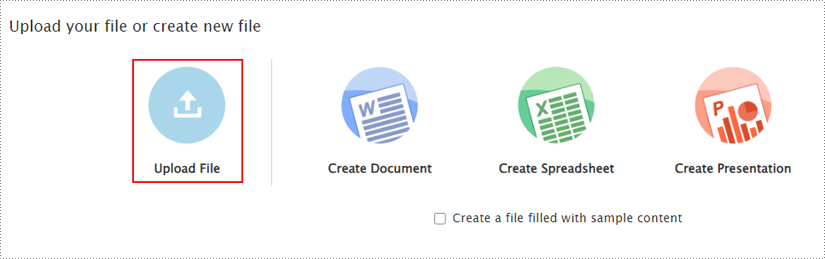
- First, you need to upload your Excel file by clicking the "Upload File" button on the example page.
- Once the file is uploaded, click the "Edit" button to open it in the Spire.Cloud.Excel Spreadsheet Editor.
2. Select Your Data
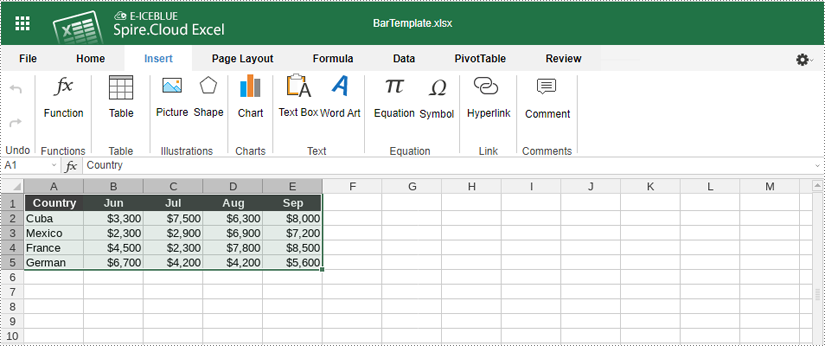
To create a chart, you need to select the data that you want to visualize:
- Click and drag to highlight the cells containing the data you want to include in your chart.
- Ensure you include headers in your selection if you want them to appear in the chart's legend.

3. Insert a Chart
With your data selected, follow these steps to insert a chart:
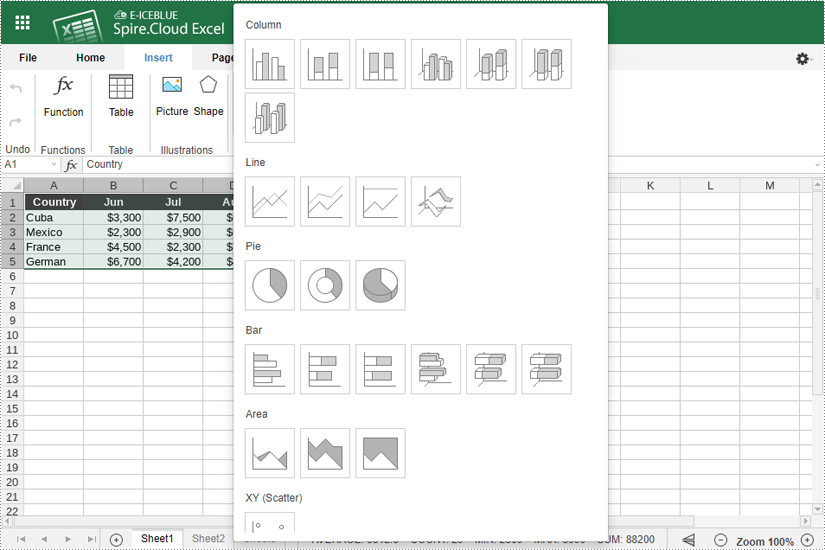
- Go to the "Insert" tab in the toolbar of Spire.Cloud.Excel Spreadsheet Editor.
- Click the "Chart" icon. This will open a menu with various chart types. Then Choose the chart type that best represents your data (e.g., bar chart, line chart, pie chart, column chart, XY (scatter chart), area chart).
4. Customize Your Chart
Spire.Cloud.Excel provides numerous options to customize your chart:
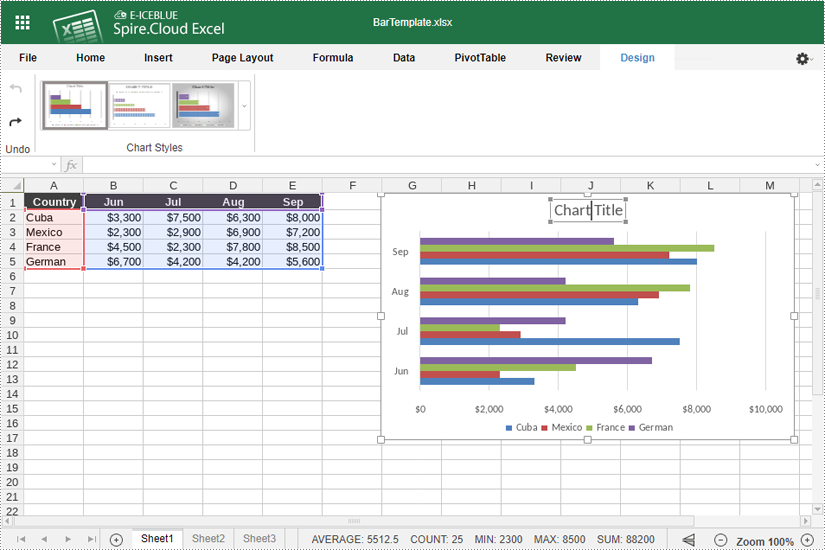
- After inserting the chart, click the "Chart Title" to add a title for it.
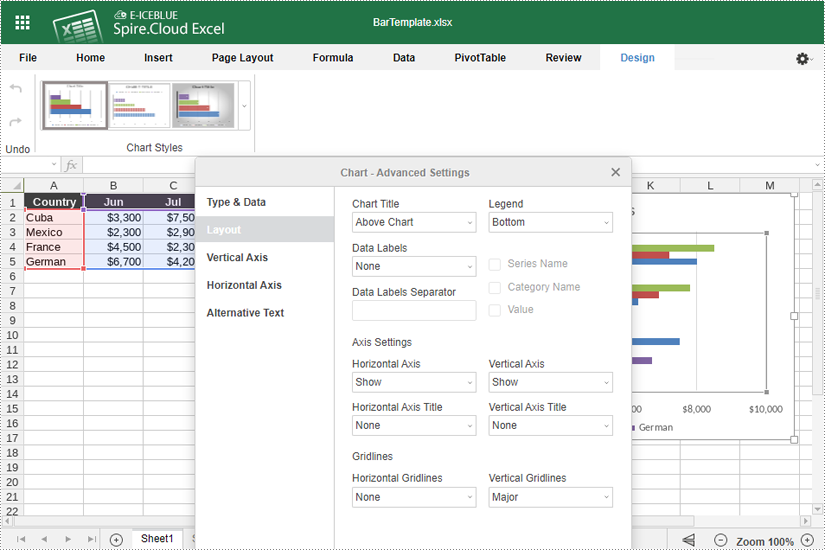
- Right-click the chart and select "Chart Advanced Settings".

- Use the options available to modify the chart's design, such as changing the chart title and legend position, adding data labels, and adjusting horizontal and vertical axes.
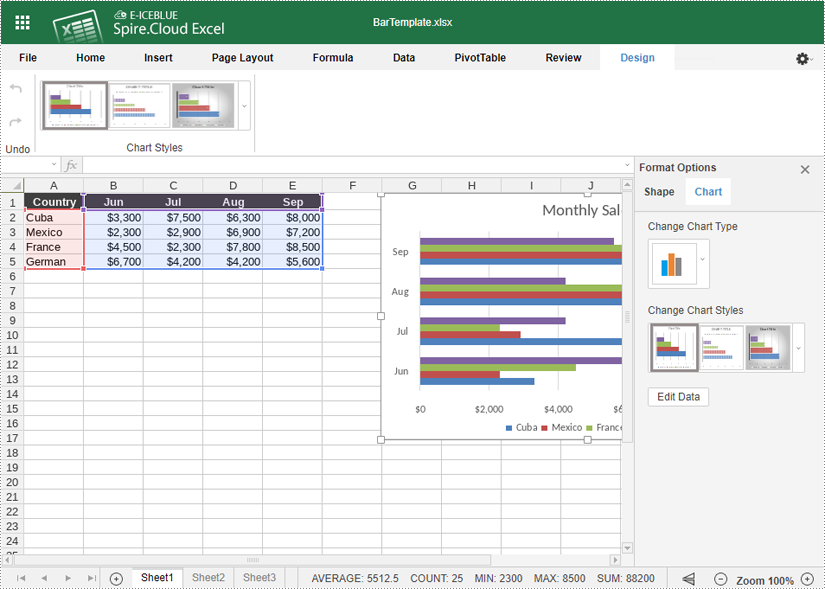
- If you want to change the chart type, right-click the chart and select "Chart Format". Then click "Chart" > "Change Chart Type".
- You can also resize and move the chart within your spreadsheet by clicking and dragging.
5. Save Your Chart
- Once you are satisfied with your chart, you can save your document by pressing "Ctrl + S" or clicking on the "File" menu and selecting "Save" to save your changes.
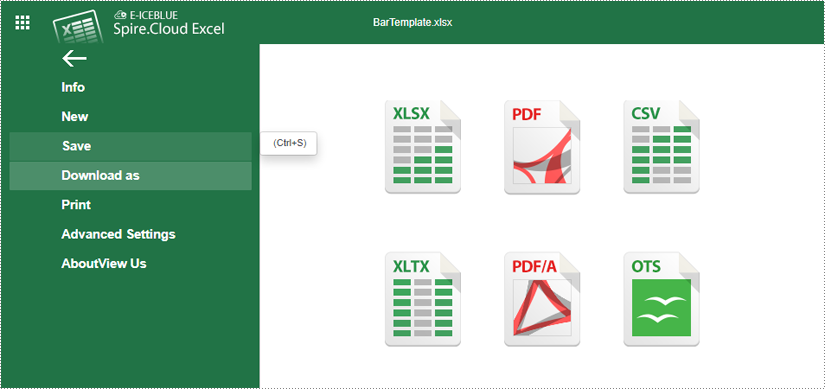
- Your file has been saved and can be accessed on the example page.
The use of online editors is showing a growing trend nowadays, driven by a multitude of factors, including the rise of remote working, the increasing popularity of cloud services, and the convenience that online editors offer in terms of accessibility and collaboration.
Among the rich features offered by online document editors, the security feature is highly valued by some users. Having the ability to password-protect documents online helps prevent unauthorized access, reduces the risk of data leakage, and ensures that only designated members can view or edit documents. This feature is especially important in collaborative environments where you need to control who can make changes.
In this article, we will explore two ways to protect a Word document online in the Spire.Cloud.Office document editor.
Spire.Cloud.Office Document Editor
Spire.Cloud.Office is a powerful online document editing tool designed to provide a seamless experience for editing Microsoft Office documents such as Word, Excel, and PowerPoint in web browsers. The online editing tool supports real-time collaboration, allowing multiple users to work on the same document simultaneously, which is especially useful for teams working on projects together, enabling immediate feedback and updates.
More than just a document editor, Spire.Cloud.Office can also serve as a document viewer and converter, making it a versatile tool for various document management needs. To utilize the services offered by Spire.Cloud.Office, you will need to first install it on your system.
- Install Spire.Cloud.Office for .NET on Windows
- Install Spire.Cloud.Office for Linux on Ubuntu
- Install Spire.Cloud.Office for Linux on CentOS
After the installation is complete, you can integrate Spire.Cloud.Office editor in your own web application or visit the example application hosted on port 3000 to explore the editor's functionalities.

Password Protect a Word Document Online
To encrypt a Word document with password in the Spire.Cloud.Office editor, simply follow the steps below:
1. Upload a Word document by clicking the "Upload File" button on the example page.
2. Select a file, wait a second for the editor to get the file ready, and then click "Edit".

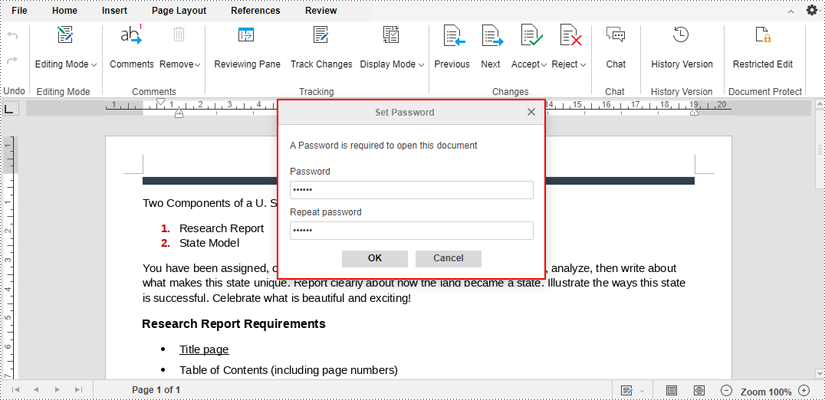
3. After opening the file in the editor, go to "File > Document Protection > Add password".
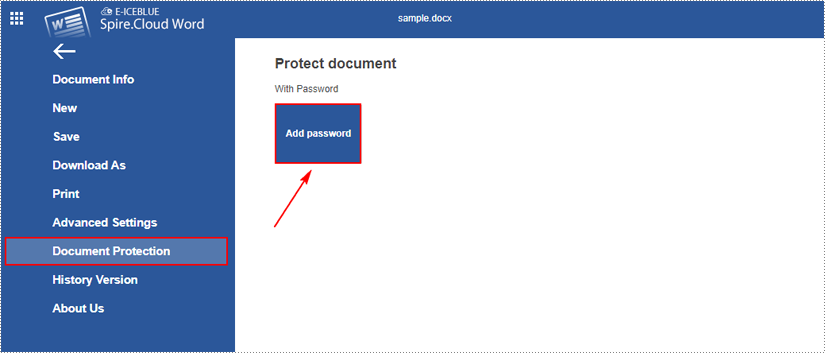
4. Enter password in the dialogue box that pops up and click "OK" to confirm.
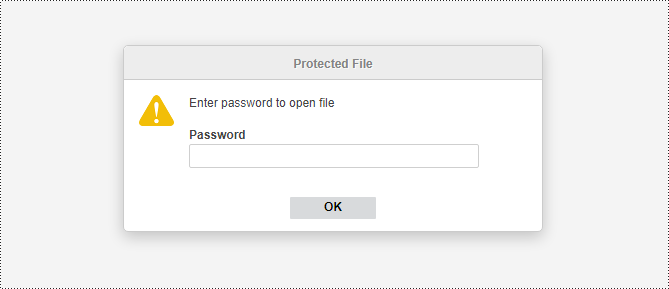
5. The editor will automatically save the encrypted file. Later on, anyone who wants to access the file will need to enter a password.
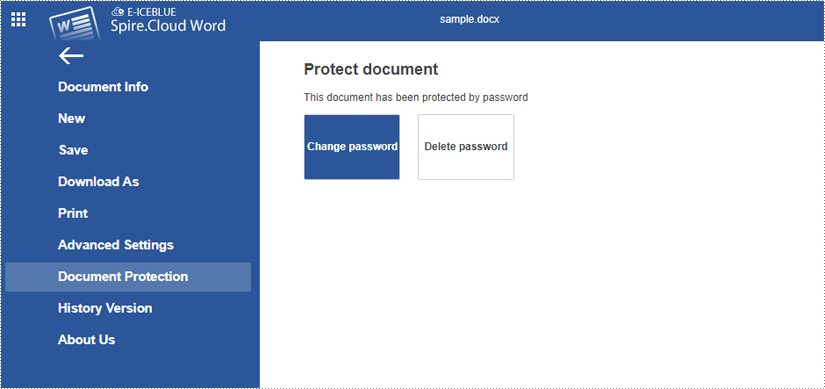
To change or remove password, open the encrypted document and then go to "File > Document Protection > Change password / Delete password".
Set Editing Restrictions on a Word Document Online
If you want to secure your document against accidental or malicious modifications, you can set editing restrictions on the document. In this way, users are only allowed to edit specified parts of the document, while other parts can only be viewed.
The following are the steps to restrict editing a Word document online using Spire.Cloud.Office editor:
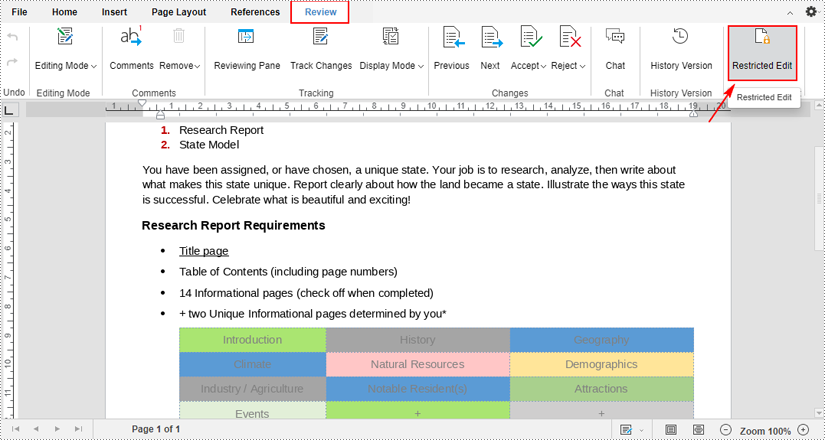
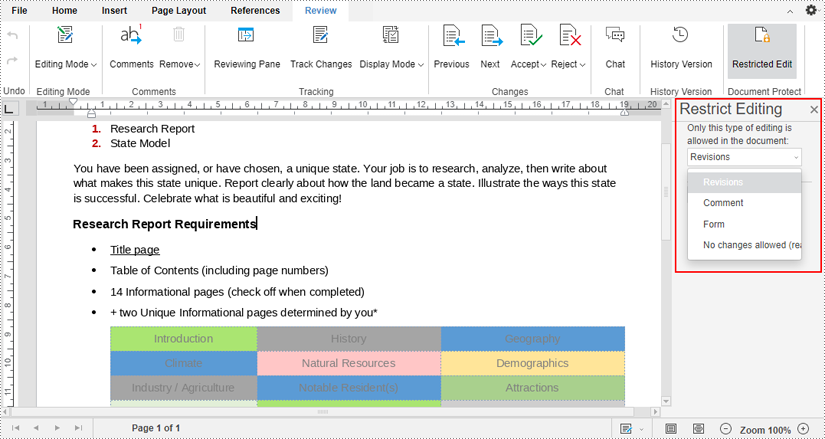
1. When a file is opened in the editor, click the "Restricted Edit" under the "Review" tab.
2. After clicking, a "Restrict Editing" pane will appear on the right side of the document. You can select one from the drop-down menu to allow only this type of editing in the document.
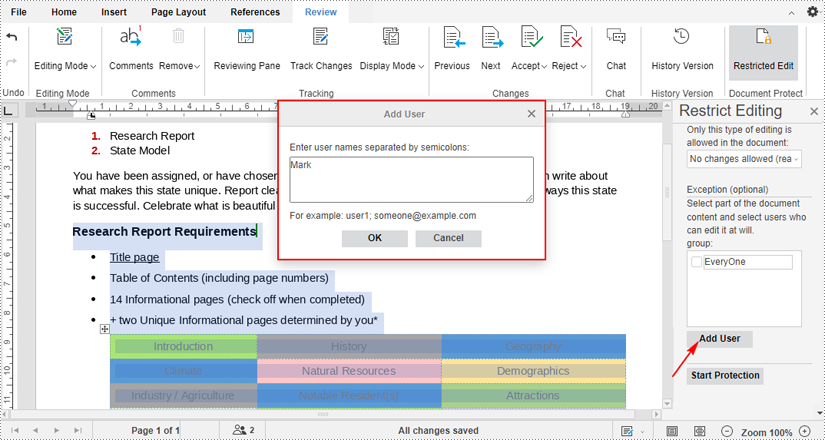
3. If you want to allow certain people to edit a specific part of your document even if it’s been restricted.
First select the part that you want to keep editable, and click the "Add User" under the "Exception (optional)" section. Then enter the usernames (or email addresses) you want to allow to edit your document.
4. Tick-mark the users you just added and click the "Start Protection" button. Then enter password on the pop-up dialogue box and click "OK" to start enforcing protection on your document.
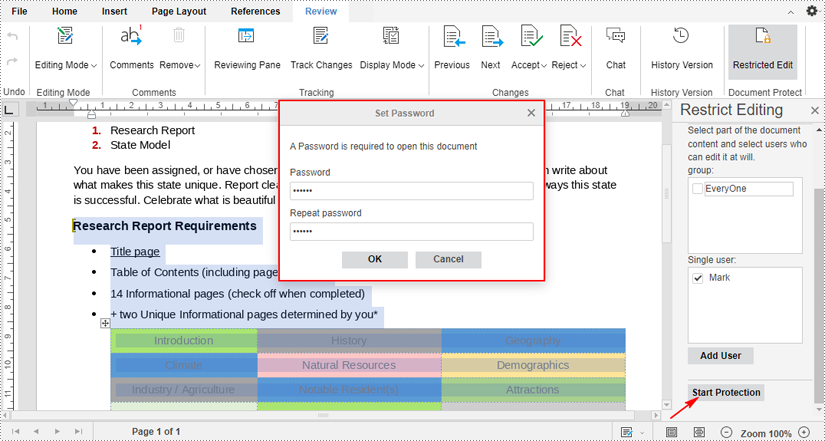
5. The editable parts will be highlighted. To remove editing restrictions on a Word document, click the "Stop Protection" button and enter the password.

Present PowerPoint Slideshows Online in Browsers (PC & Mobile Phone)
2024-07-25 08:31:50 Written by KoohjiPresenting PowerPoint slides online through a web browser represents a practical advancement in sharing information and conducting presentations. By leveraging the online editor Spire.Cloud.Presentation, users can easily showcase their slides to audiences on multiple platforms including PCs and mobile phones.
More importantly, run PowerPoint slideshows in a browser eliminates the need to install specific software, making the process simpler and more accessible. Ideal for on-the-go work scenarios and impromptu presentations, this browser-based solution provides flexibility to handle unexpected situations like not having the right computer or encountering local file corruption.
This article will show how to run PowerPoint slideshows online in browsers on both PCs and mobile phones with Spire.Cloud.Presentation to simplify the process and broaden the reach of presentations.
- Online PowerPoint Slides Editing and Presenting Tool
- Present PowerPoint Slides in PC Browsers
- Run PowerPoint Slide Show in Mobile Phone Browsers
Online PowerPoint Slides Editing and Presenting Tool
The online presentation editor Spire.Cloud.Presentation can be used in any HTML5-compliant browsers to edit, convert, print, and present PowerPoint slides. It supports creating new presentations and uploading existing presentations for processing.
Developers need to download Spire.Cloud.Presentation and install it on the Windows or Linux server, so that users can use the online editor easily in their browsers.
- Install Spire.Cloud.Presentation on a Windows Server
- Install Spire.Cloud.Presentation on a Ubuntu Server
- Install Spire.Cloud.Presentation on a CentOS Server
After installing Spire.Cloud.Presentation on the server, developers can try out the features of the editor via port 3000 or integrate the editor into HTML pages via JavaScript.
Present PowerPoint Slides in PC Browsers
Spire.Cloud.Presentation supports creating new PowerPoint presentations, selecting existing presentation files on the server, and uploading presentations for display. It supports uploading presentation formats including PPT, PPTX, POTX, PPTM, POTM, PPS, PPSX, XPS, PCL, PS, DPS, and DPT. The uploaded presentation files will be automatically converted to Open XML format for quick editing and viewing.
Steps for presenting a PowerPoint presentation online in a PC browser:
Create a new presentation to display
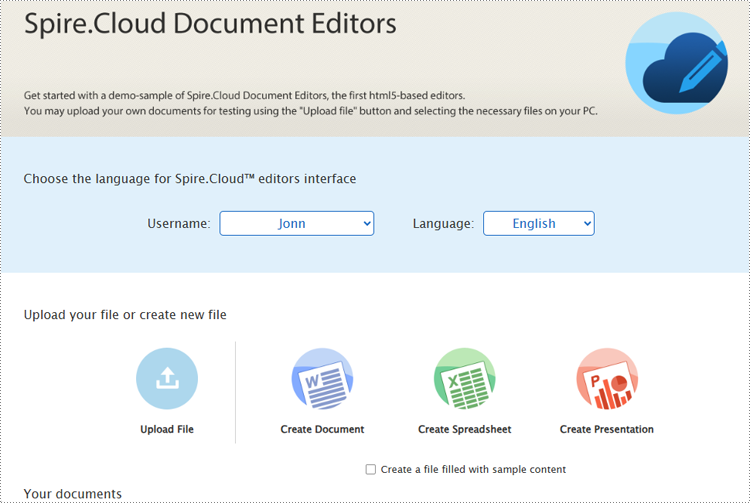
1. Open the home page and click "Create Presentation".
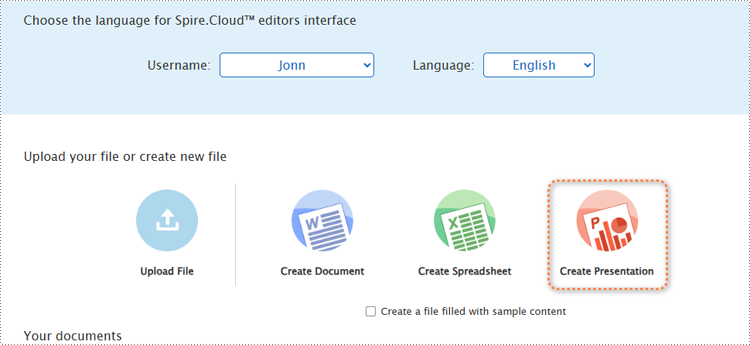
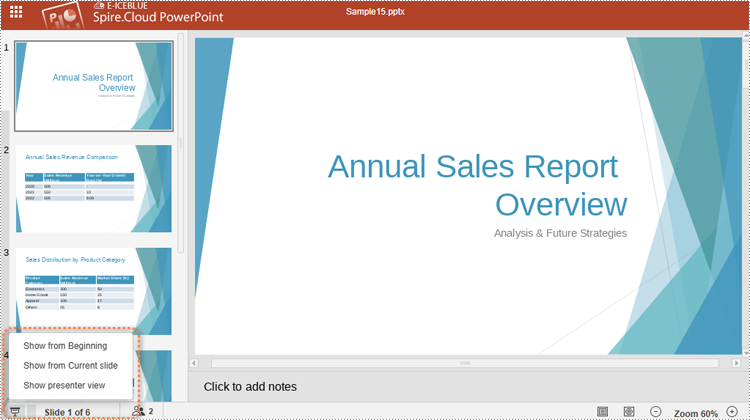
2. Once the demo file is created, the editor interface will automatically pop up.
3. After editing the slides, select the starting position or click the play button in the bottom left corner to present the file.
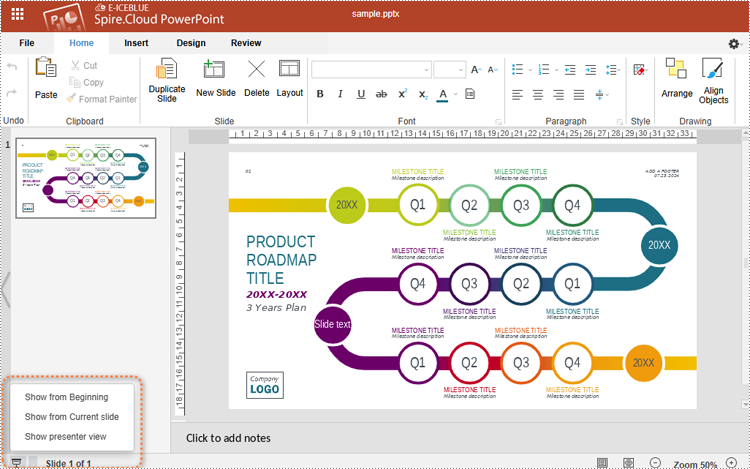
4. Use the spacebar, left or right arrow keys, or click to turn pages.

Upload a presentation file to display
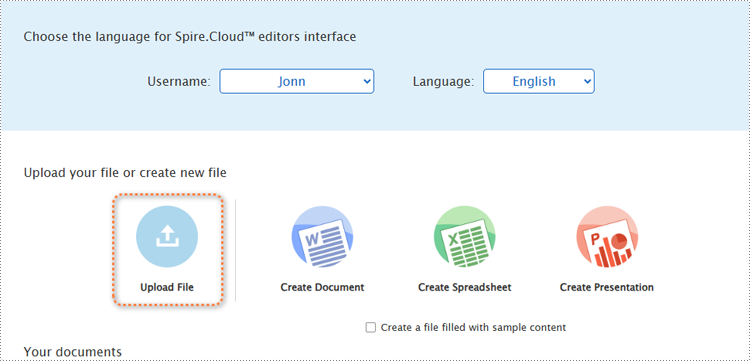
1. Open the product home page and click "Upload File".
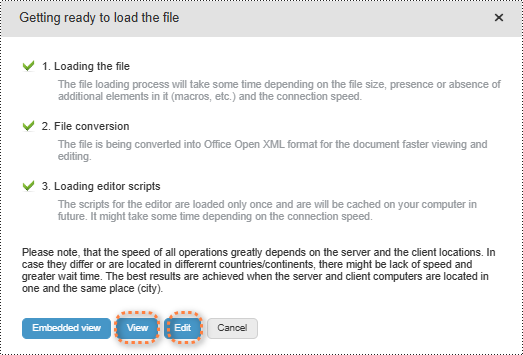
2. Select a file and upload it. Wait for the format conversion to complete and select "Edit" or "View" to open the presentation.
3. In both modes, users can either select the starting position or simply click the play button in the lower right corner to start presenting.
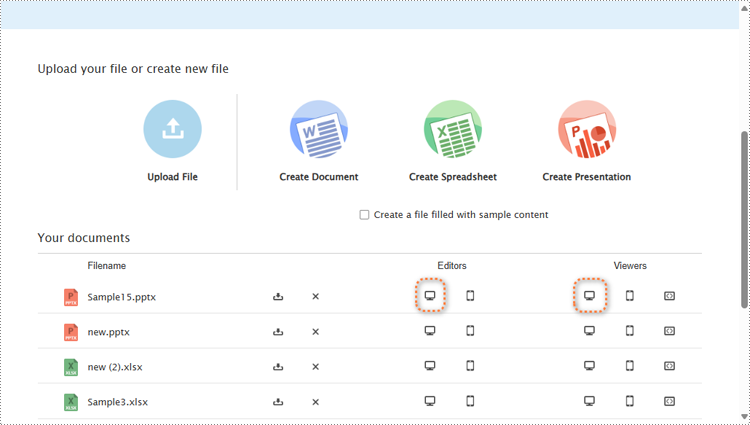
Choose a presentation file from the server’s file list to display.
Open the home page and scroll to "Your documents". Choose a file and click the computer icon in the "Editors" or the "Viewers" column to open the file in the editor mode or viewer mode. Then, the presenting can be started as above.
Run PowerPoint Slide Show in Mobile Phone Browsers
In the demo site, users can open the same webpage on a mobile device and create, upload, or select presentation files to start presenting in the same way as on PCs.
However, it's important to note that in the viewer mode on mobile devices, users can not run the slide show. Slide presentation on mobile devices can only be conducted in editor mode.
Steps for presenting a PowerPoint presentation online in a mobile device browser:
1. Open a presentation file in the editor mode on a mobile device. To ensure that the presentation content is fully displayed, users can open the presentation file in landscape mode on small-screen mobile devices.

2. Click the play button in the upper left corner to start the slide show.
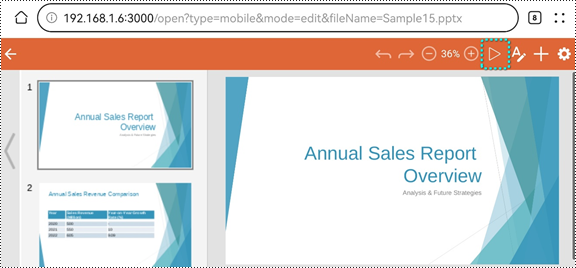
3. During the presentation, tap the screen to switch slides.

Conclusion
This article introduces the online PowerPoint presentation processing tool Spire.Cloud.Presentation and provide step-by-step guides for presenting PowerPoint slide shows online in PC or mobile phone browsers. This tool also allows users to edit, convert, and print PowerPoint presentations directly from their browsers, eliminating the need for any additional software installations.
