
Text (23)
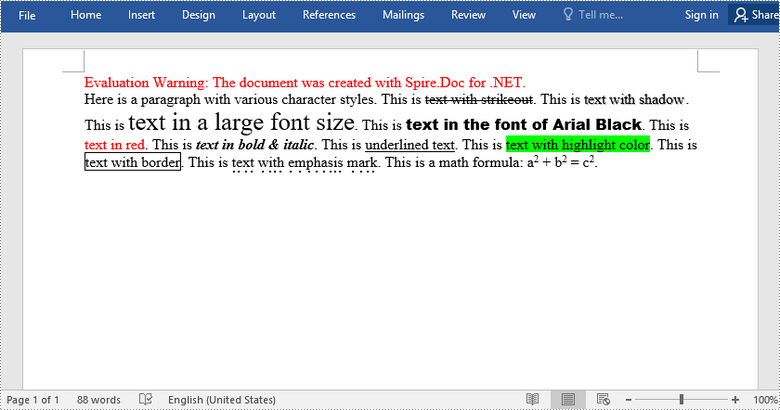
Character formatting is used to change the appearance of individual words or phrases. Formatted text can direct the reader's attention to select sections of a document and highlight key information. There are quite a lot of forms of characters formatting that you can use in Word. In this article, you will learn how to apply various types of formatting to characters in Word in C# and VB.NET using Spire.Doc for .NET.
- Font Name
- Font Size
- Font Color
- Highlight Color
- Bold
- Italic
- Underline
- Strikethrough
- Border
- Shadow Effect
- Emphasis Mark
- Subscript and Superscript
Install Spire.Doc for .NET
To begin with, you need to add the DLL files included in the Spire.Doc for .NET package as references in your .NET project. The DLL files can be either downloaded from this link or installed via NuGet.
PM> Install-Package Spire.Doc
Apply Formatting to Characters in Word in C# and VB.NET
In order to apply formatting to a piece of text, you need to get the text in a TextRange and then format the characters within the TextRange through the CharacterFormat property. The following are the detailed steps.
- Create a Document object.
- Add a section to the document using Document.AddSection() method.
- Add a paragraph to the section using Section.AddParagraph() method.
- Append text to the paragraph using Paragraph.AppendText() method and return a TextRange object.
- Apply formatting such as font name, font size, border and highlight color to the characters within the text range through TextRange.CharacterFormat property.
- Save the document to a Word file using Document.SaveToFile() method.
- C#
- VB.NET
using Spire.Doc;
using Spire.Doc.Documents;
using Spire.Doc.Fields;
using System.Drawing;

namespace ApplyFormattingToCharacters
{
    class Program
    {
        static void Main(string[] args)
        {
            //Create a Document object
            Document document = new Document();

            //Add a section
            Section sec = document.AddSection();

            //Add a paragraph
            Paragraph paragraph = sec.AddParagraph();
            paragraph.AppendText("Here is a paragraph with various character styles. This is ");

            //Append text to the paragraph and return a TextRange object
            TextRange tr = paragraph.AppendText("text with strikeout");

            //Set the character format to strikeout via TextRange object
            tr.CharacterFormat.IsStrikeout = true;

            //Apply shadow effect to text
            paragraph.AppendText(". This is ");
            tr = paragraph.AppendText("text with shadow");
            tr.CharacterFormat.IsShadow = true;

            //Set font size
            paragraph.AppendText(". This is ");
            tr = paragraph.AppendText("text in a large font size");
            tr.CharacterFormat.FontSize = 20;

            //Set font name
            paragraph.AppendText(". This is ");
            tr = paragraph.AppendText("text in the font of Arial Black");
            tr.CharacterFormat.FontName = "Arial Black";

            //Set font color
            paragraph.AppendText(". This is ");
            tr = paragraph.AppendText("text in red");
            tr.CharacterFormat.TextColor = Color.Red;

            //Apply bold & italic to text
            paragraph.AppendText(". This is ");
            tr = paragraph.AppendText("text in bold & italic");
            tr.CharacterFormat.Bold = true;
            tr.CharacterFormat.Italic = true;

            //Apply underline to text
            paragraph.AppendText(". This is ");
            tr = paragraph.AppendText("underlined text");
            tr.CharacterFormat.UnderlineStyle = UnderlineStyle.Single;

            //Apply background color to text
            paragraph.AppendText(". This is ");
            tr = paragraph.AppendText("text with highlight color");
            tr.CharacterFormat.HighlightColor = Color.Green;

            //Apply border to text
            paragraph.AppendText(". This is ");
            tr = paragraph.AppendText("text with border");
            tr.CharacterFormat.Border.BorderType = Spire.Doc.Documents.BorderStyle.Single;
            tr.CharacterFormat.Border.Color = Color.Black;

            //Apply emphasis mark to text
            paragraph.AppendText(". This is ");
            tr = paragraph.AppendText("text with emphasis mark");
            tr.CharacterFormat.EmphasisMark = Emphasis.DotBelow;

            //Apply superscript to text
            paragraph.AppendText(". This is a math formula: a");
            tr = paragraph.AppendText("2");
            tr.CharacterFormat.SubSuperScript = SubSuperScript.SuperScript;
            paragraph.AppendText(" + b");
            tr = paragraph.AppendText("2");
            tr.CharacterFormat.SubSuperScript = SubSuperScript.SuperScript;
            paragraph.AppendText(" = c");
            tr = paragraph.AppendText("2");
            tr.CharacterFormat.SubSuperScript = SubSuperScript.SuperScript;
            paragraph.AppendText(".");

            //Save to file
            document.SaveToFile("SetCharacterFormat.docx", FileFormat.Docx);
        }
    }
}
Apply for a Temporary License
If you'd like to remove the evaluation message from the generated documents, or to get rid of the function limitations, please request a 30-day trial license for yourself.
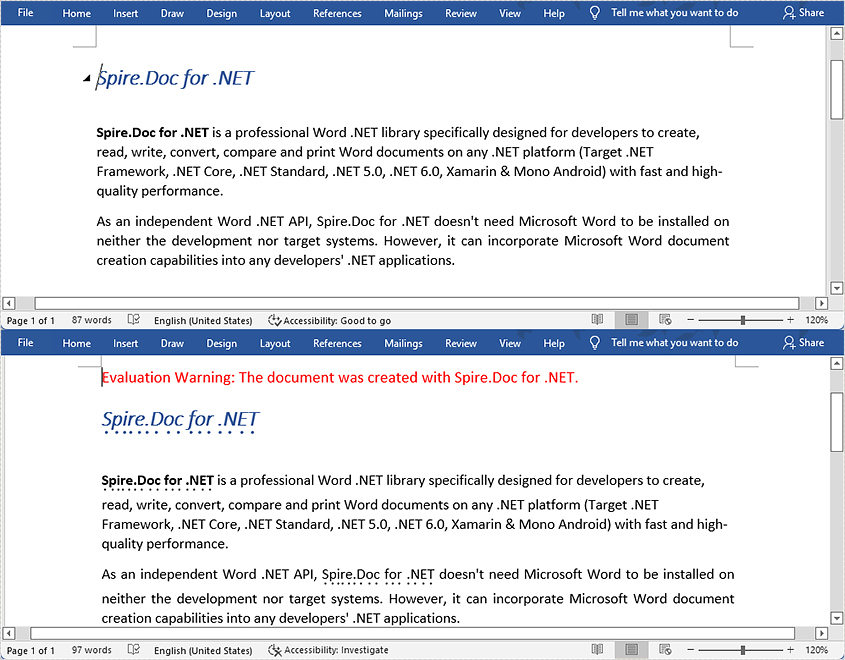
The emphasis mark is used in Word documents to emphasize words and make them more noticeable. It is usually a dot or a circle placed above or under the emphasized words. However, manually selecting words and applying emphasis marks on them takes a lot of work. Fortunately, Spire.Doc for .NET provides a much easier way to apply emphasis marks by codes. This article will show you how to apply emphasis marks to text in Word documents using Spire.Doc for .NET.
Install Spire.Doc for .NET
To begin with, you need to add the DLL files included in the Spire.Doc for.NET package as references in your .NET project. The DLL files can be either downloaded from this link or installed via NuGet.
PM> Install-Package Spire.Doc
Apply Emphasis Mark to Specified Text
The detailed steps are as follows:
- Create a Document instance.
- Load the Word document from disk using Document.LoadFromFile() method.
- Find the text you need to emphasize using Document.FindAllString() method.
- Apply emphasis mark to the found text through CharacterFormat.EmphasisMark property.
- Save the document to another Word file using Document.SaveToFile() method.
- C#
- VB.NET
using System;
using Spire.Doc;
using Spire.Doc.Documents;

namespace applyemphasismark
{
    class Program
    {
        static void Main(string[] args)
        {
            //Create a Document instance
            Document document = new Document();

            //Load the Word document from disk
            document.LoadFromFile(@"D:\testp\test.docx");

            //Find text you want to emphasize
            TextSelection[] textSelections = document.FindAllString("Spire.Doc for .NET", false, true);

            //Apply emphasis mark to the found text
            foreach (TextSelection selection in textSelections)
            {
                selection.GetAsOneRange().CharacterFormat.EmphasisMark = Emphasis.Dot;
            }

            //Save the document to another Word file
            string output = "ApllyEmphasisMark.docx";
            document.SaveToFile(output, FileFormat.Docx);
        }
    }
}
Apply for a Temporary License
If you'd like to remove the evaluation message from the generated documents, or to get rid of the function limitations, please request a 30-day trial license for yourself.
C# add new text strings after the searched text string in word document
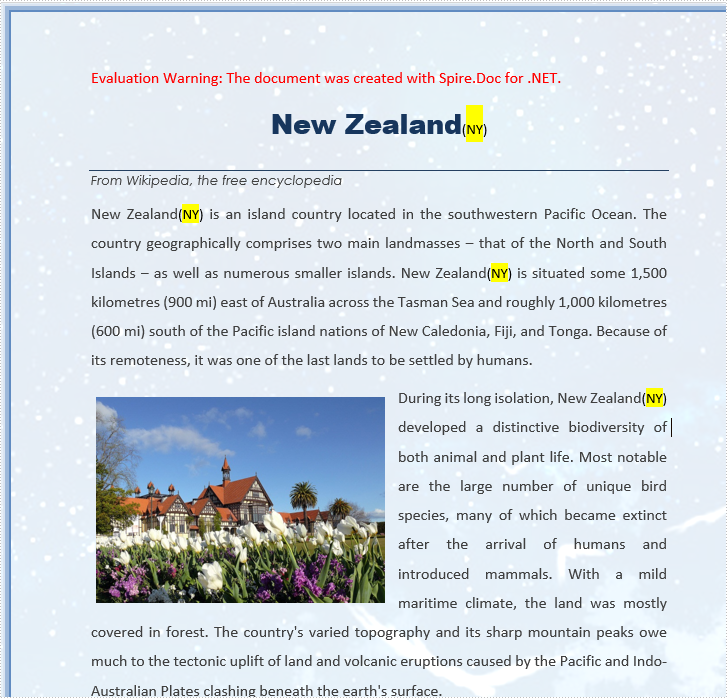
2019-04-04 07:54:55 Written by KoohjiWith Spire.Doc for .NET, we can easily insert new text to word document at exact position, it also supports to insert new text after the certain text strings at many places. This article will show you how to insert new text strings after the searched text string in word document.
using Spire.Doc;
using Spire.Doc.Documents;
using Spire.Doc.Fields;
using System.Drawing;

namespace Word
{
    class Program
    {
        static void Main(string[] args)
        {
            //load the sample document
            Document doc = new Document();
            doc.LoadFromFile("Sample.docx", FileFormat.Docx2010);

            //find all the text string “New Zealand” from the sample document
            TextSelection[] selections = doc.FindAllString("New Zealand", true, true);
            int index = 0;

            //defines text range
            TextRange range = new TextRange(doc);


            //insert new text string (NY) after the searched text string
            foreach (TextSelection selection in selections)
            {
                range = selection.GetAsOneRange();
                TextRange newrange = new TextRange(doc);
                newrange.Text = ("(NY)");
                index = range.OwnerParagraph.ChildObjects.IndexOf(range);
                range.OwnerParagraph.ChildObjects.Insert(index + 1, newrange);

            }

            //find and highlight the newly added text string NY
            TextSelection[] text2 = doc.FindAllString("NY", false, true);
            foreach (TextSelection seletion in text2)
            {
                seletion.GetAsOneRange().CharacterFormat.HighlightColor = Color.Yellow;
            }

            //save the document
            doc.SaveToFile("Result.docx", FileFormat.Docx2010);
        }
    }
}
Effective screenshot after adding the text strings to the searched text:
Spire.Doc provides several overloaded Replace methods to replace text in different scenarios. This article is going to show you how to replace a specified text in a template document with another document using Spire.Doc.
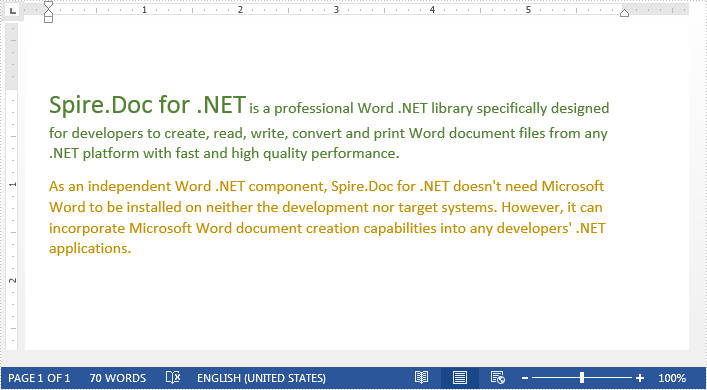
The template document:
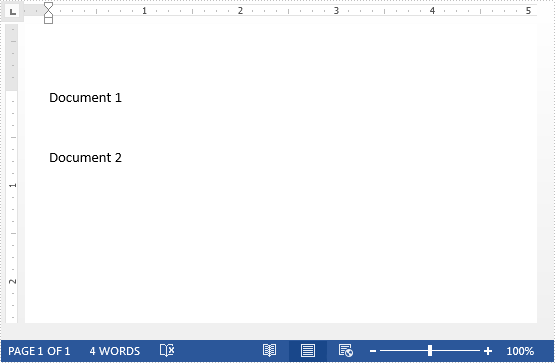
The document to replace text:
Detail steps:
Step 1: Load a template document.
Document document = new Document("Template.docx");
Step 2: Load another document to replace text.
IDocument replaceDocument = new Document("Document1.docx");
Step 3: Replace specified text with the other document.
document.Replace("Document 1", replaceDocument, false, true);
Step 4: Save the file.
document.SaveToFile("Output.docx", FileFormat.Docx2013);
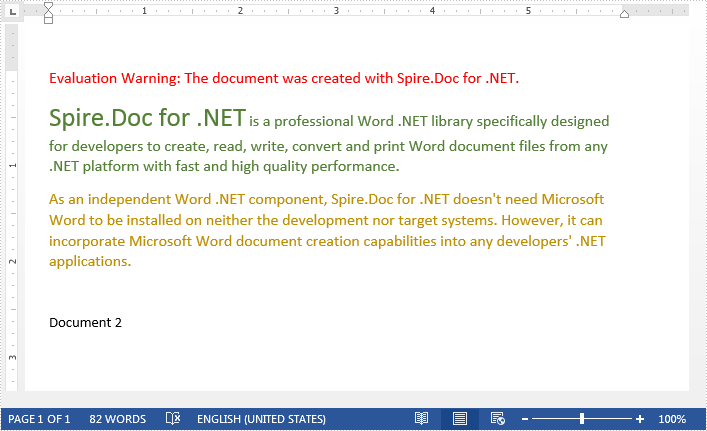
Output:
Full code:
using Spire.Doc;
using Spire.Doc.Interface;

namespace Replace_Text_With_Document
{
    class Program
    {
        static void Main(string[] args)
        {
            //Load a template document
            Document document = new Document("Template.docx");

            //Load another document to replace text
            IDocument replaceDocument = new Document("Document1.docx");

            //Replace specified text with the other document
            document.Replace("Document 1", replaceDocument, false, true);

            //Save the file
            document.SaveToFile("Output.docx", FileFormat.Docx2013);
        }
    }
}
Retrieve Style Names of all TextRanges in a Word Document in C#, VB.NET
2017-12-26 02:59:14 Written by KoohjiProgrammers may need to determine the style name of a section of text, or find the text in a document that appear in a specified style name, such as “Heading 1”. This article will show you how to retrieve style names that are applied in a Word document by using Spire.Doc with C# and VB.NET.
Step 1: Create a Document instance.
Document doc = new Document();
Step 2: Load a sample Word file.
doc.LoadFromFile("Sample.docx");
Step 3: Traverse all TextRanges in the document and get their style names through StyleName property.
foreach (Section section in doc.Sections)
{
    foreach (Paragraph paragraph in section.Paragraphs)
    {
        foreach (DocumentObject docObject in paragraph.ChildObjects)
        {
            if (docObject.DocumentObjectType == DocumentObjectType.TextRange)
            {
                TextRange text = docObject as TextRange;
                Console.WriteLine(text.StyleName);
            }
        }
    }
}
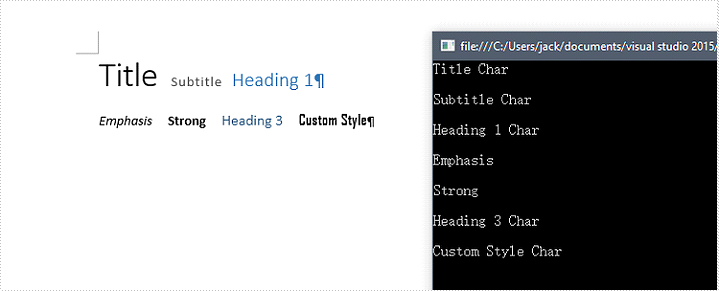
Result:
Full Code:
using Spire.Doc;
using Spire.Doc.Documents;
using Spire.Doc.Fields;
using System;
using System.Text.RegularExpressions;
namespace RetrieveStyleNames
{
    class Program
    {
        static void Main(string[] args)
        {
            Document doc = new Document();
            doc.LoadFromFile("Sample.docx");

            foreach (Section section in doc.Sections)
            {
                foreach (Paragraph paragraph in section.Paragraphs)
                {
                    foreach (DocumentObject docObject in paragraph.ChildObjects)
                    {
                        if (docObject.DocumentObjectType == DocumentObjectType.TextRange)
                        {
                            TextRange text = docObject as TextRange;
                            Console.WriteLine(text.StyleName);
                        }
                    }
                    Console.WriteLine();
                }
            }
        }
    }
}
Imports Spire.Doc
Imports Spire.Doc.Documents
Imports Spire.Doc.Fields
Imports System.Text.RegularExpressions
Namespace RetrieveStyleNames
	Class Program
		Private Shared Sub Main(args As String())
			Dim doc As New Document()
			doc.LoadFromFile("Sample.docx")

			For Each section As Section In doc.Sections
				For Each paragraph As Paragraph In section.Paragraphs
					For Each docObject As DocumentObject In paragraph.ChildObjects
						If docObject.DocumentObjectType = DocumentObjectType.TextRange Then
							Dim text As TextRange = TryCast(docObject, TextRange)
							Console.WriteLine(text.StyleName)
						End If
					Next
					Console.WriteLine()
				Next
			Next
		End Sub
	End Class
End Namespace

When working with Word templates, it's common to replace specific placeholders with real content—like names, dates, or even company logos. Manually updating each instance may take lots of effort and time. Fortunately, you can automate this process using code. In this tutorial, we'll show you how to use C# regex replace to find and replace text in Word documents. You'll learn how to apply regular expressions across the entire document, target specific paragraphs, and even replace matched text with images.
- Before We Start: Install Word Library
- Replace Text in an Entire Word Document
- Replace Text within Specific Paragraph in C#
- Replace Regex Matches with Images
- Replace Text with Regex in VB.NET
- Conclusion
Before We Start: Install Word Library
To make this task easier, we recommend using Spire.Doc for .NET — a powerful Word library designed to automate common document operations such as reading, editing, and converting Word files. With Spire.Doc, performing a C# regex replace in Word documents can be done in just a few lines of code.
You can install the library via NuGet with the following command:
PM> Install-Package Spire.Doc
Alternatively, you can download the Spire.Doc package and install it with custom settings. A free version is also available, ideal for small projects or evaluation purposes.
Use Regex to Replace Text in an Entire Word Document
Let's start with the most common scenario — replacing text throughout the entire Word document. You can use regular expressions to match all patterns like #name or #tel, then replace them with actual values such as a person's name or phone number.
With the help of the Document.Replace() method provided by Spire.Doc, this task becomes incredibly simple. Here's a step-by-step explanation along with sample code to show how to replace text using regex in C#.
Code example - replacing #name with "May" in the entire Word document using C#:
using Spire.Doc;
using System.Text.RegularExpressions;
namespace FindText
{
    class Program
    {
        static void Main(string[] args)
        {
            // Create an object of Document class and load a Word document
            Document doc = new Document();
            doc.LoadFromFile("/input/replace template.docx");
            // Set the regular expression
            Regex regex = new Regex(@"#\w+\b");
            // Replace all matches with "May"
            doc.Replace(regex, "May");
            // Save the document
            doc.SaveToFile("/output/replacealloccurences.docx", FileFormat.Docx2013);
        }
    }
}
Here is a comparison preview of the results before and after using regex to replace text in C#: 
Steps Explained:
- Create a Document instance and load a Word document from files.
- Set the regular expression.
- Replace all matches in the document with Documet.Replace() method.
- Save the updated document.
Apply Regex Replace to a Specific Paragraph in C#
Replacing text across the entire document may seem straightforward, but how can we achieve the same result within a specific paragraph? When you need more precise control, such as performing regex replace only within a paragraph range, you can retrieve the paragraph text and reset its content manually. In code, this means using regular expressions to locate matches within the target paragraph, remove the original text, and insert the replacement.
Let’s first look at a real-world code example — we’ll break down the detailed steps right after.
Code example - replacing #name with "Lily" in the first paragraph using regular expression:
using Spire.Doc;
using Spire.Doc.Documents;
using System.Text.RegularExpressions;

class Program
{
    static void Main(string[] args)
    {
        // Create a Document object and load a template
        Document doc = new Document();
        doc.LoadFromFile("/input/replace template.docx");

        Regex regex = new Regex(@"#\w+\b");

        // Get the first paragraph
        Paragraph para = doc.Sections[0].Paragraphs[0];
        string originalText = para.Text;

        if (regex.IsMatch(originalText))
        {
            string newText = regex.Replace(originalText, "Lily");

            // Clear the content and append the new text
            para.ChildObjects.Clear();
            para.AppendText(newText);
        }

        // Save the updated document
        doc.SaveToFile("/output/replacefirstpara.docx", FileFormat.Docx2013);
    }
}
Here is a before-and-after comparison of using regular expressions in C# to replace text in the first paragraph: 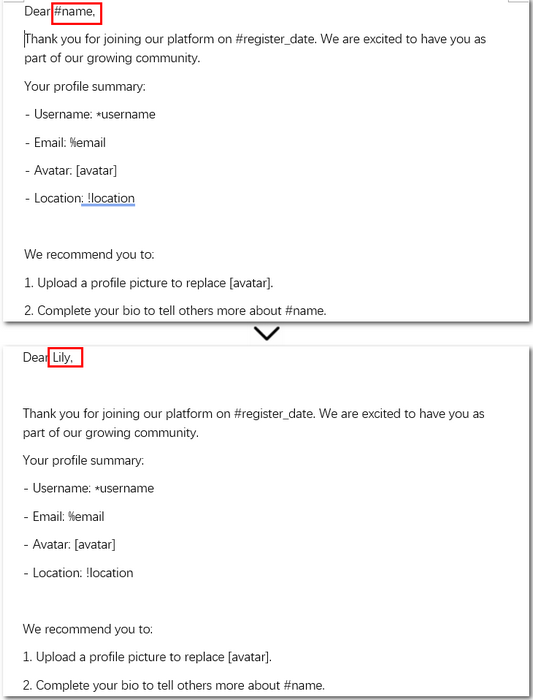
Detailed steps explained:
- Create a Document object and load the Word file.
- Access the target paragraph using Sections[].Paragraphs[] property.
- Get the original text from the paragraph.
- Use a regular expression to find and replace matching text.
- Clear the original content and append the updated text to the paragraph.
- Save the modified document.
Replace Regex Matches with Images in Word Using C#
Now that we’ve covered how to replace text in the entire document or within a single paragraph, let’s move on to something more advanced—replacing text with images. This is often used in practical scenarios like generating reports or company brochures. For instance, you might want to replace a placeholder such as [logo] with your company’s actual logo.
With the help of C# regex replace and Spire.Doc’s image insertion APIs, this task can also be automated. Let’s take a look at a real code example first, then we’ll explain how it works.
Code example – replacing [avatar] with an image:
using Spire.Doc;
using Spire.Doc.Documents;
using Spire.Doc.Fields;
using System.Text.RegularExpressions;

namespace RegexReplaceWithImage
{
    class Program
    {
        static void Main(string[] args)
        {
            // Create a Document object and load a Word file from disk
            Document document = new Document();
            document.LoadFromFile(@"\input\replace template.docx");

            // Define a regular expression to match placeholders
            Regex regex = new Regex(@"\[\w+\]", RegexOptions.IgnoreCase);

            // Find all matches in the document that match the pattern
            TextSelection[] selections = document.FindAllPattern(regex);

            // Loop through each matched placeholder
            foreach (TextSelection selection in selections)
            {
                // Create a picture object and load the image from disk
                DocPicture pic = new DocPicture(document);
                pic.LoadImage(@"\avatar-1.png");

                // Get the matched text as a single text range
                TextRange textRange = selection.GetAsOneRange();

                // Get the index of the text range in its parent paragraph
                int index = textRange.OwnerParagraph.ChildObjects.IndexOf(textRange);

                // Insert the image at the matched position
                textRange.OwnerParagraph.ChildObjects.Insert(index, pic);

                // Remove the original placeholder text
                textRange.OwnerParagraph.ChildObjects.Remove(textRange);
            }

            // Save the modified document to disk
            document.SaveToFile(@"\output\ReplaceTextWithImage.docx", FileFormat.Docx2016);
            document.Close();
        }
    }
}
Here is a before-and-after comparison of replacing text with an image using regex in C#: 
Detailed steps explained:
- Create an object of Document class and read a Word document.
- Define a regular expression to match target content.
- Find all occurrences using Document.FindAllPattern() method.
- Loop through the collection of matches.
- Create a DocPicture instance and load an image.
- Get the matched text as a text range and retrieve its index in the parent paragraph.
- Insert the image at the position and remove the original text.
- Save the Word document as a new file.
Replace Text with Regex in VB.NET
If you're working with VB.NET instead of C#, you can achieve the same result using regular expressions to search and replace text throughout a Word document. The approach is similar—load the file, apply a regex pattern, and update the content. Here's a simple example to get you started.
Imports Spire.Doc
Imports System.Text.RegularExpressions

Module Module1
	Sub Main()
		Dim doc As New Document()
		doc.LoadFromFile("/input/replace template.docx")

		Dim regex As New Regex("#\w+\b")
		doc.Replace(regex, "Lena")

		doc.SaveToFile("/output/regexreplace.docx", FileFormat.Docx2013)
	End Sub
End Module
Above is the VB.NET code for replacing text throughout an entire Word document using regular expressions.
If you need to perform other tasks, such as replacing text in specific paragraphs or replacing text with images, you can easily convert the C# code examples into VB.NET using the C# Code ⇆ VB.NET Code Converter — a handy tool developed by the Spire.Doc team.
The Conclusion
With the help of regular expressions, replacing text or even inserting images in Word documents using C# becomes a smooth and efficient process. Whether you're working on templates, reports, or personalized documents, this approach saves time and reduces manual work. Ready to try it out? Download Spire.Doc and get started with a free 30-day trial license—perfect for evaluation and small projects.
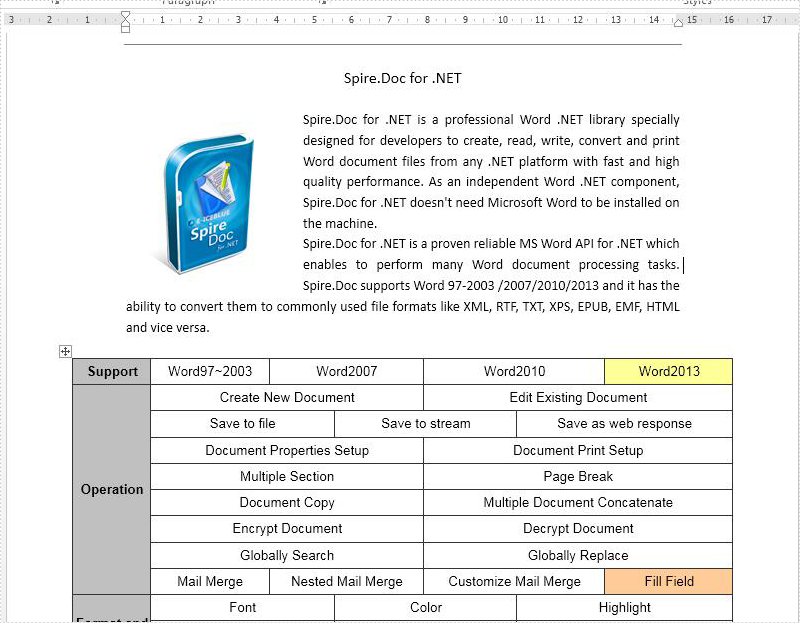
Sometimes we only need to get the text from the word document for other use when we deal with the word documents with large amount of information. With the help of Spire.Doc, we have already demonstrated how to extract the text from the word document by traverse every paragraph on the word document and then append the text accordingly. This article will show you how to use the method of doc.GetText() to extract the text directly from the word documents with texts, images and tables. It is more convenient for developers to extract the text from the word document from code.
Firstly, view the sample word document which will be extracted the text firstly:
Step 1: Create a word instance and load the source word document from file.
Document doc = new Document();
doc.LoadFromFile("Sample.docx");
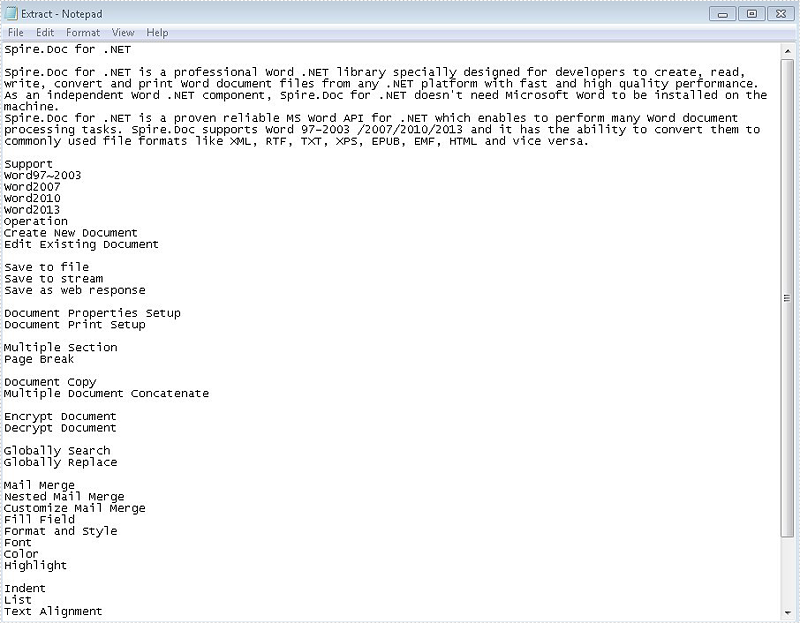
Step 2: Invoke the doc.GetText() method to get all the texts from the word document.
string s = doc.GetText();
Step 3: Create a New TEXT File to Save Extracted Text.
File.WriteAllText("Extract.txt", s.ToString());
Effective screenshot after get all the text from the word document:
Full codes:
using Spire.Doc;
using System.IO;
namespace GetText
{
   class WordText
 {
   public void GetText()
   {
     Document doc = new Document();
     doc.LoadFromFile("Sample.docx");

     string s = doc.GetText();

     File.WriteAllText("Extract.txt", s.ToString());

    }
 }
}
We can use the TextDirection enumeration in Spire.Doc.Documents namespace to set the direction of text in a word document. This enumeration contains six members: LeftToRight, TopToBottom, LeftToRightRotated, TopToBottomRotated, RightToLeft and RightToLeftRotated. The following example shows how to set text direction for all text and a part of text in a section.
Detail steps:
Step 1: Initialize a new instance of Document class and load the word document.
Document document = new Document();
document.LoadFromFile("Word.docx");
Step 2: Set text direction for all text in a section.
//Get the first section and set its text direction
Section section = document.Sections[0];
section.TextDirection = TextDirection.RightToLeftRotated;
To set text direction for a part of text, we can put the text in a table and then set text direction, as shown in the following step:
Step 3: Add a new section to the document and a table to the section, get the target table cell and set text direction for it, afterwards append text to the cell.
//Add a new section to the document
Section sec = document.AddSection();
//Add a table to the new section
Table table = sec.AddTable();
//Add one row and one column to the table
table.ResetCells(1, 1);
//Get the table cell
TableCell cell = table.Rows[0].Cells[0];
table.Rows[0].Height = 150;
table.Rows[0].Cells[0].Width = 10;
//Set text direction for the cell and append some text
cell.CellFormat.TextDirection = TextDirection.RightToLeftRotated;
cell.AddParagraph().AppendText("Hello,world: vertical style");
Add a new paragraph to check if above settings will affect the text direction of other text in this section:
sec.AddParagraph().AppendText("New Paragraph");
Step 4: Save the document.
document.SaveToFile("result.docx", FileFormat.Docx);
Result:
Set text direction for all text in a section:
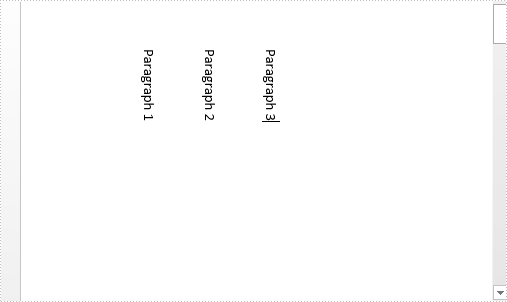
Set text direction for a part of text:

Full codes:
using Spire.Doc;
using Spire.Doc.Documents;

namespace Set_text_direction_in_Word
{
    class Program
    {
        static void Main(string[] args)
        {
            Document document = new Document();
            document.LoadFromFile("Word.docx");
            //Set text direction for all text in a section
            Section section = document.Sections[0];
            section.TextDirection = TextDirection.RightToLeftRotated;

            // Set text direction for a part of text
            Section sec = document.AddSection();
            Table table = sec.AddTable();
            table.ResetCells(1, 1);
            TableCell cell = table.Rows[0].Cells[0];
            table.Rows[0].Height = 150;
            table.Rows[0].Cells[0].Width = 10;
            cell.CellFormat.TextDirection = TextDirection.RightToLeftRotated;
            cell.AddParagraph().AppendText("Hello,world: vertical style");

            sec.AddParagraph().AppendText("New Paragraph");

            //Save the document
            document.SaveToFile("result.docx", FileFormat.Docx);
        }
    }
}
Capitals are quite suitable for stressing texts in Word. A paragraph written with capitalized letters is easy to notice, and capitalized letters imply the importance of the paragraph. This article teaches you the method of changing the case of existing text to all capitals with Spire.Doc for .NET by programming.
Install Spire.Doc for .NET
To begin with, you need to add the DLL files included in the Spire.Doc for.NET package as references in your .NET project. The DLL files can be either downloaded from this link or installed via NuGet.
PM> Install-Package Spire.Doc
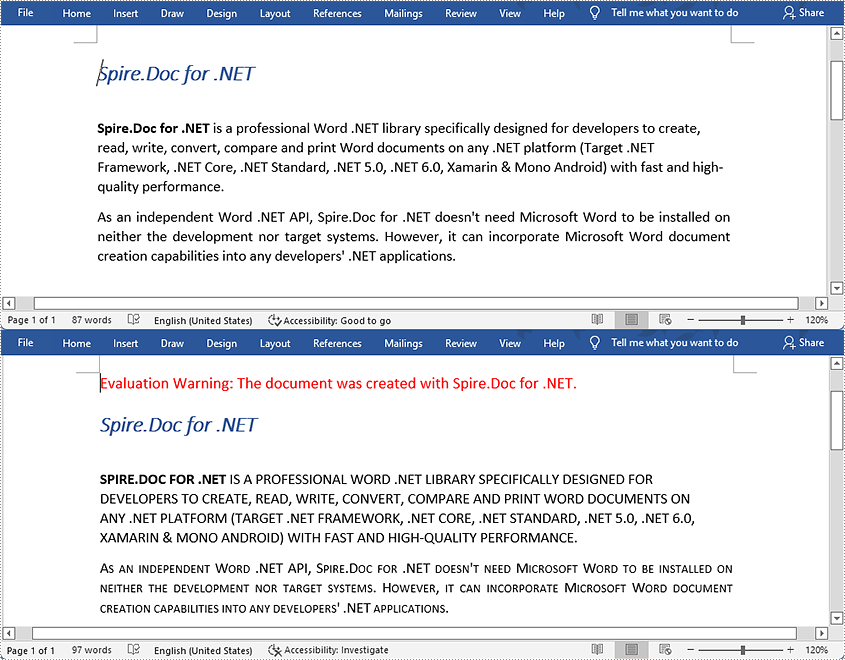
Change the Case of a Specified Paragraph to All Capitals
The detailed steps are as follows:
- Create an object of Document and load a sample Word document from file using Document.LoadFromFile() method.
- Get the second paragraph using Document.Sections[].Paragraph[] property and set its characters to AllCaps through TextRange.CharacterFormat.AllCaps property.
- Get the third paragraph using Document.Sections[].Paragraph[] property and set its characters to IsSmallCaps by TextRange.CharacterFormat.IsSmallCaps property.
- Save the document to a new Word file using Document.SaveToFile() method.
Note: AllCaps means to capitalize all the letters and set them to the same size, and IsSmallCaps means to capitalize all the letters but set the original majuscules bigger than the minuscules.
- C#
- VB.NET
using System;
using Spire.Doc;
using Spire.Doc.Documents;
using Spire.Doc.Fields;

namespace changecase
{
    class Program
    {
        static void Main(string[] args)
        {
            //Create a new document and load from file
            string input = @"D:\testp\test.docx"; ;
            Document doc = new Document();
            doc.LoadFromFile(input);
            TextRange textRange;
            //Get the second paragraph and set its characters to AllCaps
            Paragraph para1 = doc.Sections[0].Paragraphs[2];

            foreach (DocumentObject obj in para1.ChildObjects)
            {
                if (obj is TextRange)
                {
                    textRange = obj as TextRange;
                    textRange.CharacterFormat.AllCaps = true;
                }
            }

            //Get the third paragraph and set its characters to IsSmallCaps
            Paragraph para2 = doc.Sections[0].Paragraphs[3];
            foreach (DocumentObject obj in para2.ChildObjects)
            {
                if (obj is TextRange)
                {
                    textRange = obj as TextRange;
                    textRange.CharacterFormat.IsSmallCaps = true;
                }
            }

            //Save the document to a new Word file
            string output = "ChangeCase.docx";
            doc.SaveToFile(output, FileFormat.Docx2013);
        }
    }
}
Apply for a Temporary License
If you'd like to remove the evaluation message from the generated documents, or to get rid of the function limitations, please request a 30-day trial license for yourself.
How to Add, Select and Remove an Item in Combo Box in C#, VB.NET
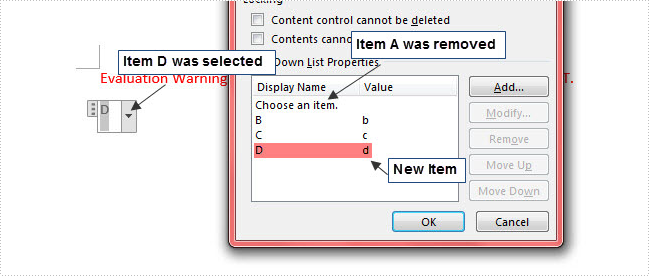
2015-12-03 02:00:16 Written by KoohjiA combo box is a commonly-used GUI widget. It is a combination of a drop-down list or list box and a single-line textbox, allowing the user either to type a value directly into the control or choose from the list of existing options. In this article, we'll introduce how to programmatically manage the item of combo box in Word file using Spire.Doc.
Here is a combo box in the sample Word document, which contains three items including A, B and C. In the following section, we'll add, select and remove an item in the combo box using code.

Code Snippet:
Step 1: Initialize a new instance of Document class and load the sample Word file.
Document document = new Document();
document.LoadFromFile( "test.docx");
Step 2: Get the combo box from the file.
foreach (Section section in document.Sections)
{
    foreach (Body body in section.ChildObjects)
    {
        foreach (DocumentObject bodyObj in body.ChildObjects)
        {
            if (bodyObj is StructureDocumentTag)
            {
                if ((bodyObj as StructureDocumentTag).SDTProperties.SDTType == SdtType.ComboBox)
                {
                    SdtComboBox combo = (bodyObj as StructureDocumentTag).SDTProperties.ControlProperties as SdtComboBox;

               }
            }
        }
    }

}
Step 3: Create a new item and set two parameters for it: display text and value. Call ListItems.Add() method to add the new item into combo box.
SdtListItem item = new SdtListItem("D","d");
combo.ListItems.Add(item);
Step 4: Call ListItems.RemoveAt() method to remove an item by its index.
combo.ListItems.RemoveAt(0);
Step 5: Call ListItems.SelectedValue() to choose an item from combo box.
combo.ListItems.SelectedValue = sdtItem;
Step 6: Save and launch the file.
document.SaveToFile("result.docx", FileFormat.Docx2013);
System.Diagnostics.Process.Start("result.docx");
Output:
Entire Code:
using Spire.Doc;
using Spire.Doc.Documents;
namespace IteminCombo
    class Program
    {
        static void Main(string[] args)
        {
            Document document = new Document();
            document.LoadFromFile("test.docx");
            foreach (Section section in document.Sections)
            {
                foreach (Body body in section.ChildObjects)
                {
                    foreach (DocumentObject bodyObj in body.ChildObjects)
                    {
                        if (bodyObj is StructureDocumentTag)
                        {
                            if ((bodyObj as StructureDocumentTag).SDTProperties.SDTType == SdtType.ComboBox)
                            {
                                SdtComboBox combo = (bodyObj as StructureDocumentTag).SDTProperties.ControlProperties as SdtComboBox;
                                SdtListItem item = new SdtListItem("D", "d");
                                combo.ListItems.Add(item);
                                foreach (SdtListItem sdtItem in combo.ListItems)
                                {
                                    if (string.CompareOrdinal(sdtItem.Value, "d") == 0)
                                    {
                                        combo.ListItems.SelectedValue = sdtItem;
                                    }
                                }
                                combo.ListItems.RemoveAt(1);
                            }
                        }
                    }
                }

            }
            document.SaveToFile("result.docx", FileFormat.Docx2013);
            System.Diagnostics.Process.Start("result.docx");
        }
    }
}
Dim document As New Document()
document.LoadFromFile("test.docx")
For Each section As Section In document.Sections
	For Each body As Body In section.ChildObjects
		For Each bodyObj As DocumentObject In body.ChildObjects
			If TypeOf bodyObj Is StructureDocumentTag Then
				If TryCast(bodyObj, StructureDocumentTag).SDTProperties.SDTType = SdtType.ComboBox Then
					Dim combo As SdtComboBox = TryCast(TryCast(bodyObj, StructureDocumentTag).SDTProperties.ControlProperties, SdtComboBox)
					Dim item As New SdtListItem("D", "d")
					combo.ListItems.Add(item)
					For Each sdtItem As SdtListItem In combo.ListItems
						If String.CompareOrdinal(sdtItem.Value, "d") = 0 Then
							combo.ListItems.SelectedValue = sdtItem
						End If
					Next
					combo.ListItems.RemoveAt(1)
				End If
			End If
		Next

	Next
Next
document.SaveToFile("result.docx", FileFormat.Docx2013)
System.Diagnostics.Process.Start("result.docx")
