
Working with large Excel files often means merging rows, columns, or specific cell ranges to keep the data clean and easy to read. You can merge cells in Excel using C# or VB.NET with just a few lines of code and even center the content both horizontally and vertically for a professional look. Whether it’s combining entire rows, joining columns, or formatting a selected range, these examples show how to automate the process and improve your workflow.
- Merge Rows or Columns in Excel using C#
- Merge a Specific Cell Range in Excel
- Merge and Center Cells in Excel using VB.NET
- The Conclusion
If you often work with Excel files in .NET projects, handling tasks like merging cells, formatting data, or generating reports, you’ll want a tool that makes the process fast and reliable. Spire.XLS is a lightweight library that lets you create, read, and modify Excel files directly in C# or VB.NET—without relying on Microsoft Office. You can add it to your project in seconds via NuGet:
PM> Install-Package Spire.XLS
From there, you’re ready to start automating your Excel workflow.
Merge Rows or Columns in Excel using C#
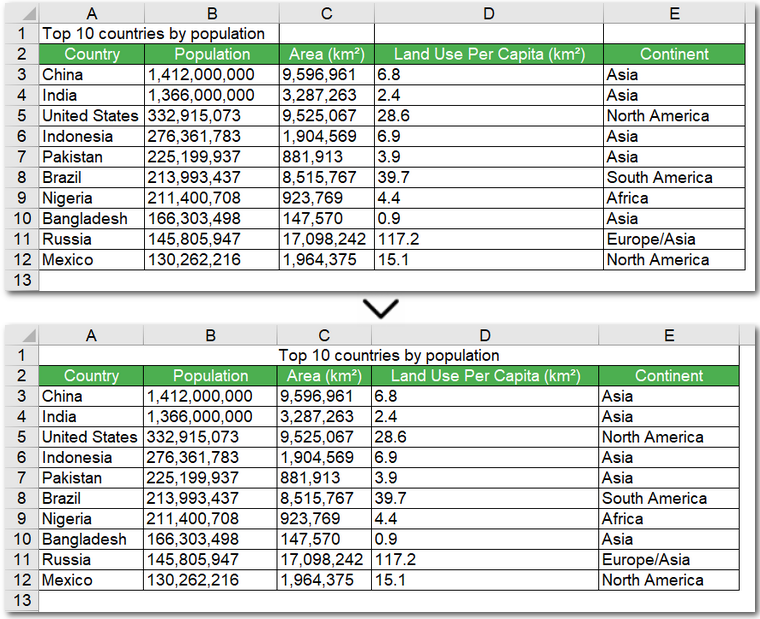
Merging rows or columns in Excel is a common way to organize data and create professional-looking spreadsheets. For example, you can merge the first row across multiple columns to form a clear, centered table header. Using C# code, this process can be automated easily, saving time and ensuring consistency across large Excel files.
Here's the code example of merging the first row and centering it in Excel using C#:
using Spire.Xls;
namespace MergeCells
{

    class Program
    {

        static void Main(string[] args)
        {
            // Create a Workbook instance and load an Excel file
            Workbook workbook = new Workbook();
            workbook.LoadFromFile("\\Population.xlsx");

            // Get the first worksheet
            Worksheet sheet = workbook.Worksheets[0];

            // Merge the first row
            sheet.Rows[0].Merge();
            // Merge the first column
            //sheet.Columns[0].Merge();

            // Set the alignment to center horizontally and vertically
            sheet.Rows[0].Style.HorizontalAlignment = HorizontalAlignType.Center;
            sheet.Rows[0].Style.VerticalAlignment = VerticalAlignType.Center;

            // Save the Excel file
            workbook.SaveToFile("\\Mergerowsandcenter.xls");

        }
    }
}
Here's the preview of merging the first row in Excel:
Code steps explained:
- Create a Workbook object and read an Excel file.
- Get a worksheet.
- Merge a certain row using Worksheet.Rows[].Merge() method.
- Set the alignment to center horizontally and vertically by adjusting the Style.HorizontalAlignment and Style.VerticalAlignment properties.
- Save the modified Excel file.
The C# code above for merging rows in an Excel file can also be used to merge columns, which is indicated with comments in the code.
After merging cells to create a clean table header, you might sometimes need to undo the operation. You can easily unmerge cells in Excel in C# or VB.NET, restoring the original cell layout without affecting your data.
Merge a Specific Cell Range in Excel
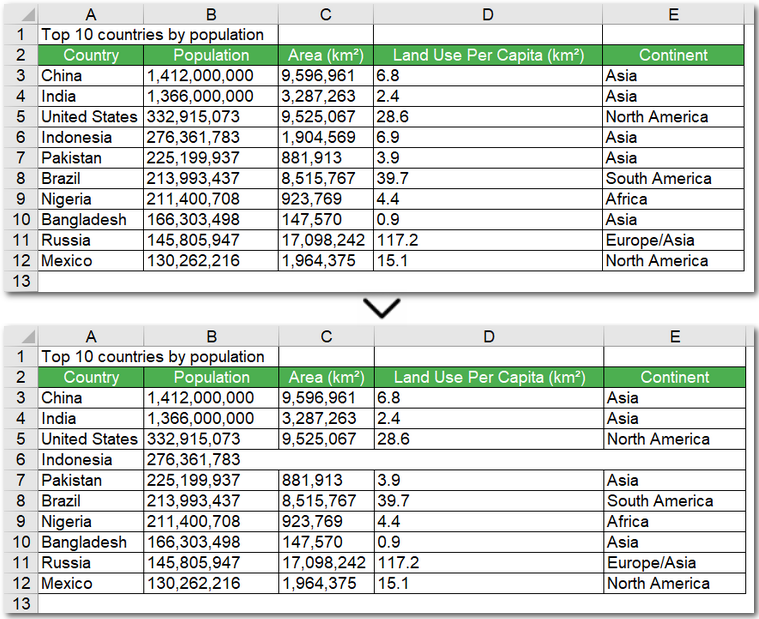
Merging a specific cell range in Excel using C# is useful when you want to highlight a section of data, such as a summary row or a group of related columns. The process is very similar to merging entire rows or columns, and you can use the same Merge() method—applied to a CellRange object via Worksheet.Range[].Merge() method. By specifying the exact range to merge, you can create a clear, organized layout that improves readability and automates the operation across multiple sheets or files without manually adjusting each cell.
The code example below demonstrates how to merge the cell range "B6:E6" in an Excel worksheet using C#:
using Spire.Xls;
namespace MergeCells
{

    class Program
    {

        static void Main(string[] args)
        {
            // Create a Workbook instance and load an Excel file
            Workbook workbook = new Workbook();
            workbook.LoadFromFile("\\Population.xlsx");

            // Get the first worksheet
            Worksheet sheet = workbook.Worksheets[0];

            // Merge the particular cell range in Excel
            sheet.Range["B6:E6"].Merge();

            // Save the Excel file
            workbook.SaveToFile("\\Mergecellrange.xls");

        }
    }
}
Here's the preview of merging a cell range in an Excel file using C#:
Merge and Center Cells in Excel using VB.NET
Just like in C#, you can merge and center cells in Excel using VB.NET to create clean table headers or highlight key data sections. The steps are very similar, and the same Merge() method applies to rows, columns, or specific cell ranges. If you want, you can even convert C# examples to VB.NET using our handy C# ↔ VB.NET code converter, making it easy to adapt existing code for your project.
Here's a code example of merging the first row and centering it in Excel using VB.NET:
Imports Spire.Xls

Namespace MergeCells

    Friend Class Program

        Private Shared Sub Main(args As String())
            ' Create a Workbook instance and load an Excel file
            Dim workbook As Workbook = New Workbook()
            workbook.LoadFromFile("E:\Administrator\Python1\input\Population.xlsx")

            ' Get the first worksheet
            Dim sheet As Worksheet = workbook.Worksheets(0)

            ' Merge the first row
            sheet.Rows(0).Merge()
            ' Merge the first column
            'sheet.Columns[0].Merge();

            ' Set the alignment to center horizontally and vertically
            sheet.Rows(0).Style.HorizontalAlignment = HorizontalAlignType.Center
            sheet.Rows(0).Style.VerticalAlignment = VerticalAlignType.Center

            ' Save the Excel file
            workbook.SaveToFile("\Mergerowsandcenter.xls")

        End Sub
    End Class
End Namespace
The Conclusion
By following these examples, you can merge cells in Excel using C#, whether it’s entire rows, columns, or specific ranges. With the help of Spire.XLS, you can merge cells in Excel files automatically without hassle and create clear, professional-looking spreadsheets. Start streamlining your workflow today and get a 30-day free license to try all features without restrictions.
