Inserting Equations into Word in Python (LaTeX & MathML)
Inserting mathematical equations into Word documents programmatically is essential for developers building scientific document generators, academic reporting systems, educational platforms, or engineering automation tools. Whether you're generating research papers, technical documentation, or mathematics worksheets, automating equation insertion greatly improves efficiency and consistency.
However, manually formatting equations in Microsoft Word is time-consuming, and building a mathematical rendering engine from scratch can be extremely complex. Developers often need a reliable way to add equations in Word while supporting standard mathematical formats such as LaTeX and MathML.
With Spire.Doc for Python, developers can insert mathematical equations into Word documents directly from LaTeX and MathML code using a straightforward API. This article demonstrates how to create Word equations in Python, including how to insert formulas, convert equations between LaTeX, MathML, and Office MathML (OMML), and export Word equations into different mathematical formats.
Quick Navigation
- Understanding Mathematical Equations in Word Documents
- Install Spire.Doc for Python
- Insert Equations into Word from LaTeX in Python
- Add MathML Equations to Word Documents in Python
- Convert Word Equations to LaTeX or MathML
- Render Equation as Image
- Complete Example: Multi-Format Equation Processing
- Common Pitfalls
- FAQ
1. Understanding Mathematical Equations in Word Documents
Microsoft Word uses Office Math Markup Language (OMML) as its internal format for mathematical equations. OMML is an XML-based structure that controls equation layout, symbols, fractions, matrices, and other mathematical elements in Word documents. However, directly creating or editing OMML is cumbersome for most developers.
In real-world applications, mathematical content is more commonly written in LaTeX or MathML:
- LaTeX is widely used in academia and scientific publishing because of its concise syntax and powerful mathematical typesetting capabilities.
- MathML is an XML-based standard designed for mathematical content on the web and in educational systems.
To generate editable Word equations programmatically, developers often need to convert between these formats and Word's native equation objects.
Why Choose Spire.Doc for Python?
Spire.Doc for Python provides native support for Word equation processing through the OfficeMath class. Instead of manually generating OMML or relying on image-based workarounds, developers can directly create editable Word equations from LaTeX or MathML code.
Key capabilities include:
| Capability | Supported |
|---|---|
| Insert equations from LaTeX | ✓ |
| Insert equations from MathML | ✓ |
| Export Word equations to LaTeX | ✓ |
| Export Word equations to MathML | ✓ |
| Access native OMML content | ✓ |
| Render equations as images | ✓ |
These capabilities are particularly useful for academic report generation, educational platforms, MathML-to-Word conversion workflows, LaTeX publishing pipelines, and other automated document generation scenarios involving mathematical content.
2. Install Spire.Doc for Python
Install Spire.Doc for Python via pip:
pip install spire.doc
Import the required classes in your Python script:
from spire.doc import *
Alternatively, you can manually install the library from the Spire.Doc for Python download page.
3. Insert Equations into Word from LaTeX in Python
LaTeX is the most widely used format for writing mathematical equations in academic and scientific documents. With Spire.Doc for Python, you can convert LaTeX expressions into native Word equation objects and insert these equations directly into DOCX files.
The following example demonstrates how to insert multiple LaTeX equations into a Word document using the OfficeMath class.
from spire.doc import *

def insert_latex_equations():
    # Create a new Word document
    doc = Document()
    section = doc.AddSection()

    # Add a title paragraph
    title_para = section.AddParagraph()
    title_para.AppendText("Mathematical Equations from LaTeX")
    title_para.Format.HorizontalAlignment = HorizontalAlignment.Left

    # Define LaTeX equations to insert
    latex_equations = [
    r"x = \frac{-b \pm \sqrt{b^2 - 4ac}}{2a}",  # Quadratic formula
    r"e^{i\pi} + 1 = 0",  # Euler's identity
    r"\int_0^\infty e^{-x} \, dx = 1",  # Definite integral
    # Summation formula
    r"\sum_{i=1}^{n} i = \frac{n(n+1)}{2}",
    r"\sum_{i=1}^{n} i = \frac{n(n+1)}{2}",  # Summation formula
    r"A = \begin{pmatrix} 1 & 2 \\ 3 & 4 \end{pmatrix}",  # Matrix
    r"P(A \mid B) = \frac{P(B \mid A)P(A)}{P(B)}",  # Probability formula
    r"\sin^2\theta + \cos^2\theta = 1",  # Trigonometric identity
    ]

    # Insert each LaTeX equation as a separate paragraph
    for latex_code in latex_equations:
        # Create an OfficeMath object from LaTeX code
        office_math = OfficeMath(doc)
        office_math.FromLatexMathCode(latex_code)

        # Add the equation to a new paragraph
        para = section.AddParagraph()
        para.Items.Add(office_math)

    # Save the document
    doc.SaveToFile("latex_equations.docx", FileFormat.Docx2019)
    doc.Close()
    print("LaTeX equations inserted successfully!")

if __name__ == "__main__":
    insert_latex_equations()
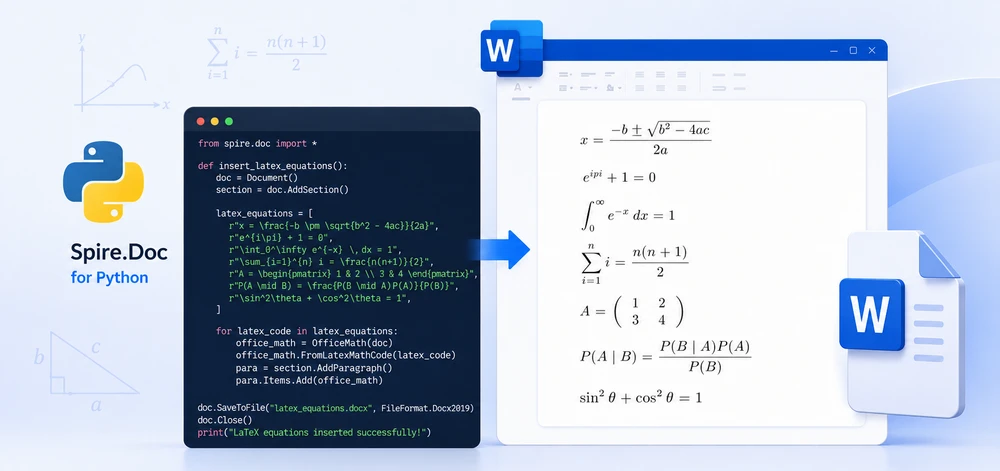
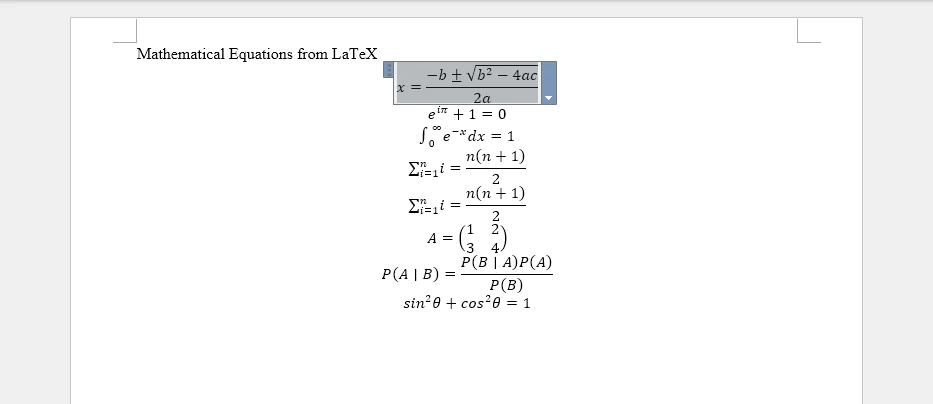
The following screenshot shows the generated Word document with equations converted from LaTeX code.
Key API Methods
- Document – Represents the Word document container used to create sections and paragraphs
- OfficeMath – Represents a mathematical equation object in Word documents
- FromLatexMathCode() – Converts LaTeX mathematical code into an Office Math object that Word can render natively
- Items.Add() – Adds the OfficeMath object to a paragraph's content collection
- SaveToFile() – Saves the document to disk in DOCX format using FileFormat.Docx2019
This approach supports complex LaTeX constructs such as fractions, integrals, matrices, Greek letters, and other mathematical operators while preserving native Word equation formatting.
Adding Inline Equations
In addition to standalone equations, you can insert inline equations within text paragraphs. This is useful for embedding mathematical expressions within sentences or explanations.
from spire.doc import *

def insert_inline_equation():
    # Create a new Word document
    doc = Document()
    section = doc.AddSection()

    # Add introductory text
    para = section.AddParagraph()
    para.AppendText("The quadratic formula is ")

    # Insert inline equation
    office_math = OfficeMath(doc)
    office_math.FromLatexMathCode(r"x = \frac{-b \pm \sqrt{b^2 - 4ac}}{2a}")
    para.Items.Add(office_math)

    para.AppendText(", where a ≠ 0.")

    # Save the document
    doc.SaveToFile("inline_equation.docx", FileFormat.Docx2019)
    doc.Close()

if __name__ == "__main__":
    insert_inline_equation()
The inserted equation appears inline within the text:
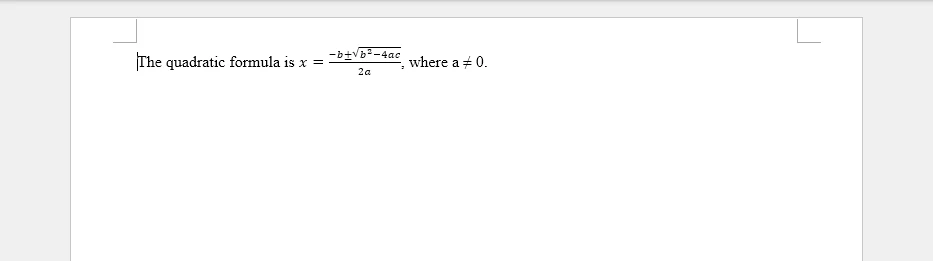
This approach makes it easy to embed mathematical expressions directly within regular text content, which is useful for educational materials, research papers, and technical documentation.
If you need to combine equations with formatted text, headings, tables, and other structured document elements, you can also refer to our tutorial on creating structured Word documents in Python.
4. Add MathML Equations to Word Documents in Python
MathML (Mathematical Markup Language) is an XML-based standard for representing mathematical expressions on the web and in digital documents. It's commonly used in online education platforms, scientific databases, and content management systems. The following example shows how to convert MathML to Word equations using Spire.Doc for Python.
from spire.doc import *

def insert_mathml_equations():
    # Create a new Word document
    doc = Document()
    section = doc.AddSection()

    # Add a title paragraph
    title_para = section.AddParagraph()
    title_para.AppendText("Mathematical Equations from MathML")

    # Define MathML equations to insert
    mathml_equations = [
    # Euler's identity
    r'<math xmlns="http://www.w3.org/1998/Math/MathML">'
    r'<msup><mi>e</mi><mrow><mi>i</mi><mi>π</mi></mrow></msup>'
    r'<mo>+</mo><mn>1</mn><mo>=</mo><mn>0</mn>'
    r'</math>',
    # Pythagorean theorem
    r'<math xmlns="http://www.w3.org/1998/Math/MathML">'
    r'<msup><mi>a</mi><mn>2</mn></msup>'
    r'<mo>+</mo>'
    r'<msup><mi>b</mi><mn>2</mn></msup>'
    r'<mo>=</mo>'
    r'<msup><mi>c</mi><mn>2</mn></msup>'
    r'</math>',
    # Fraction expression
    r'<math xmlns="http://www.w3.org/1998/Math/MathML">'
    r'<mfrac>'
    r'<mrow><mi>x</mi><mo>+</mo><mi>y</mi></mrow>'
    r'<mrow><mi>z</mi><mo>−</mo><mn>1</mn></mrow>'
    r'</mfrac>'
    r'</math>',
    # Integral equation
    r'<math xmlns="http://www.w3.org/1998/Math/MathML">'
    r'<msubsup><mo>∫</mo><mn>0</mn><mn>1</mn></msubsup>'
    r'<msup><mi>x</mi><mn>2</mn></msup>'
    r'<mi>d</mi><mi>x</mi>'
    r'<mo>=</mo>'
    r'<mfrac><mn>1</mn><mn>3</mn></mfrac>'
    r'</math>'
    ]

    # Insert each MathML equation as a separate paragraph
    for mathml_code in mathml_equations:
        # Create an OfficeMath object from MathML code
        office_math = OfficeMath(doc)
        office_math.FromMathMLCode(mathml_code)

        # Add the equation to a new paragraph
        para = section.AddParagraph()
        para.Items.Add(office_math)

    # Save the document
    doc.SaveToFile("mathml_equations.docx", FileFormat.Docx2019)
    doc.Close()
    print("MathML equations inserted successfully!")

if __name__ == "__main__":
    insert_mathml_equations()
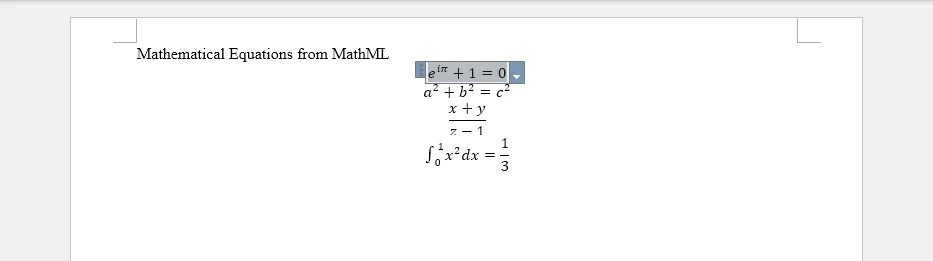
The following screenshot shows the generated Word document with equations converted from MathML code.
Key API Method
- FromMathMLCode() – Parses MathML markup and converts it into a native Word equation object.
MathML support is especially useful when working with XML-based educational content, web-based equation systems, and STEM learning platforms that store mathematical expressions in MathML format.
Combining LaTeX and MathML in One Document
You can mix both LaTeX and MathML equations within the same document, allowing flexibility in content sources:
from spire.doc import *

def insert_mixed_equations():
    # Create a new Word document
    doc = Document()
    section = doc.AddSection()

    # Insert LaTeX equation
    latex_para = section.AddParagraph()
    latex_math = OfficeMath(doc)
    latex_math.FromLatexMathCode(r"E = mc^2")
    latex_para.Items.Add(latex_math)

    # Insert MathML equation
    mathml_para = section.AddParagraph()
    mathml_math = OfficeMath(doc)
    mathml_math.FromMathMLCode(
        r'<math xmlns="http://www.w3.org/1998/Math/MathML">'
        r'<mi>F</mi><mo>=</mo><mi>m</mi><mi>a</mi>'
        r'</math>'
    )
    mathml_para.Items.Add(mathml_math)

    # Save the document
    doc.SaveToFile("mixed_equations.docx", FileFormat.Docx2019)
    doc.Close()

if __name__ == "__main__":
    insert_mixed_equations()
This approach is useful when mathematical content comes from different sources, such as LaTeX-based publishing systems and MathML-based web applications.
If your mathematical content originates from web pages or HTML-based systems, you can also refer to our tutorial on converting HTML content to Word documents in Python.
5. Convert Word Equations to LaTeX, MathML, and OMML
Besides inserting equations into Word documents, Spire.Doc for Python also supports exporting Word equations to multiple mathematical markup formats. This is useful for interoperability between Word, LaTeX publishing systems, web-based MathML platforms, and custom XML workflows.
The following example demonstrates how to extract equations from a Word document and export them as LaTeX, MathML, and Office MathML (OMML).
from spire.doc import *

def export_equation_formats():
    # Load a Word document containing equations
    doc = Document()
    doc.LoadFromFile("equations.docx")

    # Access the first paragraph
    section = doc.Sections[0]
    para = section.Paragraphs[0]

    # Find OfficeMath objects
    for item in para.ChildObjects:
        if isinstance(item, OfficeMath):

            # Export to LaTeX
            latex_code = item.ToLaTexMathCode()
            print("LaTeX:")
            print(latex_code)
            print()

            # Export to MathML
            mathml_code = item.ToMathMLCode()
            print("MathML:")
            print(mathml_code)
            print()

            # Export to Office MathML (OMML)
            omml_code = item.ToOfficeMathMLCode()
            print("OMML:")
            print(omml_code)

            # Save outputs to files
            with open("equation.tex", "w", encoding="utf-8") as f:
                f.write(latex_code)

            with open("equation.xml", "w", encoding="utf-8") as f:
                f.write(mathml_code)

            with open("equation.omml", "w", encoding="utf-8") as f:
                f.write(omml_code)

            break

    doc.Close()

if __name__ == "__main__":
    export_equation_formats()
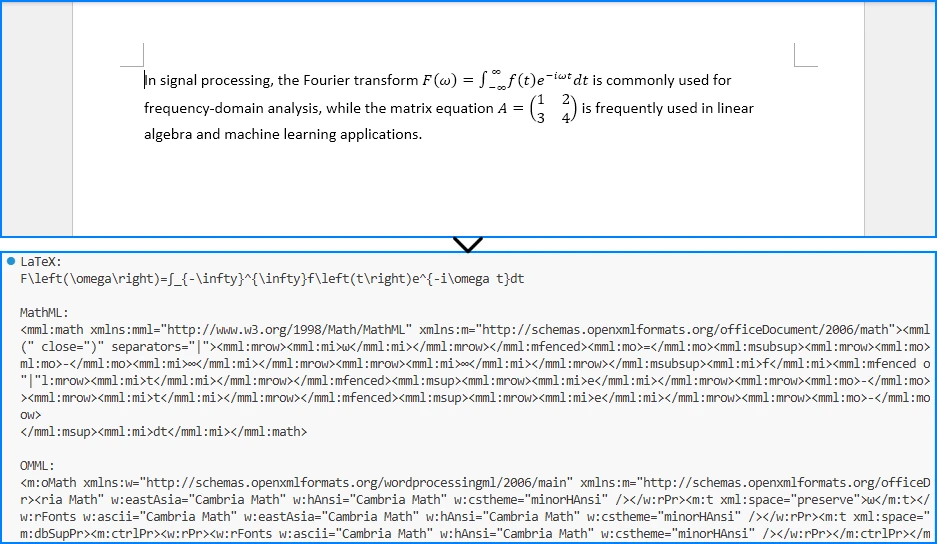
The following screenshot shows the exported equation formats printed in the Python console.
Supported Export Formats
| Format | Primary Use Case | Characteristics |
|---|---|---|
| LaTeX | Academic publishing and scientific papers | Compact syntax widely used in academia |
| MathML | Web-based mathematical content | XML-based format designed for browsers and educational systems |
| OMML | Microsoft Word integration | Native Office equation format with full Word compatibility |
These export capabilities make it easier to:
- Convert Word equations into LaTeX publishing workflows
- Publish equations on websites using MathML
- Integrate Word documents with XML-based systems
- Inspect and debug Word equation structures using OMML
6. Render Office Math Equations to Images
In some scenarios, you may need to export equations as image files for use in presentations, web pages, or other non-editable contexts. Spire.Doc for Python allows you to render Office Math equations into image streams that can be saved as image files.
from spire.doc import *

def render_equation_as_image():
    # Create a new Word document with an equation
    doc = Document()
    section = doc.AddSection()
    para = section.AddParagraph()

    # Insert an equation
    office_math = OfficeMath(doc)
    office_math.FromLatexMathCode(
        r"\int_0^\infty e^{-x^2} dx = \frac{\sqrt{\pi}}{2}"
    )
    para.Items.Add(office_math)

    # Render the equation as an image stream
    image_stream = office_math.SaveImageToStream(ImageType.Bitmap)

    # Save the image to file
    with open("equations/equation.png", "wb") as f:
        f.write(image_stream.ToArray())

    # Release unmanaged resources
    image_stream.Dispose()
    doc.Close()

    print("Equation rendered as image successfully!")

if __name__ == "__main__":
    render_equation_as_image()
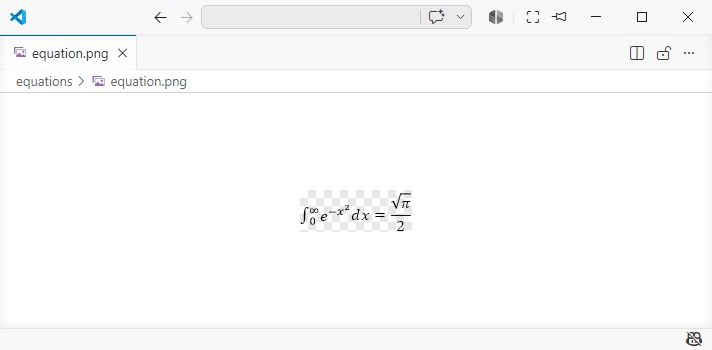
The following screenshot shows the equation rendered as an image file.
This feature is particularly useful for:
- Embedding equations in presentations
- Displaying formulas on web pages
- Generating static previews for document systems
If you want to render complete Word documents as images rather than exporting individual equations, check out our tutorial on converting Word documents to images in Python.
7. Complete Example: Multi-Format Equation Processing
The following comprehensive example demonstrates a complete workflow that combines multiple equation operations: inserting equations from different sources, exporting to various formats, and rendering as images.
from spire.doc import *

def complete_equation_workflow():
    """
    Demonstrates a complete workflow for equation processing:
    - Create equations from LaTeX and MathML
    - Export equations to LaTeX and MathML
    - Render equations as images
    """

    # Create a new Word document
    doc = Document()
    section = doc.AddSection()

    # Add document title
    title_para = section.AddParagraph()
    title_text = title_para.AppendText("Complete Equation Processing Workflow")
    title_text.CharacterFormat.FontSize = 16
    title_text.CharacterFormat.Bold = True
    title_para.Format.HorizontalAlignment = HorizontalAlignment.Center

    # Insert equations from LaTeX
    latex_section_title = section.AddParagraph()
    latex_title_text = latex_section_title.AppendText("\nEquations from LaTeX:")
    latex_title_text.CharacterFormat.Bold = True

    latex_examples = [
        (r"E = mc^2", "Einstein's Mass-Energy Equivalence"),
        (r"\sum_{i=1}^{n} i = \frac{n(n+1)}{2}", "Sum of First n Integers"),
        (r"\frac{d}{dx}\left(\int_a^x f(t)dt\right) = f(x)", "Fundamental Theorem of Calculus")
    ]

    first_equation = None

    for latex_code, description in latex_examples:
        # Add description
        desc_para = section.AddParagraph()
        desc_para.AppendText(f"{description}:")

        # Insert equation
        office_math = OfficeMath(doc)
        office_math.FromLatexMathCode(latex_code)

        eq_para = section.AddParagraph()
        eq_para.Items.Add(office_math)

        if first_equation is None:
            first_equation = office_math

    # Insert equations from MathML
    mathml_section_title = section.AddParagraph()
    mathml_title_text = mathml_section_title.AppendText("\nEquations from MathML:")
    mathml_title_text.CharacterFormat.Bold = True

    mathml_examples = [
        (
            r'<math xmlns="http://www.w3.org/1998/Math/MathML"><mi>a</mi><mo>+</mo><mi>b</mi><mo>=</mo><mi>c</mi></math>',
            "Simple Addition"
        ),
        (
            r'<math xmlns="http://www.w3.org/1998/Math/MathML"><msup><mi>e</mi><mrow><mi>i</mi><mi>π</mi></mrow></msup><mo>+</mo><mn>1</mn><mo>=</mo><mn>0</mn></math>',
            "Euler's Identity"
        )
    ]

    for mathml_code, description in mathml_examples:
        # Add description
        desc_para = section.AddParagraph()
        desc_para.AppendText(f"{description}:")

        # Insert equation
        office_math = OfficeMath(doc)
        office_math.FromMathMLCode(mathml_code)

        eq_para = section.AddParagraph()
        eq_para.Items.Add(office_math)

    # Save the Word document
    output_docx = "complete_equations.docx"
    doc.SaveToFile(output_docx, FileFormat.Docx2019)
    print(f"Word document saved: {output_docx}")

    # Export the first equation to LaTeX
    latex_export = first_equation.ToLaTexMathCode()

    with open("exported_equation.tex", "w", encoding="utf-8") as f:
        f.write(latex_export)

    print(f"Exported to LaTeX: {latex_export}")

    # Export the first equation to MathML
    mathml_export = first_equation.ToMathMLCode()

    with open("exported_equation.xml", "w", encoding="utf-8") as f:
        f.write(mathml_export)

    print("Exported to MathML")

    # Render the first equation as an image
    image_stream = first_equation.SaveImageToStream(ImageType.Bitmap)

    with open("equation_render.png", "wb") as f:
        f.write(image_stream.ToArray())

    # Release unmanaged resources
    image_stream.Dispose()

    print("Equation rendered as image successfully!")

    # Clean up
    doc.Close()

    print("\nWorkflow completed successfully!")

if __name__ == "__main__":
    complete_equation_workflow()
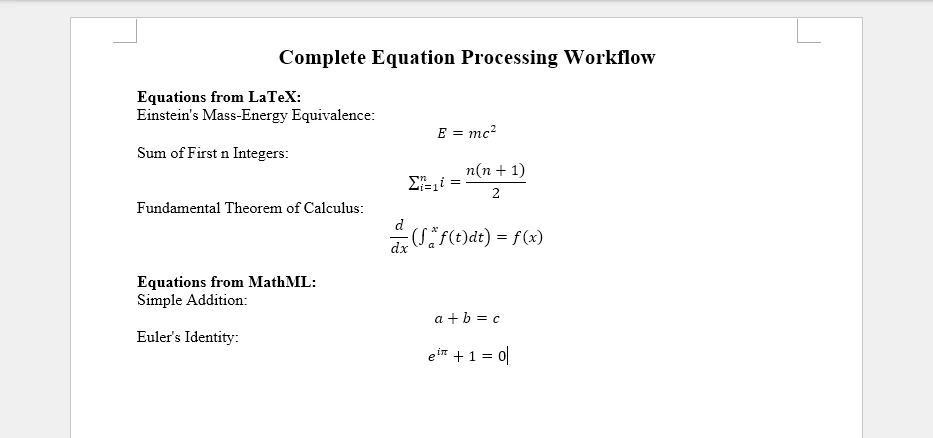
The generated Word document will look like this:
This complete example demonstrates:
- Multi-source equation insertion – Combining LaTeX and MathML inputs
- Descriptive labeling – Adding context to each equation
- Format conversion – Exporting to LaTeX and MathML
- Image rendering – Creating visual representations
- Resource management – Proper cleanup of document objects
The resulting Word document contains well-formatted equations with descriptions, while the exported files provide alternative formats for different use cases.
8. Common Pitfalls
Raw String Literals for LaTeX
When writing LaTeX code in Python strings, always use raw strings (prefix with r) to prevent escape sequence interpretation:
# Correct: Use raw string
latex_code = r"\int_0^\infty e^{-x} dx"

# Incorrect: Backslashes will be interpreted as escape sequences
latex_code = "\int_0^\infty e^{-x} dx"
Unsupported LaTeX Commands
Not all LaTeX commands are supported by Word's equation engine. Some advanced LaTeX constructs may not render correctly. Stick to standard mathematical notation whenever possible:
# Supported: Standard mathematical notation
office_math.FromLatexMathCode(r"\alpha + \beta = \gamma")

# Some advanced LaTeX constructs may not be supported
# office_math.FromLatexMathCode(r"\begin{align} ... \end{align}")
MathML Namespace Requirements
MathML code must include the proper namespace declaration to parse correctly:
# Correct: Include namespace
mathml = r'<math xmlns="http://www.w3.org/1998/Math/MathML"><mi>x</mi></math>'

# Incorrect: Missing namespace may fail
mathml = r'<math><mi>x</mi></math>'
Memory Management
Always close documents after processing to release resources, especially in batch operations:
doc = Document()

try:
    # Process equations
    doc.SaveToFile("output.docx", FileFormat.Docx2019)

finally:
    doc.Close()  # Ensure cleanup even if errors occur
Character Encoding
When saving exported LaTeX or MathML to files, ensure proper UTF-8 encoding for special characters:
with open("equation.tex", "w", encoding="utf-8") as f:
    f.write(latex_code)
Image Stream Disposal
Always dispose of image streams after use to properly release resources:
image_stream = office_math.SaveImageToStream(ImageType.Bitmap)

try:
    with open("equation.png", "wb") as f:
        f.write(image_stream.ToArray())

finally:
    image_stream.Dispose()
Conclusion
In this article, we demonstrated how to insert mathematical equations into Word documents in Python using Spire.Doc for Python. By leveraging the Spire API, developers can create Word equations from LaTeX and MathML code, convert between LaTeX, MathML, and Word’s native OMML format, and render equations as images. This capability is essential for automating scientific document generation, educational content creation, and mathematical publishing workflows.
Spire.Doc for Python provides comprehensive equation processing capabilities beyond basic insertion, including conversion between LaTeX and MathML into Word’s native OMML format, as well as exporting Word equations back to LaTeX, MathML, and OMML. The library simplifies complex mathematical typesetting while maintaining compatibility with Microsoft Word’s native equation engine.
If you want to evaluate the full capabilities of Spire.Doc for Python, you can apply for a 30-day free license.
9. FAQ
How do I insert equations into Word using Python?
Use the OfficeMath class from Spire.Doc for Python. Create an OfficeMath object, call FromLatexMathCode() or FromMathMLCode() with your equation code, then add it to a paragraph using para.Items.Add(office_math). Finally, save the document using doc.SaveToFile().
Can I add LaTeX equations to Word documents in Python?
Yes. Spire.Doc for Python supports inserting equations from LaTeX code using the FromLatexMathCode() method. Standard mathematical notation such as fractions, integrals, superscripts, subscripts, and Greek letters can be converted into Word-compatible equations.
Does Spire.Doc support MathML equations?
Yes. You can create Word equations from MathML using the FromMathMLCode() method. Make sure the MathML content includes the correct namespace declaration:
<math xmlns="http://www.w3.org/1998/Math/MathML">
Can I export Word equations back to LaTeX or MathML?
Yes. Spire.Doc for Python provides methods such as ToLaTexMathCode() and ToMathMLCode() to export Office Math equations into LaTeX or MathML formats. This is useful for content migration, storage, or integration with other mathematical systems.
How can I render equations as images?
Use the SaveImageToStream() method on an OfficeMath object to render the equation as an image stream. You can then save the stream as an image file and use it in presentations, web pages, or preview systems.
How to Create Structured Word Documents Using Python
Creating Word documents programmatically is a common requirement in Python applications. Reports, invoices, contracts, audit logs, and exported datasets are often expected to be delivered as editable .docx files rather than plain text or PDFs.
Unlike plain text output, a Word document is a structured document composed of sections, paragraphs, styles, and layout rules. When generating Word documents in Python, treating .docx files as simple text containers quickly leads to layout issues and maintenance problems.
This tutorial focuses on practical Word document creation in Python using Spire.Doc for Python. It demonstrates how to construct documents using Word’s native object model, apply formatting at the correct structural level, and generate .docx files that remain stable and editable as content grows.
Content Overview
- 1. Understanding Word Document Structure in Python
- 2. Creating a Basic Word Document in Python
- 3. Adding and Formatting Text Content
- 4. Inserting Images into a Word Document
- 5. Creating and Populating Tables
- 6. Adding Headers and Footers
- 7. Controlling Page Layout with Sections
- 8. Setting Document Properties and Metadata
- 9. Saving, Exporting, and Performance Considerations
- 10. Common Pitfalls When Creating Word Documents in Python
1. Understanding Word Document Structure in Python
Before writing code, it is important to understand how a Word document is structured internally.
A .docx file is not a linear stream of text. It consists of multiple object layers, each with a specific responsibility:
- Document – the root container for the entire file
- Section – defines page-level layout such as size, margins, and orientation
- Paragraph – represents a logical block of text
- Run (TextRange) – an inline segment of text with character formatting
- Style – a reusable formatting definition applied to paragraphs or runs
When you create a Word document in Python, you are explicitly constructing this hierarchy in code. Formatting and layout behave predictably only when content is added at the appropriate level.
Spire.Doc for Python provides direct abstractions for these elements, allowing you to work with Word documents in a way that closely mirrors how Word itself organizes content.
2. Creating a Basic Word Document in Python
This section shows how to generate a valid Word document in Python using Spire.Doc. The example focuses on establishing the correct document structure and essential workflow.
Installing Spire.Doc for Python
pip install spire.doc
Alternatively, you can download Spire.Doc for Python and integrate it manually.
Creating a Simple .docx File
from spire.doc import Document, FileFormat

# Create the document container
document = Document()

# Add a section (defines page-level layout)
section = document.AddSection()

# Add a paragraph to the section
paragraph = section.AddParagraph()
paragraph.AppendText(
    "This document was generated using Python. "
    "It demonstrates basic Word document creation with Spire.Doc."
)

# Save the document
document.SaveToFile("basic_document.docx", FileFormat.Docx)
document.Close()
This example creates a minimal but valid .docx file that can be opened in Microsoft Word. It demonstrates the essential workflow: creating a document, adding a section, inserting a paragraph, and saving the file.

From a technical perspective:
- The Document object represents the Word file structure and manages its content.
- The Section defines the page-level layout context for paragraphs.
- The Paragraph contains the visible text and serves as the basic unit for all paragraph-level formatting.
All Word documents generated with Spire.Doc follow this same structural pattern, which forms the foundation for more advanced operations.
3. Adding and Formatting Text Content
Text in a Word document is organized hierarchically. Formatting can be applied at the paragraph level (controlling alignment, spacing, indentation, etc.) or the character level (controlling font, size, color, bold, italic, etc.). Styles provide a convenient way to store these formatting settings so they can be consistently applied to multiple paragraphs or text ranges without redefining the formatting each time. Understanding the distinction between paragraph formatting, character formatting, and styles is essential when creating or editing Word documents in Python.
Adding and Setting Paragraph Formatting
All visible text in a Word document must be added through paragraphs, which serve as containers for text and layout. Paragraph-level formatting controls alignment, spacing, and indentation, and can be set directly via the Paragraph.Format property. Character-level formatting, such as font size, bold, or color, can be applied to text ranges within the paragraph via the TextRange.CharacterFormat property.
from spire.doc import Document, HorizontalAlignment, FileFormat, Color
document = Document()
section = document.AddSection()
# Add the title paragraph
title = section.AddParagraph()
title.Format.HorizontalAlignment = HorizontalAlignment.Center
title.Format.AfterSpacing = 20 # Space after the title
title.Format.BeforeSpacing = 20
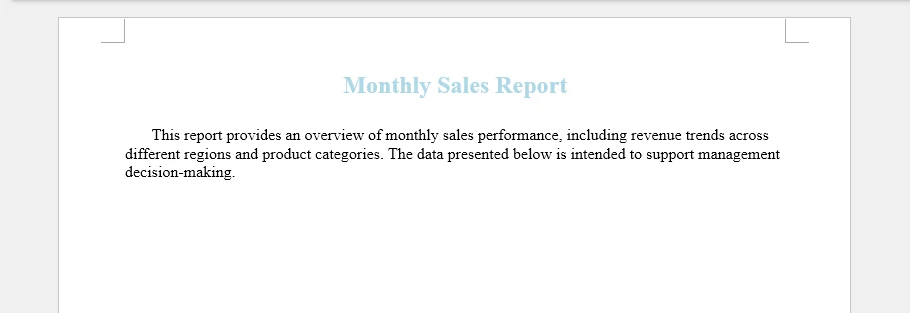
title_range = title.AppendText("Monthly Sales Report")
title_range.CharacterFormat.FontSize = 18
title_range.CharacterFormat.Bold = True
title_range.CharacterFormat.TextColor = Color.get_LightBlue()
# Add the body paragraph
body = section.AddParagraph()
body.Format.FirstLineIndent = 20
body_range = body.AppendText(
"This report provides an overview of monthly sales performance, "
"including revenue trends across different regions and product categories. "
"The data presented below is intended to support management decision-making."
)
body_range.CharacterFormat.FontSize = 12
# Save the document
document.SaveToFile("formatted_paragraph.docx", FileFormat.Docx)
document.Close()
Below is a preview of the generated Word document.
Technical notes
- Paragraph.Format sets alignment, spacing, and indentation for the entire paragraph
- AppendText() returns a TextRange object, which allows character-level formatting (font size, bold, color)
- Every paragraph must belong to a section, and paragraph order determines reading flow and pagination
Creating and Applying Styles
Styles allow you to define paragraph-level and character-level formatting once and reuse it across the document. They can store alignment, spacing, font, and text emphasis, making formatting more consistent and easier to maintain. Word documents support both custom styles and built-in styles, which must be added to the document before being applied.
Creating and Applying a Custom Paragraph Style
from spire.doc import (
Document, HorizontalAlignment, BuiltinStyle,
TextAlignment, ParagraphStyle, FileFormat
)
document = Document()
# Create a new custom paragraph style
custom_style = ParagraphStyle(document)
custom_style.Name = "CustomStyle"
custom_style.ParagraphFormat.HorizontalAlignment = HorizontalAlignment.Center
custom_style.ParagraphFormat.TextAlignment = TextAlignment.Auto
custom_style.CharacterFormat.Bold = True
custom_style.CharacterFormat.FontSize = 20
# Inherit properties from a built-in heading style
custom_style.ApplyBaseStyle(BuiltinStyle.Heading1)
# Add the style to the document
document.Styles.Add(custom_style)
# Apply the custom style
title_para = document.AddSection().AddParagraph()
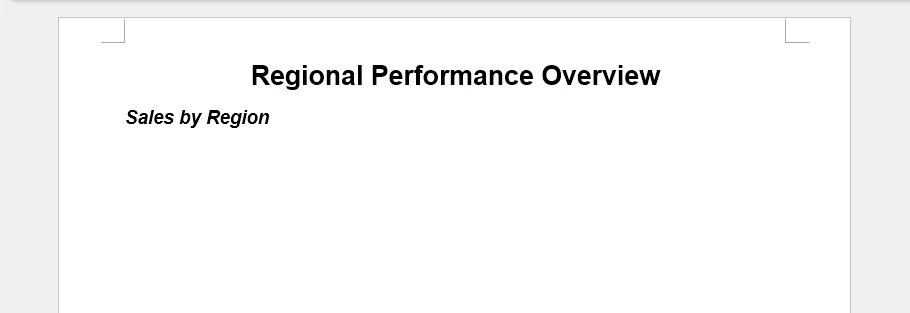
title_para.ApplyStyle(custom_style.Name)
title_para.AppendText("Regional Performance Overview")
Adding and Applying Built-in Styles
# Add a built-in style to the document
built_in_style = document.AddStyle(BuiltinStyle.Heading2)
document.Styles.Add(built_in_style)

# Apply the built-in style
heading_para = document.Sections.get_Item(0).AddParagraph()
heading_para.ApplyStyle(built_in_style.Name)
heading_para.AppendText("Sales by Region")

document.SaveToFile("document_styles.docx", FileFormat.Docx)
Preview of the generated Word document.
Technical Explanation
- ParagraphStyle(document) creates a reusable style object associated with the current document
- ParagraphFormat controls layout-related settings such as alignment and text flow
- CharacterFormat defines font-level properties like size and boldness
- ApplyBaseStyle() allows the custom style to inherit semantic meaning and default behavior from a built-in Word style
- Adding the style to document.Styles makes it available for use across all sections
Built-in styles, such as Heading 2, can be added explicitly and applied in the same way, ensuring the document remains compatible with Word features like outlines and tables of contents.
4. Inserting Images into a Word Document
In Word’s document model, images are embedded objects that belong to paragraphs, which ensures they flow naturally with text. Paragraph-anchored images adjust pagination automatically and maintain relative positioning when content changes.
Adding an Image to a Paragraph
from spire.doc import Document, TextWrappingStyle, HorizontalAlignment, FileFormat

document = Document()
section = document.AddSection()
section.AddParagraph().AppendText("\r\n\r\nExample Image\r\n")

# Insert an image
image_para = section.AddParagraph()
image_para.Format.HorizontalAlignment = HorizontalAlignment.Center
image = image_para.AppendPicture("Screen.jpg")

# Set the text wrapping style
image.TextWrappingStyle = TextWrappingStyle.Square
# Set the image size
image.Width = 350
image.Height = 200
# Set the transparency
image.FillTransparency(0.7)
# Set the horizontal alignment
image.HorizontalAlignment = HorizontalAlignment.Center

document.SaveToFile("document_images.docx", FileFormat.Docx)
Preview of the generated Word document.
Technical details
- AppendPicture() inserts the image into the paragraph, making it part of the text flow
- TextWrappingStyle determines how surrounding text wraps around the image
- Width and Height control the displayed size of the image
- FillTransparency() sets the image opacity
- HorizontalAlignment can center the image within the paragraph
Adding images to paragraphs ensures they behave like part of the text flow.
- Pagination adjusts automatically when images change size.
- Surrounding text reflows correctly when content is edited.
- When exporting to formats like PDF, images maintain their relative position.
These behaviors are consistent with Word’s handling of inline images.
For more advanced image operations in Word documents using Python, see how to insert images into a Word document with Python for a complete guide.
5. Creating and Populating Tables
Tables are commonly used to present structured data such as reports, summaries, and comparisons.
Internally, a table consists of rows, cells, and paragraphs inside each cell.
Creating and Formatting a Table in a Word Document
from spire.doc import Document, DefaultTableStyle, FileFormat, AutoFitBehaviorType
document = Document()
section = document.AddSection()
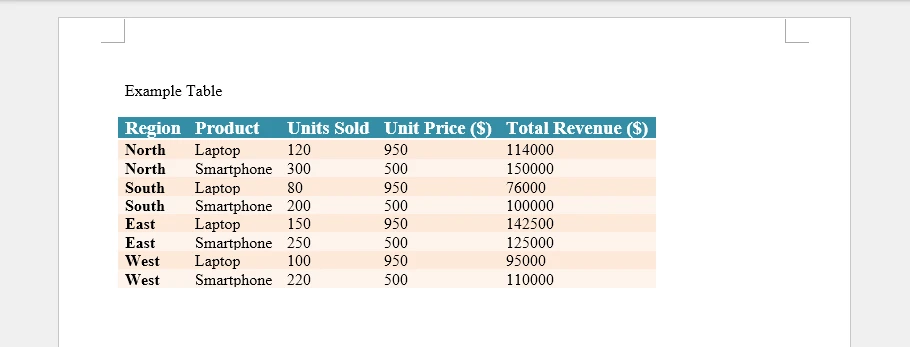
section.AddParagraph().AppendText("\r\n\r\nExample Table\r\n")
# Define the table data
table_headers = ["Region", "Product", "Units Sold", "Unit Price ($)", "Total Revenue ($)"]
table_data = [
["North", "Laptop", 120, 950, 114000],
["North", "Smartphone", 300, 500, 150000],
["South", "Laptop", 80, 950, 76000],
["South", "Smartphone", 200, 500, 100000],
["East", "Laptop", 150, 950, 142500],
["East", "Smartphone", 250, 500, 125000],
["West", "Laptop", 100, 950, 95000],
["West", "Smartphone", 220, 500, 110000]
]
# Add a table to the section
table = section.AddTable()
table.ResetCells(len(table_data) + 1, len(table_headers))
# Populate table headers
for col_index, header in enumerate(table_headers):
header_range = table.Rows[0].Cells[col_index].AddParagraph().AppendText(header)
header_range.CharacterFormat.FontSize = 14
header_range.CharacterFormat.Bold = True
# Populate table data
for row_index, row_data in enumerate(table_data):
for col_index, cell_data in enumerate(row_data):
data_range = table.Rows[row_index + 1].Cells[col_index].AddParagraph().AppendText(str(cell_data))
data_range.CharacterFormat.FontSize = 12
# Apply a default table style and auto-fit columns
table.ApplyStyle(DefaultTableStyle.ColorfulListAccent6)
table.AutoFit(AutoFitBehaviorType.AutoFitToContents)
document.SaveToFile("document_tables.docx", FileFormat.Docx)
Preview of the generated Word document.
Technical details
- Section.AddTable() inserts the table into the section content flow
- ResetCells(rows, columns) defines the table grid explicitly
- Table[row, column] or Table.Rows[row].Cells[col] returns a TableCell
Tables in Word are designed so that each cell acts as an independent content container. Text is always inserted through paragraphs, and each cell can contain multiple paragraphs, images, or formatted text. This structure allows tables to scale from simple grids to complex report layouts, making them flexible for reports, summaries, or any structured content.
For more detailed examples and advanced operations using Python, such as dynamically generating tables, merging cells, or formatting individual cells, see how to insert tables into Word documents with Python for a complete guide.
6. Adding Headers and Footers
Headers and footers in Word are section-level elements. They are not part of the main content flow and do not affect body pagination.
Each section owns its own header and footer, which allows different parts of a document to display different repeated content.
Adding Headers and Footers in a Section
from spire.doc import Document, FileFormat, HorizontalAlignment, FieldType, BreakType

document = Document()
section = document.AddSection()
section.AddParagraph().AppendBreak(BreakType.PageBreak)

# Add a header
header = section.HeadersFooters.Header
header_para1 = header.AddParagraph()
header_para1.AppendText("Monthly Sales Report").CharacterFormat.FontSize = 12
header_para1.Format.HorizontalAlignment = HorizontalAlignment.Left

header_para2 = header.AddParagraph()
header_para2.AppendText("Company Name").CharacterFormat.FontSize = 12
header_para2.Format.HorizontalAlignment = HorizontalAlignment.Right

# Add a footer with page numbers
footer = section.HeadersFooters.Footer
footer_para = footer.AddParagraph()
footer_para.Format.HorizontalAlignment = HorizontalAlignment.Center
footer_para.AppendText("Page ").CharacterFormat.FontSize = 12
footer_para.AppendField("PageNum", FieldType.FieldPage).CharacterFormat.FontSize = 12
footer_para.AppendText(" of ").CharacterFormat.FontSize = 12
footer_para.AppendField("NumPages", FieldType.FieldNumPages).CharacterFormat.FontSize = 12

document.SaveToFile("document_header_footer.docx", FileFormat.Docx)
document.Dispose()
Preview of the generated Word document.
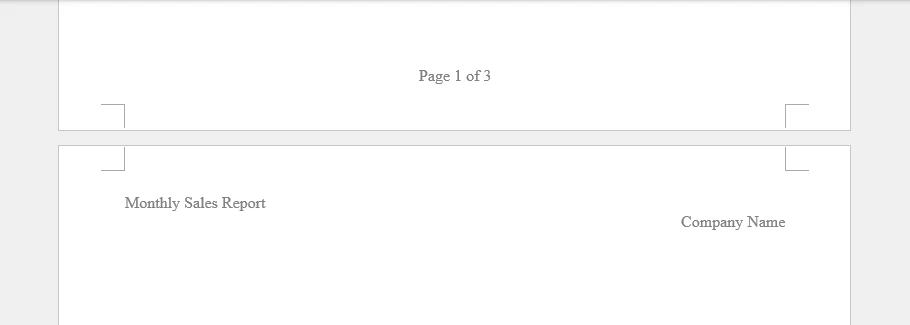
Technical notes
- section.HeadersFooters.Header / .Footer provides access to header/footer of the section
- AppendField() inserts dynamic fields like FieldPage or FieldNumPages to display dynamic content
Headers and footers are commonly used for report titles, company information, and page numbering. They update automatically as the document changes and are compatible with Word, PDF, and other export formats.
For more detailed examples and advanced operations, see how to insert headers and footers in Word documents with Python.
7. Controlling Page Layout with Sections
In Spire.Doc for Python, all page-level layout settings are managed through the Section object. Page size, orientation, and margins are defined by the section’s PageSetup and apply to all content within that section.
Configuring Page Size and Orientation
from spire.doc import PageSize, PageOrientation

section.PageSetup.PageSize = PageSize.A4()
section.PageSetup.Orientation = PageOrientation.Portrait
Technical explanation
- PageSetup is a layout configuration object owned by the Section
- PageSize defines the physical dimensions of the page
- Orientation controls whether pages are rendered in portrait or landscape mode
PageSetup defines the layout for the entire section. All paragraphs, tables, and images added to the section will follow these settings. Changing PageSetup in one section does not affect other sections in the document, allowing different sections to have different page layouts.
Setting Page Margins
section.PageSetup.Margins.Top = 50
section.PageSetup.Margins.Bottom = 50
section.PageSetup.Margins.Left = 60
section.PageSetup.Margins.Right = 60
Technical explanation
- Margins defines the printable content area for the section
- Margin values are measured in document units
Margins control the body content area for the section. They are evaluated at the section level, so you do not need to set them for individual paragraphs, and header/footer areas are not affected.
Using Multiple Sections for Different Layouts
When a document requires different page layouts, additional sections must be created.
landscape_section = document.AddSection()
landscape_section.PageSetup.Orientation = PageOrientation.Landscape
Technical notes
- AddSection() creates a new section and appends it to the document
- Each section maintains its own PageSetup, headers, and footers
- Content added after this call belongs to the new section
Using multiple sections allows mixing portrait and landscape pages or applying different layouts within a single Word document.
Below is an example preview of the above settings in a Word document:

8. Setting Document Properties and Metadata
In addition to visible content, Word documents expose metadata through built-in document properties. These properties are stored at the document level and do not affect layout or rendering.
Assigning Built-in Document Properties
document.BuiltinDocumentProperties.Title = "Monthly Sales Report"
document.BuiltinDocumentProperties.Author = "Data Analytics System"
document.BuiltinDocumentProperties.Company = "Example Corp"
Technical notes
BuiltinDocumentPropertiesprovides access to standard document properties- Properties such as
Title,Author, andCompanycan be set programmatically
Document properties are commonly used for file indexing, search, document management, and audit workflows. In addition to built-in properties, Word documents support other metadata such as Keywords, Subject, Comments, and Hyperlink base. You can also define custom properties using Document.CustomDocumentProperties.
For a guide on managing document custom properties with Python, see how to manage custom metadata in Word documents with Python.
9. Saving, Exporting, and Performance Considerations
After constructing a Word document in memory, the final step is saving or exporting it to the required output format. Spire.Doc for Python supports multiple export formats through a unified API, allowing the same document structure to be reused without additional formatting logic.
Saving and Exporting Word Documents in Multiple Formats
A document can be saved as DOCX for editing or exported to other commonly used formats for distribution.
from spire.doc import FileFormat

document.SaveToFile("output.docx", FileFormat.Docx)
document.SaveToFile("output.pdf", FileFormat.PDF)
document.SaveToFile("output.html", FileFormat.Html)
document.SaveToFile("output.rtf", FileFormat.Rtf)
The export process preserves document structure, including sections, tables, images, headers, and footers, ensuring consistent layout across formats. Check out all the supported formats in the FileFormat enumeration.
Performance Considerations for Document Generation
For scenarios involving frequent or large-scale Word document generation, performance can be improved by:
- Reusing document templates and styles
- Avoiding unnecessary section creation
- Writing documents to disk only after all content has been generated
- After saving or exporting, explicitly releasing resources using document.Close()
When generating many similar documents with different data, mail merge is more efficient than inserting content programmatically for each file. Spire.Doc for Python provides built-in mail merge support for batch document generation. For details, see how to generate Word documents in bulk using mail merge in Python.
Saving and exporting are integral parts of Word document generation in Python. By using Spire.Doc for Python’s export capabilities and following basic performance practices, Word documents can be generated efficiently and reliably for both individual files and batch workflows.
10. Common Pitfalls When Creating Word Documents in Python
The following issues frequently occur when generating Word documents programmatically.
Treating Word Documents as Plain Text
Issue Formatting breaks when content length changes.
Recommendation Always work with sections, paragraphs, and styles rather than inserting raw text.
Hard-Coding Formatting Logic
Issue Global layout changes require editing multiple code locations.
Recommendation Centralize formatting rules using styles and section-level configuration.
Ignoring Section Boundaries
Issue Margins or orientation changes unexpectedly affect the entire document.
Recommendation Use separate sections to isolate layout rules.
11. Conclusion
Creating Word documents in Python involves more than writing text to a file. A .docx document is a structured object composed of sections, paragraphs, styles, and embedded elements.
By using Spire.Doc for Python and aligning code with Word’s document model, you can generate editable, well-structured Word files that remain stable as content and layout requirements evolve. This approach is especially suitable for backend services, reporting pipelines, and document automation systems.
For scenarios involving large documents or document conversion requirements, a licensed version is required.
Parse HTML in Python: Read Strings, Files & Web URLs
When it comes to working with web content and documents, the ability to parse HTML in Python is an essential skill for developers across various domains. HTML parsing involves extracting meaningful information from HTML documents, manipulating content, and processing web data efficiently. Whether you're working on web scraping projects, data extraction tasks, content analysis, or document processing, mastering HTML parsing techniques in Python can significantly enhance your productivity and capabilities.
In this guide, we'll explore how to effectively read HTML in Python using Spire.Doc for Python. You'll learn practical techniques for processing HTML content from strings, local files, and URLs, and implementing best practices for HTML parsing in your projects.
- Why Parse HTML in Python?
- Getting Started: Install HTML Parser in Python
- How Spire.Doc Parses HTML: Core Concepts
- Best Practices for Effective HTML Parsing
- Conclusion
Why Parse HTML in Python?
HTML (HyperText Markup Language) is the backbone of the web, used to structure and present content on websites. Parsing HTML enables you to:
- Extract specific data (text, images, tables, hyperlinks) from web pages or local files.
- Analyze content structure for trends, keywords, or patterns.
- Automate data collection for research, reporting, or content management.
- Clean and process messy HTML into structured data.
While libraries like BeautifulSoup excel at lightweight parsing, Spire.Doc for Python shines when you need to integrate HTML parsing with document creation or conversion. It offers a robust framework to parse and interact with HTML content as a structured document object model (DOM).
Getting Started: Install HTML Parser in Python
Before diving into parsing, you’ll need to install Spire.Doc for Python. The library is available via PyPI, making installation straightforward:
pip install Spire.Doc
This command installs the latest version of the library, along with its dependencies. Once installed, you’re ready to start parsing HTML.
How Spire.Doc Parses HTML: Core Concepts
At its core, Spire.Doc parses HTML by translating HTML’s tag-based structure into a hierarchical document model. This model is composed of objects that represent sections, paragraphs, and other elements, mirroring the original HTML’s organization. Let’s explore how this works in practice.
1. Parsing HTML Strings in Python
If you have a small HTML snippet (e.g., from an API response or user input), parse it directly from a string. This is great for testing or working with short, static HTML.
from spire.doc import *
from spire.doc.common import *
# Define HTML content as a string
html_string = """
<html>
<head>
<title>Sample HTML</title>
</head>
<body>
<h1>Main Heading</h1>
<p>This is a paragraph with <strong>bold text</strong>.</p>
<div>
<p>A nested paragraph inside a div.</p>
</div>
<ul>
<li>List item 1</li>
<li>List item 2</li>
<li>List item 3</li>
</ul>
</body>
</html>
"""
# Initialize a new Document object
doc = Document()
# Add a section and paragraph to the document
section = doc.AddSection()
paragraph = section.AddParagraph()
# Load HTML content from the string
paragraph.AppendHTML(html_string)
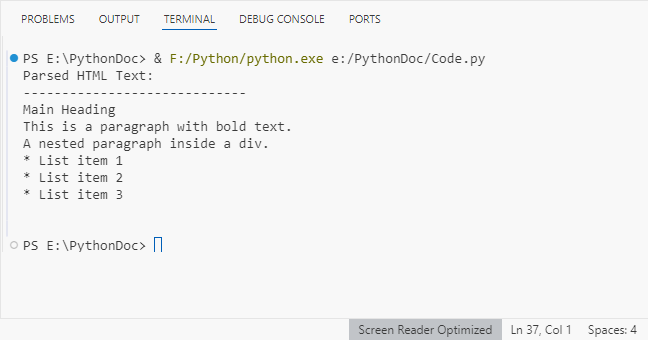
print("Parsed HTML Text:")
print("-----------------------------")
# Extract text content from the parsed HTML
parsed_text = doc.GetText()
# Print the result
print(parsed_text)
# Close the document
doc.Close()
How It Works:
- HTML String: We define a sample HTML snippet with common elements (headings, paragraphs, lists).
- Document Setup: Spire.Doc uses a Word-like structure (sections → paragraphs) to organize parsed HTML.
- Parse HTML:
AppendHTML()converts the string into structured Word elements (e.g.,<h1>becomes a "Heading 1" style,<ul>becomes a list). - Extract Text:
GetText()pulls clean, plain text from the parsed document (no HTML tags).
Output:
Spire.Doc supports exporting parsed HTML content to multiple formats such as TXT, Word via the SaveToFile() method.
2. Parsing HTML Files in Python
For local HTML files, Spire.Doc can load and parse them with a single method. This is useful for offline content (e.g., downloaded web pages, static reports).
from spire.doc import *
from spire.doc.common import *

# Define the path to your local HTML file
html_file_path = "example.html"

# Create a Document instance
doc = Document()

# Load and parse the HTML file
doc.LoadFromFile(html_file_path, FileFormat.Html)

# Analyze document structure
print(f"Document contains {doc.Sections.Count} section(s)")
print("-"*40)

# Process each section
for section_idx in range(doc.Sections.Count):
    section = doc.Sections.get_Item(section_idx)
    print(f"SECTION {section_idx + 1}")
    print(f"Section has {section.Body.Paragraphs.Count} paragraph(s)")
    print("-"*40)

    # Traverse through paragraphs in the current section
    for para_idx in range(section.Paragraphs.Count):
        para = section.Paragraphs.get_Item(para_idx)
        # Get paragraph style name and text content
        style_name = para.StyleName
        para_text = para.Text

        # Print paragraph information if content exists
        if para_text.strip():
            print(f"[{style_name}] {para_text}\n")

    # Add spacing between sections
    print()

# Close the document
doc.Close()
Key Features:
- Load Local Files:
LoadFromFile()reads the HTML file and auto-parses it into a Word structure. - Structure Analysis: Check the number of sections/paragraphs and their styles (critical for auditing content).
- Style Filtering: Identify headings (e.g., "Heading 1") or lists (e.g., "List Paragraph") to organize content.
Output:
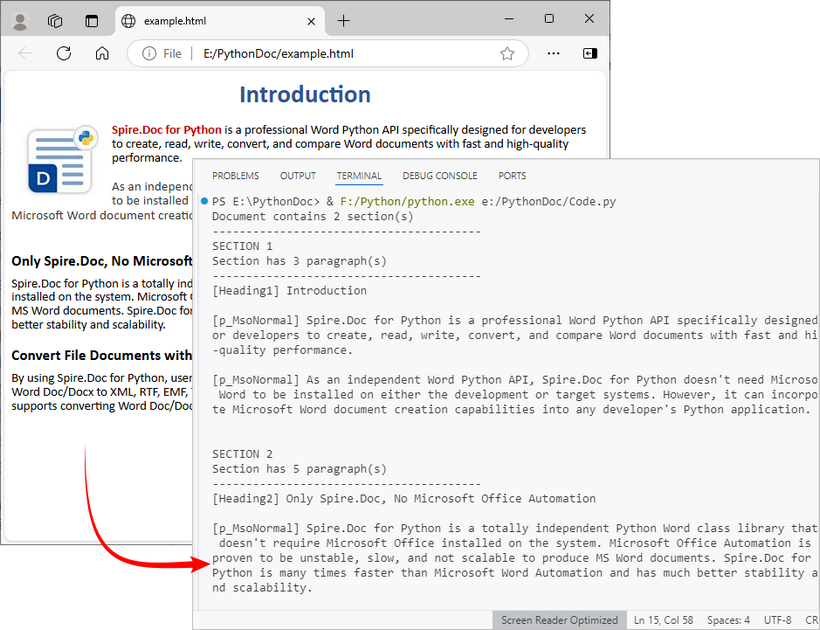
After loading the HTML file into the Document object, you can use Spire.Doc to extract specific elements like tables, hyperlinks from HTML.
3. Parsing a URL in Python
To parse HTML directly from a live web page, first fetch the HTML content from the URL using a library like requests, then pass the content to Spire.Doc for parsing. This is core for web scraping and real-time data extraction.
Install the Requests library via pip:
pip install requests
Python code to parse web page:
from spire.doc import *
from spire.doc.common import *
import requests

# Fetch html content from a URL
def fetch_html_from_url(url):
    """Fetch HTML from a URL and handle errors (e.g., 404, network issues)"""
    # Mimic a browser with User-Agent (avoids being blocked by websites)
    headers = {
        "User-Agent": "Mozilla/5.0 (Windows NT 10.0; Win64; x64)"
    }
    try:
        response = requests.get(url, headers=headers)
        response.raise_for_status()  # Raise exception for HTTP errors
        return response.text # Return raw HTML content
    except requests.exceptions.RequestException as e:
        raise Exception(f"Error fetching HTML: {str(e)}")

# Specify the target URL
url = "https://www.e-iceblue.com/privacypolicy.html"
print(f"Fetching HTML from: {url}")

# Get HTML content
html_content = fetch_html_from_url(url)

# Create document and insert HTML content into it
doc = Document()
section = doc.AddSection()
paragraph = section.AddParagraph()
paragraph.AppendHTML(html_content)

# Extract and display summary information
print("\nParsed Content Summary:")
print(f"Sections: {doc.Sections.Count}")
print("-------------------------------------------")

# Extract and display headings
print("Headings found:")
for para_idx in range(section.Paragraphs.Count):
    para = section.Paragraphs.get_Item(para_idx)

    if isinstance(para, Paragraph) and para.StyleName.startswith("Heading"):
        print(f"- {para.Text.strip()}")

# Close the document
doc.Close()
Steps Explained:
- Use requests.get() to fetch the HTML content from the URL.
- Pass the raw HTML text to Spire.Doc for parsing.
- Extract specific content (e.g., headings) from live pages for SEO audits or content aggregation.
Output:
Best Practices for Effective HTML Parsing
To optimize your HTML parsing workflow with Spire.Doc, follow these best practices:
- Validate Input Sources: Before parsing, check that HTML content (strings or files) is accessible and not corrupted. This reduces parsing errors:
import os

html_file = "data.html"
if os.path.exists(html_file):
    doc.LoadFromFile(html_file, FileFormat.Html)
else:
    print(f"Error: File '{html_file}' not found.")
- Handle Exceptions: Wrap parsing operations in try-except blocks to catch catch errors (e.g., missing files, invalid HTML):
try:
    doc.LoadFromFile("sample.html", FileFormat.Html)
except Exception as e:
    print(f"Error loading HTML: {e}")
- Optimize for Large Files: For large HTML files, consider loading content in chunks or disabling non-essential parsing features to improve performance.
- Clean Extracted Data: Use Python’s string methods (e.g., strip(), replace()) to remove extra whitespace or unwanted characters from extracted text.
- Keep the Library Updated: Regularly update Spire.Doc with
pip install --upgrade Spire.Docto benefit from improved parsing logic and bug fixes.
Conclusion
Python makes HTML parsing accessible for all skill levels. Whether you’re working with HTML strings, local files, or remote URLs, the combination of Requests (for fetching) and Spire.Doc (for structuring) simplifies complex tasks like web scraping and content extraction.
By following the examples and best practices in this guide, you’ll turn unstructured HTML into actionable, organized data in minutes. To unlock the full potential of Spire.Doc for Python, you can request a 30-day trial license here.
Creating Word Documents with Python: A Step-By-Step Guide

Automating the creation of Word documents is a powerful way to generate reports, and produce professional-looking files. With Python, you can utilize various libraries for this purpose, and one excellent option is Spire.Doc for Python, specifically designed for handling Word documents.
This guide will provide a clear, step-by-step process for creating Word documents in Python using Spire.Doc. We’ll cover everything from setting up the library to adding formatted text, images, tables, and more. Whether you're generating reports, invoices, or any other type of document, thes techniques will equip you with the essential tools to enhance your workflow effectively.
Table of Contents:
- What's Sprie.Doc for Python?
- Set Up Spire.Doc in Your Python Project
- Step 1: Create a Blank Word Document
- Step 2: Add Formatted Text (Headings, Paragraphs)
- Step 3: Insert Images to a Word Document
- Step 4: Create and Format Tables
- Step 5: Add Numbered or Bulleted Lists
- Best Practices for Word Document Creation in Python
- FAQs
- Conclusion
What's Spire.Doc for Python?
Spire.Doc is a powerful library for creating, manipulating, and converting Word documents in Python. It enables developers to generate professional-quality documents programmatically without needing Microsoft Word. Here are some key features:
- Supports Multiple Formats : Works with DOCX, DOC, RTF, and HTML.
- Extensive Functionalities : Add text, images, tables, and charts.
- Styling and Formatting : Apply various styles for consistent document appearance.
- User-Friendly API: Simplifies automation of document generation processes.
- Versatile Applications : Ideal for generating reports, invoices, and other documents.
With Spire.Doc, you have the flexibility and tools to streamline your Word document creation tasks effectively.
Set Up Spire.Doc in Your Python Project
To get started with Spire.Doc in your Python project, follow these simple steps:
- Install Spire.Doc : First, you need to install the Spire.Doc library. You can do this using pip. Open your terminal or command prompt and run the following command:
pip install spire.doc
- Import the Library : Once installed, import the Spire.Doc module in your Python script to access its functionalities. You can do this with the following import statement:
from spire.doc import *
from spire.doc.common import *
With the setup complete, you can begin writing your Python code to create Word documents according to your needs.
Step 1: Create a Blank Word Document in Python
The first step in automating Word document creation is to create a blank document. To begin with, we create a Document object, which serves as the foundation of our Word document. We then add a section to organize content, and set the page size to A4 with 60-unit margins . These configurations are crucial for ensuring proper document layout and readability.
Below is the code to initialize a document and set up the page configuration:
# Create a Document object
doc = Document()

# Add a section
section = doc.AddSection()

# Set page size and page margins
section.PageSetup.PageSize = PageSize.A4()
section.PageSetup.Margins.All = 60

# Save the document
doc.SaveToFile("BlankDocument.docx")
doc.Dispose
Step 2: Add Formatted Text (Headings, Paragraphs)
1. Add Title, Headings, Paragraphs
In this step, we add text content by first creating paragraphs using the AddParagraph method, followed by inserting text with the AppendText method.
Different paragraphs can be styled using various BuiltInStyle options, such as Title , Heading1 , and Normal , allowing for quick generation of document elements. Additionally, the TextRange.CharacterFormat property can be used to adjust the font, size, and other styles of the text, ensuring a polished and organized presentation.
Below is the code to insert and format these elements:
# Add a title
title_paragraph = section.AddParagraph()
textRange = title_paragraph.AppendText("My First Document")
title_paragraph.ApplyStyle(BuiltinStyle.Title)
textRange.CharacterFormat.FontName = "Times New Properties"
textRange.CharacterFormat.FontSize = 24

# Add a heading
heading_paragraph = section.AddParagraph()
textRange = heading_paragraph.AppendText("This Is Heading1")
heading_paragraph.ApplyStyle(BuiltinStyle.Heading1)
textRange.CharacterFormat.FontName = "Times New Properties"
textRange.CharacterFormat.FontSize = 16

# Add a paragraph
normal_paragraph = section.AddParagraph()
textRange = normal_paragraph .AppendText("This is a sample paragraph.")
normal_paragraph .ApplyStyle(BuiltinStyle.Normal)
textRange.CharacterFormat.FontName = "Times New Properties"
textRange.CharacterFormat.FontSize = 12
2. Apply Formatting to Paragraph
To ensure consistent formatting across multiple paragraphs, we can create a ParagraphStyle that defines key properties such as font attributes (name, size, color, boldness) and paragraph settings (spacing, indentation, alignment) within a single object. This style can then be easily applied to the selected paragraphs for uniformity.
Below is the code to define and apply the paragraph style:
# Defined paragraph style
style = ParagraphStyle(doc)
style.Name = "paraStyle"
style.CharacterFormat.FontName = "Arial"
style.CharacterFormat.FontSize = 13
style.CharacterFormat.TextColor = Color.get_Red()
style.CharacterFormat.Bold = True
style.ParagraphFormat.AfterSpacing = 12
style.ParagraphFormat.BeforeSpacing = 12
style.ParagraphFormat.FirstLineIndent = 4
style.ParagraphFormat.LineSpacing = 10
style.ParagraphFormat.HorizontalAlignment = HorizontalAlignment.Left
doc.Styles.Add(style)

# Apply the style to the specific paragraph
normal_paragraph.ApplyStyle("paraStyle")
You may also like: How to Convert Text to Word and Word to Text in Python
Step 3: Insert Images to a Word Document
1. Insert an Image
In this step, we add an image to our document, allowing for visual enhancements that complement the text. We begin by creating a paragraph to host the image and then proceed to insert the desired image file usingthe Paragraph.AppendPicture method. After the image is inserted, we can adjust its dimensions and alignment to ensure it fits well within the document layout.
Below is the code to insert and format the image:
# Add a paragraph
paragraph = section.AddParagraph()

# Insert an image
picture = paragraph.AppendPicture("C:\\Users\\Administrator\\Desktop\\logo.png")

# Scale the image dimensions
picture.Width = picture.Width * 0.9
picture.Height = picture.Height * 0.9

# Set text wrapping style
picture.TextWrappingStyle = TextWrappingStyle.TopAndBottom

# Center-align the image horizontally
picture.HorizontalAlignment = HorizontalAlignment.Center
2. Position Image at Precise Location
To gain precise control over the positioning of images within your Word document, you can adjust both the horizontal and vertical origins and specify the image's coordinates in relation to these margins. This allows for accurate placement of the image, ensuring it aligns perfectly with the overall layout of your document.
Below is the code to set the image's position.
picture.HorizontalOrigin = HorizontalOrigin.LeftMarginArea
picture.VerticalOrigin = VerticalOrigin.TopMarginArea
picture.HorizontalPosition = 180.0
picture.VerticalPosition = 165.0
Note : Absolute positioning does not apply when using the Inline text wrapping style.
Step 4: Create and Format Tables
In this step, we will create a table within the document and customize its appearance and functionality. This includes defining the table's structure, adding header and data rows, and setting formatting options to enhance readability.
Steps for creating and customizing a table in Word:
- Add a Table : Use the Section.AddTablemethod to create a new table.
- Specify Table Data : Define the data that will populate the table.
- Set Rows and Columns : Specify the number of rows and columns with the Table.ResetCells method.
- Access Rows and Cells : Retrieve a specific row using Table.Rows[rowIndex] and a specific cell using TableRow.Cells[cellIndex] .
- Populate the Table : Add paragraphs with text to the designated cells.
- Customize Appearance : Modify the table and cell styles through the Table.TableFormat and TableCell.CellFormat properties.
The following code demonstrates how to add a teble when creating Word documents in Python:
# Add a table
table = section.AddTable(True)

# Specify table data
header_data = ["Header 1", "Header 2", "Header 3"]
row_data = [["Row 1, Col 1", "Row 1, Col 2", "Row 1, Col 3"],
            ["Row 2, Col 1", "Row 2, Col 2", "Row 2, Col 3"]]

# Set the row number and column number of table
table.ResetCells(len(row_data) + 1, len(header_data))

# Set the width of table
table.PreferredWidth = PreferredWidth(WidthType.Percentage, int(100))

# Get header row
headerRow = table.get_Item(0)
headerRow.IsHeader = True
headerRow.Height = 23
headerRow.RowFormat.BackColor = Color.get_DarkBlue()  # Header color

# Fill the header row with data and set the text formatting
for i in range(len(header_data)):
    headerRow.get_Item(i).CellFormat.VerticalAlignment = VerticalAlignment.Middle
    paragraph = headerRow.get_Item(i).AddParagraph()
    paragraph.Format.HorizontalAlignment = HorizontalAlignment.Center
    txtRange = paragraph.AppendText(header_data[i])
    txtRange.CharacterFormat.Bold = True
    txtRange.CharacterFormat.FontSize = 15
    txtRange.CharacterFormat.TextColor = Color.get_White()  # White text color

# Fill the rest rows with data and set the text formatting
for r in range(len(row_data)):
    dataRow = table.Rows.get_Item(r + 1)
    dataRow.Height = 20
    dataRow.HeightType = TableRowHeightType.Exactly

    for c in range(len(row_data[r])):
        dataRow.Cells[c].CellFormat.VerticalAlignment = VerticalAlignment.Middle
        paragraph = dataRow.Cells[c].AddParagraph()
        paragraph.Format.HorizontalAlignment = HorizontalAlignment.Center
        txtRange = paragraph.AppendText(row_data[r][c])
        txtRange.CharacterFormat.FontSize = 13

# Alternate row color
for j in range(1, table.Rows.Count):
    if j % 2 == 0:
        row2 = table.Rows[j]
        for f in range(row2.Cells.Count):
            row2.Cells[f].CellFormat.BackColor = Color.get_LightGray()  # Alternate row color

# Set the border of table
table.TableFormat.Borders.BorderType = BorderStyle.Single
table.TableFormat.Borders.LineWidth = 1.0
table.TableFormat.Borders.Color = Color.get_Black()
You may also like: How to Create Tables in Word Documents in Python
Step 5: Add Numbered or Bulleted Lists
In this step, we create and apply both numbered and bulleted lists to enhance the document's organization. Spire.Doc offers the ListStyle class to define and manage different types of lists with customizable formatting options. Once created, these styles can be applied to any paragraph in the document, ensuring a consistent look across all list items.
Steps for generating numbered/bulleted lists in Word:
- Define the List Style : Initialize a ListStyle for the numbered or bulleted list, specifying properties such as name, pattern type, and text position.
- Add the List Style to Document : Use the Document.ListStyles.Add() method to incorporate the new list style into the document's styles collection.
- Create List Items : For each item, create a paragraph and apply the corresponding list style using the Paragraph.ListFormat.ApplyStyle() method.
- Format Text Properties : Adjust font size and type for each item to ensure consistency and readability.
Below is the code to generate numbered and bulleted lists:
# Create a numbered list style
listStyle = ListStyle(doc, ListType.Numbered)
listStyle.Name = "numberedList"
listStyle.Levels[0].PatternType = ListPatternType.Arabic
listStyle.Levels[0].TextPosition = 60;
doc.ListStyles.Add(listStyle)

# Create a numbered list
for item in ["First item", "Second item", "Third item"]:
    paragraph = section.AddParagraph()
    textRange = paragraph.AppendText(item)
    textRange.CharacterFormat.FontSize = 13
    textRange.CharacterFormat.FontName = "Times New Roman"
    paragraph.ListFormat.ApplyStyle("numberedList")

# Create a bulleted list style
listStyle = ListStyle(doc, ListType.Bulleted)
listStyle.Name = "bulletedList"
listStyle.Levels[0].BulletCharacter = "\u00B7"
listStyle.Levels[0].CharacterFormat.FontName = "Symbol"
listStyle.Levels[0].TextPosition = 20
doc.ListStyles.Add(listStyle)

# Create a bulleted list
for item in ["Bullet item one", "Bullet item two", "Bullet item three"]:
    paragraph = section.AddParagraph()
    textRange = paragraph.AppendText(item)
    textRange.CharacterFormat.FontSize = 13
    textRange.CharacterFormat.FontName = "Times New Roman"
paragraph.ListFormat.ApplyStyle("bulletedList")
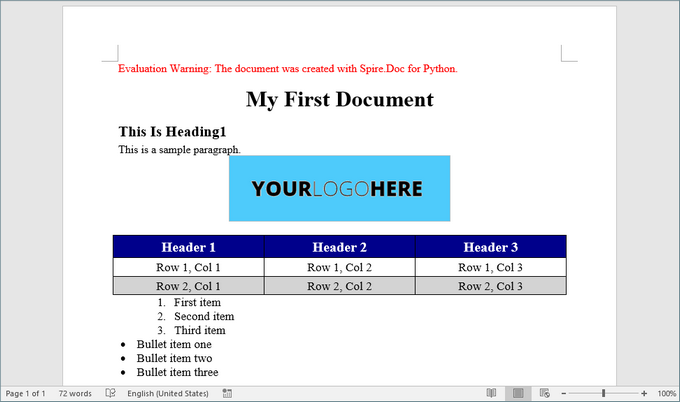
Here’s a screenshot of the Word document created using the code snippets provided above:
Best Practices for Word Document Creation in Python
- Reuse Styles : Define paragraph and list styles upfront to maintain consistency.
- Modular Code : Break document generation into functions (e.g., add_heading(), insert_table()) for reusability.
- Error Handling : Validate file paths and inputs to avoid runtime errors.
- Performance Optimization: Dispose of document objects (doc.Dispose()) to free resources.
- Use Templates : For complex documents, create MS Word templates with placeholders and replace them programmatically to save development time.
By implementing these practices, you can streamline document automation, reduce manual effort, and ensure professional-quality outputs.
FAQs
Q1: Does Spire.Doc support adding headers and footers to a Word document?
Yes, you can add and customize headers and footers, including page numbers, images, and custom text.
Q2. Can I generate Word documents on a server without Microsoft Office installed?
Yes, Spire.Doc works without Office dependencies, making it ideal for server-side automation.
Q3: Can I create Word documents from a template using Spire.Doc?
Of course, you can. Refer to the tutorial: Create Word Documents from Templates with Python
Q4: Can I convert Word documents to other formats using Spire.Doc?
Yes, Spire.Doc supports converting Word documents to various formats, including PDF, HTML, and plain text.
Q5. Can Spire.Doc edit existing Word documents?
Yes, Spire.Doc supports reading, editing, and saving DOCX/DOC files programmatically. Check out this documentation: How to Edit or Modify Word Documents in Pyhton
Conclusion
In this article, we've explored how to create Word documents in Python using the Spire.Doc library, highlighting its potential to enhance productivity while enabling the generation of highly customized and professional documents. By following the steps outlined in this guide, you can fully leverage Spire.Doc, making your document creation process both efficient and straightforward.
As you implement best practices and delve into the library's extensive functionalities, you'll discover that automating document generation significantly reduces manual effort, allowing you to concentrate on more critical tasks. Embrace the power of Python and elevate your document creation capabilities today!
Read Word DOC or DOCX Files in Python - Extract Text, Images, Tables and More

Reading Word documents in Python is a common task for developers who work with document automation, data extraction, or content processing. Whether you're working with modern .docx files or legacy .doc formats, being able to open, read, and extract content like text, tables, and images from Word files can save time and streamline your workflows.
While many Python libraries support .docx, reading .doc files—the older binary format—can be more challenging. Fortunately, there are reliable methods for handling both file types in Python.
In this tutorial, you'll learn how to read Word documents (.doc and .docx) in Python using the Spire.Doc for Python library. We'll walk through practical code examples to extract text, images, tables, comments, lists, and even metadata. Whether you're building an automation script or a full document parser, this guide will help you work with Word files effectively across formats.
Table of Contents
- Why Read Word Documents Programmatically in Python?
- Install the Library for Parsing Word Documents in Python
- Read Text from Word DOC or DOCX in Python
- Read Specific Elements from a Word Document in Python
- Conclusion
- FAQs
Why Read Word Documents Programmatically in Python?
Reading Word files using Python allows for powerful automation of content processing tasks, such as:
- Extracting data from reports, resumes, or forms.
- Parsing and organizing content into databases or dashboards.
- Converting or analyzing large volumes of Word documents.
- Integrating document reading into web apps, APIs, or back-end systems.
Programmatic reading eliminates manual copy-paste workflows and ensures consistent and scalable results.
Install the Library for Parsing Word Documents in Python
To read .docx and .doc files in Python, you need a library that can handle both formats. Spire.Doc for Python is a versatile and easy-to-use library that lets you extract text, images, tables, comments, lists, and metadata from Word documents. It runs independently of Microsoft Word, so Office installation is not required.
To get started, install Spire.Doc easily with pip:
pip install Spire.Doc
Read Text from Word DOC or DOCX in Python
Extracting text from Word documents is a common requirement in many automation and data processing tasks. Depending on your needs, you might want to read the entire content or focus on specific sections or paragraphs. This section covers both approaches.
Get Text from Entire Document
When you need to retrieve the complete textual content of a Word document — for tasks like full-text indexing or simple content export — you can use the Document.GetText() method. The following example demonstrates how to load a Word file, extract all text, and save it to a file:
from spire.doc import *

# Load the Word .docx or .doc file
document = Document()
document.LoadFromFile("sample.docx")

# Get all text
text = document.GetText()

# Save to a text file
with open("extracted_text.txt", "w", encoding="utf-8") as file:
    file.write(text)

document.Close()

Get Text from Specific Section or Paragraph
Many documents, such as reports or contracts, are organized into multiple sections. Extracting text from a specific section enables targeted processing when you need content from a particular part only. By iterating through the paragraphs of the selected section, you can isolate the relevant text:
from spire.doc import *

# Load the Word .docx or .doc file
document = Document()
document.LoadFromFile("sample.docx")

# Access the desired section
section = document.Sections[0]

# Get text from the paragraphs of the section
with open("paragraphs_output.txt", "w", encoding="utf-8") as file:
    for paragraph in section.Paragraphs:
        file.write(paragraph.Text + "\n")

document.Close()
Read Specific Elements from a Word Document in Python
Beyond plain text, Word documents often include rich content like images, tables, comments, lists, metadata, and more. These elements can easily be programmatically accessed and extracted.
Extract Images
Word documents often embed images like logos, charts, or illustrations. To extract these images:
- Traverse each paragraph and its child objects.
- Identify objects of type DocPicture.
- Retrieve the image bytes and save them as separate files.
from spire.doc import *
import os

# Load the Word document
document = Document()
document.LoadFromFile("sample.docx")

# Create a list to store image byte data
images = []

# Iterate over sections
for s in range(document.Sections.Count):
    section = document.Sections.get_Item(s)

    # Iterate over paragraphs
    for p in range(section.Paragraphs.Count):
        paragraph = section.Paragraphs.get_Item(p)

        # Iterate over child objects
        for c in range(paragraph.ChildObjects.Count):
            obj = paragraph.ChildObjects[c]
            # Extract image data
            if isinstance(obj, DocPicture):
                picture = obj
                # Get image bytes
                dataBytes = picture.ImageBytes
                # Store in the list
                images.append(dataBytes)

# Create the output directory if it doesn't exist
output_folder = "ExtractedImages"
os.makedirs(output_folder, exist_ok=True)

# Save each image from byte data
for i, item in enumerate(images):
    fileName = f"Image-{i+1}.png"
    with open(os.path.join(output_folder, fileName), 'wb') as imageFile:
        imageFile.write(item)

# Close the document
document.Close()
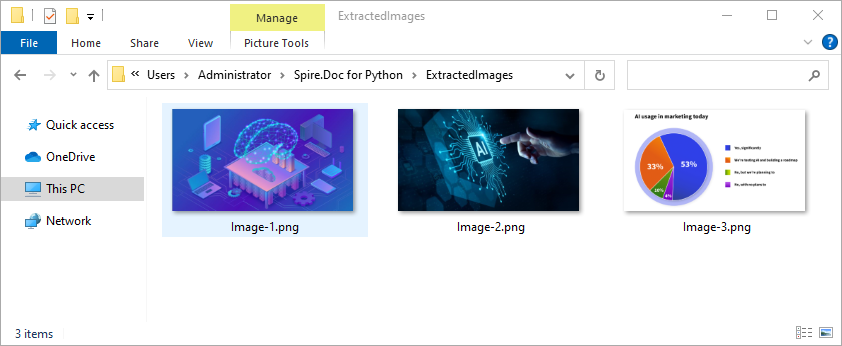
Get Table Data
Tables organize data such as schedules, financial records, or lists. To extract all tables and their content:
- Loop through tables in each section.
- Loop through rows and cells in each table.
- Traverse over each cell’s paragraphs and combine their texts.
- Save the extracted table data in a readable text format.
from spire.doc import *
import os

# Load the Word document
document = Document()
document.LoadFromFile("tables.docx")

# Ensure output directory exists
output_dir = "output/Tables"
os.makedirs(output_dir, exist_ok=True)

# Loop through each section
for s in range(document.Sections.Count):
    section = document.Sections.get_Item(s)
    tables = section.Tables

    # Loop through each table in the section
    for i in range(tables.Count):
        table = tables.get_Item(i)
        table_data = ""

        # Loop through each row
        for j in range(table.Rows.Count):
            row = table.Rows.get_Item(j)

            # Loop through each cell
            for k in range(row.Cells.Count):
                cell = row.Cells.get_Item(k)
                cell_text = ""

                # Combine text from all paragraphs in the cell
                for p in range(cell.Paragraphs.Count):
                    para_text = cell.Paragraphs.get_Item(p).Text
                    cell_text += para_text + " "

                table_data += cell_text.strip()

                # Add tab between cells (except after the last cell)
                if k < row.Cells.Count - 1:
                    table_data += "\t"
            table_data += "\n"

        # Save the table data to a separate text file
        output_path = os.path.join(output_dir, f"WordTable_{s+1}_{i+1}.txt")
        with open(output_path, "w", encoding="utf-8") as output_file:
            output_file.write(table_data)

# Close the document
document.Close()
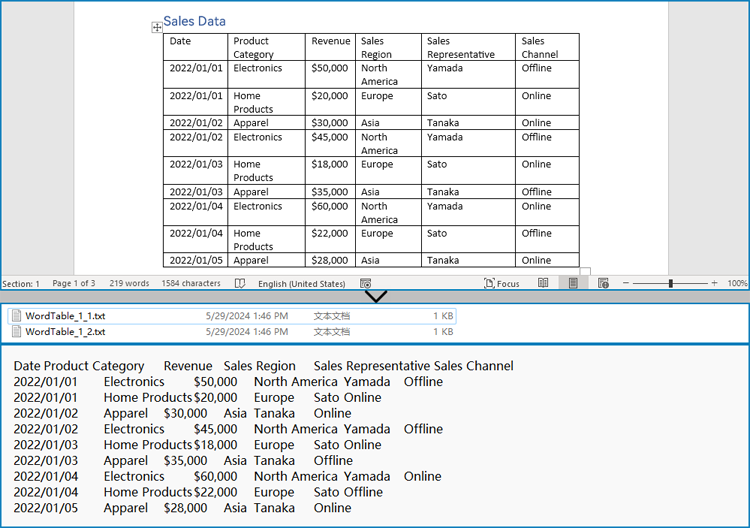
Read Lists
Lists are frequently used to structure content in Word documents. This example identifies paragraphs formatted as list items and writes the list marker together with the text to a file.
from spire.doc import *

# Load the Word document
document = Document()
document.LoadFromFile("sample.docx")

# Open a text file for writing the list items
with open("list_items.txt", "w", encoding="utf-8") as output_file:

    # Iterate over sections
    for s in range(document.Sections.Count):
        section = document.Sections.get_Item(s)

        # Iterate over paragraphs
        for p in range(section.Paragraphs.Count):
            paragraph = section.Paragraphs.get_Item(p)

            # Check if the paragraph is a list
            if paragraph.ListFormat.ListType != ListType.NoList:
                # Write the combined list marker and paragraph text to file
                output_file.write(paragraph.ListText + paragraph.Text + "\n")

# Close the document
document.Close()
Extract Comments
Comments are typically used for collaboration and feedback in Word documents. This code retrieves all comments, including the author and content, and saves them to a file with clear formatting for later review or audit.
from spire.doc import *

# Load the Word .docx or .doc document
document = Document()
document.LoadFromFile("sample.docx")

# Open a text file to save comments
with open("extracted_comments.txt", "w", encoding="utf-8") as output_file:

    # Iterate over the comments
    for i in range(document.Comments.Count):
        comment = document.Comments.get_Item(i)

        # Write comment header with comment number
        output_file.write(f"Comment {i + 1}:\n")

        # Write comment author
        output_file.write(f"Author: {comment.Format.Author}\n")

        # Extract full comment text by concatenating all paragraph texts
        comment_text = ""
        for j in range(comment.Body.Paragraphs.Count):
            paragraph = comment.Body.Paragraphs[j]
            comment_text += paragraph.Text + "\n"

        # Write the comment text
        output_file.write(f"Content: {comment_text.strip()}\n")

        # Add a blank line between comments
        output_file.write("\n")

# Close the document
document.Close()
Retrieve Metadata (Document Properties)
Metadata provides information about the document such as author, title, creation date, and modification date. This code extracts common built-in properties for reporting or cataloging purposes.
from spire.doc import *

# Load the Word .docx or .doc document
document = Document()
document.LoadFromFile("sample.docx")

# Get the built-in document properties
props = document.BuiltinDocumentProperties

# Open a text file to write the properties
with open("document_properties.txt", "w", encoding="utf-8") as output_file:
    output_file.write(f"Title: {props.Title}\n")
    output_file.write(f"Author: {props.Author}\n")
    output_file.write(f"Subject: {props.Subject}\n")
    output_file.write(f"Created: {props.CreateDate}\n")
    output_file.write(f"Modified: {props.LastSaveDate}\n")

# Close the document
document.Close()
Conclusion
Reading both .doc and .docx Word documents in Python is fully achievable with the right tools. With Spire.Doc, you can:
- Read text from the entire document, any section or paragraph.
- Extract tables and process structured data.
- Export images embedded in the document.
- Extract comments and lists from the document.
- Work with both modern and legacy Word formats without extra effort.
Try Spire.Doc today to simplify your Word document parsing workflows in Python!
FAQs
Q1: How do I read a Word DOC or DOCX file in Python?
A1: Use a Python library like Spire.Doc to load and extract content from Word files.
Q2: Do I need Microsoft Word installed to use Spire.Doc?
A2: No, it works without any Office installation.
Q3: Can I generate or update Word documents with Spire.Doc?
A3: Yes, Spire.Doc not only allows you to read and extract content from Word documents but also provides powerful features to create, modify, and save Word files programmatically.
Get a Free License
To fully experience the capabilities of Spire.Doc for Python without any evaluation limitations, you can request a free 30-day trial license.
Python: Add, Extract and Remove Custom Document Properties in Word Documents
Custom document properties are user-defined fields within a Word document that store specific metadata. Unlike standard properties, such as title, author, or subject, which are predefined by Microsoft Word, these custom properties provide users with the flexibility to define and manage additional metadata fields according to their specific requirements. In this article, we will demonstrate how to add, extract, and remove custom document properties in Word documents in Python using Spire.Doc for Python.
- Add Custom Document Properties to Word in Python
- Extract Custom Document Properties in Word in Python
- Remove Custom Document Properties from Word in Python
Install Spire.Doc for Python
This scenario requires Spire.Doc for Python and plum-dispatch v1.7.4. They can be easily installed in your Windows through the following pip command.
pip install Spire.Doc
If you are unsure how to install, please refer to this tutorial: How to Install Spire.Doc for Python on Windows
Add Custom Document Properties to Word in Python
Spire.Doc for Python provides the CustomDocumentProperties.Add() method, which enables developers to assign different types of values, such as text, time, numeric, or yes or no, to the custom properties of a Word document. The steps below demonstrate how to add custom document properties with different types of values to a Word document using Spire.Doc for Python.
- Initialize an instance of the Document class.
- Load a Word document using the Document.LoadFromFile() method.
- Get the custom document properties of the document through the Document.CustomDocumentProperties property.
- Add custom document properties with different data types to the document using the CustomDocumentProperties.Add(name, value) method.
- Save the result document using the Document.SaveToFile() method.
- Python
from spire.doc import *
from spire.doc.common import *

# Create a Document object
document = Document()
# Load a Word document
document.LoadFromFile("Example.docx")

# Add custom document properties with different types of values to the document
customProperties = document.CustomDocumentProperties
customProperties.Add("DocumentCategory", String("Technical Report"))
customProperties.Add("RevisionNumber", Int32(5))
customProperties.Add("LastReviewedDate", DateTime(2024, 12, 1, 0, 0, 0, 0))
customProperties.Add("RequiresFollowUp", Boolean(False))

# Save the result document
document.SaveToFile("AddCustomDocumentProperties.docx", FileFormat.Docx2016)
document.Close()

Extract Custom Document Properties in Word in Python
Extracting custom document properties allows developers to access metadata for further analysis, reporting, or integration into other applications. Spire.Doc for Python makes it simple to retrieve the details of these properties using the CustomDocumentProperty.Name and CustomDocumentProperty.Value properties. The detailed steps are as follows.
- Initialize an instance of the Document class.
- Load a Word document using the Document.LoadFromFile() method.
- Get the custom document properties of the document through the Document.CustomDocumentProperties property.
- Iterate through the custom document properties.
- Extract the name and value of each custom document property.
- Save the extracted data to a text file.
- Python
from spire.doc import *
from spire.doc.common import *

# Create a Document object
document = Document()
# Load a Word document
document.LoadFromFile("AddCustomDocumentProperties.docx")

# Open a text file to save the extracted custom properties
with open("ExtractedCustomProperties.txt", "w") as output_file:
    # Iterate through all custom document properties
    for i in range(document.CustomDocumentProperties.Count):
        # Extract the name and value of each custom property
        property_name = document.CustomDocumentProperties.get_Item(i).Name
        property_value = document.CustomDocumentProperties.get_Item(i).Value

        # Write the property details to the text file
        output_file.write(f"{property_name}: {property_value}\n")

document.Close()
Remove Custom Document Properties from Word in Python
Cleaning up custom document properties is crucial for maintaining confidentiality, reducing file size, and ensuring metadata does not contain outdated or irrelevant information. Spire.Doc for Python allows developers to remove custom properties from a Word document using the DocumentProperties.Remove() method. The detailed steps are as follows.
- Initialize an instance of the Document class.
- Load a Word document using the Document.LoadFromFile() method.
- Get the custom document properties of the document through the Document.CustomDocumentProperties property.
- Iterate through the custom document properties.
- Remove each custom document property through its name using the DocumentProperties.Remove() method.
- Save the result document using the Document.SaveToFile() method.
- Python
from spire.doc import *
from spire.doc.common import *

# Create a Document object
document = Document()
# Load a Word document
document.LoadFromFile("AddCustomDocumentProperties.docx")

# Iterate through all custom document properties
customProperties = document.CustomDocumentProperties
for i in range(customProperties.Count - 1, -1, -1):
    # Remove each custom document property by its name
    customProperties.Remove(customProperties[i].Name)

# Save the result document
document.SaveToFile("RemoveCustomDocumentProperties.docx", FileFormat.Docx2016)
document.Close()
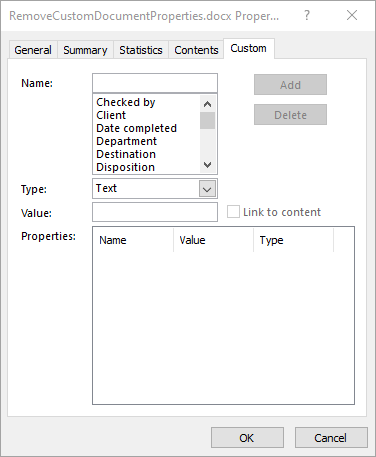
Apply for a Temporary License
If you'd like to remove the evaluation message from the generated documents, or to get rid of the function limitations, please request a 30-day trial license for yourself.
Python: Detect and Remove VBA Macros in Word Documents
Macros in Word documents are small programs created using the Visual Basic for Applications (VBA) language. They are designed to automate repetitive tasks or add advanced functionality. While these macros can be powerful tools for improving productivity, they also pose security risks if used maliciously. Therefore, it is essential to detect and remove potentially harmful macros from Word documents, especially when handling files from untrusted sources. In this article, we will explain how to detect and remove VBA macros in Word documents in Python using Spire.Doc for Python.
- Detect Whether a Word Document Contains VBA Macros in Python
- Remove VBA Macros from a Word Document in Python
Install Spire.Doc for Python
This scenario requires Spire.Doc for Python and plum-dispatch v1.7.4. They can be easily installed in your Windows through the following pip command.
pip install Spire.Doc
If you are unsure how to install, please refer to this tutorial: How to Install Spire.Doc for Python on Windows
Detect Whether a Word Document Contains VBA Macros in Python
Spire.Doc for Python provides the Document.IsContainMacro property, enabling developers to check whether a Word document contains VBA macros easily. This property returns a boolean value: True indicates that the document includes one or more VBA macros, while False indicates that no macros are present in the document.
The following steps explain how to detect whether a Word document contains VBA macros using Spire.Doc for Python:
- Initialize an instance of the Document class.
- Load a Word document using the Document.LoadFromFile() method.
- Detect whether the document includes VBA macros using the Document.IsContainMacro property.
- Python
from spire.doc import *
from spire.doc.common import *

# Initialize an instance of the Document class
document = Document()
# Load a Word document
document.LoadFromFile("Test.docm")

# Detect if the document contains VBA macros
if document.IsContainMacro:
    print("The document contains VBA macros.")
else:
    print("The document does not contain any VBA macros.")

document.Close()

Remove VBA Macros from a Word Document in Python
Developers can remove all macros from a Word document at once by using the Document.ClearMacros() method. The detailed steps are as follows.
- Initialize an instance of the Document class.
- Load a Word document using the Document.LoadFromFile() method.
- Remove all macros from the document using the Document.ClearMacros() method.
- Save the result document using the Document.SaveToFile() method.
- Python
from spire.doc import *
from spire.doc.common import *

# Initialize an instance of the Document class
document = Document()
# Load a Word document
document.LoadFromFile("Test.docm")

# Remove all VBA macros from the document
document.ClearMacros()

# Save the modified document to a docm file
document.SaveToFile("RemoveMacros.docm", FileFormat.Docm2016)
document.Close()
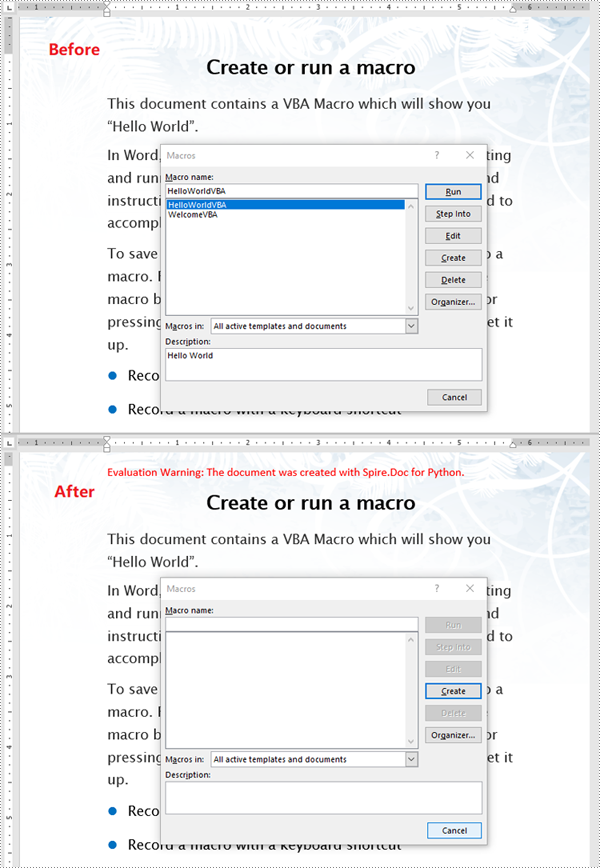
Apply for a Temporary License
If you'd like to remove the evaluation message from the generated documents, or to get rid of the function limitations, please request a 30-day trial license for yourself.
Python: Edit or Modify a Word Document
Programmatic editing of Word documents involves using code to alter or modify the contents of these documents. This approach enables automation and customization, making it particularly advantageous for handling large document collections. Through the use of Spire.Doc library, developers can perform a wide range of operations, including text manipulation, formatting changes, and the addition of images or tables.
The following sections will demonstrate how to edit or modify a Word document in Python using Spire.Doc for Python.
- Modify Text in a Word Document
- Change Formatting of Text in a Word Document
- Add New Elements to a Word Document
- Remove Paragraphs from a Word Document
Install Spire.Doc for Python
This scenario requires Spire.Doc for Python and plum-dispatch v1.7.4. They can be easily installed in your Windows through the following pip command.
pip install Spire.Doc
If you are unsure how to install, please refer to this tutorial: How to Install Spire.Doc for Python on Windows
Modify Text in a Word Document in Python
In order to alter the content of a paragraph, the initial step is to obtain the desired paragraph from a specific section through the use of the Section.Paragraphs[index] property. Following this, you can replace the existing text with the new content by assigning it to the Paragraph.Text property of the chosen paragraph.
Here are the steps to edit text in a Word document with Python:
- Create a Document object.
- Load a Word file from the given file path.
- Get a specific section using Document.Sections[index] property.
- Get a specific paragraph using Section.Paragraphs[index] property.
- Reset the text of the paragraph using Paragraph.Text property.
- Save the updated document to a different Word file.
- Python
from spire.doc import *
from spire.doc.common import *

# Create a Document object
document = Document()

# Load an existing Word file
document.LoadFromFile("C:\\Users\\Administrator\\Desktop\\input.docx");

# Get a specific section
section = document.Sections[0]

# Get a specific paragraph
paragraph = section.Paragraphs[0]

# Modify the text of the paragraph
paragraph.Text = "The text has been modified"

# Save the document to a different Word file
document.SaveToFile("output/ModifyText.docx", FileFormat.Docx)

# Dispose resource
document.Dispose()
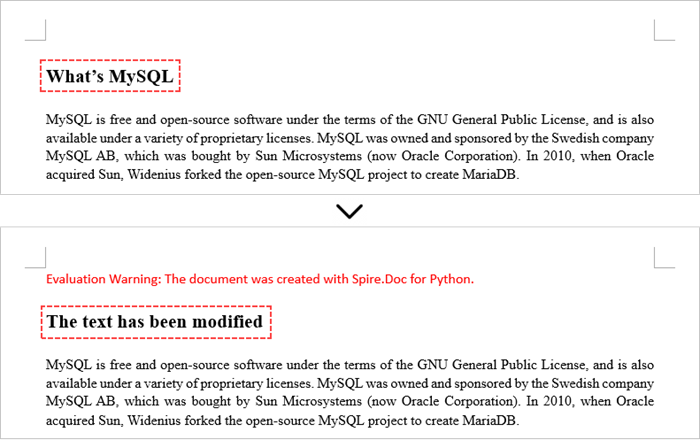
Change Formatting of Text in a Word Document in Python
To alter the text appearance of a particular paragraph, you first need to obtain the specified paragraph. Next, go through its child objects to find the individual text ranges. The formatting of each text range can then be updated using the TextRange.CharacterFormat property.
The steps to change text formatting in a Word document are as follows:
- Create a Document object.
- Load a Word file from the given file path.
- Get a specific section using Document.Sections[index] property.
- Get a specific paragraph using Section.Paragraphs[index] property.
- Iterate through the child objects in the paragraph.
- Determine if a child object is a text range.
- Get a specific text range.
- Reset the text formatting using TextRange.CharacterFormat property.
- Save the updated document to a different Word file.
- Python
from spire.doc import *
from spire.doc.common import *

# Create an object of Document
doc = Document()

# Load a Word document
doc.LoadFromFile("C:\\Users\\Administrator\\Desktop\\input.docx")

# Get a specific section
section = document.Sections.get_Item(0)

# Get a specific paragraph
paragraph = section.Paragraphs.get_Item(0)

# Iterate through the child objects in the paragraph
for i in range(paragraph.ChildObjects.Count):

    # Determine if a child object is text range
    if isinstance(paragraph.ChildObjects[i], TextRange):

        # Get a specific text range
        textRange = paragraph.ChildObjects[i]

        # Reset font name
        textRange.CharacterFormat.FontName = "Corbel Light"

        # Reset font size
        textRange.CharacterFormat.FontSize = 11.0

        # Reset text color
        textRange.CharacterFormat.TextColor = Color.get_Blue()

        # Apply italic to the text range
        textRange.CharacterFormat.Italic = True

# Save the document to a different Word file
doc.SaveToFile("output/ChangeFormatting.docx", FileFormat.Docx2019)

# Dispose resource
doc.Dispose()
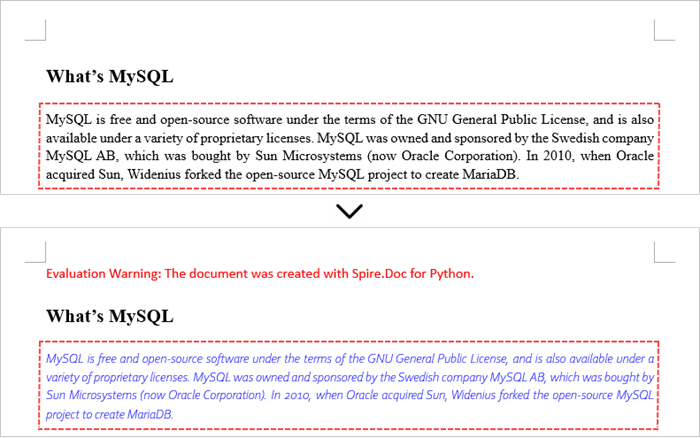
Add New Elements to a Word Document in Python
In a Word document, most elements—such as text, images, lists, and charts—are fundamentally organized around the concept of a paragraph. To insert a new paragraph into a specific section, use the Section.AddParagraph() method.
After creating the new paragraph, you can add various elements to it by leveraging the methods and properties of the Paragraph object.
The steps to add new elements (text and images) to a Word document are as follows:
- Create a Document object.
- Load a Word file from the given file path.
- Get a specific section through Document.Sections[index] property.
- Add a paragraph to the section using Section.AddParagraph() method.
- Add text to the paragraph using Paragraph.AppendText() method.
- Add an image to the paragraph using Paragraph.AppendPicture() method.
- Save the updated document to a different Word file.
- Python
from spire.doc import *
from spire.doc.common import *

# Create an object of Document
doc = Document()

# Load a Word document
doc.LoadFromFile("C:\\Users\\Administrator\\Desktop\\Input.docx")

# Get the last section
lastSection = doc.LastSection

# Add a paragraph to the section
paragraph = lastSection.AddParagraph()

# Add an image to the paragraph
picture = paragraph.AppendPicture("C:\\Users\\Administrator\\Desktop\\logo.png");

# Set text wrap style
picture.TextWrappingStyle = TextWrappingStyle.TopAndBottom

# Add text to the paragraph
paragraph.AppendText("This text and the image above are added by Spire.Doc for Python.")

# Create a paragraph style
style = ParagraphStyle(doc)
style.Name = "FontStyle"
style.CharacterFormat.FontName = "Times New Roman"
style.CharacterFormat.FontSize = 12
doc.Styles.Add(style)

# Apply the style to the paragraph
paragraph.ApplyStyle(style.Name)

# Save the document to a different Word file
doc.SaveToFile("output/AddNewElements.docx", FileFormat.Docx2019)

# Dispose resource
doc.Dispose()
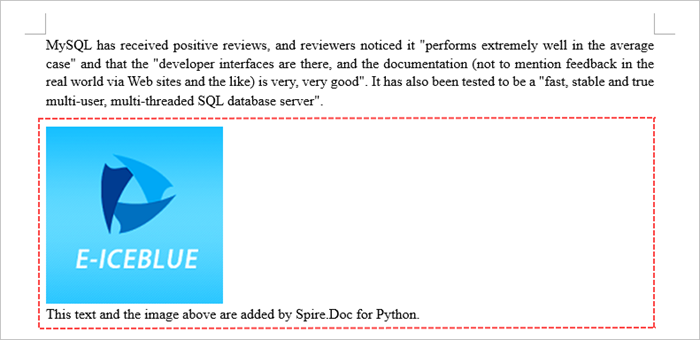
Remove Paragraphs from a Word Document in Python
To eliminate a specific paragraph from a document, simply invoke the ParagraphCollection.RemoveAt() method and supply the index of the paragraph you intend to delete.
The steps to remove paragraphs from a Word document are as follows:
- Create a Document object.
- Load a Word file from the given file path.
- Get a specific section through Document.Sections[index] property.
- Remove a specific paragraph from the section using Section.Paragraphs.RemoveAt() method.
- Save the updated document to a different Word file.
- Python
from spire.doc import *
from spire.doc.common import *

# Create an object of Document
doc = Document()

# Load a Word document
doc.LoadFromFile("C:\\Users\\Administrator\\Desktop\\input.docx")

# Get a specific section
section = doc.Sections[0]

# Remove a specific paragraph
section.Paragraphs.RemoveAt(0)

# Save the document to a different Word file
doc.SaveToFile("output/RemoveParagraph.docx", FileFormat.Docx);

# Dispose resource
doc.Dispose()
Apply for a Temporary License
If you'd like to remove the evaluation message from the generated documents, or to get rid of the function limitations, please request a 30-day trial license for yourself.
Python: Add, Modify or Remove Word Page Borders
In Microsoft Word, adding, adjusting, and removing page borders is an effective strategy to enhance the aesthetics and professionalism of your documents. The inclusion of borders can lend a page a more refined and dignified appearance, particularly suitable for formal contexts such as reports, certificates, or invitations, conveying a sense of meticulous elegance. By customizing the color, pattern, and thickness of borders, users can ingeniously integrate personal creativity according to the document theme, crafting a unique design style that makes the content more captivating. Conversely, opting to remove borders can achieve a streamlined page layout, effectively eliminating unnecessary visual clutter—a practice especially fitting for those pursuing minimalist aesthetics or aiming to save on printing costs. This article will introduce how to add, modify, or remove Word page borders in Python projects using Spire.Doc for Python.
Install Spire.Doc for Python
This scenario requires Spire.Doc for Python and plum-dispatch v1.7.4. They can be easily installed in your VS Code through the following pip command.
pip install Spire.Doc
Python Add Word Page Borders
When setting page borders in a Word document using the Spire.Doc library, you can achieve this by invoking the Section.PageSetup.Borders property. Here are the detailed steps:
- Create a Document object.
- Load a document using the Document.LoadFromFile() method.
- Use a for loop to iterate through each section (Section) in the document.
- Apply borders to all pages by setting the Section.PageSetup.PageBordersApplyType property to PageBordersApplyType.AllPages.
- Set the page border style using the Secton.PageSetup.Borders.BorderType(BorderStyle.DashDotStroker) method.
- Define the border width using the Section.PageSetup.Borders.LineWidth(2) method.
- Set the border color using the Section.PageSetup.Borders.Color(Color.get_Orange()) method.
- Set the distance between the border and the page content using the Section.PageSetup.Borders.Top.Space, Bottom.Space, Left.Space, and Right.Space properties.
- Save the changes to a Word document using the Document.SaveToFile() method.
- Python
from spire.doc import *
from spire.doc.common import *

# Create a Document object
doc = Document()

# Load an existing Word document
doc.LoadFromFile("Sample01.docx")

# Iterate through all sections in the document
for i in range(doc.Sections.Count):
    # Set borders for all pages in the current section
    doc.Sections.get_Item(i).PageSetup.PageBordersApplyType = PageBordersApplyType.AllPages

    # Set border style
    doc.Sections.get_Item(i).PageSetup.Borders.BorderType(BorderStyle.DashDotStroker)

    # Set border width
    doc.Sections.get_Item(i).PageSetup.Borders.LineWidth(2)

    # Set border color
    doc.Sections.get_Item(i).PageSetup.Borders.Color(Color.get_Orange())

    # Set the distance between the top border and page content
    doc.Sections.get_Item(i).PageSetup.Borders.Top.Space = 20.0

    # Set the distance between the bottom border and page content
    doc.Sections.get_Item(i).PageSetup.Borders.Bottom.Space = 20.0

    # Set the distance between the left border and page content
    doc.Sections.get_Item(i).PageSetup.Borders.Left.Space = 20.0

    # Set the distance between the right border and page content
    doc.Sections.get_Item(i).PageSetup.Borders.Right.Space = 20.0

# Save the modified document to a new file
doc.SaveToFile("AddWordPageBorders.docx", FileFormat.Docx)

# Release resources used by the Document object
doc.Dispose()
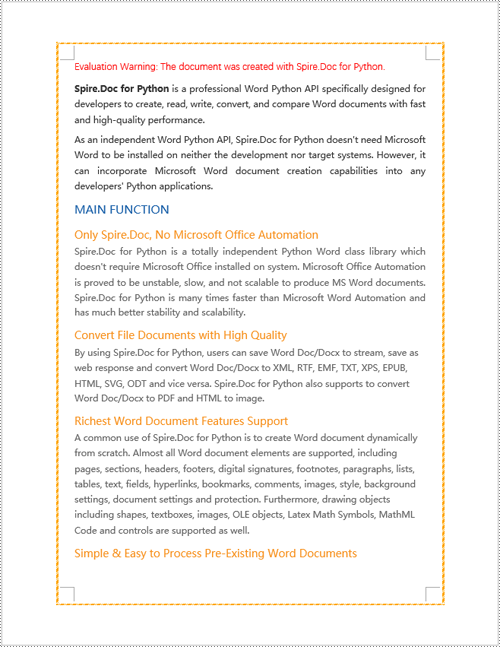
Python Modify Word Page Borders
Leveraging the Spire.Doc library, we can extensively customize the page borders in Word documents, including the style, hue, width, and other visual attributes of the borders. By tweaking these properties, achieving the desired visual presentation becomes effortless. Here are the detailed steps:
- Create a Document object.
- Load a document using the Document.LoadFromFile() method.
- Retrieve the first section of the document using Document.Sections.get_Item(0).
- Alter the page border style using the Section.PageSetup.Borders.BorderType(BorderStyle.DoubleWave) method.
- Change the color of the page border with the Section.PageSetup.Borders.Color(Color.get_Orange()) method.
- Adjust the width of the page border through the Section.PageSetup.Borders.LineWidth(2) method.
- Save the changes to a Word document using the Document.SaveToFile() method.
- Python
from spire.doc import *
from spire.doc.common import *

# Create a Document object
doc = Document()

# Load an existing Word document
doc.LoadFromFile("Sample02.docx")

# Get the first section
section = doc.Sections.get_Item(0)

# Set border style
section.PageSetup.Borders.BorderType(BorderStyle.DoubleWave)

# Set border color
section.PageSetup.Borders.Color(Color.get_Orange())

# Set border width
section.PageSetup.Borders.LineWidth(2)

# Save the modified document to a new file
doc.SaveToFile("ModifyWordPageBorders.docx", FileFormat.Docx)

# Release resources occupied by the Document object
doc.Dispose()
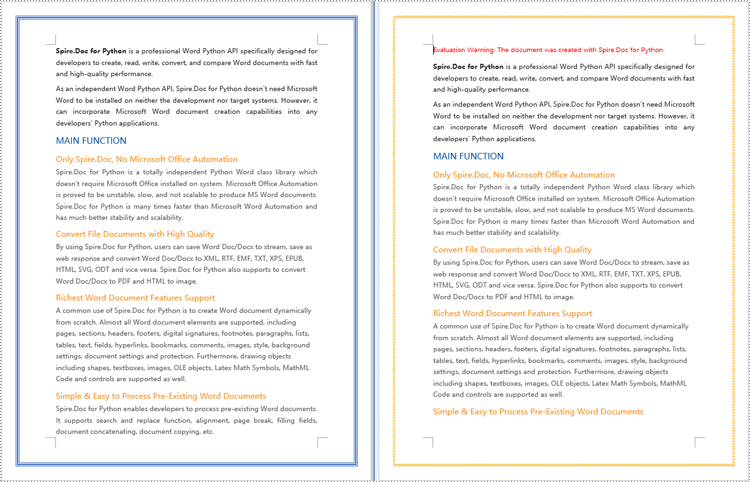
Python Remove Word Page Borders
To remove page borders in Word, you can use the Section.PageSetup.Borders.BorderType(BorderStyle.none) method. Here are the detailed steps:
- Create a Document object.
- Load a document using the Document.LoadFromFile() method.
- Use a for loop to iterate through each section (Section) in the document.
- Apply the Section.PageSetup.Borders.BorderType(BorderStyle.none) method to remove the page borders.
- Save the document using the Document.SaveToFile() method.
- Python
from spire.doc import *
from spire.doc.common import *

# Create a Document object
doc = Document()

# Load an existing Word document
doc.LoadFromFile("Sample02.docx")

# Iterate through all sections in the document
for i in range(doc.Sections.Count):
    # Remove page borders
    doc.Sections.get_Item(i).PageSetup.Borders.BorderType(BorderStyle.none)

# Save the modified document to a new file
doc.SaveToFile("RemoveWordPageBorders.docx", FileFormat.Docx)

# Release the resources occupied by the Document object
doc.Dispose()
Apply for a Temporary License
If you'd like to remove the evaluation message from the generated documents, or to get rid of the function limitations, please request a 30-day trial license for yourself.
Python: Count Words, Pages, Characters, Paragraphs and Lines in Word
Various written documents, such as academic papers, reports, and legal materials, often have specific formatting guidelines that encompass word count, page count, and other essential metrics. Accurately measuring these elements is crucial as it ensures that your document adheres to the required standards and meets the expected quality benchmarks. In this article, we will explain how to count words, pages, characters, paragraphs, and lines in a Word document in Python using Spire.Doc for Python.
- Count Words, Pages, Characters, Paragraphs, and Lines in a Word Document in Python
- Count Words and Characters in a Specific Paragraph of a Word Document in Python
Install Spire.Doc for Python
This scenario requires Spire.Doc for Python. It can be easily installed in your Windows through the following pip commands.
pip install Spire.Doc
If you are unsure how to install, please refer to: How to Install Spire.Doc for Python on Windows
Count Words, Pages, Characters, Paragraphs, and Lines in a Word Document in Python
Spire.Doc for Python offers the BuiltinDocumentProperties class that empowers you to retrieve crucial information from your Word document. By utilizing this class, you can access a wealth of details, including the built-in document properties, as well as the number of words, pages, characters, paragraphs, and lines contained within the document.
The steps below explain how to get the number of words, pages, characters, paragraphs, and lines in a Word document in Python using Spire.Doc for Python:
- Create an object of the Document class.
- Load a Word document using the Document.LoadFromFile() method.
- Get the BuiltinDocumentProperties object using the Document.BuiltinDocumentProperties property.
- Get the number of words, characters, paragraphs, lines, and pages in the document using the WordCount, CharCount, ParagraphCount, LinesCount, PageCount properties of the BuiltinDocumentProperties class, and append the result to a list.
- Write the content of the list into a text file.
- Python
from spire.doc import *
from spire.doc.common import *

# Create an object of the Document class
doc = Document()
# Load a Word document
doc = Document("Input.docx")

# Create a list
sb = []

# Get the built-in properties of the document
properties = doc.BuiltinDocumentProperties

# Get the number of words, characters, paragraphs, lines, and pages and append the result to the list
sb.append("The number of words: " + str(properties.WordCount))
sb.append("The number of characters: " + str(properties.CharCount))
sb.append("The number of paragraphs: " + str(properties.ParagraphCount))
sb.append("The number of lines: " + str(properties.LinesCount))
sb.append("The number of pages: " + str(properties.PageCount))

# Save the data in the list to a text file
with open("result.txt", "w") as file:
file.write("\n".join(sb))

doc.Close()

Count Words and Characters in a Specific Paragraph of a Word Document in Python
In addition to retrieving the overall word count, page count, and other metrics for an entire Word document, you are also able to get the word count and character count for a specific paragraph by using the Paragraph.WordCount and Paragraph.CharCount properties.
The steps below explain how to get the number of words and characters of a paragraph in a Word document in Python using Spire.Doc for Python:
- Create an object of the Document class.
- Load a Word document using the Document.LoadFromFile() method.
- Get a specific paragraph using the Document.Sections[sectionIndex].Paragraphs[paragraphIndex] property.
- Get the number of words and characters in the paragraph using the Paragraph.WordCount and Paragraph.CharCount properties, and append the result to a list.
- Write the content of the list into a text file.
- Python
from spire.doc import *
from spire.doc.common import *

# Create an object of the Document class
doc = Document()
# Load a Word document
doc = Document("Input.docx")

# Get a specific paragraph
paragraph = doc.Sections.get_Item(0).Paragraphs.get_Item(0)

# Create a list
sb = []

# Get the number of words and characters in the paragraph and append the result to the list
sb.append("The number of words: " + str(paragraph.WordCount))
sb.append("The number of characters: " + str(paragraph.CharCount))

# Save the data in the list to a text file
with open("result.txt", "w") as file:
file.write("\n".join(sb))

doc.Close()

Apply for a Temporary License
If you'd like to remove the evaluation message from the generated documents, or to get rid of the function limitations, please request a 30-day trial license for yourself.