
Program Guide (96)
Children categories
The conversion from HTML to image allows you to capture the appearance and layout of the HTML content as a static image file. It can be useful for various purposes, such as generating website previews, creating screenshots, archiving web pages, or integrating HTML content into applications that primarily deal with images. In this article, you will learn how to convert an HTML file or an HTML string to an image in Python using Spire.Doc for Python.
Install Spire.Doc for Python
This scenario requires Spire.Doc for Python and plum-dispatch v1.7.4. They can be easily installed in your Windows through the following pip command.
pip install Spire.Doc
If you are unsure how to install, please refer to this tutorial: How to Install Spire.Doc for Python on Windows
Convert an HTML File to an Image in Python
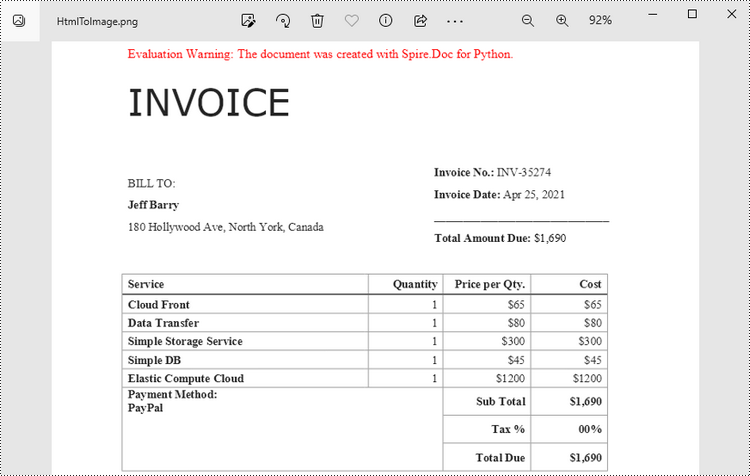
When an HTML file is loaded into the Document object using the Document.LoadFromFile() method, its contents are automatically rendered as the contents of a Word page. Then, a specific page can be saved as an image stream using the Document.SaveImageToStreams() method.
The following are the steps to convert an HTML file to an image with Python.
- Create a Document object.
- Load a HTML file using Document.LoadFromFile() method.
- Convert a specific page to an image stream using Document.SaveImageToStreams() method.
- Save the image stream as a PNG file using BufferedWriter.write() method.
- Python
from spire.doc import *
from spire.doc.common import *

# Create a Document object
document = Document()

# Load an HTML file
document.LoadFromFile("C:\\Users\\Administrator\\Desktop\\Sample.html", FileFormat.Html, XHTMLValidationType.none)

# Save the first page as an image stream
imageStream = document.SaveImageToStreams(0, ImageType.Bitmap)

# Convert the image stream as a PNG file
with open("output/HtmlToImage.png",'wb') as imageFile:
imageFile.write(imageStream.ToArray())
document.Close()
Convert an HTML String to an Image in Python
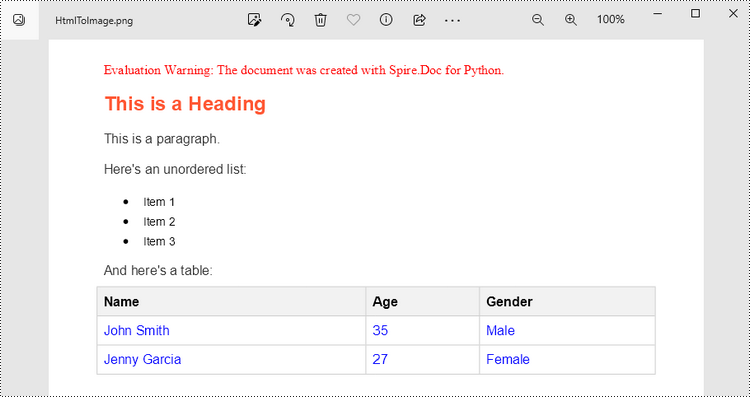
To render uncomplicated HTML strings (typically text and its formatting) as a Word page, you can utilize the Paragraph.AppendHTML() method. Afterwards, you can convert it to an image stream using the Document.SaveImageToStreams() method.
The following are the steps to convert an HTML string to an image in Python.
- Create a Document object.
- Add a section using Document.AddSection() method.
- Add a paragraph using Section.AddParagraph() method.
- Specify the HTML string, and add the it to the paragraph using Paragraph.AppendHTML() method.
- Convert a specific page to an image stream using Document.SaveImageToStreams() method.
- Save the image stream as a PNG file using BufferedWriter.write() method.
- Python
from spire.doc import *
from spire.doc.common import *

# Create a Document object
document = Document()

# Add a section to the document
sec = document.AddSection()

# Add a paragraph to the section
paragraph = sec.AddParagraph()

# Specify the HTML string
htmlString = """
<html>
<head>
    <title>HTML to Word Example</title>
    <style>
        body {
            font-family: Arial, sans-serif;
        }
        h1 {
            color: #FF5733;
            font-size: 24px;
            margin-bottom: 20px;
        }
        p {
            color: #333333;
            font-size: 16px;
            margin-bottom: 10px;
        }
        ul {
            list-style-type: disc;
            margin-left: 20px;
            margin-bottom: 15px;
        }
        li {
            font-size: 14px;
            margin-bottom: 5px;
        }
        table {
            border-collapse: collapse;
            width: 100%;
            margin-bottom: 20px;
        }
        th, td {
            border: 1px solid #CCCCCC;
            padding: 8px;
            text-align: left;
        }
        th {
            background-color: #F2F2F2;
            font-weight: bold;
        }
        td {
            color: #0000FF;
        }
    </style>
</head>
<body>
    <h1>This is a Heading</h1>
    <p>This is a paragraph.</p>
    <p>Here's an unordered list:</p>
    <ul>
        <li>Item 1</li>
        <li>Item 2</li>
        <li>Item 3</li>
    </ul>
    <p>And here's a table:</p>
    <table>
        <tr>
            <th>Name</th>
            <th>Age</th>
            <th>Gender</th>
        </tr>
        <tr>
            <td>John Smith</td>
            <td>35</td>
            <td>Male</td>
        </tr>
        <tr>
            <td>Jenny Garcia</td>
            <td>27</td>
            <td>Female</td>
        </tr>
    </table>
</body>
</html>
"""

# Append the HTML string to the paragraph
paragraph.AppendHTML(htmlString)

# Save the first page as an image stream
imageStream = document.SaveImageToStreams(0, ImageType.Bitmap)

# Convert the image stream as a PNG file
with open("output/HtmlToImage2.png",'wb') as imageFile:
    imageFile.write(imageStream.ToArray())
document.Close()
Get a Free License
To fully experience the capabilities of Spire.Doc for Python without any evaluation limitations, you can request a free 30-day trial license.
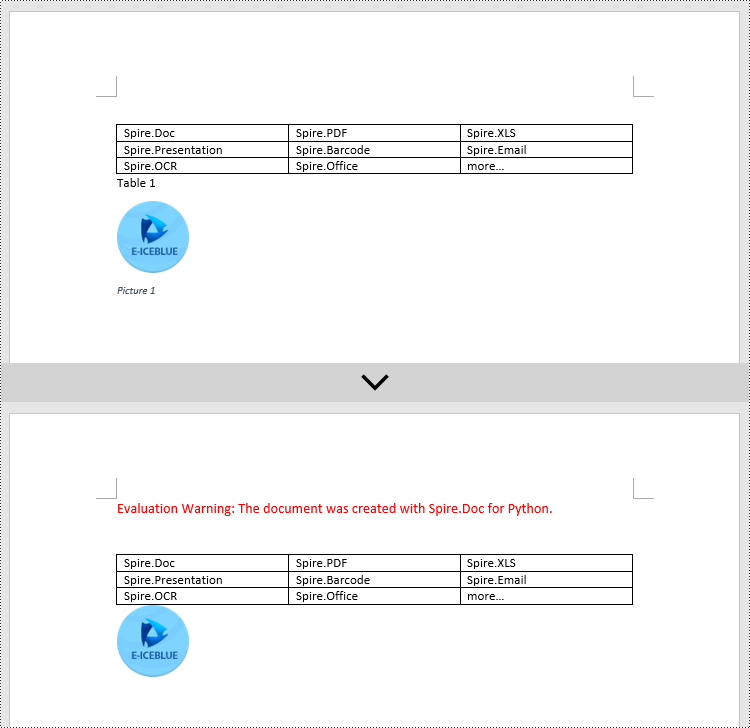
Captions play a significant role in Word documents by serving as markers, explanations, navigation aids, and accessibility features. They are crucial elements for creating professional, accurate, and user-friendly documents. Captions help improve the readability, usability, and accessibility of the document and are essential for understanding and effectively processing the document's content. This article will explain how to use Spire.Doc for Python to add or remove captions in Word documents using Python programs.
- Add Image Captions to a Word document in Python
- Add Table Captions to a Word document in Python
- Remove Captions from a Word document in Python
Install Spire.Doc for Python
This scenario requires Spire.Doc for Python and plum-dispatch v1.7.4. They can be easily installed in your Windows through the following pip command.
pip install Spire.Doc
If you are unsure how to install, please refer to this tutorial: How to Install Spire.Doc for Python on Windows
Add Image Captions to a Word document in Python
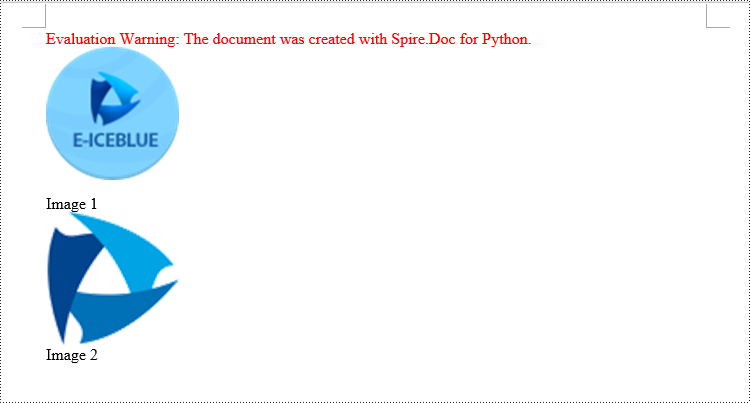
Spire.Doc for Python provides a convenient method to add captions to images. Simply call the DocPicture.AddCaption(self, name: str, numberingFormat: 'CaptionNumberingFormat', captionPosition: 'CaptionPosition') method to add a caption for the image. The detailed steps are as follows:
- Create an object of the Document class.
- Use the Document.AddSection() method to add a section.
- Add a paragraph using Section.AddParagraph() method.
- Use the Paragraph.AppendPicture(self ,imgFile:str) method to add a DocPicture image object to the paragraph.
- Use the DocPicture.AddCaption(self ,name:str,numberingFormat:'CaptionNumberingFormat',captionPosition:'CaptionPosition') method to add a caption with numbering format as CaptionNumberingFormat.Number.
- Set the Document.IsUpdateFields property to true to update all fields.
- Use the Document.SaveToFile() method to save the resulting document.
- Python
from spire.doc import *
from spire.doc.common import *

# Create a Word document object
document = Document()

# Add a section
section = document.AddSection()

# Add a new paragraph and add an image to it
pictureParagraphCaption = section.AddParagraph()
pictureParagraphCaption.Format.AfterSpacing = 10
pic1 = pictureParagraphCaption.AppendPicture("Data\\1.png")
pic1.Height = 100
pic1.Width = 100

# Add a caption to the image
format = CaptionNumberingFormat.Number
pic1.AddCaption("Image", format, CaptionPosition.BelowItem)

# Add another new paragraph and add an image to it
pictureParagraphCaption = section.AddParagraph()
pic2 = pictureParagraphCaption.AppendPicture("Data\\2.png")
pic2.Height = 100
pic2.Width = 100

# Add a caption to the image
pic2.AddCaption("Image", format, CaptionPosition.BelowItem)

# Update all fields in the document
document.IsUpdateFields = True

# Save the document as a docx file
result = "AddImageCaption.docx"
document.SaveToFile(result, FileFormat.Docx2016)

# Close the document object and release resources
document.Close()
document.Dispose()
Add Table Captions to a Word document in Python
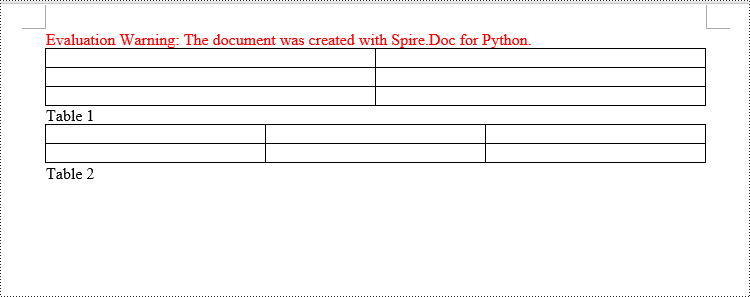
To facilitate the addition of captions to tables, Spire.Doc for Python also provides a convenient method similar to adding captions to images. You can use the Table.AddCaption(self, name:str, format:'CaptionNumberingFormat', captionPosition:'CaptionPosition') method to create a caption for the table. The following are the detailed steps:
- Create an object of the Document class.
- Use the Document.AddSection() method to add a section.
- Create a Table object and add it to the specified section in the document.
- Use the Table.ResetCells(self ,rowsNum:int,columnsNum:int) method to set the number of rows and columns in the table.
- Add a caption to the table using the Table.AddCaption(self ,name:str,format:'CaptionNumberingFormat',captionPosition:'CaptionPosition') method, specifying the caption numbering format as CaptionNumberingFormat.Number.
- Set the Document.IsUpdateFields property to true to update all fields.
- Use the Document.SaveToFile() method to save the resulting document.
- Python
from spire.doc import *
from spire.doc.common import *

# Create a Word document object
document = Document()

# Add a section
section = document.AddSection()

# Add a table
tableCaption = section.AddTable(True)
tableCaption.ResetCells(3, 2)

# Add a caption to the table
tableCaption.AddCaption("Table", CaptionNumberingFormat.Number, CaptionPosition.BelowItem)

# Add another table and caption to it
tableCaption = section.AddTable(True)
tableCaption.ResetCells(2, 3)
tableCaption.AddCaption("Table", CaptionNumberingFormat.Number, CaptionPosition.BelowItem)

# Update all fields in the document
document.IsUpdateFields = True

# Save the document as a docx file
result = "AddTableCaption.docx"
document.SaveToFile(result, FileFormat.Docx2016)

# Close the document object and release resources
document.Close()
document.Dispose()
Remove Captions from a Word document in Python
Spire.Doc for Python also supports removing captions from Word documents. Here are the detailed steps:
- Create an object of the Document class.
- Use the Document.LoadFromFile() method to load a Word document.
- Create a custom method, named detect_caption_paragraph(paragraph), to determine if a paragraph contains a caption.
- Iterate through all the Paragraph objects in the document using a loop and utilize the custom method, detect_caption_paragraph(paragraph), to identify and delete paragraphs that contain captions.
- Use the Document.SaveToFile() method to save the resulting document.
- Python
from spire.doc import *
from spire.doc.common import *

# Method to detect if a paragraph is a caption paragraph
def detect_caption_paragraph(paragraph):
    tag = False
    field = None

# Iterate through the child objects in the paragraph
    for i in range(len(paragraph.ChildObjects)):
        if paragraph.ChildObjects[i].DocumentObjectType == DocumentObjectType.Field:
            # Check if the child object is of Field type
            field = paragraph.ChildObjects[i]
            if field.Type == FieldType.FieldSequence:
                # Check if the Field type is FieldSequence, indicating a caption field type
                return True

    return tag

# Create a Word document object
document = Document()
# Load the sample.docx file
document.LoadFromFile("Data/sample.docx")

# Iterate through all sections
for i in range(len(document.Sections)):
    section = document.Sections.get_Item(i)

    # Iterate through paragraphs in reverse order within the section
    for j in range(len(section.Body.Paragraphs) - 1, -1, -1):
        # Check if the paragraph is a caption paragraph
        if detect_caption_paragraph(section.Body.Paragraphs[j]):
            # If it's a caption paragraph, remove it
            section.Body.Paragraphs.RemoveAt(j)

# Save the document after removing captions
result = "DeleteCaptions.docx"
document.SaveToFile(result, FileFormat.Docx2016)

# Close the document object and release resources
document.Close()
document.Dispose()
Apply for a Temporary License
If you'd like to remove the evaluation message from the generated documents, or to get rid of the function limitations, please request a 30-day trial license for yourself.
Page size refers to the dimensions of a document's page. It determines the width and height of the printable area and plays a crucial role in the overall layout and design of the document. Different types of documents may require specific page sizes, such as standard letter size (8.5 x 11 inches) for business letters or A4 size (210 x 297 mm) for international correspondence. Adjusting the page size ensures that your document is compatible with the intended output or presentation medium. In this article, we will demonstrate how to adjust the page size of a Word document in Python using Spire.Doc for Python.
- Adjust the Page Size of a Word Document to a Standard Page Size in Python
- Adjust the Page Size of a Word Document to a Custom Page Size in Python
Install Spire.Doc for Python
This scenario requires Spire.Doc for Python and plum-dispatch v1.7.4. They can be easily installed in your Windows through the following pip commands.
pip install Spire.Doc
If you are unsure how to install, please refer to this tutorial: How to Install Spire.Doc for Python on Windows
Adjust the Page Size of a Word Document to a Standard Page Size in Python
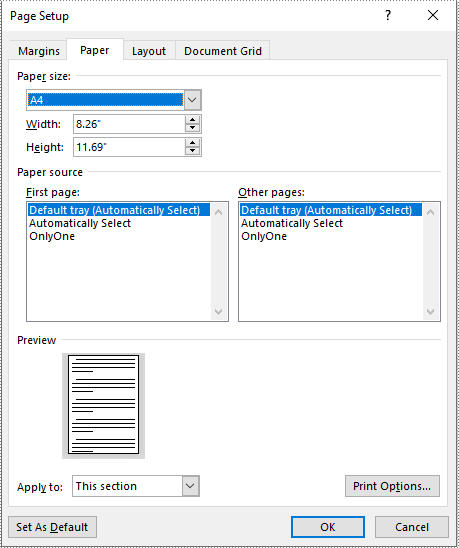
With Spire.Doc for Python, you can easily adjust the page sizes of Word documents to a variety of standard page sizes, such as A3, A4, A5, A6, B4, B5, B6, letter, legal, and tabloid. The following steps explain how to change the page size of a Word document to a standard page size using Spire.Doc for Python:
- Create an instance of the Document class.
- Load a Word document using the Document.LoadFromFile() method.
- Iterate through the sections in the document.
- Set the page size of each section to a standard page size, such as A4, by setting the Section.PageSetup.PageSize property to PageSize.A4().
- Save the result document using the Document.SaveToFile() method.
- Python
from spire.doc import *
from spire.doc.common import *

# Create an instance of the Document class
doc = Document()
# Load a Word document
doc.LoadFromFile("Input.docx")

# Iterate through the sections in the document
for i in range(doc.Sections.Count):
    section = doc.Sections.get_Item(i)
    # Change the page size of each section to A4
    section.PageSetup.PageSize = PageSize.A4()

# Save the result document
doc.SaveToFile("StandardSize.docx", FileFormat.Docx2016)
doc.Close()
Adjust the Page Size of a Word Document to a Custom Page Size in Python
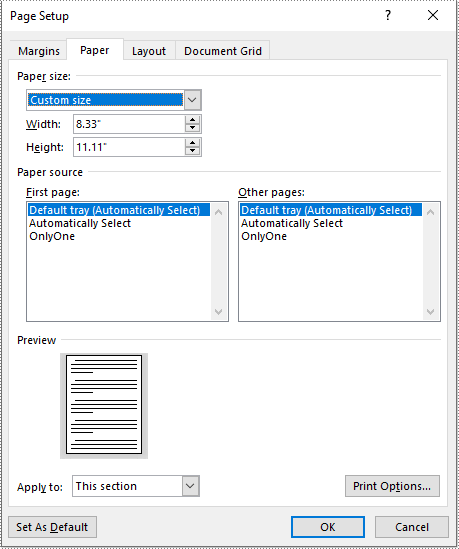
If you plan to print your document on paper with dimensions that don't match any standard paper size, you can change the page size of your document to a custom page size that matches the exact dimensions of the paper. The following steps explain how to change the page size of a Word document to a custom page size using Spire.Doc for Python:
- Create an instance of the Document class.
- Load a Word document using the Document.LoadFromFile() method.
- Create an instance of the SizeF class with customized dimensions.
- Iterate through the sections in the document.
- Set the page size of each section to a custom page size by assigning the SizeF instance to the Section.PageSetup.PageSize property.
- Save the result document using the Document.SaveToFile() method.
- Python
from spire.doc import *
from spire.doc.common import *

# Create an instance of the Document class
doc = Document()
# Load a Word document
doc.LoadFromFile("Input.docx")

# Create an instance of the SizeF class with customized dimensions
customSize = SizeF(600.0, 800.0)

# Iterate through the sections in the document
for i in range(doc.Sections.Count):
    section = doc.Sections.get_Item(i)
    # Change the page size of each section to the specified dimensions
    section.PageSetup.PageSize = customSize

# Save the result document
doc.SaveToFile("CustomSize.docx", FileFormat.Docx2016)
doc.Close()
Apply for a Temporary License
If you'd like to remove the evaluation message from the generated documents, or to get rid of the function limitations, please request a 30-day trial license for yourself.
Converting HTML to PDF in Python is a common need when you want to generate printable reports, preserve web content, or create offline documentation with consistent formatting. In this tutorial, you’ll learn how to convert HTML to PDF in Python— whether you're working with a local HTML file or a HTML string. If you're looking for a simple and reliable way to generate PDF files from HTML in Python, this guide is for you.
Install Spire.Doc to Convert HTML to PDF Easily
To convert HTML to PDF in Python, you’ll need a reliable library that supports HTML parsing and PDF rendering. Spire.Doc for Python is a powerful and easy-to-use HTML to PDF converter library that lets you generate PDF documents from HTML content — without relying on a browser, headless engine, or third-party tools.
Install via pip
You can install the library quickly with pip:
pip install spire.doc
Alternative: Manual Installation
You can also download the Spire.Doc package and perform a custom installation if you need more control over the environment.
Tip: Spire.Doc offers a free version suitable for small projects or evaluation purposes.
Once installed, you're ready to convert HTML to PDF in Python in just a few lines of code.
Convert HTML Files to PDF in Python
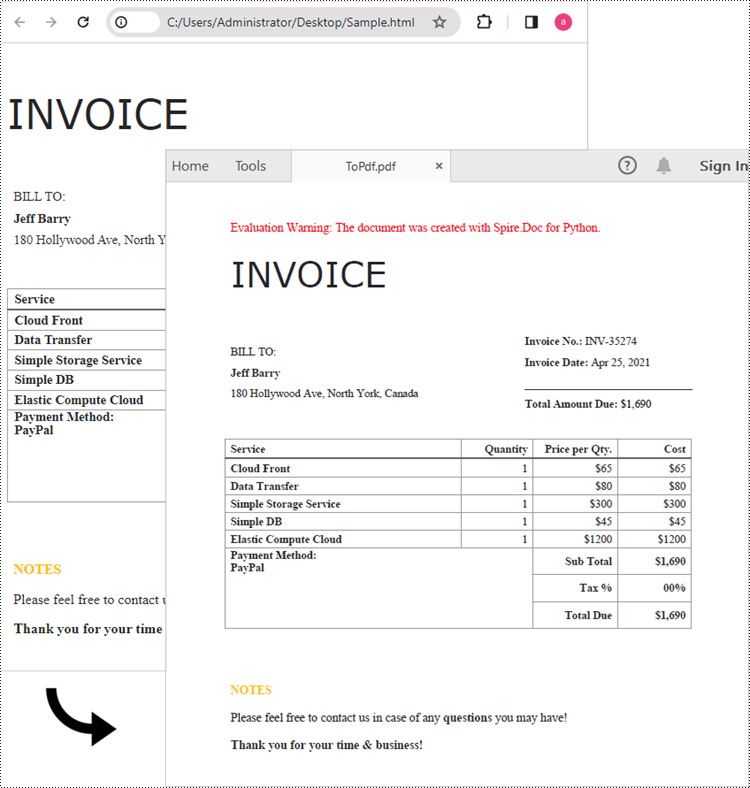
Spire.Doc for Python makes it easy to convert HTML files to PDF. The Document.LoadFromFile() method supports loading various file formats, including .html, .doc, and .docx. After loading an HTML file, you can convert it to PDF by calling Document.SaveToFile() method. Follow the steps below to convert an HTML file to PDF in Python using Spire.Doc.
Steps to convert an HTML file to PDF in Python:
- Create a Document object.
- Load an HTML file using Document.LoadFromFile() method.
- Convert it to PDF using Document.SaveToFile() method.
The following code shows how to convert an HTML file directly to PDF in Python:
from spire.doc import *
from spire.doc.common import *

# Create a Document object
document = Document()

# Load an HTML file
document.LoadFromFile("Sample.html", FileFormat.Html, XHTMLValidationType.none)

# Save the HTML file to a pdf file
document.SaveToFile("output/ToPdf.pdf", FileFormat.PDF)
document.Close()
Convert an HTML String to PDF in Python
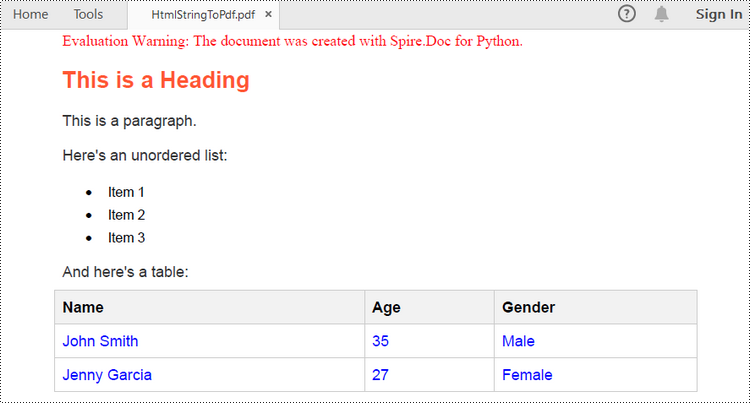
If you want to convert an HTML string to PDF in Python, Spire.Doc for Python provides a straightforward solution. For simple HTML content like paragraphs, text styles, and basic formatting, you can use the Paragraph.AppendHTML() method to insert the HTML into a Word document. Once added, you can save the document as a PDF using the Document.SaveToFile() method.
Here are the steps to convert an HTML string to a PDF file in Python.
- Create a Document object.
- Add a section using Document.AddSection() method and insert a paragraph using Section.AddParagraph() method.
- Specify the HTML string and add it to the paragraph using Paragraph.AppendHTML() method.
- Save the document as a PDF file using Document.SaveToFile() method.
Here's the complete Python code that shows how to convert an HTML string to a PDF:
from spire.doc import *
from spire.doc.common import *

# Create a Document object
document = Document()

# Add a section to the document
sec = document.AddSection()

# Add a paragraph to the section
paragraph = sec.AddParagraph()

# Specify the HTML string
htmlString = """
<html>
<head>
    <title>HTML to Word Example</title>
    <style>
        body {
            font-family: Arial, sans-serif;
        }
        h1 {
            color: #FF5733;
            font-size: 24px;
            margin-bottom: 20px;
        }
        p {
            color: #333333;
            font-size: 16px;
            margin-bottom: 10px;
        }
        ul {
            list-style-type: disc;
            margin-left: 20px;
            margin-bottom: 15px;
        }
        li {
            font-size: 14px;
            margin-bottom: 5px;
        }
        table {
            border-collapse: collapse;
            width: 100%;
            margin-bottom: 20px;
        }
        th, td {
            border: 1px solid #CCCCCC;
            padding: 8px;
            text-align: left;
        }
        th {
            background-color: #F2F2F2;
            font-weight: bold;
        }
        td {
            color: #0000FF;
        }
    </style>
</head>
<body>
    <h1>This is a Heading</h1>
    <p>This is a paragraph.</p>
    <p>Here's an unordered list:</p>
    <ul>
        <li>Item 1</li>
        <li>Item 2</li>
        <li>Item 3</li>
    </ul>
    <p>And here's a table:</p>
    <table>
        <tr>
            <th>Name</th>
            <th>Age</th>
            <th>Gender</th>
        </tr>
        <tr>
            <td>John Smith</td>
            <td>35</td>
            <td>Male</td>
        </tr>
        <tr>
            <td>Jenny Garcia</td>
            <td>27</td>
            <td>Female</td>
        </tr>
    </table>
</body>
</html>
"""

# Append the HTML string to the paragraph
paragraph.AppendHTML(htmlString)

# Save the document as a pdf file
document.SaveToFile("output/HtmlStringToPdf.pdf", FileFormat.PDF)
document.Close()
Customize the Conversion from HTML to PDF in Python
While converting HTML to PDF in Python is often straightforward, there are times when you need more control over the output. For example, you may want to set a password to protect the PDF document, or embed fonts to ensure consistent formatting across different devices. In this section, you’ll learn how to customize the HTML to PDF conversion using Spire.Doc for Python.
1. Set a Password to Protect the PDF
To prevent unauthorized viewing or editing, you can encrypt the PDF by specifying a user password and an owner password.
# Create a ToPdfParameterList object
toPdf = ToPdfParameterList()

# Set PDF encryption passwords
userPassword = "viewer"
ownerPassword = "E-iceblue"
toPdf.PdfSecurity.Encrypt(userPassword, ownerPassword, PdfPermissionsFlags.Default, PdfEncryptionKeySize.Key128Bit)

# Save as PDF with password protection
document.SaveToFile("/HtmlToPdfWithPassword.pdf", toPdf)
2. Embed Fonts to Preserve Formatting
To ensure the PDF displays correctly across all devices, you can embed all fonts used in the document.
# Create a ToPdfParameterList object
ppl = ToPdfParameterList()
ppl.IsEmbeddedAllFonts = True

# Save as PDF with embedded fonts
document.SaveToFile("/HtmlToPdfWithEmbeddedFonts.pdf", ppl)
These options give you finer control when you convert HTML to PDF in Python, especially for professional document sharing or long-term storage scenarios.
The Conclusion
Converting HTML to PDF in Python becomes simple and flexible with Spire.Doc for Python. Whether you're handling static HTML files or dynamic HTML strings, or need to secure and customize your PDFs, this library provides everything you need — all in just a few lines of code. Get a free 30-day license and start converting HTML to high-quality PDF documents in Python today!
FAQs
Q1: Can I convert an HTML file to PDF in Python? Yes. Using Spire.Doc for Python, you can convert a local HTML file to PDF with just a few lines of code.
Q2: How do I convert HTML to PDF in Chrome? While Chrome allows manual "Save as PDF", it’s not suitable for batch or automated workflows. If you're working in Python, Spire.Doc provides a better solution for programmatically converting HTML to PDF.
Q3: How do I convert HTML to PDF without losing formatting? To preserve formatting:
- Use embedded or inline CSS (not external files).
- Use absolute URLs for images and resources.
- Embed fonts using Spire.Doc options like IsEmbeddedAllFonts(True).
EPUB, short for Electronic Publication, is a widely used standard format for eBooks. It is an open and free format based on web standards, enabling compatibility with various devices and software applications. EPUB files are designed to provide a consistent reading experience across different platforms, including e-readers, tablets, smartphones, and computers. By converting your Word document to EPUB, you can ensure that your content is accessible and enjoyable to a broader audience, regardless of the devices and software they use. In this article, we will demonstrate how to convert Word documents to EPUB format in Python using Spire.Doc for Python.
Install Spire.Doc for Python
This scenario requires Spire.Doc for Python and plum-dispatch v1.7.4. They can be easily installed in your Windows through the following pip commands.
pip install Spire.Doc
If you are unsure how to install, please refer to this tutorial: How to Install Spire.Doc for Python on Windows
Convert Word to EPUB in Python
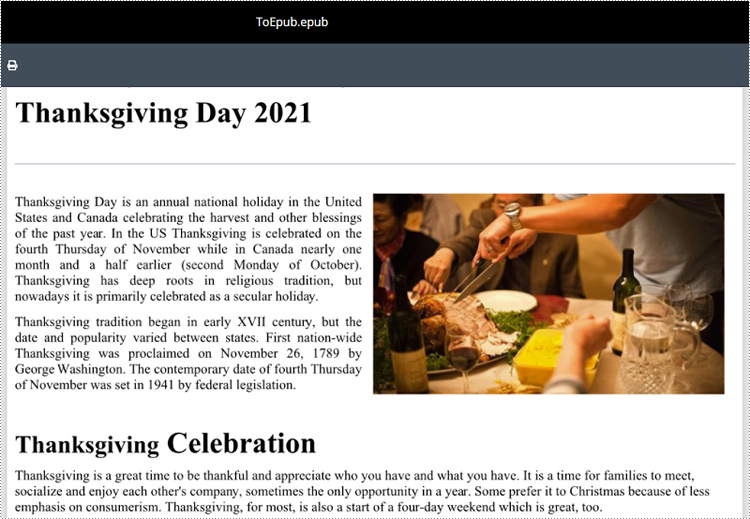
The Document.SaveToFile(fileName:str, fileFormat:FileFormat) method provided by Spire.Doc for Python supports converting a Word document to EPUB format. The detailed steps are as follows.
- Create an object of the Document class.
- Load a Word document using Document.LoadFromFile() method.
- Save the Word document to EPUB format using Document.SaveToFile(fileName:str, fileFormat:FileFormat) method.
- Python
from spire.doc import *
from spire.doc.common import *

# Specify the input Word document and output EPUB file paths
inputFile = "Sample.docx"
outputFile = "ToEpub.epub"

# Create an object of the Document class
doc = Document()
# Load a Word document
doc.LoadFromFile(inputFile)

# Save the Word document to EPUB format
doc.SaveToFile(outputFile, FileFormat.EPub)
# Close the Document object
doc.Close()
Convert Word to EPUB with a Cover Image in Python
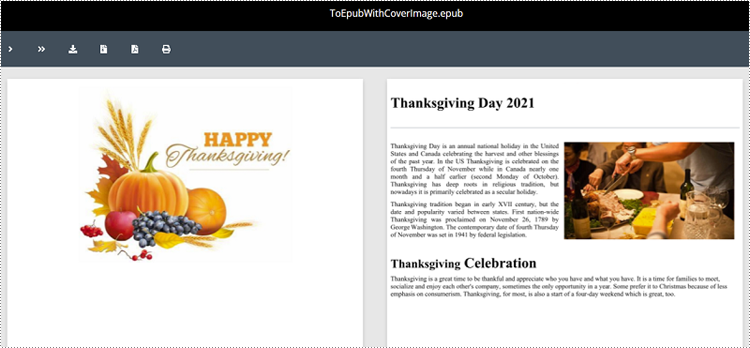
Spire.Doc for Python enables you to convert a Word document to EPUB format and set a cover image for the resulting EPUB file by using the Document.SaveToEpub(fileName:str, coverImage:DocPicture) method. The detailed steps are as follows.
- Create an object of the Document class.
- Load a Word document using Document.LoadFromFile() method.
- Create an object of the DocPicture class, and then load an image using DocPicture.LoadImage() method.
- Save the Word document as an EPUB file and set the loaded image as the cover image of the EPUB file using Document.SaveToEpub(fileName:str, coverImage:DocPicture) method.
- Python
from spire.doc import *
from spire.doc.common import *

# Specify the input Word document and output EPUB file paths
inputFile = "Sample.docx"
outputFile = "ToEpubWithCoverImage.epub"
# Specify the file path for the cover image
imgFile = "Cover.png"

# Create a Document object
doc = Document()
# Load the Word document
doc.LoadFromFile(inputFile)

# Create a DocPicture object
picture = DocPicture(doc)
# Load the cover image file
picture.LoadImage(imgFile)

# Save the Word document as an EPUB file and set the cover image
doc.SaveToEpub(outputFile, picture)
# Close the Document object
doc.Close()
Get a Free License
To fully experience the capabilities of Spire.Doc for Python without any evaluation limitations, you can request a free 30-day trial license.
RTF (Rich Text Format) is a versatile file format that can be opened and viewed by various word processing software. It supports a wide range of text formatting options, such as font style, size, color, tables, images, and more. When working with RTF files, you may sometimes need to convert them to PDF files for better sharing and printing, or to HTML format for publishing on the web. In this article, you will learn how to convert RTF to PDF or HTML with Python using Spire.Doc for Python.
Install Spire.Doc for Python
This scenario requires Spire.Doc for Python and plum-dispatch v1.7.4. They can be easily installed in your Windows through the following pip commands.
pip install Spire.Doc
If you are unsure how to install, please refer to this tutorial: How to Install Spire.Doc for Python on Windows
Convert RTF to PDF in Python
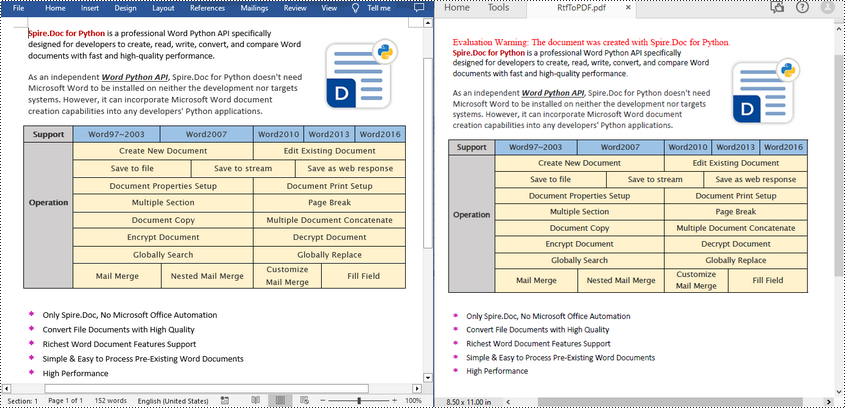
To convert an RTF file to PDF, simply load a file with .rtf extension and then save it as a PDF file using Document.SaveToFile(fileName, FileFormat.PDF) method. The following are the detailed steps.
- Create a Document object.
- Load an RTF file using Document.LoadFromFile() method.
- Save the RTF file as a PDF file using Document.SaveToFile(fileName, FileFormat.PDF) method.
- Python
from spire.doc import *
from spire.doc.common import *

inputFile = "input.rtf"
outputFile = "RtfToPDF.pdf"

# Create a Document object
doc = Document()

# Load an RTF file from disk
doc.LoadFromFile(inputFile)

# Save the RTF file as a PDF file
doc.SaveToFile(outputFile, FileFormat.PDF)
doc.Close()
Convert RTF to HTML in Python
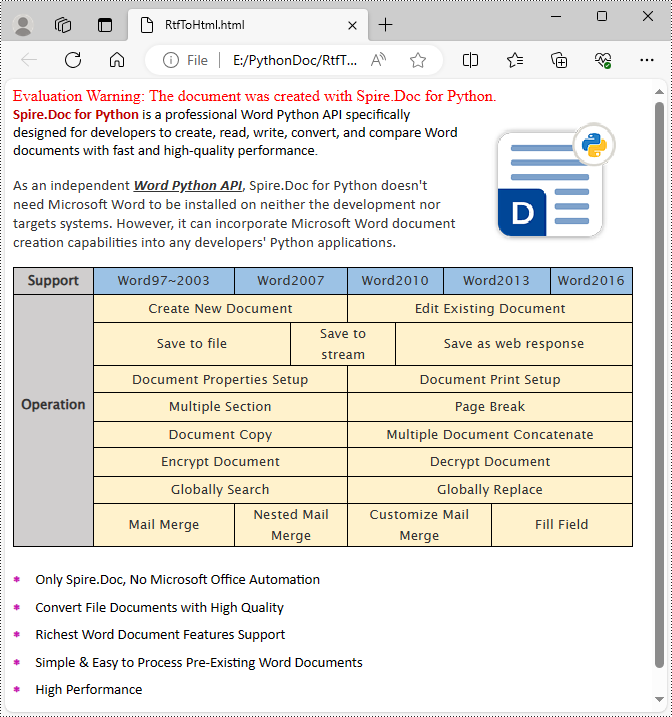
Spire.Doc for Python also allows you to use the Document.SaveToFile(fileName, FileFormat.Html) method to convert the loaded RTF file to HTML format. The following are the detailed steps.
- Create a Document object.
- Load an RTF file using Document.LoadFromFile() method.
- Save the RTF file in HTML format using Document.SaveToFile(fileName, FileFormat.Html) method.
- Python
from spire.doc import *
from spire.doc.common import *

inputFile = "input.rtf"
outputFile = "RtfToHtml.html"

# Create a Document object
doc = Document()

# Load an RTF file from disk
doc.LoadFromFile(inputFile)

# Save the RTF file in HTML format
doc.SaveToFile(outputFile, FileFormat.Html)
doc.Close()
Get a Free License
To fully experience the capabilities of Spire.Doc for Python without any evaluation limitations, you can request a free 30-day trial license.
RTF is a flexible file format that preserves formatting and basic styling while offering compatibility with various word processing software. Converting Word to RTF enables users to retain document structure, fonts, hyperlinks, and other essential elements without the need for specialized software. Similarly, converting RTF back to Word format provides the flexibility to edit and enhance documents using the powerful features of Microsoft Word. In this article, you will learn how to convert Word to RTF and vice versa in Python using Spire.Doc for Python.
Install Spire.Doc for Python
This scenario requires Spire.Doc for Python and plum-dispatch v1.7.4. They can be easily installed in your Windows through the following pip command.
pip install Spire.Doc
If you are unsure how to install, please refer to this tutorial: How to Install Spire.Doc for Python on Windows
Convert Word to RTF in Python
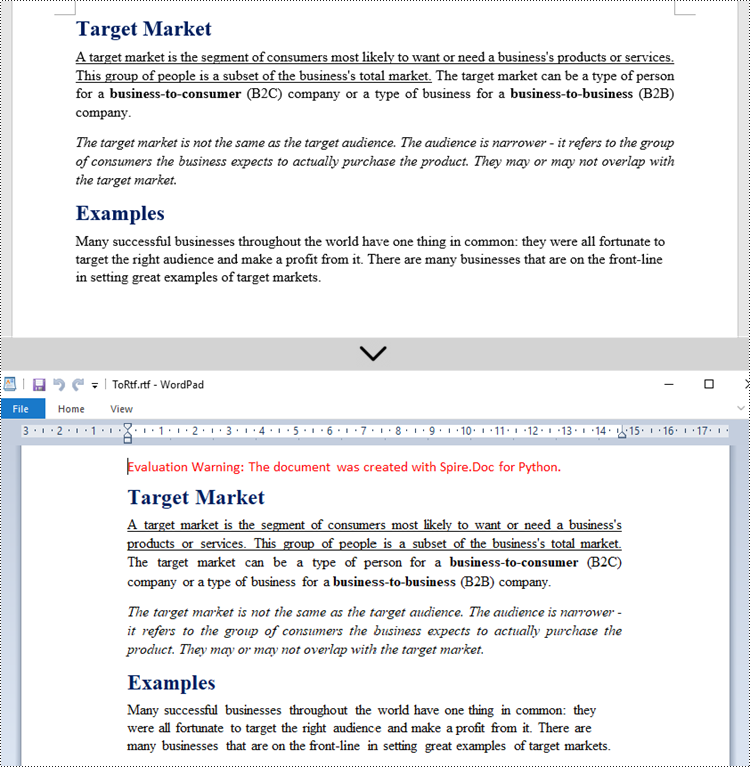
With Spire.Doc for Python, you can load a Word file using the Document.LoadFromFile() method and convert it to a different format, such as RTF, using the Document.SaveToFile() method; Conversely, you can load an RTF file in the same way and save it as a Word file.
The following are the steps to convert Word to RTF using Spire.Doc for Python.
- Create a Document object.
- Load a Word file using Document.LoadFromFile() method.
- Convert it to an RTF file using Document.SaveToFile() method.
- Python
from spire.doc import *
from spire.doc.common import *

# Create a Document object
document = Document()

# Load a Word file
document.LoadFromFile("C:\\Users\\Administrator\\Desktop\\input.docx")

# Convert to a RTF file
document.SaveToFile("output/ToRtf.rtf", FileFormat.Rtf)
document.Close()
Convert RTF to Word in Python
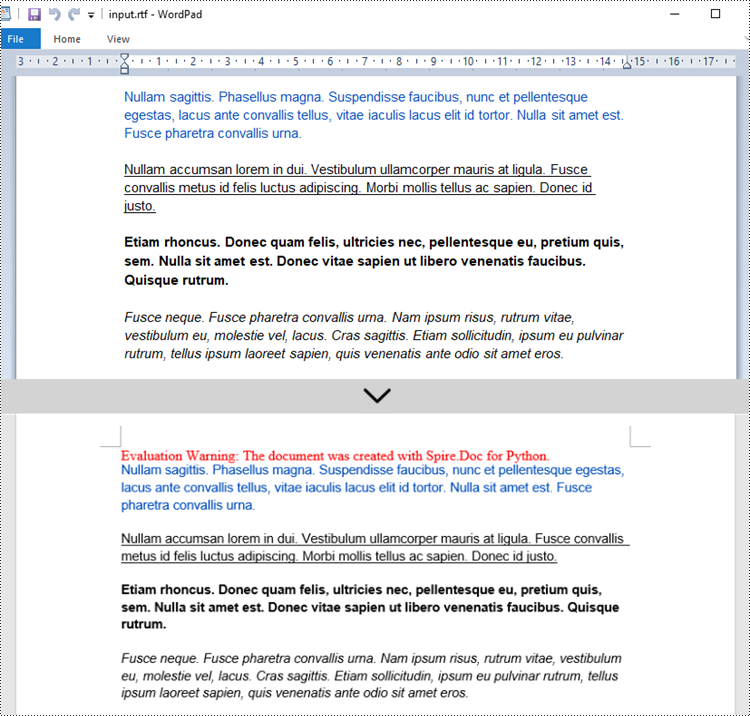
The code for converting RTF to Word is quite simply, too. Follow the steps below.
- Create a Document object.
- Load an RTF file using Document.LoadFromFile() method.
- Convert it to a Word file using Document.SaveToFile() method.
- Python
from spire.doc import *
from spire.doc.common import *

# Create a Document object
document = Document()

# Load a Rtf file
document.LoadFromFile("C:\\Users\\Administrator\\Desktop\\input.rtf")

# Convert to a Word file
document.SaveToFile("output/ToWord.docx", FileFormat.Docx2019)
document.Close()
Get a Free License
To fully experience the capabilities of Spire.Doc for Python without any evaluation limitations, you can request a free 30-day trial license.
Hyperlinks are a useful tool for connecting and navigating between different sections of your document or external resources such as websites or files. However, there may be instances where you need to modify the hyperlinks in your Word document. For example, you may need to update the text or URL of a hyperlink to ensure accuracy, or change the appearance of a hyperlink to improve visibility. In this article, you will learn how to update or change hyperlinks in a Word document in Python using Spire.Doc for Python.
- Update a Hyperlink in a Word Document in Python
- Change the Appearance of a Hyperlink in a Word Document in Python
Install Spire.Doc for Python
This scenario requires Spire.Doc for Python and plum-dispatch v1.7.4. They can be easily installed in your Windows through the following pip command.
pip install Spire.Doc
If you are unsure how to install, please refer to this tutorial: How to Install Spire.Doc for Python on Windows
Update a Hyperlink in a Word Document in Python
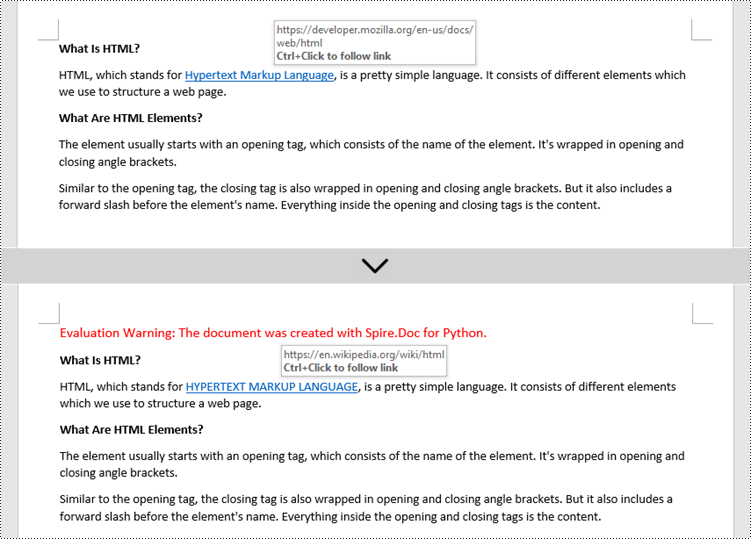
A hyperlink is recognized as a FormField object by Spire.Doc for Python. In order to modify a specific hyperlink, we need to retrieve all hyperlinks in the document and get the desired one by its index. The display text and URL of a hyperlink can be reset by the FormField.Text property and the FormField.Code property. The following are the steps to update a hyperlink in a Word document using Spire.Doc for Python.
- Create a Document object.
- Load a Word file using Document.LoadFromFile() method.
- Loop through the elements in the document to find all hyperlinks.
- Get a specific hyperlink from the hyperlink collection.
- Update the display text of the hyperlink through FormField.FieldText property.
- Update the URL of the hyperlink through FormField.Code property.
- Save the document to a different Word file using Document.SaveToFile() method.
- Python
from spire.doc import *
from spire.doc.common import *

# Create a Document object
doc = Document()

# Load a Word file
doc.LoadFromFile("C:/Users/Administrator/Desktop/input.docx")

# Find all hyperlinks in the document
hyperlinks = []
for i in range(doc.Sections.Count):
    section = doc.Sections.get_Item(i)
    for j in range(section.Body.ChildObjects.Count):
        sec = section.Body.ChildObjects.get_Item(j)
        if sec.DocumentObjectType == DocumentObjectType.Paragraph:
            for k in range((sec if isinstance(sec, Paragraph) else None).ChildObjects.Count):
                para = (sec if isinstance(sec, Paragraph)
                        else None).ChildObjects.get_Item(k)
                if para.DocumentObjectType == DocumentObjectType.Field:
                    field = para if isinstance(para, Field) else None
                    if field.Type == FieldType.FieldHyperlink:
                        hyperlinks.append(field)

# Get a specific hyperlink
hyperlink = hyperlinks[0]

# Update the display text of the hyperlink
hyperlink.FieldText = "HYPERTEXT MARKUP LANGUAGE"

# Update the URL of the hyperlink
hyperlink.Code ="HYPERLINK \"" + "https://en.wikipedia.org/wiki/HTML" + "\""

# Save the document to a docx file
doc.SaveToFile("output/UpdateHyperlink.docx", FileFormat.Docx)
doc.Close()
Change the Appearance of a Hyperlink in a Word Document in Python
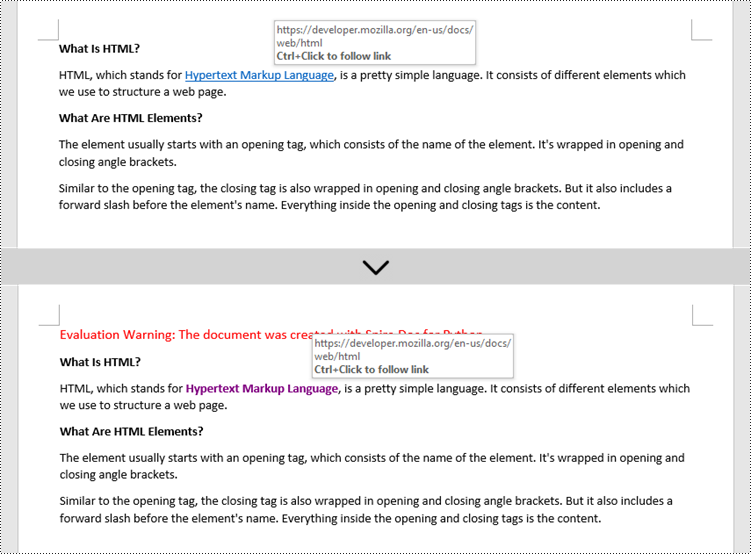
After a hyperlink is obtained, it's easy to change the appearance of it through the FormField.CharacterFormat object. Specifically, the CharacterFormat object offers the properties such as TextColor, FontName, FontSize, UnderlineStyle to change the style of the characters of a hyperlink. The following are the detailed steps.
- Create a Document object.
- Load a Word file using Document.LoadFromFile() method.
- Loop through the elements in the document to find all hyperlinks.
- Get a specific hyperlink from the hyperlink collection.
- Change the appearance of the hyperlink through the properties under FormField.CharacterFormat object.
- Save the document to a different Word file using Document.SaveToFile() method.
- Python
from spire.doc import *
from spire.doc.common import *

# Create a Document object
doc = Document()

# Load a Word file
doc.LoadFromFile("C:/Users/Administrator/Desktop/input.docx")

# Find all hyperlinks in the Word document
hyperlinks = []
for i in range(doc.Sections.Count):
    section = doc.Sections.get_Item(i)
    for j in range(section.Body.ChildObjects.Count):
        sec = section.Body.ChildObjects.get_Item(j)
        if sec.DocumentObjectType == DocumentObjectType.Paragraph:
            for k in range((sec if isinstance(sec, Paragraph) else None).ChildObjects.Count):
                para = (sec if isinstance(sec, Paragraph)
                        else None).ChildObjects.get_Item(k)
                if para.DocumentObjectType == DocumentObjectType.Field:
                    field = para if isinstance(para, Field) else None
                    if field.Type == FieldType.FieldHyperlink:
                        hyperlinks.append(field)

# Get a specific hyperlink
hyperlink = hyperlinks[0]

# Change the appearance of the hyperlink
hyperlink.CharacterFormat.UnderlineStyle = UnderlineStyle.none
hyperlink.CharacterFormat.TextColor = Color.get_Purple()
hyperlink.CharacterFormat.Bold = True

# Save the document to a docx file
doc.SaveToFile("output/ChangeAppearance.docx", FileFormat.Docx)
doc.Close()
Apply for a Temporary License
If you'd like to remove the evaluation message from the generated documents, or to get rid of the function limitations, please request a 30-day trial license for yourself.
Headers and footers in Word are sections at the top and bottom margins of each page. They can contain additional information such as page numbers, document titles, dates, author names, and other identifying details. By default, the headers or footers on all pages are the same, but in certain scenarios, you can also insert different headers or footers on the first page, odd pages, or even pages. This article will demonstrate how to insert headers and footers into a Word document in Python using Spire.Doc for Python.
- Insert Headers and Footers into a Word Document
- Add Different Headers and Footers for the First Page and Other Pages
- Add Different Headers and Footers for Odd and Even Pages
Install Spire.Doc for Python
This scenario requires Spire.Doc for Python and plum-dispatch v1.7.4. They can be easily installed in your Windows through the following pip commands.
pip install Spire.Doc
If you are unsure how to install, please refer to this tutorial: How to Install Spire.Doc for Python on Windows
Insert Headers and Footers into a Word Document in Python
To insert a header or a footer into a Word document, you first need to get them through the Section.HeadersFooters.Header and Section.HeadersFooters.Footer properties, and then add paragraphs to them to insert pictures, text, page numbers, dates, or other information.
The following are steps to add headers and footers in Word:
- Create a Document object.
- Load a Word document using Document.LoadFromFile() method.
- Get a specified section using Document.Sections[] property.
- Add Header
- Get header using Section.HeadersFooters.Header property.
- Add a paragraph to the header using HeaderFooter.AddParagraph() method and set paragraph alignment.
- Add an image to the header paragraph using Paragraph.AppendPicture() method, and then set the text wrapping style and position of the image.
- Add text to the header paragraph using Paragraph.AppendText() method, and then set the font name, size, color, etc.
- Add Footer
- Get footer using Section.HeadersFooters.Footer property.
- Add a paragraph to the footer and then add text to the footer paragraph.
- Get the borders of the footer paragraph using Paragraph.Format.Borders property, and then set the top border style and space.
- Save the result document using Document.SaveToFile() method.
- Python
from spire.doc import *
from spire.doc.common import *

# Create a Document object
document = Document()

# Load a Word document
document.LoadFromFile("Sample.docx")

# Get a specific section
section = document.Sections.get_Item(0)

# Get header
header = section.HeadersFooters.Header

# Add a paragraph to the header and set its alignment style
headerParagraph = header.AddParagraph()
headerParagraph.Format.HorizontalAlignment = HorizontalAlignment.Left

# Add an image to the header paragraph and set its text wrapping style, position
headerPicture = headerParagraph.AppendPicture("Logo.png")
headerPicture.TextWrappingStyle = TextWrappingStyle.Square
headerPicture.VerticalOrigin = VerticalOrigin.Line
headerPicture.VerticalAlignment = ShapeVerticalAlignment.Center

# Add text to the header paragraph and set its font style
text = headerParagraph.AppendText("E-iceblue Co. Ltd."+ "\nYour Office Development Master")
text.CharacterFormat.FontName = "Arial"
text.CharacterFormat.FontSize = 10
text.CharacterFormat.Bold = True
text.CharacterFormat.TextColor = Color.get_Blue()

# Get footer
footer = section.HeadersFooters.Footer

# Add a paragraph to the footer paragraph and set its alignment style
footerParagraph = footer.AddParagraph()
footerParagraph.Format.HorizontalAlignment = HorizontalAlignment.Center

# Add text to the footer paragraph and set its font style
text = footerParagraph.AppendText("Copyright © 2013 e-iceblue. All Rights Reserved.")
text.CharacterFormat.FontName = "Arial"
text.CharacterFormat.FontSize = 10

# Set the border of the footer paragraph
footerParagraph.Format.Borders.Top.BorderType = BorderStyle.Single
footerParagraph.Format.Borders.Top.Space = 0.05

# Save the result file
document.SaveToFile("HeaderAndFooter.docx", FileFormat.Docx)
document.Close()

Add Different Headers and Footers for the First Page and Other Pages in Word in Python
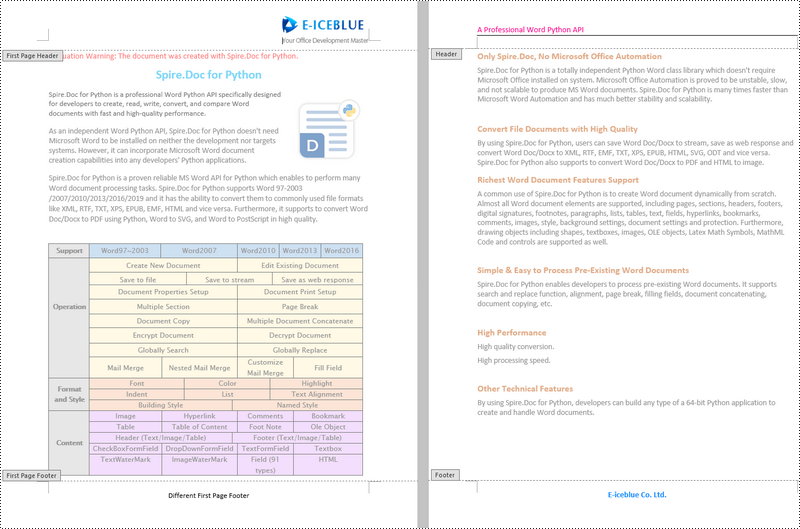
Sometimes you may need to insert a header and footer only on the first page, or you may want the header and footer on the first page different from other pages.
Spire.Doc for Python offers the Section.PageSetup.DifferentFirstPageHeaderFooter property to enable a different first page header or footer. The following are the detailed steps to accomplish the task.
- Create a Document object.
- Load a Word document using Document.LoadFromFile() method.
- Get a specified section using Document.Sections[] property.
- Enable different headers and footers for the first page and other pages by setting the Section.PageSetup.DifferentFirstPageHeaderFooter property to True.
- Get the first page header using Section.HeadersFooters.FirstPageHeader property.
- Add a paragraph to the first page header and then add an image to the header paragraph.
- Get the first page footer using Section.HeadersFooters.FirstPageFooter property.
- Add a paragraph to the first page footer and then add text to the footer paragraph.
- Set headers and footers for other pages. (There's no need to set this if you only need the header & footer for the first page.)
- Save the result document using Document.SaveToFile() method.
- Python
from spire.doc import *
from spire.doc.common import *

# Create a Document object
doc = Document()

# Load a Word document
doc.LoadFromFile("Sample.docx")

# Get a specific section
section = document.Sections.get_Item(0)

# Enable different headers and footers for the first page and other pages
section.PageSetup.DifferentFirstPageHeaderFooter = True

# Add a paragraph to the first page header and set its alignment style
headerParagraph = section.HeadersFooters.FirstPageHeader.AddParagraph()
headerParagraph.Format.HorizontalAlignment = HorizontalAlignment.Right

# Add an image to the header paragraph
headerimage = headerParagraph.AppendPicture("E-iceblue.png")

# Add a paragraph to the first page footer and set its alignment style
footerParagraph = section.HeadersFooters.FirstPageFooter.AddParagraph()
footerParagraph.Format.HorizontalAlignment = HorizontalAlignment.Center

# Add text to the footer paragraph and set its font style
text = footerParagraph.AppendText("Different First Page Footer")
text.CharacterFormat.FontSize = 11

# Set the header & footer for other pages. If you only headers & footers for the first page, don't set this.
para = section.HeadersFooters.Header.AddParagraph()
para.Format.HorizontalAlignment = HorizontalAlignment.Left
paraText = para.AppendText("A Professional Word Python API")
paraText.CharacterFormat.FontSize = 12
paraText.CharacterFormat.TextColor = Color.get_DeepPink()
para.Format.Borders.Bottom.BorderType = BorderStyle.Single
para.Format.Borders.Bottom.Space = 0.05

paragraph = section.HeadersFooters.Footer.AddParagraph()
paragraph.Format.HorizontalAlignment = HorizontalAlignment.Center
paraText = paragraph.AppendText("E-iceblue Co. Ltd.")
paraText.CharacterFormat.FontSize = 12
paraText.CharacterFormat.Bold = True
paraText.CharacterFormat.TextColor = Color.get_DodgerBlue()

# Save the result document
doc.SaveToFile("DifferentFirstPage.docx", FileFormat.Docx)
doc.Close()
Add Different Headers and Footers for Odd and Even Pages in Word in Python
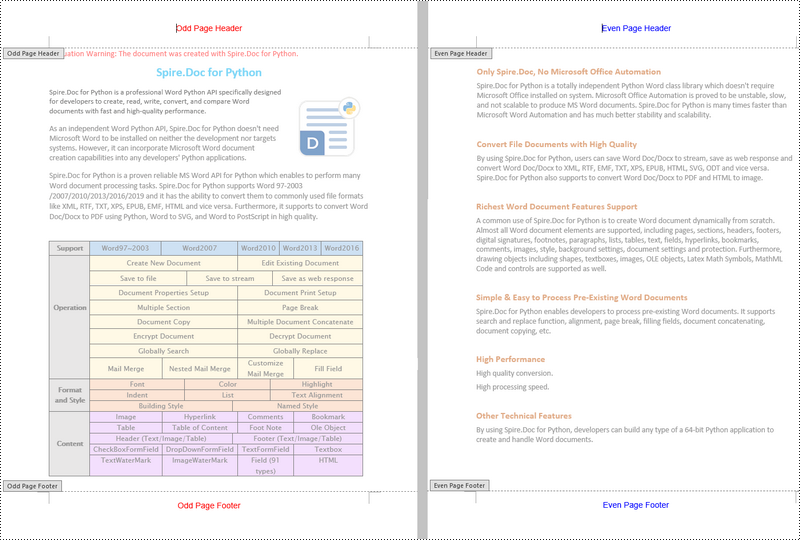
To have different headers and footers on odd and even pages, Spire.Doc for Python provides the Section.PageSetup.DifferentOddAndEvenPagesHeaderFooter property. The following are the detailed steps.
- Create a Document object.
- Load a Word document using Document.LoadFromFile() method.
- Get a specified section using Document.Sections[] property.
- Enable different headers and footers for the odd and even pages by setting the Section.PageSetup.DifferentOddAndEvenPagesHeaderFooter property to True.
- Get the header and footer of odd pages using Section.HeadersFooters.OddHeader and Section.HeadersFooters.OddFooter properties.
- Add paragraphs to the header and footer of odd pages and then add text to them.
- Get the header and footer of even pages using Section.HeadersFooters.EvenHeader and Section.HeadersFooters.EvenFooter properties.
- Add paragraphs to the header and footer of even pages and then add text to them.
- Save the result document using Document.SaveToFile() method.
- Python
from spire.doc import *
from spire.doc.common import *

# Create a Document object
doc = Document()

# Load a Word document
doc.LoadFromFile("Sample.docx")

# Get a specific section
section = document.Sections.get_Item(0)

# Enable different headers and footers for the odd and even pages
section.PageSetup.DifferentOddAndEvenPagesHeaderFooter = True

# Add headers and footers to odd pages
OHpara = section.HeadersFooters.OddHeader.AddParagraph()
OHtext = OHpara.AppendText("Odd Page Header")
OHpara.Format.HorizontalAlignment = HorizontalAlignment.Center
OHtext.CharacterFormat.FontName = "Arial"
OHtext.CharacterFormat.FontSize = 12
OHtext.CharacterFormat.TextColor = Color.get_Red()

OFpara = section.HeadersFooters.OddFooter.AddParagraph()
OFtext = OFpara.AppendText("Odd Page Footer")
OFpara.Format.HorizontalAlignment = HorizontalAlignment.Center
OFtext.CharacterFormat.FontName = "Arial"
OFtext.CharacterFormat.FontSize = 12
OFtext.CharacterFormat.TextColor = Color.get_Red()

# Add headers and footers to even pages
EHpara = section.HeadersFooters.EvenHeader.AddParagraph()
EHtext = EHpara.AppendText("Even Page Header")
EHpara.Format.HorizontalAlignment = HorizontalAlignment.Center
EHtext.CharacterFormat.FontName = "Arial"
EHtext.CharacterFormat.FontSize = 12
EHtext.CharacterFormat.TextColor = Color.get_Blue()

EFpara = section.HeadersFooters.EvenFooter.AddParagraph()
EFtext = EFpara.AppendText("Even Page Footer")
EFpara.Format.HorizontalAlignment = HorizontalAlignment.Center
EFtext.CharacterFormat.FontName = "Arial"
EFtext.CharacterFormat.FontSize = 12
EFtext.CharacterFormat.TextColor = Color.get_Blue()

# Save the result document
doc.SaveToFile("OddAndEvenHeaderFooter.docx", FileFormat.Docx)
doc.Close()
Apply for a Temporary License
If you'd like to remove the evaluation message from the generated documents, or to get rid of the function limitations, please request a 30-day trial license for yourself.
Setting the background colors for paragraphs and text in Word documents can significantly enhance the presentation and readability of content. Customizing background color is an effective approach to emphasize key information, categorize content, and add a personalized touch, thereby making it easy to create polished and professional documents. By carefully selecting and applying background colors, documents can be transformed into visually appealing works that effectively convey information and engage the reader. This article shows how to use Spire.Doc for Python to set background colors for paragraphs and text in Word documents, unlocking new possibilities for document styling and customization.
- Set Background Colors for Paragraphs Using Python
- Set Background Colors for Selected Text Using Python
Install Spire.Doc for Python
This scenario requires Spire.Doc for Python and plum-dispatch v1.7.4. They can be easily installed in your Windows through the following pip command.
pip install Spire.Doc
If you are unsure how to install, please refer to this tutorial: How to Install Spire.Doc for Python on Windows
Set Background Color for Paragraphs Using Python
By using Spire.Doc for Python, developers can get any paragraph in any section. After getting a paragraph, developers can apply a background color to it by assigning a Color object to Paragraph.Format.BackColor property. Below are the detailed steps:
- Create an instance of Document class and load a Word document using Document.LoadFromFile() method.
- Get a section using Document.Sections.get_Item() method.
- Get a paragraph in the section using Section.Paragraphs.get_Item() method.
- Set the background color of the paragraph through Paragraph.Format.BackColor property.
- Save the document using Document.SaveToFile() method.
- Python
from spire.doc import *
from spire.doc.common import *

# Create an instance of Document class and load a Word document
doc = Document()
doc.LoadFromFile("Sample.docx")

# Get the first section
section = doc.Sections.get_Item(0)

# Get the fifth paragraph
paragraph = section.Paragraphs.get_Item(4)

# Set background color for the paragraph
paragraph.Format.BackColor = Color.get_DarkGreen()

# Save the document
doc.SaveToFile("output/ParagraphBackground.docx")
doc.Close()

Set Background Colors for Selected Text Using Python
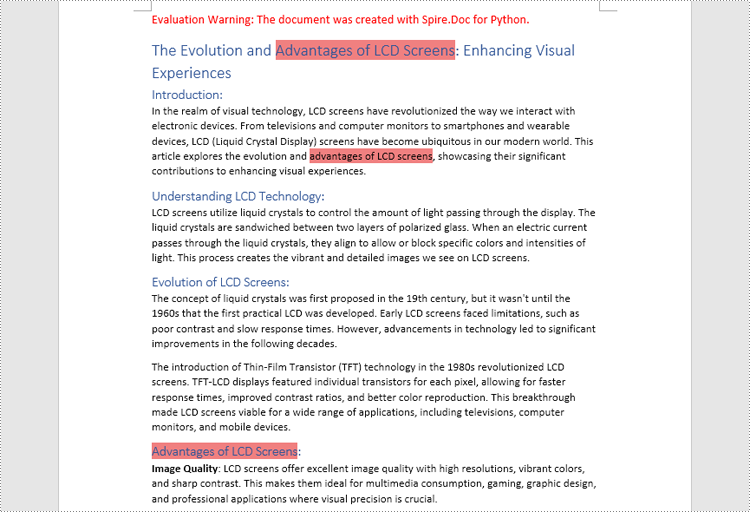
Spire.Doc for Python enables developers to find all the occurrences of specific text in a Word document with Document.FindAllString() method. After getting the finding results, developers can set the background for them through TextRange.CharacterFormat.TextBackgroundColor property. The detailed steps are as follows:
- Create an instance of Document class and load a Word document using Document.LoadFromFile() method.
- Find all the occurrences of specific text using Document.FindAllString() method.
- Loop through the occurrences, get each occurrence as a text range using TextSelection.GetAsOneRange(True) method, and set the background color of each occurrence through TextRange.CharacterFormat.TextBackgroundColor property. It is also possible to get only one occurrence from the result list and set the background color for the occurrence.
- Save the document using Document.SaveToFile() method.
- Python
from spire.doc import *
from spire.doc.common import *

# Create an instance of Document class and load a Word document
doc = Document()
doc.LoadFromFile("Sample.docx")

# Find text in the Word document
findResults = doc.FindAllString("advantages of LCD screens", False, False)

# Loop through the finding results to set background color for all occurrences
for text in findResults:
    # Get an occurrence as a text range
    textRange = text.GetAsOneRange(True)
    # Set the background color of the text range
    textRange.CharacterFormat.TextBackgroundColor = Color.get_LightCoral()

# Set the background color of a sepecified occurrence
# Get an occurrence as one text range
# textRange = findResults[1].GetAsOneRange()
# Set the background color of the text range
# textRange.CharacterFormat.BackgroundColor = Color.get_DarkCyan()

# Save the document
doc.SaveToFile("output/TextBackground.docx")
doc.Close()
Apply for a Temporary License
If you'd like to remove the evaluation message from the generated documents, or to get rid of the function limitations, please request a 30-day trial license for yourself.
