If you’re working with data that needs to be shared across software, APIs, or websites, converting Excel to XML is a critical skill. XML (Extensible Markup Language) is a universal, machine-readable format ideal for data interchange, while Excel excels at organizing spreadsheets. Bridging the gap between them allows your data to flow seamlessly across platforms.
Whether you're a beginner looking for a quick solution, an analyst ensuring data integrity, or a developer building an automated pipeline, this guide will walk you through three effective and error-free Excel to XML conversion methods.
- Method 1: Manual Excel to XML Conversion (Built-in Developer Tab)
- Method 2: Free Excel to XML Online Converters
- Method 3: Automate Excel to XML Conversion in Python
Why Convert Excel to XML?
The core value of converting Excel to XML lies in:
- Cross-Platform Compatibility: XML works with APIs, CMS platforms (WordPress, Shopify), enterprise tools (SAP, Salesforce), and programming languages (Python, Java).
-
Structured Data: XML preserves Excel’s rows/columns as tagged elements (e.g.,
<product><name>Laptop</name><price>999</price></product>), making it easy for software to parse. - Data Integrity: XML avoids formatting issues that plague Excel files (e.g., broken formulas, merged cells) when shared across systems.
- Use Cases: E-commerce product feeds, API data exports, CMS content imports, and enterprise data integration.
Structuring Excel Data for Successful Conversion
The first and most critical step happens in Excel. A well-structured source sheet guarantees a smooth conversion.
- Use unique, short column headers (no spaces/special characters—e.g., "ProductName" instead of "Product Name").
- Remove empty rows/columns (they cause XML validation errors).
- Ensure consistent data types (e.g., all prices as numbers, dates in a uniform format).
- Avoid merged cells or complex formulas; use raw data instead.
Method 1: Manual Excel to XML Conversion (Built-in Developer Tab)
Excel’s built-in Developer Tab provides native support for XML tasks, making it accessible to Excel users without programming knowledge.
Step-by-Step Guide:
Step 1: Prepare Your Excel Data
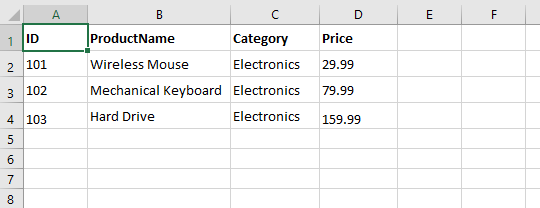
Structure your data in a clear, tabular format. The first row should contain your column headers, which will become your XML tags. For this example, let's use a simple product list:
Step 2: Create an XML Schema
An XML schema (.xsd file) defines the structure of your XML output. It specifies which tags to use and how they relate to each other.
Example Schema (save this as “products.xsd” on your computer):
<?xml version="1.0" encoding="UTF-8"?>
<xs:schema xmlns:xs="http://www.w3.org/2001/XMLSchema">
  <xs:element name="Catalog">
    <xs:complexType>
      <xs:sequence>
        <xs:element name="Product" maxOccurs="unbounded">
          <xs:complexType>
            <xs:sequence>
              <xs:element name="ID" type="xs:integer"/>
              <xs:element name="ProductName" type="xs:string"/>
              <xs:element name="Category" type="xs:string"/>
              <xs:element name="Price" type="xs:decimal"/>
            </xs:sequence>
          </xs:complexType>
        </xs:element>
      </xs:sequence>
    </xs:complexType>
  </xs:element>
</xs:schema>
- Adjust the name attributes to match your Excel column headers (case-sensitive).
- Use appropriate types (e.g., xsd:integer for numbers, xsd:string for text).
Step 3: Add the Schema to Excel
- Open your Excel file.
- Go to the Developer tab. (If you don’t see it, go to File > Options > Customize Ribbon, check "Developer," and click "OK.")
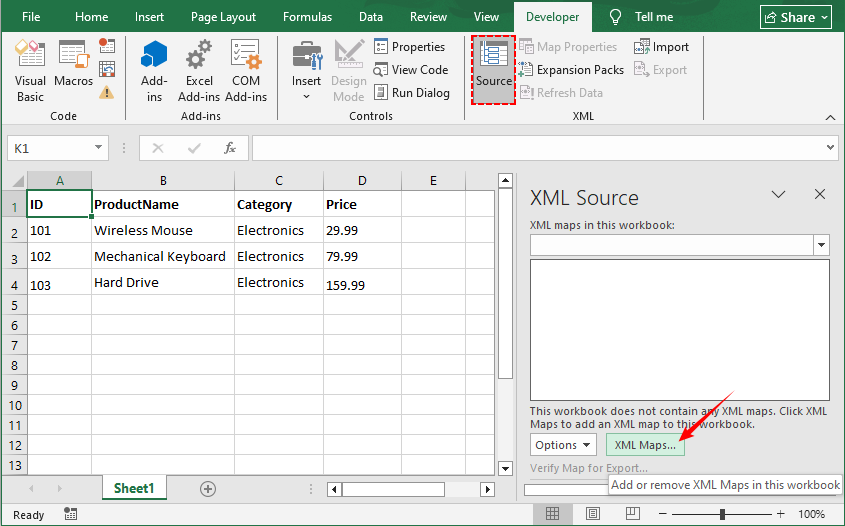
- In the Developer tab, click Source to open the XML Source pane.
- Click XML Maps... and then Add....
- Attach the .xsd schema file you created using the XML Maps dialog
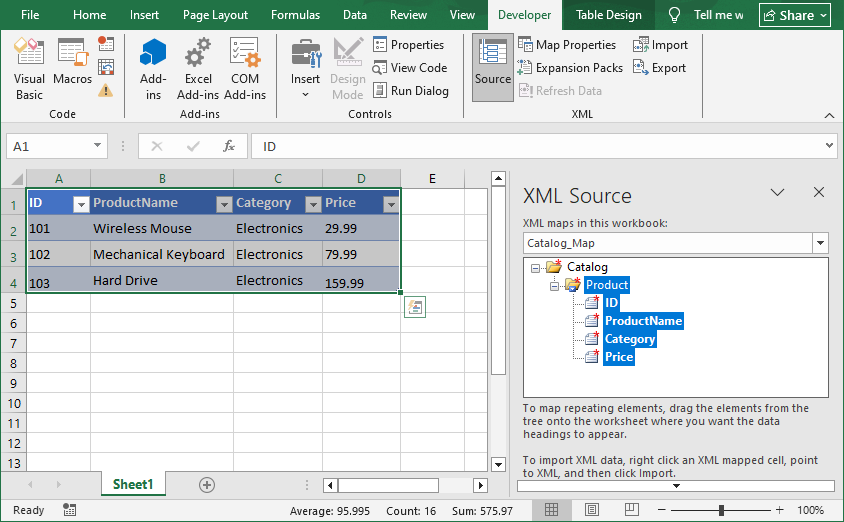
Step 4: Map XML Elements to Your Cells
- In the XML Source pane, you will see your elements (“Catalog”, “Product”, “ID”, etc.).
- Drag the “Product” element and drop it onto cell A1. Excel will create a nicely formatted table.
- The elements will now be mapped. Your data is now ready for export.
Step 5: Export to XML
- With your mapped data selected, go back to the Developer tab.
- Click Export.
- Choose a location and name for your new XML file and click OK.
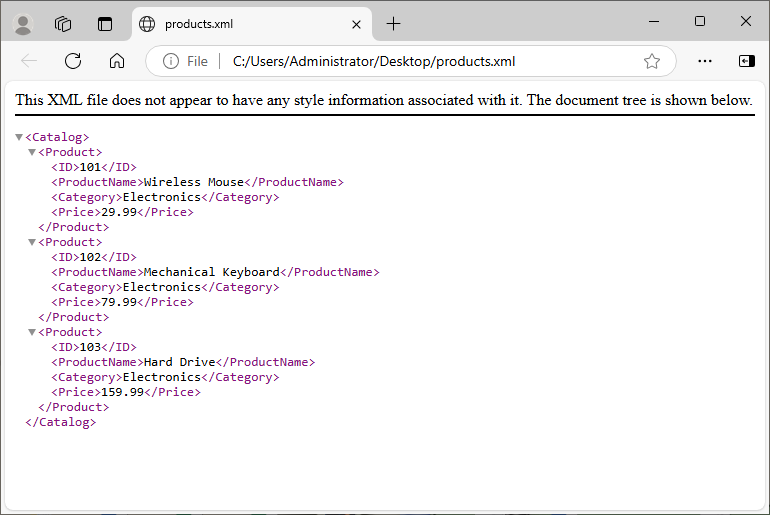
The exported XML file will match your schema, like this:
You may also like: Convert XLS/XLSX to HTML Easily — Keep Excel Formatting Intact
Method 2: Free Excel to XML Online Converters
If you need a quick, one-time conversion without the technical setup, online tools are your best friend.
Top tools to convert Excel into XML online (100% free, no sign-up):
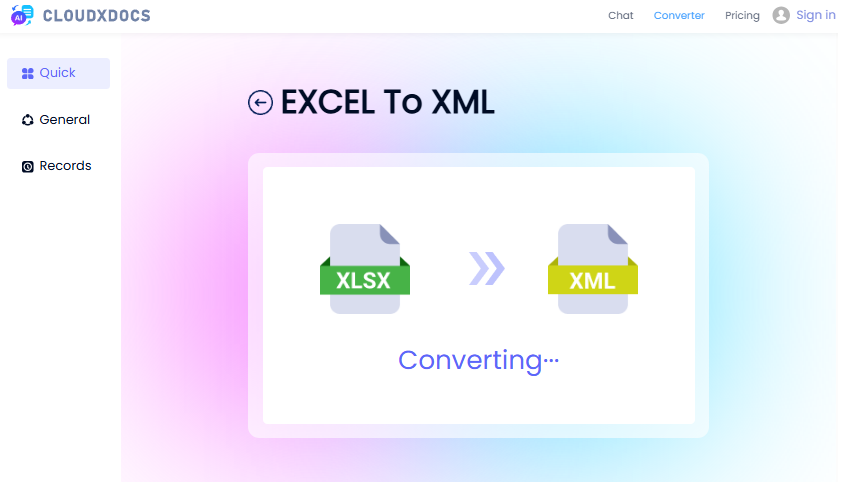
1. CloudxDocs (Most User-Friendly)
- Go to CloudxDocs EXCEL TO XML converter.
- Upload your Excel file (supports XLS, XLSX, XLSB).
- Wait for the conversion to complete and download your XML file.
This converter defaults to producing an XML Spreadsheet file that preserves Excel’s formatting.
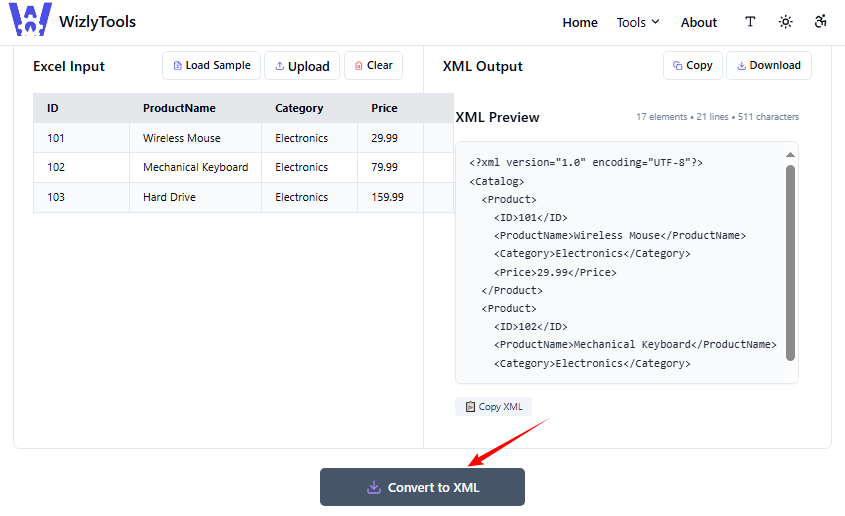
2. WizlyTools (Supports Custom XML)
- Go to WizlyTools Excel to XML converter.
- Upload an Excel file (.xlsx, .xls).
- Enter the root element name and row element name.
- Select an indentation size for your XML output.
- Click "Convert to XML" and then copy or download the resulting XML
This converter gives you more control over the XML structure, such as defining a specific root element, row element, and allows you to preview XML before downloading
Note: Avoid uploading sensitive data (e.g., financial records) to online tools. Use manual methods for confidential files.
Method 3: Automate Excel to XML Conversion in Python
For developers and IT professionals working in Python, Spire.XLS for Python provides a robust, code-driven solution for converting Excel spreadsheets to XML without requiring Microsoft Excel to be installed. This is ideal for server-side automation and application integration.
Step 1: Installation
First, you need to install the Spire.XLS for Python library. It's available via PyPI.
pip install Spire.XLS
Step 2: Write the Python Script
This script uses Spire.XLS to read Excel data, then generates XML with Python’s built-in xml.etree.ElementTree (for structure) and minidom (for pretty formatting).
from spire.xls import *
import xml.etree.ElementTree as ET
from xml.dom import minidom

# Load the Excel file
workbook = Workbook()
workbook.LoadFromFile("Orders.xlsx")

# Get the first worksheet
worksheet = workbook.Worksheets[0]

# Get row and column counts (Spire.XLS uses 1-based indexing)
max_row = worksheet.LastRow
max_col = worksheet.LastColumn

# Check if data exists (headers in row 1, data in row 2+)
if max_row < 2:
    raise ValueError("No data found! Ensure headers are in row 1 and data starts in row 2.")

# Create XML root element
root = ET.Element("Info")

# Loop through data rows (skip row 1: headers)
for row in range(2, max_row + 1):
    # Create a row element (e.g., <Order>)
    row_element = ET.SubElement(root, "Order")

    # Loop through columns to get headers and values
    for col in range(1, max_col + 1):
        # Get header (XML tag)
        header = worksheet.Range[1, col].Value

        # Get cell value (data for the XML tag)
        cell_value = worksheet.Range[row, col].Value

        # Create sub-element and add value
        ET.SubElement(row_element, header).text = str(cell_value)

# Pretty-print XML (add indentation for readability)
rough_string = ET.tostring(root, 'utf-8')
reparsed = minidom.parseString(rough_string)
pretty_xml = reparsed.toprettyxml(indent="  ")

# Save to XML file
with open("Orders.xml", 'w', encoding='utf-8') as f:
    f.write(pretty_xml)

# Close the workbook
workbook.Dispose()
Code Explanation:
- Load Excel File: Uses Spire.XLS to open an Excel file and access its first worksheet.
- Define Data Range: Finds the last row and column with data (1-based indexing in Spire.XLS) to know the bounds of the data.
-
Build XML Structure:
- Creates a root XML element
<Info>. - Loops through each data row (starting from row 2), making a
<Order>element for each. - For each column in the row: Use the header from row 1 as the XML tag, and the cell value as the tag’s content.
- Creates a root XML element
- Save XML: Formats the XML with indentation (for readability) and saves it to an XML file.
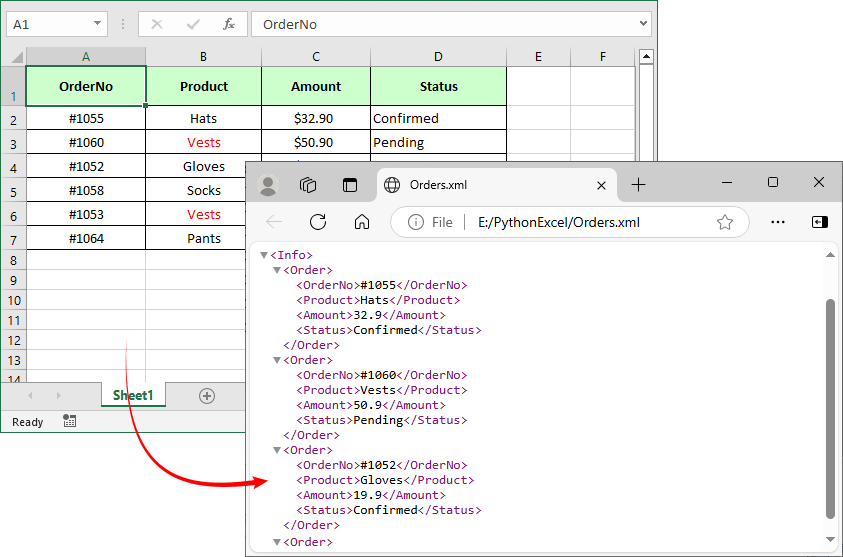
Example Output XML
Spire.XLS for Python also provides a direct SaveAsXml() method to convert Excel to Open XML format.
Final Thoughts
Converting Excel to XML is a fundamental skill that unlocks the true potential of your data, allowing it to flow seamlessly into web applications, configuration files, and other business systems. By understanding the methods available, from the controlled power of Excel's XML Maps to the rapid-fire ease of online tools and the industrial strength of Python scripting, you can choose the right tool for every job.
FAQs About Excel to XML Conversion
Q1: How do I batch-convert multiple Excel files to XML at once?
Batch conversion saves time for 10+ files—use these methods based on your skill level:
- Online tools: Zamzar supports up to 50 files per batch (upload all Excel files, select “XML” as output, and get a zip of XMLs).
- Spire.XLS for Python: Extend the provided script to loop through a folder
import os
from spire.xls import *
import xml.etree.ElementTree as ET
from xml.dom import minidom

input_folder = "C:/Excel_Batch"
output_folder = "C:/XML_Batch"
os.makedirs(output_folder, exist_ok=True)

for filename in os.listdir(input_folder):
    if filename.endswith((".xlsx", ".xls")):
        workbook = Workbook()
        workbook.LoadFromFile(os.path.join(input_folder, filename))
        # Add conversion logic (same as single file) here
        workbook.Dispose()
Q2: Can I customize the XML structure (e.g., change root/row tags)?
Yes, all methods support customization:
-
Manual: Edit the XML schema (.xsd file) to change root (e.g.,
<Catalog>) or row (e.g.,<Product>) tags. - Online: Tools like WizlyTools let you set root/row element names in settings.
- Python: Modify the script’s ET.Element("RootName") and ET.SubElement(root, "RowName") lines to match your needs.
Q3: My data has formulas. Will the XML output contain the formula or the calculated value?
In almost all cases, the XML export will contain the calculated value (the result of the formula), not the formula itself. XML is primarily a format for representing data, not the logic or calculations behind it. The conversion process reads the visible cell values.
Q4: My XML file looks messy when I open it. How can I format it properly?
The XML generated by these methods is often in a compressed format without line breaks or indentation. This is still valid XML. To view it in a readable format:
- Open the file in a modern web browser (Chrome, Firefox, Edge), which will automatically format and display it neatly.
- Use a code editor like VS Code, Notepad++, or Sublime Text, which have built-in XML formatting or plugins to re-indent the code.