Working with large datasets in Excel often means scrolling through hundreds or even thousands of rows. When this happens, it’s easy to lose track of your headers or key reference labels, which slows down analysis and increases the chance of mistakes. Keeping important rows and columns visible can dramatically improve your efficiency and accuracy.
Fortunately, Excel provides several built-in tools that allow you to freeze specific parts of your worksheet. Whether you need to keep a header row in place, lock a key identifier column, or create a combination of frozen sections, Excel has flexible options for every scenario.
In this guide, we’ll walk through five easy methods to freeze rows and columns in Excel—from simple one-click presets to fully automated solutions using VBA and Python (Spire.XLS). By the end, you'll know exactly which method fits your workflow and how to apply it with confidence.
Method overview:
- Method 1. Use Quick Freeze Presets (Top Row / First Column)
- Method 2. Freeze Any Rows and Columns Using Freeze Panes
- Method 3. Use Keyboard Shortcut (Alt + W + F + …)
- Method 4. Use VBA Automation
- Method 5. Use Python Automation (Spire.XLS)
Method 1. Use Quick Freeze Presets (Top Row / First Column)
Excel provides two instant presets that allow you to freeze the most commonly used areas—the top row and the first column. These options are ideal when your dataset uses a single header row or column.
How to Use Quick Freeze Presets
-
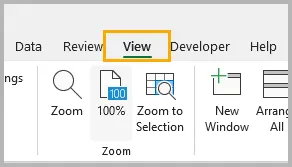
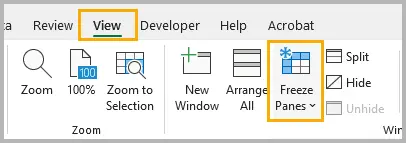
Go to the View tab on the ribbon.
-
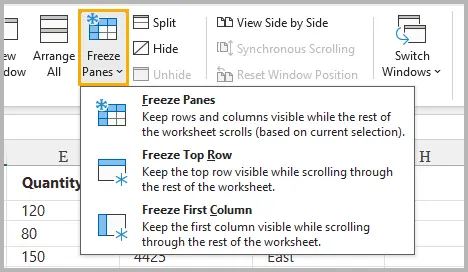
Click Freeze Panes .
-
Choose one of the following options:
- Freeze Top Row – keeps Row 1 visible when scrolling down.
- Freeze First Column – keeps Column A visible when scrolling horizontally.
Once selected, Excel adds a thin line (horizontal or vertical) indicating that the row or column is locked in place.
When to Use These Presets
- Your dataset has a single header row that must remain visible.
- Your key identifiers (e.g., ID, Name, SKU) are in the first column.
- You want the fastest possible way to freeze content without selecting any cells.
These options cover the most common freezing scenarios and are ideal for quick worksheet navigation.
Method 2. Freeze Any Rows and Columns Using Freeze Panes
While the quick presets are convenient, sometimes you need to freeze multiple rows, multiple columns, or both at once. That’s where the full Freeze Panes feature comes in.
How it Works
Excel freezes:
- Everything above the selected cell
- Everything to the left of the selected cell
This makes it possible to freeze complex headers or combined row/column structures.
Example: Freeze Rows 1–2 and Column A
-
Select the cell B3 (because it is below Row 2 and to the right of Column A).

-
Go to View → Freeze Panes .
-
Choose Freeze Panes .

Now Rows 1–2 and Column A are locked in place while the rest of the sheet remains scrollable.
More Examples
- Freeze only rows 1–3: Select A4 → Freeze Panes.
- Freeze only columns A–B: Select C1 → Freeze Panes.
- Freeze top 2 rows and first 3 columns: Select D3 → Freeze Panes.
When This Method Is Best
- Your dataset contains multi-level headers.
- You need flexibility.
- You need both rows and columns frozen at the same time.
This is the most powerful manual approach and the one used most often in professional reports.
Method 3. Use Keyboard Shortcut (Alt + W + F + …)
If you prefer to keep your hands on the keyboard, using Excel’s built-in shortcut sequence can be a faster alternative. These shortcuts mimic the steps triggered in the ribbon, allowing for quick access.
Shortcut Sequences
- Alt → W → F → F = Freeze Panes
- Alt → W → F → T = Freeze Top Row
- Alt → W → F → C = Freeze First Column
These are sequential shortcuts (not pressed at once). They work on all modern versions of Excel for Windows.
Why Shortcuts Matter
- Faster workflow for heavy Excel users
- Useful during data cleaning and analysis
- Saves time when toggling freeze/unfreeze repeatedly
If you're building Excel skills for professional spreadsheet work, memorizing these shortcuts is worth the effort.
Method 4. Use VBA Automation
If you regularly prepare templates, reports, or data exports, automating freeze panes with VBA can save significant time. A single macro can freeze specific ranges across multiple sheets or workbooks.
How to Apply VBA Code to Freeze Panes
-
Press Alt + F11 to open the VBA editor.
-
In the left panel, right-click VBAProject (YourWorkbook) and choose Insert → Module .
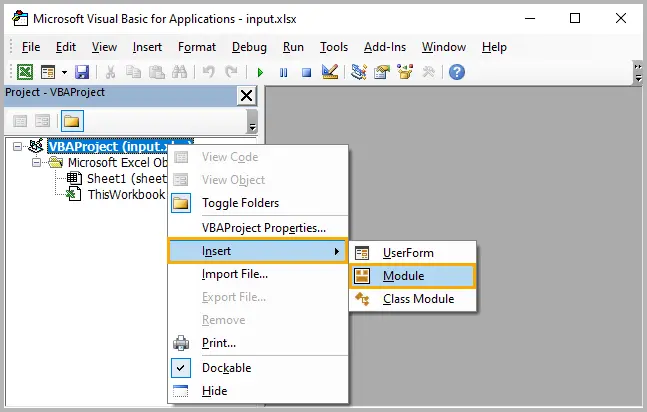
-
Copy and paste the VBA code snippet into the module.
-
Close the VBA editor.
-
Press Alt + F8 , select the macro (e.g.,
FreezeTopRow), and click Run .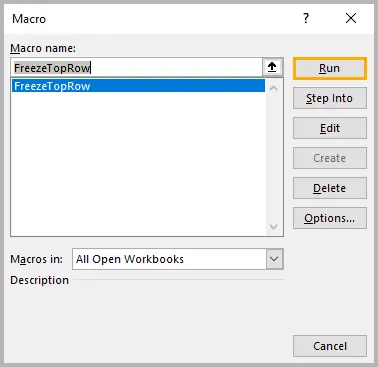
-
Return to the worksheet and confirm that the freeze panes settings have been applied.
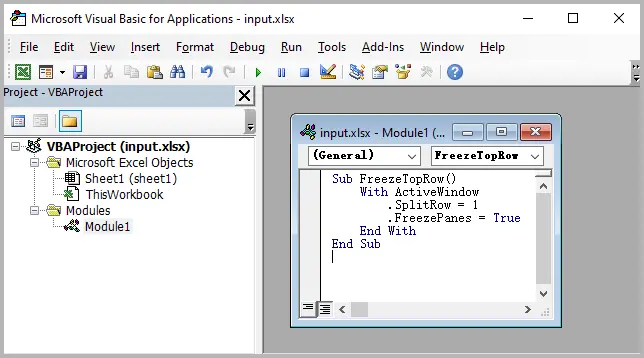
Example 1: Freeze the Top Row
Sub FreezeTopRow()
    With ActiveWindow
        .SplitRow = 1
        .FreezePanes = True
    End With
End Sub
Example 2: Freeze Rows 1–2 and Column A
Sub FreezeCustom()
    With ActiveWindow
        .SplitRow = 2
        .SplitColumn = 1
        .FreezePanes = True
    End With
End Sub
Example 3: Unfreeze Panes
Sub UnfreezePanes()
    ActiveWindow.FreezePanes = False
End Sub
When VBA Automation Is Useful
- You generate reports for multiple departments.
- You work with standardized workbook structures.
- You need freeze panes applied automatically upon opening a file.
- You create Excel-based tools or templates shared across teams.
VBA makes your formatting repeatable, reliable, and consistent.
Method 5. Use Python Automation (Spire.XLS)
For developers building automated reporting systems—especially in enterprise environments—freezing panes with Python provides a scalable, code-driven solution. The Spire.XLS for Python library allows you to manipulate Excel files without needing Excel installed.
Install Spire.XLS
pip install spire.xls
Example: Freeze Rows 1–2 and Column A
from spire.xls import *

workbook = Workbook()
workbook.LoadFromFile("input.xlsx")

sheet = workbook.Worksheets[0]
sheet.FreezePanes(3, 2)  # Freeze above row 3 and left of column 2

workbook.SaveToFile("output.xlsx", ExcelVersion.Version2016)
Freeze only the top row
sheet.FreezePanes(2, 1)
Unfreeze
sheet.UnfreezePanes()
Read further: Freeze or Unfreeze Panes in Excel Using Python
When Python Automation Is Ideal
- You generate hundreds of Excel reports automatically.
- Your workflow is integrated with web applications or backend systems.
- You need to apply consistent freeze settings programmatically.
- You want Excel automation without relying on COM or Windows.
Spire.XLS offers broad Excel capabilities, including advanced cell formatting, font and style customization, formula automation, data validation, and report generation, making it a powerful tool for enterprise-level Excel automation and workflow optimization.
Comparison Table: Choose the Right Way
| Method | Skill Level | Best For | Supports Freeze Rows | Supports Freeze Columns | Automation | Speed |
|---|---|---|---|---|---|---|
| Quick Freeze Presets | Beginner | Simple header freezing | ✔ Top row | ✔ First column | ✘ | ★★★★★ |
| Freeze Panes (Custom) | Beginner–Intermediate | Flexible freezing (rows & columns) | ✔ | ✔ | ✘ | ★★★★☆ |
| Keyboard Shortcut | Intermediate | Fast manual work | ✔ | ✔ | ✘ | ★★★★★ |
| VBA Automation | Intermediate–Advanced | Repeated freezes in templates | ✔ | ✔ | ✔ | ★★★★☆ |
| Python (Spire.XLS) | Developer | Large-scale automation & backend reporting | ✔ | ✔ | ✔ | ★★★★★ |
Summary
Freezing rows and columns is essential for navigating large Excel worksheets, and Excel provides several easy and flexible tools for doing so. The Quick Freeze Presets are perfect for common tasks, while Freeze Panes gives you full control over which parts of your worksheet remain visible. Keyboard shortcuts are ideal for fast manual workflows, and for more advanced users, VBA and Python automation provide ways to apply freezes across many sheets or automatically generated files.
Whether you're an analyst, developer, accountant, or data professional, choosing the right method will help you work more efficiently and keep your data easier to interpret.
FAQs About Freezing Panes in Excel
Q1. Why is “Freeze Panes” greyed out in Excel?
This usually happens when:
- You are currently editing a cell.
- The worksheet is protected.
- You are in Page Layout view (switch to Normal view).
Q2. Can I freeze panes in Excel Online?
Yes, Excel Online supports freezing the top row and first column, as well as custom freeze panes.
Q3. Can I freeze more than one row or column?
Yes. Use the full Freeze Panes function and select the correct cell reference below/next to the rows and columns you want to freeze.
Q4. Do freeze pane settings save with the file?
Yes. Once you save the workbook, the freeze settings remain active the next time you open it.
Q5. Can I freeze panes on multiple sheets at once?
Not manually. You must repeat the freeze action on each sheet, or automate it with VBA or Python.