
Spire.Doc for Python (103)
Word documents often contain extensive text, and applying emphasis marks is an effective way to highlight key information. Whether you need to accentuate important terms or enhance text clarity with styled formatting, emphasis marks can make your content more readable and professional. Instead of manually adjusting formatting, this guide demonstrates how to use Spire.Doc for Python to efficiently apply emphasis to text in Word with Python, saving time while ensuring a polished document.
- Apply Emphasis Marks to First Matched Text
- Apply Emphasis Marks to All Matched Text
- Apply Emphasis Marks to Text with Regular Expression
Install Spire.Doc for Python
This scenario requires Spire.Doc for Python and plum-dispatch v1.7.4. They can be easily installed in your Windows through the following pip command.
pip install Spire.Doc
If you are unsure how to install, please refer to this tutorial: How to Install Spire.Doc for Python on Windows.
Apply Emphasis Marks to First Matched Text in Word Documents
When crafting a Word document, highlighting keywords or phrases can improve readability and draw attention to important information. With Spire.Doc's CharacterFormat.EmphasisMark property, you can easily apply emphasis marks to any text, ensuring clarity and consistency.
Steps to apply emphasis marks to the first matched text in a Word document:
- Create an object of the Document class.
- Load a source Word document from files using Document.LoadFromFile() method.
- Find the text that you want to emphasize with Document.FindString() method.
- Apply emphasis marks to the text through CharacterFormat.EmphasisMark property.
- Save the updated Word document using Document.SaveToFile() method.
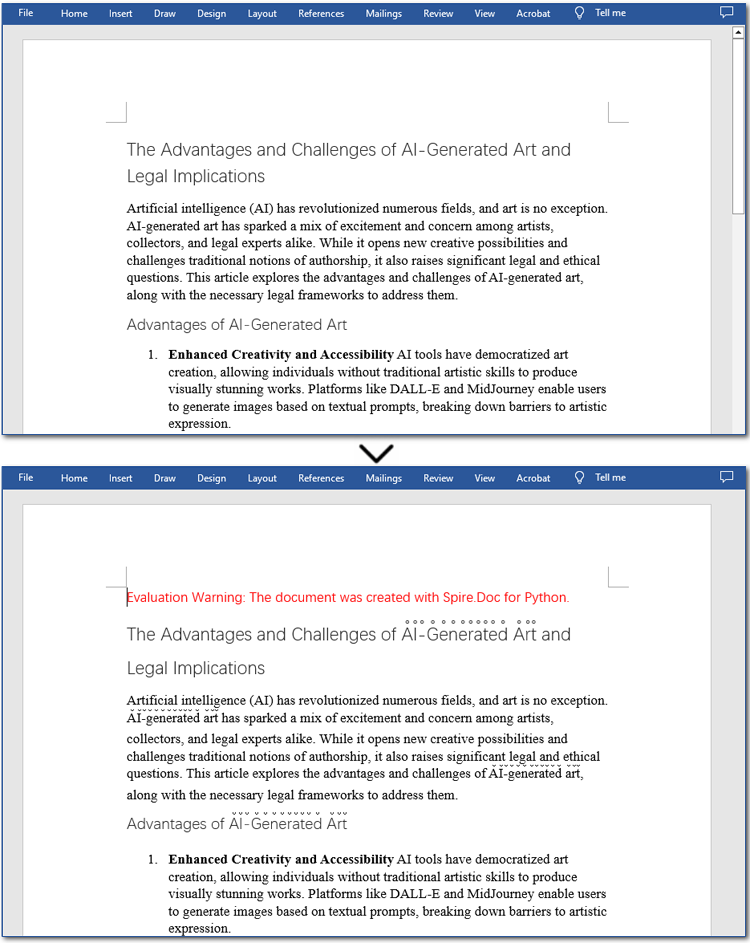
Below is the code example showing how to emphasize the first matching text of "AI-Generated Art" in a Word document:
- Python
from spire.doc import *
from spire.doc.common import *

# Create a Document object
doc = Document()
doc.LoadFromFile("/AI-Generated Art.docx")

# Customize the text that you want to apply an emphasis mark to
matchingtext = doc.FindString("AI-Generated Art", True, True)

# Apply the emphasis mark to the matched text
matchingtext.GetAsOneRange().CharacterFormat.EmphasisMark = Emphasis.CommaAbove

# Save the document as a new one
doc.SaveToFile("/ApplyEmphasisMark_FirstMatch.docx", FileFormat.Docx2013)
doc.Close()

Apply Emphasis Marks to All Matched Text in Word Files
In the previous section, we demonstrated how to add an emphasis mark to the first matched text. Now, let's take it a step further—how can we emphasize all occurrences of a specific text? The solution is simple: use the Document.FindAllString() method to locate all matches and then apply emphasis marks using the CharacterFormat.EmphasisMark property. Below, you'll find detailed steps and code examples to guide you through the process.
Steps to apply emphasis marks to all matched text:
- Create an instance of Document class.
- Read a Word file through Document.LoadFromFile() method.
- Find all the matching text using Document.FindAllString() method.
- Loop through all occurrences and apply the emphasis effect to the text through CharacterFormat.EmphasisMark property.
- Save the modified Word document through Document.SaveToFile() method.
The following code demonstrates how to apply emphasis to all occurrences of "AI-Generated Art" while ignoring case sensitivity:
- Python
from spire.doc import *
from spire.doc.common import *

# Create a Document object
doc = Document()
doc.LoadFromFile("/AI-Generated Art.docx")

# Customize the text that you want to apply an emphasis mark to
textselections = doc.FindAllString("AI-Generated Art", False, True)

# Loop through the text selections and apply the emphasis mark to the text
for textselection in textselections:
    textselection.GetAsOneRange().CharacterFormat.EmphasisMark = Emphasis.CircleAbove

# Save the document as a new one
doc.SaveToFile("/ApplyEmphasisMark_AllMatch.docx", FileFormat.Docx2013)
doc.Close()
Apply Emphasis Marks to Text in Word Documents with Regular Expression
Sometimes, the text you want to highlight may vary but follow a similar structure, such as email addresses, phone numbers, dates, or patterns like two to three words followed by special symbols (#, *, etc.). The best way to identify such text is by using regular expressions. Once located, you can apply emphasis marks using the same method. Let's go through the steps!
Steps to apply emphasis marks to text using regular expressions:
- Create a Document instance.
- Load a Word document from the local storage using Document.LoadFromFile() method.
- Find text that you want to emphasize with Document.FindAllPattern() method.
- Iterate through all occurrences and apply the emphasis effect to the text through CharacterFormat.EmphasisMark property.
- Save the resulting Word file through Document.SaveToFile() method.
The code example below shows how to emphasize "AI" and the word after it in a Word document:
- Python
from spire.doc import *
from spire.doc.common import *

# Create a Document object
doc = Document()
doc.LoadFromFile("/AI-Generated Art.docx")

# Match "AI" and the next word using regular expression
pattern = Regex(r"AI\s+\w+")

# Find all matching text
textSelections = doc.FindAllPattern(pattern)

# Loop through all the matched text and apply an emphasis mark
for selection in textSelections:
    selection.GetAsOneRange().CharacterFormat.EmphasisMark = Emphasis.DotBelow

# Save the document as a new one
doc.SaveToFile("/ApplyEmphasisMark_Regex.docx", FileFormat.Docx2013)
doc.Close()

Get a Free License
To fully experience the capabilities of Spire.Doc for Python without any evaluation limitations, you can request a free 30-day trial license.
Adding borders to specific text and paragraphs in Word documents is an effective way to highlight key information and improve the document's structure. Whether it's important terms or entire sections, borders help them stand out. In this guide, we'll show you how to use Spire.Doc for Python to add borders to text and paragraphs in Word with Python, boosting both the readability and professionalism of your document while saving you time from manual formatting.
Install Spire.Doc for Python
This scenario requires Spire.Doc for Python and plum-dispatch v1.7.4. They can be easily installed in your Windows through the following pip command.
pip install Spire.Doc
If you are unsure how to install, please refer to this tutorial: How to Install Spire.Doc for Python on Windows.
Add a Border to Text in Word Documents with Python
In Word documents, important information like technical terms, company names, or legal clauses can be highlighted with borders to draw readers' attention. Using Python, you can locate the required text with the Document.FindAllString() method and apply borders using the CharacterFormat.Border.BorderType property. Here's a step-by-step guide to help you do this efficiently.
Steps to add borders to all matched text in a Word document:
- Create an object of Document class.
- Read a source Word document from files using Document.LoadFromFile() method.
- Find all occurrences of the specified text through Document.FindAllString() method.
- Loop through all matched text and get the text as a text range.
- Add a border to the text with CharacterFormat.Border.BorderType property.
- Customize the color of the border through CharacterFormat.Border.Color property.
- Save the modified document with Document.SaveToFile() method.
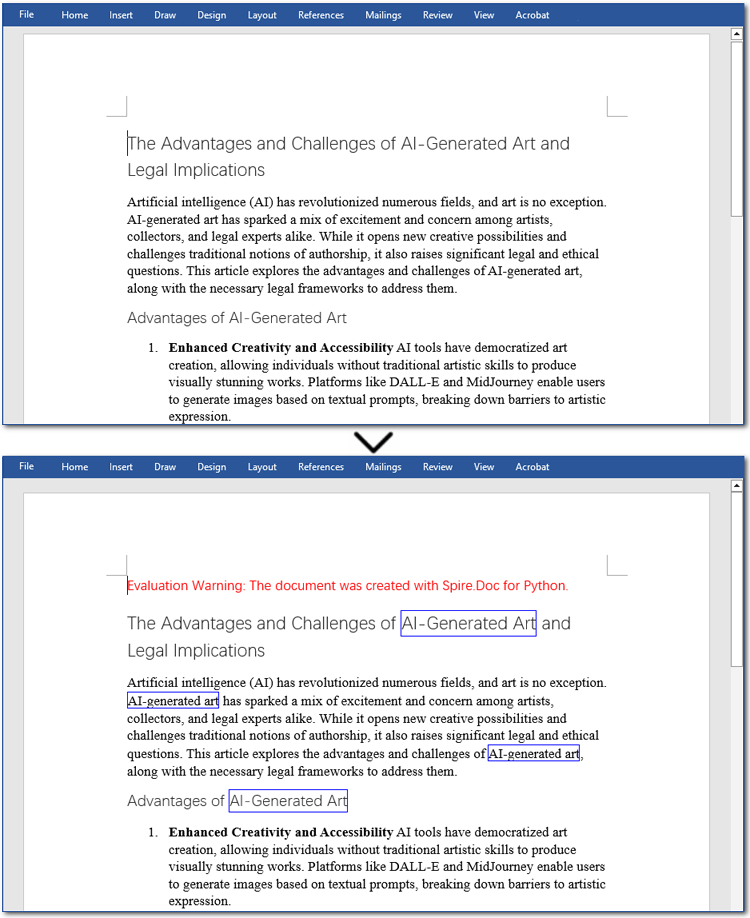
The code example below shows how to add a border to all occurrences of "AI-Generated Art":
- Python
from spire.doc import *
from spire.doc.common import *

# Create a Document object
doc = Document()
doc.LoadFromFile("/AI-Generated Art.docx")

# Set the target text
target_text = "AI-Generated Art"
# Create a TextSelection object and find all matches
text_selections = doc.FindAllString(target_text, False, True)

# Loop through the text selections
for selection in text_selections:
    text_range = selection.GetAsOneRange()
    # Add a border to the text
    text_range.CharacterFormat.Border.BorderType = BorderStyle.Single
    # Set the border color
    text_range.CharacterFormat.Border.Color = Color.get_Blue()

# Save the resulting document
doc.SaveToFile("/AddBorder_Text.docx", FileFormat.Docx2013)
doc.Close()
Add a Border to Paragraphs in Word Files Using Python
Important clauses or legal statements in contracts, summaries in reports, and quotations in papers often require adding borders to paragraphs for emphasis or distinction. Unlike text borders, adding a border to a paragraph involves finding the target paragraph by its index and then using the Format.Borders.BorderType property. Let's check out the detailed instructions.
Steps to add a border to paragraphs in Word documents:
- Create a Document instance.
- Read a Word document through Document.LoadFromFile() method.
- Get the specified paragraph with Document.Sections[].Paragraphs[] property.
- Add a border to the paragraph using Format.Borders.BorderType property.
- Set the type and color of the border.
- Save the resulting Word file through Document.SaveToFile() method.
Here is an example showing how to add a border to the fourth paragraph in a Word document:
- Python
from spire.doc import *
from spire.doc.common import *

# Create a Document object
doc = Document()
doc.LoadFromFile("/AI-Generated Art.docx")

# Get the fourth paragraph
paragraph = doc.Sections[0].Paragraphs[3]

# Add a border to the paragraph
borders = paragraph.Format.Borders
borders.BorderType(BorderStyle.DotDotDash)
borders.Color(Color.get_Blue())

# Save the updated document
doc.SaveToFile("/AddBorder_Paragraph.docx", FileFormat.Docx2013)
doc.Close()

Get a Free License
To fully experience the capabilities of Spire.Doc for Python without any evaluation limitations, you can request a free 30-day trial license.
When working with Word documents, managing fonts can be a tedious task, especially when dealing with large files or multiple documents. Whether you're looking to standardize fonts across a document or fix inconsistencies, knowing how to retrieve and replace fonts efficiently is a valuable skill. In this guide, you will learn how to use Spire.Doc for Python to automate font retrieval and replacement processes.
Install Spire.Doc for Python
This scenario requires Spire.Doc for Python and plum-dispatch v1.7.4. They can be easily installed in your Windows through the following pip command.
pip install Spire.Doc
If you are unsure how to install, please refer to this tutorial: How to Install Spire.Doc for Python on Windows
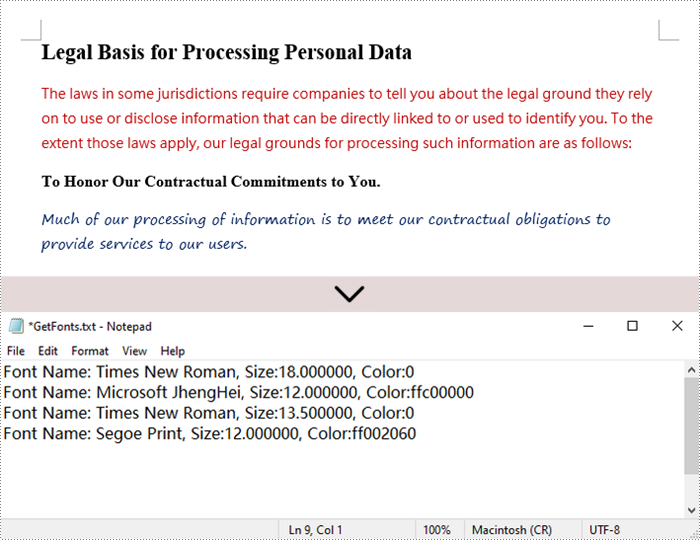
Retrieve Fonts in a Word Document
To retrieve font information from a Word document, you will need to iterate through the document's sections, paragraphs, and their child objects. As you check each child object, look for instances of TextRange. If a TextRange is found, you can extract the font details such as the font name and size from its CharacterFormat properties.
The following are the steps to retrieve font information from a Word document using Python:
- Create a Document object.
- Load a Word document using the Document.LoadFromFile() method.
- Iterate through each section and paragraph.
- For each child object, check if it’s an instance of TextRange.
- If it is, get the font name and size using the TextRange.CharacterFormat.FontName and TextRange.CharacterFormat.FontSize properties.
- Python
from spire.doc import *
from spire.doc.common import *

# Function to write string to a txt file
def WriteAllText(fname:str,text:List[str]):
    fp = open(fname,"w")
    for s in text:
        fp.write(s)

# Customize a FontInfo class
class FontInfo:
    def __init__(self):
        self._m_name = ''
        self._m_size = None

    def __eq__(self,other):
        if isinstance(other,FontInfo):
            return self._m_name == other.get_name() and self._m_size == other.get_size()
        return False

    def get_name(self):
        return self._m_name

    def set_name(self, value):
        self._m_name = value

    def get_size(self):
        return self._m_size

    def set_size(self, value):
        self._m_size = value

# Declare variables
fontImformations = ""
font_infos = []

# Create a Document instance
document = Document()

# Load a Word document
document.LoadFromFile("C:\\Users\\Administrator\\Desktop\\input.docx")

# Iterate through the sections
for i in range(document.Sections.Count):

    # Get a specific section
    section = document.Sections.get_Item(i)

    # Iterate through the paragraphs
    for j in range(section.Body.Paragraphs.Count):

        # Get a specific paragraph
        paragraph = section.Body.Paragraphs.get_Item(j)

        # Iterate through the child objects
        for k in range(paragraph.ChildObjects.Count):

            # Get a specific paragraph
            obj = paragraph.ChildObjects.get_Item(k)

            # Determine if a child object is a text range
            if isinstance(obj, TextRange):

                # Get a specific text range
                txtRange = obj if isinstance(obj, TextRange) else None

                # Get the font name and size
                fontName = txtRange.CharacterFormat.FontName
                fontSize = txtRange.CharacterFormat.FontSize

                # Get text color
                textColor = txtRange.CharacterFormat.TextColor.Name

                # Store the font information in the fontInformations variable
                fontInfo = FontInfo()
                fontInfo.set_name(fontName)
                fontInfo.set_size(fontSize)
                if  fontInfo not in font_infos:
                    font_infos.append(fontInfo)
                    str = "Font Name: {0:s}, Size:{1:f}, Color:{2:s}".format(fontInfo.get_name(), fontInfo.get_size(), textColor)
                    fontInformations += str
                    fontInformations += '\r'

# Write font information to a txt file
WriteAllText("output/GetFonts.txt", fontInformations)

# Dispose resources
document.Dispose()
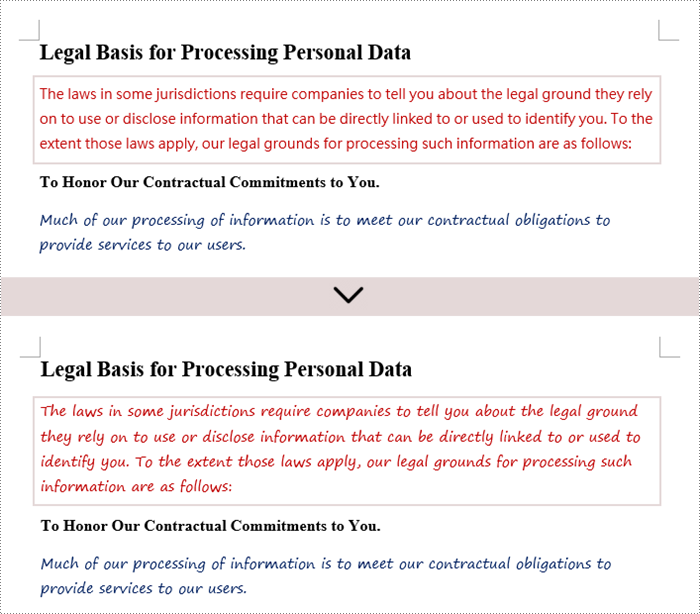
Replace Fonts in a Word Document
Once you retrieve the font name of a specific text range, you can easily replace it with a different font. To do this, utilize the TextRange.CharacterFormat.FontName property to assign a new font. Additionally, you can modify the font size and text color using the corresponding properties in the TextRange class.
The following are the steps to replace a specific font in a Word document using Python:
- Create a Document object.
- Load a Word document using the Document.LoadFromFile() method.
- Iterate through each section and paragraph.
- For each child object, check if it’s an instance of TextRange.
- If it is, get the font name using the TextRange.CharacterFormat.FontName property.
- Check if the font name is the specified font.
- If it is, set a new font name for the text range using the TextRange.CharacterFormat.FontName property.
- Save the changes to a different Word file using the Document.SaveToFile() method.
- Python
from spire.doc import *
from spire.doc.common import *

# Create a Document instance
document = Document()

# Load a Word document
document.LoadFromFile("C:\\Users\\Administrator\\Desktop\\input.docx")

# Iterate through the sections
for i in range(document.Sections.Count):

    # Get a specific section
    section = document.Sections.get_Item(i)

    # Iterate through the paragraphs
    for j in range(section.Body.Paragraphs.Count):

        # Get a specific paragraph
        paragraph = section.Body.Paragraphs.get_Item(j)

        # Iterate through the child objects
        for k in range(paragraph.ChildObjects.Count):

            # Get a specific paragraph
            obj = paragraph.ChildObjects.get_Item(k)

            # Determine if a child object is a text range
            if isinstance(obj, TextRange):

                # Get a specific text range
                txtRange = obj if isinstance(obj, TextRange) else None

                # Get the font name
                fontName = txtRange.CharacterFormat.FontName

                # Determine if the font name is Microsoft JhengHei
                if (fontName == "Microsoft JhengHei"):

                    # Replace the font with another font
                    txtRange.CharacterFormat.FontName = "Segoe Print"

# Save the document to a different file
document.SaveToFile("output/ReplaceFonts.docx", FileFormat.Docx)

# Dispose resources
document.Dispose()
Apply for a Temporary License
If you'd like to remove the evaluation message from the generated documents, or to get rid of the function limitations, please request a 30-day trial license for yourself.
Python: Add, Extract and Remove Custom Document Properties in Word Documents
2024-12-23 01:00:11 Written by AdministratorCustom document properties are user-defined fields within a Word document that store specific metadata. Unlike standard properties, such as title, author, or subject, which are predefined by Microsoft Word, these custom properties provide users with the flexibility to define and manage additional metadata fields according to their specific requirements. In this article, we will demonstrate how to add, extract, and remove custom document properties in Word documents in Python using Spire.Doc for Python.
- Add Custom Document Properties to Word in Python
- Extract Custom Document Properties in Word in Python
- Remove Custom Document Properties from Word in Python
Install Spire.Doc for Python
This scenario requires Spire.Doc for Python and plum-dispatch v1.7.4. They can be easily installed in your Windows through the following pip command.
pip install Spire.Doc
If you are unsure how to install, please refer to this tutorial: How to Install Spire.Doc for Python on Windows
Add Custom Document Properties to Word in Python
Spire.Doc for Python provides the CustomDocumentProperties.Add() method, which enables developers to assign different types of values, such as text, time, numeric, or yes or no, to the custom properties of a Word document. The steps below demonstrate how to add custom document properties with different types of values to a Word document using Spire.Doc for Python.
- Initialize an instance of the Document class.
- Load a Word document using the Document.LoadFromFile() method.
- Get the custom document properties of the document through the Document.CustomDocumentProperties property.
- Add custom document properties with different data types to the document using the CustomDocumentProperties.Add(name, value) method.
- Save the result document using the Document.SaveToFile() method.
- Python
from spire.doc import *
from spire.doc.common import *

# Create a Document object
document = Document()
# Load a Word document
document.LoadFromFile("Example.docx")

# Add custom document properties with different types of values to the document
customProperties = document.CustomDocumentProperties
customProperties.Add("DocumentCategory", String("Technical Report"))
customProperties.Add("RevisionNumber", Int32(5))
customProperties.Add("LastReviewedDate", DateTime(2024, 12, 1, 0, 0, 0, 0))
customProperties.Add("RequiresFollowUp", Boolean(False))

# Save the result document
document.SaveToFile("AddCustomDocumentProperties.docx", FileFormat.Docx2016)
document.Close()

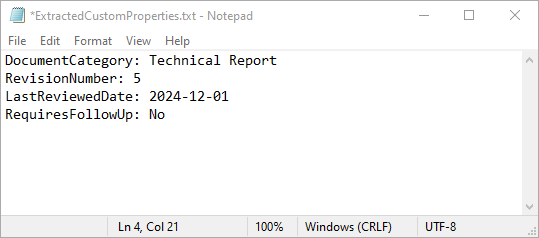
Extract Custom Document Properties in Word in Python
Extracting custom document properties allows developers to access metadata for further analysis, reporting, or integration into other applications. Spire.Doc for Python makes it simple to retrieve the details of these properties using the CustomDocumentProperty.Name and CustomDocumentProperty.Value properties. The detailed steps are as follows.
- Initialize an instance of the Document class.
- Load a Word document using the Document.LoadFromFile() method.
- Get the custom document properties of the document through the Document.CustomDocumentProperties property.
- Iterate through the custom document properties.
- Extract the name and value of each custom document property.
- Save the extracted data to a text file.
- Python
from spire.doc import *
from spire.doc.common import *

# Create a Document object
document = Document()
# Load a Word document
document.LoadFromFile("AddCustomDocumentProperties.docx")

# Open a text file to save the extracted custom properties
with open("ExtractedCustomProperties.txt", "w") as output_file:
    # Iterate through all custom document properties
    for i in range(document.CustomDocumentProperties.Count):
        # Extract the name and value of each custom property
        property_name = document.CustomDocumentProperties.get_Item(i).Name
        property_value = document.CustomDocumentProperties.get_Item(i).Value

        # Write the property details to the text file
        output_file.write(f"{property_name}: {property_value}\n")

document.Close()
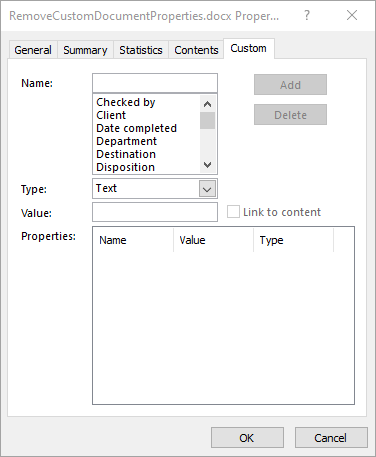
Remove Custom Document Properties from Word in Python
Cleaning up custom document properties is crucial for maintaining confidentiality, reducing file size, and ensuring metadata does not contain outdated or irrelevant information. Spire.Doc for Python allows developers to remove custom properties from a Word document using the DocumentProperties.Remove() method. The detailed steps are as follows.
- Initialize an instance of the Document class.
- Load a Word document using the Document.LoadFromFile() method.
- Get the custom document properties of the document through the Document.CustomDocumentProperties property.
- Iterate through the custom document properties.
- Remove each custom document property through its name using the DocumentProperties.Remove() method.
- Save the result document using the Document.SaveToFile() method.
- Python
from spire.doc import *
from spire.doc.common import *

# Create a Document object
document = Document()
# Load a Word document
document.LoadFromFile("AddCustomDocumentProperties.docx")

# Iterate through all custom document properties
customProperties = document.CustomDocumentProperties
for i in range(customProperties.Count - 1, -1, -1):
    # Remove each custom document property by its name
    customProperties.Remove(customProperties[i].Name)

# Save the result document
document.SaveToFile("RemoveCustomDocumentProperties.docx", FileFormat.Docx2016)
document.Close()
Apply for a Temporary License
If you'd like to remove the evaluation message from the generated documents, or to get rid of the function limitations, please request a 30-day trial license for yourself.
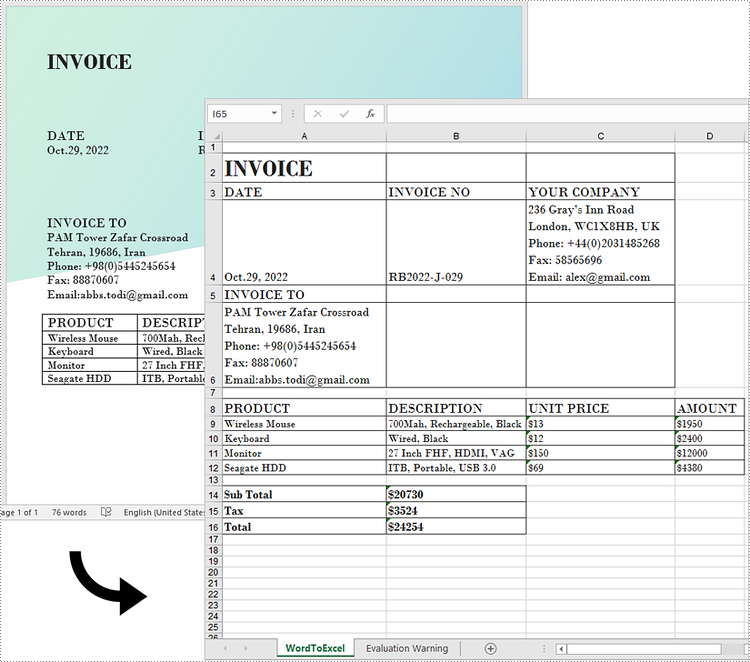
While Word is a powerful tool for creating and formatting documents, it is not optimized for advanced data management and analysis. In contrast, Excel excels at handling data in tabular form, allowing users to perform calculations, create charts, and conduct thorough data analysis.
Generally, converting complex Word documents into Excel spreadsheets is not advisable, as Excel may struggle to preserve the original layout. However, if your Word document primarily consists of tables, converting it to Excel can be highly beneficial. This transformation unlocks Excel's advanced functions, formulas, and visualization tools, enabling you to organize your data more effectively and improve your reporting and decision-making capabilities. In this article, we will focus specifically on how to convert this kind of Word documents to Excel in Python using Spire.Office for Python.
Install Spire.Office for Python
This scenario requires Spire.Office for Python and plum-dispatch v1.7.4. They can be easily installed in your Windows through the following pip command.
pip install Spire.Office
Convert Word to Excel in Python
This process uses two libraries in the Spire.Office for Python package. They're Spire.XLS for Python and Spire.Doc for Python. The former is used to read and extract content from a Word document, and the latter is used to create an Excel document and write data in specific cells. To make this code example easy to understand, we have defined the following three custom methods that handle specific tasks:
- ExportTableInExcel() - Export data from a Word table to specified Excel cells.
- CopyContentInTable() - Copy content from a table cell in Word to an Excel cell.
- CopyTextAndStyle() - Copy text with formatting from a Word paragraph to an Excel cell.
The following steps demonstrate how to export data from an entire Word document to an Excel worksheet using Spire.Office for Python.
- Create a Document object to load a Word file.
- Create a Worbbook object and add a worksheet named "WordToExcel" to it.
- Traverse through all the sections in the Word document and all the document objects under a certain section, and then determine if a document object is a paragraph or a table.
- If the document object is a paragraph, write the paragraph in a specified cell in Excel using CoypTextAndStyle() method.
- If the document object is a table, export the table data from Word to Excel cells using ExportTableInExcel() method.
- Auto fit the row height and column width in Excel so that the data within a cell will not exceed the bound of the cell.
- Save the workbook to an Excel file using Workbook.SaveToFile() method.
- Python
from spire.xls import *
from spire.doc import *

# Export data from Word table to Excel cells
def ExportTableInExcel(worksheet, row, table):
    for rowIndex in range(len(table.Rows)):
        tbRow = table.Rows[rowIndex]
        column = 1
        for cellIndex in range(len(tbRow.Cells)):
            tbCell = tbRow.Cells[cellIndex]
            cell = worksheet.Range[row, column]
            cell.BorderAround()
            CopyContentInTable(worksheet, tbCell, cell)
            column += 1
        row += 1
    return row

# Copy content from a Word table cell to an Excel cell
def CopyContentInTable(worksheet, tbCell, cell):
    newPara = Paragraph(tbCell.Document)
    for i in range(len(tbCell.ChildObjects)):
        documentObject = tbCell.ChildObjects[i]
        if isinstance(documentObject, Paragraph):
            paragraph = documentObject
            for cObj in range(len(paragraph.ChildObjects)):
                newPara.ChildObjects.Add(paragraph.ChildObjects[cObj].Clone())
            if i < len(tbCell.ChildObjects) - 1:
                newPara.AppendText("\n")
    CopyTextAndStyle(worksheet, cell, newPara)

# Copy text and style of a paragraph to a cell
def CopyTextAndStyle(worksheet, cell, paragraph):
    richText = cell.RichText
    richText.Text = paragraph.Text
    startIndex = 0
    for documentObject in range(len(paragraph.ChildObjects)):
        documentObject = paragraph.ChildObjects[documentObject]
        if isinstance(documentObject, TextRange):
            textRange = documentObject
            fontName = textRange.CharacterFormat.FontName
            isBold = textRange.CharacterFormat.Bold
            textColor = textRange.CharacterFormat.TextColor
            fontSize = textRange.CharacterFormat.FontSize
            textRangeText = textRange.Text
            strLength = len(textRangeText)
            font = worksheet.Workbook.CreateFont()
            font.Color = textColor
            font.IsBold = isBold
            font.Size = fontSize
            font.FontName = fontName
            endIndex = startIndex + strLength
            richText.SetFont(startIndex, endIndex, font)
            startIndex += strLength
        if isinstance(documentObject, DocPicture):
            picture = documentObject
            worksheet.Pictures.Add(cell.Row, cell.Column, picture.Image)
            worksheet.SetRowHeightInPixels(cell.Row, 1, picture.Image.Height)

    if paragraph.Format.HorizontalAlignment == HorizontalAlignment.Left:
        cell.Style.HorizontalAlignment = HorizontalAlignType.Left
    elif paragraph.Format.HorizontalAlignment == HorizontalAlignment.Center:
        cell.Style.HorizontalAlignment = HorizontalAlignType.Center
    elif paragraph.Format.HorizontalAlignment == HorizontalAlignment.Right:
        cell.Style.HorizontalAlignment = HorizontalAlignType.Right

# Create a Document object
doc = Document()
# Load a Word file
doc.LoadFromFile("C:/Users/Administrator/Desktop/Invoice.docx")

# Create a Workbook object
wb = Workbook()
# Remove the default worksheets
wb.Worksheets.Clear()

# Create a worksheet named "WordToExcel"
worksheet = wb.CreateEmptySheet("WordToExcel")
row = 1
column = 1

# Loop through the sections in the Word document
for sec_index in range(doc.Sections.Count):
    section = doc.Sections[sec_index]
    # Loop through the document object under a certain section
    for obj_index in range(section.Body.ChildObjects.Count):
        documentObject = section.Body.ChildObjects[obj_index]
        # Determine if the object is a paragraph
        if isinstance(documentObject, Paragraph):
            cell = worksheet.Range[row, column]
            paragraph = documentObject
            # Copy paragraph from Word to a specific cell
            CopyTextAndStyle(worksheet, cell, paragraph)
            row += 1

        # Determine if the object is a table
        if isinstance(documentObject, Table):
            table = documentObject
            # Export table data from Word to Excel
            currentRow = ExportTableInExcel(worksheet, row, table)
            row = currentRow

# Auto fit row height and column width
worksheet.AllocatedRange.AutoFitRows()
worksheet.AllocatedRange.AutoFitColumns()

# Wrap text in cells
worksheet.AllocatedRange.IsWrapText = True

# Save the workbook to an Excel file
wb.SaveToFile("WordToExcel.xlsx", ExcelVersion.Version2013)
wb.Dispose()
doc.Dispose()
Get a Free License
To fully experience the capabilities of Spire.Doc for Python without any evaluation limitations, you can request a free 30-day trial license.
In Word, each paragraph should convey a unique idea or point, helping to organize information in a way that is easy for readers to understand. Inserting new paragraphs allows you to introduce new concepts or expand on different aspects of a topic, making the text clearer. In this article, you will learn how to insert a new paragraph in Word in Python using Spire.Doc for Python.
- Add a Paragraph at the End of a Word Document in Python
- Insert a Paragraph at a Specified Location in Word in Python
Install Spire.Doc for Python
This scenario requires Spire.Doc for Python and plum-dispatch v1.7.4. They can be easily installed in your Windows through the following pip commands.
pip install Spire.Doc
If you are unsure how to install, please refer to this tutorial: How to Install Spire.Doc for Python on Windows
Add a Paragraph at the End of a Word Document in Python
To add a new paragraph at the end, you need to get the last section of the Word document through the Document.LastSection property, and then add a paragraph at the end of the section through the Section.AddParagraph() method. The following are the detailed steps:
- Create a Document instance.
- Load a Word document using Document.LoadFromFile() method.
- Get the last section of the document using Document.LastSection property.
- Add a paragraph at the end of the section using Section.AddParagraph() method, and then add text to it using Paragraph.AppendText() method.
- Create a ParagraphStyle object and set the font name, size, style of the paragraph text.
- Apply the paragraph style using Paragraph.ApplyStyle() method
- Save the result document using Document.SaveToFile() method.
- Python
from spire.doc import *
from spire.doc.common import *

# Create a Document object
doc = Document()

# Load a Word document
doc.LoadFromFile("Test.docx")

# Get the first section
section = doc.LastSection

# Add a paragraph at the end and set its text content
para = section.AddParagraph()
para.AppendText("Add a paragraph to the end of the document.")

# Set the paragraph style
style = ParagraphStyle(doc)
style.Name = "Style1"
style.CharacterFormat.FontName = "Times New Roman"
style.CharacterFormat.FontSize = 12
style.CharacterFormat.TextColor = Color.get_Blue()
style.CharacterFormat.Bold= True
doc.Styles.Add(style)
para.ApplyStyle("Style1")
para.Format.BeforeSpacing = 10

# Save the result file
doc.SaveToFile("AddParagraph.docx", FileFormat.Docx2016)
doc.Close()

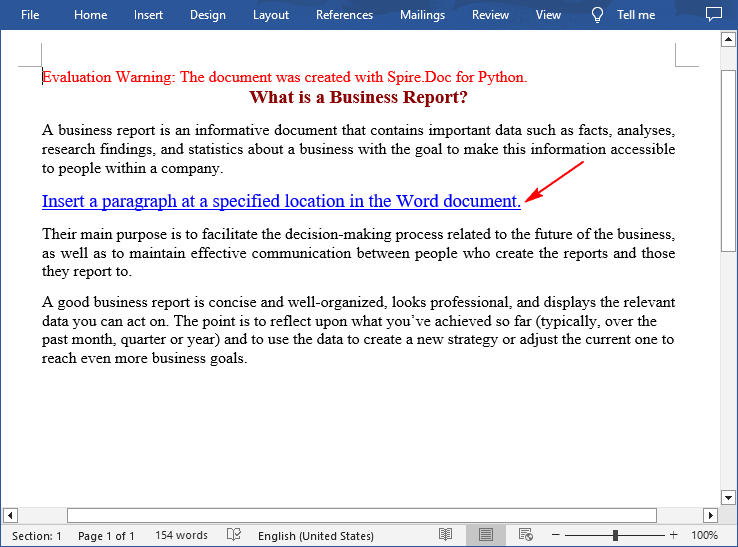
Insert a Paragraph at a Specified Location in Word in Python
You can also add a paragraph and then insert it to a specified position in Word through the Section.Paragraphs.Insert(index: int, paragraph: IParagraph) method. The following are the detailed steps:
- Create a Document instance.
- Load a Word document using Document.LoadFromFile() method.
- Get a specified section using Document.Sections[] property.
- Add a paragraph using Section.AddParagraph() method, and then add text to it using Paragraph.AppendText() method.
- Set the font name, size, style of the paragraph text.
- Insert the newly added paragraph at a specified index using Section.Paragraphs.Insert(index: int, paragraph: IParagraph) method.
- Save the result document using Document.SaveToFile() method.
- Python
from spire.doc import *
from spire.doc.common import *

# Create a Document object
doc = Document()

# Load a Word document
doc.LoadFromFile("Test.docx")

# Get the first section
section = doc.Sections[0]

# Add a paragraph and set its text content
para = section.AddParagraph()
textRange = para.AppendText("Insert a paragraph at a specified location in the Word document.")

# Set the font name, size, color and style
textRange.CharacterFormat.TextColor = Color.get_Blue()
textRange.CharacterFormat.FontName = "Times New Roman"
textRange.CharacterFormat.FontSize = 14
textRange.CharacterFormat.UnderlineStyle = UnderlineStyle.Single

# Insert the paragraph as the third paragraph
section.Paragraphs.Insert(2, para)

# Set spacing after the paragraph
para.Format.AfterSpacing = 10

# Save the result file
doc.SaveToFile("InsertParagraph.docx", FileFormat.Docx2016)
doc.Close()
Apply for a Temporary License
If you'd like to remove the evaluation message from the generated documents, or to get rid of the function limitations, please request a 30-day trial license for yourself.
MS Word allows users to view hyperlinks but lacks a built-in feature for extracting hyperlinks with a single click. This limitation makes extracting multiple links from a document time-consuming. Thankfully, Python can streamline this process significantly. In this article, we'll show you how to use Spire.Doc for Python to easily extract hyperlinks from Word documents with Python, either individual or batch, saving you time and effort.
Install Spire.Doc for Python
This scenario requires Spire.Doc for Python and plum-dispatch v1.7.4. They can be easily installed in your Windows through the following pip command.
pip install Spire.Doc
If you are unsure how to install, please refer to this tutorial: How to Install Spire.Doc for Python on Windows.
Extract Hyperlinks from Word Documents: Specified Links
Whether you're looking to retrieve just one important link or filter out certain URLs, this section will guide you through the process step by step. Using the Field.FieldText and the Field.Code properties provided by Spire.Doc, you can efficiently target and extract specified hyperlinks, making it easier to access the information you need.
Steps to extract specified hyperlinks from Word documents:
- Create an instance of Document class.
- Read a Word document from files using Document.LoadFromFile() method.
- Iterate through elements to find all hyperlinks in this Word document.
- Get a certain hyperlink from the hyperlink collection.
- Retrieve the hyperlink text with Field.FieldText property.
- Extract URLs from the hyperlink in the Word document using Field.Code property.
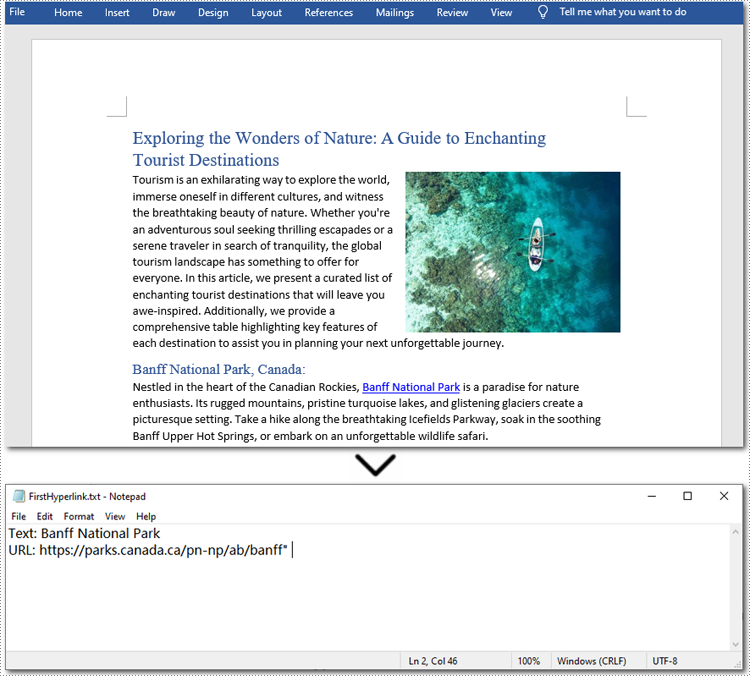
Here is the code example of extracting the first hyperlink in a Word document:
- Python
from spire.doc import *
from spire.doc.common import *

# Create a Document object
doc = Document()

# Load a Word file
doc.LoadFromFile("/sample.docx")

# Find all hyperlinks in the Word document
hyperlinks = []
for i in range(doc.Sections.Count):
    section = doc.Sections.get_Item(i)
    for j in range(section.Body.ChildObjects.Count):
        sec = section.Body.ChildObjects.get_Item(j)
        if sec.DocumentObjectType == DocumentObjectType.Paragraph:
            for k in range((sec if isinstance(sec, Paragraph) else None).ChildObjects.Count):
                para = (sec if isinstance(sec, Paragraph) else None).ChildObjects.get_Item(k)
                if para.DocumentObjectType == DocumentObjectType.Field:
                    field = para if isinstance(para, Field) else None
                    if field.Type == FieldType.FieldHyperlink:
                        hyperlinks.append(field)

# Get the first hyperlink text and URL
if hyperlinks:
    first_hyperlink = hyperlinks[0]
    hyperlink_text = first_hyperlink.FieldText
    hyperlink_url = first_hyperlink.Code.split('HYPERLINK ')[1].strip('"')

    # Save to a text file
    with open("/FirstHyperlink.txt", "w") as file:
        file.write(f"Text: {hyperlink_text}\nURL: {hyperlink_url}\n")

# Close the document
doc.Close()
Extract All Hyperlinks from Word Documents
After checking out how to extract specified hyperlinks, let's move on to extracting all hyperlinks from your Word documents. This is especially helpful when you need a list of all links, whether to check for broken ones or for other purposes. By automating this process with Spire.Doc(short for Spire Doc for Python), you can save time and ensure accuracy. Let's take a closer look at the steps and code example. Steps to extract all hyperlinks from Word documents:
- Create a Document object.
- Load a Word document from the local storage with Document.LoadFromFile() method.
- Loop through elements to find all hyperlinks in the Word document.
- Iterate through all hyperlinks in the collection.
- Use Field.FieldText property to extract the hyperlink text from each link.
- Use Field.Code property to get URLs from hyperlinks.
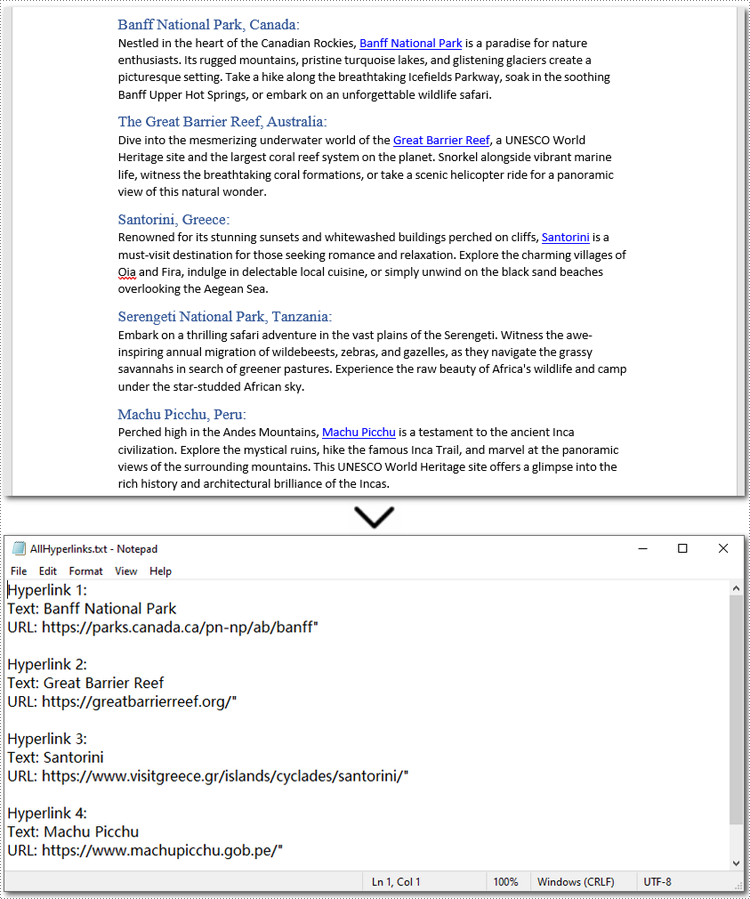
Below is a code example of extracting all hyperlinks from a Word document:
- Python
from spire.doc import *
from spire.doc.common import *

# Create a Document object
doc = Document()

# Load a Word file
doc.LoadFromFile("/sample.docx")

# Find all hyperlinks in the Word document
hyperlinks = []
for i in range(doc.Sections.Count):
    section = doc.Sections.get_Item(i)
    for j in range(section.Body.ChildObjects.Count):
        sec = section.Body.ChildObjects.get_Item(j)
        if sec.DocumentObjectType == DocumentObjectType.Paragraph:
            for k in range((sec if isinstance(sec, Paragraph) else None).ChildObjects.Count):
                para = (sec if isinstance(sec, Paragraph) else None).ChildObjects.get_Item(k)
                if para.DocumentObjectType == DocumentObjectType.Field:
                    field = para if isinstance(para, Field) else None
                    if field.Type == FieldType.FieldHyperlink:
                        hyperlinks.append(field)

# Save all hyperlinks text and URL to a text file
with open("/AllHyperlinks.txt", "w") as file:
    for i, hyperlink in enumerate(hyperlinks):
        hyperlink_text = hyperlink.FieldText
        hyperlink_url = hyperlink.Code.split('HYPERLINK ')[1].strip('"')
        file.write(f"Hyperlink {i+1}:\nText: {hyperlink_text}\nURL: {hyperlink_url}\n\n")

# Close the document
doc.Close()
Apply for a Temporary License
If you'd like to remove the evaluation message from the generated documents, or to get rid of the function limitations, please request a 30-day trial license for yourself.
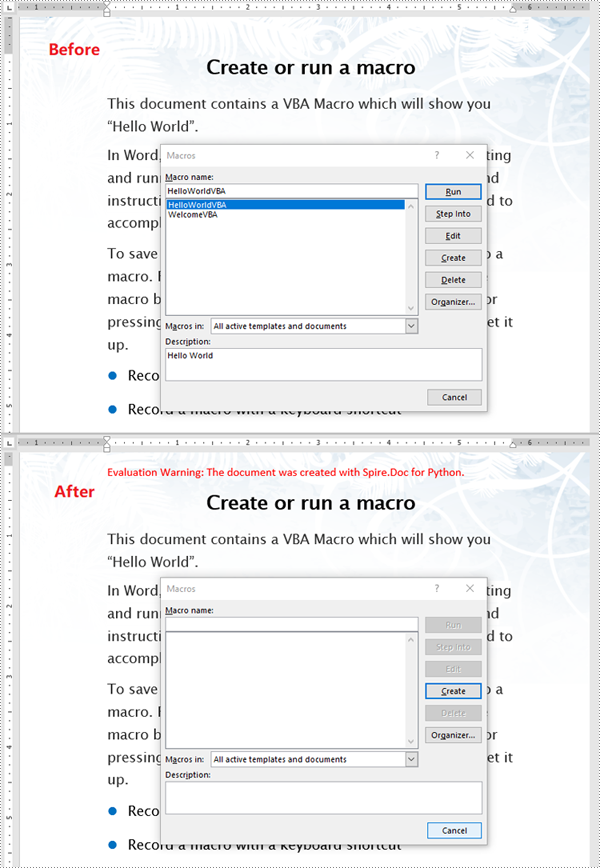
Macros in Word documents are small programs created using the Visual Basic for Applications (VBA) language. They are designed to automate repetitive tasks or add advanced functionality. While these macros can be powerful tools for improving productivity, they also pose security risks if used maliciously. Therefore, it is essential to detect and remove potentially harmful macros from Word documents, especially when handling files from untrusted sources. In this article, we will explain how to detect and remove VBA macros in Word documents in Python using Spire.Doc for Python.
- Detect Whether a Word Document Contains VBA Macros in Python
- Remove VBA Macros from a Word Document in Python
Install Spire.Doc for Python
This scenario requires Spire.Doc for Python and plum-dispatch v1.7.4. They can be easily installed in your Windows through the following pip command.
pip install Spire.Doc
If you are unsure how to install, please refer to this tutorial: How to Install Spire.Doc for Python on Windows
Detect Whether a Word Document Contains VBA Macros in Python
Spire.Doc for Python provides the Document.IsContainMacro property, enabling developers to check whether a Word document contains VBA macros easily. This property returns a boolean value: True indicates that the document includes one or more VBA macros, while False indicates that no macros are present in the document.
The following steps explain how to detect whether a Word document contains VBA macros using Spire.Doc for Python:
- Initialize an instance of the Document class.
- Load a Word document using the Document.LoadFromFile() method.
- Detect whether the document includes VBA macros using the Document.IsContainMacro property.
- Python
from spire.doc import *
from spire.doc.common import *

# Initialize an instance of the Document class
document = Document()
# Load a Word document
document.LoadFromFile("Test.docm")

# Detect if the document contains VBA macros
if document.IsContainMacro:
    print("The document contains VBA macros.")
else:
    print("The document does not contain any VBA macros.")

document.Close()

Remove VBA Macros from a Word Document in Python
Developers can remove all macros from a Word document at once by using the Document.ClearMacros() method. The detailed steps are as follows.
- Initialize an instance of the Document class.
- Load a Word document using the Document.LoadFromFile() method.
- Remove all macros from the document using the Document.ClearMacros() method.
- Save the result document using the Document.SaveToFile() method.
- Python
from spire.doc import *
from spire.doc.common import *

# Initialize an instance of the Document class
document = Document()
# Load a Word document
document.LoadFromFile("Test.docm")

# Remove all VBA macros from the document
document.ClearMacros()

# Save the modified document to a docm file
document.SaveToFile("RemoveMacros.docm", FileFormat.Docm2016)
document.Close()
Apply for a Temporary License
If you'd like to remove the evaluation message from the generated documents, or to get rid of the function limitations, please request a 30-day trial license for yourself.
Textboxes in a Word document serve as versatile containers for text, enabling users to enhance layout and design. They allow for the separation of content from the main body, making documents more visually appealing and organized. Extracting or updating textboxes can be essential for improving document efficiency, ensuring information is current, and facilitating data analysis.
In this article, you will learn how to extract or update textboxes in a Word document using Python and Spire.Doc for Python.
Install Spire.Doc for Python
This scenario requires Spire.Doc for Python and plum-dispatch v1.7.4. They can be easily installed in your Windows through the following pip command.
pip install Spire.Doc
If you are unsure how to install, please refer to this tutorial: How to Install Spire.Doc for Python on Windows
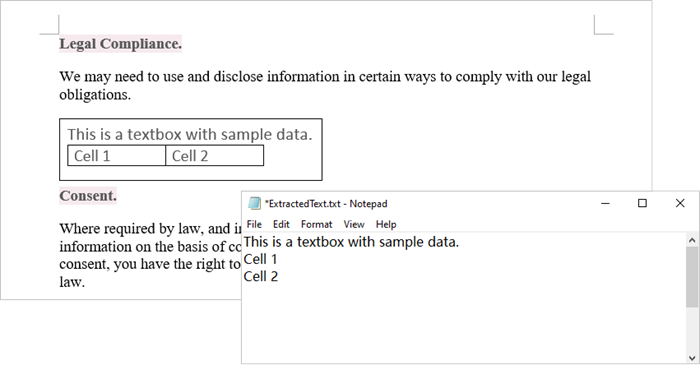
Extract Text from a Textbox in Word
Using Spire.Doc for Python, you can access a specific text box in a document by utilizing the Document.TextBoxes[index] property. After retrieving the text box, you can iterate through its child objects to identify whether each one is a paragraph or a table. If the object is a paragraph, you can retrieve its text using the Paragraph.Text property. In cases where the object is a table, you will need to loop through each cell to extract text from every individual cell within that table.
The steps to extract text from a text box in a Word document are as follows:
- Create a Document object.
- load a Word file by using Document.LoadFromFile() method.
- Access a specific text box using Document.TextBoxes[index] property.
- Iterate through the child objects within the text box.
- Determine if a child object is a paragraph. If it is, retrieve the text from the paragraph using Paragraph.Text property.
- Check if a child object is a table. If so, iterate through the cells in the table to extract text from each cell.
- Python
from spire.doc import *
from spire.doc.common import *

# Create a Document object
document = Document()

# Load a Word file
document.LoadFromFile("C:\\Users\\Administrator\\Desktop\\input.docx")

# Get a specific textbox
textBox = document.TextBoxes.get_Item(0)

with open('ExtractedText.txt','w') as sw:

    # Iterate through the child objects in the textbox
    for i in range(textBox.ChildObjects.Count):

        # Get a specific child object
        object = textBox.ChildObjects.get_Item(i)

        # Determine if the child object is paragraph
        if object.DocumentObjectType == DocumentObjectType.Paragraph:

            # Write paragraph text to txt file
            sw.write((object if isinstance(object, Paragraph) else None).Text + "\n")

        # Determine if the child object is table
        if object.DocumentObjectType == DocumentObjectType.Table:
            table = object if isinstance(object, Table) else None
            for i in range(table.Rows.Count):
                row = table.Rows[i]
                for j in range(row.Cells.Count):
                    cell = row.Cells[j]
                    for k in range(cell.Paragraphs.Count):
                        paragraph = cell.Paragraphs.get_Item(k)

                        # Write paragrah text of a specific cell to txt file
                        sw.write(paragraph.Text + "\n")

# Dispose resources
document.Dispose()
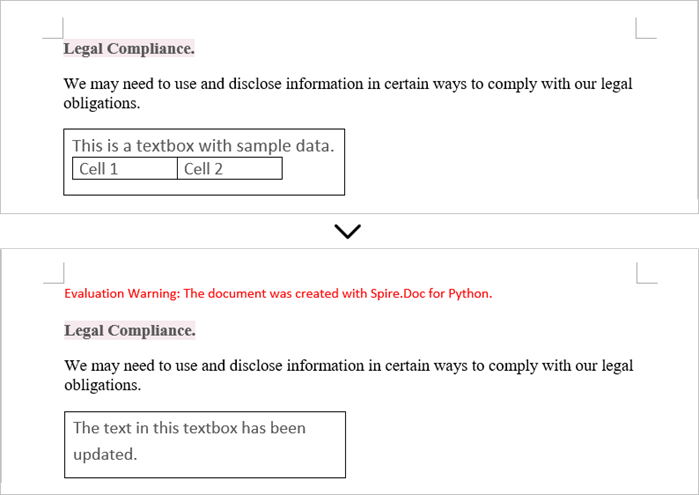
Update Text in a Textbox in Word
To update a textbox in a Word document, start by clearing its existing content with the TextBox.ChildObjects.Clear() method. This action removes all child objects, including any paragraphs or tables currently contained within the textbox. After clearing the content, you can add a new paragraph to the text box. Once the paragraph is created, set its text to the desired value.
The steps to update a textbox in a Word document are as follows:
- Create a Document object.
- Load a Word file using Document.LoadFromFile() method.
- Get a specific textbox using Document.TextBoxes[index] property
- Remove existing content of the textbox using TextBox.ChildObjects.Clear() method.
- Add a paragraph to the textbox using TextBox.Body.AddParagraph() method.
- Add text to the paragraph using Paragraph.AppendText() method.
- Save the document to a different Word file.
- Python
from spire.doc import *
from spire.doc.common import *

# Create a Document object
document = Document()

# Load a Word file
document.LoadFromFile("C:\\Users\\Administrator\\Desktop\\Input.docx")

# Get a specific textbox
textBox = document.TextBoxes.get_Item(0)

# Remove child objects of the textbox
textBox.ChildObjects.Clear()

# Add a new paragraph to the textbox
paragraph = textBox.Body.AddParagraph()

# Set line spacing
paragraph.Format.LineSpacing = 15.0

# Add text to the paragraph
textRange = paragraph.AppendText("The text in this textbox has been updated.")

# Set font size
textRange.CharacterFormat.FontSize = 15.0

# Save the document to a different Word file
document.SaveToFile("UpdateTextbox.docx", FileFormat.Docx2019);

# Dispose resources
document.Dispose()
Apply for a Temporary License
If you'd like to remove the evaluation message from the generated documents, or to get rid of the function limitations, please request a 30-day trial license for yourself.
Programmatic editing of Word documents involves using code to alter or modify the contents of these documents. This approach enables automation and customization, making it particularly advantageous for handling large document collections. Through the use of Spire.Doc library, developers can perform a wide range of operations, including text manipulation, formatting changes, and the addition of images or tables.
The following sections will demonstrate how to edit or modify a Word document in Python using Spire.Doc for Python.
- Modify Text in a Word Document
- Change Formatting of Text in a Word Document
- Add New Elements to a Word Document
- Remove Paragraphs from a Word Document
Install Spire.Doc for Python
This scenario requires Spire.Doc for Python and plum-dispatch v1.7.4. They can be easily installed in your Windows through the following pip command.
pip install Spire.Doc
If you are unsure how to install, please refer to this tutorial: How to Install Spire.Doc for Python on Windows
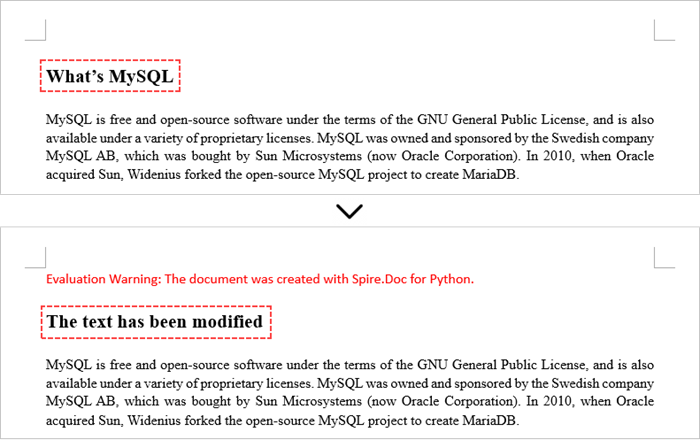
Modify Text in a Word Document in Python
In order to alter the content of a paragraph, the initial step is to obtain the desired paragraph from a specific section through the use of the Section.Paragraphs[index] property. Following this, you can replace the existing text with the new content by assigning it to the Paragraph.Text property of the chosen paragraph.
Here are the steps to edit text in a Word document with Python:
- Create a Document object.
- Load a Word file from the given file path.
- Get a specific section using Document.Sections[index] property.
- Get a specific paragraph using Section.Paragraphs[index] property.
- Reset the text of the paragraph using Paragraph.Text property.
- Save the updated document to a different Word file.
- Python
from spire.doc import *
from spire.doc.common import *

# Create a Document object
document = Document()

# Load an existing Word file
document.LoadFromFile("C:\\Users\\Administrator\\Desktop\\input.docx");

# Get a specific section
section = document.Sections[0]

# Get a specific paragraph
paragraph = section.Paragraphs[0]

# Modify the text of the paragraph
paragraph.Text = "The text has been modified"

# Save the document to a different Word file
document.SaveToFile("output/ModifyText.docx", FileFormat.Docx)

# Dispose resource
document.Dispose()
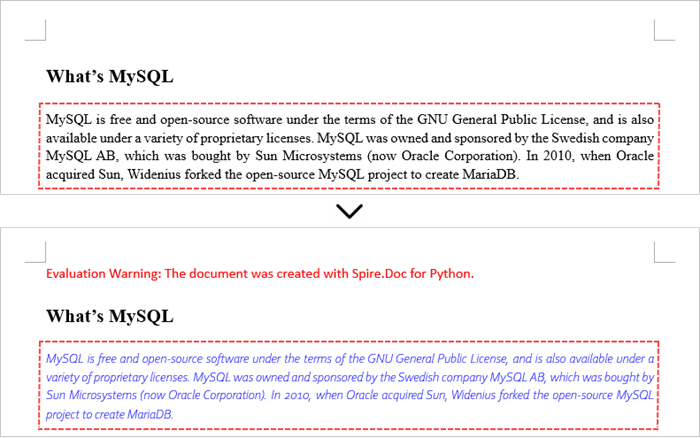
Change Formatting of Text in a Word Document in Python
To alter the text appearance of a particular paragraph, you first need to obtain the specified paragraph. Next, go through its child objects to find the individual text ranges. The formatting of each text range can then be updated using the TextRange.CharacterFormat property.
The steps to change text formatting in a Word document are as follows:
- Create a Document object.
- Load a Word file from the given file path.
- Get a specific section using Document.Sections[index] property.
- Get a specific paragraph using Section.Paragraphs[index] property.
- Iterate through the child objects in the paragraph.
- Determine if a child object is a text range.
- Get a specific text range.
- Reset the text formatting using TextRange.CharacterFormat property.
- Save the updated document to a different Word file.
- Python
from spire.doc import *
from spire.doc.common import *

# Create an object of Document
doc = Document()

# Load a Word document
doc.LoadFromFile("C:\\Users\\Administrator\\Desktop\\input.docx")

# Get a specific section
section = document.Sections.get_Item(0)

# Get a specific paragraph
paragraph = section.Paragraphs.get_Item(0)

# Iterate through the child objects in the paragraph
for i in range(paragraph.ChildObjects.Count):

    # Determine if a child object is text range
    if isinstance(paragraph.ChildObjects[i], TextRange):

        # Get a specific text range
        textRange = paragraph.ChildObjects[i]

        # Reset font name
        textRange.CharacterFormat.FontName = "Corbel Light"

        # Reset font size
        textRange.CharacterFormat.FontSize = 11.0

        # Reset text color
        textRange.CharacterFormat.TextColor = Color.get_Blue()

        # Apply italic to the text range
        textRange.CharacterFormat.Italic = True

# Save the document to a different Word file
doc.SaveToFile("output/ChangeFormatting.docx", FileFormat.Docx2019)

# Dispose resource
doc.Dispose()
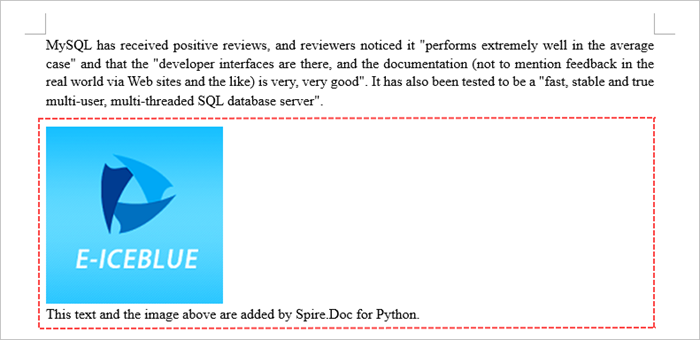
Add New Elements to a Word Document in Python
In a Word document, most elements—such as text, images, lists, and charts—are fundamentally organized around the concept of a paragraph. To insert a new paragraph into a specific section, use the Section.AddParagraph() method.
After creating the new paragraph, you can add various elements to it by leveraging the methods and properties of the Paragraph object.
The steps to add new elements (text and images) to a Word document are as follows:
- Create a Document object.
- Load a Word file from the given file path.
- Get a specific section through Document.Sections[index] property.
- Add a paragraph to the section using Section.AddParagraph() method.
- Add text to the paragraph using Paragraph.AppendText() method.
- Add an image to the paragraph using Paragraph.AppendPicture() method.
- Save the updated document to a different Word file.
- Python
from spire.doc import *
from spire.doc.common import *

# Create an object of Document
doc = Document()

# Load a Word document
doc.LoadFromFile("C:\\Users\\Administrator\\Desktop\\Input.docx")

# Get the last section
lastSection = doc.LastSection

# Add a paragraph to the section
paragraph = lastSection.AddParagraph()

# Add an image to the paragraph
picture = paragraph.AppendPicture("C:\\Users\\Administrator\\Desktop\\logo.png");

# Set text wrap style
picture.TextWrappingStyle = TextWrappingStyle.TopAndBottom

# Add text to the paragraph
paragraph.AppendText("This text and the image above are added by Spire.Doc for Python.")

# Create a paragraph style
style = ParagraphStyle(doc)
style.Name = "FontStyle"
style.CharacterFormat.FontName = "Times New Roman"
style.CharacterFormat.FontSize = 12
doc.Styles.Add(style)

# Apply the style to the paragraph
paragraph.ApplyStyle(style.Name)

# Save the document to a different Word file
doc.SaveToFile("output/AddNewElements.docx", FileFormat.Docx2019)

# Dispose resource
doc.Dispose()
Remove Paragraphs from a Word Document in Python
To eliminate a specific paragraph from a document, simply invoke the ParagraphCollection.RemoveAt() method and supply the index of the paragraph you intend to delete.
The steps to remove paragraphs from a Word document are as follows:
- Create a Document object.
- Load a Word file from the given file path.
- Get a specific section through Document.Sections[index] property.
- Remove a specific paragraph from the section using Section.Paragraphs.RemoveAt() method.
- Save the updated document to a different Word file.
- Python
from spire.doc import *
from spire.doc.common import *

# Create an object of Document
doc = Document()

# Load a Word document
doc.LoadFromFile("C:\\Users\\Administrator\\Desktop\\input.docx")

# Get a specific section
section = doc.Sections[0]

# Remove a specific paragraph
section.Paragraphs.RemoveAt(0)

# Save the document to a different Word file
doc.SaveToFile("output/RemoveParagraph.docx", FileFormat.Docx);

# Dispose resource
doc.Dispose()
Apply for a Temporary License
If you'd like to remove the evaluation message from the generated documents, or to get rid of the function limitations, please request a 30-day trial license for yourself.
