
Program Guide (86)
Children categories
Pages are the most fundamental components of a PDF document. If you want to add new information or supplemental material to an existing PDF, it is necessary to add new pages. Conversely, if there are some pages that contain incorrect or irrelevant content, you can remove them to create a more professional document. In this article, you will learn how to programmatically add or delete pages in PDF using Spire.PDF for Python.
Install Spire.PDF for Python
This scenario requires Spire.PDF for Python and plum-dispatch v1.7.4. They can be easily installed in your Windows through the following pip command.
pip install Spire.PDF
If you are unsure how to install, please refer to this tutorial: How to Install Spire.PDF for Python on Windows
Add Empty Pages to a PDF Document in Python
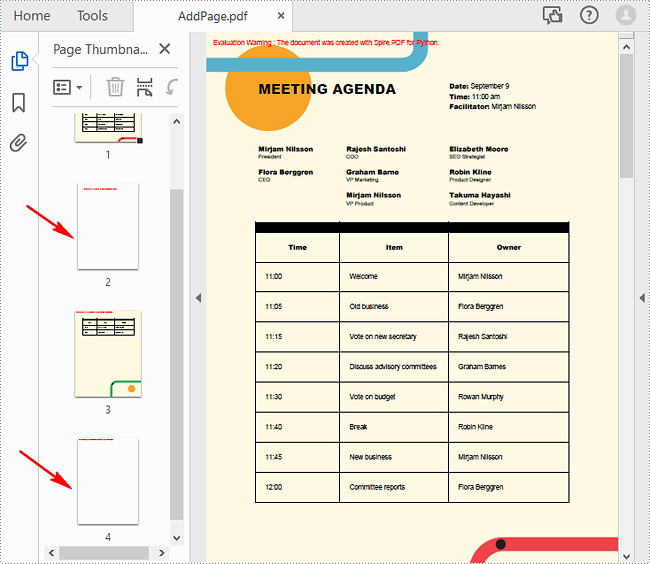
With Spire.PDF for Python, you can easily add a blank page to a specific position or to the end of the document using PdfDocument.Pages.Insert() or PdfDocument.Pages.Add(SizeF, PdfMargins) methods. The following are the detailed steps.
- Create a PdfDocument object.
- Load a sample PDF document using PdfDocument.LoadFromFile() method.
- Create a new blank page and insert it into a specific position of the document using PdfDocument.Pages.Insert() method.
- Create another new blank page with the specified size and margins, and then append it to the end of the document using PdfDocument.Pages.Add(SizeF, PdfMargins) method.
- Save the result document using PdfDocument.SaveToFile() method.
- Python
from spire.pdf.common import *
from spire.pdf import *

# Create a PdfDocument object
pdf = PdfDocument()

# Load a PDF document
pdf.LoadFromFile("Test.pdf")

# Insert a blank page to the document as the second page
pdf.Pages.Insert(1)

# Add an empty page to the end of the document
pdf.Pages.Add(PdfPageSize.A4(), PdfMargins(0.0, 0.0))

# Save the result document
pdf.SaveToFile("AddPage.pdf")
pdf.Close()
Delete an Existing Page in a PDF Document in Python
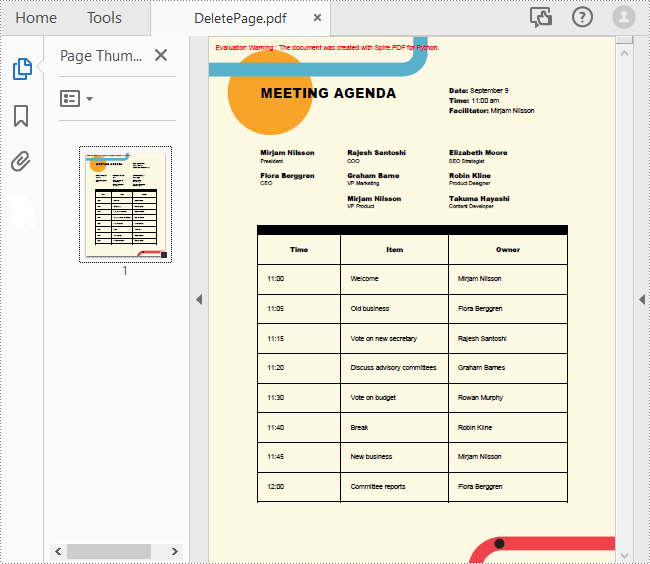
To remove a specified page from a PDF, you can use the PdfDocument.Pages.RemoveAt() method. The following are the detailed steps.
- Create a PdfDocument object.
- Load a sample PDF document using PdfDocument.LoadFromFile() method.
- Remove a specified page from the document using PdfDocument.Pages.RemoveAt() method.
- Save the result document using PdfDocument.SaveToFile() method.
- Python
from spire.pdf.common import *
from spire.pdf import *

# Create a PdfDocument object
pdf = PdfDocument()

# Load a PDF document
pdf.LoadFromFile("Test.pdf")

# Delete the second page of the document
pdf.Pages.RemoveAt(1)

# Save the result document
pdf.SaveToFile("DeletePage.pdf")
pdf.Close()
Apply for a Temporary License
If you'd like to remove the evaluation message from the generated documents, or to get rid of the function limitations, please request a 30-day trial license for yourself.
Stamps are a powerful tool in PDF documents that allow users to mark and annotate specific areas or sections of a PDF file. Often used for approval, review, or to indicate a specific status, stamps can greatly enhance collaboration and document management. In PDF, stamps can take various forms, such as a simple checkmark, a customized graphic, a date and time stamp, or even a signature. In this article, you will learn how to add image stamps and dynamic stamps to a PDF document in Python using Spire.PDF for Python.
Install Spire.PDF for Python
This scenario requires Spire.PDF for Python and plum-dispatch v1.7.4. They can be easily installed in your Windows through the following pip command.
pip install Spire.PDF
If you are unsure how to install, please refer to this tutorial: How to Install Spire.PDF for Python on Windows
Add an Image Stamp to PDF Documents in Python
Spire.PDF for Python offers the PdfRubberStampAnnotation class to represent a rubber stamp in a PDF document. In order to create the appearance of a rubber stamp, the PdfTemplate class is used. The PdfTemplate is a piece of canvas on which you can draw whatever information you want, such as text, images, date, and time.
Image stamps can include logos, signatures, watermarks, or any other custom graphics that you want to overlay onto your PDFs. The main steps to add an image stamp to PDF using Spire.PDF for Python are as follows.
- Create a PdfDocument object.
- Load a PDF file using PdfDocument.LoadFromFile() method.
- Load an image that you want to stamp on PDF using PdfImage.FromFile() method.
- Create a PdfTemplate object with the dimensions of the image.
- Draw the image on the template using PdfTemplate.Graphics.DrawImage() method.
- Create a PdfRubberStampAnnotation object, and set the template as its appearance.
- Add the stamp to a specific PDF page using PdfPageBase.AnnotationsWidget.Add() method.
- Save the document to a different file using PdfDocument.SaveToFile() method.
- Python
from spire.pdf.common import *
from spire.pdf import *

# Create a PdfDocument object
doc = PdfDocument()

# Load a PDF document
doc.LoadFromFile("C:\\Users\\Administrator\\Desktop\\input.pdf")

# Get a specific page
page = doc.Pages[2]

# Load an image file
image = PdfImage.FromFile("C:\\Users\\Administrator\\Desktop\\secret.png")

# Get the width and height of the image
width = (float)(image.Width)
height = (float)(image.Height)

# Create a PdfTemplate object based on the size of the image
template = PdfTemplate(width, height, True)

# Draw image on the template
template.Graphics.DrawImage(image, 0.0, 0.0, width, height)

# Create a rubber stamp annotation, specifying its location and position
rect = RectangleF((float) (page.ActualSize.Width - width - 50), (float) (page.ActualSize.Height - height - 40), width, height)
stamp = PdfRubberStampAnnotation(rect)

# Create a PdfAppearance object
pdfAppearance = PdfAppearance(stamp)

# Set the template as the normal state of the appearance
pdfAppearance.Normal = template

# Apply the appearance to the stamp
stamp.Appearance = pdfAppearance

# Add the stamp annotation to PDF
page.AnnotationsWidget.Add(stamp)

# Save the file
doc.SaveToFile("output/ImageStamp.pdf")
doc.Close()

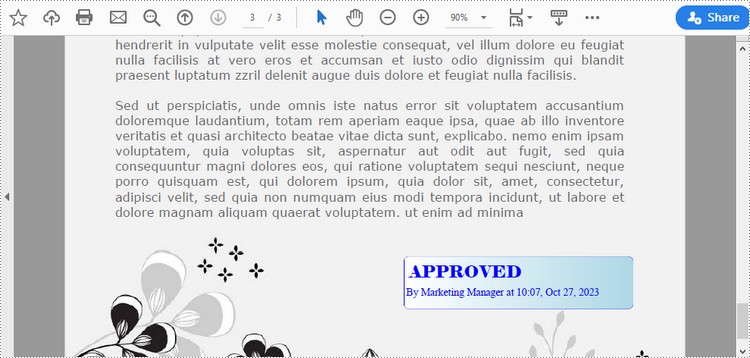
Add a Dynamic Stamp to PDF in Python
Unlike static stamps, dynamic stamps can contain variable information such as the date, time, or user input. The following are the steps to create a dynamic stamp in PDF using Spire.PDF for Python.
- Create a PdfDocument object.
- Load a PDF file using PdfDocument.LoadFromFile() method.
- Create a PdfTemplate object with desired size.
- Draw strings on the template using PdfTemplate.Graphics.DrawString() method.
- Create a PdfRubberStampAnnotation object, and set the template as its appearance.
- Add the stamp to a specific PDF page using PdfPageBase.AnnotationsWidget.Add() method.
- Save the document to a different file using PdfDocument.SaveToFile() method.
- Python
from spire.pdf.common import *
from spire.pdf import *

# Create a PdfDocument object
doc = PdfDocument()

# Load a PDF document
doc.LoadFromFile("C:\\Users\\Administrator\\Desktop\\input.pdf")

# Get a specific page
page = doc.Pages[2]

# Create a PdfTemplate object
template = PdfTemplate(220.0, 50.0, True)

# Create two fonts
font1 = PdfTrueTypeFont("Elephant", 16.0, 0, True)
font2 = PdfTrueTypeFont("Times New Roman", 10.0, 0, True)

# Create a solid brush and a gradient brush
solidBrush = PdfSolidBrush(PdfRGBColor(Color.get_Blue()))
rectangle1 = RectangleF(PointF(0.0, 0.0), template.Size)
linearGradientBrush = PdfLinearGradientBrush(rectangle1, PdfRGBColor(Color.get_White()), PdfRGBColor(Color.get_LightBlue()), PdfLinearGradientMode.Horizontal)

# Create a pen
pen = PdfPen(solidBrush)

# Create a rounded rectangle path
CornerRadius = 10.0
path = PdfPath()
path.AddArc(template.GetBounds().X, template.GetBounds().Y, CornerRadius, CornerRadius, 180.0, 90.0)
path.AddArc(template.GetBounds().X + template.Width - CornerRadius, template.GetBounds().Y, CornerRadius, CornerRadius, 270.0, 90.0)
path.AddArc(template.GetBounds().X + template.Width - CornerRadius, template.GetBounds().Y + template.Height - CornerRadius, CornerRadius, CornerRadius, 0.0, 90.0)
path.AddArc(template.GetBounds().X, template.GetBounds().Y + template.Height - CornerRadius, CornerRadius, CornerRadius, 90.0, 90.0)
path.AddLine(template.GetBounds().X, template.GetBounds().Y + template.Height - CornerRadius, template.GetBounds().X, template.GetBounds().Y + CornerRadius / 2)

# Draw path on the template
template.Graphics.DrawPath(pen, path)
template.Graphics.DrawPath(linearGradientBrush, path)

# Draw text on the template
string1 = "APPROVED\n"
string2 = "By Marketing Manager at " + DateTime.get_Now().ToString("HH:mm, MMM dd, yyyy")
template.Graphics.DrawString(string1, font1, solidBrush, PointF(5.0, 5.0))
template.Graphics.DrawString(string2, font2, solidBrush, PointF(2.0, 28.0))

# Create a rubber stamp, specifying its size and location
rectangle2 = RectangleF((float) (page.ActualSize.Width - 220.0 - 50.0), (float) (page.ActualSize.Height - 50.0 - 100.0), 220.0, 50.0)
stamp = PdfRubberStampAnnotation(rectangle2)

# Create a PdfAppearance object and apply the template as its normal state
apprearance = PdfAppearance(stamp)
apprearance.Normal = template

# Apply the appearance to stamp
stamp.Appearance = apprearance

# Add the stamp annotation to annotation collection
page.AnnotationsWidget.Add(stamp)

# Save the file
doc.SaveToFile("output/DynamicStamp.pdf", FileFormat.PDF)
doc.Dispose()
Apply for a Temporary License
If you'd like to remove the evaluation message from the generated documents, or to get rid of the function limitations, please request a 30-day trial license for yourself.
Image watermarks are frequently found on shared documents. Unlike text watermarks, image watermarks provide a simpler and less intrusive way to emphasize copyright, ownership, and confidentiality by displaying company logos, trademarks, warning icons, etc. In addition, adding image watermarks to PDF documents can also help brand promotion and enhance the visual appeal of the documents. This article will explain how to insert image watermarks to PDF documents using Spire.PDF for Python in Python programs.
Install Spire.PDF for Python
This scenario requires Spire.PDF for Python and plum-dispatch v1.7.4. They can be easily installed in your Windows through the following pip commands.
pip install Spire.PDF
If you are unsure how to install, please refer to this tutorial: How to Install Spire.PDF for Python on Windows
Add Single Image Watermarks to PDF Documents
Single image watermarks are transparent images at the center of PDF pages. With Spire.PDF for Python, users can draw a specified image as a watermark on any PDF page. The detailed steps are as follows:
- Create an object of PdfDocument class.
- Load a PDF document using PdfDocument.LoadFromFile() method.
- Load the watermark image using PdfImage.FromFile() method.
- Loop through the pages in the document to add the watermark.
- Get a page using PdfDocument.Pages.get_Item() method.
- Set the transparency of the watermark using PdfPageBase.Canvas.SetTransparency() method.
- Draw the watermark image in the center of the page using PdfPageBase.Canvas.DrawImage() method.
- Save the document using PdfDocument.SaveToFile() method.
- Python
from spire.pdf import *
from spire.pdf.common import *

# Create an object of PdfDocument class
pdf = PdfDocument()

# Load a PDF document
pdf.LoadFromFile("Sample.pdf")

# Load the watermark image
image = PdfImage.FromFile("watermark.png")

# Get the width and height of the image
imageWidth = float(image.Width)
imageHeight = float(image.Height)

# Loop through the pages in the document
for i in range(pdf.Pages.Count):
    # Get a page
    page = pdf.Pages.get_Item(i)
    # Set the transparency of the watermark
    page.Canvas.SetTransparency(0.3)
    # Get the width and height of the page
    pageWidth = page.ActualSize.Width
    pageHeight = page.ActualSize.Height
    # Draw the watermark image on the page
    page.Canvas.DrawImage(image, pageWidth/2 - imageWidth/2, pageHeight/2 - imageHeight/2, imageWidth, imageHeight)

# Save the document
pdf.SaveToFile("output/SingleImageWatermark.pdf")
pdf.Close()
Add Repeating Image Watermarks to PDF Documents
Repeating image watermarks are images repeated regularly on PDF pages. Drawing repeated image watermarks on PDF pages with Spire.PDF for Python involves the use of the PdfTillingBrush class. Below are the detailed steps:
- Create an object of PdfDocument class.
- Load a PDF document using PdfDocument.LoadFromFile() method.
- Load the watermark image using PdfImage.FromFile() method.
- Loop through the pages in the document to add the watermark.
- Get a page using PdfDocument.Pages.get_Item() method.
- Create an object of PdfTilingBrush class and set its size to determine the number of repetitions of the watermark.
- Set the transparency of the watermark using PdfTillingBrush.Graphics.SetTransparency() method.
- Translate the coordinate system to the specified position using PdfTillingBrush.Graphics.TranslateTransform() method to make the watermark displayed in the center of each repetition.
- Draw the watermark image on the tilling brush using PdfTillingBrush.Graphics.DrawImage() method.
- Draw the watermark on the page using PdfPageBase.Canvas.DrawRectangle() method.
- Save the document using PdfDocument.SaveToFile() method.
- Python
from spire.pdf.common import *
from spire.pdf import *

# Create an object of PdfDocument class
pdf = PdfDocument()

# Load a PDF document
pdf.LoadFromFile("Sample.pdf")

# Load the watermark image
image = PdfImage.FromFile("watermark.png")

# Loop through the pages of the document
for i in range(pdf.Pages.Count):
    # Get a page
    page = pdf.Pages.get_Item(i)
    # Create an object of PdfTilingBrush class and set its size
    brush = PdfTilingBrush(SizeF(page.Canvas.Size.Width / float(3), page.Canvas.Size.Height / float(3)))
    # Set the transparency of the watermark
    brush.Graphics.SetTransparency(0.3)
    brush.Graphics.Save()
    # Translate the coordinate to the specified position
    brush.Graphics.TranslateTransform(brush.Size.Width/2 - image.Width/2, brush.Size.Height/2 - image.Height/2)
    # Draw the watermark image on the brush
    brush.Graphics.DrawImage(image, 0.0, 0.0, float(image.Width), float(image.Height))
    brush.Graphics.Restore()
    # Draw the watermark on the page
    page.Canvas.DrawRectangle(brush, RectangleF(PointF(0.0, 0.0), page.Canvas.Size))

# Save the PDF document
pdf.SaveToFile("output/RepeatingImageWatermark.pdf", FileFormat.PDF)
pdf.Close()
Apply for a Temporary License
If you'd like to remove the evaluation message from the generated documents, or to get rid of the function limitations, please request a 30-day trial license for yourself.
Watermarking is a critical technique for securing documents, indicating ownership, and preventing unauthorized copying. Whether you're distributing drafts or branding final deliverables, applying watermarks helps protect your content effectively. In this tutorial, you’ll learn how to add watermarks to a PDF in Python using the powerful and easy-to-use Spire.PDF for Python library.
We'll walk through how to insert both text and image watermarks , handle transparency and positioning, and resolve common issues — all with clean, well-documented code examples.
Table of Contents:
- Python Library for Watermarking PDFs
- Adding a Text Watermark to a PDF
- Adding an Image Watermark to a PDF
- Troubleshooting Common Issues
- Wrapping Up
- FAQs
Python Library for Watermarking PDFs
Spire.PDF for Python is a robust library that provides comprehensive PDF manipulation capabilities. For watermarking specifically, it offers:
- High precision in watermark placement and rotation.
- Flexible transparency controls.
- Support for both text and image watermarks.
- Ability to apply watermarks to specific pages or entire documents.
- Preservation of original PDF quality.
Before proceeding, ensure you have Spire.PDF installed in your Python environment:
pip install spire.pdf
Adding a Text Watermark to a PDF
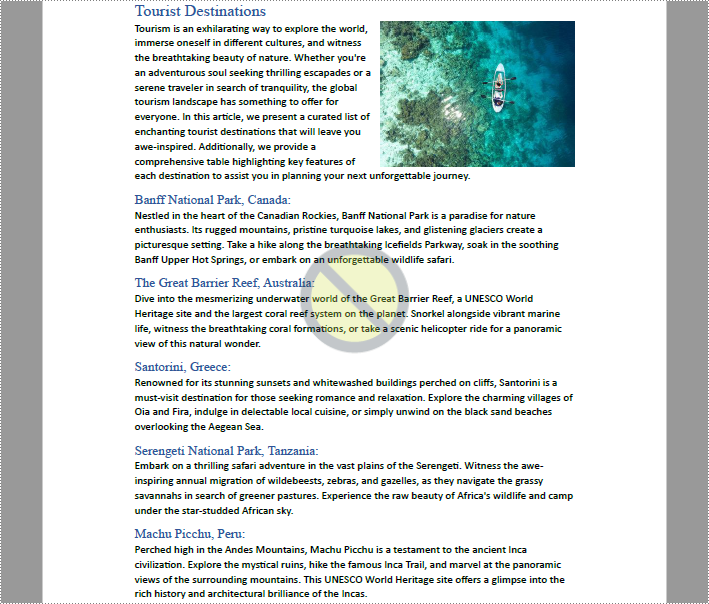
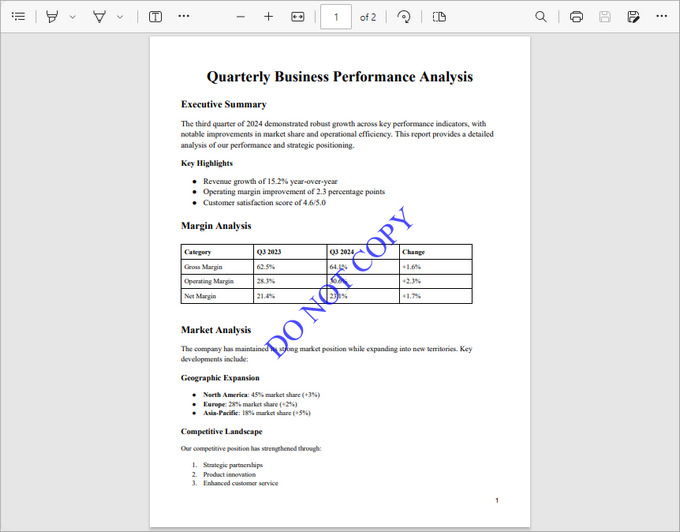
This code snippet demonstrates how to add a diagonal "DO NOT COPY" watermark to each page of a PDF file. It manages the size, color, positioning, rotation, and transparency of the watermark for a professional result.
from spire.pdf import *
from spire.pdf.common import *
import math

# Create an object of PdfDocument class
doc = PdfDocument()

# Load a PDF document from the specified path
doc.LoadFromFile("C:\\Users\\Administrator\\Desktop\\Input.pdf")

# Create an object of PdfTrueTypeFont class for the watermark font
font = PdfTrueTypeFont("Times New Roman", 48.0, 0, True)

# Specify the watermark text
text = "DO NOT COPY"

# Measure the dimensions of the text to ensure proper positioning
text_width = font.MeasureString(text).Width
text_height = font.MeasureString(text).Height

# Loop through each page in the document
for i in range(doc.Pages.Count):

    # Get the current page
    page = doc.Pages.get_Item(i)

    # Save the current canvas state
    state = page.Canvas.Save()

    # Calculate the center coordinates of the page
    x = page.Canvas.Size.Width  / 2
    y = page.Canvas.Size.Height / 2

    # Translate the coodinate system to the center so that the center of the page becomes the origin (0, 0)
    page.Canvas.TranslateTransform(x, y)

    # Rotate the canvas 45 degrees counterclockwise for the watermark
    page.Canvas.RotateTransform(-45.0)

    # Set the transparency of the watermark
    page.Canvas.SetTransparency(0.7)

    # Draw the watermark text at the centered position using negative offsets
    page.Canvas.DrawString(text, font, PdfBrushes.get_Blue(), PointF(-text_width / 2, -text_height / 2))

    # Restore the canvas state to prevent transformations from affecting subsequent drawings
    page.Canvas.Restore(state)

# Save the modified document to a new PDF file
doc.SaveToFile("output/TextWatermark.pdf")

# Dispose resources
doc.Dispose()
Breakdown of the Code :
- Load the PDF Document : The script loads an input PDF file from a specified path using the PdfDocument class.
- Configure Watermark Text : A watermark text ("DO NOT COPY") is set with a specific font (Times New Roman, 48pt) and measured for accurate positioning.
- Apply Transformations : For each page, the script:
- Centers the coordinate system.
- Rotates the canvas by 45 degrees counterclockwise.
- Sets transparency (70%) for the watermark.
- Draw the Watermark : The text is drawn at (-text_width / 2, -text_height / 2), which aligns the text perfectly around the center point of the page, regardless of the rotation applied.
- Save the Document : The modified document is saved to a new PDF file.
Output:
Adding an Image Watermark to a PDF
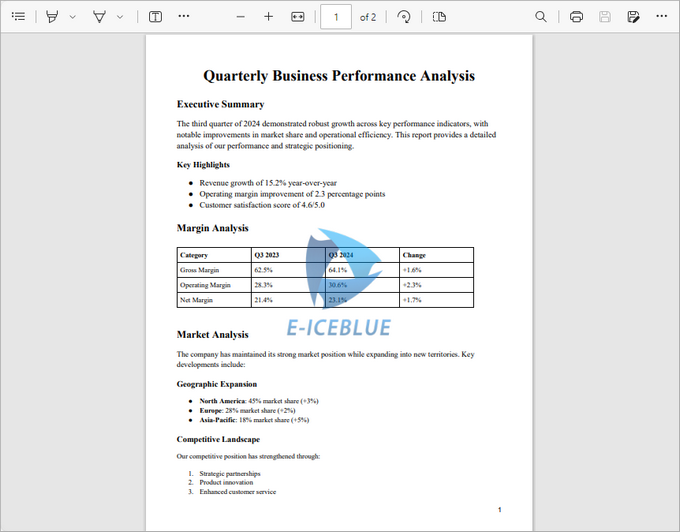
This code snippet adds a semi-transparent image watermark to each page of a PDF, ensuring proper positioning and a professional appearance.
from spire.pdf import *
from spire.pdf.common import *

# Create an object of PdfDocument class
doc = PdfDocument()

# Load a PDF document from the specified path
doc.LoadFromFile("C:\\Users\\Administrator\\Desktop\\Input.pdf")

# Load the watermark image from the specified path
image = PdfImage.FromFile("C:\\Users\\Administrator\\Desktop\\logo.png")

# Get the width and height of the loaded image for positioning
imageWidth = float(image.Width)
imageHeight = float(image.Height)

# Loop through each page in the document to apply the watermark
for i in range(doc.Pages.Count):
    # Get the current page
    page = doc.Pages.get_Item(i)

    # Set the transparency of the watermark to 50%
    page.Canvas.SetTransparency(0.5)

    # Get the dimensions of the current page
    pageWidth = page.ActualSize.Width
    pageHeight = page.ActualSize.Height

    # Calculate the x and y coordinates to center the image on the page
    x = (pageWidth - imageWidth) / 2
    y = (pageHeight - imageHeight) / 2

    # Draw the image at the calculated center position on the page
    page.Canvas.DrawImage(image, x, y, imageWidth, imageHeight)

# Save the modified document to a new PDF file
doc.SaveToFile("output/ImageWatermark.pdf")

# Dispose resources
doc.Dispose()
Breakdown of the Code :
- Load the PDF Document : The script loads an input PDFfile from a specified path using the PdfDocument class.
- Configure Watermark Image : The watermark image is loaded from a specified path, and its dimensions are retrieved for accurate positioning.
- Apply Transformations : For each page, the script:
- Sets the watermark transparency (50%).
- Calculates the center position of the page for the watermark.
- Draw the Watermark : The image is drawn at the calculated center coordinates, ensuring it is centered on each page.
- Save the Document : The modified document is saved to a new PDF file.
Output:
Apart from watermarks, you can also add stamps to PDFs. Unlike watermarks, which are fixed in place, stamps can be freely moved or deleted, offering greater flexibility in document annotation.
Troubleshooting Common Issues
- Watermark Not Appearing :
- Verify file paths are correct.
- Check transparency isn't set to 0 (fully transparent).
- Ensure coordinates place the watermark within page bounds.
- Quality Issues :
- For text, use higher-quality fonts.
- For images, ensure adequate resolution.
- Rotation Problems :
- Remember that rotation occurs around the current origin point.
- The order of transformations matters (translate then rotate).
Wrapping Up
With Spire.PDF for Python, adding watermarks to PDF documents becomes a simple and powerful process. Whether you need bold "Confidential" text across every page or subtle branding with logos, the library handles it all efficiently. By combining coordinate transformations, transparency settings, and drawing commands, you can create highly customized watermarking workflows tailored to your document's purpose.
FAQs
Q1. Can I add both text and image watermarks to the same PDF?
Yes, you can combine both approaches in a single loop over the PDF pages.
Q2. How can I rotate image watermarks?
Use Canvas.RotateTransform(angle) before drawing the image, similar to the text watermark example.
Q3. Does Spire.PDF support transparent PNGs for watermarks?
Yes, Spire.PDF preserves the transparency of PNG images when used as watermarks.
Q4. Can I apply different watermarks to different pages?
Absolutely. You can implement conditional logic within your page loop to apply different watermarks based on page number or other criteria.
Get a Free License
To fully experience the capabilities of Spire.PDF for Python without any evaluation limitations, you can request a free 30-day trial license.
SVG (Scalable Vector Graphics) is an XML-based vector image format that describes two-dimensional graphics using geometric shapes, text, and other graphical elements. SVG files can be easily scaled without losing image quality, which makes them ideal for various purposes such as web design, illustrations, and animations. In certain situations, you may encounter the need to convert PDF files to SVG format. In this article, we will explain how to convert PDF to SVG in Python using Spire.PDF for Python.
- Convert a PDF File to SVG in Python
- Convert a PDF File to SVG with Custom Width and Height in Python
- Convert Specific Pages of a PDF File to SVG in Python
Install Spire.PDF for Python
This scenario requires Spire.PDF for Python and plum-dispatch v1.7.4. They can be easily installed in your Windows through the following pip command.
pip install Spire.PDF
If you are unsure how to install, please refer to this tutorial: How to Install Spire.PDF for Python on Windows
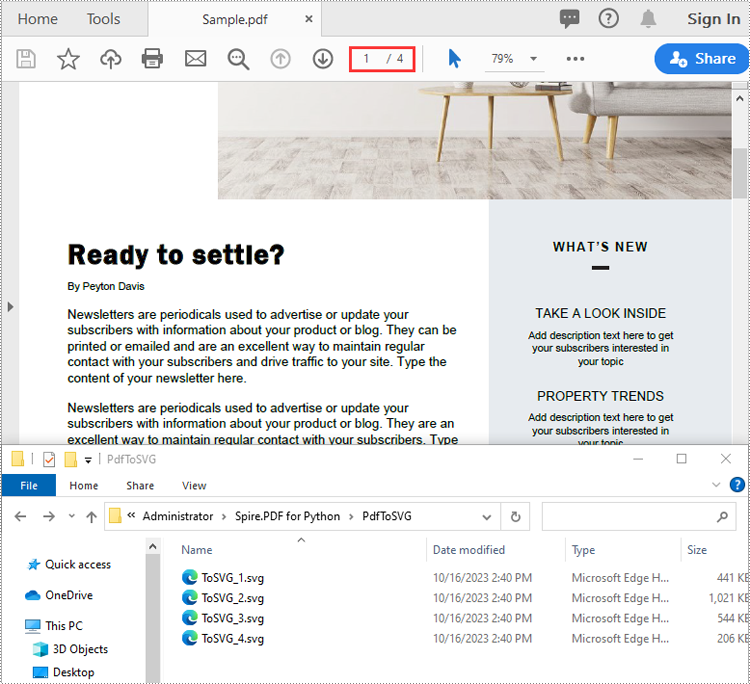
Convert a PDF File to SVG in Python
Spire.PDF for Python provides the PdfDocument.SaveToFile(filename:str, fileFormat:FileFormat) method to convert each page of a PDF file to a separate SVG file. The detailed steps are as follows.
- Create an object of the PdfDocument class.
- Load a sample PDF file using PdfDocument.LoadFromFile() method.
- Convert each page of the PDF file to SVG using PdfDocument.SaveToFile(filename:str, fileFormat:FileFormat) method.
- Python
from spire.pdf.common import *
from spire.pdf import *

# Create an object of the PdfDocument class
doc = PdfDocument()
# Load a PDF file
doc.LoadFromFile("Sample.pdf")

# Save each page of the file to a separate SVG file
doc.SaveToFile("PdfToSVG/ToSVG.svg", FileFormat.SVG)

# Close the PdfDocument object
doc.Close()
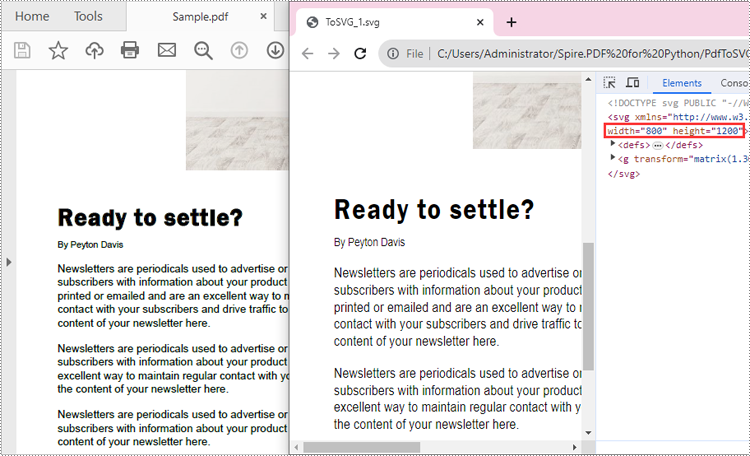
Convert a PDF File to SVG with Custom Width and Height in Python
The PdfDocument.PdfConvertOptions.SetPdfToSvgOptions(wPixel:float, hPixel:float) method provided by Spire.PDF for Python allows you to specify the width and height of the SVG files converted from PDF. The detailed steps are as follows.
- Create an object of the PdfDocument class.
- Load a sample PDF file using PdfDocument.LoadFromFile() method.
- Specify the width and height of the output SVG files using PdfDocument.PdfConvertOptions.SetPdfToSvgOptions(wPixel:float, hPixel:float) method.
- Convert each page of the PDF file to SVG using PdfDocument.SaveToFile(filename:str, fileFormat:FileFormat) method.
- Python
from spire.pdf.common import *
from spire.pdf import *

# Create an object of the PdfDocument class
doc = PdfDocument()
# Load a PDF file
doc.LoadFromFile("Sample.pdf")

# Specify the width and height of output SVG files
doc.ConvertOptions.SetPdfToSvgOptions(800.0, 1200.0)

# Save each page of the file to a separate SVG file
doc.SaveToFile("PdfToSVGWithCustomWidthAndHeight/ToSVG.svg", FileFormat.SVG)

# Close the PdfDocument object
doc.Close()
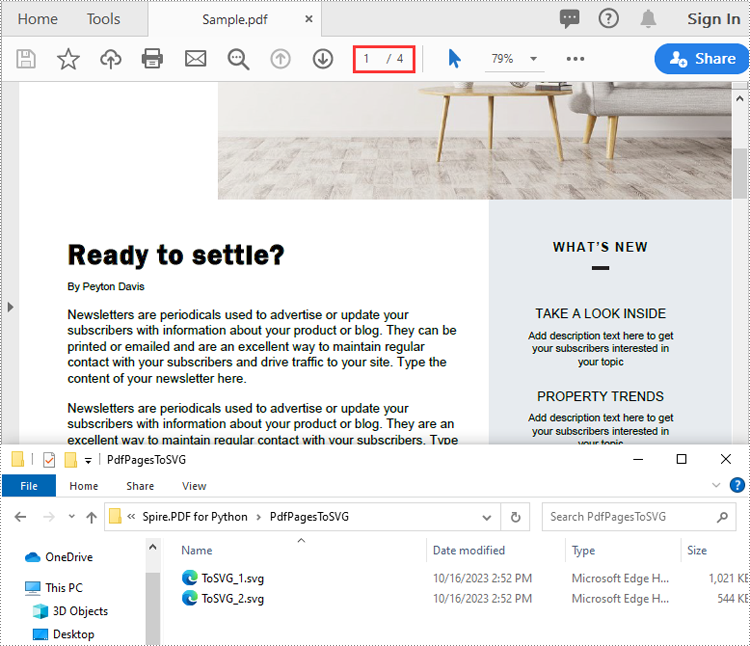
Convert Specific Pages of a PDF File to SVG in Python
The PdfDocument.SaveToFile(filename:str, startIndex:int, endIndex:int, fileFormat:FileFormat) method provided by Spire.PDF for Python allows you to convert specific pages of a PDF file to SVG files. The detailed steps are as follows.
- Create an object of the PdfDocument class.
- Load a sample PDF file using PdfDocument.LoadFromFile() method.
- Convert specific pages of the PDF file to SVG using PdfDocument.SaveToFile(filename:str, startIndex:int, endIndex:int, fileFormat:FileFormat) method.
- Python
from spire.pdf.common import *
from spire.pdf import *

# Create an object of the PdfDocument class
doc = PdfDocument()
# Load a PDF file
doc.LoadFromFile("Sample.pdf")

# Save specific pages of the file to SVG files
doc.SaveToFile("PdfPagesToSVG/ToSVG.svg", 1, 2, FileFormat.SVG)

# Close the PdfDocument object
doc.Close()
Apply for a Temporary License
If you'd like to remove the evaluation message from the generated documents, or to get rid of the function limitations, please request a 30-day trial license for yourself.
Alongside textual content, images in a PDF play a crucial role in conveying messages effectively. Being able to manipulate images within a PDF document, such as adding, replacing, or removing them, can be incredibly useful for enhancing the visual appeal, updating outdated graphics, or modifying the document's content. In this article, you will learn how to add, replace, or delete images in a PDF document in Python using Spire.PDF for Python.
- Add an Image to a PDF Document in Python
- Replace an Image in a PDF Document in Python
- Remove an Image from a PDF Document in Python
Install Spire.PDF for Python
This scenario requires Spire.PDF for Python and plum-dispatch v1.7.4. They can be easily installed in your Windows through the following pip command.
pip install Spire.PDF
If you are unsure how to install, please refer to this tutorial: How to Install Spire.PDF for Python on Windows
Add an Image to a PDF Document in Python
To add an image to a PDF page, you can use the PdfPage.Canvas.DrawImage() method. The following are the detailed steps.
- Create a PdfDocument object.
- Add a page to the document using PdfDocument.Pages.Add() method.
- Load an image using PdfImage.FromFile() method.
- Draw the image on the page using PdfPageBase.Canvas.DrawImage() method.
- Save the document using PdfDocument.SaveToFile() method.
- Python
from spire.pdf.common import *
from spire.pdf import *

# Create a PdfDocument instance
doc = PdfDocument()

# Set the page margins
doc.PageSettings.SetMargins(30.0, 30.0, 30.0, 30.0)

# Add a page
page = doc.Pages.Add()

# Load an image
image = PdfImage.FromFile('C:/Users/Administrator/Desktop/logo.png')

# Specify the size of the image in the document
width = image.Width * 0.70
height = image.Height * 0.70

# Specify the X and Y coordinates where the image will be drawn
x = 10.0
y = 30.0

# Draw the image at a specified location on the page
page.Canvas.DrawImage(image, x, y, width, height)

# Save the result document
doc.SaveToFile("output/AddImage.pdf", FileFormat.PDF)
Replace an Image in a PDF Document in Python
Spire.PDF for Python offers the PdfImageHelper class to help us get and deal with the images in a certain page. To replace an image with a new one, you can use the PdfImageHelper.ReplaceImage() method. The following are the steps.
- Create a PdfDocument object.
- Load a PDF document using PdfDocument.LoadFromFile() method.
- Get a specific page through PdfDocument.Pages[index] property.
- Load an image using PdfImage.FromFile() method.
- Create a PdfImageHelper object, and get the image information from the specified page using PdfImageHelper.GetImagesInfo() method.
- Replace an existing image in the page with the new image using PdfImageHelper.ReplaceImage() method.
- Save the document using PdfDocument.SaveToFile() method.
- Python
from spire.pdf.common import *
from spire.pdf import *

# Create a PdfDocument instance
doc = PdfDocument()

# Load a PDF document
doc.LoadFromFile('C:/Users/Administrator/Desktop/input.pdf')

# Get the first page
page = doc.Pages[0]

# Load an image
image = PdfImage.FromFile('C:/Users/Administrator/Desktop/newImage.png')

# Create a PdfImageHelper instance
imageHelper = PdfImageHelper()

# Get the image information from the page
imageInfo = imageHelper.GetImagesInfo(page)

# Replace the first image on the page with the loaded image
imageHelper.ReplaceImage(imageInfo[0], image)

# Save the result document
doc.SaveToFile("output/ReplaceImage.pdf", FileFormat.PDF)
Remove an Image from a PDF Document in Python
To remove a specific image from a page, use the PdfPageBase.DeleteImage(index) method. The following are the steps.
- Create a PdfDocument object.
- Load a PDF document using PdfDocument.LoadFromFile() method.
- Get a specific page through PdfDocument.Pages[index] property.
- Delete a certain image in the page by its index using PdfPageBase.DeleteImage() method.
- Save the document using PdfDocument.SaveToFile() method.
- Python
from spire.pdf.common import *
from spire.pdf import *

# Create a PdfDocument instance
doc = PdfDocument()

# Load a PDF document
doc.LoadFromFile('C:/Users/Administrator/Desktop/input.pdf')

# Get the first page
page = doc.Pages[0]

# Delete the first image on the page
page.DeleteImage(0)

# Save the result document
doc.SaveToFile('output/DeleteImage.pdf', FileFormat.PDF)
Apply for a Temporary License
If you'd like to remove the evaluation message from the generated documents, or to get rid of the function limitations, please request a 30-day trial license for yourself.
Extract Text from PDF in Python: A Complete Guide with Practical Code Samples
2023-10-09 01:26:32 Written by Koohji
PDF files are everywhere—from contracts and research papers to eBooks and invoices. While they preserve formatting perfectly, extracting text from PDFs can be challenging, especially with large or complex documents. Manual copying is not only slow but often inaccurate.
Whether you’re a developer automating workflows, a data analyst processing content, or simply someone needing quick text extraction, programmatic methods can save you valuable time and effort.
In this comprehensive guide, you’ll learn how to extract text from PDF files in Python using Spire.PDF for Python — a powerful and easy-to-use PDF processing library. We’ll cover extracting all text, targeting specific pages or areas, ignoring hidden text, and capturing layout details such as text position and size.
Table of Contents
- Why Extract Text from PDF Files
- Install Spire.PDF for Python: Powerful PDF Parser Library
- Extract Text from PDF (Basic Example)
- Advanced Text Extraction Features
- Conclusion
- FAQs
Why Extract Text from PDF Files
Text extraction from PDFs is essential for many use cases, including:
- Automating data entry and document processing
- Enabling full-text search and indexing
- Performing data analysis on reports and surveys
- Extracting content for machine learning and NLP
- Converting PDFs to other editable formats
Install Spire.PDF for Python: Powerful PDF Parser Library
Spire.PDF for Python is a comprehensive and easy-to-use PDF processing library that simplifies all your PDF manipulation needs. It offers advanced text extraction capabilities that work seamlessly with both simple and complex PDF documents.
Installation
The library can be installed easily via pip. Open your terminal and run the following command:
pip install spire.pdf
Need help with the installation? Follow this step-by-step guide: How to Install Spire.PDF for Python on Windows
Extract Text from PDF (Basic Example)
If you just want to quickly read all the text from a PDF, this simple example shows how to do it. It iterates over each page, extracts the full text using PdfTextExtractor, and saves it to a text file with spacing and line breaks preserved.
from spire.pdf.common import *
from spire.pdf import *

# Create a PdfDocument object
doc = PdfDocument()

# Load a PDF document
doc.LoadFromFile('C:/Users/Administrator/Desktop/Terms of service.pdf')

# Prepare a variable to hold the extracted text
all_text = ""

# Create a PdfTextExtractOptions object
extractOptions = PdfTextExtractOptions()
# Extract all text including whitespaces
extractOptions.IsExtractAllText = True

# Loop through all pages and extract text
for i in range(doc.Pages.Count):
    page = doc.Pages[i]
    textExtractor = PdfTextExtractor(page)
    text = textExtractor.ExtractText(extractOptions)
    # Append text from each page
    all_text += text + "\n"

# Write all extracted text to a file
with open('output/TextOfAllPages.txt', 'w', encoding='utf-8') as file:
    file.write(all_text)
Advanced Text Extraction Features
For greater control over what and how text is extracted, Spire.PDF for Python offers advanced options. You can selectively extract content from specific pages or regions, or even with layout details, such as text position and size, to better suit your specific data processing needs.
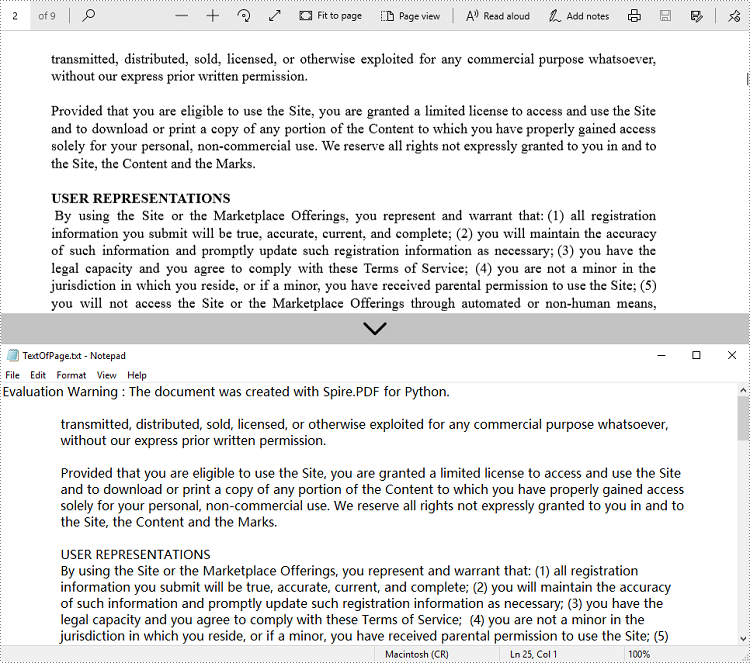
Retrieve Text from Selected Pages
Instead of processing an entire PDF, you can target specific pages for text extraction. This is especially useful for large documents where only certain sections are relevant for your task.
from spire.pdf.common import *
from spire.pdf import *

# Create a PdfDocument object
doc = PdfDocument()

# Load a PDF document
doc.LoadFromFile('C:/Users/Administrator/Desktop/Terms of service.pdf')

# Create a PdfTextExtractOptions object and enable full text extraction
extractOptions = PdfTextExtractOptions()
# Extract all text including whitespaces
extractOptions.IsExtractAllText = True

# Get a specific page (e.g., page 2)
page = doc.Pages[1]

# Create a PdfTextExtractor object
textExtractor = PdfTextExtractor(page)

# Extract text from the page
text = textExtractor.ExtractText(extractOptions)

# Write the extracted text to a file using UTF-8 encoding
with open('output/TextOfPage.txt', 'w', encoding='utf-8') as file:
    file.write(text)
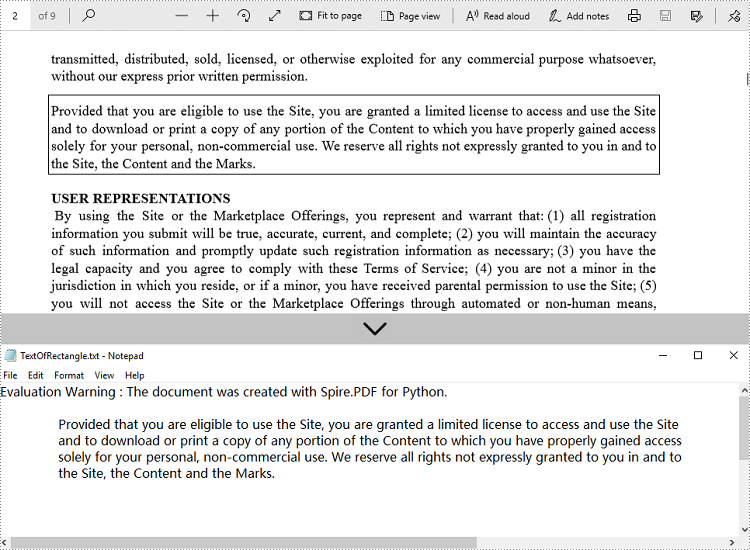
Get Text from Defined Area
When dealing with structured documents like forms or invoices, extracting text from a specific region can be more efficient. You can define a rectangular area and extract only the text within that boundary on the page.
from spire.pdf.common import *
from spire.pdf import *

# Create a PdfDocument object
doc = PdfDocument()

# Load a PDF document
doc.LoadFromFile('C:/Users/Administrator/Desktop/Terms of service.pdf')

# Get a specific page (e.g., page 2)
page = doc.Pages[1]

# Create a PdfTextExtractor object
textExtractor = PdfTextExtractor(page)

# Create a PdfTextExtractOptions object
extractOptions = PdfTextExtractOptions()

# Define the rectangular area to extract text from
# RectangleF(left, top, width, height)
extractOptions.ExtractArea = RectangleF(0.0, 100.0, 890.0, 80.0)

# Extract text from the specified area, keeping white spaces
text = textExtractor.ExtractText(extractOptions)

# Write the extracted text to a file using UTF-8 encoding
with open('output/TextOfRectangle.txt', 'w', encoding='utf-8') as file:
    file.write(text)
Ignore Hidden Text During Extraction
Some PDFs contain hidden or invisible text, often used for accessibility or OCR layers. You can choose to ignore such content during extraction to focus only on what is actually visible to users.
from spire.pdf.common import *
from spire.pdf import *

# Create a PdfDocument object
doc = PdfDocument()

# Load a PDF document
doc.LoadFromFile('C:/Users/Administrator/Desktop/Terms of service.pdf')

# Create a PdfTextExtractOptions object
extractOptions = PdfTextExtractOptions()
# Ignore hidden text during extraction
extractOptions.IsShowHiddenText = False

# Get a specific page (e.g., page 2)
page = doc.Pages[1]

# Create a PdfTextExtractor object
textExtractor = PdfTextExtractor(page)

# Extract text from the page
text = textExtractor.ExtractText(extractOptions)

# Write the extracted text to a file using UTF-8 encoding
with open('output/ExcludeHiddenText.txt', 'w', encoding='utf-8') as file:
    file.write(text)
Retrieve Text with Position (Coordinates) and Size Information
For layout-sensitive applications—such as converting PDF content into editable formats or reconstructing page structure—you can extract text along with its position and size. This provides precise control over how content is interpreted and used.
from spire.pdf.common import *
from spire.pdf import *

# Create a PdfDocument object
doc = PdfDocument()

# Load a PDF document
doc.LoadFromFile('C:/Users/Administrator/Desktop/Terms of service.pdf')

# Loop through all pages of the document
for i in range(doc.Pages.Count):
    page = doc.Pages[i]

    # Create a PdfTextFinder object for the current page
    finder = PdfTextFinder(page)

    # Find all text fragments on the page
    fragments = finder.FindAllText()

    print(f"Page {i + 1}:")

    # Loop through all text fragments
    for fragment in fragments:
        # Extract text content from the current text fragment
        text = fragment.Text

        # Get bounding rectangles with position and size
        rects = fragment.Bounds

        print(f'Text: "{text}"')

        # Iterate through all rectangles
        for rect in rects:
            # Print the position and size information of the current rectangle
            print(f"Position: ({rect.X}, {rect.Y}), Size: ({rect.Width} x {rect.Height})")

        print()
Conclusion
Extracting text from PDF files in Python becomes efficient and flexible with Spire.PDF for Python. Whether you need to process entire documents or extract text from specific pages or regions, Spire.PDF provides a robust set of tools to meet your needs. By automating text extraction, you can streamline workflows, power intelligent search systems, or prepare data for analysis and machine learning.
FAQs
Q1: Can text be extracted from password-protected PDFs?
A1: Yes, Spire.PDF for Python can open and extract text from secured files by providing the correct password when loading the PDF document.
Q2: Is batch text extraction from multiple PDFs supported?
A2: Yes, you can programmatically iterate through a directory of PDF files and apply text extraction to each file efficiently using Spire.PDF for Python.
Q3: Is it possible to extract images or tables from PDFs?
A3: While this guide focuses on text extraction, Spire.PDF for Python also supports image extraction and table extraction.
Q4: Can text be extracted from scanned (image-based) PDFs?
A4: Extracting text from scanned PDFs requires OCR (Optical Character Recognition). Spire.PDF for Python does not include built-in OCR, but you can combine it with an OCR library like Spire.OCR for image-to-text conversion.
Get a Free License
To fully experience the capabilities of Spire.PDF for Python without any evaluation limitations, you can request a free 30-day trial license.
PDF files often contain critical embedded images (e.g., charts, diagrams, scanned documents). For developers, knowing how to extract images from PDF in Python allows them to repurpose graphical content for automated report generation or feed these visuals into machine learning models for analysis and OCR tasks.

This article explores how to leverage the Spire.PDF for Python library to extract images from PDF files via Python, covering the following aspects:
- Installation & Environment Setup
- How to Extract Images from PDFs using Python
- Handle Different Image Formats While Extraction
- Frequently Asked Questions
- Conclusion (Extract Text and More)
Installation & Environment Setup
Before you start using Spire.PDF for Python to extract images from PDF, make sure you have the following in place:
-
Python Environment: Ensure that you have Python installed on your system. It is recommended to use the latest stable version for the best compatibility and performance.
-
Spire.PDF for Python Library: You need to install the Python PDF SDK, and the easiest way is using pip, the Python package installer.
Open your command prompt or terminal and run the following command:
pip install Spire.PDF
How to Extract Images from PDFs using Python
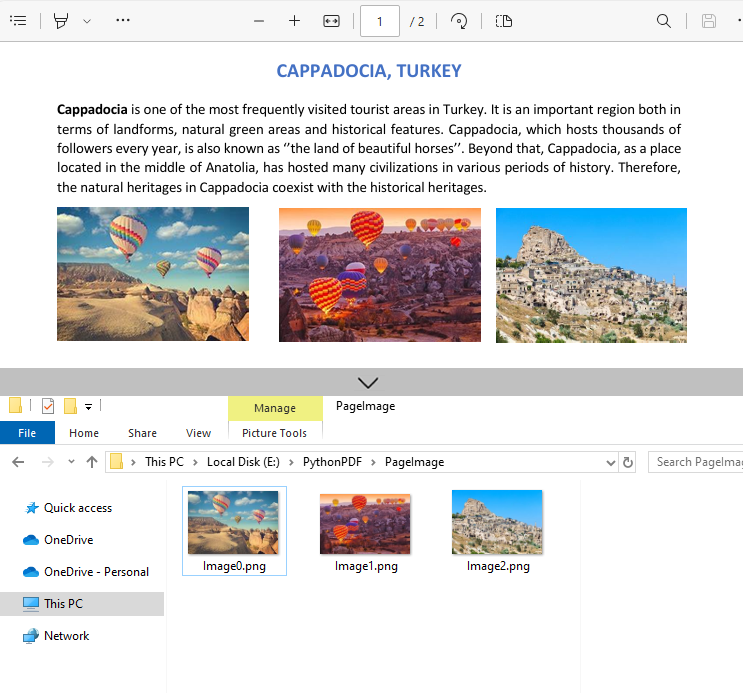
Example 1: Extract Images from a PDF Page
Here’s a complete Python script to extract and save images from a specified page in PDF:
from spire.pdf.common import *
from spire.pdf import *

# Create a PdfDocument instance
pdf = PdfDocument()

# Load a PDF file
pdf.LoadFromFile("template1.pdf")

# Get the first page
page = pdf.Pages[0]

# Create a PdfImageHelper instance
imageHelper = PdfImageHelper()

# Get the image information on the page
imageInfo = imageHelper.GetImagesInfo(page)

# Iterate through the image information
for i in range(0, len(imageInfo)):
    # Save images to file
    imageInfo[i].Image.Save("PageImage\\Image" + str(i) + ".png")

# Release resources
pdf.Dispose()
Key Steps Explained:
- Load the PDF: Use the LoadFromFile() method to load a PDF file.
- Access a Page: Access a specified PDF page by index.
- Extract Image information:
- Create a PdfImageHelper instance to facilitate image extraction.
- Use the GetImagesInfo() method to retrieve image information from the specified page, and return a list of PdfImageInfo objects.
- Save Images to Files:
- Loops through all detected images on the page
- Use the PdfImageInfo[].Image.Save() method to save the image to disk.
Output:
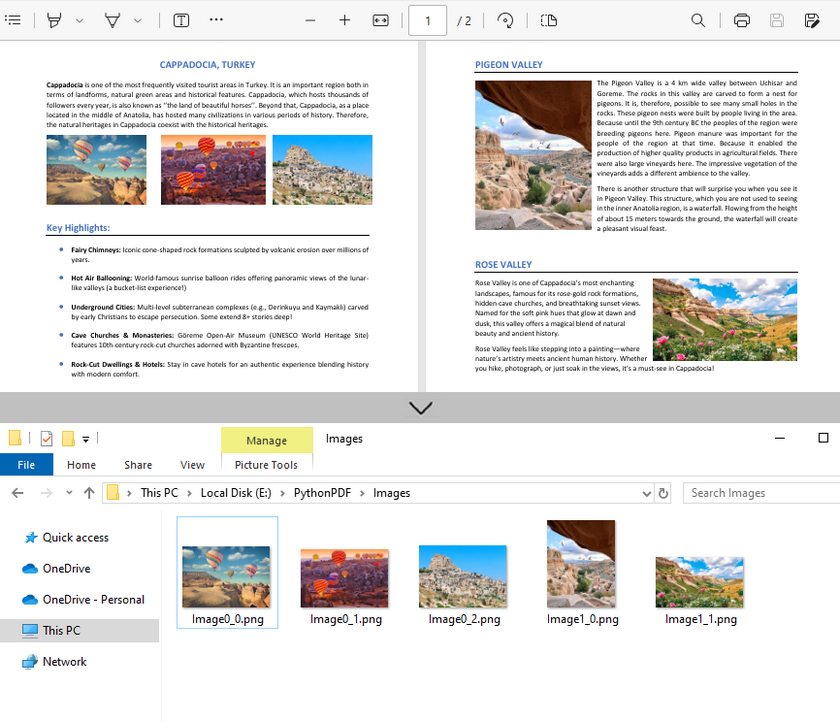
Example 2: Extract All Images from a PDF File
Building on the single-page extraction method, you can iterate through all pages of the PDF document to extract every embedded image.
Python code example:
from spire.pdf.common import *
from spire.pdf import *

# Create a PdfDocument instance
pdf = PdfDocument()

# Load a PDF file
pdf.LoadFromFile("template1.pdf")

# Create a PdfImageHelper instance
imageHelper = PdfImageHelper()

# Iterate through the pages in the document
for i in range(0, pdf.Pages.Count):
    # Get the current page
    page = pdf.Pages[i]
    # Get the image information on the page
    imageInfo = imageHelper.GetImagesInfo(page)
    # Iterate through the image information items
    for j in range(0, len(imageInfo)):
        # Save the current image to file
        imageInfo[j].Image.Save(f"Images\\Image{i}_{j}.png")

# Release resources
pdf.Close()
Output:
Handle Different Image Formats While Extraction
Spire.PDF for Python supports extracting images in various formats such as PNG, JPG/JPEG, BMP, etc. When saving the extracted images, you can choose the appropriate format based on your needs.
Common Image Formats:
| Format | Best Use Cases | PDF Extraction Notes |
|---|---|---|
| JPG/JPEG | Photos, scanned documents | Common in PDFs; quality loss on re-compress |
| PNG | Web graphics, diagrams, screenshots | Preserves transparency; larger file sizes |
| BMP | Windows applications, temp storage | Rare in modern PDFs; avoid for web use |
| TIFF | Archiving, print, OCR input | Ideal for document preservation; multi-page |
| EMF | Windows vector editing | Editable in Illustrator/Inkscape |
Frequently Asked Questions
Q1: Is Spire.PDF for Python a free library?
Spire.PDF for Python offers both free and commercial versions. The free version has limitations, such as a maximum of 10 pages per PDF. For commercial use or to remove these restrictions, you can request a trial license here.
Q2: Can I extract images from a specified page range only?
Yes. Instead of iterating through all pages, specify the page indices you want. For example, to extract images from the pages 2 to 5:
# Extract images from pages 2 to 5
for i in range(1, 4): # Pages are zero-indexed
    page = pdf.Pages[i]
    # Process images as before
Q3: Is it possible to extract text from images?
Yes. For scanned PDF files, after extracting the images, you can extract the text in the images in conjunction with the Spire.OCR for Python library.
A step-by-step guide: How to Extract Text from Image Using Python (OCR Code Examples)
Conclusion (Extract Text and More)
Spire.PDF simplifies image extraction from PDF in Python with minimal code. By following this guide, you can:
- Extract images from single pages or entire PDF documents.
- Save images from PDF in various formats (PNG, JPG, BMP or TIFF).
As a PDF document can contain different elements, the Python PDF library is also capable of:
Large PDF files can sometimes be cumbersome to handle, especially when sharing or uploading them. Splitting a large PDF file into multiple smaller PDFs reduces the file size, making it more manageable and quicker to open and process. In this article, we will demonstrate how to split PDF documents in Python using Spire.PDF for Python.
Install Spire.PDF for Python
This scenario requires Spire.PDF for Python and plum-dispatch v1.7.4. They can be easily installed in your Windows through the following pip command.
pip install Spire.PDF
If you are unsure how to install, please refer to this tutorial: How to Install Spire.PDF for Python on Windows
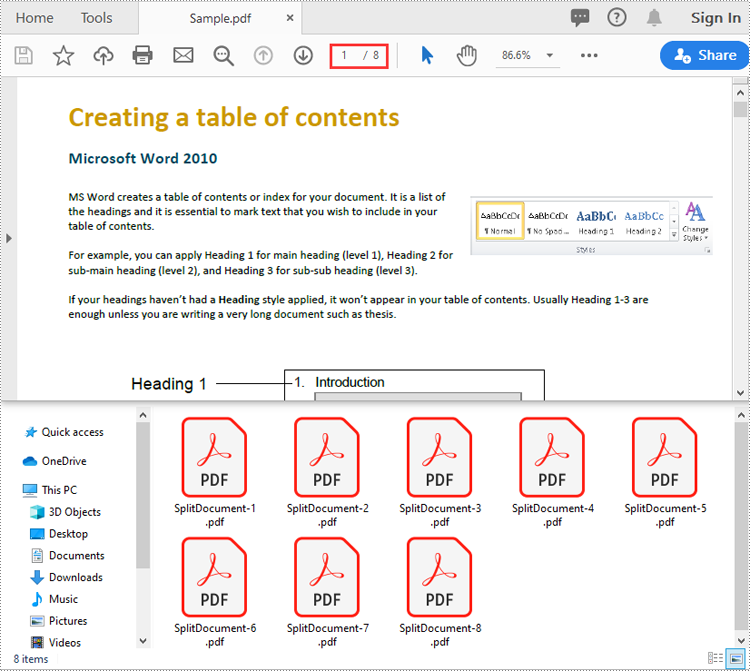
Split a PDF File into Multiple Single-Page PDFs in Python
Spire.PDF for Python offers the PdfDocument.Split() method to divide a multi-page PDF document into multiple single-page PDF files. The following are the detailed steps.
- Create a PdfDocument object.
- Load a PDF document using PdfDocument.LoadFromFile() method.
- Split the document into multiple single-page PDFs using PdfDocument.Split() method.
- Python
from spire.pdf.common import *
from spire.pdf import *

# Create a PdfDocument object
doc = PdfDocument()
# Load a PDF file
doc.LoadFromFile("Sample.pdf")

# Split the PDF file into multiple single-page PDFs
doc.Split("Output/SplitDocument-{0}.pdf", 1)

# Close the PdfDocument object
doc.Close()
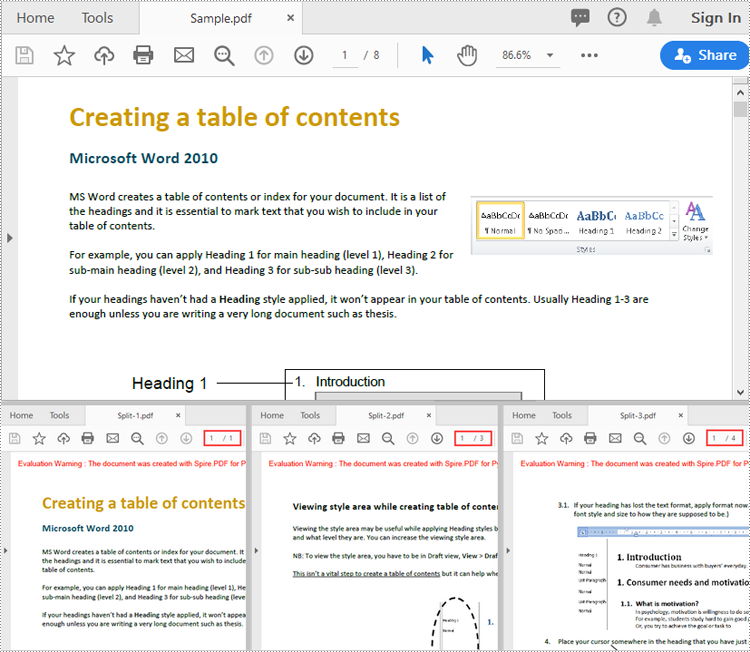
Split a PDF File by Page Ranges in Python
To split a PDF file into two or more PDF files by page ranges, you need to create two or more new PDF files, and then import the specific page or range of pages from the source PDF into the newly created PDF files. The following are the detailed steps.
- Create a PdfDocument object.
- Load a PDF document using PdfDocument.LoadFromFile() method.
- Create three PdfDocument objects.
- Import the first page from the source file into the first document using PdfDocument.InsertPage() method.
- Import pages 2-4 from the source file into the second document using PdfDocument.InsertPageRange() method.
- Import the remaining pages from the source file into the third document using PdfDocument.InsertPageRange() method.
- Save the three documents using PdfDocument.SaveToFile() method.
- Python
from spire.pdf.common import *
from spire.pdf import *

# Create a PdfDocument object
doc = PdfDocument()
# Load a PDF file
doc.LoadFromFile("Sample.pdf")

# Create three PdfDocument objects
newDoc_1 = PdfDocument()
newDoc_2 = PdfDocument()
newDoc_3 = PdfDocument()

# Insert the first page of the source file into the first document
newDoc_1.InsertPage(doc, 0)

# Insert pages 2-4 of the source file into the second document
newDoc_2.InsertPageRange(doc, 1, 3)

# Insert the rest pages of the source file into the third document
newDoc_3.InsertPageRange(doc, 4, doc.Pages.Count - 1)

# Save the three documents
newDoc_1.SaveToFile("Output1/Split-1.pdf")
newDoc_2.SaveToFile("Output1/Split-2.pdf")
newDoc_3.SaveToFile("Output1/Split-3.pdf")

# Close the PdfDocument objects
doc.Close()
newDoc_1.Close()
newDoc_2.Close()
newDoc_3.Close()
Apply for a Temporary License
If you'd like to remove the evaluation message from the generated documents, or to get rid of the function limitations, please request a 30-day trial license for yourself.
Python Image to PDF Conversion: Best Practices and Code Examples
2023-09-27 01:15:52 Written by Koohji
Converting images to PDF programmatically is a common task in document management, as it enhances organization, facilitates sharing, and ensures efficient archiving. By consolidating various image formats into a single PDF document, users can easily manage and distribute their visual content.
In this article, we will explore how to convert a variety of image formats —including PNG , JPEG , TIFF , and SVG —into PDF files using Spire.PDF for Python. We’ll provide detailed instructions and code examples to guide you through the conversion process, highlighting the flexibility and power of this library for handling different image types.
Table of Contents:
- Why Convert Image to PDF?
- Introducing Spire.PDF: Python Image-to-PDF Library
- Convert PNG or JPEG to PDF
- Convert Multi-Page TIFF to PDF
- Convert Scalable SVG to PDF
- Merge Multiple Images into One PDF
- Conclusion
- FAQs
1. Why Convert Image to PDF?
PDFs are preferred for their portability, security, and consistent formatting across devices. Converting images to PDF offers several benefits:
- Preservation of Quality: PDFs retain image resolution, ensuring no loss in clarity.
- Easier Sharing: A single PDF can combine multiple images, simplifying distribution.
- Document Standardization: Converting images to PDF ensures compatibility with most document management systems.
Whether you're archiving scanned documents or preparing a portfolio, converting images to PDF enhances usability.
2. Introducing Spire.PDF: Python Image-to-PDF Library
Spire.PDF for Python is a robust library that enables PDF creation, manipulation, and conversion. Key features include:
- Support for multiple image formats (PNG, JPEG, BMP, SVG, and more).
- Flexible page customization (size, margins, orientation).
- Batch processing and multi-image merging.
- Advanced options like watermarking and encryption (beyond basic conversion).
To install the library, use:
pip install Spire.PDF
3. Convert PNG or JPEG to PDF in Python
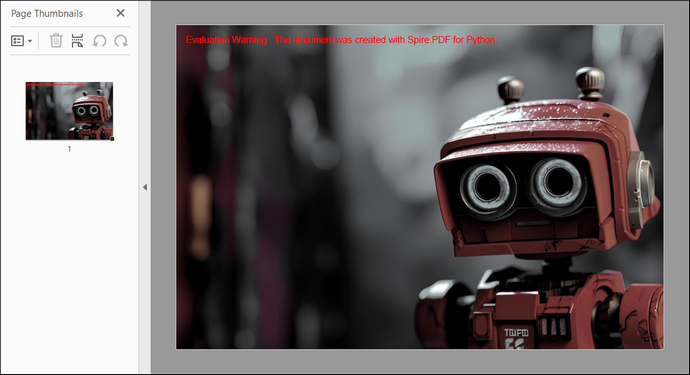
3.1 Generate PDF Matching Image Dimensions
To convert a PNG or JPEG image to PDF while preserving its original size, we start by creating a PdfDocument object, which serves as the container for our PDF. We set the page margins to zero, ensuring that the image will fill the entire page.
After loading the image, we obtain its dimensions to create a new page that matches these dimensions. Finally, we draw the image on the page and save the document to a PDF file. This approach guarantees pixel-perfect conversion without resizing or distortion.
The following code demonstrates how to generate a PDF that perfectly matches your image’s size:
from spire.pdf.common import *
from spire.pdf import *

# Create a PdfDocument object
document = PdfDocument()

# Set the page margins to 0
document.PageSettings.SetMargins(0.0)

# Load an image file
image = PdfImage.FromFile("C:\\Users\\Administrator\\Desktop\\robot.jpg")

# Get the image width and height
imageWidth = image.PhysicalDimension.Width
imageHeight = image.PhysicalDimension.Height

# Add a page that has the same size as the image
page = document.Pages.Add(SizeF(imageWidth, imageHeight))

# Draw image at (0, 0) of the page
page.Canvas.DrawImage(image, 0.0, 0.0)

# Save to file
document.SaveToFile("output/ImageToPdf.pdf")

# Dispose resources
document.Dispose()
Output:
3.2 Custom PDF Layouts and Image Position
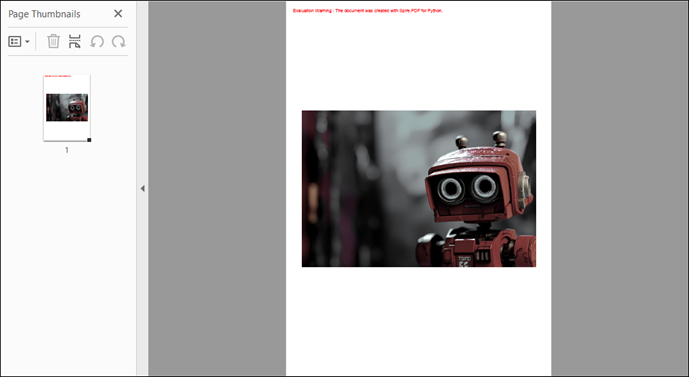
To customize the PDF page size and margins, a few modifications to the code are needed. In this example, we set the page size to A4, adjusting the margins accordingly. The image is centered on the page by calculating its position based on the page dimensions. This method creates a more polished layout for the PDF.
The code below shows how to customize PDF settings and position images during conversion:
from spire.pdf.common import *
from spire.pdf import *

# Create a PdfDocument object
document = PdfDocument()

# Set the page margins to 5
document.PageSettings.SetMargins(5.0)

# Define page size (A4 or custom)
document.PageSettings.Size = PdfPageSize.A4()

# Add a new page to the document
page = document.Pages.Add()

# Load the image from file
image = PdfImage.FromFile("C:\\Users\\Administrator\\Desktop\\robot.jpg")

# Get the image dimensions
imageWidth = image.PhysicalDimension.Width
imageHeight = image.PhysicalDimension.Height

# Calculate centered position for the image
x = (page.GetClientSize().Width - imageWidth) / 2
y = (page.GetClientSize().Height - imageHeight) / 2

# Draw the image at the calculated position
page.Canvas.DrawImage(image, x, y, imageWidth, imageHeight)

# Save to a PDF file
document.SaveToFile("output/ImageToPdf.pdf")

# Release resources
document.Dispose()
Output:
4. Convert Multi-Page TIFF to PDF in Python
TIFF files are widely used for high-resolution images, making them suitable for applications such as document scanning and medical imaging. However, Spire.PDF does not support TIFF images natively. To handle TIFF files, we can use the Python Imaging Library (PIL) , which can be installed with the following command:
pip install Pillow
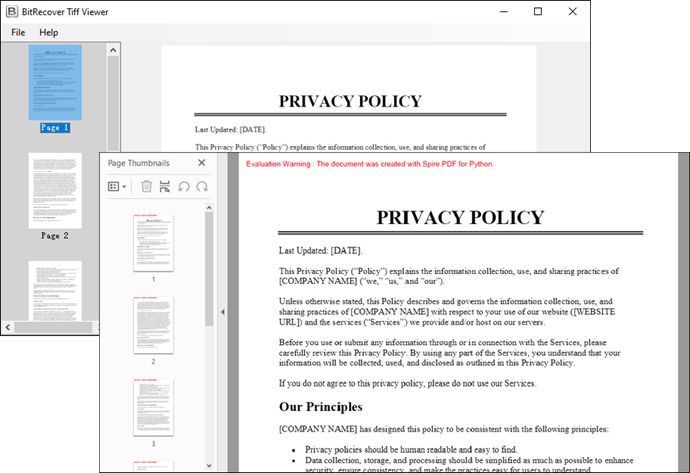
Using PIL, we can access each frame of a TIFF file, temporarily save it as a PNG, and then draw each PNG onto a PDF. This method ensures that each frame is added as a separate page in the PDF, preserving the original quality and layout.
Here is the code snippet for converting a multi-page TIFF to PDF in Python:
from spire.pdf.common import *
from spire.pdf import *
from PIL import Image
import io

# Create a PdfDocument object
document = PdfDocument()

# Set the page margins to 0
document.PageSettings.SetMargins(0.0)

# Load a TIFF image
tiff_image = Image.open("C:\\Users\\Administrator\\Desktop\\TIFF.tiff")

# Iterate through the frames in it
for i in range(tiff_image.n_frames):

    # Go to the current frame
    tiff_image.seek(i)

    # Extract the image of the current frame
    frame_image = tiff_image.copy()

    # Save the image to a PNG file
    frame_image.save(f"temp/output_frame_{i}.png")

    # Load the image file to PdfImage
    image = PdfImage.FromFile(f"temp/output_frame_{i}.png")

    # Get image width and height
    imageWidth = image.PhysicalDimension.Width
    imageHeight = image.PhysicalDimension.Height

    # Add a page to the document
    page = document.Pages.Add(SizeF(imageWidth, imageHeight))

    # Draw image at (0, 0) of the page
    page.Canvas.DrawImage(image, 0.0, 0.0)

# Save the document to a PDF file
document.SaveToFile("Output/TiffToPdf.pdf",FileFormat.PDF)

# Dispose resources
document.Dispose()
Output:
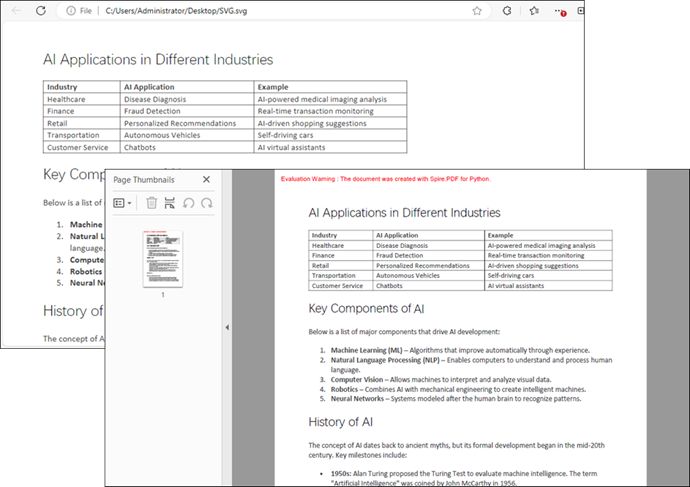
5. Convert Scalable SVG to PDF in Python
SVG files are vector graphics that provide scalability without loss of quality, making them ideal for web graphics and print media. In this example, we create a PdfDocument object and load an SVG file directly into it. Spire.PDF library efficiently handles the conversion, allowing for quick and straightforward saving of the SVG as a PDF with minimal code.
Below is the code snippet for converting an SVG file to a PDF:
from spire.pdf.common import *
from spire.pdf import *

# Create a PdfDocument object
document = PdfDocument()

# Load an SVG file
document.LoadFromSvg("C:\\Users\\Administrator\\Desktop\\SVG.svg")

# Save the SVG file to PDF
document.SaveToFile("output/SvgToPdf.pdf", FileFormat.PDF)

# Dispose resources
document.Dispose()
Tip : To combine multiple SVG files into a single PDF, convert them separately and then merge the resulting PDFs. For guidance, check out this article: How to Merge PDF Documents in Python.
Output:
6. Merge Multiple Images into One PDF
This process involves iterating through images in a specified directory, loading each one, and creating corresponding pages in the PDF document. Each page is formatted to match the image dimensions, preventing any loss or distortion. Finally, each image is drawn onto its respective page.
Code example for combining a folder of images into a single PDF:
from spire.pdf.common import *
from spire.pdf import *
import os

# Create a PdfDocument object
doc = PdfDocument()

# Set the page margins to 0
doc.PageSettings.SetMargins(0.0)

# Get the folder where the images are stored
path = "C:\\Users\\Administrator\\Desktop\\Images\\"
files = os.listdir(path)

# Iterate through the files in the folder
for root, dirs, files in os.walk(path):
    for file in files:

        # Load a particular image
        image = PdfImage.FromFile(os.path.join(root, file))

        # Get the image width and height
        width = image.PhysicalDimension.Width
        height = image.PhysicalDimension.Height

        # Add a page that has the same size as the image
        page = doc.Pages.Add(SizeF(width, height))

        # Draw image at (0, 0) of the page
        page.Canvas.DrawImage(image, 0.0, 0.0, width, height)

# Save to file
doc.SaveToFile("output/CombineImages.pdf")
doc.Dispose()
Output:

7. Conclusion
Converting images to PDF in Python using the Spire.PDF library is a straightforward task that can be accomplished through various methods for different image formats. Whether you need to convert single images, customize layouts, or merge multiple images, Spire.PDF provides the necessary tools to achieve your goals efficiently. With just a few lines of code, you can create high-quality PDFs from images, enhancing your document management capabilities.
8. FAQs
Q1: Can I convert images in bulk using Spire.PDF?
Yes, Spire.PDF allows you to iterate through directories and convert multiple images to a single PDF or individual PDFs, making bulk conversions easy.
Q2: What image formats does Spire.PDF support?
Spire.PDF supports various image formats, including PNG, JPEG, BMP, and SVG, providing versatility for different use cases.
Q3: Can I customize the PDF layout?
Absolutely. You can set margins, page sizes, and positions of images within the PDF for a tailored layout that meets your requirements.
Q4: Does converting an image to PDF reduce its quality?
No - when using Spire.PDF with default settings, the original image data is embedded without compression.
Get a Free License
To fully experience the capabilities of Spire.PDF for Python without any evaluation limitations, you can request a free 30-day trial license.
