
Spire.Doc for .NET (338)
Children categories
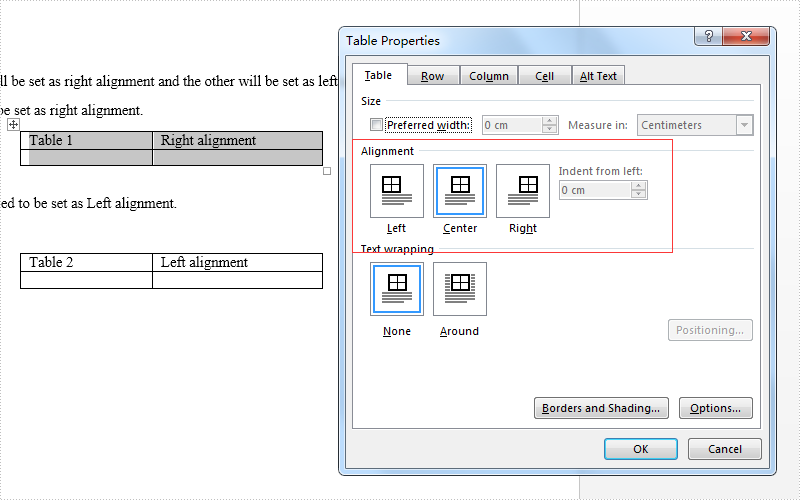
Usually there are three kinds of alignment style for a word table: left aligned, centered and right aligned. On Microsoft word, we can go to table properties to set the alignment for the whole table. Spire.Doc also offers a property table.TableFormat.HorizontalAlignment to enable developers to set the table alignment style easily in C#. This article will demonstrate how to align a table in C#.
Firstly, view the how to align a table for Microsoft word:
Here come to the code snippet of how Spire.Doc align a table.
Step 1: Create a word document and load from file.
Document doc = new Document();
doc.LoadFromFile("sample.docx");
Step 2: Get the first section and two tables from the word document.
Section section = doc.Sections[0];
Table table = section.Tables[0] as Table;
Table table1 = section.Tables[1] as Table;
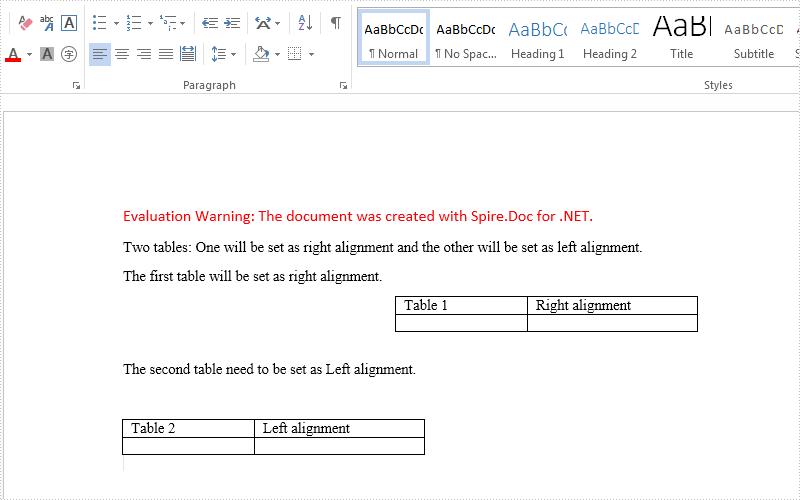
Step 3: Set the different alignment properties for each table.
table.Format.HorizontalAlignment = RowAlignment.Right;
table.Format.LeftIndent = 34;

table1.Format.HorizontalAlignment = RowAlignment.Left;
table1.Format.LeftIndent = 34;
Step 4: Save the document to file:
doc.SaveToFile("result.docx", FileFormat.Docx);
Effective screenshots after align the table format:
Full codes:
using Spire.Doc;
using Spire.Doc.Documents;
namespace AlignTable
{
    class Program
    {

        static void Main(string[] args)
        {

            Document doc = new Document();
            doc.LoadFromFile("sample.docx");

            Section section = doc.Sections[0];
            Table table = section.Tables[0] as Table;
            Table table1 = section.Tables[1] as Table;

            table.Format.HorizontalAlignment = RowAlignment.Right;
            table.Format.LeftIndent = 34;

            table1.Format.HorizontalAlignment = RowAlignment.Left;
            table1.Format.LeftIndent = 34;

            doc.SaveToFile("result.docx", FileFormat.Docx);
        }
    }
}
Change the color or remove underline from hyperlink in Word with C#
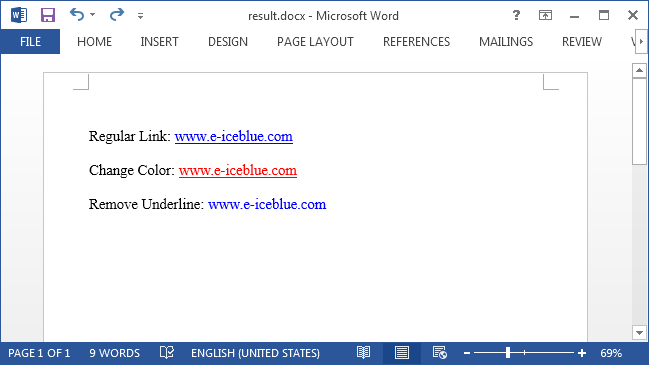
2016-05-12 08:14:23 Written by KoohjiBy default, hyperlink in Word shows up as blue and underlined. In some cases, users may want to modify the hyperlink style so as to get better looking with the whole document. This article is going to introduce how we can remove the underline or change the color of hyperlinks using Spire.Doc in C#.
Code Snippets:
Step 1: Create a new object of Document class, add a section to it.
Document document = new Document();
Section section = document.AddSection();
Step 2: Add a paragraph and append a hyperlink to the paragraph. In order to format the hyperlink, we return the value of hyperlink in a TextRange.
Paragraph para= section.AddParagraph();
TextRange txtRange = para1.AppendHyperlink("www.e-iceblue.com", "www.e-iceblue.com", HyperlinkType.WebLink);
Step 3: Format the hyperlink with the specified the font name, font size, color and underline style.
txtRange.CharacterFormat.FontName = "Times New Roman";
txtRange.CharacterFormat.FontSize = 12;
txtRange.CharacterFormat.TextColor = System.Drawing.Color.Red;
txtRange.CharacterFormat.UnderlineStyle = UnderlineStyle.None;
Step 4: Save the file.
document.SaveToFile("result.docx", FileFormat.Docx2013);
Output:
Full Code:
using Spire.Doc;
using Spire.Doc.Documents;
using Spire.Doc.Fields;

namespace FormatHyperlink
{
    class Program
    {
        static void Main(string[] args)
        {
            Document document = new Document();
            Section section = document.AddSection();

            Paragraph para1= section.AddParagraph();
            para1.AppendText("Regular Link: ");
            TextRange txtRange1 = para1.AppendHyperlink("www.e-iceblue.com", "www.e-iceblue.com", HyperlinkType.WebLink);
            txtRange1.CharacterFormat.FontName = "Times New Roman";
            txtRange1.CharacterFormat.FontSize = 12;
            Paragraph blankPara1 = section.AddParagraph();

            Paragraph para2 = section.AddParagraph();
            para2.AppendText("Change Color: ");
            TextRange txtRange2 = para2.AppendHyperlink("www.e-iceblue.com", "www.e-iceblue.com", HyperlinkType.WebLink);
            txtRange2.CharacterFormat.FontName = "Times New Roman";
            txtRange2.CharacterFormat.FontSize = 12;
            txtRange2.CharacterFormat.TextColor = System.Drawing.Color.Red;
            Paragraph blankPara2 = section.AddParagraph();

            Paragraph para3 = section.AddParagraph();
            para3.AppendText("Remove Underline: ");
            TextRange txtRange3 = para3.AppendHyperlink("www.e-iceblue.com", "www.e-iceblue.com", HyperlinkType.WebLink);
            txtRange3.CharacterFormat.FontName = "Times New Roman";
            txtRange3.CharacterFormat.FontSize = 12;
            txtRange3.CharacterFormat.UnderlineStyle = UnderlineStyle.None;

            document.SaveToFile("result.docx", FileFormat.Docx2013);
            System.Diagnostics.Process.Start("result.docx");
        }
    }
}
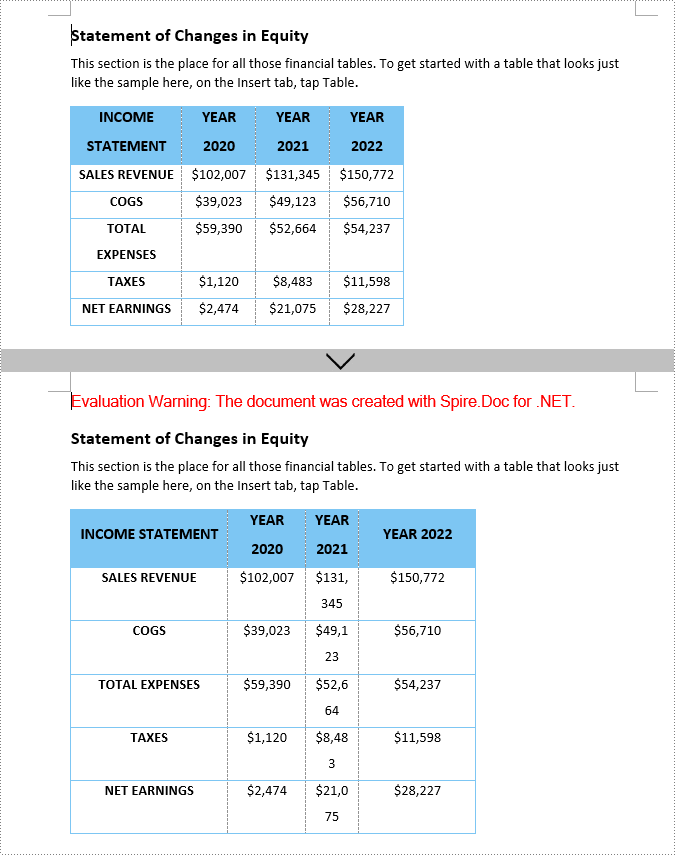
Manually adjusting table columns can be time-consuming, especially if you have a large document with multiple tables. This is where the AutoFit tables feature in Word comes into play. It allows you to adjust the size of your table automatically, eliminating the need for manual adjustments. By setting AutoFit, the table will always adapt to display the content in the most suitable way. In this article, you will learn how to autofit tables in a Word document in C# using Spire.Doc for .NET.
- Set Tables to AutoFit to Contents in Word in C#
- Set Tables to AutoFit to Window in Word in C#
- Set Tables to Fixed Column Width in Word in C#
Install Spire.Doc for .NET
To begin with, you need to add the DLL files included in the Spire.Doc for.NET package as references in your .NET project. The DLL files can be either downloaded from this link or installed via NuGet.
PM> Install-Package Spire.Doc
Set Tables to AutoFit to Contents in Word in C#
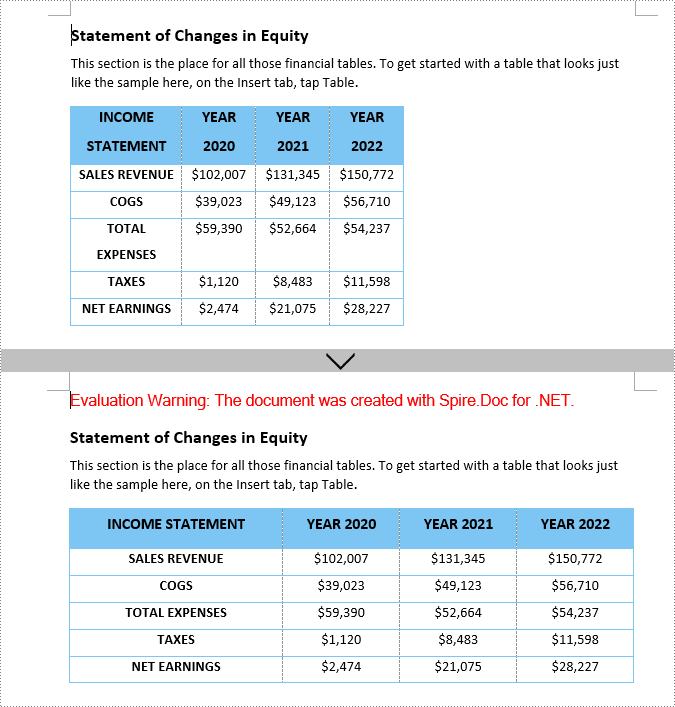
The AutoFit to Contents option in Word adjusts the size of table columns and rows according to the content within the cells. Once set, each column is automatically resized to ensure that all content is displayed completely without excessive empty space.
With Spire.Doc for .NET, you can use the Table.AutoFit(AutoFitBehaviorType.AutoFitToContents) method to autofit tables to content. The following are the detailed steps:
- Create a Document instance.
- Load a Word document using Document.LoadFromFile() method.
- Get a specified section in the document through Document.Sections[] property.
- Get a specified table in the section through Section.Tables[] property.
- AutoFit the table to contents using Table.AutoFit(AutoFitBehaviorType.AutoFitToContents) method.
- Save the result document using Document.SaveToFile() method.
- C#
using Spire.Doc;

namespace AutoFitToContents
{
    class Program
    {

        static void Main(string[] args)
        {
            // Create a Document instance
            Document doc = new Document();

            // Load a Word document
            doc.LoadFromFile("TableTemp.docx");

            // Get the first section in the document
            Section section = doc.Sections[0];

            // Get the first table in the section
            Table table = section.Tables[0] as Table;

            // AutoFit the table to contents
            table.AutoFit(AutoFitBehaviorType.AutoFitToContents);

            // Save the result document
            doc.SaveToFile("AutoFitToContents.docx", FileFormat.Docx);
        }
    }
}

Set Tables to AutoFit to Window in Word in C#
The AutoFit to Window option in Word enables the table to automatically adjust its width to fit the width of the Word window. Once set, the table will expand or contract to fill the entire page width (between the left and right margins).
To autofit tables to page, use the Table.AutoFit(AutoFitBehaviorType.AutoFitToWindow) method. The following are the detailed steps:
- Create a Document instance.
- Load a Word document using Document.LoadFromFile() method.
- Get a specified section in the document through Document.Sections[] property.
- Get a specified table in the section through Section.Tables[] property.
- AutoFit the table to Word window using Table.AutoFit(AutoFitBehaviorType.AutoFitToWindow) method.
- Save the result document using Document.SaveToFile() method.
- C#
using Spire.Doc;

namespace AutoFitToWindow
{
    class Program
    {

        static void Main(string[] args)
        {
            // Create a Document instance
            Document doc = new Document();

            // Load a Word document
            doc.LoadFromFile("TableTemp.docx");

            // Get the first section in the document
            Section section = doc.Sections[0];

            // Get the first table in the section
            Table table = section.Tables[0] as Table;

            // AutoFit the table to page
            table.AutoFit(AutoFitBehaviorType.AutoFitToWindow);

            // Save the result document
            doc.SaveToFile("AutoFitToWindow.docx", FileFormat.Docx);
        }
    }
}
Set Tables to Fixed Column Width in Word in C#
The Fixed Column Width option in Word allows you to maintain a specific, unchanging width for each column in the table. Once set, the column width of the table will remain fixed regardless of any changes to the content within the cells or the size of the document window.
The Table.AutoFit(AutoFitBehaviorType.FixedColumnWidths) method can be used to set fixed column width for Word tables. The following are the detailed steps to:
- Create a Document instance.
- Load a Word document using Document.LoadFromFile() method.
- Get a specified section in the document through Document.Sections[] property.
- Get a specified table in the section through Section.Tables[] property.
- Fix the column widths of the table using Table.AutoFit(AutoFitBehaviorType.FixedColumnWidths) method.
- Iterate through each row and then set the new column widths using Table.Rows[index].Cells[index].SetCellWidth() method.
- Save the result document using Document.SaveToFile() method.
- C#
using Spire.Doc;

namespace FixedColumnWidth
{
    class Program
    {

        static void Main(string[] args)
        {
            // Create a Document instance
            Document doc = new Document();

            // Load a Word document
            doc.LoadFromFile("TableTemp.docx");

            // Get the first section in the document
            Section section = doc.Sections[0];

            // Get the first table in the section
            Table table = section.Tables[0] as Table;

            // Set to fixed column width
            table.AutoFit(AutoFitBehaviorType.FixedColumnWidths);

            // Iterate through each row in the table
            for (int i = 0; i < table.Rows.Count; i++)
            {
                // Reset the width of the first column
                table.Rows[i].Cells[0].SetCellWidth(120f, CellWidthType.Point);
                // Reset the width of the second column
                table.Rows[i].Cells[1].SetCellWidth(60f, CellWidthType.Point);
                // Reset the width of the third column
                table.Rows[i].Cells[2].SetCellWidth(40f, CellWidthType.Point);
                // Reset the width of the fourth column
                table.Rows[i].Cells[3].SetCellWidth(90f, CellWidthType.Point);

            }

            // Save the result document
            doc.SaveToFile("FixedColumnWidth.docx", FileFormat.Docx);
        }
    }
}
Get a Free License
To fully experience the capabilities of Spire.Doc for .NET without any evaluation limitations, you can request a free 30-day trial license.
