C#/VB.NET: преобразование PDF в XPS или XPS в PDF
Оглавление
Установлено через NuGet
PM> Install-Package Spire.PDF
Ссылки по теме
XPS — это формат, похожий на PDF, но использующий XML в макете, внешнем виде и информации о печати файла. Формат XPS был разработан Microsoft и изначально поддерживается операционными системами Windows. Если вы хотите работать с файлами PDF на компьютере с Windows без установки другого программного обеспечения, вы можете преобразовать его в формат XPS. Точно так же, если вам нужно поделиться файлом XPS с пользователем Mac или использовать его на различных устройствах, рекомендуется преобразовать его в PDF. В этой статье будет показано, как программно конвертировать PDF в XPS или XPS в PDF используя Spire.PDF for .NET.
Установите Spire.PDF for .NET
Для начала вам нужно добавить файлы DLL, включенные в пакет Spire.PDF for .NET, в качестве ссылок в ваш проект .NET. Файлы DLL можно загрузить по этой ссылке или установить через NuGet.
PM> Install-Package Spire.PDF
Преобразование PDF в XPS в C# и VB.NET
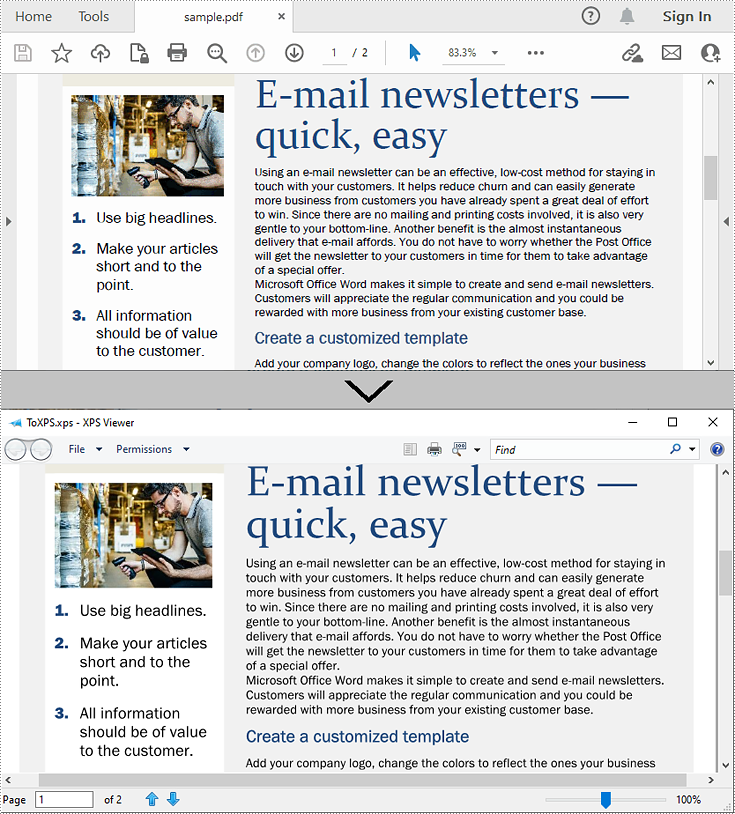
Spire.PDF for .NET поддерживает преобразование PDF в файлы различных форматов, а для преобразования PDF в XPS вам потребуется всего три строки основного кода. Ниже приведены подробные шаги.
- Создайте экземпляр PdfDocument.
- Загрузите образец PDF-документа с помощью метода PdfDocument.LoadFromFile().
- Преобразуйте документ PDF в файл XPS, используя метод PdfDocument.SaveToFile (строковое имя файла, FileFormat.XPS).
- C#
- VB.NET
using Spire.Pdf;

    namespace ConvertPdfToXps
    {
        class Program
        {
            static void Main(string[] args)
            {
                //Create a PdfDocument instance
                PdfDocument pdf = new PdfDocument();

                //Load sample PDF document
                pdf.LoadFromFile("sample.pdf");

                //Save it to XPS format
                pdf.SaveToFile("ToXPS.xps", FileFormat.XPS);
                pdf.Close();
            }
        }
    }
Преобразование XPS в PDF на C# и VB.NET
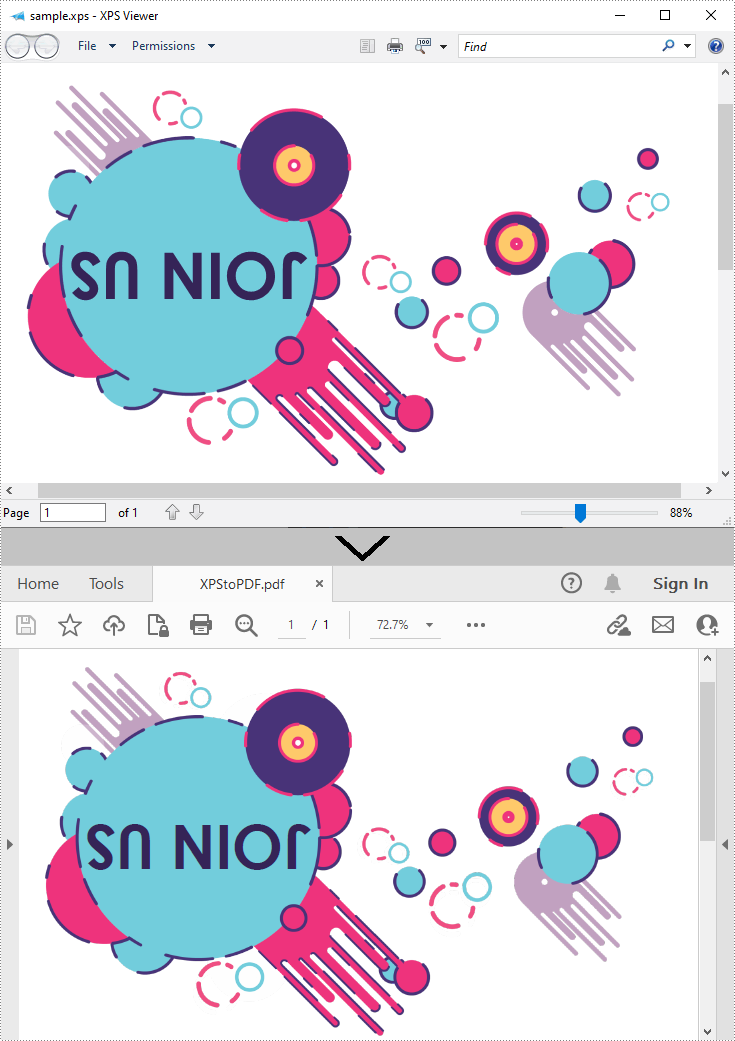
Преобразование XPS в PDF также можно выполнить с помощью Spire.PDF for .NET. Во время преобразования вы можете настроить сохранение изображения высокого качества в сгенерированном PDF-файле с помощью метода PdfDocument.ConvertOptions.SetXpsToPdfOptions(). Ниже приведены подробные шаги.
- Создайте экземпляр PdfDocument.
- Загрузите файл XPS с помощью метода PdfDocument.LoadFromFile(string filename, FileFormat.XPS) или метода PdfDocument.LoadFromXPS().
- Во время преобразования установите параметры преобразования XPS в PDF, чтобы сохранить изображения высокого качества с помощью метода PdfDocument.ConvertOptions.SetXpsToPdfOptions().
- Сохраните файл XPS в файл PDF с помощью метода PdfDocument.SaveToFile(строковое имя файла, FileFormat.PDF).
- C#
- VB.NET
using Spire.Pdf;

    namespace ConvertXPStoPDF
    {
        class Program
        {
            static void Main(string[] args)
            {
                //Create a PdfDocument instance
                PdfDocument pdf = new PdfDocument();

                //Load a sample XPS file
                pdf.LoadFromFile("Sample.xps", FileFormat.XPS);
                //pdf.LoadFromXPS("Sample.xps");

                //Keep high quality images when converting XPS to PDF
                pdf.ConvertOptions.SetXpsToPdfOptions(true);

                //Save the XPS file to PDF
                pdf.SaveToFile("XPStoPDF.pdf", FileFormat.PDF);
            }
        }
    }
Подать заявку на временную лицензию
Если вы хотите удалить оценочное сообщение из сгенерированных документов или избавиться от функциональных ограничений, пожалуйста запросить 30-дневную пробную лицензию для себя.
C#/VB.NET: PDF in XPS oder XPS in PDF konvertieren
Inhaltsverzeichnis
Über NuGet installiert
PM> Install-Package Spire.PDF
verwandte Links
XPS ist ein Format ähnlich wie PDF, verwendet jedoch XML für Layout, Erscheinungsbild und Druckinformationen einer Datei. Das XPS-Format wurde von Microsoft entwickelt und wird von den Windows-Betriebssystemen nativ unterstützt. Wenn Sie Ihre PDF-Dateien auf einem Windows-Computer bearbeiten möchten, ohne andere Software zu installieren, können Sie sie in das XPS-Format konvertieren. Wenn Sie eine XPS-Datei mit einem Mac-Benutzer teilen oder auf verschiedenen Geräten verwenden müssen, ist es ebenfalls empfehlenswerter, sie in PDF zu konvertieren. In diesem Artikel wird gezeigt, wie man programmgesteuert vorgeht Konvertieren Sie PDF in XPS oder XPS in PDF Verwendung von Spire.PDF for .NET.
Installieren Sie Spire.PDF for .NET
Zunächst müssen Sie die im Spire.PDF for.NET-Paket enthaltenen DLL-Dateien als Referenzen in Ihrem .NET-Projekt hinzufügen. Die DLL-Dateien können entweder über diesen Link heruntergeladen oder über NuGet installiert werden.
PM> Install-Package Spire.PDF
Konvertieren Sie PDF in XPS in C# und VB.NET
Spire.PDF for .NET unterstützt die Konvertierung von PDF in verschiedene Dateiformate. Für die Konvertierung von PDF in XPS benötigen Sie lediglich drei Zeilen Kerncode. Im Folgenden finden Sie die detaillierten Schritte.
- Erstellen Sie eine PdfDocument-Instanz.
- Laden Sie ein Beispiel-PDF-Dokument mit der Methode PdfDocument.LoadFromFile().
- Konvertieren Sie das PDF-Dokument mit der Methode PdfDocument.SaveToFile (Zeichenfolge Dateiname, FileFormat.XPS) in eine XPS-Datei.
- C#
- VB.NET
using Spire.Pdf;

    namespace ConvertPdfToXps
    {
        class Program
        {
            static void Main(string[] args)
            {
                //Create a PdfDocument instance
                PdfDocument pdf = new PdfDocument();

                //Load sample PDF document
                pdf.LoadFromFile("sample.pdf");

                //Save it to XPS format
                pdf.SaveToFile("ToXPS.xps", FileFormat.XPS);
                pdf.Close();
            }
        }
    }
Konvertieren Sie XPS in PDF in C# und VB.NET
Auch die Konvertierung von XPS nach PDF ist mit Spire.PDF for .NET möglich. Während der Konvertierung können Sie mit der Methode PdfDocument.ConvertOptions.SetXpsToPdfOptions() festlegen, dass in der generierten PDF-Datei eine hohe Bildqualität erhalten bleibt. Im Folgenden finden Sie die detaillierten Schritte.
- Erstellen Sie eine PdfDocument-Instanz.
- Laden Sie eine XPS-Datei mit der Methode PdfDocument.LoadFromFile(string filename, FileFormat.XPS) oder der Methode PdfDocument.LoadFromXPS().
- Legen Sie während der Konvertierung mithilfe der Methode PdfDocument.ConvertOptions.SetXpsToPdfOptions() die XPS-zu-PDF-Konvertierungsoptionen fest, um qualitativ hochwertige Bilder beizubehalten.
- Speichern Sie die XPS-Datei mit der Methode PdfDocument.SaveToFile(string filename, FileFormat.PDF) in einer PDF-Datei.
- C#
- VB.NET
using Spire.Pdf;

    namespace ConvertXPStoPDF
    {
        class Program
        {
            static void Main(string[] args)
            {
                //Create a PdfDocument instance
                PdfDocument pdf = new PdfDocument();

                //Load a sample XPS file
                pdf.LoadFromFile("Sample.xps", FileFormat.XPS);
                //pdf.LoadFromXPS("Sample.xps");

                //Keep high quality images when converting XPS to PDF
                pdf.ConvertOptions.SetXpsToPdfOptions(true);

                //Save the XPS file to PDF
                pdf.SaveToFile("XPStoPDF.pdf", FileFormat.PDF);
            }
        }
    }
Beantragen Sie eine temporäre Lizenz
Wenn Sie die Bewertungsmeldung aus den generierten Dokumenten entfernen oder die Funktionseinschränkungen beseitigen möchten, wenden Sie sich bitte an uns Fordern Sie eine 30-Tage-Testlizenz an für sich selbst.
C#/VB.NET: convertir PDF a XPS o XPS a PDF
Tabla de contenido
Instalado a través de NuGet
PM> Install-Package Spire.PDF
enlaces relacionados
XPS es un formato similar a PDF pero utiliza XML en el diseño, la apariencia y la información de impresión de un archivo. El formato XPS fue desarrollado por Microsoft y es compatible de forma nativa con los sistemas operativos Windows. Si desea trabajar con sus archivos PDF en una computadora con Windows sin instalar otro software, puede convertirlos al formato XPS. Asimismo, si necesita compartir un archivo XPS con un usuario de Mac o usarlo en varios dispositivos, es más recomendable convertirlo a PDF. Este artículo demostrará cómo programáticamente convierta PDF a XPS o XPS a PDF utilizando Spire.PDF for .NET.
Instalar Spire.PDF for .NET
Para empezar, debe agregar los archivos DLL incluidos en el paquete Spire.PDF for .NET como referencias en su proyecto .NET. Los archivos DLL se pueden descargar desde este enlace o instalar a través de NuGet.
PM> Install-Package Spire.PDF
Convierta PDF a XPS en C# y VB.NET
Spire.PDF for .NET admite la conversión de PDF a varios formatos de archivo y, para lograr la conversión de PDF a XPS, solo necesita tres líneas de código central. Los siguientes son los pasos detallados.
- Cree una instancia de PdfDocument.
- Cargue un documento PDF de muestra utilizando el método PdfDocument.LoadFromFile().
- Convierta el documento PDF en un archivo XPS utilizando el método PdfDocument.SaveToFile (nombre de archivo de cadena, FileFormat.XPS).
- C#
- VB.NET
using Spire.Pdf;

    namespace ConvertPdfToXps
    {
        class Program
        {
            static void Main(string[] args)
            {
                //Create a PdfDocument instance
                PdfDocument pdf = new PdfDocument();

                //Load sample PDF document
                pdf.LoadFromFile("sample.pdf");

                //Save it to XPS format
                pdf.SaveToFile("ToXPS.xps", FileFormat.XPS);
                pdf.Close();
            }
        }
    }
Convierta XPS a PDF en C# y VB.NET
La conversión de XPS a PDF también se puede lograr con Spire.PDF for .NET. Durante la conversión, puede configurar para mantener una imagen de alta calidad en el archivo PDF generado utilizando el método PdfDocument.ConvertOptions.SetXpsToPdfOptions(). Los siguientes son los pasos detallados.
- Cree una instancia de PdfDocument.
- Cargue un archivo XPS usando el método PdfDocument.LoadFromFile(string filename, FileFormat.XPS) o el método PdfDocument.LoadFromXPS().
- Durante la conversión, configure las opciones de conversión de XPS a PDF para mantener imágenes de alta calidad utilizando el método PdfDocument.ConvertOptions.SetXpsToPdfOptions().
- Guarde el archivo XPS en un archivo PDF usando el método PdfDocument.SaveToFile(string filename, FileFormat.PDF).
- C#
- VB.NET
using Spire.Pdf;

    namespace ConvertXPStoPDF
    {
        class Program
        {
            static void Main(string[] args)
            {
                //Create a PdfDocument instance
                PdfDocument pdf = new PdfDocument();

                //Load a sample XPS file
                pdf.LoadFromFile("Sample.xps", FileFormat.XPS);
                //pdf.LoadFromXPS("Sample.xps");

                //Keep high quality images when converting XPS to PDF
                pdf.ConvertOptions.SetXpsToPdfOptions(true);

                //Save the XPS file to PDF
                pdf.SaveToFile("XPStoPDF.pdf", FileFormat.PDF);
            }
        }
    }
Solicitar una Licencia Temporal
Si desea eliminar el mensaje de evaluación de los documentos generados o deshacerse de las limitaciones de la función, por favor solicitar una licencia de prueba de 30 días para ti.
C#/VB.NET: PDF를 XPS로 또는 XPS를 PDF로 변환
NuGet을 통해 설치됨
PM> Install-Package Spire.PDF
관련된 링크들
XPS는 PDF와 유사한 형식이지만 파일의 레이아웃, 모양 및 인쇄 정보에 XML을 사용합니다. XPS 형식은 Microsoft에서 개발했으며 기본적으로 Windows 운영 체제에서 지원됩니다. 다른 소프트웨어를 설치하지 않고 Windows 컴퓨터에서 PDF 파일로 작업하려면 XPS 형식으로 변환할 수 있습니다. 마찬가지로 XPS 파일을 Mac 사용자와 공유하거나 다양한 기기에서 사용해야 하는 경우 PDF로 변환하는 것이 좋습니다. 이 문서에서는 프로그래밍 방식으로 PDF를 XPS로 또는 XPS를 PDF로 변환Spire.PDF for .NET사용.
Spire.PDF for .NET 설치
먼저 Spire.PDF for .NET 패키지에 포함된 DLL 파일을 .NET 프로젝트의 참조로 추가해야 합니다. DLL 파일은 이 링크 에서 다운로드하거나 NuGet을 통해 설치할 수 있습니다.
PM> Install-Package Spire.PDF
C# 및 VB.NET에서 PDF를 XPS로 변환
Spire.PDF for .NET 다양한 파일 형식으로 변환하는 것을 지원하며 PDF를 XPS로 변환하려면 세 줄의 핵심 코드만 있으면 됩니다. 다음은 세부 단계입니다.
- PdfDocument 인스턴스를 만듭니다.
- PdfDocument.LoadFromFile() 메서드를 사용하여 샘플 PDF 문서를 로드합니다.
- PdfDocument.SaveToFile(문자열 파일 이름, FileFormat.XPS) 메서드를 사용하여 PDF 문서를 XPS 파일로 변환합니다.
- C#
- VB.NET
using Spire.Pdf;

    namespace ConvertPdfToXps
    {
        class Program
        {
            static void Main(string[] args)
            {
                //Create a PdfDocument instance
                PdfDocument pdf = new PdfDocument();

                //Load sample PDF document
                pdf.LoadFromFile("sample.pdf");

                //Save it to XPS format
                pdf.SaveToFile("ToXPS.xps", FileFormat.XPS);
                pdf.Close();
            }
        }
    }
C# 및 VB.NET에서 XPS를 PDF로 변환
Spire.PDF for .NET 사용하여 XPS에서 PDF로 변환할 수도 있습니다. 변환하는 동안 PdfDocument.ConvertOptions.SetXpsToPdfOptions() 메서드를 사용하여 생성된 PDF 파일에 고품질 이미지를 유지하도록 설정할 수 있습니다. 다음은 세부 단계입니다.
- PdfDocument 인스턴스를 만듭니다.
- PdfDocument.LoadFromFile(문자열 파일 이름, FileFormat.XPS) 메서드 또는 PdfDocument.LoadFromXPS() 메서드를 사용하여 XPS 파일을 로드합니다.
- 변환하는 동안 XPS에서 PDF로 변환 옵션을 설정하여 PdfDocument.ConvertOptions.SetXpsToPdfOptions() 메서드를 사용하여 고품질 이미지를 유지합니다.
- PdfDocument.SaveToFile(문자열 파일 이름, FileFormat.PDF) 메서드를 사용하여 XPS 파일을 PDF 파일로 저장합니다.
- C#
- VB.NET
using Spire.Pdf;

    namespace ConvertXPStoPDF
    {
        class Program
        {
            static void Main(string[] args)
            {
                //Create a PdfDocument instance
                PdfDocument pdf = new PdfDocument();

                //Load a sample XPS file
                pdf.LoadFromFile("Sample.xps", FileFormat.XPS);
                //pdf.LoadFromXPS("Sample.xps");

                //Keep high quality images when converting XPS to PDF
                pdf.ConvertOptions.SetXpsToPdfOptions(true);

                //Save the XPS file to PDF
                pdf.SaveToFile("XPStoPDF.pdf", FileFormat.PDF);
            }
        }
    }
임시 면허 신청
생성된 문서에서 평가 메시지를 제거하거나 기능 제한을 제거하려면 다음을 수행하십시오 30일 평가판 라이선스 요청 자신을 위해.
C#/VB.NET: Converti PDF in XPS o XPS in PDF
Sommario
Installato tramite NuGet
PM> Install-Package Spire.PDF
Link correlati
XPS è un formato simile al PDF ma utilizza XML nel layout, nell'aspetto e nelle informazioni di stampa di un file. Il formato XPS è stato sviluppato da Microsoft ed è nativamente supportato dai sistemi operativi Windows. Se vuoi lavorare con i tuoi file PDF su un computer Windows senza installare altro software, puoi convertirli in formato XPS. Allo stesso modo, se devi condividere un file XPS con un utente Mac o utilizzarlo su vari dispositivi, è consigliabile convertirlo in PDF. Questo articolo dimostrerà come eseguire a livello di codice convertire PDF in XPS o XPS in PDF utilizzando Spire.PDF for .NET.
Installa Spire.PDF for .NET
Per cominciare, è necessario aggiungere i file DLL inclusi nel pacchetto Spire.PDF for.NET come riferimenti nel progetto .NET. I file DLL possono essere scaricati da questo link o installato tramite NuGet.
PM> Install-Package Spire.PDF
Converti PDF in XPS in C# e VB.NET
Spire.PDF for .NET supporta la conversione di PDF in vari formati di file e per ottenere la conversione da PDF a XPS, sono necessarie solo tre righe di codice di base. Di seguito sono riportati i passaggi dettagliati.
- Creare un'istanza PdfDocument.
- Carica un documento PDF di esempio utilizzando il metodo PdfDocument.LoadFromFile().
- Convertire il documento PDF in un file XPS utilizzando il metodo PdfDocument.SaveToFile (string filename, FileFormat.XPS).
- C#
- VB.NET
using Spire.Pdf;

    namespace ConvertPdfToXps
    {
        class Program
        {
            static void Main(string[] args)
            {
                //Create a PdfDocument instance
                PdfDocument pdf = new PdfDocument();

                //Load sample PDF document
                pdf.LoadFromFile("sample.pdf");

                //Save it to XPS format
                pdf.SaveToFile("ToXPS.xps", FileFormat.XPS);
                pdf.Close();
            }
        }
    }
Converti XPS in PDF in C# e VB.NET
La conversione da XPS a PDF può essere ottenuta anche con Spire.PDF for .NET. Durante la conversione, è possibile impostare per mantenere un'immagine di alta qualità sul file PDF generato utilizzando il metodo PdfDocument.ConvertOptions.SetXpsToPdfOptions(). Di seguito sono riportati i passaggi dettagliati.
- Creare un'istanza PdfDocument.
- Caricare un file XPS utilizzando il metodo PdfDocument.LoadFromFile(string filename, FileFormat.XPS) o il metodo PdfDocument.LoadFromXPS().
- Durante la conversione, imposta le opzioni di conversione da XPS a PDF per mantenere immagini di alta qualità utilizzando il metodo PdfDocument.ConvertOptions.SetXpsToPdfOptions().
- Salvare il file XPS in un file PDF utilizzando il metodo PdfDocument.SaveToFile(string filename, FileFormat.PDF).
- C#
- VB.NET
using Spire.Pdf;

    namespace ConvertXPStoPDF
    {
        class Program
        {
            static void Main(string[] args)
            {
                //Create a PdfDocument instance
                PdfDocument pdf = new PdfDocument();

                //Load a sample XPS file
                pdf.LoadFromFile("Sample.xps", FileFormat.XPS);
                //pdf.LoadFromXPS("Sample.xps");

                //Keep high quality images when converting XPS to PDF
                pdf.ConvertOptions.SetXpsToPdfOptions(true);

                //Save the XPS file to PDF
                pdf.SaveToFile("XPStoPDF.pdf", FileFormat.PDF);
            }
        }
    }
Richiedi una licenza temporanea
Se desideri rimuovere il messaggio di valutazione dai documenti generati o eliminare le limitazioni delle funzioni, per favore richiedere una licenza di prova di 30 giorni per te.
C#/VB.NET : convertir un PDF en XPS ou XPS en PDF
Table des matières
Installé via NuGet
PM> Install-Package Spire.PDF
Liens connexes
XPS est un format similaire au PDF mais utilise XML dans la mise en page, l'apparence et les informations d'impression d'un fichier. Le format XPS a été développé par Microsoft et il est pris en charge de manière native par les systèmes d'exploitation Windows. Si vous souhaitez travailler avec vos fichiers PDF sur un ordinateur Windows sans installer d'autres logiciels, vous pouvez les convertir au format XPS. De même, si vous avez besoin de partager un fichier XPS avec un utilisateur Mac ou de l'utiliser sur divers appareils, il est plus recommandé de le convertir en PDF. Cet article vous montrera comment programmer convertir PDF en XPS ou XPS en PDF en utilisant Spire.PDF for .NET.
Installer Spire.PDF for .NET
Pour commencer, vous devez ajouter les fichiers DLL inclus dans le package Spire.PDF for .NET en tant que références dans votre projet .NET. Les fichiers DLL peuvent être téléchargés à partir de ce lien ou installés via NuGet.
PM> Install-Package Spire.PDF
Convertir PDF en XPS en C# et VB.NET
Spire.PDF for .NET prend en charge la conversion de PDF en différents formats de fichiers, et pour réaliser la conversion PDF en XPS, vous n'avez besoin que de trois lignes de code de base. Voici les étapes détaillées.
- Créez une instance PdfDocument.
- Chargez un exemple de document PDF à l'aide de la méthode PdfDocument.LoadFromFile().
- Convertissez le document PDF en un fichier XPS à l'aide de la méthode PdfDocument.SaveToFile (nom de fichier de chaîne, FileFormat.XPS).
- C#
- VB.NET
using Spire.Pdf;

    namespace ConvertPdfToXps
    {
        class Program
        {
            static void Main(string[] args)
            {
                //Create a PdfDocument instance
                PdfDocument pdf = new PdfDocument();

                //Load sample PDF document
                pdf.LoadFromFile("sample.pdf");

                //Save it to XPS format
                pdf.SaveToFile("ToXPS.xps", FileFormat.XPS);
                pdf.Close();
            }
        }
    }
Convertir XPS en PDF en C# et VB.NET
La conversion de XPS en PDF peut également être réalisée avec Spire.PDF for .NET. Lors de la conversion, vous pouvez choisir de conserver une image de haute qualité sur le fichier PDF généré en utilisant la méthode PdfDocument.ConvertOptions.SetXpsToPdfOptions(). Voici les étapes détaillées.
- Créez une instance PdfDocument.
- Chargez un fichier XPS à l'aide de la méthode PdfDocument.LoadFromFile(string filename, FileFormat.XPS) ou de la méthode PdfDocument.LoadFromXPS().
- Lors de la conversion, définissez les options de conversion XPS en PDF pour conserver des images de haute qualité à l'aide de la méthode PdfDocument.ConvertOptions.SetXpsToPdfOptions().
- Enregistrez le fichier XPS dans un fichier PDF à l'aide de la méthode PdfDocument.SaveToFile(string filename, FileFormat.PDF).
- C#
- VB.NET
using Spire.Pdf;

    namespace ConvertXPStoPDF
    {
        class Program
        {
            static void Main(string[] args)
            {
                //Create a PdfDocument instance
                PdfDocument pdf = new PdfDocument();

                //Load a sample XPS file
                pdf.LoadFromFile("Sample.xps", FileFormat.XPS);
                //pdf.LoadFromXPS("Sample.xps");

                //Keep high quality images when converting XPS to PDF
                pdf.ConvertOptions.SetXpsToPdfOptions(true);

                //Save the XPS file to PDF
                pdf.SaveToFile("XPStoPDF.pdf", FileFormat.PDF);
            }
        }
    }
Demander une licence temporaire
Si vous souhaitez supprimer le message d'évaluation des documents générés ou vous débarrasser des limitations de la fonction, veuillez demander une licence d'essai de 30 jours pour toi.
C#/VB.NET: Converter PDF para HTML
Instalado via NuGet
PM> Install-Package Spire.PDF
Links Relacionados
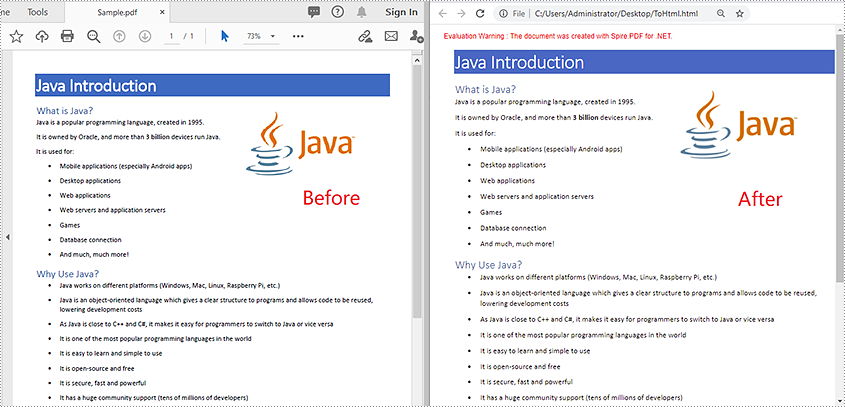
Por vários motivos, você pode querer converter PDF em HTML. Por exemplo, você precisa compartilhar documentos PDF em mídias sociais ou publicar conteúdo PDF na web. Neste artigo, você aprenderá como converter PDF para HTML em C# e VB.NET usando o Spire.PDF for .NET.
Instalar o Spire.PDF for .NET
Para começar, você precisa adicionar os arquivos DLL incluídos no pacote Spire.PDF for.NET como referências em seu projeto .NET. Os arquivos DLL podem ser baixados deste link ou instalados via NuGet.
PM> Install-Package Spire.PDF
Converter PDF para HTML em C# e VB.NET
A seguir estão as etapas para converter um documento PDF em HTML:
- Inicialize uma instância da classe PdfDocument.
- Carregue um documento PDF usando o método PdfDocument.LoadFromFile(filePath).
- Salve o documento PDF como HTML usando o método PdfDocument.SaveToFile(filePath, FileFormat.HTML).
- C#
- VB.NET
using Spire.Pdf;

    namespace ConvertPdfToHtml
    {
        class Program
        {
            static void Main(string[] args)
            {
                //Create a PdfDocument instance
                PdfDocument pdf = new PdfDocument();
                //Load a PDF document
                pdf.LoadFromFile(@"C:\Users\Administrator\Desktop\Sample.pdf");

                //Save the PDF document as HTML
                pdf.SaveToFile(@"C:\Users\Administrator\Desktop\ToHtml.html", FileFormat.HTML);
            }
        }
    }
Solicitar uma licença temporária
Se você deseja remover a mensagem de avaliação dos documentos gerados ou se livrar das limitações de função, por favor solicite uma licença de avaliação de 30 dias para você mesmo.
C#/VB.NET: преобразование PDF в HTML
Установлено через NuGet
PM> Install-Package Spire.PDF
Ссылки по теме
По разным причинам вам может понадобиться преобразовать PDF в HTML. Например, вам нужно поделиться документами PDF в социальных сетях или опубликовать содержимое PDF в Интернете. В этой статье вы узнаете, как конвертировать PDF в HTML на C# и VB.NET используя Spire.PDF for .NET.
Установите Spire.PDF for .NET
Для начала вам нужно добавить файлы DLL, включенные в пакет Spire.PDF for .NET, в качестве ссылок в ваш проект .NET. Файлы DLL можно загрузить по этой ссылке или установить через NuGet
PM> Install-Package Spire.PDF
Преобразование PDF в HTML на C# и VB.NET
Ниже приведены шаги для преобразования документа PDF в HTML:
- Инициализировать экземпляр класса PdfDocument.
- Загрузите документ PDF с помощью метода PdfDocument.LoadFromFile(filePath).
- Сохраните документ PDF как HTML, используя метод PdfDocument.SaveToFile(filePath, FileFormat.HTML).
- C#
- VB.NET
using Spire.Pdf;

    namespace ConvertPdfToHtml
    {
        class Program
        {
            static void Main(string[] args)
            {
                //Create a PdfDocument instance
                PdfDocument pdf = new PdfDocument();
                //Load a PDF document
                pdf.LoadFromFile(@"C:\Users\Administrator\Desktop\Sample.pdf");

                //Save the PDF document as HTML
                pdf.SaveToFile(@"C:\Users\Administrator\Desktop\ToHtml.html", FileFormat.HTML);
            }
        }
    }
Подать заявку на временную лицензию
Если вы хотите удалить оценочное сообщение из сгенерированных документов или избавиться от функциональных ограничений, пожалуйста запросить 30-дневную пробную лицензию для себя.
C#/VB.NET: PDF in HTML konvertieren
Inhaltsverzeichnis
Über NuGet installiert
PM> Install-Package Spire.PDF
verwandte Links
Aus verschiedenen Gründen möchten Sie möglicherweise PDF in HTML konvertieren. Sie müssen beispielsweise PDF-Dokumente in sozialen Medien teilen oder PDF-Inhalte im Web veröffentlichen. In diesem Artikel erfahren Sie, wie das geht Konvertieren Sie PDF in HTML in C# und VB.NET Verwendung von Spire.PDF for .NET.
Installieren Sie Spire.PDF for .NET
Zunächst müssen Sie die im Spire.PDF for.NET-Paket enthaltenen DLL-Dateien als Referenzen in Ihrem .NET-Projekt hinzufügen. Die DLL-Dateien können entweder über diesen Link heruntergeladen oder über NuGet installiert werden.
PM> Install-Package Spire.PDF
Konvertieren Sie PDF in HTML in C# und VB.NET
Im Folgenden finden Sie die Schritte zum Konvertieren eines PDF-Dokuments in HTML:
- Initialisieren Sie eine Instanz der PdfDocument-Klasse.
- Laden Sie ein PDF-Dokument mit der Methode PdfDocument.LoadFromFile(filePath).
- Speichern Sie das PDF-Dokument als HTML mit der Methode PdfDocument.SaveToFile(filePath, FileFormat.HTML).
- C#
- VB.NET
using Spire.Pdf;

    namespace ConvertPdfToHtml
    {
        class Program
        {
            static void Main(string[] args)
            {
                //Create a PdfDocument instance
                PdfDocument pdf = new PdfDocument();
                //Load a PDF document
                pdf.LoadFromFile(@"C:\Users\Administrator\Desktop\Sample.pdf");

                //Save the PDF document as HTML
                pdf.SaveToFile(@"C:\Users\Administrator\Desktop\ToHtml.html", FileFormat.HTML);
            }
        }
    }
Beantragen Sie eine temporäre Lizenz
Wenn Sie die Bewertungsmeldung aus den generierten Dokumenten entfernen oder die Funktionseinschränkungen beseitigen möchten, wenden Sie sich bitte an uns Fordern Sie eine 30-Tage-Testlizenz an für sich selbst.
C#/VB.NET: convertir PDF a HTML
Tabla de contenido
Instalado a través de NuGet
PM> Install-Package Spire.PDF
enlaces relacionados
Por varias razones, es posible que desee convertir PDF a HTML. Por ejemplo, necesita compartir documentos PDF en las redes sociales o publicar contenido PDF en la web. En este artículo, aprenderá cómo convertir PDF a HTML en C# y VB.NET usando Spire.PDF for .NET.
Instalar Spire.PDF for .NET
Para empezar, debe agregar los archivos DLL incluidos en el paquete Spire.PDF for .NET como referencias en su proyecto .NET. Los archivos DLL se pueden descargar desde este enlace o instalar a través de NuGet.
PM> Install-Package Spire.PDF
Convierta PDF a HTML en C# y VB.NET
Los siguientes son los pasos para convertir un documento PDF a HTML:
- Inicialice una instancia de la clase PdfDocument.
- Cargue un documento PDF utilizando el método PdfDocument.LoadFromFile(filePath).
- Guarde el documento PDF como HTML utilizando el método PdfDocument.SaveToFile(filePath, FileFormat.HTML).
- C#
- VB.NET
using Spire.Pdf;

    namespace ConvertPdfToHtml
    {
        class Program
        {
            static void Main(string[] args)
            {
                //Create a PdfDocument instance
                PdfDocument pdf = new PdfDocument();
                //Load a PDF document
                pdf.LoadFromFile(@"C:\Users\Administrator\Desktop\Sample.pdf");

                //Save the PDF document as HTML
                pdf.SaveToFile(@"C:\Users\Administrator\Desktop\ToHtml.html", FileFormat.HTML);
            }
        }
    }
Solicitar una Licencia Temporal
Si desea eliminar el mensaje de evaluación de los documentos generados o deshacerse de las limitaciones de la función, por favor solicitar una licencia de prueba de 30 días para ti.