Java set zoom factor on Excel worksheet
The excel zoom factor could help us to display the data on Excel worksheet clearly or completely. This article will demonstrate how to set the zoom factor on Excel work sheet in Java application by Spire.XLS for Java.
import com.spire.xls.*;

public class ZoomFactor{
    public static void main(String[] args) {

        //Create a workbook and load a file
        Workbook workbook = new Workbook();
        workbook.loadFromFile("Sample.xlsx");

        //Get the first worksheet
        Worksheet sheet = workbook.getWorksheets().get(0);

        //Set the zoom factor of the sheet to 150
        sheet.setZoom(150);

        //Save the Excel file
        workbook.saveToFile("Zoomfactor.xlsx", ExcelVersion.Version2010);
    }
}
Effective screenshot after setting the zoom factor of the sheet to 150.

Create Chart with Non-Contiguous Data in Excel in Java
This article demonstrates how to create chart with non-contiguous data in Excel using Spire.XLS for Java.
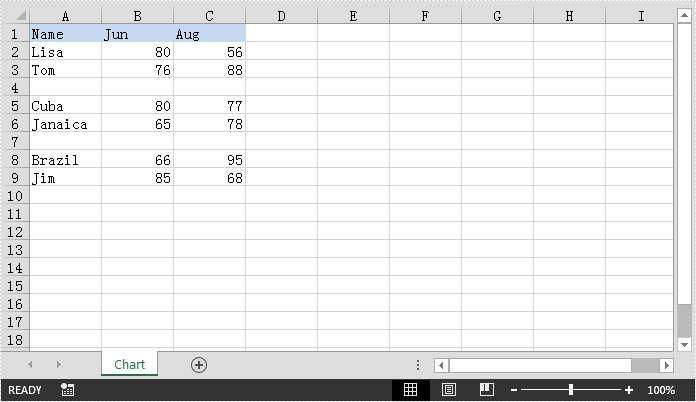
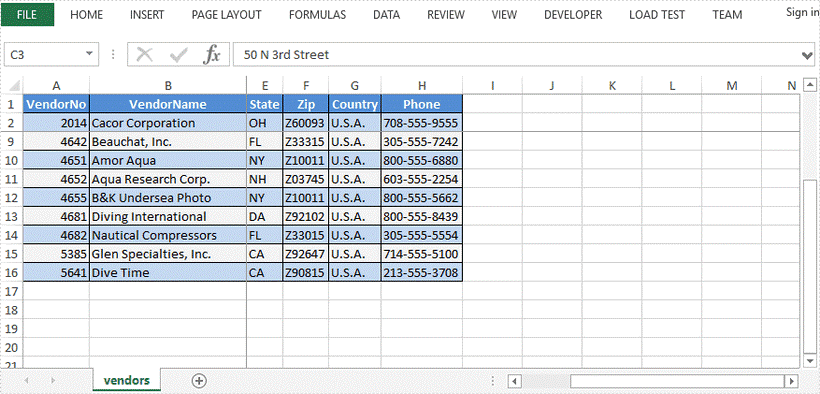
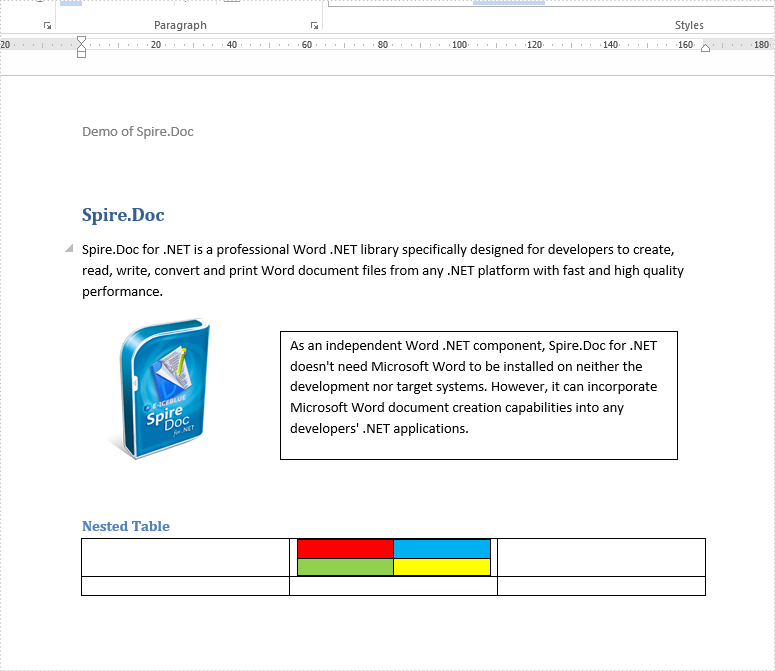
The example Excel file:
import com.spire.xls.*;
import com.spire.xls.charts.ChartSerie;

import java.awt.*;

public class ChartWithNonContiguousData {
    public static void main(String[] args){
        //Create a Workbook instance
        Workbook workbook = new Workbook();
        //Load the Excel file
        workbook.loadFromFile("NonContiguousData.xlsx");

        //Get the first worksheet
        Worksheet sheet = workbook.getWorksheets().get(0);

        //Add a clustered column chart to the worksheet
        Chart chart = sheet.getCharts().add(ExcelChartType.ColumnClustered);
        chart.setSeriesDataFromRange(false);
        //Set chart position
        chart.setLeftColumn(1);
        chart.setTopRow(10);
        chart.setRightColumn(10);
        chart.setBottomRow(24);

        //Add a series to the chart
        ChartSerie cs1 = (ChartSerie)chart.getSeries().add();
        //Set series name
        cs1.setName(sheet.getCellRange("B1").getValue());
        //Set category labels for the series using non-contiguous data
        cs1.setCategoryLabels(sheet.getCellRange("A2:A3").addCombinedRange(sheet.getCellRange("A5:A6"))
.addCombinedRange(sheet.getCellRange("A8:A9")));
        //Set values for the series using non-contiguous data
        cs1.setValues(sheet.getCellRange("B2:B3").addCombinedRange(sheet.getCellRange("B5:B6"))
.addCombinedRange(sheet.getCellRange("B8:B9")));
        //Specify the series type
        cs1.setSerieType(ExcelChartType.ColumnClustered);

        //Add a series to the chart
        ChartSerie cs2 = (ChartSerie)chart.getSeries().add();
        //Set series name
        cs2.setName(sheet.getCellRange("C1").getValue());
        //Set category labels for the series using non-contiguous data
        cs2.setCategoryLabels(sheet.getCellRange("A2:A3").addCombinedRange(sheet.getCellRange("A5:A6"))
.addCombinedRange(sheet.getCellRange("A8:A9")));
        //Set values for the series using non-contiguous data
        cs2.setValues(sheet.getCellRange("C2:C3").addCombinedRange(sheet.getCellRange("C5:C6"))
.addCombinedRange(sheet.getCellRange("C8:C9")));
        //Specify the series type
        cs2.setSerieType(ExcelChartType.ColumnClustered);

        //Set chart title
        chart.setChartTitle("Chart");
        chart.getChartTitleArea().getFont().setSize(20);
        chart.getChartTitleArea().setColor(Color.black);

        chart.getPrimaryValueAxis().hasMajorGridLines(false);

        //Save the result file
        workbook.saveToFile("Chart.xlsx", ExcelVersion.Version2013);
    }
}
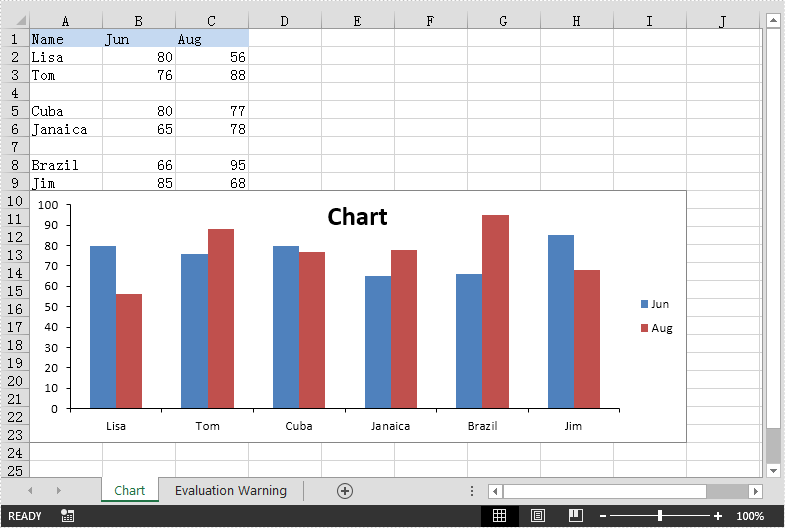
Output:
Freeze or Unfreeze Excel Rows and Columns in Java
This article demonstrates how to freeze or unfreeze rows and columns in Excel using Spire.XLS for Java.
Freeze top row
//Create a Workbook instance
Workbook workbook = new Workbook();

//Load a sample Excel file
workbook.loadFromFile("C:\\Users\\Administrator\\Desktop\\sample.xlsx");

//Get the first worksheet
Worksheet sheet = workbook.getWorksheets().get(0);

//Freeze top row
sheet.freezePanes(2,1);

//Save to file
workbook.saveToFile("FreezeTopRow.xlsx", ExcelVersion.Version2016);
Freeze fisrt column
//Create a Workbook instance
Workbook workbook = new Workbook();

//Load a sample Excel file
workbook.loadFromFile("C:\\Users\\Administrator\\Desktop\\sample.xlsx");

//Get the first worksheet
Worksheet sheet = workbook.getWorksheets().get(0);

//Freeze frist column
sheet.freezePanes(1,2);

//Save to file
workbook.saveToFile("FreezeFirstColumn.xlsx", ExcelVersion.Version2016);
Freeze few rows and columns
//Create a Workbook instance
Workbook workbook = new Workbook();

//Load a sample Excel file
workbook.loadFromFile("C:\\Users\\Administrator\\Desktop\\sample.xlsx");

//Get the first worksheet
Worksheet sheet = workbook.getWorksheets().get(0);

//Freeze the second row and the second column
sheet.freezePanes(3,3);

//Save to file
workbook.saveToFile("FreezeFewRowsAndColumns.xlsx", ExcelVersion.Version2016);
Unfreeze panes
//Create a Workbook instance
Workbook workbook = new Workbook();

//Load a sample Excel file
workbook.loadFromFile("C:\\Users\\Administrator\\Desktop\\FreezeSample.xlsx");

//Get the first worksheet
Worksheet sheet = workbook.getWorksheets().get(0);

//Unfreeze panes
sheet.removePanes();

//Save to file
workbook.saveToFile("UnfreezePanes.xlsx", ExcelVersion.Version2016);
Java: Set Background Color and Image for Excel in Java
Excel documents are widely used in many applications, and it is often necessary to customize their appearance to improve their readability. One way to achieve this is by setting a background color or image for the document, which can enhance its visual appeal and give it a more professional look. This article will demonstrate how to set background color and image for Excel in Java using Spire.XLS for Java.
Install Spire.XLS for Java
First, you're required to add the Spire.Xls.jar file as a dependency in your Java program. The JAR file can be downloaded from this link. If you use Maven, you can easily import the JAR file in your application by adding the following code to your project's pom.xml file.
<repositories>
    <repository>
        <id>com.e-iceblue</id>
        <name>e-iceblue</name>
        <url>https://repo.e-iceblue.com/nexus/content/groups/public/</url>
    </repository>
</repositories>
<dependencies>
    <dependency>
        <groupId>e-iceblue</groupId>
        <artifactId>spire.xls</artifactId>
        <version>16.4.1</version>
    </dependency>
</dependencies>
Set Background Color for Excel in Java
With Spire.XLS for Java, not only can you set the background color for the entire range of cells used in the worksheet, but you can also set it for a specific range of cells within the worksheet. The following are the steps to set background color for Excel.
- Create a Workbook instance.
- Load a sample Excel file using Workbook.loadFromFile() method.
- Get a specific worksheet from the workbook using Workbook.getWorksheets.get(index) method.
- Use Worksheet.getAllocatedRange().getStyle().setColor() method to set background color for the used cell range or Worksheet.getCellRange().getStyle().setColor() method to set background color for a specified cell range in the worksheet.
- Save the result file using Workbook.saveToFile() method.
- Java
import com.spire.xls.ExcelVersion;
        import com.spire.xls.Workbook;
        import com.spire.xls.Worksheet;

        import java.awt.*;

public class BackgroundColor{
    public static void main(String[] args){
        //Create a Workbook instance
        Workbook workbook = new Workbook();
        //Load an Excel file
        workbook.loadFromFile("sample.xlsx");

        //Get the first worksheet
        Worksheet sheet = workbook.getWorksheets().get(0);
        //Set background color for the used cell range in the worksheet
        sheet.getAllocatedRange().getStyle().setColor(Color.orange);
        //Set background color for a specified cell range in the worksheet
        //sheet.getCellRange("A1:E19").getStyle().setColor(Color.pink);

        //Save the file
        workbook.saveToFile("SetBackColor.xlsx", ExcelVersion.Version2013);
    }
}
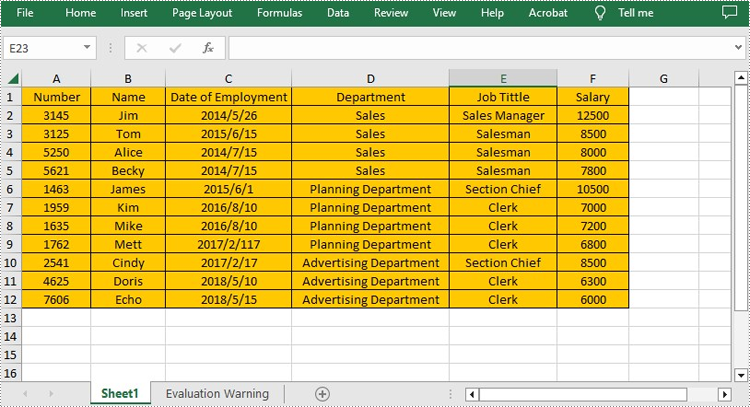
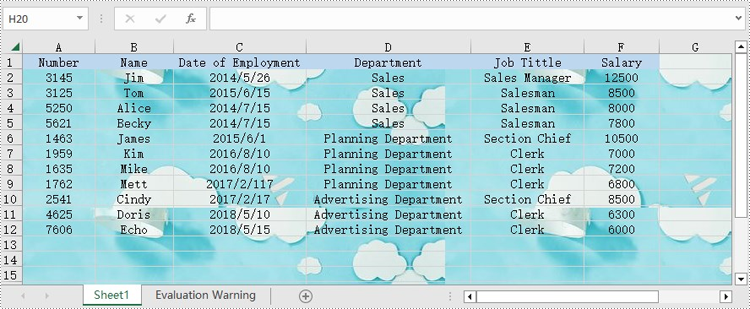
Set Background Image for Excel in Java
Spire.XLS for Java also offers Worksheet.getPageSetup().setBackgoundImage() method for users to set the image background. The following are the steps to achieve this.
- Create a Workbook instance.
- Load a sample Excel file using Workbook.loadFromFile() method.
- Get a specific worksheet from the workbook using Workbook.getWorksheets.get(index) method.
- Set the image as the background image of the worksheet using Worksheet. getPageSetup().setBackgoundImage() method.
- Save the result file using Workbook.saveToFile() method.
- Java
import com.spire.xls.ExcelVersion;
import com.spire.xls.Workbook;
import com.spire.xls.Worksheet;

import javax.imageio.ImageIO;
import java.awt.image.BufferedImage;
import java.io.File;
import java.io.IOException;

public class BackgroundImage {
    public static void main(String[] args) throws IOException {
        //Create a Workbook instance
        Workbook workbook = new Workbook();
        //Load an Excel file
        workbook.loadFromFile("sample.xlsx");

        //Get the first worksheet
        Worksheet sheet = workbook.getWorksheets().get(0);
        //Load an image
        BufferedImage image = ImageIO.read( new File("background.jpg"));
        //Set the image as the background image of the worksheet
        sheet.getPageSetup().setBackgoundImage(image);

        //Save the file
        workbook.saveToFile("SetBackImage.xlsx", ExcelVersion.Version2013);
    }
}
Apply for a Temporary License
If you'd like to remove the evaluation message from the generated documents, or to get rid of the function limitations, please request a 30-day trial license for yourself.
Java: Insert, Extract, or Delete Textboxes in Excel
Textboxes in Excel are versatile tools that enhance the functionality of your spreadsheets. They allow users to add annotations, labels, or supplementary information, making it easier to convey important messages or insights. Whether you're looking to highlight critical data points, provide detailed explanations, or create visually appealing reports, effectively managing textboxes is essential.
In this article, you will learn how to insert a textbox, extract text from a textbox, and delete a textbox in Excel using Java and Spire.XLS for Java.
- Insert a Textbox to Excel in Java
- Extract Text from a Textbox in Excel in Java
- Delete a Textbox in Excel in Java
Install Spire.XLS for Java
First of all, you're required to add the Spire.Xls.jar file as a dependency in your Java program. The JAR file can be downloaded from this link. If you use Maven, you can easily import the JAR file in your application by adding the following code to your project's pom.xml file.
<repositories>
    <repository>
        <id>com.e-iceblue</id>
        <name>e-iceblue</name>
        <url>https://repo.e-iceblue.com/nexus/content/groups/public/</url>
    </repository>
</repositories>
<dependencies>
    <dependency>
        <groupId>e-iceblue</groupId>
        <artifactId>spire.xls</artifactId>
        <version>16.4.1</version>
    </dependency>
</dependencies>
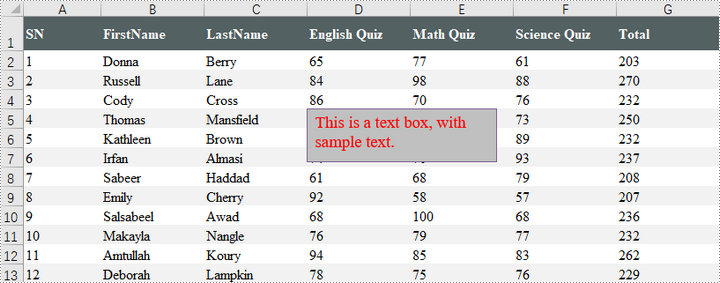
Insert a Textbox to Excel in Java
A textbox can be inserted into a worksheet using the Worksheet.getTextBoxes().addTextBox() method. This method returns an ITextBoxShape object, which provides various methods like setText(), setHAlignment(), and getFill() for configuring the text and formatting of the textbox.
To add a textbox with personalized text and formatting in Excel, follow these steps:
- Create a Workbook object.
- Load an Excel file from the specified file path.
- Retrieve a specific worksheet from the workbook.
- Insert a textbox at the desired location using Worksheet.getTextBoxes().addTextBox() method.
- Set the textbox text using ITextBoxShape.setText() method.
- Customize the textbox's appearance using other methods available in the ITextBoxShape object.
- Save the workbook as a new Excel file.
- Java
import com.spire.xls.*;
import com.spire.xls.core.ITextBoxShape;

import java.awt.*;

public class AddTextbox {

    public static void main(String[] args) {

        // Create a Workbook object
        Workbook workbook = new Workbook();

        // Load an Excel document
        workbook.loadFromFile("C:\\Users\\Administrator\\Desktop\\Input.xlsx");

        // Get a specific sheet
        Worksheet sheet = workbook.getWorksheets().get(0);

        // Add a textbox to the specified location
        ITextBoxShape textBoxShape = sheet.getTextBoxes().addTextBox(5, 4, 60, 200);

        // Set text of the textbox
        textBoxShape.setText("This is a text box, with sample text.");

        // Create a font
        ExcelFont font = workbook.createFont();
        font.setFontName("Times New Roman");
        font.setSize(14);
        font.setColor(Color.red);

        // Apply font to the text
        textBoxShape.getRichText().setFont(0, textBoxShape.getText().length() - 1, font);

        // Set horizontal alignment
        textBoxShape.setHAlignment(CommentHAlignType.Left);

        // Set the fill color of the shape
        textBoxShape.getFill().setFillType(ShapeFillType.SolidColor);
        textBoxShape.getFill().setForeColor(Color.LIGHT_GRAY);

        // Save the Excel file
        workbook.saveToFile("output/AddTextBox.xlsx", ExcelVersion.Version2010);

        // Dispose resources
        workbook.dispose();
    }
}
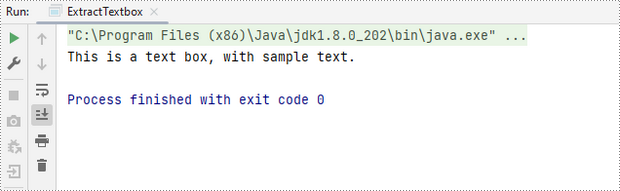
Extract Text from a Textbox in Excel in Java
You can access a specific textbox using the Worksheet.getTextBoxes().get() method. After retrieving it, the text can be accessed with the ITextBox.getText() method.
Here are the steps to extract text from a textbox in Excel:
- Create a Workbook object.
- Load an Excel file from the specified file path.
- Retrieve a specific worksheet from the workbook.
- Access the desired textbox using Worksheet.getTextBoxes().get() method.
- Get the textbox's text using ITextBox.getText() method.
- Java
import com.spire.xls.Workbook;
import com.spire.xls.Worksheet;
import com.spire.xls.core.ITextBox;

public class ExtractTextbox {

    public static void main(String[] args) {

        // Create a Workbook object
        Workbook workbook = new Workbook();

        // Load an Excel file
        workbook.loadFromFile("C:\\Users\\Administrator\\Desktop\\TextBox.xlsx");

        // Get a specific worksheet
        Worksheet sheet = workbook.getWorksheets().get(0);

        // Get a specific textbox
        ITextBox textBox = sheet.getTextBoxes().get(0);

        // Get text from the textbox
        String text = textBox.getText();

        // Print out result
        System.out.println(text);
    }
}
Delete a Textbox in Excel in Java
To delete a specific textbox from a worksheet, utilize the ITextBoxes.get().Remove() method. If you want to clear all textboxes, first obtain the count with the Worksheet.getTextBoxes().getCount() method, then loop through the collection to remove each textbox one by one.
Here's how to remove a textbox from Excel:
- Create a Workbook object.
- Load an Excel file from the desired file path.
- Access a specific worksheet within the workbook.
- Retrieve the textbox collection using Worksheet.getTextBoxes() method.
- Delete the targeted textbox using ITextBoxes.get().Remove() method.
- Save the modified workbook to a new Excel file.
- Java
import com.spire.xls.ExcelVersion;
import com.spire.xls.Workbook;
import com.spire.xls.Worksheet;
import com.spire.xls.core.ITextBoxes;

public class DeleteTextbox {

    public static void main(String[] args) {

        // Create a Workbook object
        Workbook workbook = new Workbook();

        // Load an Excel file
        workbook.loadFromFile("C:\\Users\\Administrator\\Desktop\\TextBox.xlsx");

        // Get a specific worksheet
        Worksheet sheet = workbook.getWorksheets().get(0);

        // Get textbox collection from the worksheet
        ITextBoxes textBoxes = sheet.getTextBoxes();

        // Remove a specific textbox
        textBoxes.get(0).remove();

        // Save the updated document to a different Excel file
        workbook.saveToFile("output/DeleteTextbox.xlsx", ExcelVersion.Version2016);

        // Dispose resources
        workbook.dispose();
    }
}
Apply for a Temporary License
If you'd like to remove the evaluation message from the generated documents, or to get rid of the function limitations, please request a 30-day trial license for yourself.
Java: Merge Word Documents
Sometimes we need to merge several related Word documents to make a more complete one. To merge documents with MS Word, you need to manually copy and paste contents or import contents from other documents, which can be tedious. Luckily, Spire.Doc for Java provides 2 easy ways to merge Word documents by programming. This article will show the detailed steps to merge Word documents.
Install Spire.Doc for Java
First, you're required to add the Spire.Doc.jar file as a dependency in your Java program. The JAR file can be downloaded from this link. If you use Maven, you can easily import the JAR file in your application by adding the following code to your project's pom.xml file.
<repositories>
    <repository>
        <id>com.e-iceblue</id>
        <name>e-iceblue</name>
        <url>https://repo.e-iceblue.com/nexus/content/groups/public/</url>
    </repository>
</repositories>
<dependencies>
    <dependency>
        <groupId>e-iceblue</groupId>
        <artifactId>spire.doc</artifactId>
        <version>14.5.3</version>
    </dependency>
</dependencies>
Merge Documents by Inserting the Entire File
The method Document.insertTextFromFile() provided by Spire.Doc allows merging Word documents by inserting other documents entirely into a document with the inserted contents starting from a new page.
The detailed steps of merging documents by inserting the entire file are as follows:
- Create an object of Document class and load a Word document from disk.
- Insert another Word document entirely to the loaded document using Document.insertTextFromFile() method.
- Save the result document using Document.saveToFile() method.
- Java
import com.spire.doc.*;

public class merge {
    public static void main(String[] args) {
        //Create an object of Document and load a Word document from disk
        Document document = new Document("C:/Samples/Sample1.docx");

        //Insert another Word document entirely to the document
        document.insertTextFromFile("C:/Samples/Sample2.docx", FileFormat.Docx_2013);

        //Save the result document
        document.saveToFile("MergingResult.docx", FileFormat.Docx_2013);
    }
}
Merge Documents by Cloning Contents
If you want to merge documents without starting a new page, you can clone the contents of other documents to add to the end of a document.
The detailed steps of merging documents by cloning contents are as follows:
- Create two objects of Document and load the two Word documents from disk.
- Loop through the second document to get all the sections using Document.getSections() method, then loop through all the sections to get their child objects using Section.getBod().getChildObjects() method, then get the last section of the first document using Document.getLastSection() method, and then add the child objects to the last section of the first document using Body.getChildObjects().add() method.
- Save the result document using Document.saveToFile() method.
- Java
import com.spire.doc.*;

public class mergeDocuments {
    public static void main(String[] args){
        //Create two Document objects and load two Word documents from disk
        Document document1 = new Document("C:/Samples/Sample1.docx");
        Document document2 = new Document("C:/Samples/Sample2.docx");

        //Loop through the second document to get all the sections
        for (Object sectionObj : (Iterable) document2.getSections()) {
            Section sec=(Section)sectionObj;
            //Loop through the sections of the second document to get their child objects
            for (Object docObj :(Iterable ) sec.getBody().getChildObjects()) {
                DocumentObject obj=(DocumentObject)docObj;

                //Get the last section of the first document
                Section lastSection = document1.getLastSection();

                //Add the child objects to the last section of the first document
                Body body = lastSection.getBody();
                body.getChildObjects().add(obj.deepClone());
            }
        }

        //Save the result document
        document1.saveToFile("MergingResult.docx", FileFormat.Docx_2013);
    }
}

Apply for a Temporary License
If you'd like to remove the evaluation message from the generated documents, or to get rid of the function limitations, please request a 30-day trial license for yourself.
Java: Insert or Remove Footnotes in Word
Footnotes are commonly used in Word documents to provide additional information or detailed explanations for the content. Long and complex words and phrases can make writings difficult for readers to travel through. But providing explanations in the main text would break the coherence of writings and make them much more tedious. Fortunately, footnotes can help writers to give information and explanations at the end of the page, without disrupting the fluency and concision of writings. This article demonstrates how to use Spire.Doc for Java to insert or remove footnotes in Word.
Install Spire.Doc for Java
First, you're required to add the Spire.Doc.jar file as a dependency in your Java program. The JAR file can be downloaded from this link. If you use Maven, you can easily import the JAR file in your application by adding the following code to your project's pom.xml file.
<repositories>
    <repository>
        <id>com.e-iceblue</id>
        <name>e-iceblue</name>
        <url>https://repo.e-iceblue.com/nexus/content/groups/public/</url>
    </repository>
</repositories>
<dependencies>
    <dependency>
        <groupId>e-iceblue</groupId>
        <artifactId>spire.doc</artifactId>
        <version>14.5.3</version>
    </dependency>
</dependencies>
Insert a Footnote into a Word Document
The detailed steps of inserting footnote are as follows:
- Create an object of Document class.
- Load a Word document form disk using Document.loadFromFile() method.
- Find the text to be noted using Document.findString() method.
- Add a footnote using Paragraph.getChildObjects().insert() method.
- Add a paragraph in the footnote using Footnote.getTextBody().addParagraph() method.
- Add text in the added paragraph using Paragraph.appendText() method.
- Set the text format of the footnote using the methods under CharacterFormat object returned by TextRange.getCharacterFormat() method.
- Set the text format of the marker using the methods under CharaterFormat object returned by Footnote.getMarkerCharacterFormat() method.
- Save the document using Document.saveToFile() method.
- Java
import com.spire.doc.*;
import com.spire.doc.documents.*;
import com.spire.doc.fields.*;
import java.awt.*;
public class insertFootnote {
public static void main(String[] args) {
//Create an object of Document class
Document document = new Document();
//Load a Word document from disk
document.loadFromFile("D:/Samples/Sample.docx");
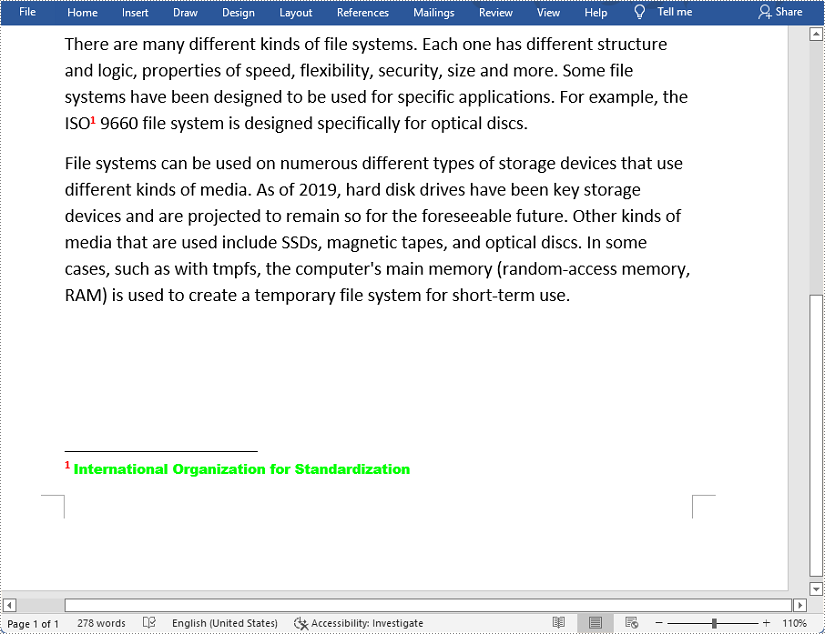
//Find the word to be cited
TextSelection selection = document.findString("ISO", false, true);
//Add a footnote
TextRange textRange = selection.getAsOneRange();
Paragraph paragraph = textRange.getOwnerParagraph();
int index = paragraph.getChildObjects().indexOf(textRange);
Footnote footnote = paragraph.appendFootnote(FootnoteType.Footnote);
paragraph.getChildObjects().insert(index + 1, footnote);
//Add a paragraph in the footnote
Paragraph paragraph1 = footnote.getTextBody().addParagraph();
//Add text in the added paragraph
textRange = paragraph1.appendText("International Organization for Standardization");
//Set the text format of the footnote
textRange.getCharacterFormat().setFontName("Arial Black");
textRange.getCharacterFormat().setFontSize(10);
textRange.getCharacterFormat().setTextColor(Color.yellow);
//Set the text format of the marker
footnote.getMarkerCharacterFormat().setFontName("Calibri");
footnote.getMarkerCharacterFormat().setFontSize(12);
footnote.getMarkerCharacterFormat().setBold(true);
footnote.getMarkerCharacterFormat().setTextColor(Color.red);
//Save the document
String output = "output/insertFootnote.docx";
document.saveToFile(output, FileFormat.Docx_2010);
}
}
Remove Footnotes from a Word Document
The detailed steps of removing footnotes are as follows:
- Create an object of Document class.
- Load a Word document from disk using Document.loadFromFile() method.
- Loop through sections, then paragraphs and then their child objects to get a specific child object and determine if it is a footnote.
- Remove a specific footnote using Paragraph.getChildObjects().removeAt() method.
- Save the document using Document.saveToFile() method.
- Java
import com.spire.doc.*;
import com.spire.doc.fields.*;
import com.spire.doc.documents.*;
import java.util.*;
public class RemoveFootnote {
public static void main(String[] args) {
//Create an object of Document class
Document document = new Document();
//Load a Word document from disk
document.loadFromFile("D:/Samples/Sample.docx");
//Loop through the sections
for (int i = 0; i < document.getSections().getCount(); i++) {
//Get a specific section
Section section = document.getSections().get(i);
//Loop through the paragraphs in the section
for (int j = 0; j < section.getParagraphs().getCount(); j++)
{
//Get a specific paragraph
Paragraph para = section.getParagraphs().get(j);
//Create a list
ListFootnote> footnotes = new ArrayList<>();
//Loop through the child objects in the paragraph
for (int k = 0, cnt = para.getChildObjects().getCount(); k < cnt; k++)
{
//Get a specific child object
ParagraphBase pBase = (ParagraphBase)para.getChildObjects().get(k);
//Determine if the child object is a footnote
if (pBase instanceof Footnote)
{
Footnote footnote = (Footnote)pBase;
//Add the footnote to the list
footnotes.add(footnote);
}
}
if (footnotes != null) {
//Loop through the footnotes in the list
for (int y = 0; y < footnotes.size(); y++) {
//Remove a specific footnote
para.getChildObjects().remove(footnotes.get(y));
}
}
}
}
//Save the document
document.saveToFile("output/removeFootnote.docx", FileFormat.Docx);
}
}
Apply for a Temporary License
If you'd like to remove the evaluation message from the generated documents, or to get rid of the function limitations, please request a 30-day trial license for yourself.
Java: Print Word Documents
Printing Word documents is a fundamental aspect of document management, allowing you to transform digital files into tangible, physical copies. Whether you need to produce hard copies for reference, distribution, or archival purposes, the ability to print Word documents is a valuable skill that remains relevant in various professional and personal settings.
In this article, you will learn how to print Word documents in Java using the Spire.Doc for Java library and java.awt.print package.
- Print Word with the Default Printer in Java
- Print Word with a Specified Printer in Java
- Print Word with a Print Dialog Box in Java
- Print a Range of Pages in Word in Java
- Print Word in Duplex Mode in Java
Install Spire.Doc for Java
First, you're required to add the Spire.Doc.jar file as a dependency in your Java program. The JAR file can be downloaded from this link. If you use Maven, you can easily import the JAR file in your application by adding the following code to your project's pom.xml file.
<repositories>
    <repository>
        <id>com.e-iceblue</id>
        <name>e-iceblue</name>
        <url>https://repo.e-iceblue.com/nexus/content/groups/public/</url>
    </repository>
</repositories>
<dependencies>
    <dependency>
        <groupId>e-iceblue</groupId>
        <artifactId>spire.doc</artifactId>
        <version>14.5.3</version>
    </dependency>
</dependencies>
Print Word with the Default Printer in Java
Printing Word documents with the default printer is a convenient and straightforward method. This approach is often suitable for regular printing tasks when specific printer settings are not necessary or when users prefer to utilize the default configurations set in their printer.
The following are the steps to print Word documents with the default printer using Spire.Doc for Java and java.awt.print.
- Create a PrinterJob object, and call the methods under it to set up a print job.
- Create a Document object, and load a Word document using Document.LoadFromFile() method.
- Render each page of the document in the specified format using PrinterJob.setPrintable() method.
- Call PrinterJob.print() method to print the Word document.
- Java
import com.spire.doc.Document;

import java.awt.print.PageFormat;
import java.awt.print.Paper;
import java.awt.print.PrinterException;
import java.awt.print.PrinterJob;

public class PrintWithDefaultPrinter {

    public static void main(String[] args) {

        // Create a Document object
        Document document = new Document();

        // Load a Word file
        document.loadFromFile("C:\\Users\\Administrator\\Desktop\\Input.docx");

        // Create a PrinterJob object
        PrinterJob printerJob = PrinterJob.getPrinterJob();

        // Create a PageFormat object and set it to the default size and orientation
        PageFormat pageFormat = printerJob.defaultPage();

        // Return a copy of the Paper object associated with this PageFormat
        Paper paper = pageFormat.getPaper();

        // Set the imageable area of this Paper
        paper.setImageableArea(0, 0, pageFormat.getWidth(), pageFormat.getHeight());

        // Set the number of copies to be printed
        printerJob.setCopies(1);

        // Set the Paper object for this PageFormat
        pageFormat.setPaper(paper);

        // Call painter to render the pages in the specified format
        printerJob.setPrintable(document, pageFormat);

        // Print document
        try {
            printerJob.print();
        } catch (PrinterException e) {
            e.printStackTrace();
        }
    }
}
Print Word with a Specified Printer in Java
Printing a Word document with a specified printer in Java allows you to choose a specific printer device to handle the printing task. This approach can be useful in scenarios where you have multiple printers available and want to direct the print output to a specific one.
The following are the steps to print Word documents with a specified printer using Spire.Doc for Java and java.awt.print.
- Create a PrinterJob object, and call the methods under it to set up a print job.
- Find the print service by the printer name using the custom method findPrintService().
- Apply the print service using PrinterJob.setPrintService() method.
- Create a Document object, and load a Word document using Document.LoadFromFile() method.
- Render each page of the document in the specified format using PrinterJob.setPrintable() method.
- Call PrinterJob.print() method to print the Word document.
- Java
import com.spire.doc.Document;

import javax.print.PrintService;
import java.awt.print.PageFormat;
import java.awt.print.Paper;
import java.awt.print.PrinterException;
import java.awt.print.PrinterJob;

public class PrintWithSpecifiedPrinter {

    public static void main(String[] args) throws PrinterException {

        // Create a PrinterJob object which is initially associated with the default printer
        PrinterJob printerJob = PrinterJob.getPrinterJob();

        // Specify printer name
        PrintService myPrintService = findPrintService("\\\\192.168.1.104\\HP LaserJet P1007");
        printerJob.setPrintService(myPrintService);

        // Create a PageFormat instance and set it to a default size and orientation
        PageFormat pageFormat = printerJob.defaultPage();

        // Return a copy of the Paper object associated with this PageFormat.
        Paper paper = pageFormat.getPaper();

        // Set the imageable area of this Paper.
        paper.setImageableArea(0, 0, pageFormat.getWidth(), pageFormat.getHeight());

        // Set the Paper object for this PageFormat.
        pageFormat.setPaper(paper);

        // Create a Document object
        Document document = new Document();

        // Load a Word file
        document.loadFromFile("C:\\Users\\Administrator\\Desktop\\Input.docx");

        // Call painter to render the pages in the specified format
        printerJob.setPrintable(document, pageFormat);

        // Print document
        try {
            printerJob.print();
        } catch (PrinterException e) {
            e.printStackTrace();
        }
    }

    // Find print service
    private static PrintService findPrintService(String printerName) {

        PrintService[] printServices = PrinterJob.lookupPrintServices();
        for (PrintService printService : printServices) {
            if (printService.getName().equals(printerName)) {
                return printService;
            }
        }
        return null;
    }
}
Print Word with a Print Dialog Box in Java
Printing a Word document with a print dialog box enables users to select a printer and customize print settings before initiating the process. By presenting a print dialog box, you provide users with flexibility and control over the printing operation.
To print Word document with a print dialog box in Java, follow these step:
- Create a PrinterJob object, and call methods under it to set up a print job.
- Create a Document object, and load a Word document using Document.LoadFromFile() method.
- Render each page of the document in the specified format using PrinterJob.setPrintable() method.
- Call PrinterJob.printDialog() method to display print dialog.
- Call PrinterJob.print() method to print the Word document.
- Java
import com.spire.doc.Document;

import java.awt.print.PageFormat;
import java.awt.print.Paper;
import java.awt.print.PrinterException;
import java.awt.print.PrinterJob;

public class PrintWithDialogBox {

    public static void main(String[] args) {

        // Create a PrinterJob object which is initially associated with the default printer
        PrinterJob printerJob = PrinterJob.getPrinterJob();

        // Create a PageFormat object and set it to a default size and orientation
        PageFormat pageFormat = printerJob.defaultPage();

        // Return a copy of the Paper object associated with this PageFormat
        Paper paper = pageFormat.getPaper();

        // Set the imageable area of this Paper
        paper.setImageableArea(0, 0, pageFormat.getWidth(), pageFormat.getHeight());

        // Set the Paper object for this PageFormat
        pageFormat.setPaper(paper);

        // Create a Document object
        Document document = new Document();

        // Load a Word file
        document.loadFromFile("C:\\Users\\Administrator\\Desktop\\Math.docx");

        // Call painter to render the pages in the specified format
        printerJob.setPrintable(document, pageFormat);

        // Display the print dialog
        if (printerJob.printDialog()) {
            try {

// Print document
                printerJob.print();
            } catch (PrinterException e) {
                e.printStackTrace();
            }
        }
    }
}
Print a Range of Pages in Word in Java
Printing a range of pages in Microsoft Word is a useful feature that allows you to select specific pages from a document and print only those pages, rather than printing the entire document. This can be particularly handy when you're working with lengthy documents or when you only need to print a specific section.
The steps to set print range while printing Word documents in Java are as follows.
- Create a PrinterJob object, and call the methods under it to set up a print job.
- Create a Document object, and load a Word document using Document.LoadFromFile() method.
- Render each page of the document in the specified format using PrinterJob.setPrintable() method.
- Create a PrintRequestAttributeSet object, and add the print range to the attribute set.
- Call PrinterJob.print() method to print the range of pages.
- Java
import com.spire.doc.Document;

import javax.print.attribute.HashPrintRequestAttributeSet;
import javax.print.attribute.PrintRequestAttributeSet;
import javax.print.attribute.standard.PageRanges;
import java.awt.print.PageFormat;
import java.awt.print.Paper;
import java.awt.print.PrinterException;
import java.awt.print.PrinterJob;

public class PrintPageRange {

    public static void main(String[] args) {

        // Create a Document object
        Document document = new Document();

        // Load a Word file
        document.loadFromFile("C:\\Users\\Administrator\\Desktop\\Input.docx");

        // Create a PrinterJob object
        PrinterJob printerJob = PrinterJob.getPrinterJob();

        // Create a PageFormat object and set it to the default size and orientation
        PageFormat pageFormat = printerJob.defaultPage();

        // Return a copy of the Paper object associated with this PageFormat
        Paper paper = pageFormat.getPaper();

        // Set the imageable area of this Paper
        paper.setImageableArea(0, 0, pageFormat.getWidth(), pageFormat.getHeight());

        // Set the number of copies
        printerJob.setCopies(1);

        // Set the Paper object for this PageFormat
        pageFormat.setPaper(paper);

        // Call painter to render the pages in the specified format
        printerJob.setPrintable(document, pageFormat);

        // Create a PrintRequestAttributeSet object
        PrintRequestAttributeSet attributeSet = new HashPrintRequestAttributeSet();

        // Set print range
        attributeSet.add(new PageRanges(1,5));

        // Print document
        try {
            printerJob.print(attributeSet);
        } catch (PrinterException e) {
            e.printStackTrace();
        }
    }
}
Print Word in Duplex Mode in Java
Duplex printing, also known as two-sided printing, allows you to print on both sides of a sheet of paper automatically, which can be beneficial for lengthy reports, presentations, or handouts.
The steps to print Word documents in duplex mode in Java are as follows.
- Create a PrinterJob object, and call the methods under it to set up a print job.
- Create a Document object, and load a Word document using Document.LoadFromFile() method.
- Render each page of the document in the specified format using PrinterJob.setPrintable() method.
- Create a PrintRequestAttributeSet object, and add the two-sided printing mode to the attribute set.
- Call PrinterJob.print() method to print the Word document.
- Java
import com.spire.doc.Document;

import javax.print.attribute.HashPrintRequestAttributeSet;
import javax.print.attribute.PrintRequestAttributeSet;
import javax.print.attribute.standard.Sides;
import java.awt.print.PageFormat;
import java.awt.print.Paper;
import java.awt.print.PrinterException;
import java.awt.print.PrinterJob;

public class PrintInDuplexMode {

    public static void main(String[] args) {

        // Create a Document object
        Document document = new Document();

        // Load a Word file
        document.loadFromFile("C:\\Users\\Administrator\\Desktop\\Input.docx");

        // Create a PrinterJob object which is initially associated with the default printer
        PrinterJob printerJob = PrinterJob.getPrinterJob();

        // Create a PageFormat object and set it to a default size and orientation
        PageFormat pageFormat = printerJob.defaultPage();

        // Return a copy of the Paper object associated with this PageFormat
        Paper paper = pageFormat.getPaper();

        // Set the imageable area of this Paper
        paper.setImageableArea(0, 0, pageFormat.getWidth(), pageFormat.getHeight());

        // Set the Paper object for this PageFormat
        pageFormat.setPaper(paper);

        // Call painter to render the pages in the specified format
        printerJob.setPrintable(document, pageFormat);

        // Create a PrintRequestAttributed object
        PrintRequestAttributeSet attributeSet = new HashPrintRequestAttributeSet();

        // Enable duplex printing mode
        attributeSet.add(Sides.TWO_SIDED_SHORT_EDGE);

        // Print document
        try {
            printerJob.print(attributeSet);
        } catch (PrinterException e) {
            e.printStackTrace();
        }
    }
}
Apply for a Temporary License
If you'd like to remove the evaluation message from the generated documents, or to get rid of the function limitations, please request a 30-day trial license for yourself.
How to convert Word to PostScript in C#
PostScript is a page description language that is an industry standard for outputting high-resolution text and graphics. From Version 6.11.2, Spire.Doc supports to convert doc/docx to a postscript file in both WinForm app and ASP.NET app. This article will demonstrate how to convert word to PostScript in C# and VB.NET.
Firstly, view the sample word document:
using Spire.Doc;

namespace Word
{
    class Program
    {
        static void Main(string[] args)
        {
            Document doc = new Document();
            doc.LoadFromFile("Sample.docx", FileFormat.Docx2010);
            doc.SaveToFile("Result.ps", FileFormat.PostScript);
        }
    }
}
Imports Spire.Doc
Namespace Word
    Class Program
        Private Shared Sub Main(ByVal args As String())
            Dim doc As Document = New Document()
            doc.LoadFromFile("Sample.docx", FileFormat.Docx2010)
            doc.SaveToFile("Result.ps", FileFormat.PostScript)
        End Sub
    End Class
End Namespace
Effective screenshot of the resulted PostScript file converted from .docx document:
Java: Convert PDF to PDF/A
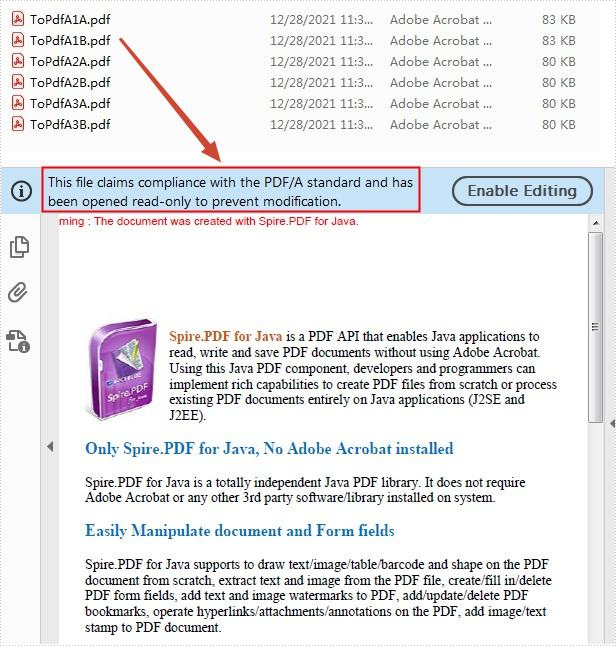
PDF/A is a kind of PDF format designed for archiving and long-term preservation of electronic documents. Unlike paper documents that are easily damaged or smeared, PDF/A format ensures that documents can be reproduced in exactly the same way even after long-term storage. This article will demonstrate how to convert PDF to PDF/A-1A, 2A, 3A, 1B, 2B and 3B compliant PDF using Spire.PDF for Java.
Install Spire.PDF for Java
First of all, you're required to add the Spire.PDF.jar file as a dependency in your Java program. The JAR file can be downloaded from this link. If you use Maven, you can easily import the JAR file in your application by adding the following code to your project's pom.xml file.
<repositories>
    <repository>
        <id>com.e-iceblue</id>
        <name>e-iceblue</name>
        <url>https://repo.e-iceblue.com/nexus/content/groups/public/</url>
    </repository>
</repositories>
<dependencies>
    <dependency>
        <groupId>e-iceblue</groupId>
        <artifactId>spire.pdf</artifactId>
        <version>12.5.1</version>
    </dependency>
</dependencies>
Convert PDF to PDF/A
The detailed steps are as follows:
- Create a PdfStandardsConverter instance, and pass in a sample PDF file as a parameter.
- Convert the sample file to PdfA1A conformance level using PdfStandardsConverter.toPdfA1A() method.
- Convert the sample file to PdfA1B conformance level using PdfStandardsConverter. toPdfA1B() method.
- Convert the sample file to PdfA2A conformance level using PdfStandardsConverter. toPdfA2A() method.
- Convert the sample file to PdfA2B conformance level using PdfStandardsConverter. toPdfA2B() method.
- Convert the sample file to PdfA3A conformance level using PdfStandardsConverter. toPdfA3A() method.
- Convert the sample file to PdfA3B conformance level using PdfStandardsConverter. toPdfA3B() method.
- Java
import com.spire.pdf.conversion.PdfStandardsConverter;

public class ConvertPdfToPdfA {
    public static void main(String[] args) {

        //Create a PdfStandardsConverter instance, and pass in a sample file as a parameter
        PdfStandardsConverter converter = new PdfStandardsConverter("sample.pdf");

        //Convert to PdfA1A
        converter.toPdfA1A("output/ToPdfA1A.pdf");

        //Convert to PdfA1B
        converter.toPdfA1B("output/ToPdfA1B.pdf");

        //Convert to PdfA2A
        converter.toPdfA2A( "output/ToPdfA2A.pdf");

        //Convert to PdfA2B
        converter.toPdfA2B("output/ToPdfA2B.pdf");

        //Convert to PdfA3A
        converter.toPdfA3A("output/ToPdfA3A.pdf");

        //Convert to PdfA3B
        converter.toPdfA3B("output/ToPdfA3B.pdf");
    }
}
Apply for a Temporary License
If you'd like to remove the evaluation message from the generated documents, or to get rid of the function limitations, please request a 30-day trial license for yourself.