Creating a professional checklist or form in Microsoft Word often requires inserting checkboxes. Whether you need interactive, clickable checkboxes for digital forms or static symbols for printed documents, Word offers versatile solutions. In this guide, we'll walk you through 4 easy and practical ways to insert checkbox in Word-from built-in features to advanced automation using C#.
By the end, you'll be able to turn any plain document into a structured, professional checklist that improves clarity, accuracy, and user experience. Let's dive in!
Table of Contents
- Understand the Types of Checkboxes in Word
- Method 1: Insert a Checkbox in Word (Interactive)
- Method 2: Create a Static Checkbox in Word (Print-Only)
- Method 3: Insert Checkbox in Word for the Web (Online)
- Method 4: Add Checkboxes to Word Automatically Using C#
- Why Insert Checkbox in Word Documents
- Troubleshooting Common Checkbox Issues
Understand the Types of Checkboxes in Word
Before inserting a checkbox in your Word document, it's important to understand the different types available and their typical use cases. Word provides two primary options, each suited for specific needs:
| Checkbox Type | Description | Best Use Cases |
|---|---|---|
| Clickable Checkboxes | Interactive content controls that users can click to check/uncheck. | Digital forms, surveys, electronic task lists, interactive templates. |
| Static Checkboxes | Visual symbols (like ☑, ✓) that look like checkboxes but cannot be clicked. | Printed manuals, hand-filled forms, visual lists, PDF exports. |
Knowing the differences helps you pick the most suitable checkbox type for your document. Let's explore the methods below to create both types.
Method 1: Insert a Checkbox in Word (Interactive)
To insert a checkbox in Word that users can check or uncheck directly, follow these steps using the Checkbox Content Control feature. This method is ideal for creating electronic forms and checklists shared via email or Teams.
Prerequisite:
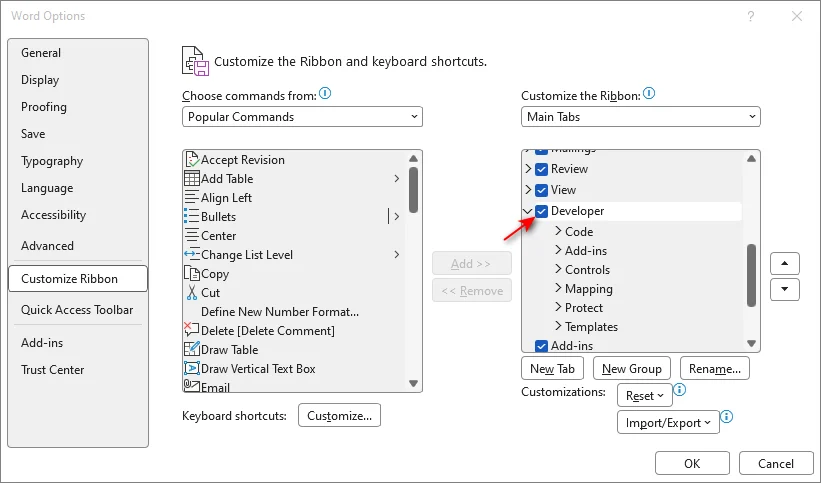
Before proceeding, ensure the Developer Tab is enabled in your ribbon. If not, go to File > Options > Customize Ribbon, check the box next to Developer, and click OK.
Step-by-Step Instructions:
-
Place your cursor where you want the checkbox to appear.
-
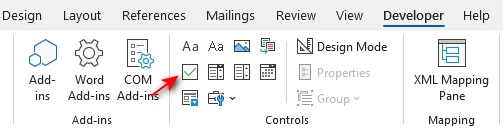
Navigate to the Developer tab on the top ribbon.
-
In the Controls group, click the Check Box Content Control icon (looks like a square with a checkmark inside).
Compatibility Tip: If you need compatibility with very old versions of Word (pre-2007), you can choose Legacy Tools > Check Box Form Field. However, Content Control is recommended for all modern versions (Word 2010-2024) as it offers better formatting and security options.
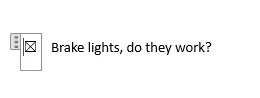
Result: An interactive checkbox now appears in your document. Clicking it will instantly toggle between checked and unchecked states.
Note for Mac Users
The process to insert a checkbox in Word on Mac is similar, but the interface layout differs slightly:
- Enable Developer Tab: Click Word in the top menu bar > select Preferences > Ribbon & Toolbar > Check the box next to Developer.
- Insert the Checkbox: Go to the Developer tab in the ribbon and click the Check Box icon.
Pro Tips
- Change the Checkbox Symbol (X to ✓): By default, Word uses an "X". To switch to a checkmark: Select the checkbox, go to Developer > Properties, click Change next to Checked symbol, choose ✓ (usually found in the Wingdings font), and hit OK.
- Create a Quick Checklist: Don't re-insert every time. Simply copy your first checkbox (Ctrl+C / Cmd+C) and paste it (Ctrl+V / Cmd+V) at the start of other lines.
- Protect the Form: To stop users from typing over your text, go to Developer > Restrict Editing. Check Allow only this type of editing, select Filling in forms from the dropdown, then click Yes, Start Enforcing Protection (you can set a password if desired).
Method 2: Insert a Static Checkbox in Word (Print-Only)
If you are creating a document intended to be printed and filled out by hand (such as a physical checklist or survey), you can insert a static checkbox symbol. This method creates a visual box that looks perfect on paper, but cannot be clicked digitally.
You have two quick options depending on your needs:
Option A: The Symbol Method (Best for Single or Custom Placement)
Use this if you need to place checkboxes randomly or want full control over the symbol style.
-
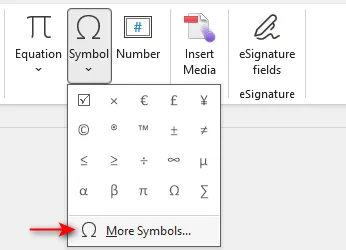
Navigate to the Insert tab > Click Symbol > More Symbols...
-
In the dialog box, change the Font dropdown to Wingdings or Wingdings 2.
-
Select your preferred square symbol (like □) and click Insert.
Option B: The Bullet List Method (Best for Long Checklists)
Use this if you have a long list of items and want a checkbox automatically at the start of each line.
-
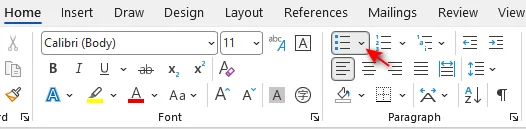
Select your list of text items.
-
Go to the Home tab > Click the arrow next to the Bullets icon.
-
Select Define New Bullet... > Symbol.
-
Choose Wingdings, pick the square box (□), and click OK.
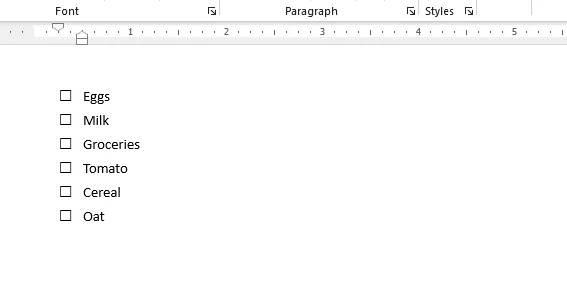
Result: Your entire list instantly transforms into a printable checklist.
Method 3: Insert Checkbox in Word for the Web (Online)
If you don't have the desktop version of Word installed or prefer cloud-based collaboration, you can still create documents with interactive checkboxes or checklists using Word for the Web. This method is native to the browser and requires no software installation.
Steps to Insert Checkbox in Word Online:
-
Open your document in Word for the Web.
-
Place your cursor where you want the checkbox (or highlight a list of items).
-
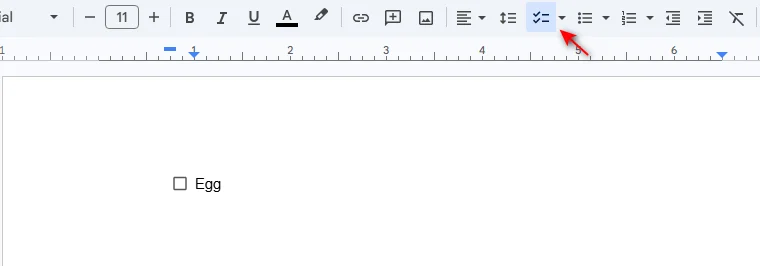
Go to the Home tab on the ribbon.
-
Click the Checklist icon in the Paragraph group.
Keyboard Shortcut: You can also press Ctrl + , (Control + Comma) to instantly create a check list.
Best for Collaboration:
Unlike static symbols, checkboxes inserted here are fully interactive. If you share this document via OneDrive or SharePoint, team members can check/uncheck boxes simultaneously, and the status updates in real-time for everyone.
Method 4: Add Checkboxes to Word Automatically Using C#
For developers or IT professionals who need to generate hundreds of forms dynamically (e.g., surveys, contracts, or checklists), manually inserting checkboxes is inefficient. You can automate this process using C# and a .NET library like Spire.Doc for .NET.
This method allows you to programmatically create Word documents and insert interactive checkbox content controls - all without opening the Microsoft Word UI.
Prerequisites
Before you begin, ensure you have:
- Visual Studio (or another C# IDE).
- The Spire.Doc for .NET library.
Step-by-Step C# Implementation
-
Install the Library.
First, install Spire.Doc via NuGet by running the following command in Package Manager Console (Recommended):
PM> Install-Package Spire.DocAlternatively, you can also download the library from the official website and manually reference the DLL in your project.
-
Write The C# Code:
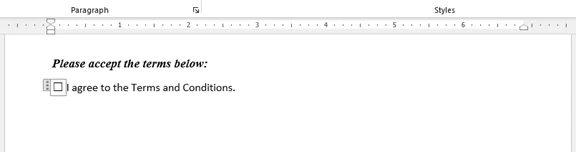
The following code demonstrates how to create a new document, add a paragraph of text, and insert an interactive checkbox content control next to it.
using Spire.Doc;
using Spire.Doc.Documents;
using Spire.Doc.Fields;

namespace CheckboxAutomation
{
    class Program
    {
        static void Main(string[] args)
        {
            // Create a new Word document instance
            Document document = new Document();
            Section section = document.AddSection();
            // Add some descriptive text
            Paragraph headerPara = section.AddParagraph();
            headerPara.AppendText("Please accept the terms below:");
            headerPara.ApplyStyle(BuiltinStyle.Heading5); // Optional styling
            headerPara.Format.AfterSpacing = 10;

            // Create a paragraph to hold the checkbox and label
            Paragraph checkPara = section.AddParagraph();

            // Create a StructureDocumentTagInline (SDT)
            // This is the container for the Content Control
            StructureDocumentTagInline sdt = new StructureDocumentTagInline(document);

            // Add the SDT to the paragraph's child objects
            checkPara.ChildObjects.Add(sdt);

            // Set the SDT type to CheckBox
            sdt.SDTProperties.SDTType = SdtType.CheckBox;

            // Configure the Checkbox Properties
            SdtCheckBox checkBox = new SdtCheckBox();
            sdt.SDTProperties.ControlProperties = checkBox;
            TextRange tr = new TextRange(document);
            sdt.ChildObjects.Add(tr);

            // Set default state (false = unchecked)
            checkBox.Checked = false;

            // Add text after the checkbox
            TextRange textRange = checkPara.AppendText(" I agree to the Terms and Conditions.");
            textRange.CharacterFormat.FontName = "Calibri";
            textRange.CharacterFormat.FontSize = 12;

            // Save the document
            document.SaveToFile("AutomatedForm.docx", FileFormat.Docx2013);
        }
    }
}
Developer Tips:
-
Legacy vs. Content Control: The code above creates a modern Content Control. If you need to support Word 2003 or older, you would use Form Field (Legacy Tools) instead, though this is rarely needed in modern development.
-
Insert Static Symbols: If you do not need interactivity and just want a printed symbol, you can insert it directly into the text range using Unicode characters:
TextRange tr = paragraph.AppendText('\u2611'.ToString()); // Unicode for ☑Reference: How to Insert Symbol in Word in C#.
-
Server-Side Automation: Since this library does not require Microsoft Office to be installed on the server, it is safe to use in ASP.NET web applications or Azure Functions for backend document generation.
When to Use C# Automation?
- Bulk Generation: Creating 1,000+ employee onboarding forms.
- Dynamic Data: Filling forms based on database entries before adding checkboxes.
- Server-Side Processing: Generating documents on a backend server without Microsoft Office installed.
Why Insert Checkbox in Word Documents
While text documents are great for information, adding checkboxes transforms them into interactive tools that drive efficiency and accuracy. They are essential for:
- Streamline Forms & Surveys: Enabling users to select options quickly without typing, which standardizes data collection and reduces input errors in feedback forms or registration sheets.
- Enhance Task Management: Providing a visual and satisfying way to track progress in to-do lists, daily planners, or project roadmaps.
- Ensure Compliance & Safety: Creating clear, verifiable records in inspection logs, safety audits, or cleaning schedules where specific steps must be confirmed.
- Simplify Agreements: Offering a distinct, user-friendly method for users to accept terms and conditions or acknowledge policies in HR and legal documents.
Troubleshooting Common Checkbox Issues
Even with the right method, you might encounter a few hiccups when inserting a checkbox in your Word document. Here are solutions to the most common problems:
| Issue | Possible Cause | Solution |
|---|---|---|
| Can't Click the Checkbox | Document is in "Design Mode" or protected. | Go to Developer tab > Toggle off Design Mode. Or stop Restrict Editing. |
| Checkmark looks like a weird square or question mark | The font changed from Wingdings to a standard font. | Select the symbol and change the font back to Wingdings or Wingdings 2. |
| Can't find the Developer Tab | It is hidden by default in the ribbon. | Right-click the ribbon > Customize the Ribbon > Check Developer. |
| Checkbox moves text around | The object alignment is set to "In Line with Text". | Right-click the checkbox > Wrap Text > Select Square or In Front of Text. |
Conclusion
You now have four practical ways to insert checkboxes in Word, ranging from simple manual tools to advanced automated workflows. Choosing the right method depends on your specific scenario:
- For Digital Forms: Use the Developer Tab (Content Control) to create interactive, clickable fields that users can toggle on and off.
- For Printed Lists: Use the Symbol Method to insert static boxes (like ☐) that are perfect for physical checklists.
- For Quick Collaboration: Use the Word for the Web Checklist feature for real-time shared to-do lists.
- For Bulk Generation: Use C# Automation (with Spire.Doc) to programmatically generate hundreds of forms without opening Word.
By selecting the method that aligns with your goals, you can create professional, organized, and highly functional documents in minutes.
FAQs: How to Insert Checkbox in Word
Q1: How do I insert a checkbox without the Developer tab?
A1: Go to Insert > Symbol, select Wingdings, and choose the square box (☐). Note that this creates a static image for printing, not a clickable box.
Q2: Why does my checkbox show an "X" instead of a checkmark (✓)?
A2: This is the default setting. To fix it, go to Developer > Properties and change the "Checked symbol" to a checkmark (found in the Wingdings 2 font).
Q3: Can I insert a checkbox in Word for the Web?
A3: Yes. Go to the Home tab and click the Checklist button. This creates an interactive checkbox perfect for online collaboration.
Q4: How do I stop users from typing next to the checkbox?
A4: Go to Developer > Restrict Editing, select Filling in forms, and click Yes, Start Enforcing Protection.
Q5: Can I automate checkbox insertion for multiple documents?
A5: Yes. You can use C# automation with libraries like Spire.Doc to programmatically insert checkboxes into hundreds of documents simultaneously.