
When working with long Word documents, important information can easily get lost in dense text. Manually scanning pages is time-consuming and error-prone, and missing key points can impact reports, collaboration, or decision-making. Highlighting text in Word is a simple yet effective way to emphasize important content, improve readability, and speed up document review.
In this guide, we’ll cover 5 practical methods to highlight text in Word —from simple manual tools to automated techniques. By the end, you’ll know how to highlight single words, phrases, or all instances of a keyword across your documents efficiently.
Methods Overview
- Method 1 — Highlight Text in Word with the Text Highlight Color Tool
- Method 2 — Highlight All Instances of a Word Quickly via Find & Replace
- Method 3 — Highlight Keywords Temporarily Using Navigation Pane
- Method 4 — Highlight Text in Word Online
- Method 5 — Automate Text Highlighting in Word Document with C#
Understanding Text Highlighting in Word
Text highlighting in Microsoft Word is a simple yet powerful feature used to draw attention to specific parts of your document. It works like a virtual highlighter pen, letting you mark words, phrases, or entire sections with color so they stand out from the surrounding text.
Why Highlight Text in Word
Highlighting isn’t just for decoration. It serves several practical purposes:
- Emphasize important content – Key points, deadlines, or instructions are easy to spot.
- Improve readability – Helps readers scan long documents quickly.
- Organize information – Different colors can categorize topics, priorities, or stages in a project.
- Facilitate collaboration – Reviewers or team members can quickly see important or edited sections.
By applying highlighting thoughtfully, you ensure readers can focus on the most important information without feeling overwhelmed. Below, we’ll explore 5 methods for this purpose.
Method 1 — Highlight Text in Word with the Text Highlight Color Tool
One of the simplest ways to highlight text in Word documents is using the built-in Text Highlight Color tool. This method works like a digital marker and is ideal for emphasizing single or few keywords in short documents.
Step-by-Step Instructions:
-
Select the text or phrase you want to highlight.
-
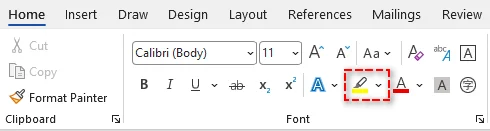
Navigate to the Home tab on the ribbon.
-
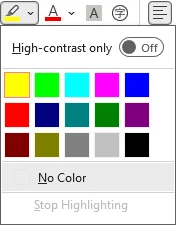
In the Font group, click the arrow next to the Text Highlight Color tool (looks like a marker pen).
-
Choose a color from the palette (e.g., Yellow, Green, Blue) to apply the highlight instantly.
Tips:
- To highlight multiple areas, select a highlight color first to turn your cursor into a highlighter pen. Then click and drag over multiple non-contiguous sections without re-selecting the tool.
- If you want a faster workflow, simply select your text and press Ctrl + Alt + H together. This applies the last used highlight color (or the default color if you haven’t used one yet) immediately.
✅Pros:
- Easy and intuitive for all users.
- Works for almost all Word versions (including Word for Microsoft Office 365, Word 2024, 2019, 2016, 2013 and 2010).
⚠️Limitations:
- Requires manual selection for each instance.
- Time-consuming for long documents with repeated keywords.
You may also like: How to Find and Replace Text in Word
Method 2 — Highlight All Instances of a Word Quickly via Find & Replace
When you need to highlight all occurrences of a specific text across a long Word document, the Find and Replace tool is more efficient. It automatically scans the document for all instances and applies highlighting to them.
Steps:
-
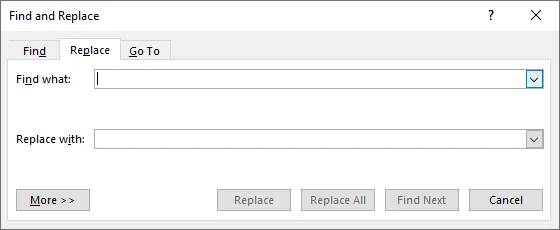
Go to the Home tab, then click Replace in the Editing group to open the Find and Replace dialog. You can also press Ctrl + H.
-
In the dialog, type the word or phrase you want to highlight (e.g., Budget) in the Find what box.
-
Click More >> to expand advanced options.
-
Ensure your cursor is in the Replace with box, then click Format (bottom left) > Highlight.
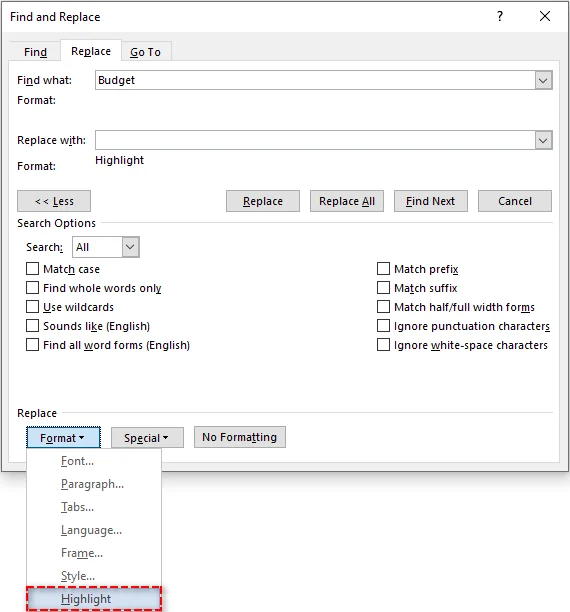
Note: You should see "Highlight" appear below the "Replace with" field.
-
Click Replace All. Word will confirm the number of replacements made, and every instance of the word will now be highlighted.
Tips for Accurate Highlighting:
- To prevent partial matches (e.g., highlighting “cat” in “category”), check the Find whole words only option in the "More" menu.
- In case you want to distinguish between capital and lowercase letters, select Match case in the "More" menu.
✅Pros:
- Fast way to highlight all instances of a word.
- Ensures 100% consistency, no missed occurrences.
⚠️Limitations:
- Only works for one keyword at a time.
- Cannot select a highlight color unless you set it beforehand with the Text Highlight Color tool.
Method 3 — Highlight Keywords Temporarily Using Navigation Pane
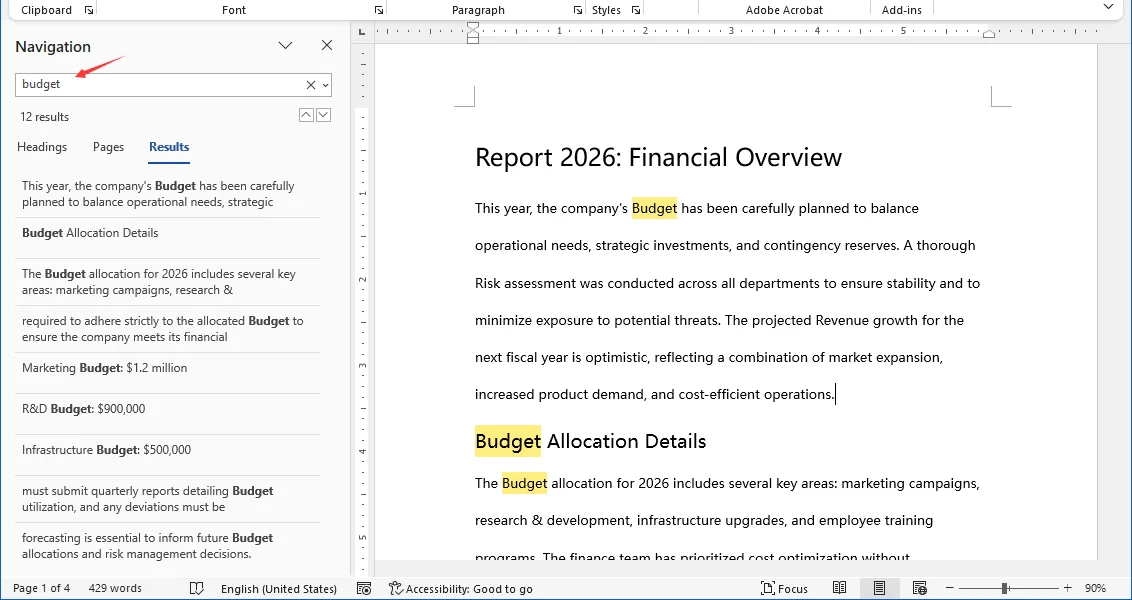
If your goal is to scan a Word document for keywords during a review meeting without permanently altering the file’s formatting, the Navigation Pane is ideal. It provides temporary visual cues that disappear when cleared.
Steps:
- Press Ctrl + F to open the Navigation Pane on the left.
- Type your search term in the search box.
- Word temporarily highlights all matches in the document body in yellow.
- Use the list in the pane to jump between occurrences.
✅Pros:
- Great for quick scanning and navigation.
- Zero risk of messing up the final document format.
⚠️Limitations:
- These highlights do not print or save. They are screen-only.
- Disappears as soon as you clear the search box.
Method 4 — Highlight Text in Word Online
When you don’t have Microsoft Word installed or need to collaborate in real time, Word for the web (Word 365 Online) is an ideal option. It lets you highlight text quickly while keeping changes synchronized with your team.
How to Highlight Text in Word Online:
- Open your document in Word for the web (Word 365 Online).
- Select the text you want to highlight.
- Go to the Home tab in the top menu.
- Click the Text Highlight Color icon.
- Choose a color to apply the highlight.
Tip:
- If you don’t see the highlight option, make sure the document isn’t in view-only mode.
✅Pros:
- Highlights are synced quickly for collaborators.
- Works on any device (laptop, mobile and more).
- No software installation required.
⚠️Limitations:
- Find & Replace with formatting/highlight rules is not supported (or may be limited) in Word for the web.
- Depending on your document permissions, some editing/highlighting features may be limited.
Method 5 — Automate Text Highlighting in Word Document with C#
For developers, data analysts, and enterprises needing to process multiple keywords or hundreds of documents, manual highlighting is inefficient and unsustainable. By using C# with the Spire.Doc for .NET library, you can:
- Batch process hundreds of instances or documents in seconds.
- Apply different colors to specific terms automatically.
- Ensure 100% consistency without missing a single match.
About Spire.Doc for .NET
Spire.Doc is a standalone Word manipulation library that allows developers to create and update Word documents including applying text highlighting without relying on Microsoft Office. This makes it the ideal choice for server-side automation and cloud environments.
Installation Requirements
Before proceeding, install the library via NuGet or download it via the official website:
PM> Install-Package Spire.Doc
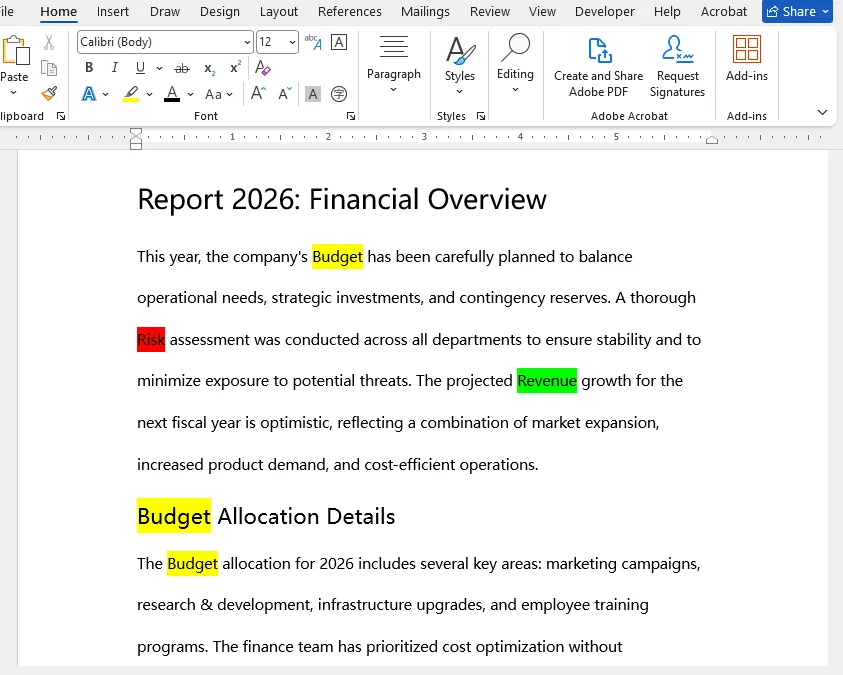
C# Code Example: Highlight Multiple Keywords with Distinct Colors
The example below demonstrates how to load a Word document, search for multiple keywords, and highlight them with distinct colors (e.g., "Budget" in Yellow, "Risk" in Red) efficiently.
using Spire.Doc;
using Spire.Doc.Documents;
using System;
using System.Collections.Generic;
using System.Drawing;

namespace HighlightMultipleKeywords
{
    internal class Program
    {
        static void Main(string[] args)
        {
            // Load the Word document
            Document doc = new Document();
            doc.LoadFromFile("Report_2026.docx");

            // Define keywords and different highlight colors
            // You can customize this list to match your specific needs
            Dictionary<string, Color> keywords = new Dictionary<string, Color>()
            {
                { "Budget", Color.Yellow },
                { "Risk", Color.Red },
                { "Revenue", Color.Green }
            };

            // Highlight all occurrences of each keyword
            foreach (var kvp in keywords)
            {
                TextSelection[] selections = doc.FindAllString(kvp.Key, false, true); // Parameters: searchText, matchCase, wholeWord
                foreach (TextSelection selection in selections)
                {
                    selection.GetAsOneRange().CharacterFormat.HighlightColor = kvp.Value;
                }
            }

            // Save the highlighted document
            doc.SaveToFile("Report_2026_Highlighted.docx", FileFormat.Docx);
            doc.Close();
            Console.WriteLine("Keyword highlighting completed!");
        }
    }
}
Tips for Developers:
- You can extend this single-file workflow to batch processing by wrapping the same highlighting logic in a loop over all .docx files in an input folder (e.g., foreach (var file in Directory.GetFiles(...))).
- If your keywords follow patterns (for example, partial codes or variable phrases), consider using regular expressions to enhance matching accuracy — see Find and Replace Text by Regular Expressions in Word in C# for more details.
✅Pros:
- Easily highlight different terms with different colors in one execution without manual effort.
- Eliminates human error and ensures uniform formatting.
- Runs on any machine or server without Microsoft Word installed.
⚠️Limitations:
- Requires basic C# programming knowledge.
- Configuring the project and library may be challenging for beginners.
Conclusion and Recommendations
You now have 5 practical ways to highlight text in Word, ranging from quick manual tools to advanced automated workflows. Choosing the right method depends on your specific scenario:
- For single documents & few terms: Use the Text Highlight Color tool or the Find & Replace feature.
- For temporary review: Use the Navigation Pane to scan without altering formatting.
- For remote collaboration: Use Word for the web (Word 365 Online) for real-time syncing without desktop installation.
- For batch processing & automation: Use C# automation (with Spire.Doc) to handle hundreds of files and multiple colors instantly.
Final Thought:
Start with the built-in tools for everyday tasks. But if you find yourself repeating the same highlighting steps across dozens of files, it’s time to level up with automation to save hours of manual work.
Troubleshooting Common Highlighting Issues
Even with simple tools, users often encounter specific problems when trying to highlight text in Word. Here are the solutions to the most common issues.
| Issue | Likely Cause | Solution |
|---|---|---|
| Highlights do not print | You used the Navigation Pane (temporary highlights). | Use the Text Highlight Color tool or Find & Replace method to apply permanent highlights that print. |
| Partial words highlighted | "Find whole words only" was not selected. | In Find & Replace, click More >> and check Find whole words only to avoid highlighting substrings. |
| Highlight color not applied | The text selection was incorrect or cursor was not in highlighter mode. | Select the text properly, or if highlighting multiple areas, first choose the color so the cursor becomes a highlighter, then click and drag over text. |
FAQs: How to Highlight Text in Word
Q1: What is the keyboard shortcut to highlight text in Word?
A1: After selecting the text, press Ctrl + Alt + H to instantly apply the last used or the default highlight color if you haven’t used one yet.
Q2: Can I highlight text in Word Online?
A2: Yes, you can highlight text in Word online just like in the desktop version by using the Text Highlight Color tool. However, advanced features like Find & Replace with formatting are unsupported in the web version.
Q3: Why can’t I remove highlighting from some text?
A3: The color might be Paragraph Shading, not text highlighting. To fix it: Go to Home > Paragraph > Shading and select No Color.
Q4: How do I highlight text in a protected/read-only Word document?
A4: You cannot edit or highlight text in a strictly read-only or protected file directly. You have two options:
- Enable Editing: If you see a yellow bar at the top saying "Protected View," click Enable Editing.
- Save a Copy: If the file is restricted, go to File > Save As and save a new copy to your local drive. You can then highlight text in this new editable version.
Q5: Can I highlight text in multiple Word documents at once?
A5: You can use C# with libraries like Spire.Doc to highlight text across multiple files simultaneously.