Want to give your PowerPoint slides a more professional and customized look? Setting a custom picture as your background is a fundamental skill that can significantly enhance the visual impact of your presentation. The right background picture ensures your presentation stands out while keeping your content readable.
Whether you are a casual user looking for a quick manual fix or a developer needing to make a picture a background in PowerPoint across multiple files using Python, this guide covers everything you need to know.
How to Make a Picture a Background in PowerPoint (Manual)
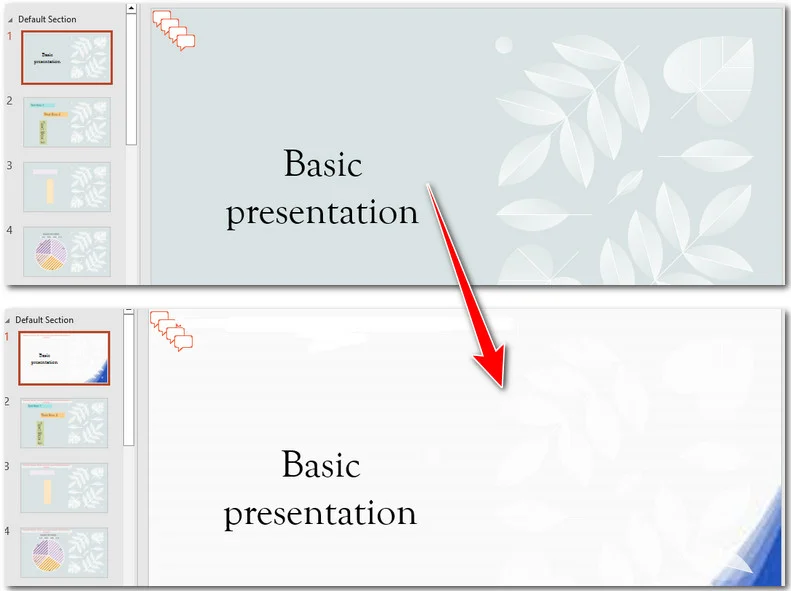
For most users, the built-in features of Microsoft PowerPoint are the most direct and accessible way to customize a presentation. Since there’s no need to install third-party software, the intuitive interface allows you to add a background image in PowerPoint and see the results instantly. This manual approach is perfect for handling individual files where you need precise, creative control over each slide's visual impact.
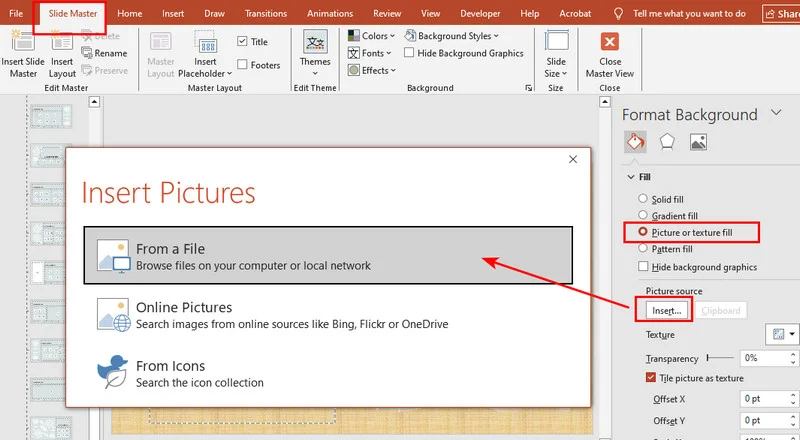
- Step 1: Simply right-click on any empty area of your slide and select Format Background from the context menu to bring up the settings panel on the right side of your screen.
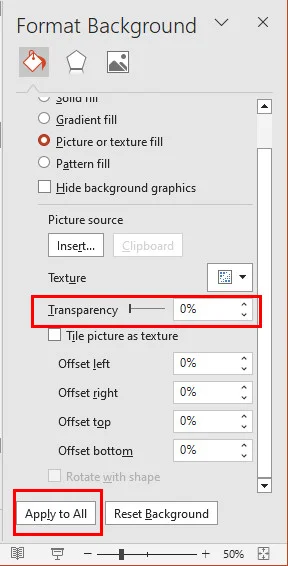
- Step 2: Within the Fill section of the pane, choose the Picture or texture fill option. Click the Insert button to upload a file from your computer or choose from an online library.

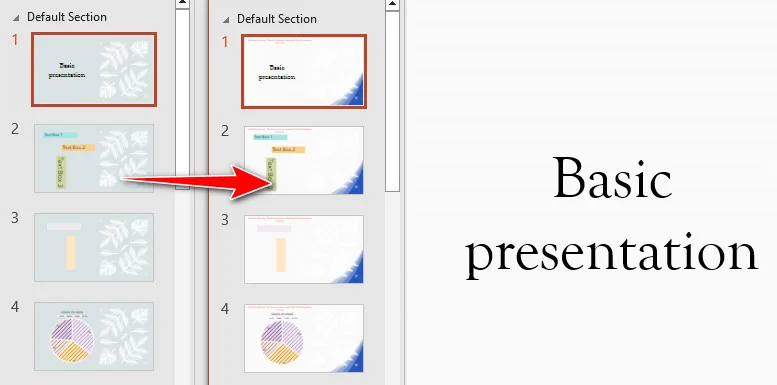
- Step 3: By default, your selection only affects the current slide. To make a picture be the background for PowerPoint across the entire deck, click the Apply to All button at the bottom of the pane.
- Step 4: If your image is too vibrant and distracts from your text, use the Transparency slider. This is the easiest way to make your background image more transparent, ensuring your content remains the focal point while the image provides the perfect visual context.
Pro Tip: If you’ve already applied a background and want to swap it for a different style or texture, you can explore this guide on How to Change PowerPoint Slide Backgrounds for more advanced customization methods.
How to Set a PowerPoint Background Image using Python
While manual adjustments work for a single PowerPoint presentation, they become inefficient when you need to process dozens or hundreds of files. For developers and data analysts, automating the workflow is a better choice to ensure consistency and save time.
By using a library like Free Spire.Presentation for Python, you can programmatically add a picture background in PowerPoint with high precision across any number of slides.
Method 1: Set Background Picture for a Specific Slide
This approach is perfect for creating unique title pages or chapter dividers by targeting a specific slide index. To add a picture background in PowerPoint via Python, the process is straightforward: first, load the presentation and access the desired slide; next, define the background fill type as Picture and finally, embed background image and set it to stretch across the slide dimensions.
Here's a sample code showing how to make a picture be the background for the first slide in a PowerPoint file:
from spire.presentation import *

# Create a Presentation object and load your file
ppt = Presentation()
ppt.LoadFromFile("/input/pre1.pptx")

# Access the first slide (Index 0)
slide = ppt.Slides[0]

# Access and configure the slide background
background = slide.SlideBackground
background.Type = BackgroundType.Custom
background.Fill.FillType = FillFormatType.Picture

# Load the image and embed it into the presentation
image_path = r"/bg.jpg"
image_stream = Stream(image_path)
imageData = ppt.Images.AppendStream(image_stream)

# Set the image to stretch and fill the entire slide area
background.Fill.PictureFill.FillType = PictureFillType.Stretch
background.Fill.PictureFill.Picture.EmbedImage = imageData

# Save the updated document
ppt.SaveToFile("/output/CustomBackground.pptx", FileFormat.Pptx2013)
ppt.Dispose()
Method 2: Set Background Picture for the Entire Presentation
To make a picture be the background for PowerPoint across every single slide, the most efficient approach is to use a simple for loop. Instead of targeting a specific index, we iterate through the entire slide collection, applying the background settings to each one automatically. This ensures a consistent visual theme throughout the deck, regardless of how many slides it contains.
Here's the code example you can follow:
from spire.presentation import *

# Initialize the presentation and load the file
ppt = Presentation()
ppt.LoadFromFile("/input/pre1.pptx")

# Prepare the image once to be reused across all slides
image_path = r"/bg.jpg"
image_stream = Stream(image_path)
imageData = ppt.Images.AppendStream(image_stream)

# Iterate through each slide in the presentation
for slide in ppt.Slides:
    # Access and configure the background for the current slide
    background = slide.SlideBackground
    background.Type = BackgroundType.Custom
    background.Fill.FillType = FillFormatType.Picture

    # Set the embedded image and fill mode
    background.Fill.PictureFill.FillType = PictureFillType.Stretch
    background.Fill.PictureFill.Picture.EmbedImage = imageData

# Save the updated document to the output folder
ppt.SaveToFile("/output/BatchBackground.pptx", FileFormat.Pptx2013)
ppt.Dispose()
Note: If you need to clear out old branding or reset your slides to a clean state, check out this specialized guide on how to remove backgrounds from PowerPoint slides.
Advanced Trick: Using Slide Master for Backgrounds
The Slide Master is the "blueprint" of your presentation. By setting the background here, you ensure that every new slide added to the deck automatically inherits the same design, providing a foolproof way to maintain a uniform style. By defining your visuals here, you ensure every new slide automatically inherits the same design, providing a foolproof way to maintain a uniform brand identity.
How to Set a Master Background Manually
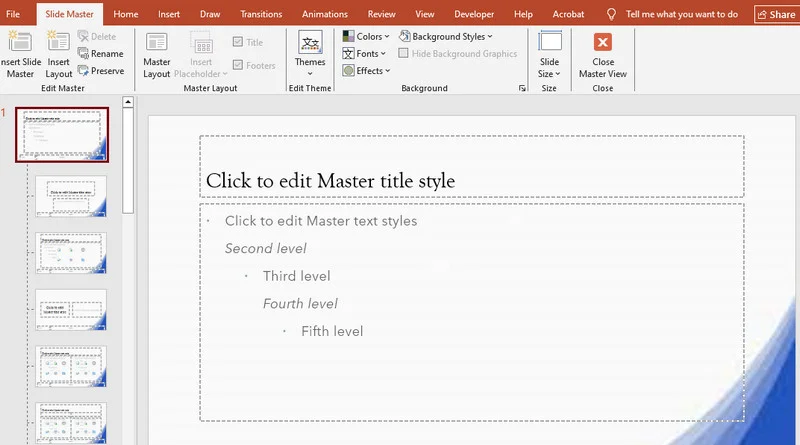
- Step 1: Navigate to the View tab on the top ribbon and click Slide Master to enter the template editing mode.
- Step 2: Select the top-level Master slide (the largest thumbnail in the left pane) to apply the change globally to all layouts.
- Step 3: Right-click the slide, choose Format Background, and select Picture or texture fill to insert your image.
- Step 4: Click Close Master View on the ribbon to return to your normal editing mode with a permanent, locked background.
Python Automation for Master Slides
For those managing corporate templates, you can automate this process using Free Spire.Presentation for Python. By accessing the Masters[0] collection, you apply the background to the template level, ensuring total brand alignment with minimal code.
Here's the code example:
from spire.presentation import *

# Initialize the Presentation object and load the file
ppt = Presentation()
ppt.LoadFromFile("/input/pre1.pptx")

# Prepare the image resource (Load once to save memory)
image_path = r"/bg.jpg"
image_stream = Stream(image_path)
imageData = ppt.Images.AppendStream(image_stream)

# Iterate through all Slide Masters in the presentation
for master in ppt.Masters:
    # Access the background of the slide master
    background = master.SlideBackground

    # Set the background type to custom
    background.Type = BackgroundType.Custom

    # Set the background fill type to Picture
    background.Fill.FillType = FillFormatType.Picture

    # Set the picture fill mode to Stretch to ensure it covers the full slide
    background.Fill.PictureFill.FillType = PictureFillType.Stretch

    # Embed the image data into the master background
    background.Fill.PictureFill.Picture.EmbedImage = imageData

# Save the updated document to the output folder
ppt.SaveToFile("/output/MasterBackground.pptx", FileFormat.Pptx2013)
ppt.Dispose()
Conclusion
Whether you prefer the intuitive MS Office tools or writing a few lines of Python code, mastering how to make a picture a background in PowerPoint is a vital skill. Manual methods offer artistic nuance for a single PowerPoint presentation, while automation empowers you to handle bulk processing with ease. By utilizing the Slide Master for consistency and adjusting transparency for readability, you ensure your next presentation is both visually stunning and professionally polished.
FAQ: Mastering PowerPoint Backgrounds
Q1: How do I make a background image fit without stretching?
Ensure your image matches the slide's aspect ratio (usually 16:10 or 16:9). In the Format Background pane, use the Offset settings to reposition the image within the slide frame. In Python, use Stretch to fill the slide, but ensure your image has the correct aspect ratio to avoid distortion
Q2: How do I apply a picture background to all slides at once?
After inserting your image in the Format Background pane, click the Apply to All button at the bottom. For a more permanent template, go to View > Slide Master, set the background on the top-level master slide, and it will automatically apply to every new slide you create.
Q3: Can I add a background image on PowerPoint mobile or from the web?
On mobile, tap Edit > Design > Format Background to upload from your gallery. For web images, use Insert > Pictures > Online Pictures, then apply it via the background settings. This ensures the image is properly embedded rather than just linked.
Q4: How do I make text readable over a busy background?
The most effective way is to adjust the Transparency slider in the Format Background pane. Setting it to 50%–70% softens the image, allowing your text to pop while keeping the visual context. In Python, you can achieve this by adjusting the Transparency property of the PictureFill.