
Program Guide (52)
Children categories
PowerPoint presentations often contain sensitive information, such as financial data, trade secrets, or personal details. When sharing these files via email or cloud storage, it is important to prevent unauthorized individuals from accessing or viewing them. To protect the content of your PowerPoint presentation, there are various security measures you can employ. For instance, you can implement password protection, or make the presentation as final or read-only. In certain situations, you may find the need to unprotect a password-protected or encrypted PowerPoint presentation. This may be necessary when you need to share the file with the public or when the password is no longer needed. In this article, we will explain how to protect or unprotect a PowerPoint presentation in Python using Spire.Presentation for Python.
- Protect a PowerPoint Presentation with a Password
- Mark a PowerPoint Presentation as Final
- Make a PowerPoint Presentation Read-Only
- Remove Password Protection from a PowerPoint Presentation
- Remove Mark as Final Option from a PowerPoint Presentation
- Remove Read-Only Option from a PowerPoint Presentation
Install Spire.Presentation for Python
This scenario requires Spire.Presentation for Python and plum-dispatch v1.7.4. They can be easily installed in your Windows through the following pip command.
pip install Spire.Presentation
If you are unsure how to install, please refer to this tutorial: How to Install Spire.Presentation for Python on Windows
Protect a PowerPoint Presentation with a Password
You can protect a PowerPoint presentation with a password to ensure that only the people who have the right password can view and edit it.
The following steps demonstrate how to protect a PowerPoint presentation with a password:
- Create an object of the Presentation class.
- Load a PowerPoint presentation using Presentation.LoadFromFile() method.
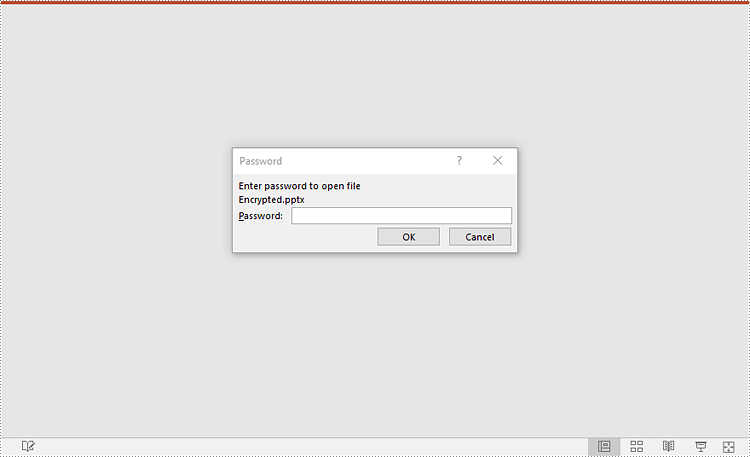
- Encrypt the presentation with a password using Presentation.Encrypt() method.
- Save the resulting presentation using Presentation.SaveToFile() method.
- Python
from spire.presentation import *

# Create a Presentation object
presentation = Presentation()
# Load a PowerPoint presentation
presentation.LoadFromFile("Sample.pptx")

# Encrypy the presentation with a password
presentation.Encrypt("your password")

# Save the resulting presentation
presentation.SaveToFile("Encrypted.pptx", FileFormat.Pptx2016)
presentation.Dispose()
Mark a PowerPoint Presentation as Final
You can mark a PowerPoint presentation as final to inform readers that the document is final and no further editing is expected.
The following steps demonstrate how to mark a PowerPoint presentation as final:
- Create an object of the Presentation class.
- Load a PowerPoint presentation using Presentation.LoadFromFile() method.
- Mark the presentation as final using presentation.DocumentProperty.MarkAsFinal property.
- Save the resulting presentation using Presentation.SaveToFile() method.
- Python
from spire.presentation import *

# Create a Presentation object
presentation = Presentation()
# Load a PowerPoint presentation
presentation.LoadFromFile("Sample.pptx")

# Mark the presentation as final
presentation.DocumentProperty.MarkAsFinal = True

# Save the resulting presentation
presentation.SaveToFile("MarkAsFinal.pptx", FileFormat.Pptx2016)
presentation.Dispose()

Make a PowerPoint Presentation Read-Only
You can make a PowerPoint presentation read-only to allow others to view it while preventing them from making any changes to the content.
The following steps demonstrate how to make a PowerPoint presentation read-only:
- Create an object of the Presentation class.
- Load a PowerPoint presentation using Presentation.LoadFromFile() method.
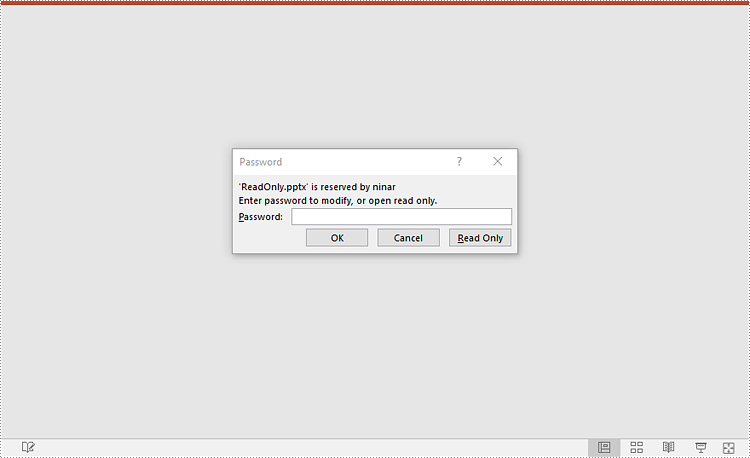
- Make the presentation read-only using Presentation.Protect() method.
- Save the resulting presentation using Presentation.SaveToFile() method.
- Python
from spire.presentation import *

# Create a Presentation object
presentation = Presentation()
# Load a PowerPoint presentation
presentation.LoadFromFile("Sample.pptx")

# Make the presentation read-only by protecting it with a password
presentation.Protect("your password")

# Save the resulting presentation
presentation.SaveToFile("ReadOnly.pptx", FileFormat.Pptx2016)
presentation.Dispose()
Remove Password Protection from a PowerPoint Presentation
You can remove password protection from a PowerPoint presentation by loading the presentation with the correct password and then removing the password protection from it.
The following steps demonstrate how to remove password protection from a PowerPoint presentation:
- Create an object of the Presentation class.
- Load a password-protected PowerPoint presentation with its password using Presentation.LoadFromFile() method.
- Remove password protection from the presentation using Presentation.RemoveEncryption() method.
- Save the resulting presentation using Presentation.SaveToFile() method.
- Python
from spire.presentation import *

# Create a Presentation object
presentation = Presentation()
# Load an encrypted PowerPoint presentation with its password
presentation.LoadFromFile("Encrypted.pptx", "your password")

# Remove password encryption from the presentation
presentation.RemoveEncryption()

# Save the resulting presentation
presentation.SaveToFile("Decrypted.pptx", FileFormat.Pptx2016)
presentation.Dispose()

Remove Mark as Final Option from a PowerPoint Presentation
The mark as final feature makes a PowerPoint presentation read-only to prevent further changes, if you decide to make changes to the presentation later, you can remove the mark as final option from it.
The following steps demonstrate how to remove the mark as final option from a PowerPoint presentation:
- Create an object of the Presentation class.
- Load a PowerPoint presentation that has been marked as final using Presentation.LoadFromFile() method.
- Remove the mark as final option from the presentation using presentation.DocumentProperty.MarkAsFinal property.
- Save the resulting presentation using Presentation.SaveToFile() method.
- Python
from spire.presentation import *

# Create a Presentation object
presentation = Presentation()
# Load a PowerPoint presentation that has been marked as final
presentation.LoadFromFile("MarkAsFinal.pptx")

# Remove the mark as final option from the presentation
presentation.DocumentProperty.MarkAsFinal = False

# Save the resulting presentation
presentation.SaveToFile("RemoveMarkAsFinal.pptx", FileFormat.Pptx2016)
presentation.Dispose()
Remove Read-Only Option from a PowerPoint Presentation
Removing the read-only option from a PowerPoint presentation allows you to regain full editing capabilities, enabling you to modify, add, or delete content within the presentation as needed.
The following steps demonstrate how to remove the read-only option from a PowerPoint presentation:
- Create an object of the Presentation class.
- Load a PowerPoint presentation that has been made as read-only using Presentation.LoadFromFile() method.
- Remove the read-only option from the presentation using Presentation.RemoveProtect() method.
- Save the resulting presentation using Presentation.SaveToFile() method.
- Python
from spire.presentation import *

# Create a Presentation object
presentation = Presentation()
# Load a PowerPoint presentation that has been made as read-only
presentation.LoadFromFile("ReadOnly.pptx")

# Remove the read-only option from the presentation
presentation.RemoveProtect()

# Save the resulting presentation
presentation.SaveToFile("RemoveReadOnly.pptx", FileFormat.Pptx2016)
presentation.Dispose()
Apply for a Temporary License
If you'd like to remove the evaluation message from the generated documents, or to get rid of the function limitations, please request a 30-day trial license for yourself.
Speaker notes in PowerPoint play a crucial role in enhancing the presenter's delivery and ensuring a seamless presentation experience. They can be added to individual slides to provide valuable guidance, reminders, and supplementary information for the presenter. Unlike the content displayed on the slides, speaker notes are typically not visible to the audience during the actual presentation. In this article, we'll explain how to add, read or delete speaker notes in a PowerPoint presentation in Python using Spire.Presentation for Python.
- Add Speaker Notes to PowerPoint in Python
- Read Speaker Notes in PowerPoint in Python
- Delete Speaker Notes from PowerPoint in Python
Install Spire.Presentation for Python
This scenario requires Spire.Presentation for Python and plum-dispatch v1.7.4. They can be easily installed in your Windows through the following pip command.
pip install Spire.Presentation
If you are unsure how to install, please refer to this tutorial: How to Install Spire.Presentation for Python on Windows
Add Speaker Notes to PowerPoint in Python
Spire.Presentation for Python provides the ISlide.AddNotesSlides() method to add notes to a PowerPoint slide. The detailed steps are as follows.
- Create a Presentation object.
- Load a PowerPoint presentation using Presentation.LoadFromFile() method.
- Get the slide that you want to add notes to using Presentation.Slides[index] property.
- Add a notes slide to the slide using ISlide.AddNotesSlides() method.
- Create TextParagraph objects and set text for the paragraphs using TextParagraph.Text property, then add the paragraphs to the notes slide using NotesSlide.NotesTextFrame.Paragraphs.Append() method.
- Save the resulting presentation using Presentation.SaveToFile() method.
- Python
from spire.presentation.common import *
from spire.presentation import *
# Create a Presentation object
ppt = Presentation()
# Load a PowerPoint presentation
ppt.LoadFromFile("Sample.pptx")
# Get the first slide
slide = ppt.Slides[0]
# Add a notes slide to the slide
notesSlide = slide.AddNotesSlide()
# Add 4 paragraphs to the notes slide
paragraph = TextParagraph()
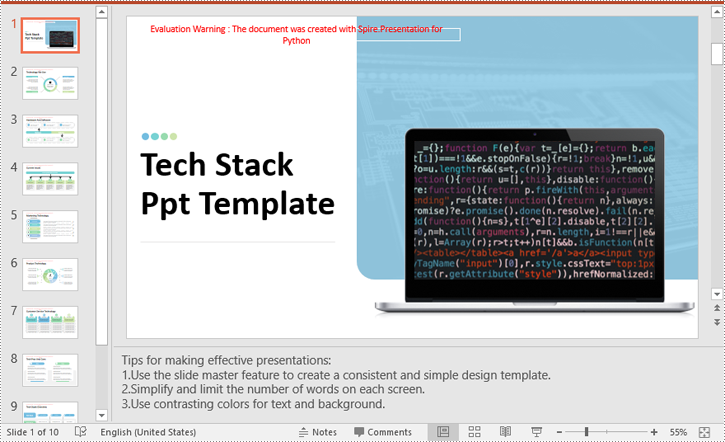
paragraph.Text = "Tips for making effective presentations:"
notesSlide.NotesTextFrame.Paragraphs.Append(paragraph)
paragraph = TextParagraph()
paragraph.Text = "Use the slide master feature to create a consistent and simple design template."
notesSlide.NotesTextFrame.Paragraphs.Append(paragraph)
paragraph = TextParagraph()
paragraph.Text = "Simplify and limit the number of words on each screen."
notesSlide.NotesTextFrame.Paragraphs.Append(paragraph)
paragraph = TextParagraph()
paragraph.Text = "Use contrasting colors for text and background."
notesSlide.NotesTextFrame.Paragraphs.Append(paragraph)
# Set bullet type and style for specific paragraphs
for i in range(1, notesSlide.NotesTextFrame.Paragraphs.Count):
notesSlide.NotesTextFrame.Paragraphs[i].BulletType = TextBulletType.Numbered
notesSlide.NotesTextFrame.Paragraphs[i].BulletStyle = NumberedBulletStyle.BulletArabicPeriod
# Save the resulting presentation
ppt.SaveToFile("AddSpeakerNotes.pptx", FileFormat.Pptx2016)
ppt.Dispose()
Read Speaker Notes in PowerPoint in Python
To read the text content of the notes, you can use the NotesSlide.NotesTextFrame.Text property. The detailed steps are as follows.
- Create a Presentation object.
- Load a PowerPoint presentation using Presentation.LoadFromFile() method.
- Get the slide that you want to read notes from using Presentation.Slides[index] property.
- Get the notes slide of the slide using ISlide.NotesSlide property.
- Get the text content of the notes slide using NotesSlide.NotesTextFrame.Text property.
- Write the text content into a text file.
- Python
from spire.presentation.common import *
from spire.presentation import *
# Create a Presentation object
ppt = Presentation()
# Load a PowerPoint presentation
ppt.LoadFromFile("AddSpeakerNotes.pptx")
# Get the first slide
slide = ppt.Slides[0]
# Get the notes slide of the slide
notesSlide = slide.NotesSlide
# Get the text content of the notes slide
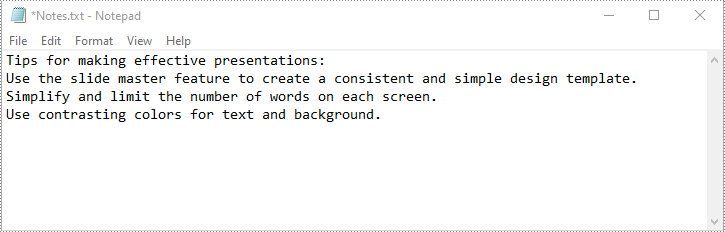
notes = notesSlide.NotesTextFrame.Text
# Write the text content to a text file
with open("Notes.txt", 'w') as file:
file.write(notes)
ppt.Dispose()
Delete Speaker Notes from PowerPoint in Python
You can delete a specific paragraph of note or delete all the notes from a slide using the NotesSlide.NotesTextFrame.Paragraphs.RemoveAt(index) or NotesSlide.NotesTextFrame.Paragraphs.Clear() method. The detailed steps are as follows.
- Create a Presentation object.
- Load a PowerPoint presentation using Presentation.LoadFromFile() method.
- Get the slide that you want to delete notes from using Presentation.Slides[index] property.
- Get the notes slide of the slide using ISlide.NotesSlide property.
- Delete a specific paragraph of note or delete all the notes from the notes slide using the NotesSlide.NotesTextFrame.Paragraphs.RemoveAt(index) or NotesSlide.NotesTextFrame.Paragraphs.Clear() method.
- Save the resulting presentation using Presentation.SaveToFile() method.
- Python
from spire.presentation.common import *
from spire.presentation import *

# Create a Presentation object
presentation = Presentation()
# Load a PowerPoint presentation
presentation.LoadFromFile("AddSpeakerNotes.pptx")

# Get the first slide
slide = presentation.Slides[0]

# Get the notes slide of the slide
notesSlide = slide.NotesSlide

# Remove a specific paragraph of note from the notes slide
# notesSlide.NotesTextFrame.Paragraphs.RemoveAt(1)

# Remove all the notes from the notes slide
notesSlide.NotesTextFrame.Paragraphs.Clear()

# Save the resulting presentation
presentation.SaveToFile("DeleteSpeakerNotes.pptx", FileFormat.Pptx2013)
presentation.Dispose()
Apply for a Temporary License
If you'd like to remove the evaluation message from the generated documents, or to get rid of the function limitations, please request a 30-day trial license for yourself.
SmartArt in Microsoft PowerPoint is a valuable tool that allows users to create visually appealing diagrams, charts, and graphics to represent information or concepts. It provides a quick and easy way to transform plain text into visually engaging visuals, making it easier for the audience to understand and remember the information being presented. In this article, we will demonstrate how to create, read and delete SmartArt in a PowerPoint in Python using Spire.Presentation for Python.
- Create SmartArt in PowerPoint in Python
- Read SmartArt in PowerPoint in Python
- Delete SmartArt from PowerPoint in Python
Install Spire.Presentation for Python
This scenario requires Spire.Presentation for Python and plum-dispatch v1.7.4. They can be easily installed in your Windows through the following pip command.
pip install Spire.Presentation
If you are unsure how to install, please refer to this tutorial: How to Install Spire.Presentation for Python on Windows
Create SmartArt in PowerPoint in Python
Spire.Presentation for Python provides the ISlide.Shapes.AppendSmartArt() method to add a SmartArt graphic to a specific slide of a PowerPoint presentation. The detailed steps are as follows.
- Create an object of the Presentation class.
- Load a PowerPoint presentation using Presentation.LoadFromFile() method.
- Get a specified slide by its index using Presentation.Slides[index] property.
- Insert a SmartArt graphic into the specified slide using ISlide.Shapes.AppendSmartArt() method.
- Set the style and color of the SmartArt using ISmartArt.Style and ISmartArt.ColorStyle properties.
- Loop through the nodes in the SmartArt and remove all default nodes using ISmartArt.Nodes.RemoveNode() method.
- Add a node to the SmartArt using ISmartArt.Nodes.AddNode() method.
- Add two sub-nodes to the node using ISmartArtNode.ChildNodes.AddNode() method.
- Add two sub-nodes to the first sub-node and the second sub-node respectively using ISmartArtNode.ChildNodes.AddNode() method.
- Add text to each node and sub-node using ISmartArtNode.TextFrame.Text property, and then set the font size for the text using ISmartArtNode.TextFrame.TextRange.FontHeight property.
- Save the resulting presentation using Presentation.SaveToFile() method.
- Python
from spire.presentation.common import *
from spire.presentation import *

# Create a Presentation object
presentation = Presentation()
# Load a PowerPoint presentation
presentation.LoadFromFile("Sample.pptx")

# Get the first slide
slide = presentation.Slides[0]

# Add a SmartArt (Organization Chart) to the slide
smartArt = slide.Shapes.AppendSmartArt(200, 60, 500, 430, SmartArtLayoutType.OrganizationChart)

# Set style and color for the SmartArt
smartArt.Style = SmartArtStyleType.ModerateEffect
smartArt.ColorStyle = SmartArtColorType.ColorfulAccentColors5to6

# Remove the default nodes from the SmartArt
list = []
for node in smartArt.Nodes:
    list.append(node)
for subnode in list:
    smartArt.Nodes.RemoveNode(subnode)

# Add a node to the SmartArt
node = smartArt.Nodes.AddNode()

# Add two sub-nodes to the node
subNode1 = node.ChildNodes.AddNode()
subNode2 = node.ChildNodes.AddNode()

# Add two sub-nodes to the first sub-node
subsubNode1 = subNode1.ChildNodes.AddNode()
subsubNode2 = subNode1.ChildNodes.AddNode()
# Add two sub-nodes to the second sub-node
subsubNode3 = subNode2.ChildNodes.AddNode()
subsubNode4 = subNode2.ChildNodes.AddNode()

# Set text and font size for the node and sub-nodes
node.TextFrame.Text = "CEO"
node.TextFrame.TextRange.FontHeight = 14.0
subNode1.TextFrame.Text = "Development Manager"
subNode1.TextFrame.TextRange.FontHeight = 12.0
subNode2.TextFrame.Text = "Quality Assurance Manager"
subNode2.TextFrame.TextRange.FontHeight = 12.0
subsubNode1.TextFrame.Text = "Developer A"
subsubNode1.TextFrame.TextRange.FontHeight = 12.0
subsubNode2.TextFrame.Text = "Developer B"
subsubNode2.TextFrame.TextRange.FontHeight = 12.0
subsubNode3.TextFrame.Text = "Tester A"
subsubNode3.TextFrame.TextRange.FontHeight = 12.0
subsubNode4.TextFrame.Text = "Tester B"
subsubNode4.TextFrame.TextRange.FontHeight = 12.0

# Save the resulting presentation
presentation.SaveToFile("InsertSmartArt.pptx", FileFormat.Pptx2016)
presentation.Dispose()

Read SmartArt in PowerPoint in Python
To read the text of SmartArt graphics on a PowerPoint slide, you need to find the SmartArt shapes on the slide, then loop through all nodes of each SmartArt shape, and finally retrieve the text of each node through the ISmartArtNode.TextFrame.Text property. The detailed steps are as follows.
- Create an object of the Presentation class.
- Load a PowerPoint presentation using Presentation.LoadFromFile() method.
- Get a specific slide using Presentation.Slides[index] property.
- Create a list to store the extracted text.
- Loop through all the shapes on the slide.
- Check if the shapes are of ISmartArt type. If the result is True, loop through all the nodes of each SmartArt shape, then retrieve the text from each node through ISmartArtNode.TextFrame.Text property and append the text to the list.
- Write the text in the list into a text file.
- Python
from spire.presentation.common import *
from spire.presentation import *

# Create a Presentation object
presentation = Presentation()
# Load a PowerPoint presentation
presentation.LoadFromFile("InsertSmartArt.pptx")

# Get the first slide
slide = presentation.Slides[0]

# Create a list to store the extracted text
str = []
str.append("Text Extracted from SmartArt:")

# Loop through the shapes on the slide and find the SmartArt shapes
for shape in slide.Shapes:
    if isinstance(shape, ISmartArt):
        smartArt = shape
        # Extract text from the SmartArt shapes and append the text to the list
        for node in smartArt.Nodes:
            str.append(node.TextFrame.Text)

# Write the text in the list into a text file
with open("ExtractTextFromSmartArt.txt", "w", encoding = "utf-8") as text_file:
    for text in str:
        text_file.write(text + "\n")

presentation.Dispose()
Delete SmartArt from PowerPoint in Python
To delete SmartArt graphics from a PowerPoint slide, you need to loop through all the shapes on the slide, find the SmartArt shapes and then delete them from the slide using ISlide.Shapes.Remove() method. The detailed steps are as follows.
- Create an object of the Presentation class.
- Load a PowerPoint presentation using Presentation.LoadFromFile() method.
- Get a specific slide using Presentation.Slides[index] property.
- Create a list to store the SmartArt shapes.
- Loop through all the shapes on the slide.
- Check if the shapes are of ISmartArt type. If the result is True, append them to the list.
- Loop through the SmartArt shapes in the list, then remove them from the slide one by one using ISlide.Shapes.Remove() method.
- Save the resulting presentation using Presentation.SaveToFile() method.
- Python
from spire.presentation.common import *
from spire.presentation import *

# Create a Presentation object
presentation = Presentation()
# Load a PowerPoint presentation
presentation.LoadFromFile("InsertSmartArt.pptx")

# Get the first slide
slide = presentation.Slides[0]

# Create a list to store the SmartArt shapes
list = []

# Loop through all the shapes on the slide
for shape in slide.Shapes:
    # Find the SmartArt shapes and append them to the list
    if isinstance (shape, ISmartArt):
        list.append(shape)

# Remove the SmartArt from the slide
for smartArt in list:
    slide.Shapes.Remove(smartArt)

# Save the resulting presentation
presentation.SaveToFile("DeleteSmartArt.pptx", FileFormat.Pptx2016)
presentation.Dispose()
Apply for a Temporary License
If you'd like to remove the evaluation message from the generated documents, or to get rid of the function limitations, please request a 30-day trial license for yourself.
Images have the power to captivate audiences and enhance their understanding of your content. By adding relevant and visually appealing images to your PowerPoint presentations, you can effectively convey complex ideas and make your presentations more memorable and impactful. In this article, we will explain how to add images to PowerPoint presentations in Python using Spire.Presentation for Python.
Install Spire.Presentation for Python
This scenario requires Spire.Presentation for Python and plum-dispatch v1.7.4. They can be easily installed in your Windows through the following pip command.
pip install Spire.Presentation
If you are unsure how to install, please refer to this tutorial: How to Install Spire.Presentation for Python on Windows
Add an Image to a Slide in Python
Spire.Presentation for Python offers the ISlide.Shapes.AppendEmbedImageByPath() method to add an image to a specific slide. The detailed steps are as follows.
- Create an object of the Presentation class.
- Load a PowerPoint presentation using Presentation.LoadFromFile() method.
- Get a specific slide by its index through Presentation.Slides[index] property.
- Add an image to the slide using ISlide.Shapes.AppendEmbedImageByPath() method.
- Save the resulting presentation using Presentation.SaveToFile() method.
- Python
from spire.presentation.common import *
import math
from spire.presentation import *

inputFile = "Input.pptx"
outputFile = "AddImageToSlide.pptx"

# Create an object of the Presentation class
presentation = Presentation()
# Load a PowerPoint presentation
presentation.LoadFromFile(inputFile)

# Get the first slide
slide = presentation.Slides[0]

# Insert an image into the slide
imageFile = "Image.png"
left = math.trunc(presentation.SlideSize.Size.Width / float(2)) - 280
rect1 = RectangleF.FromLTRB (left, 140, 120 + left, 260)
image = slide.Shapes.AppendEmbedImageByPath (ShapeType.Rectangle, imageFile, rect1)
image.Line.FillType = FillFormatType.none

# Save the resulting presentation
presentation.SaveToFile(outputFile, FileFormat.Pptx2010)
presentation.Dispose()
Add an Image to a Slide Master in Python
A slide master is the top-level slide that governs the formatting and styling of all other slides within the presentation. When you make changes to the slide master, such as adding a logo, modifying the background or changing the font styles, those changes are automatically applied to all slides based on that slide master. If you want an image to appear on all your slides, you can add it to the slide master.
Spire.Presentation for Python offers the IMasterSlide.Shapes.AppendEmbedImageByPath() method to add an image to a slide master. The detailed steps are as follows.
- Create an object of the Presentation class.
- Load a PowerPoint presentation using Presentation.LoadFromFile() method.
- Get a specific slide master by its index through Presentation.Masters[index] property.
- Add an image to the slide master using IMasterSlide.Shapes.AppendEmbedImageByPath() method.
- Save the resulting presentation using Presentation.SaveToFile() method.
- Python
from spire.presentation.common import *
import math
from spire.presentation import *

inputFile = "Input1.pptx"
outputFile = "AddImageToSlideMaster.pptx"

# Create an object of the Presentation class
presentation = Presentation()
# Load a PowerPoint presentation
presentation.LoadFromFile(inputFile)

# Get the first slide master
master = presentation.Masters[0]

# Insert an image into the slide master
imageFile = "Logo.png"
rect1 = RectangleF.FromLTRB (40, 40, 80, 80)
image = master.Shapes.AppendEmbedImageByPath (ShapeType.Rectangle, imageFile, rect1)
image.Line.FillType = FillFormatType.none

# Save the resulting presentation
presentation.SaveToFile(outputFile, FileFormat.Pptx2010)
presentation.Dispose()

Apply for a Temporary License
If you'd like to remove the evaluation message from the generated documents, or to get rid of the function limitations, please request a 30-day trial license for yourself.
Hiding and showing slides are two practical features in PowerPoint that allow you to control the visibility of slides during a slideshow. Hiding slides is useful when you want to skip certain slides or temporarily remove them from the presentation without deleting them. Whereas showing slides is helpful when you want to re-display the hidden slides. In this article, we will demonstrate how to hide and show slides in a PowerPoint presentation in Python using Spire.Presentation for Python.
- Hide a Specific Slide in PowerPoint in Python
- Show a Hidden Slide in PowerPoint in Python
- Show All Hidden Slides in PowerPoint in Python
Install Spire.Presentation for Python
This scenario requires Spire.Presentation for Python and plum-dispatch v1.7.4. They can be easily installed in your Windows through the following pip command.
pip install Spire.Presentation
If you are unsure how to install, please refer to this tutorial: How to Install Spire.Presentation for Python on Windows
Hide a Specific Slide in PowerPoint in Python
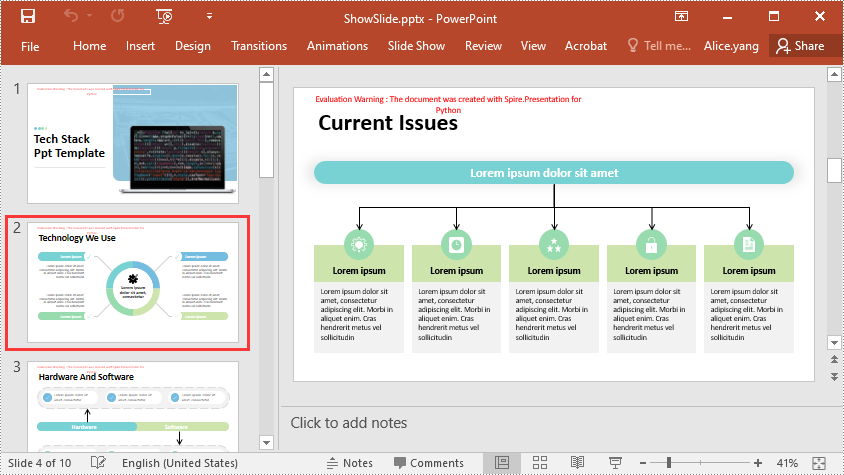
Spire.Presentation for Python provides the ISlide.Hidden property to control the visibility of a slide during a slideshow. If you don’t want a certain slide to be shown, you can hide this slide by setting the ISlide.Hidden property as True. The detailed steps are as follows.
- Create an object of the Presentation class.
- Load a PowerPoint presentation using Presentation.LoadFromFile() method.
- Get a specific slide using Presentation.Slides[index] property.
- Hide the slide by setting the ISlide.Hidden property as True.
- Save the resulting presentation using Presentation.SaveToFile() method.
- Python
from spire.presentation.common import *
from spire.presentation import *

# Create an object of the Presentation class
ppt = Presentation()
# Load a PowerPoint presentation
ppt.LoadFromFile("Sample.pptx")

# Get the second slide and hide it
slide = ppt.Slides[1]
slide.Hidden = True

# Save the resulting presentation to a new .pptx file
ppt.SaveToFile("HideSlide.pptx", FileFormat.Pptx2016)
ppt.Dispose()
Show a Hidden Slide in PowerPoint in Python
To show a hidden slide, you can set the ISlide.Hidden property as False. The detailed steps are as follows.
- Create an object of the Presentation class.
- Load a PowerPoint presentation using Presentation.LoadFromFile() method.
- Get a specific slide using Presentation.Slides[index] property.
- Unhide the slide by setting the ISlide.Hidden property as False.
- Save the resulting presentation using Presentation.SaveToFile() method.
- Python
from spire.presentation.common import *
from spire.presentation import *

# Create an object of the Presentation class
ppt = Presentation()
# Load a PowerPoint presentation
ppt.LoadFromFile("HideSlide.pptx")

# Get the second slide and unhide it
slide = ppt.Slides[1]
slide.Hidden = False

# Save the resulting presentation to a new .pptx file
ppt.SaveToFile("ShowSlide.pptx", FileFormat.Pptx2016)
ppt.Dispose()
Show All Hidden Slides in PowerPoint in Python
To show all hidden slides in a PowerPoint presentation, you need to loop through all the slides in the presentation, then find the hidden slides and unhide them by setting the ISlide.Hidden property as False. The detailed steps are as follows.
- Create an object of the Presentation class.
- Load a PowerPoint presentation using Presentation.LoadFromFile() method.
- Loop through the slides in the presentation.
- Check whether the current slide is hidden or not using ISlide.Hidden property. If the result is true, unhide the slide by setting the ISlide.Hidden property as False.
- Save the resulting presentation using Presentation.SaveToFile() method.
- Python
from spire.presentation.common import *
from spire.presentation import *

# Create an object of the Presentation class
ppt = Presentation()
# Load a PowerPoint presentation
ppt.LoadFromFile("Sample2.pptx")

# Loop through each slide in the presentation
for i in range(ppt.Slides.Count):
    slide = ppt.Slides[i]
    # Check if the slide is hidden
    if(slide.Hidden):
        # Unhide the slide
        slide.Hidden = False

# Save the resulting presentation to a new .pptx file
ppt.SaveToFile("ShowAllHidenSlides.pptx", FileFormat.Pptx2016)
ppt.Dispose()
Apply for a Temporary License
If you'd like to remove the evaluation message from the generated documents, or to get rid of the function limitations, please request a 30-day trial license for yourself.
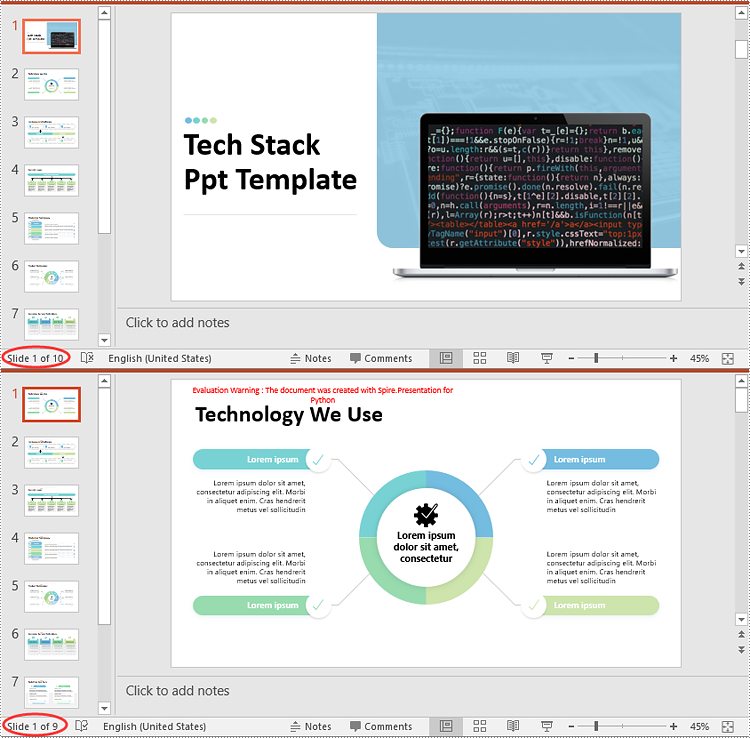
Adding and deleting slides in PowerPoint are essential actions that allow presenters to control the structure and content of their presentations. Adding slides provides the opportunity to expand and enhance the presentation by introducing new topics or providing supporting information. On the other hand, deleting slides helps streamline the presentation by removing redundant, repetitive, or irrelevant content. In this article, we will demonstrate how to add or delete slides in a PowerPoint Presentation in Python using Spire.Presentation for Python.
- Add a New Slide at the End of the PowerPoint Document in Python
- Insert a New Slide Before a Specific Slide in PowerPoint in Python
- Delete a Specific Slide from a PowerPoint Document in Python
Install Spire.Presentation for Python
This scenario requires Spire.Presentation for Python and plum-dispatch v1.7.4. They can be easily installed in your Windows through the following pip command.
pip install Spire.Presentation
If you are unsure how to install, please refer to this tutorial: How to Install Spire.Presentation for Python on Windows
Add a New Slide at the End of the PowerPoint Document in Python
Spire.Presentation for Python provides the Presentation.Slides.Append() method to add a new slide after the last slide of a PowerPoint presentation. The detailed steps are as follows.
- Create an object of the Presentation class.
- Load a PowerPoint presentation using Presentation.LoadFromFile() method.
- Add a new blank slide at the end of the presentation using Presentation.Slides.Append() method.
- Save the result presentation using Presentation.SaveToFile() method.
- Python
from spire.presentation.common import *
from spire.presentation import *

# Create a Presentation object
presentation = Presentation()

# Load a PowerPoint presentation
presentation.LoadFromFile("Sample.pptx")

# Add a new slide at the end of the presentation
presentation.Slides.Append()

# Save the result presentation to a .pptx file
presentation.SaveToFile("AddSlide.pptx", FileFormat.Pptx2013)
presentation.Dispose()
Insert a New Slide Before a Specific Slide in PowerPoint in Python
You can use the Presentation.Slides.Insert() method to insert a new slide before a specific slide of a PowerPoint presentation. The detailed steps are as follows.
- Create an object of the Presentation class.
- Load a PowerPoint presentation using Presentation.LoadFromFile() method.
- Insert a blank slide before a specific slide using Presentation.Slides.Insert() method.
- Save the result presentation using Presentation.SaveToFile() method.
- Python
from spire.presentation.common import *
from spire.presentation import *

# Create a Presentation object
presentation = Presentation()

# Load a PowerPoint presentation
presentation.LoadFromFile("Sample.pptx")

# Insert a blank slide before the second slide
presentation.Slides.Insert(1)

# Save the result presentation to a .pptx file
presentation.SaveToFile("InsertSlide.pptx", FileFormat.Pptx2013)
presentation.Dispose()
Delete a Specific Slide from a PowerPoint Document in Python
To delete a specific slide from a PowerPoint presentation, you can use the Presentation.Slides.RemoveAt() method. The detailed steps are as follows.
- Create an object of the Presentation class.
- Load a PowerPoint presentation using Presentation.LoadFromFile() method.
- Remove a specific slide from the presentation using Presentation.Slides.RemoveAt() method.
- Save the result presentation using Presentation.SaveToFile() method.
- Python
from spire.presentation.common import *
from spire.presentation import *

# Create a Presentation object
presentation = Presentation()

# Load a PowerPoint presentation
presentation.LoadFromFile("Sample.pptx")

# Remove the first slide
presentation.Slides.RemoveAt(0)

# Save the result presentation to a .pptx file
presentation.SaveToFile("RemoveSlide.pptx", FileFormat.Pptx2013)
presentation.Dispose()
Apply for a Temporary License
If you'd like to remove the evaluation message from the generated documents, or to get rid of the function limitations, please request a 30-day trial license for yourself.
Python: Convert PowerPoint to Images (PNG, JPG, BMP, SVG)
2023-09-27 01:05:46 Written by AdministratorImages are universally compatible and can be easily shared across various platforms, devices, and applications. By converting PowerPoint slides to images, you can distribute your content effortlessly via email, messaging apps, websites, or social media platforms. This makes your presentation accessible to a wider audience and ensures that it can be viewed by anyone, regardless of the software or device they are using. In this article, we will explain how to convert PowerPoint to images in Python using Spire.Presentation for Python.
- Convert PowerPoint Presentation to JPG, PNG or BMP Images
- Convert PowerPoint Presentation to JPG, PNG or BMP Images with a Specific Size
- Convert PowerPoint Presentation to SVG Images
Install Spire.Presentation for Python
This scenario requires Spire.Presentation for Python and plum-dispatch v1.7.4. They can be easily installed in your Windows through the following pip command.
pip install Spire.Presentation
If you are unsure how to install, please refer to this tutorial: How to Install Spire.Presentation for Python on Windows
Convert PowerPoint Presentation to JPG, PNG or BMP Images in Python
Spire.Presentation for Python offers the ISlide.SaveAsImage() method which enables you to convert the slides in a PowerPoint presentation to image files in formats like PNG, JPG or BMP with ease. The detailed steps are as follows:
- Create a Presentation object.
- Load a PowerPoint presentation using Presentation.LoadFromFile() method.
- Loop through the slides in the presentation.
- Save each slide to an image stream using ISlide.SaveAsImage() method.
- Save the image stream to a JPG, PNG or BMP file using Stream.Save() method.
- Python
from spire.presentation.common import *
from spire.presentation import *

# Create a Presentation object
presentation = Presentation()

# Load a PowerPoint presentation
presentation.LoadFromFile("Sample.pptx")

# Loop through the slides in the presentation
for i, slide in enumerate(presentation.Slides):
    # Specify the output file name
    fileName ="Output/ToImage_" + str(i) + ".png"
    # Save each slide as a PNG image
    image = slide.SaveAsImage()
    image.Save(fileName)
    image.Dispose()

presentation.Dispose()
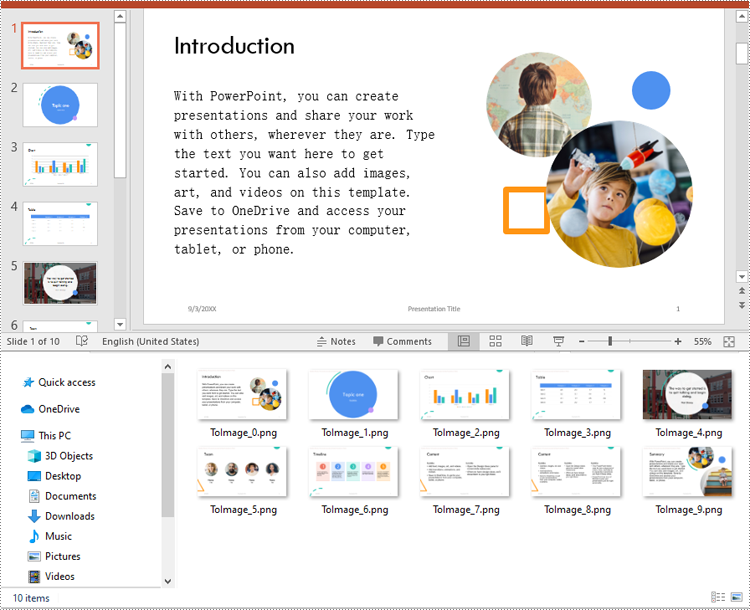
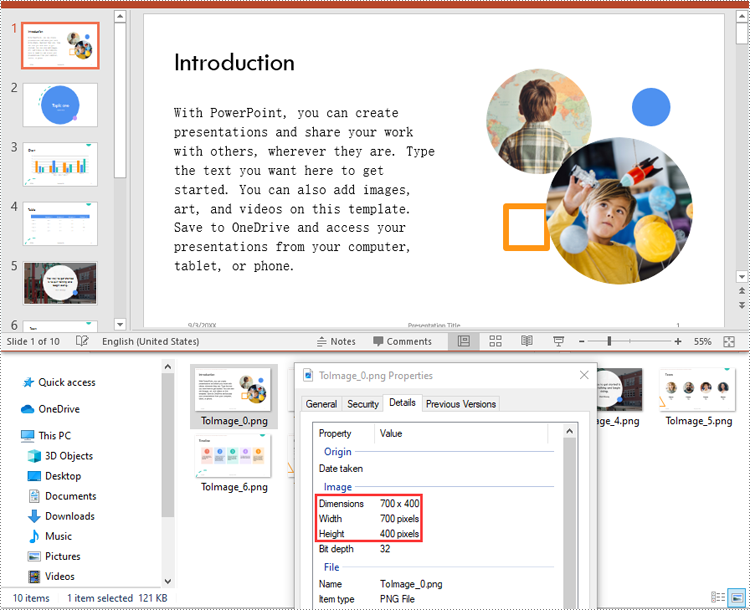
Convert PowerPoint Presentation to JPG, PNG or BMP Images with a Specific Size in Python
You can convert the slides in a PowerPoint presentation to images with a specific size using ISlide.SaveAsImageByWH() method. The detailed steps are as follows:
- Create a Presentation object.
- Load a PowerPoint presentation using Presentation.LoadFromFile() method.
- Loop through the slides in the presentation.
- Save each slide to an image stream using ISlide.SaveAsImageByWH() method.
- Save the image stream to a JPG, PNG or BMP file using Stream.Save() method.
- Python
from spire.presentation.common import *
from spire.presentation import *

# Create a Presentation object
presentation = Presentation()

# Load a PowerPoint presentation
presentation.LoadFromFile("Sample.pptx")

# Loop through the slides in the presentation
for i, slide in enumerate(presentation.Slides):
    # Specify the output file name
    fileName ="Output/ToImage_" + str(i) + ".png"
    # Save each slide to a PNG image with a size of 700 * 400 pixels
    slide1 = (ISlide)(slide)
    image = slide1.SaveAsImageByWH(700, 400)
    image.Save(fileName)
    image.Dispose()

presentation.Dispose()
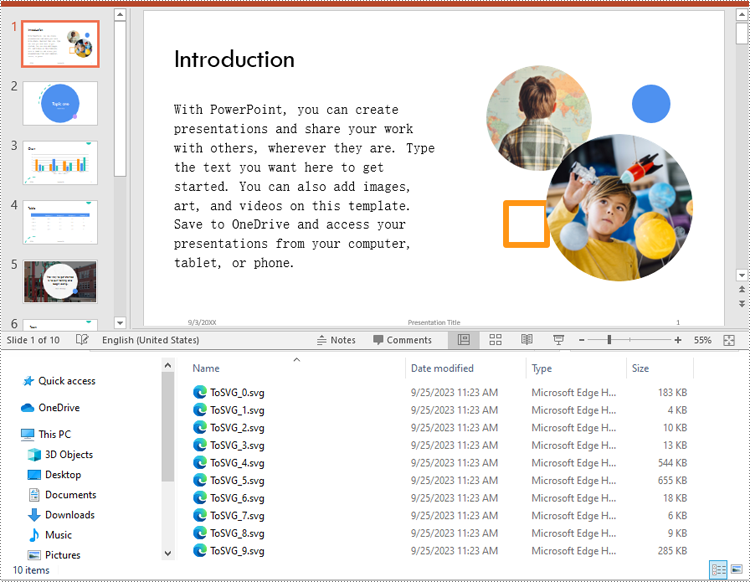
Convert PowerPoint Presentation to SVG Images in Python
To convert the slides in a PowerPoint presentation to SVG images, you can use the ISlide.SaveToSVG() method. The detailed steps are as follows:
- Create a Presentation object.
- Load a PowerPoint presentation using Presentation.LoadFromFile() method.
- Enable the Presentation.IsNoteRetained property to retain notes when converting the presentation to SVG files.
- Loop through the slides in the presentation.
- Save each slide to an SVG stream using ISlide.SaveToSVG() method.
- Save the SVG stream to an SVG file using Stream.Save() method.
- Python
from spire.presentation.common import *
from spire.presentation import *

# Create a Presentation object
presentation = Presentation()

# Load a PowerPoint presentation
presentation.LoadFromFile("Sample.pptx")

# Enable the IsNoteRetained property to retain notes when converting the presentation to SVG files
presentation.IsNoteRetained = True

# Loop through the slides in the presentation
for i, slide in enumerate(presentation.Slides):
    # Specify the output file name
    fileName = "SVG/ToSVG_" + str(i) + ".svg"
    # Save each slide to an SVG image
    slide1 = (ISlide)(slide)
    svgStream = slide1.SaveToSVG()
    svgStream.Save(fileName)

presentation.Dispose()
Apply for a Temporary License
If you'd like to remove the evaluation message from the generated documents, or to get rid of the function limitations, please request a 30-day trial license for yourself.
Extracting images from a PowerPoint presentation is necessary when you need to reuse them elsewhere. By doing so, you gain the flexibility to use these images outside the confines of the original presentation, thus maximizing their value in different projects. This article will demonstrate how to extract images from a PowerPoint document in Python using Spire.Presentation for Python.
Install Spire.Presentation for Python
This scenario requires Spire.Presentation for Python and plum-dispatch v1.7.4. They can be easily installed in your Windows through the following pip command.
pip install Spire.Presentation
If you are unsure how to install, please refer to this tutorial: How to Install Spire.Presentation for Python on Windows
Extract Images from a PowerPoint Document in Python
To extract images from an entire PowerPoint presentation, you need to use the Presentation.Images property to get the collection of all the images in the presentation, then iterate through the elements in the collection and call IImageData.Image.Save() method to save each element to an image file. The following are the detailed steps:
- Create a Presentation instance.
- Load a PowerPoint document using Presentation.LoadFromFile() method.
- Get the collection of all the images in the document using Presentation.Images property.
- Iterate through the elements in the collection, and save each element as an image file using the IImageData.Image.Save() method.
- Python
from spire.presentation.common import *
from spire.presentation import *

# Create a Presentation instance
ppt = Presentation()

# Load a PowerPoint document
ppt.LoadFromFile("sample.pptx")

# Iterate through all images in the document
for i, image in enumerate(ppt.Images):

    # Extract the images
    ImageName = "ExtractImage/Images_"+str(i)+".png"
    image.Image.Save(ImageName)

ppt.Dispose()

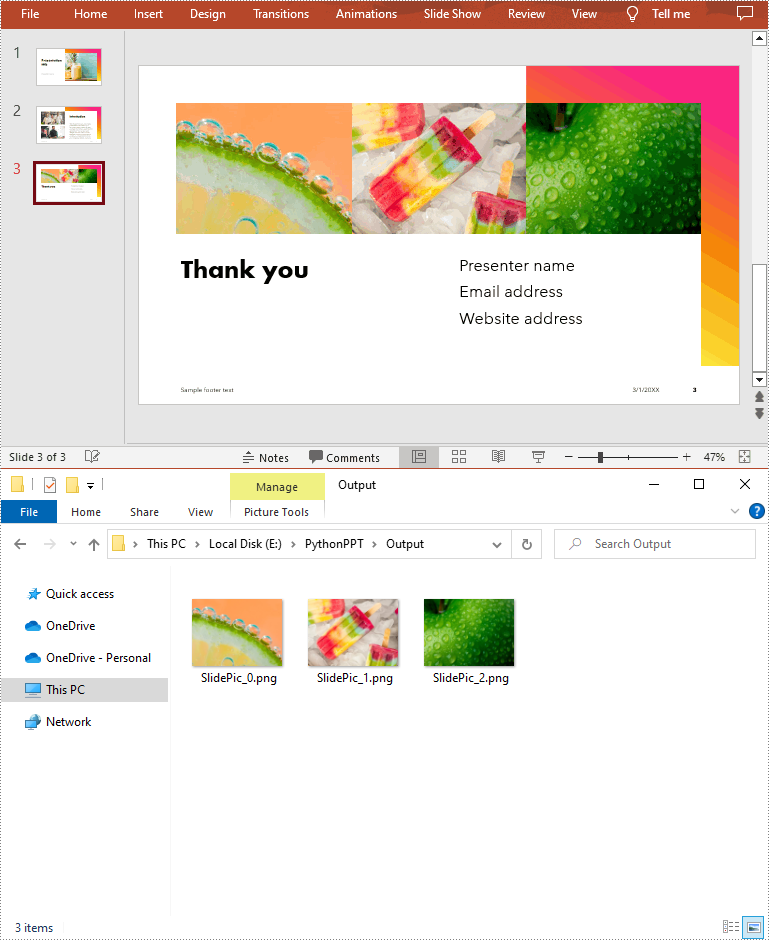
Extract Images from a Presentation Slide in Python
To extract images from a specific slide, you need to iterate through all shapes on the slide and find the shapes that are of SlidePicture or PictureShape type, then use the SlidePicture.PictureFill.Picture.EmbedImage.Image.Save() or PictureShape.EmbedImage.Image.Save() method to save the images to image files. The following are the detailed steps:
- Create a Presentation instance.
- Load a PowerPoint document using Presentation.LoadFromFile() method.
- Get a specified slide using Presentation.Slides[int] property.
- Iterate through all shapes on the slide.
- Determine whether the shapes are of SlidePicture or PictureShape type. If so, save the images to image files using SlidePicture.PictureFill.Picture.EmbedImage.Image.Save() or PictureShape.EmbedImage.Image.Save() method.
- Python
from spire.presentation.common import *
from spire.presentation import *

# Create a Presentation instance
ppt = Presentation()

# Load a PowerPoint document
ppt.LoadFromFile("sample.pptx")

# Get a specified slide
slide = ppt.Slides[2]

i = 0
#Traverse all shapes in the slide
for s in slide.Shapes:

    # Determine if the shape is of SlidePicture type
    if isinstance(s, SlidePicture):

        # If yes, then extract the image
        ps = s if isinstance(s, SlidePicture) else None
        ps.PictureFill.Picture.EmbedImage.Image.Save("Output/SlidePic_"+str(i)+".png")
        i += 1

    # Determine if the shape is of PictureShape type
    if isinstance(s, PictureShape):

        # If yes, then extract the image
        ps = s if isinstance(s, PictureShape) else None
        ps.EmbedImage.Image.Save("Output/SlidePic_"+str(i)+".png")
        i += 1

ppt.Dispose()
Apply for a Temporary License
If you'd like to remove the evaluation message from the generated documents, or to get rid of the function limitations, please request a 30-day trial license for yourself.
Convert PowerPoint PPT or PPTX to PDF in Python: A Comprehensive Guide
2023-09-12 01:08:24 Written by Koohji
Looking to convert PowerPoint PPT or PPTX files to PDF using Python? This comprehensive guide walks you through the process of converting PowerPoint to PDF with ease. You'll learn how to perform quick conversions using default settings, as well as explore advanced features such as exporting specific slides, adjusting slide size for optimal output, including hidden slides, and generating PDF/A-compliant files for archival use.
- Why Convert PowerPoint to PDF
- Python PowerPoint to PDF Converter Library Installation
- Convert PowerPoint to PDF with Default Settings
- Export PowerPoint to PDF with Advanced Settings
- Conclusion
- FAQs
Why Convert PowerPoint to PDF?
Converting PowerPoint files to PDF offers several advantages:
- Universal Compatibility: PDF files can be opened on virtually any device or operating system without needing PowerPoint installed.
- Preserved Formatting: Unlike PowerPoint files, PDFs lock in layout, fonts, and images to avoid rendering inconsistencies.
- Enhanced Security: PDF files can be encrypted, making them ideal for sharing confidential information.
- Reduced File Size: PDFs often have a smaller file size than PowerPoint presentations, making them easier to share via email or upload online.
Python PowerPoint to PDF Converter Library Installation
To convert PowerPoint presentations to PDF in Python, you can use Spire.Presentation for Python. This powerful library allows you to create, read, modify, and convert PowerPoint PPTX and PPT files without needing Microsoft PowerPoint installed.
Why Choose Spire.Presentation for Python?
- High Fidelity: Ensures accurate conversion while preserving formatting and layout.
- User-Friendly: Simple API makes it easy to implement in your projects.
- Versatile: Supports a wide range of PowerPoint features and formats.
Install Spire.Presentation for Python
Before starting with the conversion process, install Spire.Presentation via pip using the following command:
pip install Spire.Presentation
Need help with installation? Refer to this detailed documentation: How to Install Spire.Presentation for Python on Windows
Convert PowerPoint to PDF with Default Settings
Spire.Presentation makes it easy to convert PowerPoint files to PDF with just a few lines of code.
The example below shows how to load a .pptx or .ppt file and export it to PDF using default settings - ideal for quick conversions where no customization is needed.
from spire.presentation import *

# Create a Presentation object
presentation = Presentation()

# Load a PPTX file
presentation.LoadFromFile("Input.pptx")
# Or load a PPT file
# presentation.LoadFromFile("Input.ppt")

# Save the file as a PDF
presentation.SaveToFile("Basic_conversion.pdf", FileFormat.PDF)
presentation.Dispose()

Export PowerPoint to PDF with Advanced Settings
Spire.Presentation provides a range of advanced settings that give you control over how the PDF output is generated, making it ideal for both professional use and archival purposes. For example, you can:
- Export a Particular Slide to PDF
- Adjust Slide Size for Optimal PDF Output
- Include Hidden Slides in the Converted PDF
- Generate PDF/A-compliant Files from PowerPoint
Export a Particular Slide to PDF
If you only need to share a specific part of your presentation, Spire.Presentation allows you to extract and convert individual slides to a PDF. This is especially useful for generating slide-specific reports or handouts.
from spire.presentation import *

# Create a Presentation object
presentation = Presentation()

# Load the PowerPoint file
presentation.LoadFromFile("Input.pptx")

# Get the desired slide (e.g., the second slide)
slide = presentation.Slides.get_Item(1)

# Save the slide as a PDF
slide.SaveToFile("Single_slide.pdf", FileFormat.PDF)
presentation.Dispose()

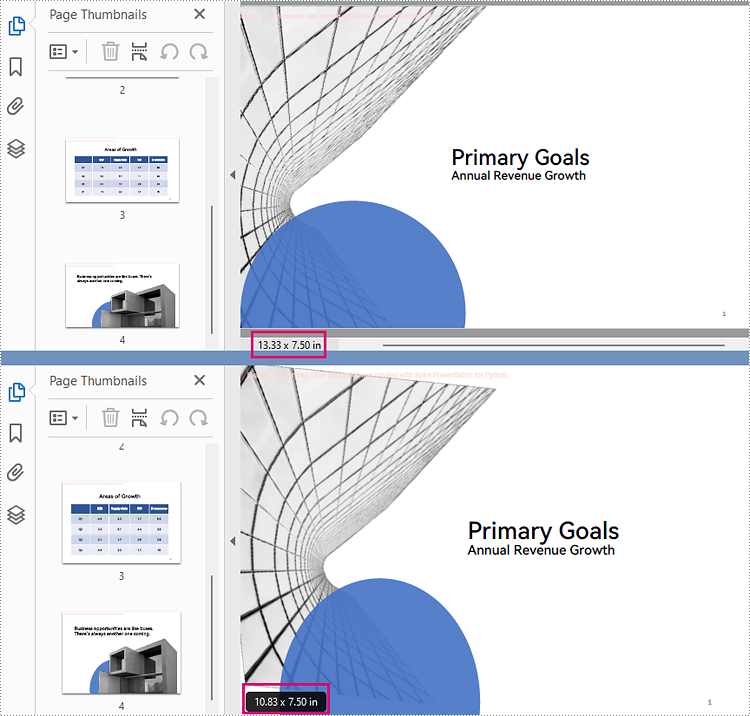
Adjust Slide Size for Optimal PDF Output
To ensure that your PDF meets printing or layout requirements, you can adjust the slide dimensions before conversion. Spire.Presentation lets you set standard slide sizes as well as custom slide dimensions so the output aligns with your document formatting needs.
from spire.presentation import *

# Create a Presentation object
presentation = Presentation()
# Load the PowerPoint file
presentation.LoadFromFile("Input.pptx")

# Set the slide size to a standard slide size like A4
presentation.SlideSize.Type = SlideSizeType.A4

# # Or you can set custom slide size (e.g., 720x540 points)
# presentation.SlideSize.Size = SizeF(720.0, 540.0)

# Fit content to the new slide size
presentation.SlideSizeAutoFit = True

# Save the presentation as a PDF
presentation.SaveToFile("Resized_output.pdf", FileFormat.PDF)
presentation.Dispose()
Include Hidden Slides in the Converted PDF
By default, hidden slides are excluded from conversion. However, if your workflow requires complete documentation, Spire.Presentation enables you to include hidden slides in the output PDF.
from spire.presentation import *

# Create a Presentation object
presentation = Presentation()

# Load the PowerPoint file
presentation.LoadFromFile("Input.pptx")

# Get the SaveToPdfOption object
option = presentation.SaveToPdfOption

# Enable ContainHiddenSlides option
option.ContainHiddenSlides = True

# Save the presentation as a PDF
presentation.SaveToFile("Include_hidden_slides.pdf", FileFormat.PDF)
presentation.Dispose()
Generate PDF/A-compliant Files from PowerPoint
PDF/A is a specialized format intended for long-term digital preservation. If your organization needs to archive presentations in a standards-compliant format, Spire.Presentation allows you to export PDF/A files that conform to archival best practices.
from spire.presentation import *

# Create a Presentation object
presentation = Presentation()

# Load the PowerPoint file
presentation.LoadFromFile("Input.pptx")

# Get the SaveToPdfOption object
option = presentation.SaveToPdfOption

# Set PDF compliance to PDF/A-1a
option.PdfConformanceLevel = PdfConformanceLevel.Pdf_A1A

# Save the presentation as a PDF
presentation.SaveToFile("Pdf_a_output.pdf", FileFormat.PDF)
presentation.Dispose()
Conclusion
Spire.Presentation for Python offers a robust set of features for converting PowerPoint files to PDF with minimal effort and maximum flexibility. Whether you require simple conversions or advanced customization options, this library gives developers full control over the process. From exporting individual slides to generating archival-quality outputs, it’s a comprehensive tool for PowerPoint-to-PDF conversion workflows in Python.
FAQs
Q1: Can I convert PPTX and PPT files without installing Microsoft PowerPoint?
A1: Yes, Spire.Presentation is a standalone library and does not require Microsoft Office or PowerPoint to be installed.
Q2: Does the library support batch conversion of multiple PowerPoint files?
A2: Yes, you can write scripts to loop through multiple files and convert each to PDF programmatically.
Q3: Is PDF/A-1a the only compliance level supported for PPT to PDF/A conversion?
A3: No, Spire.Presentation supports multiple compliance levels for PPT to PDF/A conversion, including PDF/A-1a, PDF/A-2a, PDF/A-3a, PDF/A-1b, PDF/A-2b, and PDF/A-3b.
Get a Free License
To fully experience the capabilities of Spire.Presentation for Python without any evaluation limitations, you can request a free 30-day trial license.
Spire.Presentation for Python is a professional presentation processing API that is highly compatible with PowerPoint. It is a completely independent class library that developers can use to create, edit, convert, and save PowerPoint presentations efficiently without installing Microsoft PowerPoint.
Spire.Presentation for Python supports a variety of presentation manipulation features, such as adding/deleting/hiding/showing/rearranging/copying slides, adding/extracting images, adding/removing hyperlinks, adding/extracting animations, creating tables/charts, adding/extracting/highlighting/replacing text, adding/extracting/replacing videos and audio, encrypting/decrypting presentations, adding text/image watermarks, setting/removing background, and manipulating comments/speaker note etc.
