Documents such as contract templates, onboarding registration forms and project initiation applications usually need a number of editable positions left in a fixed layout. A plain paragraph with an underline can produce a similar effect, but the person filling it in may delete the instructions by accident, and there is no way to restrict the type of content that can be entered. Word content controls are designed for exactly this purpose: they wrap a piece of content into a separate object with a type and properties, which both constrains the filling range and makes the content easy for programs to recognize and process in batches.
Inserting content controls one by one in desktop software is suitable for a small number of documents; once documents have to be generated in batches in a web workflow, manual operation becomes impractical. Uploading files to a server for processing, on the other hand, takes the documents off the user's device. This article uses Spire.Doc for JavaScript to add content controls directly in the browser: documents are read into memory through the virtual file system (VFS), written back to the VFS after processing and then downloaded. The whole process does not depend on Office and requires no backend service.
This article covers the following topics:
All three control types are created by StructureDocumentTagInline; they differ in the value of SDTProperties.SDTType and in the control properties:
| Control type | SDTType value |
Control property class |
|---|---|---|
| Text content control | SdtType.Text |
SdtText |
| Rich text content control | SdtType.RichText |
SdtText |
| Picture content control | SdtType.Picture |
DocPicture |
For installation and project setup, refer to Integrating Spire.Doc for JavaScript in a React Project. The examples below assume that Spire.Doc is installed and the WebAssembly module is initialized.
Add a Text Content Control
A text content control accepts plain text input and is suitable for fields that do not allow complex formatting, such as a project name, a contact person or a department name. Create an inline control with StructureDocumentTagInline, set SDTType to SdtType.Text, and then use SdtText to control whether multiple lines are allowed.
The following members are involved in adding a text content control:
| Member | Purpose |
|---|---|
StructureDocumentTagInline(document) |
Creates an inline content control object |
SDTProperties.SDTType |
Sets the control type, here SdtType.Text |
SDTProperties.ControlProperties |
Type-specific properties; SdtText for a text control |
SdtText.IsMultiline |
Whether multiple lines of input are allowed |
SDTContent.ChildObjects |
Holds the text content inside the control |
The specific steps are as follows:
- Get the Spire.Doc WASM module and confirm that it is ready.
- Load the font, create a document with the
Documentclass and add a section. - Create a
StructureDocumentTagInlinecontrol in the paragraph and setSDTTypetoSdtType.Text. - Set the multiline property with
SdtText, and writeTextRangecontent intoSDTContent. - Save the result file with
SaveToFile(), read it from the VFS and trigger a browser download.
The code for adding a text content control is as follows:
function App() {
  const addTextControl = async () => {
    // Get the Spire.Doc WASM module
    const wasmModule = window.wasmModule?.spiredoc;

    if (!wasmModule) {
      alert('Spire.Doc is not ready yet');
      return;
    }

    // Load the font
    await window.spire.FetchFileToVFS('arial.ttf', '/Library/Fonts/', `${process.env.PUBLIC_URL}/font/`);
    await window.spire.FetchFileToVFS('arialbd.ttf', '/Library/Fonts/', `${process.env.PUBLIC_URL}/font/`);

    // Create a document and add a section
    const doc = new wasmModule.Document();
    const section = doc.AddSection();

    // Add the title paragraph
    const titleParagraph = section.AddParagraph();
    const titleRange = titleParagraph.AppendText('Project Initiation Application');
    titleRange.CharacterFormat.FontName = 'Arial';
    titleRange.CharacterFormat.FontSize = 19;
    titleRange.CharacterFormat.Bold = true;
    titleRange.CharacterFormat.TextColor = wasmModule.Color.FromArgb(255, 15, 110, 90);
    titleParagraph.Format.AfterSpacing = 6;

    // Add the subtitle
    const subtitleParagraph = section.AddParagraph();
    const subtitleRange = subtitleParagraph.AppendText('Technical Committee — November 2026');
    subtitleRange.CharacterFormat.FontName = 'Arial';
    subtitleRange.CharacterFormat.FontSize = 9;
    subtitleRange.CharacterFormat.TextColor = wasmModule.Color.FromArgb(255, 89, 89, 89);
    subtitleParagraph.Format.AfterSpacing = 16;

    // Add the text before the control
    const paragraph = section.AddParagraph();
    paragraph.AppendText('Project name:  ');

    // Create an inline content control and add it to the paragraph
    const sdt = new wasmModule.StructureDocumentTagInline(doc);
    paragraph.ChildObjects.Add(sdt);

    // Set the control type to text
    sdt.SDTProperties.SDTType = wasmModule.SdtType.Text;
    const textProperties = new wasmModule.SdtText(true);
    textProperties.IsMultiline = true;
    sdt.SDTProperties.ControlProperties = textProperties;

    // Set the alias, tag and appearance
    sdt.SDTProperties.Alias = 'Project Name';
    sdt.SDTProperties.Tag = 'project-name';
    sdt.SDTProperties.Appearance = wasmModule.SdtAppearance.Tags;

    // Write the content of the control
    const content = new wasmModule.TextRange(doc);
    content.Text = 'Intelligent Document Processing Platform (Phase II)';
    sdt.SDTContent.ChildObjects.Add(content);

    // Add a filling note
    const noteParagraph = section.AddParagraph();
    noteParagraph.Format.BeforeSpacing = 10;
    const noteRange = noteParagraph.AppendText('Note: keep the project name within 30 characters and consistent with the project approval document.');
    noteRange.CharacterFormat.FontName = 'Arial';
    noteRange.CharacterFormat.FontSize = 9;
    noteRange.CharacterFormat.TextColor = wasmModule.Color.FromArgb(255, 89, 89, 89);

    // Save the result file
    const outputFileName = 'AddTextContentControl.docx';
    doc.SaveToFile({ fileName: outputFileName, fileFormat: wasmModule.FileFormat.Docx2013 });
    doc.Dispose();

    // Read the generated file from the VFS and trigger the download
    const fileArray = window.dotnetRuntime.Module.FS.readFile(outputFileName);
    const blob = new Blob([fileArray], { type: 'application/vnd.openxmlformats-officedocument.wordprocessingml.document' });
    const url = URL.createObjectURL(blob);
    const a = document.createElement('a');
    a.href = url;
    a.download = outputFileName;
    a.click();
    URL.revokeObjectURL(url);
  };

  return (
    <div style={{ textAlign: 'center', height: '300px' }}>
      <h1>Add Text Content Control</h1>
      <button onClick={addTextControl}>Generate Document</button>
    </div>
  );
}

export default App;
Document after adding a text content control:

Alias, Tag and Appearance of a Content Control
SDTProperties has three groups of properties that are unrelated to the content itself but closely related to later processing:
| Property | Purpose |
|---|---|
Alias |
The name shown in Word, so that the person filling in the form can recognize the control |
Tag |
A machine-readable marker, usually in hyphenated English, for locating the control by business field |
Appearance |
How the control is displayed in the document; Tags shows alias tags on both sides of the content |
The example sets Appearance to SdtAppearance.Tags so that the generated document directly shows the control boundaries and aliases, which makes the result easy to check. If it is not set, Word uses the default display and the control looks no different from ordinary text.
Add a Rich Text Content Control
A rich text content control is also based on SdtText, but its type is SdtType.RichText. It allows fonts, font sizes, colors and bold formatting to be preserved inside the control, which makes it suitable for passages that need emphasis, such as version highlights, approval comments or supplementary contract clauses.
Compared with the text content control, the steps are basically the same, with one difference: SDTType uses SdtType.RichText, and the content of the control can be split into several TextRange objects that are formatted separately.
The specific steps are as follows:
- Get the Spire.Doc WASM module and confirm that it is ready.
- Load the font, create a document with the
Documentclass and add a section. - Create a
StructureDocumentTagInlinecontrol in the paragraph and setSDTTypetoSdtType.RichText. - Create several
TextRangeobjects in order, set their colors and bold settings, and add them toSDTContent. - Save the result file with
SaveToFile(), read it from the VFS and trigger a browser download.
The code for adding a rich text content control is as follows:
function App() {
  const addRichTextControl = async () => {
    // Get the Spire.Doc WASM module
    const wasmModule = window.wasmModule?.spiredoc;

    if (!wasmModule) {
      alert('Spire.Doc is not ready yet');
      return;
    }

    // Load the font
    await window.spire.FetchFileToVFS('arial.ttf', '/Library/Fonts/', `${process.env.PUBLIC_URL}/font/`);
    await window.spire.FetchFileToVFS('arialbd.ttf', '/Library/Fonts/', `${process.env.PUBLIC_URL}/font/`);

    // Create a document and add a section
    const doc = new wasmModule.Document();
    const section = doc.AddSection();

    // Add the title paragraph
    const titleParagraph = section.AddParagraph();
    const titleRange = titleParagraph.AppendText('Release Notes');
    titleRange.CharacterFormat.FontName = 'Arial';
    titleRange.CharacterFormat.FontSize = 19;
    titleRange.CharacterFormat.Bold = true;
    titleRange.CharacterFormat.TextColor = wasmModule.Color.FromArgb(255, 15, 110, 90);
    titleParagraph.Format.AfterSpacing = 6;

    // Add the subtitle
    const subtitleParagraph = section.AddParagraph();
    const subtitleRange = subtitleParagraph.AppendText('Northstar Document Platform — 2026.11');
    subtitleRange.CharacterFormat.FontName = 'Arial';
    subtitleRange.CharacterFormat.FontSize = 9;
    subtitleRange.CharacterFormat.TextColor = wasmModule.Color.FromArgb(255, 89, 89, 89);
    subtitleParagraph.Format.AfterSpacing = 16;

    // Add the text before the control
    const paragraph = section.AddParagraph();
    paragraph.AppendText('Release highlights:  ');

    // Create an inline content control and add it to the paragraph
    const sdt = new wasmModule.StructureDocumentTagInline(doc);
    paragraph.ChildObjects.Add(sdt);

    // Set the control type to rich text
    sdt.SDTProperties.SDTType = wasmModule.SdtType.RichText;
    const textProperties = new wasmModule.SdtText(true);
    textProperties.IsMultiline = true;
    sdt.SDTProperties.ControlProperties = textProperties;

    // Set the alias, tag and appearance
    sdt.SDTProperties.Alias = 'Release Highlights';
    sdt.SDTProperties.Tag = 'release-highlights';
    sdt.SDTProperties.Appearance = wasmModule.SdtAppearance.Tags;

    // First text fragment: green body text
    const firstRange = new wasmModule.TextRange(doc);
    firstRange.Text = 'This release supports';
    firstRange.CharacterFormat.FontName = 'Arial';
    firstRange.CharacterFormat.TextColor = wasmModule.Color.FromArgb(255, 0, 128, 0);
    sdt.SDTContent.ChildObjects.Add(firstRange);

    // Second text fragment: orange bold keyword
    const secondRange = new wasmModule.TextRange(doc);
    secondRange.Text = 'content controls';
    secondRange.CharacterFormat.FontName = 'Arial';
    secondRange.CharacterFormat.Bold = true;
    secondRange.CharacterFormat.TextColor = wasmModule.Color.FromArgb(255, 237, 125, 49);
    sdt.SDTContent.ChildObjects.Add(secondRange);

    // Third text fragment: green body text
    const thirdRange = new wasmModule.TextRange(doc);
    thirdRange.Text = ' for batch writing and format validation.';
    thirdRange.CharacterFormat.FontName = 'Arial';
    thirdRange.CharacterFormat.TextColor = wasmModule.Color.FromArgb(255, 0, 128, 0);
    sdt.SDTContent.ChildObjects.Add(thirdRange);

    // Add a tip
    const noteParagraph = section.AddParagraph();
    noteParagraph.Format.BeforeSpacing = 10;
    const noteRange = noteParagraph.AppendText('Tip: the content inside a rich text control can be split into several TextRange objects, each with its own font, color and bold setting.');
    noteRange.CharacterFormat.FontName = 'Arial';
    noteRange.CharacterFormat.FontSize = 9;
    noteRange.CharacterFormat.TextColor = wasmModule.Color.FromArgb(255, 89, 89, 89);

    // Save the result file
    const outputFileName = 'AddRichTextContentControl.docx';
    doc.SaveToFile({ fileName: outputFileName, fileFormat: wasmModule.FileFormat.Docx2013 });
    doc.Dispose();

    // Read the generated file from the VFS and trigger the download
    const fileArray = window.dotnetRuntime.Module.FS.readFile(outputFileName);
    const blob = new Blob([fileArray], { type: 'application/vnd.openxmlformats-officedocument.wordprocessingml.document' });
    const url = URL.createObjectURL(blob);
    const a = document.createElement('a');
    a.href = url;
    a.download = outputFileName;
    a.click();
    URL.revokeObjectURL(url);
  };

  return (
    <div style={{ textAlign: 'center', height: '300px' }}>
      <h1>Add Rich Text Content Control</h1>
      <button onClick={addRichTextControl}>Generate Document</button>
    </div>
  );
}

export default App;
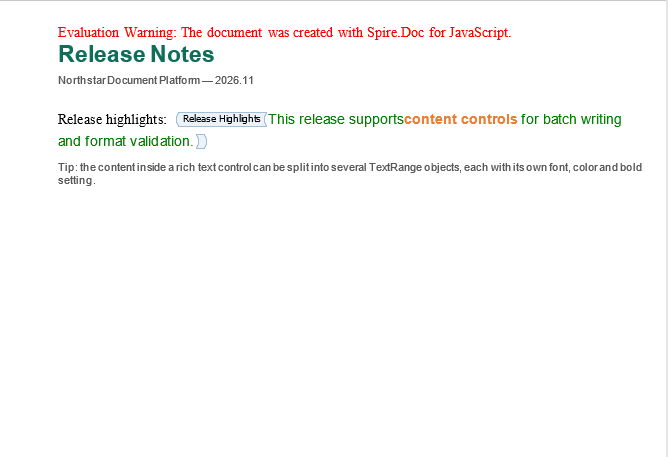
Document after adding a rich text content control:
Combining Multiple Formats in a Rich Text Control
The content of a rich text control is made up of several TextRange objects joined in order. Each added TextRange appends a piece of text with its own formatting inside the control: it is possible to recolor only a keyword or to make a whole passage bold. Note that the CharacterFormat of a TextRange only affects that fragment and does not apply to the other content in the control; if the whole passage should share the same formatting, set it on each fragment.
Add a Picture Content Control
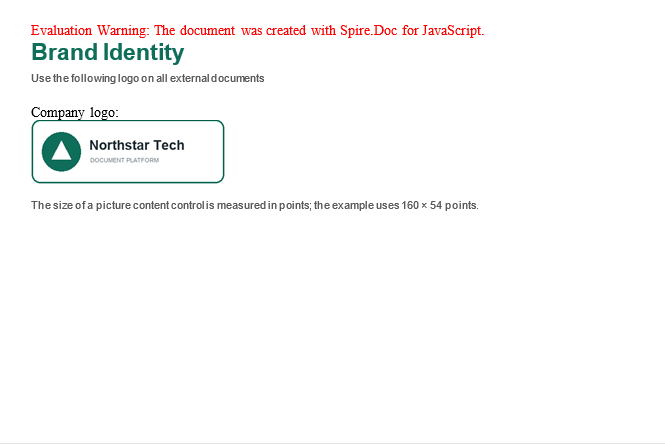
A picture content control holds a replaceable picture and is suitable for scenarios such as company logos, product diagrams and signature or seal positions. It is created in the same way as the previous two types: set SDTType to SdtType.Picture and use a DocPicture object as the control content.
A picture content control does not set its properties through ControlProperties; instead, the DocPicture is added directly to SDTContent. The example reads logo.png from public/data, so put that picture in the project's public/data directory before running it. Picture dimensions are measured in points and can be adjusted after LoadImage():
| Member | Purpose |
|---|---|
DocPicture(document) |
Creates a picture object |
DocPicture.LoadImage(path) |
Loads a picture from the VFS |
DocPicture.Width / Height |
Display size of the picture, in points |
The specific steps are as follows:
- Get the Spire.Doc WASM module and confirm that it is ready.
- Load the font and the sample picture into the VFS, then create a document and add a section.
- Create a
StructureDocumentTagInlinecontrol and setSDTTypetoSdtType.Picture. - Create a
DocPicture, load the picture, set its width and height, and add it toSDTContent. - Save the result file with
SaveToFile(), read it from the VFS and trigger a browser download.
The code for adding a picture content control is as follows:
function App() {
  const addPictureControl = async () => {
    // Get the Spire.Doc WASM module
    const wasmModule = window.wasmModule?.spiredoc;

    if (!wasmModule) {
      alert('Spire.Doc is not ready yet');
      return;
    }

    // Load the font and the sample picture
    await window.spire.FetchFileToVFS('arial.ttf', '/Library/Fonts/', `${process.env.PUBLIC_URL}/font/`);
    await window.spire.FetchFileToVFS('arialbd.ttf', '/Library/Fonts/', `${process.env.PUBLIC_URL}/font/`);
    await window.spire.FetchFileToVFS('logo.png', '', `${process.env.PUBLIC_URL}/data/`);

    // Create a document and add a section
    const doc = new wasmModule.Document();
    const section = doc.AddSection();

    // Add the title paragraph
    const titleParagraph = section.AddParagraph();
    const titleRange = titleParagraph.AppendText('Brand Identity');
    titleRange.CharacterFormat.FontName = 'Arial';
    titleRange.CharacterFormat.FontSize = 19;
    titleRange.CharacterFormat.Bold = true;
    titleRange.CharacterFormat.TextColor = wasmModule.Color.FromArgb(255, 15, 110, 90);
    titleParagraph.Format.AfterSpacing = 6;

    // Add the subtitle
    const subtitleParagraph = section.AddParagraph();
    const subtitleRange = subtitleParagraph.AppendText('Use the following logo on all external documents');
    subtitleRange.CharacterFormat.FontName = 'Arial';
    subtitleRange.CharacterFormat.FontSize = 9;
    subtitleRange.CharacterFormat.TextColor = wasmModule.Color.FromArgb(255, 89, 89, 89);
    subtitleParagraph.Format.AfterSpacing = 16;

    // Add the text before the picture
    const label = section.AddParagraph();
    label.AppendText('Company logo: ');

    // Create an inline content control and add it to a new paragraph
    const paragraph = section.AddParagraph();
    const sdt = new wasmModule.StructureDocumentTagInline(doc);
    paragraph.ChildObjects.Add(sdt);

    // Set the control type to picture
    sdt.SDTProperties.SDTType = wasmModule.SdtType.Picture;
    sdt.SDTProperties.Alias = 'Company Logo';
    sdt.SDTProperties.Tag = 'brand-logo';

    // Load the picture and set its display size
    const picture = new wasmModule.DocPicture(doc);
    picture.LoadImage('logo.png');
    picture.Width = 160;
    picture.Height = 54;
    sdt.SDTContent.ChildObjects.Add(picture);

    // Add a note about the size
    const noteParagraph = section.AddParagraph();
    noteParagraph.Format.BeforeSpacing = 10;
    const noteRange = noteParagraph.AppendText('The size of a picture content control is measured in points; the example uses 160 × 54 points.');
    noteRange.CharacterFormat.FontName = 'Arial';
    noteRange.CharacterFormat.FontSize = 9;
    noteRange.CharacterFormat.TextColor = wasmModule.Color.FromArgb(255, 89, 89, 89);

    // Save the result file
    const outputFileName = 'AddPictureContentControl.docx';
    doc.SaveToFile({ fileName: outputFileName, fileFormat: wasmModule.FileFormat.Docx2013 });
    doc.Dispose();

    // Read the generated file from the VFS and trigger the download
    const fileArray = window.dotnetRuntime.Module.FS.readFile(outputFileName);
    const blob = new Blob([fileArray], { type: 'application/vnd.openxmlformats-officedocument.wordprocessingml.document' });
    const url = URL.createObjectURL(blob);
    const a = document.createElement('a');
    a.href = url;
    a.download = outputFileName;
    a.click();
    URL.revokeObjectURL(url);
  };

  return (
    <div style={{ textAlign: 'center', height: '300px' }}>
      <h1>Add Picture Content Control</h1>
      <button onClick={addPictureControl}>Generate Document</button>
    </div>
  );
}

export default App;
Document after adding a picture content control:
FAQ
What is the difference between a content control and ordinary text
Ordinary text is just a run of characters in a paragraph, so a program can only find it by position or by its text content. A content control is a separate object with a type, alias, tag and lock state, whose business meaning can be read directly through SDTProperties. In Word it also indicates the fillable area with a tag or a border. For templates that need to collect data and be reused repeatedly, content controls are usually easier to maintain.
What can I do if the generated content control shows no border in Word
With the default appearance, the control looks much the same as ordinary text. Set SDTProperties.Appearance to SdtAppearance.Tags to show alias tags on both sides of the control, or to SdtAppearance.BoundingBox to show a border in Word's editing view. Appearance only affects the display; it does not change the control type or the content.
How should I choose between a text content control and a rich text content control
If the field only accepts plain text and the person filling it in should not change the font or color, choose a text content control. If formats such as bold and color have to be preserved inside the control, or the content is itself a passage with emphasis, choose a rich text content control. In code the two differ only in SDTType and in how the content fragments are organized.
Why does the size set for a picture content control differ slightly from the actual size
When both DocPicture.Width and Height are set, the picture is scaled proportionally according to its original aspect ratio, so the final size may differ from the set values by one or two points. For an exact size, set only one dimension and let the other be calculated from the ratio, or crop the source picture to the target ratio before inserting it.
Get a Free License
Spire.Doc for JavaScript offers a 30-day full-featured free trial license with no functional limitations. Apply here to evaluate before purchasing.
