Удаление разрывов страниц в Excel: Руководство по ручному и автоматическому режимам (2025)
Содержание
Нежелательные разрывы страниц в Excel могут нарушить макет вашего листа и сделать печать данных утомительной. Они часто появляются после изменения настроек печати, корректировки полей или переключения режимов просмотра. Независимо от того, вставлены ли разрывы страниц вручную или добавлены Excel автоматически, знание того, как их удалить, поможет вам поддерживать чистоту и профессиональный вид листа.
Эта статья покажет вам, как удалять разрывы страниц в Excel, включая как ручные, так и автоматические разрывы страниц. В ней также рассматривается, как скрыть разрывы страниц и предлагаются решения для пакетного удаления для нескольких листов или книг.
- Понимание разрывов страниц в Excel (ручные и автоматические)
- Как удалить ручные разрывы страниц в Excel
- Как удалить автоматические разрывы страниц в Excel
- Скрыть разрывы страниц в обычном режиме
- Пакетное удаление разрывов страниц в Excel с помощью Python
Понимание разрывов страниц в Excel (ручные и автоматические)
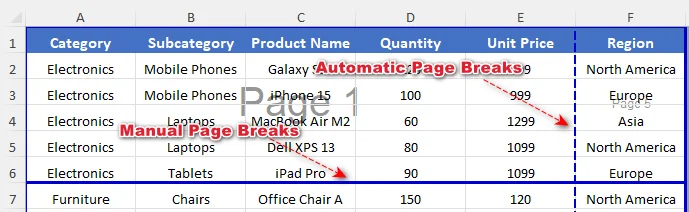
Прежде чем удалять разрывы страниц, важно знать два основных типа, которые использует Excel:
- Ручные разрывы страниц: Вставляются пользователями для контроля того, где заканчивается страница при печати.
- Автоматические разрывы страниц: Добавляются Excel на основе полей, размера бумаги, настроек масштабирования и области печати.
Вы можете использовать Предварительный просмотр разрывов страниц для определения типов разрывов страниц. Ручные разрывы отображаются сплошными синими линиями, а автоматические — пунктирными синими линиями.
Метод удаления зависит от того, с каким типом разрыва страницы вы имеете дело.
Как удалить ручные разрывы страниц в Excel
Вы можете удалять отдельные ручные разрывы страниц или очищать все ручные разрывы страниц на листе по мере необходимости. Для массовых операций скрипты Excel VBA позволяют эффективно удалять разрывы страниц на нескольких листах.
Удалить ручной разрыв страницы
Вы можете удалить определенный ручной разрыв страницы на листе Excel, выбрав правильную ячейку рядом с разрывом. Вот как это сделать:
-
Перейдите на вкладку Вид на ленте и нажмите Предварительный просмотр разрывов страниц в группе Режимы просмотра книги.
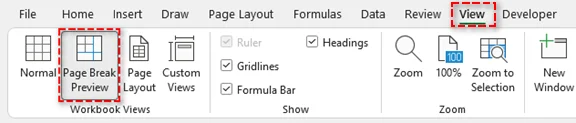
Вы также можете нажать на значок Предварительный просмотр разрывов страниц в строке состояния (внизу справа).
-
Определите ручной разрыв страницы (сплошная синяя линия), который вы хотите удалить.
-
Выберите ячейку рядом с разрывом страницы:
-
Для горизонтального разрыва страницы выберите любую ячейку ниже разрыва.
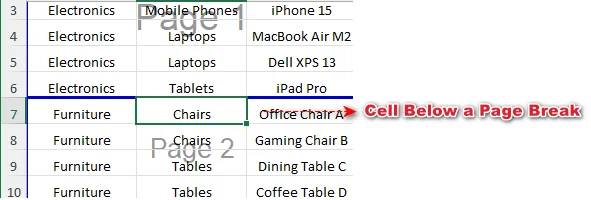
-
Для вертикального разрыва страницы выберите любую ячейку справа от разрыва.

-
-
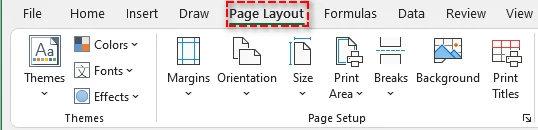
Перейдите на вкладку Разметка страницы на ленте.
-
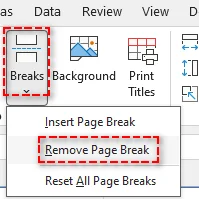
Нажмите Разрывы, затем выберите Удалить разрыв страницы.
Это удаляет только выбранный ручной разрыв страницы, а остальная часть листа останется без изменений.
Совет: Вы также можете щелкнуть ячейку правой кнопкой мыши и выбрать Удалить разрыв страницы, чтобы удалить разрыв. Или напрямую перетащить линию разрыва за пределы области предварительного просмотра разрывов страниц, если в вашем Excel включена функция перетаскивания.
Удалить все ручные разрывы страниц с листа
Если на вашем листе несколько ручных разрывов страниц, их одновременное удаление может сэкономить время. Выполните следующие шаги:
-
Выберите любую ячейку на листе.
-
Перейдите на вкладку Разметка страницы на ленте.
-
Нажмите Разрывы > Сбросить все разрывы страниц.
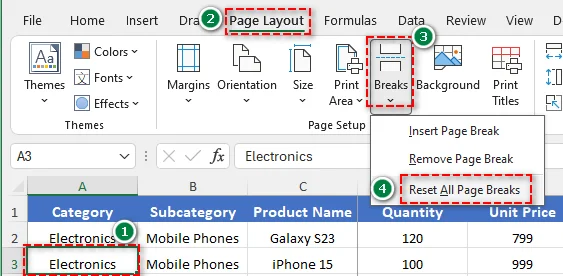
Это удаляет все вручную вставленные разрывы страниц с активного листа.
Удалить ручные разрывы страниц с нескольких листов с помощью VBA
Если вам нужно одновременно удалить ручные разрывы страниц с нескольких листов, использование VBA (Visual Basic for Applications) является наиболее эффективным решением. Вот как это сделать:
-
Нажмите Alt + F11 (Windows) или Option + F11 (Mac), чтобы открыть редактор VBA.
-
В редакторе перейдите в Insert > Module.
-
Скопируйте и вставьте следующий код:
Sub ResetPageBreaksAllSheets() Dim ws As Worksheet For Each ws In ActiveWorkbook.Worksheets ws.ResetAllPageBreaks Next ws End Sub -
Нажмите F5, чтобы выполнить макрос.
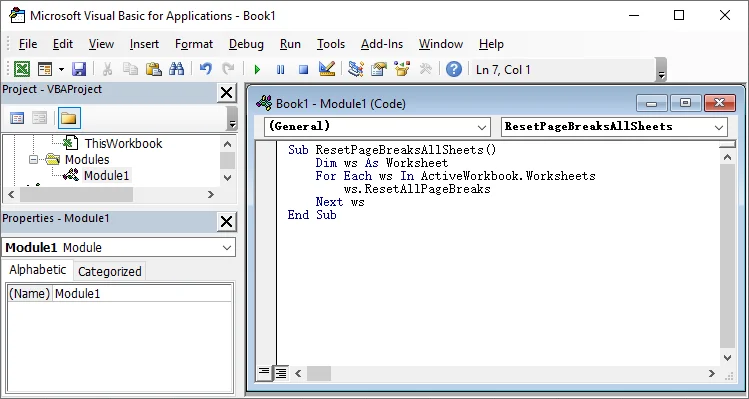
Все ручные разрывы страниц на каждом листе в активной книге будут удалены одновременно.
Как удалить автоматические разрывы страниц в Excel
Автоматические разрывы страниц в Excel нельзя удалить полностью. Однако вы можете управлять ими, настраивая параметры макета, такие как масштабирование, поля, ориентация страницы и область печати. Оптимизация этих настроек позволяет разместить больше содержимого на каждой странице и уменьшить количество нежелательных разрывов.
Чтобы уменьшить количество автоматических разрывов страниц:
- Изменить масштабирование
Перейдите в Разметка страницы > Вписать, установите Ширина и Высота на Авто или увеличьте процент масштабирования.
Размещение большего количества содержимого на странице уменьшает количество автоматических разрывов страниц. - Настроить поля
Перейдите в Разметка страницы > Поля и выберите Узкие или Настраиваемые поля.
Меньшие поля расширяют область печати и помогают уменьшить количество разрывов страниц. - Изменить ориентацию страницы
Перейдите в Разметка страницы > Ориентация и переключитесь с Книжной на Альбомную.
Более широкие страницы вмещают больше столбцов, уменьшая количество вертикальных разрывов страниц. - Очистить область печати
Перейдите в Разметка страницы > Область печати и очистите область печати, если она ограничивает диапазон содержимого.
Очистка области печати гарантирует, что Excel точно рассчитает автоматические разрывы страниц и избежит ненужных разрывов.
Скрыть разрывы страниц в обычном режиме
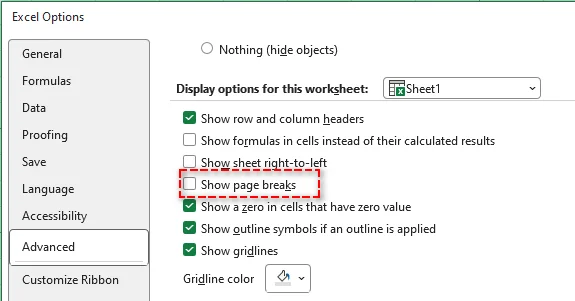
Иногда пользователи хотят скрыть линии разрывов страниц в Excel, не изменяя поведение при печати. Это полезно, если линии разрывов появляются после входа в Предварительный просмотр. Выполните следующие шаги:
-
Нажмите Файл > Параметры.
-
Перейдите в Дополнительно.
-
Прокрутите до Параметры отображения для этого листа.
-
Снимите флажок Показывать разрывы страниц.
-
Нажмите ОК.
Примечание: Это действие не удаляет разрывы страниц. Оно только скрывает линии разрывов страниц на экране и не влияет на макет печати. Если флажок Показывать разрывы страниц нельзя снять, убедитесь, что лист находится в режиме Обычный, а не в режиме Предварительный просмотр разрывов страниц.
Пакетное удаление разрывов страниц в Excel с помощью Python
Ручное удаление разрывов страниц из нескольких книг Excel может занять много времени. Используя Python и библиотеки, такие как Spire.XLS for Python, вы можете пакетно удалить все разрывы страниц в нескольких файлах, экономя время и обеспечивая единообразное форматирование.

Шаги для пакетного удаления с помощью Python:
-
Установите Spire.XLS из PyPI с помощью pip:
pip install spire.xls -
Напишите скрипт Python для пакетного удаления разрывов страниц из нескольких файлов Excel
from spire.xls import * import os input_folder = "input_excels" output_folder = "output_excels" for file_name in os.listdir(input_folder): if file_name.endswith(".xlsx"): # Load workbook workbook = Workbook() workbook.LoadFromFile(os.path.join(input_folder, file_name)) # Clear page breaks in all worksheets for sheet in workbook.Worksheets: sheet.HPageBreaks.Clear() sheet.VPageBreaks.Clear() sheet.ViewMode = ViewMode.Preview # Save updated workbook workbook.SaveToFile(os.path.join(output_folder, file_name), ExcelVersion.Version2013) workbook.Dispose() -
Запустите код
Выполните скрипт для автоматического удаления разрывов страниц на целевом листе Excel.
Совет: Вы также можете настроить масштабирование листа, поля и ориентацию страницы в своем коде, чтобы уменьшить количество автоматических разрывов страниц.
Связанная статья: Python: вставка или удаление разрывов страниц в Excel
Заключение
В этом руководстве мы рассмотрели, как удалять разрывы страниц в Excel, включая как ручные, так и автоматические разрывы страниц. Следуя этим шагам, вы сможете эффективно очистить свои листы и поддерживать их в организованном и готовом к печати виде.
Ищете больше качественных руководств по Excel? Ознакомьтесь с нашими бесплатными ресурсами по Excel.
Часто задаваемые вопросы: удаление разрывов страниц в Excel
В1: В чем разница между ручными и автоматическими разрывами страниц?
О1: Ручные разрывы страниц вставляются пользователями для точного контроля мест разрыва страниц при печати, в то время как автоматические разрывы страниц добавляются Excel на основе настроек печати и макета.
В2: Могу ли я удалить разрывы страниц, не затрагивая печать?
О2: Да. Вы можете скрыть линии разрывов страниц в обычном режиме просмотра листа. Это влияет только на их отображение на экране; разрывы остаются в файле и все еще могут влиять на печать.
В3: Почему я не могу удалить некоторые разрывы страниц в Excel?
О3: Автоматические разрывы страниц нельзя удалить напрямую. Они контролируются Excel для поддержания макета печати, но вы можете влиять на них, настраивая поля, масштабирование, размер бумаги или область печати.
В4: Как удалить разрывы страниц на нескольких листах одновременно?
О4: Самый эффективный способ удалить разрывы страниц на нескольких листах в Excel — использовать VBA или Python. Это позволяет быстро и последовательно очищать все ручные разрывы страниц в больших книгах или нескольких файлах.
Смотрите также
Converter TXT para Word: 4 Métodos Fáceis e Gratuitos
Índice
- Método 1: Usando o Microsoft Word (Offline)
- Método 2: Usando o Conversor Online de TXT para Word
- Método 3: Usando o Google Docs (Gratuito e Baseado na Nuvem)
- Método 4: Programação em C# (Conversão em Lote/Automatizada)
- Dicas para uma Conversão de TXT para Word Bem-Sucedida
- Solução de Problemas Comuns
- Perguntas Frequentes
Os arquivos TXT são amplamente utilizados por sua simplicidade e compatibilidade em todos os dispositivos, mas carecem de opções de formatação como fontes, tabelas ou imagens que tornam os documentos profissionais. Se você precisa preparar um relatório, redigir um ensaio ou criar um documento de negócios, converter TXT para Word é uma tarefa comum que pode economizar seu tempo e melhorar a qualidade do seu trabalho.
Neste artigo, compartilharemos os métodos de conversão de TXT para Word mais eficazes e fáceis de usar, incluindo ferramentas offline, conversores online e fluxos de trabalho de programação automatizados. Ao final, você poderá escolher a melhor abordagem para suas necessidades e concluir a conversão em minutos.
- Método 1: Usando o Microsoft Word (Offline)
- Método 2: Usando o Conversor Online de TXT para Word
- Método 3: Usando o Google Docs (Gratuito e Baseado na Nuvem)
- Método 4: Programação em C# (Conversão em Lote/Automatizada)
- Dicas para uma Conversão de TXT para Word Bem-Sucedida
- Solução de Problemas Comuns
- Perguntas Frequentes
Método 1: Usando o Microsoft Word (Offline)
O Microsoft Word é o processador de texto mais popular e possui um recurso integrado para abrir e converter arquivos TXT diretamente. Este método é ideal se você já tem o Word instalado no seu computador, pois garante 100% de precisão na formatação (para texto simples) e não requer ferramentas de terceiros.
Guia passo a passo para converter arquivo de texto para Word:
- Abra o Microsoft Word e clique em “Arquivo” > “Abrir”.
- Na janela do explorador de arquivos, navegue até a pasta onde seu arquivo TXT está armazenado.
- No menu suspenso “Tipo de arquivo”, selecione “Texto Simples (*.txt)” para filtrar os arquivos TXT.
- Selecione seu arquivo TXT e clique em “Abrir”, depois escolha a codificação apropriada.
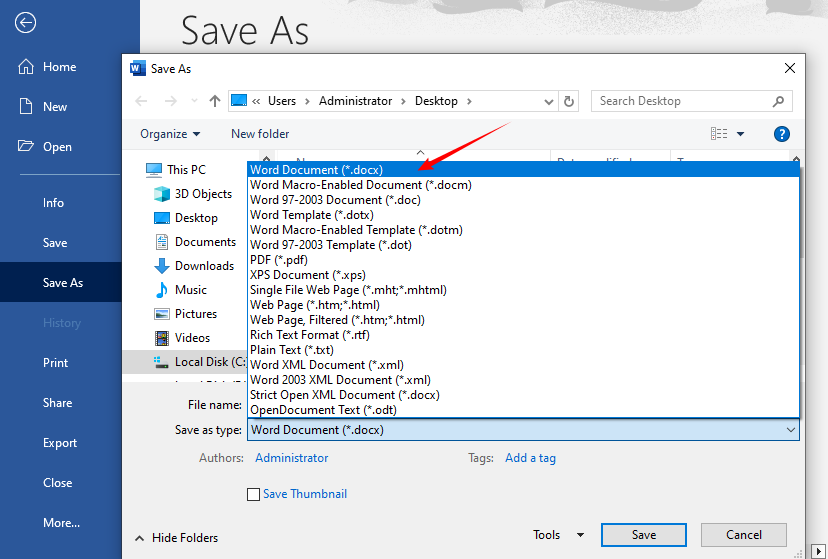
- Assim que o conteúdo do TXT for exibido no Word, clique em “Arquivo” novamente e selecione “Salvar Como”.
- Escolha um local para salvar, selecione “Documento do Word (*.docx)” ou “Documento do Word 97-2003 (*.doc)” como o formato do arquivo e clique em “Salvar”.
Dica: Se o seu arquivo TXT tiver caracteres especiais (por exemplo, acentos, símbolos), certifique-se de que a opção “Codificação” no Assistente de Importação de Texto esteja definida como “UTF-8” para preservá-los durante a conversão.
Método 2: Usando o Conversor Online de TXT para Word
Se você não tem o Microsoft Word instalado, os conversores online são uma ótima alternativa. Eles funcionam em qualquer dispositivo com conexão à internet (Windows, Mac, celular, tablet) e não exigem downloads.
Conversores Recomendados:
- CLOUDXDOCS: Converta arquivos TXT para Word sem anúncios ou marcas d'água
- FreeConvert: Conversor online fácil de usar com uma interface limpa
- Convertio: Suporta conversão em lote e converte TXT para doc/docx
Passos para converter TXT para Word online:
- Visite o site do conversor escolhido
- Envie seu arquivo TXT (arraste e solte ou procure)
- Selecione "DOC" ou "DOCX" como formato de saída
- Clique no botão "Converter" ou "Iniciar"
- Baixe o documento Word convertido
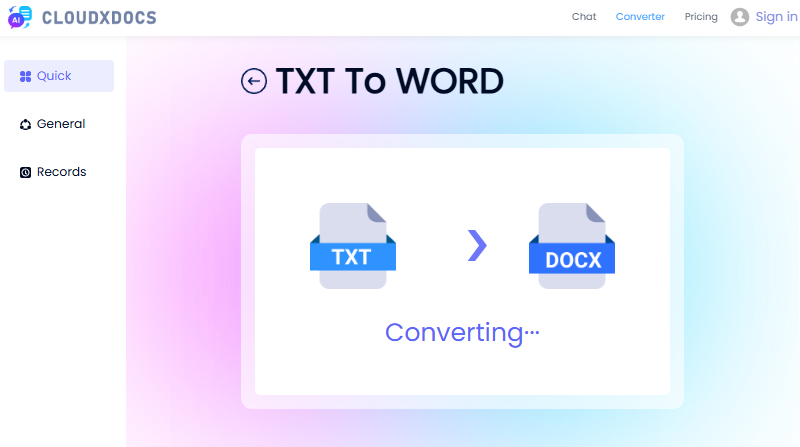
Exemplo de uso do CLOUDXDOCS:
Nota de Segurança: Para documentos sensíveis, considere métodos offline, pois as ferramentas online armazenam temporariamente os arquivos em seus servidores.
Você também pode gostar: Converta Texto para PDF Facilmente: 4 Métodos Rápidos e Profissionais
Método 3: Usando o Google Docs (Gratuito e Baseado na Nuvem)
O Google Docs é um processador de texto gratuito baseado na nuvem que permite abrir, editar e converter arquivos de texto para arquivos do Word sem instalar software. É perfeito para usuários que preferem armazenamento em nuvem e colaboração.
Guia passo a passo para converter TXT para Word gratuitamente:
- Abra seu navegador e vá para Google Docs. Clique no documento “Em branco” para criar um novo arquivo.
- Clique em “Arquivo” > “Abrir” no menu superior. Na janela “Abrir um arquivo”, clique na guia “Upload”.
- Arraste e solte seu arquivo TXT na área de upload ou clique em “Procurar” para escolhê-lo manually.
- Assim que o arquivo TXT for carregado, ele será aberto no Google Docs.
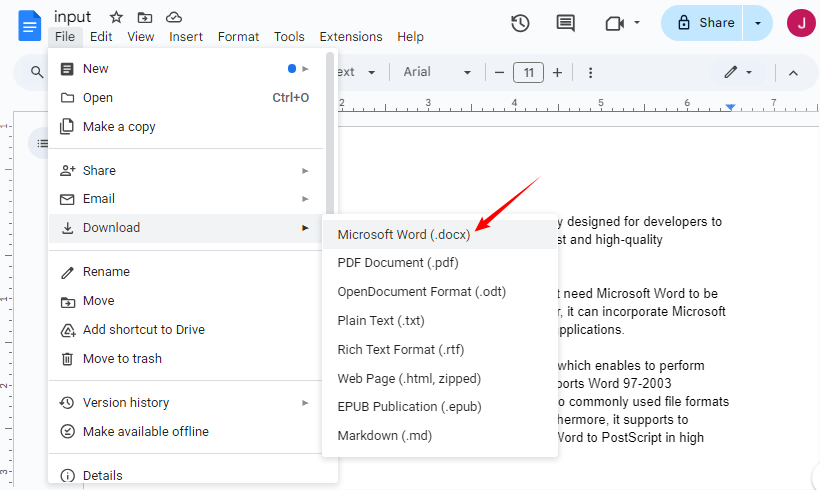
- Clique em “Arquivo” > “Fazer download” > “Microsoft Word (.docx)” no menu suspenso.
- O arquivo Word convertido será baixado automaticamente para o seu dispositivo.
✔ Ideal para: Edição colaborativa ou usuários que trabalham em vários dispositivos.
Método 4: Programação em C# (Conversão em Lote/Automatizada)
Para desenvolvedores ou equipes que precisam converter centenas de arquivos TXT (ou integrar a conversão em um aplicativo .NET), a abordagem em C# com o Free Spire.Doc for .NET é eficiente e escalável.
O que é o Free Spire.Doc for .NET?
Free Spire.Doc é uma biblioteca .NET gratuita que permite criar, editar e converter documentos do Word (DOC/DOCX) em C#/VB.NET sem instalar o Microsoft Office. Ele suporta o desenvolvimento multiplataforma e é ideal para fluxos de trabalho automatizados (por exemplo, converter arquivos TXT enviados por usuários em um aplicativo da web).
Passos para converter TXT para Word em C#
- Instalar via NuGet:
Install-Package FreeSpire.Doc
- Código C# Completo:
using Spire.Doc;

namespace ConvertTextToWord
{
    internal class Program
    {
        static void Main(string[] args)
        {
            // Create a Document object
            Document doc = new Document();
            // Load a text file
            doc.LoadText("Sample.txt");

            // Save the text file in Word format
            doc.SaveToFile("TextToWord.docx", FileFormat.Docx2016);
            doc.Close();
        }
    }
}
Este código carrega um arquivo TXT e o salva no formato DOCX através do método SaveToFile(). Além disso, o Free Spire.Doc também suporta a conversão de arquivos do Word de volta para arquivos TXT via C#.
Dicas para uma Conversão de TXT para Word Bem-Sucedida
Para evitar problemas comuns (por exemplo, texto ausente, erros de formatação), siga estas dicas:
- Faça backup do seu arquivo TXT original antes da conversão: Em caso de erros, você pode reverter para a versão original.
- Verifique as quebras de linha: Os arquivos TXT geralmente têm quebras de linha manuais. Após a conversão, use o recurso “Substituir” do Word (Ctrl+H) para remover quebras de linha extras, se necessário.
- Evite arquivos TXT grandes com conversores online: A maioria das ferramentas online gratuitas tem limites de tamanho de arquivo (50MB-100MB). Para arquivos grandes, use o Microsoft Word ou o Google Docs.
- Verifique os caracteres especiais: Se o seu arquivo TXT contiver caracteres ou símbolos não ingleses, verifique o arquivo Word convertido para garantir que eles sejam preservados.
Solução de Problemas Comuns
| Problema | Solução |
|---|---|
| Formatação perdida | Arquivos TXT não contêm formatação; reaplique os estilos no Word após a conversão. |
| Caracteres especiais são exibidos incorretamente | Certifique-se de que a codificação UTF-8 esteja selecionada durante a importação. |
| O arquivo não converte | Verifique se o arquivo não está corrompido ou protegido por senha. |
| O arquivo convertido é muito grande | Salve como DOCX, exclua linhas em branco não utilizadas ou comprima imagens (se adicionadas após a conversão). |
Conclusão
Converter TXT para o formato Word é simples com a abordagem certa. Para a maioria dos usuários, abrir diretamente o arquivo TXT no Microsoft Word oferece os melhores resultados. Para aqueles sem acesso ao Word, ferramentas online gratuitas ou o Google Docs oferecem alternativas confiáveis. Se você é um desenvolvededor que precisa de escalabilidade, o método em C# com o Free Spire.Doc permite automatizar conversões em lote e personalizar a formatação
Seja para aprimorar um único documento ou construir um fluxo de trabalho automatizado, esses métodos cobrem todos os casos de uso para a conversão de TXT para Word. Lembre-se de que, embora a conversão seja direta, a formatação precisará ser aplicada posteriormente, já que os arquivos de texto simples contêm apenas conteúdo bruto.
Perguntas Frequentes
P: A conversão de TXT para Word é gratuita?
R: Sim, existem vários métodos gratuitos, incluindo ferramentas online, o Google Docs e o uso da biblioteca .NET gratuita.
P: A conversão de TXT para Word preserva a formatação?
R: Os arquivos TXT não contêm dados de formatação, então você precisará aplicar a formatação no Word após a conversão.
P: Como posso converter vários arquivos TXT para Word de uma vez?
R: Você pode:
- Usar um conversor em lote online como o Convertio.
- Escrever um script em C# usando o Free Spire.Doc para percorrer todos os arquivos TXT em uma pasta com
Directory.GetFiles( @"C:\Documents\", "*.txt")e repetir a lógica de conversão para cada arquivo.
P: Qual é a diferença entre los formatos DOC e DOCX?
R: DOC é o formato binário mais antigo usado no Word 97–2003. DOCX é o formato mais novo, baseado em XML (usado desde o Word 2007), com melhor compressão de arquivo, segurança e recursos de recuperação. DOCX é recomendado, a menos que você precise de compatibilidade com software muito antigo.
Veja Também
TXT를 Word로 변환: 쉽고 무료인 4가지 방법
TXT 파일은 단순성과 모든 장치에서의 호환성 때문에 널리 사용되지만, 문서를 전문적으로 보이게 하는 글꼴, 표, 이미지와 같은 서식 옵션이 부족합니다. 보고서를 준비하거나, 에세이 초안을 작성하거나, 비즈니스 문서를 만들어야 할 때, TXT를 Word로 변환하는 것은 시간을 절약하고 작업 품질을 향상시킬 수 있는 일반적인 작업입니다.
이 기사에서는 오프라인 도구, 온라인 변환기, 자동화된 프로그래밍 워크플로우를 포함하여 가장 효과적이고 사용자 친화적인 TXT를 Word로 변환하는 방법을 공유합니다. 이 글을 다 읽고 나면, 필요에 가장 적합한 방법을 선택하고 몇 분 안에 변환을 완료할 수 있게 될 것입니다.
- 방법 1: Microsoft Word 사용 (오프라인)
- 방법 2: 온라인 TXT를 Word로 변환기 사용
- 방법 3: Google Docs 사용 (무료 및 클라우드 기반)
- 방법 4: C# 프로그래밍 (일괄/자동 변환)
- 성공적인 TXT를 Word로 변환하기 위한 팁
- 일반적인 문제 해결
- 자주 묻는 질문
방법 1: Microsoft Word 사용 (오프라인)
Microsoft Word는 가장 인기 있는 워드 프로세서이며, TXT 파일을 직접 열고 변환하는 내장 기능이 있습니다. 이 방법은 컴퓨터에 Word가 이미 설치되어 있는 경우에 이상적이며, (일반 텍스트에 대해) 100% 서식 정확도를 보장하고 타사 도구가 필요하지 않습니다.
텍스트 파일을 Word로 변환하는 단계별 안내:
- Microsoft Word를 열고 “파일” > “열기”를 클릭합니다.
- 파일 탐색기 창에서 TXT 파일이 저장된 폴더로 이동합니다.
- “파일 형식” 드롭다운에서 “일반 텍스트 (*.txt)”를 선택하여 TXT 파일을 필터링합니다.
- TXT 파일을 선택하고 “열기”를 클릭한 다음, 적절한 인코딩을 선택합니다.
- TXT 내용이 Word에 표시되면 다시 “파일”을 클릭하고 “다른 이름으로 저장”을 선택합니다.
- 저장 위치를 선택하고 파일 형식으로 “Word 문서 (*.docx)” 또는 “Word 97-2003 문서 (*.doc)”를 선택한 다음 “저장”을 클릭합니다.
팁: TXT 파일에 특수 문자(예: 악센트, 기호)가 있는 경우, 변환 중에 문자를 보존하기 위해 텍스트 가져오기 마법사의 “인코딩” 옵션이 “UTF-8”로 설정되었는지 확인하십시오.
방법 2: 온라인 TXT를 Word로 변환기 사용
Microsoft Word가 설치되어 있지 않은 경우, 온라인 변환기는 훌륭한 대안입니다. 인터넷에 연결된 모든 장치(Windows, Mac, 휴대폰, 태블릿)에서 작동하며 다운로드가 필요 없습니다.
추천 변환기:
- CLOUDXDOCS: 광고나 워터마크 없이 TXT를 Word 파일로 변환
- FreeConvert: 깔끔한 인터페이스를 갖춘 사용자 친화적인 온라인 변환기
- Convertio: 일괄 변환을 지원하며 TXT를 doc/docx로 변환
온라인에서 TXT를 Word로 변환하는 단계:
- 선택한 변환기 웹사이트를 방문하세요
- TXT 파일을 업로드하세요 (드래그 앤 드롭 또는 찾아보기)
- 출력 형식으로 "DOC" 또는 "DOCX"를 선택하세요
- "변환" 또는 "시작" 버튼을 클릭하세요
- 변환된 Word 문서를 다운로드하세요
CLOUDXDOCS 사용 예시:
보안 참고: 민감한 문서의 경우, 온라인 도구는 파일을 서버에 일시적으로 저장하므로 오프라인 방법을 고려하십시오.
관심 있을 만한 글: 텍스트를 PDF로 쉽게 변환하기: 4가지 빠르고 전문적인 방법
방법 3: Google Docs 사용 (무료 및 클라우드 기반)
Google Docs는 소프트웨어 설치 없이 텍스트 파일을 열고, 편집하고, Word 파일로 변환할 수 있는 무료 클라우드 기반 워드 프로세서입니다. 클라우드 저장소와 협업을 선호하는 사용자에게 적합합니다.
무료로 TXT를 Word로 변환하는 단계별 안내:
- 브라우저를 열고 Google Docs로 이동합니다. “내용 없음” 문서를 클릭하여 새 파일을 만듭니다.
- 상단 메뉴에서 “파일” > “열기”를 클릭합니다. “파일 열기” 창에서 “업로드” 탭을 클릭합니다.
- TXT 파일을 업로드 영역으로 드래그 앤 드롭하거나, “찾아보기”를 클릭하여 수동으로 선택합니다.
- TXT 파일이 업로드되면 Google Docs에서 열립니다.
- 드롭다운 메뉴에서 “파일” > “다운로드” > “Microsoft Word (.docx)”를 클릭합니다.
- 변환된 Word 파일이 장치에 자동으로 다운로드됩니다.
✔ 최적 대상: 협업 편집 또는 여러 장치에서 작업하는 사용자.
방법 4: C# 프로그래밍 (일괄/자동 변환)
수백 개의 TXT 파일을 변환해야 하거나 .NET 앱에 변환 기능을 통합해야 하는 개발자나 팀에게는 Free Spire.Doc for .NET을 사용한 C# 접근 방식이 효율적이고 확장 가능합니다.
Free Spire.Doc for .NET이란?
Free Spire.Doc은 Microsoft Office를 설치하지 않고도 C#/VB.NET에서 Word 문서(DOC/DOCX)를 생성, 편집 및 변환할 수 있는 무료 .NET 라이브러리입니다. 크로스플랫폼 개발을 지원하며 자동화된 워크플로우(예: 웹 앱에서 사용자가 업로드한 TXT 파일 변환)에 이상적입니다.
C#에서 TXT를 Word로 변환하는 단계
- NuGet을 통해 설치:
Install-Package FreeSpire.Doc
- 전체 C# 코드:
using Spire.Doc;

namespace ConvertTextToWord
{
    internal class Program
    {
        static void Main(string[] args)
        {
            // Create a Document object
            Document doc = new Document();
            // Load a text file
            doc.LoadText("Sample.txt");

            // Save the text file in Word format
            doc.SaveToFile("TextToWord.docx", FileFormat.Docx2016);
            doc.Close();
        }
    }
}
이 코드는 TXT 파일을 로드하고 SaveToFile() 메서드를 통해 DOCX 형식으로 저장합니다. 또한 Free Spire.Doc은 C#을 통해 Word 파일을 다시 TXT 파일로 변환하는 것도 지원합니다.
성공적인 TXT를 Word로 변환하기 위한 팁
일반적인 문제(예: 텍스트 누락, 서식 오류)를 피하려면 다음 팁을 따르십시오:
- 변환 전 원본 TXT 파일 백업: 오류가 발생할 경우 원본 버전으로 되돌릴 수 있습니다.
- 줄 바꿈 확인: TXT 파일에는 종종 수동 줄 바꿈이 있습니다. 변환 후 필요한 경우 Word의 “바꾸기” 기능(Ctrl+H)을 사용하여 추가 줄 바꿈을 제거하십시오.
- 온라인 변환기로 큰 TXT 파일 피하기: 대부분의 무료 온라인 도구에는 파일 크기 제한(50MB-100MB)이 있습니다. 큰 파일의 경우 Microsoft Word 또는 Google Docs를 사용하십시오.
- 특수 문자 확인: TXT 파일에 영어가 아닌 문자나 기호가 포함된 경우, 변환된 Word 파일을 확인하여 보존되었는지 확인하십시오.
일반적인 문제 해결
| 문제 | 해결책 |
|---|---|
| 서식 손실 | TXT 파일에는 서식이 포함되어 있지 않습니다. 변환 후 Word에서 스타일을 다시 적용하십시오. |
| 특수 문자가 잘못 표시됨 | 가져오는 동안 UTF-8 인코딩이 선택되었는지 확인하십시오. |
| 파일이 변환되지 않음 | 파일이 손상되지 않았거나 암호로 보호되어 있지 않은지 확인하십시오. |
| 변환된 파일이 너무 큼 | DOCX로 저장하고, 사용하지 않는 빈 줄을 삭제하거나, (변환 후 추가된 경우) 이미지를 압축하십시오. |
결론
TXT를 Word 형식으로 변환하는 것은 올바른 접근 방식을 사용하면 간단합니다. 대부분의 사용자에게는 Microsoft Word에서 직접 TXT 파일을 여는 것이 최상의 결과를 제공합니다. Word에 액세스할 수 없는 사용자에게는 무료 온라인 도구나 Google Docs가 신뢰할 수 있는 대안을 제공합니다. 확장성이 필요한 개발자라면 Free Spire.Doc을 사용한 C# 방법을 통해 일괄 변환을 자동화하고 서식을 사용자 지정할 수 있습니다.
단일 문서를 다듬거나 자동화된 워크플로우를 구축하든, 이 방법들은 TXT를 Word로 변환하는 모든 사용 사례를 다룹니다. 변환은 간단하지만, 일반 텍스트 파일에는 원시 콘텐츠만 포함되어 있으므로 나중에 서식을 적용해야 한다는 점을 기억하십시오.
자주 묻는 질문
Q: TXT를 Word로 변환하는 것은 무료인가요?
A: 예, 온라인 도구, Google Docs, 무료 .NET 라이브러리 사용을 포함하여 여러 무료 방법이 있습니다.
Q: TXT를 Word로 변환하면 서식이 유지되나요?
A: TXT 파일에는 서식 데이터가 포함되어 있지 않으므로 변환 후 Word에서 서식을 적용해야 합니다.
Q: 여러 TXT 파일을 한 번에 Word로 변환하려면 어떻게 해야 하나요?
A: 다음을 수행할 수 있습니다:
- Convertio와 같은 온라인 일괄 변환기를 사용합니다.
- Free Spire.Doc을 사용하여 C# 스크립트를 작성하여
Directory.GetFiles( @"C:\Documents\", "*.txt")로 폴더의 모든 TXT 파일을 반복하고 각 파일에 대해 변환 로직을 반복합니다.
Q: DOC와 DOCX 형식의 차이점은 무엇인가요?
A: DOC는 Word 97–2003에서 사용된 이전 바이너리 형식입니다. DOCX는 더 나은 파일 압축, 보안 및 복구 기능을 갖춘 최신 XML 기반 형식(Word 2007부터 사용)입니다. 매우 오래된 소프트웨어와의 호환성이 필요하지 않은 한 DOCX를 권장합니다.
관련 항목
Convertire TXT in Word: 4 metodi facili e gratuiti
Indice
- Metodo 1: Utilizzo di Microsoft Word (Offline)
- Metodo 2: Utilizzo di un convertitore online da TXT a Word
- Metodo 3: Utilizzo di Google Docs (Gratuito e basato su cloud)
- Metodo 4: Programmazione C# (Conversione batch/automatizzata)
- Suggerimenti per una conversione da TXT a Word di successo
- Risoluzione dei problemi comuni
- Domande frequenti
I file TXT sono ampiamente utilizzati per la loro semplicità e compatibilità su tutti i dispositivi, ma mancano di opzioni di formattazione come caratteri, tabelle o immagini che rendono i documenti professionali. Che tu debba preparare un rapporto, redigere un saggio o creare un documento aziendale, convertire TXT in Word è un'attività comune che può farti risparmiare tempo e migliorare la qualità del tuo lavoro.
In questo articolo, condivideremo i metodi di conversione da TXT a Word più efficaci e facili da usare, inclusi strumenti offline, convertitori online e flussi di lavoro di programmazione automatizzati. Alla fine, sarai in grado di scegliere l'approccio migliore per le tue esigenze e completare la conversione in pochi minuti.
- Metodo 1: Utilizzo di Microsoft Word (Offline)
- Metodo 2: Utilizzo di un convertitore online da TXT a Word
- Metodo 3: Utilizzo di Google Docs (Gratuito e basato su cloud)
- Metodo 4: Programmazione C# (Conversione batch/automatizzata)
- Suggerimenti per una conversione da TXT a Word di successo
- Risoluzione dei problemi comuni
- Domande frequenti
Metodo 1: Utilizzo di Microsoft Word (Offline)
Microsoft Word è l'elaboratore di testi più popolare e dispone di una funzione integrata per aprire e convertire direttamente i file TXT. Questo metodo è ideale se hai già Word installato sul tuo computer, poiché garantisce una precisione di formattazione del 100% (per il testo semplice) e non richiede strumenti di terze parti.
Guida passo passo per convertire un file di testo in Word:
- Apri Microsoft Word, quindi fai clic su “File” > “Apri”.
- Nella finestra di esplorazione file, vai alla cartella in cui è archiviato il tuo file TXT.
- Nel menu a discesa “Tipo file”, seleziona “Testo normale (*.txt)” per filtrare i file TXT.
- Seleziona il tuo file TXT e fai clic su “Apri”, quindi scegli la codifica appropriata.
- Una volta visualizzato il contenuto del TXT in Word, fai di nuovo clic su “File” e seleziona “Salva con nome”.
- Scegli una posizione di salvataggio, seleziona “Documento di Word (*.docx)” o “Documento di Word 97-2003 (*.doc)” come formato file e fai clic su “Salva”.
Suggerimento: se il tuo file TXT contiene caratteri speciali (ad es. accenti, simboli), assicurati che l'opzione “Codifica” nella procedura guidata di importazione del testo sia impostata su “UTF-8” per preservarli durante la conversione.
Metodo 2: Utilizzo di un convertitore online da TXT a Word
Se non hai installato Microsoft Word, i convertitori online sono un'ottima alternativa. Funzionano su qualsiasi dispositivo con una connessione Internet (Windows, Mac, telefono, tablet) e non richiedono download.
Convertitori consigliati:
- CLOUDXDOCS: Converti file TXT in Word senza pubblicità o filigrane
- FreeConvert: Convertitore online intuitivo con un'interfaccia pulita
- Convertio: Supporta la conversione batch e converte TXT in doc/docx
Passaggi per convertire TXT in Word online:
- Visita il sito web del convertitore scelto
- Carica il tuo file TXT (trascina e rilascia o sfoglia)
- Seleziona "DOC" o "DOCX" come formato di output
- Fai clic sul pulsante "Converti" o "Avvia"
- Scarica il documento Word convertito
Esempio di utilizzo di CLOUDXDOCS:
Nota sulla sicurezza: per i documenti sensibili, considera i metodi offline poiché gli strumenti online archiviano temporaneamente i file sui loro server.
Potrebbe piacerti anche: Convertire testo in PDF facilmente: 4 metodi rapidi e professionali
Metodo 3: Utilizzo di Google Docs (Gratuito e basato su cloud)
Google Docs è un elaboratore di testi gratuito basato su cloud che ti consente di aprire, modificare e convertire file di testo in file di Word senza installare software. È perfetto per gli utenti che preferiscono l'archiviazione su cloud e la collaborazione.
Guida passo passo per convertire gratuitamente TXT in Word:
- Apri il browser e vai su Google Docs. Fai clic sul documento “Vuoto” per creare un nuovo file.
- Fai clic su “File” > “Apri” dal menu in alto. Nella finestra “Apri un file”, fai clic sulla scheda “Carica”.
- Trascina e rilascia il tuo file TXT nell'area di caricamento o fai clic su “Sfoglia” per sceglierlo manualmente.
- Una volta caricato il file TXT, si aprirà in Google Docs.
- Fai clic su “File” > “Scarica” > “Microsoft Word (.docx)” dal menu a discesa.
- Il file Word convertito verrà scaricato automaticamente sul tuo dispositivo.
✔ Ideale per: Modifica collaborativa o utenti che lavorano su più dispositivi.
Metodo 4: Programmazione C# (Conversione batch/automatizzata)
Per sviluppatori o team che necessitano di convertire centinaia di file TXT (o integrare la conversione in un'app .NET), l'approccio C# con Free Spire.Doc for .NET è efficiente e scalabile.
Cos'è Free Spire.Doc for .NET?
Free Spire.Doc è una libreria .NET gratuita che ti consente di creare, modificare e convertire documenti Word (DOC/DOCX) in C#/VB.NET senza installare Microsoft Office. Supporta lo sviluppo multipiattaforma ed è ideale per flussi di lavoro automatizzati (ad es. conversione di file TXT caricati dall'utente in un'app web).
Passaggi per convertire TXT in Word in C#
- Installa tramite NuGet:
Install-Package FreeSpire.Doc
- Codice C# completo:
using Spire.Doc;

namespace ConvertTextToWord
{
    internal class Program
    {
        static void Main(string[] args)
        {
            // Create a Document object
            Document doc = new Document();
            // Load a text file
            doc.LoadText("Sample.txt");

            // Save the text file in Word format
            doc.SaveToFile("TextToWord.docx", FileFormat.Docx2016);
            doc.Close();
        }
    }
}
Questo codice carica un file TXT e lo salva in formato DOCX tramite il metodo SaveToFile(). Inoltre, Free Spire.Doc supporta anche la conversione di file Word in file TXT tramite C#.
Suggerimenti per una conversione da TXT a Word di successo
Per evitare problemi comuni (ad es. testo mancante, errori di formattazione), segui questi suggerimenti:
- Esegui il backup del file TXT originale prima della conversione: in caso di errori, puoi tornare alla versione originale.
- Controlla le interruzioni di riga: i file TXT hanno spesso interruzioni di riga manuali. Dopo la conversione, utilizza la funzione “Sostituisci” di Word (Ctrl+H) per rimuovere le interruzioni di riga extra se necessario.
- Evita file TXT di grandi dimensioni con i convertitori online: la maggior parte degli strumenti online gratuiti ha limiti di dimensione dei file (50 MB-100 MB). Per file di grandi dimensioni, utilizza Microsoft Word o Google Docs.
- Verifica i caratteri speciali: se il tuo file TXT contiene caratteri o simboli non inglesi, controlla il file Word convertito per assicurarti che vengano preservati.
Risoluzione dei problemi comuni
| Problema | Soluzione |
|---|---|
| Formattazione persa | I file TXT non contengono formattazione; riapplica gli stili in Word dopo la conversione. |
| I caratteri speciali vengono visualizzati in modo errato | Assicurati che la codifica UTF-8 sia selezionata durante l'importazione. |
| Il file non si converte | Verifica che il file non sia danneggiato o protetto da password. |
| Il file convertito è troppo grande | Salva come DOCX, elimina le righe vuote non utilizzate o comprimi le immagini (se aggiunte dopo la conversione). |
Conclusione
Convertire il formato da TXT a Word è semplice con l'approccio giusto. Per la maggior parte degli utenti, l'apertura diretta del file TXT in Microsoft Word fornisce i risultati migliori. Per coloro che non hanno accesso a Word, gli strumenti online gratuiti o Google Docs offrono alternative affidabili. Se sei uno sviluppatore che necessita di scalabilità, il metodo C# con Free Spire.Doc ti consente di automatizzare le conversioni batch e personalizzare la formattazione
Che tu stia perfezionando un singolo documento o creando un flusso di lavoro automatizzato, questi metodi coprono ogni caso d'uso per la conversione da TXT a Word. Ricorda che, sebbene la conversione sia semplice, la formattazione dovrà essere applicata in seguito poiché i file di testo semplice contengono solo contenuto grezzo.
Domande frequenti
D: La conversione da TXT a Word è gratuita?
R: Sì, esistono diversi metodi gratuiti, inclusi strumenti online, Google Docs e l'utilizzo della libreria .NET gratuita.
D: La conversione da TXT a Word preserva la formattazione?
R: I file TXT non contengono dati di formattazione, quindi dovrai applicare la formattazione in Word dopo la conversione.
D: Come posso convertire più file TXT in Word contemporaneamente?
R: Puoi:
- Utilizzare un convertitore batch online come Convertio.
- Scrivere uno script C# utilizzando Free Spire.Doc per scorrere tutti i file TXT in una cartella con
Directory.GetFiles( @"C:\Documents\", "*.txt")e ripetere la logica di conversione per ogni file.
D: Qual è la differenza tra i formati DOC e DOCX?
R: DOC è il vecchio formato binario utilizzato in Word 97–2003. DOCX è il formato più recente, basato su XML (utilizzato da Word 2007) con una migliore compressione dei file, sicurezza e funzionalità di ripristino. Si consiglia DOCX a meno che non sia necessaria la compatibilità con software molto vecchio.
Vedi anche
Convertir TXT en Word : 4 méthodes simples et gratuites
Table des matières
- Méthode 1 : Utilisation de Microsoft Word (hors ligne)
- Méthode 2 : Utilisation d'un convertisseur TXT vers Word en ligne
- Méthode 3 : Utilisation de Google Docs (gratuit et basé sur le cloud)
- Méthode 4 : Programmation C# (conversion par lots/automatisée)
- Conseils pour une conversion TXT vers Word réussie
- Dépannage des problèmes courants
- Foire aux questions
Les fichiers TXT sont largement utilisés pour leur simplicité et leur compatibilité sur tous les appareils, mais ils manquent d'options de mise en forme comme les polices, les tableaux ou les images qui rendent les documents professionnels. Que vous ayez besoin de préparer un rapport, de rédiger un essai ou de créer un document professionnel, la conversion de TXT en Word est une tâche courante qui peut vous faire gagner du temps et améliorer la qualité de votre travail.
Dans cet article, nous partagerons les méthodes de conversion de TXT en Word les plus efficaces et conviviales, y compris les outils hors ligne, les convertisseurs en ligne et les flux de travail de programmation automatisés. À la fin, vous serez en mesure de choisir la meilleure approche pour vos besoins et de terminer la conversion en quelques minutes.
- Méthode 1 : Utilisation de Microsoft Word (hors ligne)
- Méthode 2 : Utilisation d'un convertisseur TXT vers Word en ligne
- Méthode 3 : Utilisation de Google Docs (gratuit et basé sur le cloud)
- Méthode 4 : Programmation C# (conversion par lots/automatisée)
- Conseils pour une conversion TXT vers Word réussie
- Dépannage des problèmes courants
- Foire aux questions
Méthode 1 : Utilisation de Microsoft Word (hors ligne)
Microsoft Word est le traitement de texte le plus populaire, et il dispose d'une fonctionnalité intégrée pour ouvrir et convertir directement les fichiers TXT. Cette méthode est idéale si vous avez déjà installé Word sur votre ordinateur, car elle garantit une précision de mise en forme à 100 % (pour le texte brut) et ne nécessite aucun outil tiers.
Guide étape par étape pour convertir un fichier texte en Word :
- Ouvrez Microsoft Word, puis cliquez sur « Fichier » > « Ouvrir ».
- Dans la fenêtre de l'explorateur de fichiers, accédez au dossier où votre fichier TXT est stocké.
- Dans la liste déroulante « Type de fichier », sélectionnez « Texte brut (*.txt) » pour filtrer les fichiers TXT.
- Sélectionnez votre fichier TXT et cliquez sur « Ouvrir », puis choisissez l'encodage approprié.
- Une fois le contenu TXT affiché dans Word, cliquez à nouveau sur « Fichier » et sélectionnez « Enregistrer sous ».
- Choisissez un emplacement de sauvegarde, sélectionnez « Document Word (*.docx) » ou « Document Word 97-2003 (*.doc) » comme format de fichier, et cliquez sur « Enregistrer ».
Conseil : Si votre fichier TXT contient des caractères spéciaux (par exemple, des accents, des symboles), assurez-vous que l'option « Encodage » dans l'assistant d'importation de texte est définie sur « UTF-8 » pour les préserver lors de la conversion.
Méthode 2 : Utilisation d'un convertisseur TXT vers Word en ligne
Si vous n'avez pas installé Microsoft Word, les convertisseurs en ligne sont une excellente alternative. Ils fonctionnent sur n'importe quel appareil avec une connexion Internet (Windows, Mac, téléphone, tablette) et ne nécessitent aucun téléchargement.
Convertisseurs recommandés :
- CLOUDXDOCS : Convertissez des fichiers TXT en fichiers Word sans publicité ni filigrane
- FreeConvert : Convertisseur en ligne convivial avec une interface claire
- Convertio : Prend en charge la conversion par lots et convertit les fichiers TXT en doc/docx
Étapes pour convertir un fichier TXT en Word en ligne :
- Visitez le site Web du convertisseur de votre choix
- Téléchargez votre fichier TXT (glisser-déposer ou parcourir)
- Sélectionnez « DOC » ou « DOCX » comme format de sortie
- Cliquez sur le bouton « Convertir » ou « Démarrer »
- Téléchargez le document Word converti
Exemple d'utilisation de CLOUDXDOCS :
Note de sécurité : Pour les documents sensibles, envisagez des méthodes hors ligne car les outils en ligne stockent temporairement les fichiers sur leurs serveurs.
Vous aimerez peut-être aussi : Convertir du texte en PDF facilement : 4 méthodes rapides et professionnelles
Méthode 3 : Utilisation de Google Docs (gratuit et basé sur le cloud)
Google Docs est un traitement de texte gratuit basé sur le cloud qui vous permet d'ouvrir, de modifier et de convertir des fichiers texte en fichiers Word sans installer de logiciel. C'est parfait pour les utilisateurs qui préfèrent le stockage dans le cloud et la collaboration.
Guide étape par étape pour convertir gratuitement un fichier TXT en Word :
- Ouvrez votre navigateur et allez sur Google Docs. Cliquez sur le document « Vierge » pour créer un nouveau fichier.
- Cliquez sur « Fichier » > « Ouvrir » dans le menu supérieur. Dans la fenêtre « Ouvrir un fichier », cliquez sur l'onglet « Importer ».
- Faites glisser et déposez votre fichier TXT dans la zone d'importation, ou cliquez sur « Parcourir » pour le choisir manuellement.
- Une fois le fichier TXT importé, il s'ouvrira dans Google Docs.
- Cliquez sur « Fichier » > « Télécharger » > « Microsoft Word (.docx) » dans le menu déroulant.
- Le fichier Word converti sera automatiquement téléchargé sur votre appareil.
✔ Idéal pour : L'édition collaborative ou les utilisateurs qui travaillent sur plusieurs appareils.
Méthode 4 : Programmation C# (conversion par lots/automatisée)
Pour les développeurs ou les équipes ayant besoin de convertir des centaines de fichiers TXT (ou d'intégrer la conversion dans une application .NET), l'approche C# avec Free Spire.Doc for .NET est efficace et évolutive.
Qu'est-ce que Free Spire.Doc for .NET ?
Free Spire.Doc est une bibliothèque .NET gratuite qui vous permet de créer, modifier et convertir des documents Word (DOC/DOCX) en C#/VB.NET sans installer Microsoft Office. Elle prend en charge le développement multiplateforme et est idéale pour les flux de travail automatisés (par exemple, la conversion de fichiers TXT téléchargés par l'utilisateur dans une application Web).
Étapes pour convertir un fichier TXT en Word en C#
- Installer via NuGet :
Install-Package FreeSpire.Doc
- Code C# complet :
using Spire.Doc;

namespace ConvertTextToWord
{
    internal class Program
    {
        static void Main(string[] args)
        {
            // Create a Document object
            Document doc = new Document();
            // Load a text file
            doc.LoadText("Sample.txt");

            // Save the text file in Word format
            doc.SaveToFile("TextToWord.docx", FileFormat.Docx2016);
            doc.Close();
        }
    }
}
Ce code charge un fichier TXT et l'enregistre au format DOCX via la méthode SaveToFile(). De plus, Free Spire.Doc prend également en charge la conversion de fichiers Word en fichiers TXT via C#.
Conseils pour une conversion TXT vers Word réussie
Pour éviter les problèmes courants (par exemple, texte manquant, erreurs de mise en forme), suivez ces conseils :
- Sauvegardez votre fichier TXT d'origine avant la conversion : En cas d'erreurs, vous pouvez revenir à la version d'origine.
- Vérifiez les sauts de ligne : Les fichiers TXT ont souvent des sauts de ligne manuels. Après la conversion, utilisez la fonction « Remplacer » de Word (Ctrl+H) pour supprimer les sauts de ligne supplémentaires si nécessaire.
- Évitez les fichiers TXT volumineux avec les convertisseurs en ligne : La plupart des outils en ligne gratuits ont des limites de taille de fichier (50 Mo-100 Mo). Pour les fichiers volumineux, utilisez Microsoft Word ou Google Docs.
- Vérifiez les caractères spéciaux : Si votre fichier TXT contient des caractères ou des symboles non anglais, vérifiez le fichier Word converti pour vous assurer qu'ils sont préservés.
Dépannage des problèmes courants
| Problème | Solution |
|---|---|
| Mise en forme perdue | Les fichiers TXT ne contiennent aucune mise en forme ; réappliquez les styles dans Word après la conversion. |
| Les caractères spéciaux s'affichent incorrectement | Assurez-vous que l'encodage UTF-8 est sélectionné lors de l'importation. |
| Le fichier ne se convertit pas | Vérifiez que le fichier n'est pas corrompu ou protégé par un mot de passe. |
| Le fichier converti est trop volumineux | Enregistrez au format DOCX, supprimez les lignes vides inutilisées ou compressez les images (si elles sont ajoutées après la conversion). |
Conclusion
La conversion du format TXT au format Word est simple avec la bonne approche. Pour la plupart des utilisateurs, l'ouverture directe du fichier TXT dans Microsoft Word donne les meilleurs résultats. Pour ceux qui n'ont pas accès à Word, les outils en ligne gratuits ou Google Docs offrent des alternatives fiables. Si vous êtes un développeur ayant besoin d'évolutivité, la méthode C# avec Free Spire.Doc vous permet d'automatiser les conversions par lots et de personnaliser la mise en forme
Que vous peaufiniez un seul document ou que vous construisiez un flux de travail automatisé, ces méthodes couvrent tous les cas d'utilisation pour la conversion de TXT en Word. N'oubliez pas que bien que la conversion soit simple, la mise en forme devra être appliquée par la suite, car les fichiers texte brut ne contiennent que du contenu brut.
Foire aux questions
Q : La conversion de TXT en Word est-elle gratuite ?
R : Oui, il existe plusieurs méthodes gratuites, notamment des outils en ligne, Google Docs et l'utilisation de la bibliothèque .NET gratuite.
Q : La conversion de TXT en Word préserve-t-elle la mise en forme ?
R : Les fichiers TXT ne contiennent aucune donnée de mise en forme, vous devrez donc appliquer la mise en forme dans Word après la conversion.
Q : Comment puis-je convertir plusieurs fichiers TXT en Word en même temps ?
R : Vous pouvez :
- Utiliser un convertisseur par lots en ligne comme Convertio.
- Écrire un script C# utilisant Free Spire.Doc pour parcourir tous les fichiers TXT d'un dossier avec
Directory.GetFiles( @"C:\Documents\", "*.txt")et répéter la logique de conversion pour chaque fichier.
Q : Quelle est la différence entre les formats DOC et DOCX ?
R : DOC est l'ancien format binaire utilisé dans Word 97–2003. DOCX est le format plus récent, basé sur XML (utilisé depuis Word 2007) avec une meilleure compression de fichiers, une meilleure sécurité et de meilleures fonctionnalités de récupération. DOCX est recommandé, sauf si vous avez besoin de compatibilité avec de très anciens logiciels.
Voir aussi
Convertir TXT a Word: 4 métodos fáciles y gratuitos
Tabla de Contenidos
- Método 1: Usando Microsoft Word (Sin conexión)
- Método 2: Usando un convertidor de TXT a Word en línea
- Método 3: Usando Google Docs (Gratis y basado en la nube)
- Método 4: Programación en C# (Conversión por lotes/automatizada)
- Consejos para una conversión exitosa de TXT a Word
- Solución de problemas comunes
- Preguntas frecuentes
Los archivos TXT son ampliamente utilizados por su simplicidad y compatibilidad en todos los dispositivos, pero carecen de opciones de formato como fuentes, tablas o imágenes que hacen que los documentos sean profesionales. Ya sea que necesite preparar un informe, redactar un ensayo o crear un documento comercial, convertir TXT a Word es una tarea común que puede ahorrarle tiempo y mejorar la calidad de su trabajo.
En este artículo, compartiremos los métodos de conversión de TXT a Word más efectivos y fáciles de usar, incluidas herramientas sin conexión, convertidores en línea y flujos de trabajo de programación automatizados. Al final, podrá elegir el mejor enfoque para sus necesidades y completar la conversión en minutos.
- Método 1: Usando Microsoft Word (Sin conexión)
- Método 2: Usando un convertidor de TXT a Word en línea
- Método 3: Usando Google Docs (Gratis y basado en la nube)
- Método 4: Programación en C# (Conversión por lotes/automatizada)
- Consejos para una conversión exitosa de TXT a Word
- Solución de problemas comunes
- Preguntas frecuentes
Método 1: Usando Microsoft Word (Sin conexión)
Microsoft Word es el procesador de textos más popular y tiene una función incorporada para abrir y convertir archivos TXT directamente. Este método es ideal si ya tiene Word instalado en su computadora, ya que garantiza una precisión de formato del 100% (para texto sin formato) y no requiere herramientas de terceros.
Guía paso a paso para convertir un archivo de texto a Word:
- Abra Microsoft Word y luego haga clic en “Archivo” > “Abrir”.
- En la ventana del explorador de archivos, navegue a la carpeta donde está almacenado su archivo TXT.
- En el menú desplegable “Tipo de archivo”, seleccione “Texto sin formato (*.txt)” para filtrar los archivos TXT.
- Seleccione su archivo TXT y haga clic en “Abrir”, luego elija la codificación adecuada.
- Una vez que el contenido del TXT se muestre en Word, haga clic en “Archivo” nuevamente y seleccione “Guardar como”.
- Elija una ubicación para guardar, seleccione “Documento de Word (*.docx)” o “Documento de Word 97-2003 (*.doc)” como formato de archivo y haga clic en “Guardar”.
Consejo: Si su archivo TXT tiene caracteres especiales (por ejemplo, acentos, símbolos), asegúrese de que la opción “Codificación” en el Asistente para importar texto esté configurada en “UTF-8” para conservarlos durante la conversión.
Método 2: Usando un convertidor de TXT a Word en línea
Si no tiene Microsoft Word instalado, los convertidores en línea son una excelente alternativa. Funcionan en cualquier dispositivo con conexión a Internet (Windows, Mac, teléfono, tableta) y no requieren descargas.
Convertidores recomendados:
- CLOUDXDOCS: Convierta archivos TXT a Word sin anuncios ni marcas de agua
- FreeConvert: Convertidor en línea fácil de usar con una interfaz limpia
- Convertio: Admite la conversión por lotes y convierte TXT a doc/docx
Pasos para convertir TXT a Word en línea:
- Visite el sitio web del convertidor elegido
- Suba su archivo TXT (arrastrar y soltar o buscar)
- Seleccione "DOC" o "DOCX" como formato de salida
- Haga clic en el botón "Convertir" o "Iniciar"
- Descargue el documento de Word convertido
Ejemplo de uso de CLOUDXDOCS:
Nota de seguridad: Para documentos confidenciales, considere los métodos sin conexión, ya que las herramientas en línea almacenan temporalmente los archivos en sus servidores.
También te puede interesar: Convertir texto a PDF fácilmente: 4 métodos rápidos y profesionales
Método 3: Usando Google Docs (Gratis y basado en la nube)
Google Docs es un procesador de textos gratuito basado en la nube que le permite abrir, editar y convertir archivos de texto a archivos de Word sin instalar software. Es perfecto para usuarios que prefieren el almacenamiento en la nube y la colaboración.
Guía paso a paso para convertir TXT a Word gratis:
- Abra su navegador y vaya a Google Docs. Haga clic en el documento “En blanco” para crear un nuevo archivo.
- Haga clic en “Archivo” > “Abrir” en el menú superior. En la ventana “Abrir un archivo”, haga clic en la pestaña “Subir”.
- Arrastre y suelte su archivo TXT en el área de carga, o haga clic en “Buscar” para elegirlo manualmente.
- Una vez que se cargue el archivo TXT, se abrirá en Google Docs.
- Haga clic en “Archivo” > “Descargar” > “Microsoft Word (.docx)” en el menú desplegable.
- El archivo de Word convertido se descargará automáticamente en su dispositivo.
✔ Ideal para: Edición colaborativa o usuarios que trabajan en múltiples dispositivos.
Método 4: Programación en C# (Conversión por lotes/automatizada)
Para desarrolladores o equipos que necesitan convertir cientos de archivos TXT (o integrar la conversión en una aplicación .NET), el enfoque de C# con Free Spire.Doc for .NET es eficiente y escalable.
¿Qué es Free Spire.Doc for .NET?
Free Spire.Doc es una biblioteca .NET gratuita que le permite crear, editar y convertir documentos de Word (DOC/DOCX) en C#/VB.NET sin instalar Microsoft Office. Admite el desarrollo multiplataforma y es ideal para flujos de trabajo automatizados (por ejemplo, convertir archivos TXT cargados por el usuario en una aplicación web).
Pasos para convertir TXT a Word en C#
- Instalar a través de NuGet:
Install-Package FreeSpire.Doc
- Código C# completo:
using Spire.Doc;

namespace ConvertTextToWord
{
    internal class Program
    {
        static void Main(string[] args)
        {
            // Create a Document object
            Document doc = new Document();
            // Load a text file
            doc.LoadText("Sample.txt");

            // Save the text file in Word format
            doc.SaveToFile("TextToWord.docx", FileFormat.Docx2016);
            doc.Close();
        }
    }
}
Este código carga un archivo TXT y lo guarda en formato DOCX a través del método SaveToFile(). Además, Free Spire.Doc también admite la conversión de archivos de Word a archivos TXT a través de C#.
Consejos para una conversión exitosa de TXT a Word
Para evitar problemas comunes (por ejemplo, texto faltante, errores de formato), siga estos consejos:
- Haga una copia de seguridad de su archivo TXT original antes de la conversión: En caso de errores, puede volver a la versión original.
- Compruebe los saltos de línea: Los archivos TXT a menudo tienen saltos de línea manuales. Después de la conversión, use la función “Reemplazar” de Word (Ctrl+H) para eliminar los saltos de línea adicionales si es necesario.
- Evite archivos TXT grandes con convertidores en línea: La mayoría de las herramientas en línea gratuitas tienen límites de tamaño de archivo (50 MB-100 MB). Para archivos grandes, use Microsoft Word o Google Docs.
- Verifique los caracteres especiales: Si su archivo TXT contiene caracteres o símbolos que no están en inglés, verifique el archivo de Word convertido para asegurarse de que se conserven.
Solución de problemas comunes
| Problema | Solución |
|---|---|
| Formato perdido | Los archivos TXT no contienen formato; vuelva a aplicar los estilos en Word después de la conversión. |
| Los caracteres especiales se muestran incorrectamente | Asegúrese de que la codificación UTF-8 esté seleccionada durante la importación. |
| El archivo no se convierte | Verifique que el archivo no esté dañado o protegido con contraseña. |
| El archivo convertido es demasiado grande | Guarde como DOCX, elimine las líneas en blanco no utilizadas o comprima las imágenes (si se agregaron después de la conversión). |
Conclusión
Convertir de formato TXT a Word es simple con el enfoque correcto. Para la mayoría de los usuarios, abrir directamente el archivo TXT en Microsoft Word proporciona los mejores resultados. Para aquellos sin acceso a Word, las herramientas gratuitas en línea o Google Docs ofrecen alternativas confiables. Si es un desarrollador que necesita escalabilidad, el método de C# con Free Spire.Doc le permite automatizar las conversiones por lotes y personalizar el formato
Ya sea que esté puliendo un solo documento o creando un flujo de trabajo automatizado, estos métodos cubren todos los casos de uso para la conversión de TXT a Word. Recuerde que si bien la conversión es sencilla, el formato deberá aplicarse después, ya que los archivos de texto sin formato solo contienen contenido sin procesar.
Preguntas frecuentes
P: ¿La conversión de TXT a Word es gratuita?
R: Sí, existen múltiples métodos gratuitos, que incluyen herramientas en línea, Google Docs y el uso de la biblioteca .NET gratuita.
P: ¿La conversión de TXT a Word conserva el formato?
R: Los archivos TXT no contienen datos de formato, por lo que deberá aplicar el formato en Word después de la conversión.
P: ¿Cómo puedo convertir varios archivos TXT a Word a la vez?
R: Puede:
- Usar un convertidor por lotes en línea como Convertio.
- Escribir un script de C# usando Free Spire.Doc para recorrer todos los archivos TXT en una carpeta con
Directory.GetFiles( @"C:\Documents\", "*.txt")y repetir la lógica de conversión para cada archivo.
P: ¿Cuál es la diferencia entre los formatos DOC y DOCX?
R: DOC es el formato binario más antiguo utilizado en Word 97–2003. DOCX es el formato más nuevo, basado en XML (utilizado desde Word 2007) con mejores funciones de compresión, seguridad y recuperación de archivos. Se recomienda DOCX a menos que necesite compatibilidad con software muy antiguo.
Ver también
TXT in Word umwandeln: 4 einfache & kostenlose Methoden
Inhaltsverzeichnis
- Methode 1: Verwendung von Microsoft Word (Offline)
- Methode 2: Verwendung eines Online-TXT-zu-Word-Konverters
- Methode 3: Verwendung von Google Docs (kostenlos & cloudbasiert)
- Methode 4: C#-Programmierung (Stapel-/automatisierte Konvertierung)
- Tipps für eine erfolgreiche TXT-zu-Word-Konvertierung
- Fehlerbehebung bei häufigen Problemen
- Häufig gestellte Fragen
TXT-Dateien sind wegen ihrer Einfachheit und Kompatibilität auf allen Geräten weit verbreitet, aber ihnen fehlen Formatierungsoptionen wie Schriftarten, Tabellen oder Bilder, die Dokumente professionell machen. Ob Sie einen Bericht vorbereiten, einen Aufsatz entwerfen oder ein Geschäftsdokument erstellen müssen, das Konvertieren von TXT in Word ist eine häufige Aufgabe, die Ihnen Zeit sparen und die Qualität Ihrer Arbeit verbessern kann.
In diesem Artikel stellen wir die effektivsten und benutzerfreundlichsten Methoden zur TXT-zu-Word-Konvertierung vor, einschließlich Offline-Tools, Online-Konvertern und automatisierten Programmier-Workflows. Am Ende können Sie den besten Ansatz für Ihre Bedürfnisse auswählen und die Konvertierung in wenigen Minuten abschließen.
- Methode 1: Verwendung von Microsoft Word (Offline)
- Methode 2: Verwendung eines Online-TXT-zu-Word-Konverters
- Methode 3: Verwendung von Google Docs (kostenlos & cloudbasiert)
- Methode 4: C#-Programmierung (Stapel-/automatisierte Konvertierung)
- Tipps für eine erfolgreiche TXT-zu-Word-Konvertierung
- Fehlerbehebung bei häufigen Problemen
- Häufig gestellte Fragen
Methode 1: Verwendung von Microsoft Word (Offline)
Microsoft Word ist das beliebteste Textverarbeitungsprogramm und verfügt über eine integrierte Funktion zum direkten Öffnen und Konvertieren von TXT-Dateien. Diese Methode ist ideal, wenn Sie Word bereits auf Ihrem Computer installiert haben, da sie eine 100%ige Formatierungsgenauigkeit (für reinen Text) gewährleistet und keine Tools von Drittanbietern erfordert.
Schritt-für-Schritt-Anleitung zum Konvertieren einer Textdatei in Word:
- Öffnen Sie Microsoft Word und klicken Sie dann auf „Datei“ > „Öffnen“.
- Navigieren Sie im Datei-Explorer-Fenster zu dem Ordner, in dem Ihre TXT-Datei gespeichert ist.
- Wählen Sie im Dropdown-Menü „Dateityp“ die Option „Nur Text (*.txt)“ aus, um TXT-Dateien zu filtern.
- Wählen Sie Ihre TXT-Datei aus und klicken Sie auf „Öffnen“. Wählen Sie dann die entsprechende Kodierung.
- Sobald der TXT-Inhalt in Word angezeigt wird, klicken Sie erneut auf „Datei“ und wählen Sie „Speichern unter“.
- Wählen Sie einen Speicherort, wählen Sie „Word-Dokument (*.docx)“ oder „Word 97-2003-Dokument (*.doc)“ als Dateiformat und klicken Sie auf „Speichern“.
Tipp: Wenn Ihre TXT-Datei Sonderzeichen (z. B. Akzente, Symbole) enthält, stellen Sie sicher, dass die Option „Kodierung“ im Textimport-Assistenten auf „UTF-8“ eingestellt ist, um sie bei der Konvertierung beizubehalten.
Methode 2: Verwendung eines Online-TXT-zu-Word-Konverters
Wenn Sie Microsoft Word nicht installiert haben, sind Online-Konverter eine großartige Alternative. Sie funktionieren auf jedem Gerät mit Internetverbindung (Windows, Mac, Telefon, Tablet) und erfordern keine Downloads.
Empfohlene Konverter:
- CLOUDXDOCS: Konvertieren Sie TXT- in Word-Dateien ohne Werbung und Wasserzeichen
- FreeConvert: Benutzerfreundlicher Online-Konverter mit einer sauberen Oberfläche
- Convertio: Unterstützt die Stapelkonvertierung und konvertiert TXT in doc/docx
Schritte zum Online-Konvertieren von TXT in Word:
- Besuchen Sie die Website des von Ihnen gewählten Konverters
- Laden Sie Ihre TXT-Datei hoch (Drag-and-Drop oder Durchsuchen)
- Wählen Sie „DOC“ oder „DOCX“ als Ausgabeformat
- Klicken Sie auf die Schaltfläche „Konvertieren“ oder „Start“
- Laden Sie das konvertierte Word-Dokument herunter
Anwendungsbeispiel für CLOUDXDOCS:
Sicherheitshinweis: Bei vertraulichen Dokumenten sollten Sie Offline-Methoden in Betracht ziehen, da Online-Tools Dateien vorübergehend auf ihren Servern speichern.
Das könnte Ihnen auch gefallen: Text einfach in PDF konvertieren: 4 schnelle und professionelle Methoden
Methode 3: Verwendung von Google Docs (kostenlos & cloudbasiert)
Google Docs ist ein kostenloses, cloudbasiertes Textverarbeitungsprogramm, mit dem Sie Textdateien öffnen, bearbeiten und in Word-Dateien konvertieren können, ohne Software installieren zu müssen. Es ist perfekt für Benutzer, die Cloud-Speicher und Zusammenarbeit bevorzugen.
Schritt-für-Schritt-Anleitung zum kostenlosen Konvertieren von TXT in Word:
- Öffnen Sie Ihren Browser und gehen Sie zu Google Docs. Klicken Sie auf das „Leere“ Dokument, um eine neue Datei zu erstellen.
- Klicken Sie im oberen Menü auf „Datei“ > „Öffnen“. Klicken Sie im Fenster „Datei öffnen“ auf die Registerkarte „Hochladen“.
- Ziehen Sie Ihre TXT-Datei per Drag-and-Drop in den Upload-Bereich oder klicken Sie auf „Durchsuchen“, um sie manuell auszuwählen.
- Sobald die TXT-Datei hochgeladen ist, wird sie in Google Docs geöffnet.
- Klicken Sie im Dropdown-Menü auf „Datei“ > „Herunterladen“ > „Microsoft Word (.docx)“.
- Die konvertierte Word-Datei wird automatisch auf Ihr Gerät heruntergeladen.
✔ Am besten für: Kollaboratives Bearbeiten oder Benutzer, die auf mehreren Geräten arbeiten.
Methode 4: C#-Programmierung (Stapel-/automatisierte Konvertierung)
Für Entwickler oder Teams, die Hunderte von TXT-Dateien konvertieren müssen (oder die Konvertierung in eine .NET-App integrieren möchten), ist der C#-Ansatz mit Free Spire.Doc for .NET effizient und skalierbar.
Was ist Free Spire.Doc for .NET?
Free Spire.Doc ist eine kostenlose .NET-Bibliothek, mit der Sie Word-Dokumente (DOC/DOCX) in C#/VB.NET erstellen, bearbeiten und konvertieren können, ohne Microsoft Office zu installieren. Es unterstützt die plattformübergreifende Entwicklung und ist ideal für automatisierte Workflows (z. B. das Konvertieren von vom Benutzer hochgeladenen TXT-Dateien in einer Web-App).
Schritte zum Konvertieren von TXT in Word in C#
- Über NuGet installieren:
Install-Package FreeSpire.Doc
- Vollständiger C#-Code:
using Spire.Doc;

namespace ConvertTextToWord
{
    internal class Program
    {
        static void Main(string[] args)
        {
            // Create a Document object
            Document doc = new Document();
            // Load a text file
            doc.LoadText("Sample.txt");

            // Save the text file in Word format
            doc.SaveToFile("TextToWord.docx", FileFormat.Docx2016);
            doc.Close();
        }
    }
}
Dieser Code lädt eine TXT-Datei und speichert sie über die Methode SaveToFile() im DOCX-Format. Darüber hinaus unterstützt Free Spire.Doc auch das Zurückkonvertieren von Word-Dateien in TXT-Dateien über C#.
Tipps für eine erfolgreiche TXT-zu-Word-Konvertierung
Um häufige Probleme (z. B. fehlender Text, Formatierungsfehler) zu vermeiden, befolgen Sie diese Tipps:
- Sichern Sie Ihre ursprüngliche TXT-Datei vor der Konvertierung: Im Fehlerfall können Sie zur ursprünglichen Version zurückkehren.
- Auf Zeilenumbrüche prüfen: TXT-Dateien haben oft manuelle Zeilenumbrüche. Verwenden Sie nach der Konvertierung die „Ersetzen“-Funktion von Word (Strg+H), um bei Bedarf zusätzliche Zeilenumbrüche zu entfernen.
- Vermeiden Sie große TXT-Dateien bei Online-Konvertern: Die meisten kostenlosen Online-Tools haben Dateigrößenbeschränkungen (50 MB-100 MB). Verwenden Sie für große Dateien Microsoft Word oder Google Docs.
- Sonderzeichen überprüfen: Wenn Ihre TXT-Datei nicht-englische Zeichen oder Symbole enthält, überprüfen Sie die konvertierte Word-Datei, um sicherzustellen, dass sie erhalten bleiben.
Fehlerbehebung bei häufigen Problemen
| Problem | Lösung |
|---|---|
| Formatierung verloren | TXT-Dateien enthalten keine Formatierung; wenden Sie Stile nach der Konvertierung in Word erneut an. |
| Sonderzeichen werden falsch angezeigt | Stellen Sie sicher, dass beim Import die UTF-8-Kodierung ausgewählt ist. |
| Datei wird nicht konvertiert | Überprüfen Sie, ob die Datei nicht beschädigt oder passwortgeschützt ist. |
| Konvertierte Datei ist zu groß | Als DOCX speichern, ungenutzte Leerzeilen löschen oder Bilder komprimieren (falls nach der Konvertierung hinzugefügt). |
Fazit
Das Konvertieren von TXT in das Word-Format ist mit dem richtigen Ansatz einfach. Für die meisten Benutzer liefert das direkte Öffnen der TXT-Datei in Microsoft Word die besten Ergebnisse. Für diejenigen ohne Word-Zugang bieten kostenlose Online-Tools oder Google Docs zuverlässige Alternativen. Wenn Sie als Entwickler Skalierbarkeit benötigen, können Sie mit der C#-Methode mit Free Spire.Doc Stapelkonvertierungen automatisieren und die Formatierung anpassen
Egal, ob Sie ein einzelnes Dokument aufpolieren oder einen automatisierten Workflow erstellen, diese Methoden decken jeden Anwendungsfall für die TXT-zu-Word-Konvertierung ab. Denken Sie daran, dass die Konvertierung zwar unkompliziert ist, die Formatierung jedoch anschließend angewendet werden muss, da reine Textdateien nur Rohinhalte enthalten.
Häufig gestellte Fragen
F: Ist die Konvertierung von TXT in Word kostenlos?
A: Ja, es gibt mehrere kostenlose Methoden, einschließlich Online-Tools, Google Docs und der Verwendung der kostenlosen .NET-Bibliothek.
F: Bleibt die Formatierung beim Konvertieren von TXT in Word erhalten?
A: TXT-Dateien enthalten keine Formatierungsdaten, daher müssen Sie die Formatierung nach der Konvertierung in Word anwenden.
F: Wie kann ich mehrere TXT-Dateien gleichzeitig in Word konvertieren?
A: Sie können:
- Verwenden Sie einen Online-Stapelkonverter wie Convertio.
- Schreiben Sie ein C#-Skript mit Free Spire.Doc, um alle TXT-Dateien in einem Ordner mit
Directory.GetFiles( @"C:\Documents\", "*.txt")zu durchlaufen und die Konvertierungslogik für jede Datei zu wiederholen.
F: Was ist der Unterschied zwischen den Formaten DOC und DOCX?
A: DOC ist das ältere Binärformat, das in Word 97–2003 verwendet wurde. DOCX ist das neuere, XML-basierte Format (seit Word 2007 verwendet) mit besserer Dateikomprimierung, Sicherheit und Wiederherstellungsfunktionen. DOCX wird empfohlen, es sei denn, Sie benötigen Kompatibilität mit sehr alter Software.
Siehe auch
Конвертация TXT в Word: 4 простых и бесплатных способа
Содержание
- Метод 1: Использование Microsoft Word (офлайн)
- Метод 2: Использование онлайн-конвертера TXT в Word
- Метод 3: Использование Google Docs (бесплатно и в облаке)
- Метод 4: Программирование на C# (пакетное/автоматизированное преобразование)
- Советы по успешному преобразованию TXT в Word
- Устранение распространенных проблем
- Часто задаваемые вопросы
Файлы TXT широко используются из-за их простоты и совместимости со всеми устройствами, но в них отсутствуют параметры форматирования, такие как шрифты, таблицы или изображения, которые делают документы профессиональными. Независимо от того, нужно ли вам подготовить отчет, составить эссе или создать деловой документ, преобразование TXT в Word — это обычная задача, которая может сэкономить ваше время и повысить качество вашей работы.
В этой статье мы поделимся наиболее эффективными и удобными методами преобразования TXT в Word, включая офлайн-инструменты, онлайн-конвертеры и автоматизированные рабочие процессы программирования. К концу вы сможете выбрать лучший подход для своих нужд и завершить преобразование за считанные минуты.
- Метод 1: Использование Microsoft Word (офлайн)
- Метод 2: Использование онлайн-конвертера TXT в Word
- Метод 3: Использование Google Docs (бесплатно и в облаке)
- Метод 4: Программирование на C# (пакетное/автоматизированное преобразование)
- Советы по успешному преобразованию TXT в Word
- Устранение распространенных проблем
- Часто задаваемые вопросы
Метод 1: Использование Microsoft Word (офлайн)
Microsoft Word — самый популярный текстовый процессор, в котором есть встроенная функция для прямого открытия и преобразования файлов TXT. Этот метод идеален, если у вас уже установлен Word на вашем компьютере, так как он обеспечивает 100% точность форматирования (для простого текста) и не требует никаких сторонних инструментов.
Пошаговое руководство по преобразованию текстового файла в Word:
- Откройте Microsoft Word, а затем нажмите «Файл» > «Открыть».
- В окне проводника перейдите в папку, где хранится ваш файл TXT.
- В раскрывающемся списке «Тип файла» выберите «Обычный текст (*.txt)», чтобы отфильтровать файлы TXT.
- Выберите свой файл TXT и нажмите «Открыть», затем выберите соответствующую кодировку.
- Как только содержимое TXT отобразится в Word, снова нажмите «Файл» и выберите «Сохранить как».
- Выберите место для сохранения, выберите «Документ Word (*.docx)» или «Документ Word 97-2003 (*.doc)» в качестве формата файла и нажмите «Сохранить».
Совет: если ваш файл TXT содержит специальные символы (например, диакритические знаки, символы), убедитесь, что для параметра «Кодировка» в мастере импорта текста установлено значение «UTF-8», чтобы сохранить их во время преобразования.
Метод 2: Использование онлайн-конвертера TXT в Word
Если у вас не установлен Microsoft Word, онлайн-конвертеры — отличная альтернатива. Они работают на любом устройстве с подключением к Интернету (Windows, Mac, телефон, планшет) и не требуют загрузки.
Рекомендуемые конвертеры:
- CLOUDXDOCS: конвертируйте файлы TXT в Word без рекламы и водяных знаков
- FreeConvert: удобный онлайн-конвертер с понятным интерфейсом
- Convertio: поддерживает пакетное преобразование и конвертирует TXT в doc/docx
Шаги по преобразованию TXT в Word онлайн:
- Посетите выбранный вами сайт-конвертер
- Загрузите свой TXT-файл (перетащите или выберите)
- Выберите «DOC» или «DOCX» в качестве выходного формата
- Нажмите кнопку «Конвертировать» или «Начать»
- Загрузите преобразованный документ Word
Пример использования CLOUDXDOCS:
Примечание по безопасности: для конфиденциальных документов рассмотрите возможность использования офлайн-методов, поскольку онлайн-инструменты временно хранят файлы на своих серверах.
Вам также может понравиться: Легко конвертируйте текст в PDF: 4 быстрых и профессиональных метода
Метод 3: Использование Google Docs (бесплатно и в облаке)
Google Docs — это бесплатный облачный текстовый процессор, который позволяет открывать, редактировать и преобразовывать текстовые файлы в файлы Word без установки программного обеспечения. Он идеально подходит для пользователей, которые предпочитают облачное хранилище и совместную работу.
Пошаговое руководство по бесплатному преобразованию TXT в Word:
- Откройте браузер и перейдите в Google Docs. Нажмите на «Пустой» документ, чтобы создать новый файл.
- Нажмите «Файл» > «Открыть» в верхнем меню. В окне «Открыть файл» перейдите на вкладку «Загрузить».
- Перетащите свой TXT-файл в область загрузки или нажмите «Обзор», чтобы выбрать его вручную.
- После загрузки TXT-файл откроется в Google Docs.
- Нажмите «Файл» > «Скачать» > «Microsoft Word (.docx)» в раскрывающемся меню.
- Преобразованный файл Word будет автоматически загружен на ваше устройство.
✔ Лучше всего подходит для: совместного редактирования или пользователей, которые работают на нескольких устройствах.
Метод 4: Программирование на C# (пакетное/автоматизированное преобразование)
Для разработчиков или команд, которым необходимо преобразовать сотни файлов TXT (или интегрировать преобразование в приложение .NET), подход на C# с использованием Free Spire.Doc for .NET является эффективным и масштабируемым.
Что такое Free Spire.Doc for .NET?
Free Spire.Doc — это бесплатная библиотека .NET, которая позволяет создавать, редактировать и конвертировать документы Word (DOC/DOCX) на C#/VB.NET без установки Microsoft Office. Она поддерживает кроссплатформенную разработку и идеально подходит для автоматизированных рабочих процессов (например, преобразования загруженных пользователем файлов TXT в веб-приложении).
Шаги по преобразованию TXT в Word на C#
- Установить через NuGet:
Install-Package FreeSpire.Doc
- Полный код на C#:
using Spire.Doc;

namespace ConvertTextToWord
{
    internal class Program
    {
        static void Main(string[] args)
        {
            // Create a Document object
            Document doc = new Document();
            // Load a text file
            doc.LoadText("Sample.txt");

            // Save the text file in Word format
            doc.SaveToFile("TextToWord.docx", FileFormat.Docx2016);
            doc.Close();
        }
    }
}
Этот код загружает файл TXT и сохраняет его в формате DOCX с помощью метода SaveToFile(). Кроме того, Free Spire.Doc также поддерживает преобразование файлов Word обратно в файлы TXT с помощью C#.
Советы по успешному преобразованию TXT в Word
Чтобы избежать распространенных проблем (например, отсутствия текста, ошибок форматирования), следуйте этим советам:
- Сделайте резервную копию исходного файла TXT перед преобразованием: в случае ошибок вы сможете вернуться к исходной версии.
- Проверьте разрывы строк: файлы TXT часто содержат ручные разрывы строк. После преобразования используйте функцию «Заменить» в Word (Ctrl+H), чтобы при необходимости удалить лишние разрывы строк.
- Избегайте больших файлов TXT при использовании онлайн-конвертеров: большинство бесплатных онлайн-инструментов имеют ограничения на размер файла (50–100 МБ). Для больших файлов используйте Microsoft Word или Google Docs.
- Проверьте специальные символы: если ваш файл TXT содержит неанглийские символы или знаки, проверьте преобразованный файл Word, чтобы убедиться, что они сохранены.
Устранение распространенных проблем
| Проблема | Решение |
|---|---|
| Потеряно форматирование | Файлы TXT не содержат форматирования; примените стили в Word после преобразования. |
| Специальные символы отображаются некорректно | Убедитесь, что при импорте выбрана кодировка UTF-8. |
| Файл не конвертируется | Убедитесь, что файл не поврежден и не защищен паролем. |
| Преобразованный файл слишком большой | Сохраните как DOCX, удалите неиспользуемые пустые строки или сожмите изображения (если они были добавлены после преобразования). |
Заключение
Преобразование формата TXT в Word — простая задача при правильном подходе. Для большинства пользователей наилучшие результаты дает прямое открытие файла TXT в Microsoft Word. Для тех, у кого нет доступа к Word, надежные альтернативы предлагают бесплатные онлайн-инструменты или Google Docs. Если вы разработчик, которому нужна масштабируемость, метод C# с Free Spire.Doc позволяет автоматизировать пакетные преобразования и настраивать форматирование
Независимо от того, дорабатываете ли вы один документ или создаете автоматизированный рабочий процесс, эти методы охватывают все варианты использования для преобразования TXT в Word. Помните, что, хотя преобразование является простым, форматирование необходимо будет применить позже, поскольку файлы с обычным текстом содержат только необработанное содержимое.
Часто задаваемые вопросы
В: Бесплатно ли преобразование TXT в Word?
О: Да, существует несколько бесплатных методов, включая онлайн-инструменты, Google Docs и использование бесплатной библиотеки .NET.
В: Сохраняется ли форматирование при преобразовании TXT в Word?
О: Файлы TXT не содержат данных о форматировании, поэтому вам нужно будет применить форматирование в Word после преобразования.
В: Как я могу преобразовать несколько файлов TXT в Word одновременно?
О: Вы можете:
- Использовать онлайн-конвертер для пакетной обработки, например Convertio.
- Написать скрипт на C# с использованием Free Spire.Doc для перебора всех файлов TXT в папке с помощью
Directory.GetFiles( @"C:\Documents\", "*.txt")и повторить логику преобразования для каждого файла.
В: В чем разница между форматами DOC и DOCX?
О: DOC — это старый двоичный формат, использовавшийся в Word 97–2003. DOCX — это более новый формат на основе XML (используется с Word 2007), с лучшим сжатием файлов, безопасностью и функциями восстановления. Рекомендуется использовать DOCX, если вам не требуется совместимость с очень старым программным обеспечением.
Смотрите также
Converter Word para PNG: 3 Maneiras Práticas que Você Realmente Pode Usar
Você já compartilhou um documento do Word com colegas de trabalho ou o postou online, apenas para descobrir que o layout parece completamente diferente? As fontes mudam, o espaçamento quebra e as páginas não aparecem mais da maneira que você deseja. É exatamente quando a conversão de um documento do Word para um arquivo PNG se torna útil. Ao transformar cada página em uma imagem, você pode preservar a aparência visual original em diferentes sistemas e dispositivos.
No guia de hoje, vamos percorrer três maneiras práticas e fáceis de converter Word para PNG, ajudando você a escolher o método que melhor se adapta à sua situação — seja para uma solução rápida de uma única vez ou uma abordagem mais confiável.
- Converter Word para PNG Usando Conversores Online
- Converter Documento do Word para PNG com Capturas de Tela
- Convertendo Word para PNG com Python
- Escolhendo a Maneira Certa de Converter Word para PNG
- Perguntas Frequentes
1. Converter Word para PNG Usando Conversores Online
Conversores online são a solução mais comum que as pessoas tentam primeiro. Eles funcionam diretamente no navegador e não exigem conhecimento técnico. Após o upload de um documento do Word, o serviço o processa em um servidor remoto e exporta cada página como uma imagem PNG.
Antes de usar um conversor online de Word para PNG, vale a pena verificar o formato do arquivo. Se o seu documento ainda estiver no formato .doc mais antigo, é recomendável converter doc para docx primeiro, pois a maioria das ferramentas online lida com arquivos .docx de forma mais confiável e produz resultados mais consistentes.
Em vez de recomendar conversores específicos de documento do Word para PNG, este capítulo simplesmente destaca duas opções populares para mostrar como funcionam.
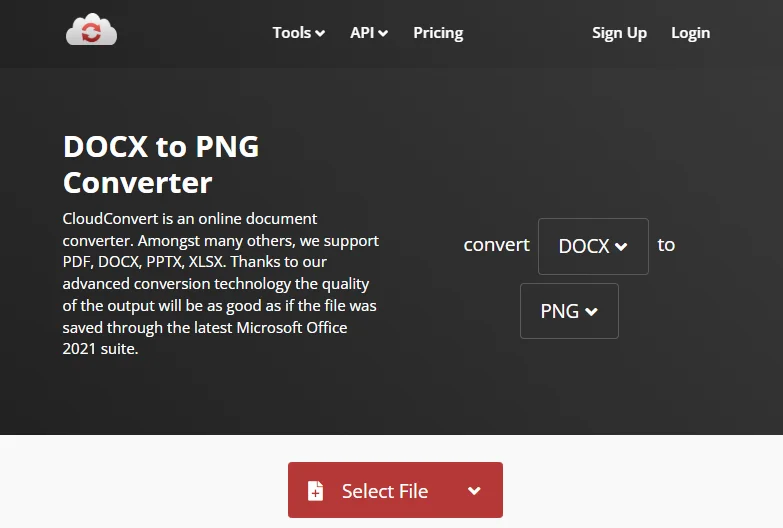
cloudconvert
O cloudconvert é uma plataforma de conversão de arquivos tudo-em-um que suporta uma ampla gama de formatos. Além de converter rapidamente documentos do Word em arquivos de imagem como PNG, ele também pode lidar com arquivos do Excel, vídeos, arquivos de áudio e muito mais. Usá-lo para converter Word para PNG é simples:
- Acesse o cloudconvert e escolha converter Word para PNG, ou simplesmente pesquise pelo conversor de Word para PNG do cloudconvert.
- Faça o upload do seu arquivo e clique em Converter.
- Assim que a conversão estiver concluída, baixe o arquivo PNG para o seu dispositivo local.
CLOUDXDOCS
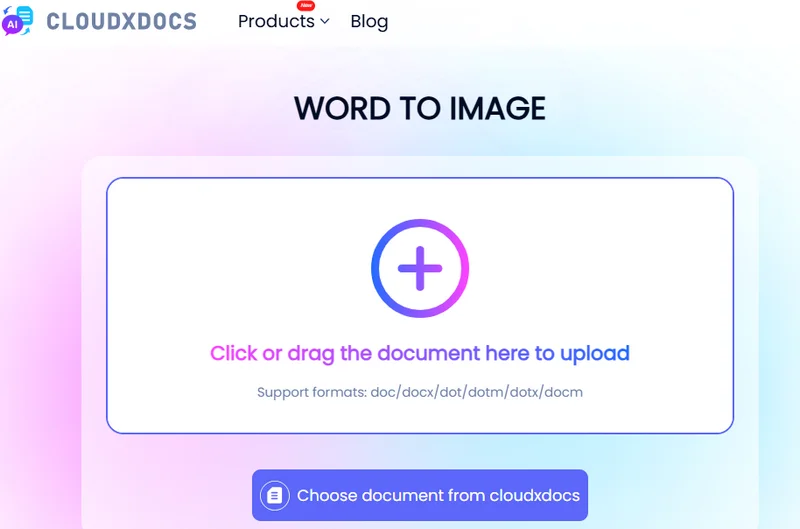
O CLOUDXDOCS é outro site que suporta a conversão de múltiplos formatos de arquivo. Ele lida principalmente com documentos como arquivos do Word, planilhas do Excel, PDFs e apresentações do PowerPoint. Diferente do cloudconvert, ele também permite que você edite arquivos online e integra recursos de IA para processar inteligentemente diferentes tipos de documentos.
Converter Word para PNG com o CLOUDXDOCS é igualmente simples:
- Navegue até o CLOUDXDOCS e escolha Conversor → WORD > IMAGEM.
- Faça o upload do seu arquivo e a conversão começará automaticamente.
- Clique em Baixar para salvar o arquivo PNG convertido em seu dispositivo local.
Esses dois conversores de Word para PNG são rápidos e convenientes, especialmente para tarefas pequenas ou ocasionais. No entanto, eles geralmente vêm com limitações, como restrições de tamanho de arquivo, resolução de imagem limitada e preocupações com o upload de documentos confidenciais. As ferramentas online são mais adequadas para conversões simples e únicas, em vez de uso contínuo ou profissional.
Dica: Você pode reduzir o tamanho de um documento do Word removendo hiperlinks, comentários, anexos e outros elementos desnecessários.
2. Converter Documento do Word para PNG com Capturas de Tela
Embora o Microsoft Word não forneça um recurso integrado para converter arquivos do Word diretamente em imagens, você ainda pode salvar um documento do Word como PNG usando a função de captura de tela em seu computador ou outros dispositivos. Por exemplo, no Windows você pode usar a tecla Print Screen, enquanto no macOS você pode usar Command (⌘) + Shift + 4 para capturar uma área selecionada da tela. 
Essa abordagem é essencialmente uma solução manual em vez de uma conversão verdadeira, mas pode ser útil quando você precisa apenas da imagem de uma ou duas páginas. As etapas gerais são as seguintes:
- Abra o documento do Word e navegue até a página que deseja salvar como PNG.
- Ajuste o nível de zoom para que a página inteira caiba claramente na tela.
- Use o atalho de captura de tela do sistema para capturar a página.
- Salve a imagem capturada no formato PNG em seu dispositivo local.
Lembre-se de que a qualidade da imagem depende da resolução da sua tela e das configurações de zoom, e cada página deve ser capturada separadamente.
3. Convertendo Word para PNG com Python
Para usuários que precisam de qualidade de saída consistente ou desejam converter vários arquivos de uma vez, usar Python para converter documentos do Word para PNG é a solução mais confiável. Diferente das ferramentas online ou capturas de tela, essa abordagem não depende da resolução da tela ou de operações manuais. Em vez disso, ela trabalha diretamente com a estrutura interna do documento e renderiza cada página como uma imagem programaticamente.
Uma maneira comum de conseguir isso em Python é usando o Free Spire.Doc. É uma biblioteca leve de processamento de documentos que permite carregar arquivos do Word, percorrer as páginas e exportá-las como imagens sem depender do Microsoft Word ou de qualquer outro aplicativo de terceiros. ![Converter um Documento do Word para Arquivos PNG Usando o Free Spire.Doc]/images/art_images/convert-word-png-4.webp)
Aqui está o exemplo de código que você pode consultar:
from spire.doc import *
from spire.doc.common import *

# Create a Document object
document = Document()

# Load a Word file
document.LoadFromFile("Desktop/input.docx")

# Loop through the pages in the document
for i in range(document.GetPageCount()):

    # Convert the current page to bitmap image
    imageStream = document.SaveImageToStreams(i, ImageType.Bitmap)

    # Save the bitmap to a PNG file
    with open('Output/ToImage-{0}.png'.format(i),'wb') as imageFile:
        imageFile.write(imageStream.ToArray())

document.Close()
Essa abordagem é comumente usada em sistemas automatizados, serviços de backend e fluxos de trabalho empresariais. Embora exija alguma configuração técnica, funciona bem para conversão em lote e melhora muito a eficiência.
4. Escolhendo a Maneira Certa de Converter Word para PNG
Para ajudá-lo a identificar rapidamente o método que melhor se adapta às suas necessidades, esta seção compara as três soluções mais comuns de Word para PNG discutidas anteriormente.
| Método | Facilidade de Uso | Qualidade da Imagem | Suporte a Lote | Automação | Ideal Para |
|---|---|---|---|---|---|
| Ferramentas Online | Muito fácil, sem necessidade de configuração | Média, geralmente com resolução fixa | Limitado ou não suportado | Não suportado | Conversões únicas e usuários casuais |
| Capturas de Tela | Fácil, mas totalmente manual | Baixa a média, depende da resolução da tela | Não suportado | Não suportado | Capturar uma única página para referência rápida |
| Free Spire.Doc (Python) | Requer conhecimento básico de programação | Alta, com resolução controlável | Totalmente suportado | Totalmente suportado | Processamento em lote, automação e fluxos de trabalho empresariais |
Considerações Finais
Converter Word para PNG se torna muito mais fácil quando você entende as três abordagens abordadas neste guia. As ferramentas online são convenientes para conversões rápidas e únicas, as capturas de tela funcionam apenas para necessidades simples e temporárias, e usar o Free Spire.Doc com Python oferece o maior controle para processamento em lote e automação. Ao escolher a opção que se alinha com o tamanho do seu arquivo, requisitos de qualidade e fluxo de trabalho, você pode transformar documentos do Word em imagens PNG de forma mais eficiente.
Perguntas Frequentes sobre a Conversão de Documento do Word para Arquivo PNG
P1: Como posso converter um arquivo do Word para PNG online e de graça?
Você pode converter um arquivo do Word para PNG online usando ferramentas gratuitas como o cloudconvert ou o CLOUDXDOCS. Essas plataformas permitem que você faça o upload de um documento do Word, escolha PNG como o formato de saída e baixe as imagens convertidas, geralmente com limitações básicas de tamanho de arquivo ou contagem de páginas.
P2: Como converto Word para PNG ou JPG?
Ao usar o cloudconvert, basta selecionar PNG ou JPG como o formato de saída.
Com o Free Spire.Doc, você só precisa alterar a extensão do arquivo ao salvar a imagem renderizada:
    with open('Output/ToImage-{0}.jpg'.format(i),'wb') as imageFile:
        imageFile.write(imageStream.ToArray())
P3: Qual método de conversão de Word para PNG funciona melhor para várias páginas ou arquivos em lote?
Para documentos de várias páginas ou conversão em lote, usar Python com o Free Spire.Doc é a opção mais confiável. Ele suporta o processamento de múltiplos documentos de uma só vez diretamente no código.
Leia Também
Word를 PNG로 변환: 실제로 사용할 수 있는 3가지 실용적인 방법
Word 문서를 동료와 공유하거나 온라인에 게시했을 때 레이아웃이 완전히 다르게 보이는 것을 발견한 적이 있습니까? 글꼴이 바뀌고, 간격이 깨지고, 페이지가 더 이상 원하는 대로 표시되지 않습니다. 바로 이럴 때 Word 문서를 PNG 파일로 변환하는 것이 유용합니다. 각 페이지를 이미지로 변환하면 다른 시스템과 장치에서도 원본의 시각적 모양을 그대로 유지할 수 있습니다.
오늘 가이드에서는 Word를 PNG로 변환하는 세 가지 실용적이고 쉬운 방법을 안내하여, 빠른 일회성 해결책이 필요하든 더 안정적인 접근 방식이 필요하든 상황에 가장 적합한 방법을 선택하는 데 도움을 드립니다.
- 온라인 변환기를 사용하여 Word를 PNG로 변환
- 스크린샷으로 Word 문서를 PNG로 변환
- Python으로 Word를 PNG로 변환
- Word를 PNG로 변환하는 올바른 방법 선택
- 자주 묻는 질문
1. 온라인 변환기를 사용하여 Word를 PNG로 변환
온라인 변환기는 사람들이 가장 먼저 시도하는 가장 일반적인 해결책입니다. 브라우저에서 직접 작동하며 기술적인 지식이 필요하지 않습니다. Word 문서를 업로드하면 서비스가 원격 서버에서 처리하고 각 페이지를 PNG 이미지로 내보냅니다.
온라인 Word를 PNG로 변환하는 변환기를 사용하기 전에 파일 형식을 확인하는 것이 좋습니다. 문서가 여전히 이전 .doc 형식인 경우, 대부분의 온라인 도구가 .docx 파일을 더 안정적으로 처리하고 더 일관된 결과를 생성하므로 먼저 doc를 docx로 변환하는 것이 좋습니다.
이 장에서는 특정 Word 문서를 PNG로 변환하는 변환기를 추천하는 대신, 두 가지 인기 있는 옵션이 어떻게 작동하는지 간단히 보여줍니다.
cloudconvert
cloudconvert는 다양한 형식을 지원하는 올인원 파일 변환 플랫폼입니다. Word 문서를 PNG와 같은 이미지 파일로 빠르게 변환하는 것 외에도 Excel 파일, 비디오, 오디오 파일 등을 처리할 수 있습니다. 이를 사용하여 Word를 PNG로 변환하는 방법은 간단합니다.
- cloudconvert로 이동하여 Word를 PNG로 변환하도록 선택하거나, cloudconvert의 Word to PNG 변환기를 검색하십시오.
- 파일을 업로드하고 변환을 클릭하십시오.
- 변환이 완료되면 PNG 파일을 로컬 장치에 다운로드하십시오.
CLOUDXDOCS
CLOUDXDOCS는 여러 파일 형식 변환을 지원하는 또 다른 웹사이트입니다. 주로 Word 파일, Excel 스프레드시트, PDF 및 PowerPoint 프레젠테이션과 같은 문서를 처리합니다. cloudconvert와 달리 온라인에서 파일을 편집할 수 있으며 AI 기능을 통합하여 다양한 유형의 문서를 지능적으로 처리합니다.
CLOUDXDOCS로 Word를 PNG로 변환하는 것도 마찬가지로 간단합니다.
- CLOUDXDOCS로 이동하여 변환기 → WORD > IMAGE를 선택하십시오.
- 파일을 업로드하면 변환이 자동으로 시작됩니다.
- 다운로드를 클릭하여 변환된 PNG 파일을 로컬 장치에 저장하십시오.
이 두 Word to PNG 변환기는 특히 작거나 가끔씩 하는 작업에 빠르고 편리합니다. 그러나 파일 크기 제한, 제한된 이미지 해상도, 민감한 문서 업로드에 대한 우려와 같은 제한이 따르는 경우가 많습니다. 온라인 도구는 지속적이거나 전문적인 용도보다는 간단한 일회성 변환에 가장 적합합니다.
팁: 하이퍼링크, 주석, 첨부 파일 및 기타 불필요한 요소를 제거하여 Word 문서의 크기를 줄일 수 있습니다.
2. 스크린샷으로 Word 문서를 PNG로 변환
Microsoft Word는 Word 파일을 직접 이미지로 변환하는 기본 제공 기능을 제공하지 않지만, 컴퓨터나 다른 장치의 스크린샷 기능을 사용하여 Word 문서를 PNG로 저장할 수 있습니다. 예를 들어, Windows에서는 Print Screen 키를 사용할 수 있고, macOS에서는 Command (⌘) + Shift + 4를 사용하여 화면의 선택된 영역을 캡처할 수 있습니다.
이 접근 방식은 실제 변환이라기보다는 수동 해결 방법에 가깝지만, 한두 페이지의 이미지만 필요할 때 유용할 수 있습니다. 일반적인 단계는 다음과 같습니다.
- Word 문서를 열고 PNG로 저장하려는 페이지로 이동합니다.
- 전체 페이지가 화면에 명확하게 맞도록 확대/축소 수준을 조정합니다.
- 시스템 스크린샷 바로 가기를 사용하여 페이지를 캡처합니다.
- 캡처한 이미지를 PNG 형식으로 로컬 장치에 저장합니다.
이미지 품질은 화면 해상도와 확대/축소 설정에 따라 달라지며, 각 페이지는 별도로 캡처해야 한다는 점을 명심하십시오.
3. Python으로 Word를 PNG로 변환
일관된 출력 품질이 필요하거나 한 번에 여러 파일을 변환하려는 사용자에게는 Python을 사용하여 Word 문서를 PNG로 변환하는 것이 가장 안정적인 해결책입니다. 온라인 도구나 스크린샷과 달리 이 접근 방식은 화면 해상도나 수동 작업에 의존하지 않습니다. 대신 문서의 내부 구조와 직접 작동하여 각 페이지를 프로그래밍 방식으로 이미지로 렌더링합니다.
Python에서 이를 달성하는 일반적인 방법은 Free Spire.Doc을 사용하는 것입니다. 이것은 Microsoft Word나 다른 타사 응용 프로그램에 의존하지 않고 Word 파일을 로드하고, 페이지를 반복하고, 이미지로 내보낼 수 있는 경량 문서 처리 라이브러리입니다. ![Free Spire.Doc을 사용하여 Word 문서를 PNG 파일로 변환]/images/art_images/convert-word-png-4.webp)
참고할 수 있는 코드 예제는 다음과 같습니다.
from spire.doc import *
from spire.doc.common import *

# Create a Document object
document = Document()

# Load a Word file
document.LoadFromFile("Desktop/input.docx")

# Loop through the pages in the document
for i in range(document.GetPageCount()):

    # Convert the current page to bitmap image
    imageStream = document.SaveImageToStreams(i, ImageType.Bitmap)

    # Save the bitmap to a PNG file
    with open('Output/ToImage-{0}.png'.format(i),'wb') as imageFile:
        imageFile.write(imageStream.ToArray())

document.Close()
이 접근 방식은 자동화된 시스템, 백엔드 서비스 및 엔터프라이즈 워크플로에서 일반적으로 사용됩니다. 약간의 기술적 설정이 필요하지만 일괄 변환에 잘 작동하며 효율성을 크게 향상시킵니다.
4. Word를 PNG로 변환하는 올바른 방법 선택
필요에 가장 적합한 방법을 신속하게 식별하는 데 도움이 되도록 이 섹션에서는 앞에서 설명한 세 가지 가장 일반적인 Word-to-PNG 솔루션을 비교합니다.
| 방법 | 사용 용이성 | 이미지 품질 | 일괄 지원 | 자동화 | 최적 대상 |
|---|---|---|---|---|---|
| 온라인 도구 | 매우 쉬움, 설정 필요 없음 | 중간, 일반적으로 고정 해상도 | 제한적이거나 지원되지 않음 | 지원되지 않음 | 일회성 변환 및 일반 사용자 |
| 스크린샷 | 쉽지만 완전히 수동 | 낮음에서 중간, 화면 해상도에 따라 다름 | 지원되지 않음 | 지원되지 않음 | 빠른 참조를 위해 단일 페이지 캡처 |
| Free Spire.Doc (Python) | 기본 코딩 지식 필요 | 높음, 제어 가능한 해상도 | 완전 지원 | 완전 지원 | 일괄 처리, 자동화 및 엔터프라이즈 워크플로 |
마지막 생각들
이 가이드에서 다루는 세 가지 접근 방식을 이해하면 Word를 PNG로 변환하는 것이 훨씬 쉬워집니다. 온라인 도구는 빠르고 일회성 변환에 편리하고, 스크린샷은 간단하고 일시적인 요구에만 작동하며, Python과 함께 Free Spire.Doc을 사용하면 일괄 처리 및 자동화에 대한 가장 많은 제어를 제공합니다. 파일 크기, 품질 요구 사항 및 워크플로에 맞는 옵션을 선택하면 Word 문서를 PNG 이미지로 더 효율적으로 변환할 수 있습니다.
Word 문서를 PNG 파일로 변환하는 것에 대한 자주 묻는 질문
Q1: Word 파일을 온라인에서 무료로 PNG로 어떻게 변환할 수 있나요?
cloudconvert 또는 CLOUDXDOCS와 같은 무료 도구를 사용하여 온라인에서 Word 파일을 PNG로 변환할 수 있습니다. 이러한 플랫폼을 사용하면 Word 문서를 업로드하고 출력 형식으로 PNG를 선택한 다음 변환된 이미지를 다운로드할 수 있으며, 일반적으로 파일 크기나 페이지 수에 대한 기본 제한이 있습니다.
Q2: Word를 PNG나 JPG로 어떻게 변환하나요?
cloudconvert를 사용할 때 출력 형식으로 PNG 또는 JPG를 선택하기만 하면 됩니다.
Free Spire.Doc을 사용하면 렌더링된 이미지를 저장할 때 파일 확장자만 변경하면 됩니다.
    with open('Output/ToImage-{0}.jpg'.format(i),'wb') as imageFile:
        imageFile.write(imageStream.ToArray())
Q3: 여러 페이지나 일괄 파일에 가장 적합한 Word to PNG 방법은 무엇인가요?
다중 페이지 문서나 일괄 변환의 경우 Python과 Free Spire.Doc을 사용하는 것이 가장 안정적인 옵션입니다. 코드에서 직접 한 번에 여러 문서를 처리하는 것을 지원합니다.