Comment ajouter des filigranes dans Excel (4 méthodes simples)
Table des matières
- Méthode 1 : Ajouter un filigrane à l'aide de l'en-tête et du pied de page
- Méthode 2 : Insérer une image d'arrière-plan comme filigrane
- Méthode 3 : Insérer un WordArt ou des formes comme filigrane
- Méthode 4 : Ajouter des filigranes à Excel par programmation à l'aide de Python
- Comparaison des méthodes de filigrane
- Réflexions finales
- FAQ sur l'ajout de filigranes à Excel
Les filigranes sont largement utilisés dans les fichiers Excel pour indiquer l'état ou la propriété d'un document, tel que Confidentiel, Brouillon, Exemple, ou un logo d'entreprise. Ils sont particulièrement utiles lors du partage de rapports en interne ou de la distribution de fichiers à des parties prenantes externes.
Contrairement à Microsoft Word, Excel ne propose pas de fonctionnalité « Filigrane » dédiée. Cependant, il existe plusieurs moyens pratiques d'obtenir le même effet en utilisant des outils intégrés ou des solutions programmatiques.
Dans cet article, vous apprendrez quatre façons simples et efficaces d'ajouter des filigranes à Excel, allant des techniques manuelles au filigrane automatisé à l'aide de Python.
Aperçu des méthodes :
- Méthode 1 : Ajouter un filigrane à l'aide de l'en-tête et du pied de page
- Méthode 2 : Insérer une image d'arrière-plan comme filigrane
- Méthode 3 : Insérer un WordArt ou des formes comme filigrane
- Méthode 4 : Ajouter des filigranes à Excel par programmation à l'aide de Python
Méthode 1 : Ajouter un filigrane à l'aide de l'en-tête et du pied de page
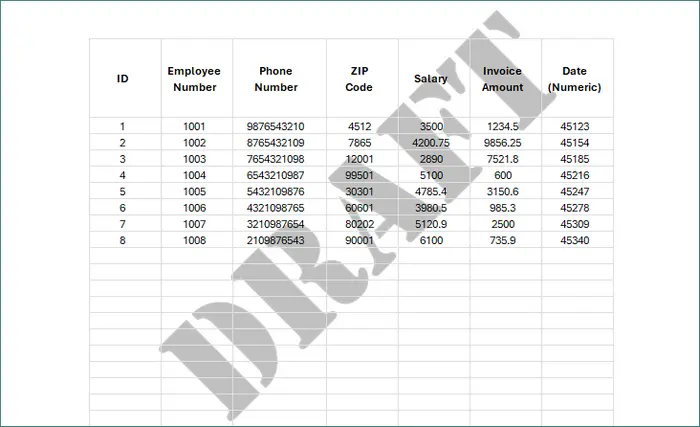
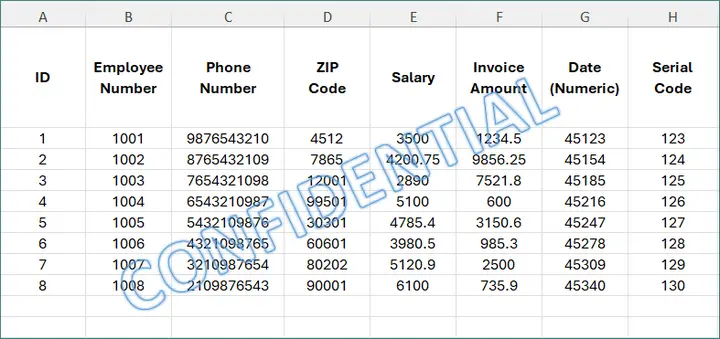
L'utilisation de la fonctionnalité En-tête et pied de page est la manière la plus largement acceptée d'ajouter un filigrane dans Excel, en particulier pour les documents qui seront imprimés ou exportés au format PDF.
Parce que le filigrane est placé en dehors de la grille de la feuille de calcul, il n'interfère pas avec le contenu des cellules tout en restant cohérent sur toutes les pages.
Cette méthode fonctionne bien pour ajouter des images de logos ou de « brouillon » à des rapports formels et des documents officiels.
Étapes
-
Ouvrez votre fichier Excel.
-
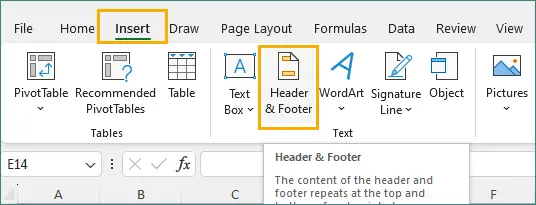
Allez dans Insertion → En-tête et pied de page.
-
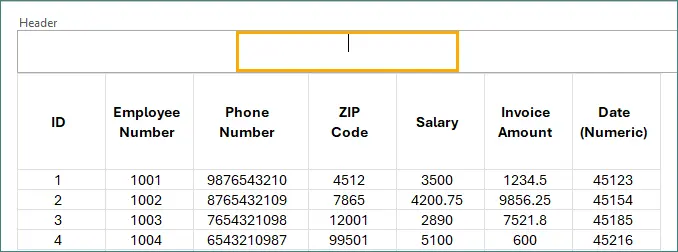
Cliquez sur la section centrale de l'en-tête.
-
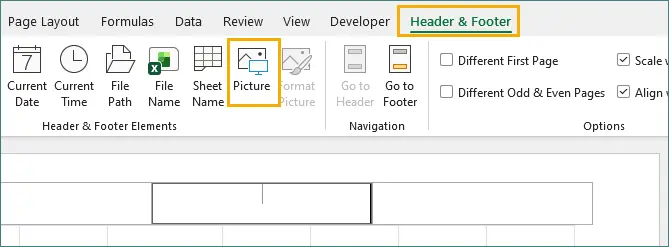
Cliquez sur Image dans la section En-tête et pied de page pour insérer un filigrane d'image, ou saisissez directement du texte.
Remarque : Un filigrane d'image est recommandé, car le texte d'en-tête rend souvent difficile l'obtention d'une apparence de filigrane efficace.
-
Appuyez n'importe où en dehors de l'en-tête pour voir le filigrane.
Avantages
- Imprimable.
- Apparence propre et professionnelle.
- Convient aux logos et aux étiquettes de documents.
Inconvénients
- Non visible en mode Normal.
- Flexibilité de formatage limitée.
Meilleur cas d'utilisation
Cette méthode est la mieux adaptée aux documents Excel formels ou partageables où le filigrane doit apparaître à l'impression, dans l'aperçu avant impression ou dans les PDF exportés sans interférer avec les données de la feuille de calcul.
Méthode 2 : Insérer une image d'arrière-plan comme filigrane
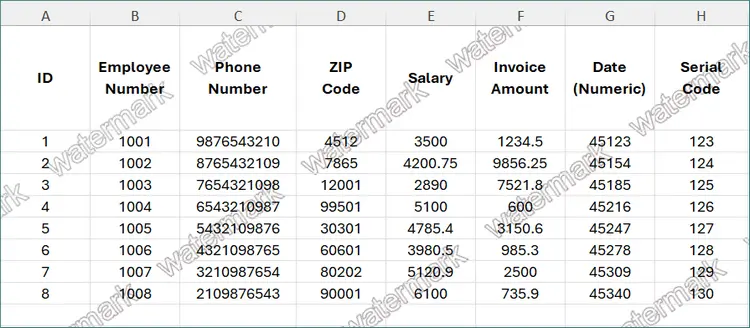
Excel vous permet d'insérer une image comme arrière-plan de feuille de calcul, qui peut servir de filigrane. Ce filigrane reste visible en mode Normal, ce qui le rend utile pour la révision à l'écran, le partage interne ou les fichiers de modèle.
Cependant, les images d'arrière-plan sont conçues uniquement à des fins de référence visuelle et n'apparaîtront pas lors de l'impression ou de l'exportation au format PDF.
Étapes
-
Ouvrez votre fichier Excel.
-
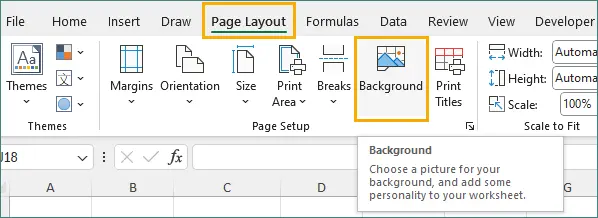
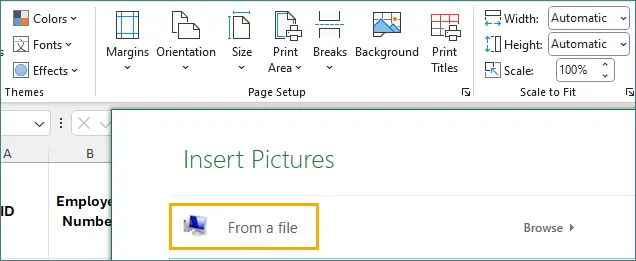
Allez dans Mise en page → Arrière-plan.
-
Sélectionnez un fichier image.
-
L'image se répétera sur toute la feuille de calcul.
Avantages
- Visible en mode Normal.
- Simple à appliquer.
- S'applique à toute la feuille de calcul.
Inconvénients
- Non imprimable.
- Personnalisation limitée.
Meilleur cas d'utilisation
Cette méthode est la mieux adaptée aux documents internes ou aux modèles de travail où la visibilité lors de l'édition est plus importante que le résultat imprimé.
Méthode 3 : Insérer un WordArt ou des formes comme filigrane
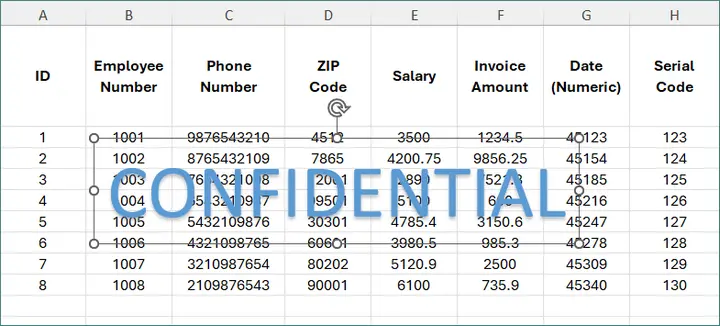
L'insertion d'un WordArt, d'une Zone de texte ou d'une Forme offre le plus de contrôle sur l'apparence d'un filigrane.
Parce que le filigrane est un objet de feuille de calcul ordinaire, il reste visible en mode Normal et peut être librement redimensionné, pivoté et stylisé.
Cette approche est idéale lorsque vous avez besoin de filigranes textuels personnalisés ou de styles de filigrane différents sur des feuilles individuelles.
Étapes
-
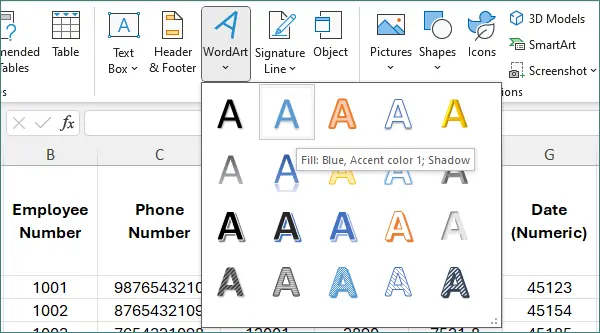
Allez dans Insertion → WordArt.

-
Sélectionnez un style prédéfini dans le menu déroulant.
-
Saisissez le texte du filigrane (par exemple, « CONFIDENTIEL »).
-
Faites pivoter la forme et ajustez l'apparence (taille, couleur ou style) du texte selon vos besoins.
Avantages
- Entièrement personnalisable.
- Visible en mode Normal.
- Facile à modifier ou à supprimer.
Inconvénients
- Peut se déplacer lors du redimensionnement des lignes ou des colonnes.
- Nécessite une configuration manuelle par feuille de calcul.
Meilleur cas d'utilisation
Cette méthode est la mieux adaptée aux scénarios de révision à l'écran où le filigrane doit rester visible en mode Normal et où un style de texte flexible ou un étiquetage spécifique à la feuille est requis.
Méthode 4 : Ajouter des filigranes à Excel par programmation à l'aide de Python
Lorsque le filigrane doit être appliqué de manière répétée ou sur plusieurs fichiers, l'automatisation programmatique est l'approche la plus efficace.
En utilisant Spire.XLS for Python, vous pouvez ajouter des filigranes par programmation de la même manière que les méthodes manuelles décrites précédemment, y compris les filigranes d'en-tête/pied de page, les filigranes d'image d'arrière-plan et les filigranes basés sur des formes.
Cela garantit des résultats cohérents tout en réduisant l'effort manuel, en particulier dans les flux de travail de génération de rapports ou de distribution de documents.
Exemple : Ajouter un filigrane d'image via l'en-tête et le pied de page
L'exemple suivant ajoute un filigrane d'image à l'en-tête central de chaque feuille de calcul. Cette méthode est équivalente à la Méthode 1 et produit un filigrane qui apparaît en mode Mise en page, dans l'Aperçu avant impression et dans les PDF exportés.
from spire.xls import *
from spire.xls.common import *

# Create a Workbook object
workbook = Workbook()

# Load an Excel document
workbook.LoadFromFile("C:\\Users\\Administrator\\Desktop\\Input.xlsx")

# Load the watermark image
stream = Stream("C:\\Users\\Administrator\\Desktop\\confidential.png")

# Apply the watermark to all worksheets
for i in range(workbook.Worksheets.Count):
    worksheet = workbook.Worksheets[i]
    worksheet.PageSetup.CenterHeader = "&G"
    worksheet.PageSetup.CenterHeaderImage = stream

# Save the result
workbook.SaveToFile("output/AddWatermark.xlsx", ExcelVersion.Version2016)

# Release resources
workbook.Dispose()
Cas d'utilisation typiques
- Vous devez ajouter un filigrane à plusieurs fichiers ou feuilles de calcul Excel.
- Les filigranes doivent être appliqués de manière cohérente et automatique.
- Les fichiers Excel sont générés dans le cadre d'un pipeline de reporting ou d'exportation.
Pour explorer les fonctionnalités d'automatisation Excel supplémentaires et les détails d'utilisation de l'API, consultez le Guide de programmation Spire.XLS. Le guide couvre des exemples pratiques qui peuvent vous aider à étendre la logique de filigrane et à créer des solutions de traitement Excel plus flexibles.
Comparaison des méthodes de filigrane
| Méthode | Imprimable | Visible en mode Normal | Personnalisable | Automatisation |
|---|---|---|---|---|
| En-tête et pied de page | ✔ | ✖ | Limité | ✔ |
| Image d'arrière-plan | ✖ | ✔ | ✖ | ✔ |
| WordArt / Forme | ✔ | ✔ | ✔ | Limité |
| Automatisation Python | ✔ / ✖ | ✔ / ✖ | Contrôlé | ✔✔ |
Réflexions finales
Bien qu'Excel ne propose pas de fonctionnalité de filigrane intégrée, il offre plusieurs moyens fiables d'obtenir le même résultat. La meilleure approche dépend de la manière dont le fichier sera utilisé et distribué.
- Utilisez les filigranes En-tête et pied de page pour les documents professionnels qui seront imprimés ou exportés au format PDF.
- Utilisez les images d'arrière-plan ou le WordArt lorsque la visibilité du filigrane lors de l'édition à l'écran est la priorité.
- Utilisez l'automatisation Python avec Spire.XLS lorsque les filigranes doivent être appliqués de manière cohérente sur plusieurs fichiers ou dans le cadre d'un flux de travail automatisé.
En choisissant la méthode qui correspond à vos exigences de visibilité et de sortie, vous pouvez ajouter des filigranes clairs et efficaces à Excel sans perturber la lisibilité des données ou la structure du document.
FAQ sur l'ajout de filigranes à Excel
Q1. Excel a-t-il une fonctionnalité de filigrane intégrée ?
Non. Excel ne propose pas de bouton de filigrane dédié, mais plusieurs alternatives efficaces sont disponibles.
Q2. Pourquoi mon filigrane n'apparaît-il pas en mode Normal ?
Les filigranes d'en-tête et de pied de page ne sont visibles qu'en mode Mise en page ou dans l'Aperçu avant impression.
Q3. Puis-je ajouter des filigranes différents à différentes feuilles ?
Oui. Cela peut être fait manuellement ou par programmation en appliquant des paramètres par feuille de calcul.
Q4. Quelle est la meilleure façon d'ajouter un filigrane à des fichiers Excel en masse ?
L'utilisation de l'automatisation Python avec Spire.XLS est l'approche la plus efficace et la plus évolutive.
Vous pourriez aussi être intéressé par
Cómo agregar marcas de agua en Excel (4 formas fáciles)
Tabla de Contenidos
- Método 1: Agregar una Marca de Agua Usando Encabezado y Pie de Página
- Método 2: Insertar una Imagen de Fondo como Marca de Agua
- Método 3: Insertar WordArt o Formas como Marca de Agua
- Método 4: Agregar Marcas de Agua a Excel Programáticamente Usando Python
- Comparación de los Métodos de Marca de Agua
- Conclusiones Finales
- Preguntas Frecuentes Sobre Agregar Marcas de Agua a Excel
Las marcas de agua se utilizan ampliamente en los archivos de Excel para indicar el estado o la propiedad del documento, como Confidencial, Borrador, Muestra o un logotipo de la empresa. Son especialmente útiles al compartir informes internamente o distribuir archivos a partes interesadas externas.
A diferencia de Microsoft Word, Excel no proporciona una función dedicada de “Marca de agua”. Sin embargo, existen varias formas prácticas de lograr el mismo efecto utilizando herramientas integradas o soluciones programáticas.
En este artículo, aprenderá cuatro formas fáciles y efectivas de agregar marcas de agua a Excel, que van desde técnicas manuales hasta marcas de agua automatizadas usando Python.
Resumen de los métodos:
- Método 1: Agregar una Marca de Agua Usando Encabezado y Pie de Página
- Método 2: Insertar una Imagen de Fondo como Marca de Agua
- Método 3: Insertar WordArt o Formas como Marca de Agua
- Método 4: Agregar Marcas de Agua a Excel Programáticamente Usando Python
Método 1: Agregar una Marca de Agua Usando Encabezado y Pie de Página
Usar la función Encabezado y pie de página es la forma más aceptada de agregar una marca de agua en Excel, especialmente para documentos que se imprimirán o exportarán como PDF.
Debido a que la marca de agua se coloca fuera de la cuadrícula de la hoja de trabajo, no interfiere con el contenido de las celdas y se mantiene constante en todas las páginas.
Este método funciona bien para agregar imágenes de logotipos o “borrador” a informes formales y documentos oficiales.
Pasos
-
Abra su archivo de Excel.
-
Vaya a Insertar → Encabezado y pie de página.
-
Haga clic en la sección central del encabezado.
-
Haga clic en Imagen en la sección Encabezado y pie de página para insertar una marca de agua de imagen, o escriba texto directamente.
Nota: Se recomienda una marca de agua de imagen, ya que el texto del encabezado a menudo dificulta lograr una apariencia de marca de agua efectiva.
-
Toque en cualquier lugar fuera del encabezado para ver la marca de agua.
Pros
- Imprimible.
- Apariencia limpia y profesional.
- Adecuado para logotipos y etiquetas de documentos.
Contras
- No visible en la vista Normal.
- Flexibilidad de formato limitada.
Mejor Caso de Uso
Este método es más adecuado para documentos de Excel formales o compartibles donde la marca de agua debe aparecer en la impresión, la Vista Previa de Impresión o los PDF exportados sin interferir con los datos de la hoja de trabajo.
Método 2: Insertar una Imagen de Fondo como Marca de Agua
Excel le permite insertar una imagen como fondo de una hoja de trabajo, que puede servir como marca de agua. Esta marca de agua permanece visible en la vista Normal, lo que la hace útil para la revisión en pantalla, el uso compartido interno o los archivos de plantilla.
Sin embargo, las imágenes de fondo están diseñadas exclusivamente para referencia visual y no aparecerán al imprimir o exportar a PDF.
Pasos
-
Abra su archivo de Excel.
-
Vaya a Diseño de página → Fondo.
-
Seleccione un archivo de imagen.
-
La imagen se repetirá en toda la hoja de trabajo.
Pros
- Visible en la vista Normal.
- Fácil de aplicar.
- Se aplica a toda la hoja de trabajo.
Contras
- No imprimible.
- Personalización limitada.
Mejor Caso de Uso
Este método es más adecuado para documentos internos o plantillas de trabajo donde la visibilidad durante la edición es más importante que la salida de impresión.
Método 3: Insertar WordArt o Formas como Marca de Agua
Insertar un WordArt, un Cuadro de texto o una Forma proporciona el mayor control sobre la apariencia de una marca de agua.
Debido a que la marca de agua es un objeto de hoja de trabajo normal, permanece visible en la vista Normal y se puede cambiar de tamaño, rotar y diseñar libremente.
Este enfoque es ideal cuando necesita marcas de agua basadas en texto personalizadas o diferentes estilos de marca de agua en hojas individuales.
Pasos
-
Vaya a Insertar → WordArt.
-
Seleccione un estilo predefinido del menú desplegable.
-
Ingrese el texto de la marca de agua (por ejemplo, “CONFIDENCIAL”).
-
Gire la forma y ajuste la apariencia (tamaño, color o estilo) del texto según sea necesario.
Pros
- Totalmente personalizable.
- Visible en la vista Normal.
- Fácil de editar o eliminar.
Contras
- Puede moverse cuando se cambian el tamaño de las filas o columnas.
- Requiere configuración manual por hoja de trabajo.
Mejor Caso de Uso
Este método es más adecuado para escenarios de revisión en pantalla donde la marca de agua debe permanecer visible en la vista Normal y donde se requiere un estilo de texto flexible o un etiquetado específico de la hoja.
Método 4: Agregar Marcas de Agua a Excel Programáticamente Usando Python
Cuando es necesario aplicar marcas de agua repetidamente o en varios archivos, la automatización programática es el enfoque más eficiente.
Usando Spire.XLS for Python, puede agregar marcas de agua programáticamente de la misma manera que los métodos manuales descritos anteriormente, incluidas las marcas de agua de encabezado/pie de página, las marcas de agua de imagen de fondo y las marcas de agua basadas en formas.
Esto garantiza resultados consistentes al tiempo que reduce el esfuerzo manual, especialmente en los flujos de trabajo de generación de informes o distribución de documentos.
Ejemplo: Agregar una Marca de Agua de Imagen a través del Encabezado y Pie de Página
El siguiente ejemplo agrega una marca de agua de imagen al encabezado central de cada hoja de trabajo. Este método es equivalente al Método 1 y produce una marca de agua que aparece en la vista de Diseño de página, la Vista previa de impresión y los PDF exportados.
from spire.xls import *
from spire.xls.common import *

# Create a Workbook object
workbook = Workbook()

# Load an Excel document
workbook.LoadFromFile("C:\\Users\\Administrator\\Desktop\\Input.xlsx")

# Load the watermark image
stream = Stream("C:\\Users\\Administrator\\Desktop\\confidential.png")

# Apply the watermark to all worksheets
for i in range(workbook.Worksheets.Count):
    worksheet = workbook.Worksheets[i]
    worksheet.PageSetup.CenterHeader = "&G"
    worksheet.PageSetup.CenterHeaderImage = stream

# Save the result
workbook.SaveToFile("output/AddWatermark.xlsx", ExcelVersion.Version2016)

# Release resources
workbook.Dispose()
Casos de Uso Típicos
- Necesita marcar con agua varios archivos o hojas de trabajo de Excel.
- Las marcas de agua deben aplicarse de manera consistente y automática.
- Los archivos de Excel se generan como parte de un proceso de generación de informes o exportación.
Para explorar capacidades adicionales de automatización de Excel y detalles de uso de la API, consulte la Guía de Programación de Spire.XLS. La guía cubre ejemplos prácticos que pueden ayudarlo a extender la lógica de las marcas de agua y crear soluciones de procesamiento de Excel más flexibles.
Comparación de los Métodos de Marca de Agua
| Método | Imprimible | Visible en Vista Normal | Personalizable | Automatización |
|---|---|---|---|---|
| Encabezado y Pie de Página | ✔ | ✖ | Limitada | ✔ |
| Imagen de Fondo | ✖ | ✔ | ✖ | ✔ |
| WordArt / Forma | ✔ | ✔ | ✔ | Limitada |
| Automatización con Python | ✔ / ✖ | ✔ / ✖ | Controlada | ✔✔ |
Conclusiones Finales
Aunque Excel no proporciona una función de marca de agua incorporada, ofrece múltiples formas confiables de lograr el mismo resultado. El mejor enfoque depende de cómo se usará y distribuirá el archivo.
- Use marcas de agua de Encabezado y pie de página para documentos profesionales que se imprimirán o exportarán a PDF.
- Use imágenes de fondo o WordArt cuando la visibilidad de la marca de agua durante la edición en pantalla sea la prioridad.
- Use la automatización de Python con Spire.XLS cuando las marcas de agua deban aplicarse de manera consistente en varios archivos o como parte de un flujo de trabajo automatizado.
Al elegir el método que coincida con sus requisitos de visibilidad y salida, puede agregar marcas de agua claras y efectivas a Excel sin interrumpir la legibilidad de los datos o la estructura del documento.
Preguntas Frecuentes Sobre Agregar Marcas de Agua a Excel
P1. ¿Excel tiene una función de marca de agua incorporada?
No. Excel no ofrece un botón de marca de agua dedicado, pero hay varias alternativas efectivas disponibles.
P2. ¿Por qué mi marca de agua no aparece en la vista Normal?
Las marcas de agua de encabezado y pie de página solo son visibles en Diseño de página o Vista previa de impresión.
P3. ¿Puedo agregar diferentes marcas de agua a diferentes hojas?
Sí. Esto se puede hacer manual o programáticamente aplicando configuraciones por hoja de trabajo.
P4. ¿Cuál es la mejor manera de marcar con agua archivos de Excel en masa?
Usar la automatización de Python con Spire.XLS es el enfoque más eficiente y escalable.
También le Podría Interesar
Wasserzeichen in Excel hinzufügen (4 einfache Methoden)
Inhaltsverzeichnis
- Methode 1: Wasserzeichen mit Kopf- und Fußzeile hinzufügen
- Methode 2: Hintergrundbild als Wasserzeichen einfügen
- Methode 3: WordArt oder Formen als Wasserzeichen einfügen
- Methode 4: Wasserzeichen programmgesteuert mit Python in Excel einfügen
- Vergleich der Wasserzeichenmethoden
- Abschließende Gedanken
- Häufig gestellte Fragen zum Hinzufügen von Wasserzeichen in Excel
Wasserzeichen werden in Excel-Dateien häufig verwendet, um den Dokumentenstatus oder den Besitz anzuzeigen, z. B. Vertraulich, Entwurf, Beispiel oder ein Firmenlogo. Sie sind besonders nützlich, wenn Berichte intern geteilt oder Dateien an externe Stakeholder verteilt werden.
Im Gegensatz zu Microsoft Word bietet Excel keine spezielle „Wasserzeichen“-Funktion. Es gibt jedoch mehrere praktische Möglichkeiten, den gleichen Effekt mit integrierten Tools oder programmatischen Lösungen zu erzielen.
In diesem Artikel lernen Sie vier einfache und effektive Möglichkeiten, Wasserzeichen in Excel hinzuzufügen, die von manuellen Techniken bis hin zur automatisierten Wasserzeichenerstellung mit Python reichen.
Methodenübersicht:
- Methode 1: Wasserzeichen mit Kopf- und Fußzeile hinzufügen
- Methode 2: Hintergrundbild als Wasserzeichen einfügen
- Methode 3: WordArt oder Formen als Wasserzeichen einfügen
- Methode 4: Wasserzeichen programmgesteuert mit Python in Excel einfügen
Methode 1: Wasserzeichen mit Kopf- und Fußzeile hinzufügen
Die Verwendung der Funktion Kopf- und Fußzeile ist die am weitesten verbreitete Methode, um ein Wasserzeichen in Excel hinzuzufügen, insbesondere für Dokumente, die gedruckt oder als PDF exportiert werden.
Da das Wasserzeichen außerhalb des Arbeitsblattrasters platziert wird, stört es den Zellinhalt nicht und bleibt auf allen Seiten konsistent.
Diese Methode eignet sich gut zum Hinzufügen von Logos oder „Entwurf“-Bildern zu formellen Berichten und offiziellen Dokumenten.
Schritte
-
Öffnen Sie Ihre Excel-Datei.
-
Gehen Sie zu Einfügen → Kopf- und Fußzeile.
-
Klicken Sie auf den mittleren Bereich der Kopfzeile.
-
Klicken Sie im Bereich Kopf- und Fußzeile auf Bild, um ein Bildwasserzeichen einzufügen, oder geben Sie direkt Text ein.
Hinweis: Ein Bildwasserzeichen wird empfohlen, da es bei Kopfzeilentext oft schwierig ist, ein effektives Wasserzeichen-Erscheinungsbild zu erzielen.
-
Tippen Sie irgendwo außerhalb der Kopfzeile, um das Wasserzeichen zu sehen.
Vorteile
- Druckbar.
- Sauberes und professionelles Erscheinungsbild.
- Geeignet für Logos und Dokumentenbeschriftungen.
Nachteile
- In der Normalansicht nicht sichtbar.
- Begrenzte Formatierungsflexibilität.
Bester Anwendungsfall
Diese Methode eignet sich am besten für formelle oder gemeinsam nutzbare Excel-Dokumente, bei denen das Wasserzeichen im Druck, in der Druckvorschau oder in exportierten PDFs erscheinen muss, ohne die Arbeitsblattdaten zu beeinträchtigen.
Methode 2: Hintergrundbild als Wasserzeichen einfügen
Excel ermöglicht es Ihnen, ein Bild als Arbeitsblatthintergrund einzufügen, das als Wasserzeichen dienen kann. Dieses Wasserzeichen bleibt in der Normalansicht sichtbar und ist daher nützlich für die Überprüfung am Bildschirm, die interne Freigabe oder Vorlagendateien.
Hintergrundbilder sind jedoch rein für die visuelle Referenz gedacht und werden beim Drucken oder Exportieren in PDF nicht angezeigt.
Schritte
-
Öffnen Sie Ihre Excel-Datei.
-
Gehen Sie zu Seitenlayout → Hintergrund.
-
Wählen Sie eine Bilddatei aus.
-
Das Bild wird auf dem gesamten Arbeitsblatt wiederholt.
Vorteile
- In der Normalansicht sichtbar.
- Einfach anzuwenden.
- Gilt für das gesamte Arbeitsblatt.
Nachteile
- Nicht druckbar.
- Begrenzte Anpassungsmöglichkeiten.
Bester Anwendungsfall
Diese Methode eignet sich am besten für interne Dokumente oder Arbeitsvorlagen, bei denen die Sichtbarkeit während der Bearbeitung wichtiger ist als die Druckausgabe.
Methode 3: WordArt oder Formen als Wasserzeichen einfügen
Das Einfügen von WordArt, Textfeld oder Form bietet die größte Kontrolle über das Erscheinungsbild eines Wasserzeichens.
Da das Wasserzeichen ein reguläres Arbeitsblattobjekt ist, bleibt es in der Normalansicht sichtbar und kann frei in der Größe geändert, gedreht und formatiert werden.
Dieser Ansatz ist ideal, wenn Sie benutzerdefinierte textbasierte Wasserzeichen oder unterschiedliche Wasserzeichenstile auf einzelnen Blättern benötigen.
Schritte
-
Gehen Sie zu Einfügen → WordArt.
-
Wählen Sie einen vordefinierten Stil aus dem Dropdown-Menü.
-
Geben Sie den Wasserzeichentext ein (zum Beispiel „VERTRAULICH“).
-
Drehen Sie die Form und passen Sie das Erscheinungsbild (Größe, Farbe oder Stil) des Textes nach Bedarf an.
Vorteile
- Vollständig anpassbar.
- In der Normalansicht sichtbar.
- Einfach zu bearbeiten oder zu entfernen.
Nachteile
- Kann sich verschieben, wenn Zeilen oder Spalten in der Größe geändert werden.
- Erfordert eine manuelle Einrichtung pro Arbeitsblatt.
Bester Anwendungsfall
Diese Methode eignet sich am besten für Szenarien zur Überprüfung am Bildschirm, bei denen das Wasserzeichen in der Normalansicht sichtbar bleiben muss und eine flexible Textformatierung oder eine blatt-spezifische Beschriftung erforderlich ist.
Methode 4: Wasserzeichen programmgesteuert mit Python in Excel einfügen
Wenn Wasserzeichen wiederholt oder auf mehrere Dateien angewendet werden müssen, ist die programmgesteuerte Automatisierung der effizienteste Ansatz.
Mit Spire.XLS for Python können Sie Wasserzeichen programmgesteuert auf die gleiche Weise wie die zuvor beschriebenen manuellen Methoden hinzufügen, einschließlich Kopf-/Fußzeilen-Wasserzeichen, Hintergrundbild-Wasserzeichen und formbasierten Wasserzeichen.
Dies gewährleistet konsistente Ergebnisse und reduziert den manuellen Aufwand, insbesondere bei der Berichterstellung oder bei Workflows zur Dokumentenverteilung.
Beispiel: Bildwasserzeichen über Kopf- und Fußzeile hinzufügen
Das folgende Beispiel fügt ein Bildwasserzeichen in die mittlere Kopfzeile jedes Arbeitsblatts ein. Diese Methode entspricht Methode 1 und erzeugt ein Wasserzeichen, das in der Seitenlayoutansicht, der Druckvorschau und in exportierten PDFs erscheint.
from spire.xls import *
from spire.xls.common import *

# Erstellen Sie ein Workbook-Objekt
workbook = Workbook()

# Laden Sie ein Excel-Dokument
workbook.LoadFromFile("C:\\Users\\Administrator\\Desktop\\Input.xlsx")

# Laden Sie das Wasserzeichenbild
stream = Stream("C:\\Users\\Administrator\\Desktop\\confidential.png")

# Wenden Sie das Wasserzeichen auf alle Arbeitsblätter an
for i in range(workbook.Worksheets.Count):
    worksheet = workbook.Worksheets[i]
    worksheet.PageSetup.CenterHeader = "&G"
    worksheet.PageSetup.CenterHeaderImage = stream

# Speichern Sie das Ergebnis
workbook.SaveToFile("output/AddWatermark.xlsx", ExcelVersion.Version2016)

# Ressourcen freigeben
workbook.Dispose()
Typische Anwendungsfälle
- Sie müssen mehrere Excel-Dateien oder Arbeitsblätter mit einem Wasserzeichen versehen.
- Wasserzeichen müssen konsistent und automatisch angewendet werden.
- Excel-Dateien werden als Teil einer Berichts- oder Export-Pipeline generiert.
Um zusätzliche Excel-Automatisierungsfunktionen und Details zur API-Nutzung zu erkunden, lesen Sie den Spire.XLS-Programmierleitfaden. Der Leitfaden enthält praktische Beispiele, die Ihnen helfen können, die Wasserzeichenlogik zu erweitern und flexiblere Excel-Verarbeitungslösungen zu erstellen.
Vergleich der Wasserzeichenmethoden
| Methode | Druckbar | Sichtbar in Normalansicht | Anpassbar | Automatisierung |
|---|---|---|---|---|
| Kopf- & Fußzeile | ✔ | ✖ | Begrenzt | ✔ |
| Hintergrundbild | ✖ | ✔ | ✖ | ✔ |
| WordArt / Form | ✔ | ✔ | ✔ | Begrenzt |
| Python-Automatisierung | ✔ / ✖ | ✔ / ✖ | Gesteuert | ✔✔ |
Abschließende Gedanken
Obwohl Excel keine integrierte Wasserzeichenfunktion bietet, gibt es mehrere zuverlässige Möglichkeiten, das gleiche Ergebnis zu erzielen. Der beste Ansatz hängt davon ab, wie die Datei verwendet und verteilt wird.
- Verwenden Sie Wasserzeichen in der Kopf- und Fußzeile für professionelle Dokumente, die gedruckt oder als PDF exportiert werden.
- Verwenden Sie Hintergrundbilder oder WordArt, wenn die Sichtbarkeit des Wasserzeichens während der Bearbeitung am Bildschirm Priorität hat.
- Verwenden Sie die Python-Automatisierung mit Spire.XLS, wenn Wasserzeichen konsistent auf mehrere Dateien oder als Teil eines automatisierten Workflows angewendet werden müssen.
Indem Sie die Methode wählen, die Ihren Sichtbarkeits- und Ausgabeanforderungen entspricht, können Sie klare, effektive Wasserzeichen in Excel hinzufügen, ohne die Lesbarkeit der Daten oder die Dokumentstruktur zu beeinträchtigen.
Häufig gestellte Fragen zum Hinzufügen von Wasserzeichen in Excel
F1. Hat Excel eine integrierte Wasserzeichenfunktion?
Nein. Excel bietet keine spezielle Wasserzeichen-Schaltfläche, aber es stehen mehrere effektive Alternativen zur Verfügung.
F2. Warum wird mein Wasserzeichen in der Normalansicht nicht angezeigt?
Wasserzeichen in Kopf- und Fußzeilen sind nur im Seitenlayout oder in der Druckvorschau sichtbar.
F3. Kann ich verschiedenen Blättern unterschiedliche Wasserzeichen hinzufügen?
Ja. Dies kann manuell oder programmgesteuert erfolgen, indem Einstellungen pro Arbeitsblatt angewendet werden.
F4. Was ist der beste Weg, um Excel-Dateien in großen Mengen mit einem Wasserzeichen zu versehen?
Die Verwendung der Python-Automatisierung mit Spire.XLS ist der effizienteste und skalierbarste Ansatz.
Das könnte Sie auch interessieren
Как добавить водяные знаки в Excel (4 простых способа)
Содержание
- Способ 1: Добавление водяного знака с помощью верхнего и нижнего колонтитула
- Способ 2: Вставка фонового изображения в качестве водяного знака
- Способ 3: Вставка WordArt или фигур в качестве водяного знака
- Способ 4: Программное добавление водяных знаков в Excel с помощью Python
- Сравнение методов нанесения водяных знаков
- Заключительные мысли
- Часто задаваемые вопросы о добавлении водяных знаков в Excel
Водяные знаки широко используются в файлах Excel для обозначения статуса или принадлежности документа, например, Конфиденциально, Черновик, Образец или логотип компании. Они особенно полезны при обмене отчетами внутри компании или распространении файлов внешним заинтересованным сторонам.
В отличие от Microsoft Word, в Excel нет специальной функции "Водяной знак". Однако существует несколько практических способов добиться того же эффекта с помощью встроенных инструментов или программных решений.
В этой статье вы узнаете четыре простых и эффективных способа добавления водяных знаков в Excel, от ручных техник до автоматического нанесения водяных знаков с помощью Python.
Обзор методов:
- Способ 1: Добавление водяного знака с помощью верхнего и нижнего колонтитула
- Способ 2: Вставка фонового изображения в качестве водяного знака
- Способ 3: Вставка WordArt или фигур в качестве водяного знака
- Способ 4: Программное добавление водяных знаков в Excel с помощью Python
Способ 1: Добавление водяного знака с помощью верхнего и нижнего колонтитула
Использование функции Верхний и нижний колонтитул — наиболее распространенный способ добавления водяного знака в Excel, особенно для документов, которые будут распечатаны или экспортированы в PDF.
Поскольку водяной знак размещается за пределами сетки листа, он не мешает содержимому ячеек, оставаясь одинаковым на всех страницах.
Этот метод хорошо подходит для добавления логотипов или изображений "черновик" в официальные отчеты и документы.
Шаги
-
Откройте ваш файл Excel.
-
Перейдите в Вставка → Верхний и нижний колонтитул.
-
Щелкните центральную часть колонтитула.
-
Нажмите Изображение в разделе Верхний и нижний колонтитул, чтобы вставить водяной знак в виде изображения, или введите текст напрямую.
Примечание: Рекомендуется использовать водяной знак в виде изображения, так как текст в колонтитуле часто затрудняет создание эффективного вида водяного знака.
-
Коснитесь любого места за пределами колонтитула, чтобы увидеть водяной знак.
Плюсы
- Для печати.
- Чистый и профессиональный вид.
- Подходит для логотипов и меток документов.
Минусы
- Не видно в обычном режиме.
- Ограниченная гибкость форматирования.
Лучший вариант использования
Этот метод лучше всего подходит для официальных или совместно используемых документов Excel, где водяной знак должен появляться при печати, в предварительном просмотре или в экспортированных PDF-файлах, не мешая данным на листе.
Способ 2: Вставка фонового изображения в качестве водяного знака
Excel позволяет вставлять изображение в качестве фона листа, которое может служить водяным знаком. Этот водяной знак остается видимым в Обычном режиме, что делает его полезным для просмотра на экране, внутреннего обмена или использования в файлах-шаблонах.
Однако фоновые изображения предназначены исключительно для визуального ознакомления и не будут отображаться при печати или экспорте в PDF.
Шаги
-
Откройте ваш файл Excel.
-
Перейдите в Разметка страницы → Фон.
-
Выберите файл изображения.
-
Изображение будет повторяться по всему листу.
Плюсы
- Видно в обычном режиме.
- Простота применения.
- Применяется ко всему листу.
Минусы
- Не для печати.
- Ограниченная настройка.
Лучший вариант использования
Этот метод лучше всего подходит для внутренних документов или рабочих шаблонов, где видимость во время редактирования важнее, чем печатный вывод.
Способ 3: Вставка WordArt или фигур в качестве водяного знака
Вставка WordArt, текстового поля или фигуры обеспечивает наибольший контроль над внешним видом водяного знака.
Поскольку водяной знак является обычным объектом листа, он остается видимым в обычном режиме и может быть свободно изменен в размере, повернут и стилизован.
Этот подход идеален, когда вам нужны пользовательские текстовые водяные знаки или разные стили водяных знаков на отдельных листах.
Шаги
-
Перейдите в Вставка → WordArt.
-
Выберите предопределенный стиль из выпадающего меню.
-
Введите текст водяного знака (например, "КОНФИДЕНЦИАЛЬНО").
-
Поверните фигуру и при необходимости отрегулируйте внешний вид (размер, цвет или стиль) текста.
Плюсы
- Полностью настраиваемый.
- Видно в обычном режиме.
- Легко редактировать или удалять.
Минусы
- Может смещаться при изменении размеров строк или столбцов.
- Требуется ручная настройка для каждого листа.
Лучший вариант использования
Этот метод лучше всего подходит для сценариев просмотра на экране, когда водяной знак должен оставаться видимым в обычном режиме и где требуется гибкое стилизование текста или маркировка для конкретного листа.
Способ 4: Программное добавление водяных знаков в Excel с помощью Python
Когда водяные знаки необходимо наносить многократно или на несколько файлов, программная автоматизация является наиболее эффективным подходом.
Используя Spire.XLS for Python, вы можете программно добавлять водяные знаки теми же способами, что и описанные ранее ручные методы, включая водяные знаки в колонтитулах, водяные знаки в виде фонового изображения и водяные знаки на основе фигур.
Это обеспечивает согласованные результаты при одновременном сокращении ручных усилий, особенно в рабочих процессах создания отчетов или распространения документов.
Пример: добавление водяного знака в виде изображения через верхний и нижний колонтитулы
В следующем примере добавляется водяной знак в виде изображения в центральный верхний колонтитул каждого листа. Этот метод эквивалентен Способу 1 и создает водяной знак, который появляется в режиме разметки страницы, предварительном просмотре и экспортированных PDF-файлах.
from spire.xls import *
from spire.xls.common import *

# Create a Workbook object
workbook = Workbook()

# Load an Excel document
workbook.LoadFromFile("C:\\Users\\Administrator\\Desktop\\Input.xlsx")

# Load the watermark image
stream = Stream("C:\\Users\\Administrator\\Desktop\\confidential.png")

# Apply the watermark to all worksheets
for i in range(workbook.Worksheets.Count):
    worksheet = workbook.Worksheets[i]
    worksheet.PageSetup.CenterHeader = "&G"
    worksheet.PageSetup.CenterHeaderImage = stream

# Save the result
workbook.SaveToFile("output/AddWatermark.xlsx", ExcelVersion.Version2016)

# Release resources
workbook.Dispose()
Типичные случаи использования
- Вам необходимо нанести водяные знаки на несколько файлов или листов Excel.
- Водяные знаки должны наноситься последовательно и автоматически.
- Файлы Excel создаются как часть конвейера отчетности или экспорта.
Чтобы изучить дополнительные возможности автоматизации Excel и детали использования API, см. Руководство по программированию Spire.XLS. Руководство содержит практические примеры, которые помогут вам расширить логику нанесения водяных знаков и создавать более гибкие решения для обработки Excel.
Сравнение методов нанесения водяных знаков
| Метод | Для печати | Видно в обычном режиме | Настраиваемый | Автоматизация |
|---|---|---|---|---|
| Верхний и нижний колонтитул | ✔ | ✖ | Ограниченно | ✔ |
| Фоновое изображение | ✖ | ✔ | ✖ | ✔ |
| WordArt / Фигура | ✔ | ✔ | ✔ | Ограниченно |
| Автоматизация Python | ✔ / ✖ | ✔ / ✖ | Контролируемый | ✔✔ |
Заключительные мысли
Хотя в Excel нет встроенной функции водяных знаков, он предлагает несколько надежных способов достижения того же результата. Лучший подход зависит от того, как файл будет использоваться и распространяться.
- Используйте водяные знаки в верхнем и нижнем колонтитулах для профессиональных документов, которые будут распечатаны или экспортированы в PDF.
- Используйте фоновые изображения или WordArt, когда приоритетом является видимость водяного знака во время редактирования на экране.
- Используйте автоматизацию Python с помощью Spire.XLS, когда водяные знаки должны применяться последовательно к нескольким файлам или как часть автоматизированного рабочего процесса.
Выбрав метод, соответствующий вашим требованиям к видимости и выводу, вы можете добавлять четкие и эффективные водяные знаки в Excel, не нарушая читаемость данных или структуру документа.
Часто задаваемые вопросы о добавлении водяных знаков в Excel
В1. Есть ли в Excel встроенная функция водяных знаков?
Нет. В Excel нет специальной кнопки для водяных знаков, но доступно несколько эффективных альтернатив.
В2. Почему мой водяной знак не отображается в обычном режиме?
Водяные знаки в верхнем и нижнем колонтитулах видны только в режиме разметки страницы или в предварительном просмотре.
В3. Могу ли я добавить разные водяные знаки на разные листы?
Да. Это можно сделать вручную или программно, применяя настройки для каждого листа.
В4. Какой лучший способ массового нанесения водяных знаков на файлы Excel?
Использование автоматизации Python с помощью Spire.XLS является наиболее эффективным и масштабируемым подходом.
Вам также может быть интересно
Remover quebras de página no Excel: Guia manual e automático (2025)
Índice
Quebras de página indesejadas no Excel podem atrapalhar o layout da sua planilha e tornar a impressão dos seus dados frustrante. Elas geralmente aparecem após alterar as configurações de impressão, ajustar as margens ou mudar as visualizações. Quer as quebras de página sejam inseridas manualmente ou adicionadas automaticamente pelo Excel, saber como removê-las ajuda a manter uma planilha limpa e profissional.
Este artigo mostra como remover quebras de página no Excel, incluindo quebras de página manuais e automáticas. Ele também aborda como ocultar quebras de página e fornece soluções de remoção em lote para várias planilhas ou pastas de trabalho.
- Compreendendo as quebras de página no Excel (manuais vs. automáticas)
- Como remover quebras de página manuais no Excel
- Como remover quebras de página automáticas no Excel
- Ocultar quebras de página na visualização normal
- Remover quebras de página em lote no Excel com Python
Compreendendo as quebras de página no Excel (manuais vs. automáticas)
Antes de remover as quebras de página, é importante conhecer os dois tipos principais que o Excel usa:
- Quebras de página manuais: Inseridas pelos usuários para controlar onde uma página termina ao imprimir.
- Quebras de página automáticas: Adicionadas pelo Excel com base nas margens, tamanho do papel, configurações de escala e área de impressão.
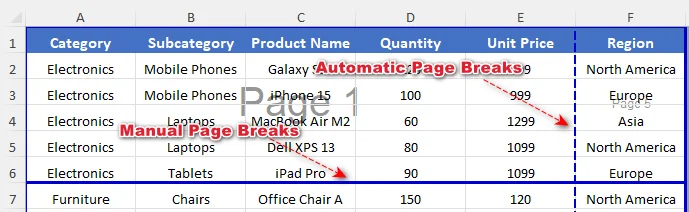
Você pode usar a Visualização de Quebra de Página para identificar os tipos de quebra de página. As quebras manuais aparecem como linhas azuis contínuas, enquanto as quebras automáticas aparecem como linhas azuis tracejadas.
O método de remoção depende do tipo de quebra de página com o qual você está lidando.
Como remover quebras de página manuais no Excel
Você pode remover quebras de página manuais individuais ou limpar todas as quebras de página manuais de uma planilha, conforme necessário. Para operações em massa, os scripts VBA do Excel permitem remover quebras de página de várias planilhas de forma eficiente.
Remover uma quebra de página manual
Você pode remover uma quebra de página manual específica em uma planilha do Excel selecionando a célula correta perto da quebra. Veja como fazer:
-
Vá para a guia Exibir na faixa de opções e clique em Visualização de Quebra de Página no grupo Modos de Exibição da Pasta de Trabalho.
Você também pode clicar no ícone Visualização de Quebra de Página na barra de status (canto inferior direito).
-
Identifique a quebra de página manual (linha azul contínua) que você deseja remover.
-
Selecione uma célula perto da quebra de página:
-
Para uma quebra de página horizontal, selecione qualquer célula abaixo da quebra.
-
Para uma quebra de página vertical, selecione qualquer célula à direita da quebra.
-
-
Vá para a guia Layout da Página na faixa de opções.
-
Clique em Quebras e escolha Remover Quebra de Página.
Isso remove apenas a quebra de página manual selecionada, e o restante da planilha permanecerá inalterado.
Dica: Você também pode clicar com o botão direito na célula e selecionar Remover Quebra de Página para excluir a quebra. Ou, arraste diretamente a linha de quebra para fora da área de visualização de quebra de página se o recurso de arrastar e soltar estiver ativado no seu Excel.
Remover todas as quebras de página manuais de uma planilha
Se a sua planilha tiver várias quebras de página manuais, removê-las todas de uma vez pode economizar tempo. Siga os passos abaixo:
-
Selecione qualquer célula na planilha.
-
Vá para a guia Layout da Página na faixa de opções.
-
Clique em Quebras > Redefinir Todas as Quebras de Página.
Isso remove todas as quebras de página inseridas manualmente da planilha ativa.
Excluir quebras de página manuais de várias planilhas com VBA
Se você precisar remover quebras de página manuais de várias planilhas simultaneamente, usar VBA (Visual Basic for Applications) é a solução mais eficiente. Veja como fazer:
-
Pressione Alt + F11 (Windows) ou Option + F11 (Mac) para abrir o editor do VBA.
-
No editor, vá para Inserir > Módulo.
-
Copie e cole o seguinte código:
Sub ResetPageBreaksAllSheets() Dim ws As Worksheet For Each ws In ActiveWorkbook.Worksheets ws.ResetAllPageBreaks Next ws End Sub -
Pressione F5 para executar a macro.
Todas as quebras de página manuais em cada planilha da pasta de trabalho ativa serão removidas de uma vez.
Como remover quebras de página automáticas no Excel
As quebras de página automáticas no Excel não podem ser removidas completamente. No entanto, você pode controlá-las ajustando as configurações de layout, como escala, margens, orientação da página e área de impressão. Otimizar essas configurações permite que mais conteúdo caiba em cada página e reduz quebras indesejadas.
Para reduzir as quebras de página automáticas:
- Alterar Escala
Vá para Layout da Página > Dimensionar para Ajustar, defina Largura e Altura como Automático ou aumente a porcentagem de escala.
Ajustar mais conteúdo por página reduz as quebras de página automáticas. - Ajustar Margens
Vá para Layout da Página > Margens e selecione Estreita ou Margens Personalizadas.
Margens menores expandem a área de impressão e ajudam a reduzir as quebras de página. - Alterar Orientação da Página
Vá para Layout da Página > Orientação e mude de Retrato para Paisagem.
Páginas mais largas acomodam mais colunas, reduzindo as quebras de página verticais. - Limpar Área de Impressão
Vá para Layout da Página > Área de Impressão e limpe a área de impressão se ela restringir o intervalo de conteúdo.
Limpar a área de impressão garante que o Excel calcule as quebras de página automáticas com precisão e evite quebras desnecessárias.
Ocultar quebras de página na visualização normal
Às vezes, os usuários desejam ocultar as linhas de quebra de página no Excel sem alterar o comportamento de impressão. Isso é útil se as linhas de quebra aparecerem após entrar na Visualização de Impressão. Siga estes passos:
-
Clique em Arquivo > Opções.
-
Vá para Avançado.
-
Role até Opções de exibição para esta planilha.
-
Desmarque Mostrar quebras de página.
-
Clique em OK.
Nota: Esta ação não remove as quebras de página. Ela apenas oculta as linhas de quebra de página na tela e não afeta o layout de impressão. Se a caixa Mostrar quebras de página não puder ser desmarcada, certifique-se de que a planilha esteja no modo de exibição Normal em vez do modo Visualização de Quebra de Página.
Remover quebras de página em lote no Excel com Python
Remover manualmente as quebras de página de várias pastas de trabalho do Excel pode ser demorado. Usando Python e bibliotecas como Spire.XLS para Python, você pode remover em lote todas as quebras de página de vários arquivos, economizando tempo e garantindo uma formatação consistente.

Passos para Remoção em Lote com Python:
-
Instale o Spire.XLS do PyPI usando pip:
pip install spire.xls -
Escreva um script Python para remover em lote as quebras de página de vários arquivos do Excel
from spire.xls import * import os input_folder = "input_excels" output_folder = "output_excels" for file_name in os.listdir(input_folder): if file_name.endswith(".xlsx"): # Load workbook workbook = Workbook() workbook.LoadFromFile(os.path.join(input_folder, file_name)) # Clear page breaks in all worksheets for sheet in workbook.Worksheets: sheet.HPageBreaks.Clear() sheet.VPageBreaks.Clear() sheet.ViewMode = ViewMode.Preview # Save updated workbook workbook.SaveToFile(os.path.join(output_folder, file_name), ExcelVersion.Version2013) workbook.Dispose() -
Execute o código
Execute o script para remover automaticamente as quebras de página na planilha do Excel de destino.
Dica: Você também pode ajustar a escala da planilha, as margens e a orientação da página em seu código para reduzir as quebras de página automáticas.
Artigo Relacionado: Python: Inserir ou Remover Quebras de Página no Excel
Conclusão
Neste guia, abordamos como remover quebras de página no Excel, incluindo quebras de página manuais e automáticas. Seguindo estes passos, você pode limpar efetivamente suas planilhas e mantê-las organizadas e prontas para impressão.
Procurando por mais tutoriais de Excel de alta qualidade? Confira nossos recursos gratuitos de Excel.
Perguntas Frequentes: Remover Quebras de Página no Excel
P1: Qual é a diferença entre quebras de página manuais e automáticas?
R1: As quebras de página manuais são inseridas pelos usuários para controlar exatamente onde as páginas quebram durante a impressão, enquanto as quebras de página automáticas são adicionadas pelo Excel com base nas configurações de impressão e no layout.
P2: Posso remover quebras de página sem afetar a impressão?
R2: Sim. Você pode ocultar as linhas de quebra de página na visualização Normal da planilha. Isso afeta apenas a exibição na tela; as quebras permanecem no arquivo e ainda podem influenciar a impressão.
P3: Por que não consigo remover algumas quebras de página no Excel?
R3: As quebras de página automáticas não podem ser excluídas diretamente. Elas são controladas pelo Excel para manter o layout de impressão, mas você pode influenciá-las ajustando as margens, a escala, o tamanho do papel ou a área de impressão.
P4: Como remover quebras de página em várias planilhas de uma vez?
R4: A maneira mais eficiente de remover quebras de página em várias planilhas no Excel é usar VBA ou Python. Isso permite que você limpe todas as quebras de página manuais em grandes pastas de trabalho ou vários arquivos de forma rápida e consistente.
Veja Também
Excel 페이지 나누기 제거: 수동 및 자동 가이드 (2025)
Excel의 원치 않는 페이지 나누기는 워크시트 레이아웃을 방해하고 데이터 인쇄를 어렵게 만들 수 있습니다. 인쇄 설정을 변경하거나, 여백을 조정하거나, 보기를 전환한 후에 종종 나타납니다. 페이지 나누기가 수동으로 삽입되었든 Excel에 의해 자동으로 추가되었든, 이를 제거하는 방법을 알면 깨끗하고 전문적인 워크시트를 유지하는 데 도움이 됩니다.
이 문서에서는 수동 및 자동 페이지 나누기를 포함하여 Excel에서 페이지 나누기를 제거하는 방법을 보여줍니다. 또한 페이지 나누기를 숨기는 방법과 여러 워크시트 또는 통합 문서에 대한 일괄 제거 솔루션을 다룹니다.
- Excel의 페이지 나누기 이해 (수동 대 자동)
- Excel에서 수동 페이지 나누기를 제거하는 방법
- Excel에서 자동 페이지 나누기를 제거하는 방법
- 기본 보기에서 페이지 나누기 숨기기
- Python으로 Excel에서 페이지 나누기 일괄 제거
Excel의 페이지 나누기 이해 (수동 대 자동)
페이지 나누기를 제거하기 전에 Excel에서 사용하는 두 가지 주요 유형을 아는 것이 중요합니다.
- 수동 페이지 나누기: 인쇄할 때 페이지가 끝나는 위치를 제어하기 위해 사용자가 삽입합니다.
- 자동 페이지 나누기: 여백, 용지 크기, 배율 설정 및 인쇄 영역을 기반으로 Excel에서 추가합니다.
페이지 나누기 미리 보기를 사용하여 페이지 나누기 유형을 식별할 수 있습니다. 수동 나누기는 실선 파란색 선으로 나타나고 자동 나누기는 파선 파란색 선으로 나타납니다.
제거 방법은 처리 중인 페이지 나누기 유형에 따라 다릅니다.
Excel에서 수동 페이지 나누기를 제거하는 방법
필요에 따라 개별 수동 페이지 나누기를 제거하거나 워크시트 내의 모든 수동 페이지 나누기를 지울 수 있습니다. 대량 작업의 경우 Excel VBA 스크립트를 사용하면 여러 워크시트에서 효율적으로 페이지 나누기를 제거할 수 있습니다.
수동 페이지 나누기 제거
나누기 근처의 올바른 셀을 선택하여 Excel 시트에서 특정 수동 페이지 나누기를 제거할 수 있습니다. 방법은 다음과 같습니다.
-
리본의 보기 탭으로 이동하여 통합 문서 보기 그룹 아래에서 페이지 나누기 미리 보기를 클릭합니다.
상태 표시줄(오른쪽 하단)의 페이지 나누기 미리 보기 아이콘을 클릭할 수도 있습니다.
-
제거하려는 수동 페이지 나누기(실선 파란색 선)를 식별합니다.
-
페이지 나누기 근처의 셀 선택:
-
가로 페이지 나누기의 경우 나누기 아래의 아무 셀이나 선택합니다.
-
세로 페이지 나누기의 경우 나누기 오른쪽의 아무 셀이나 선택합니다.
-
-
리본의 페이지 레이아웃 탭으로 이동합니다.
-
나누기를 클릭한 다음 페이지 나누기 제거를 선택합니다.
이렇게 하면 선택한 수동 페이지 나누기만 제거되고 나머지 시트는 변경되지 않습니다.
팁: 셀을 마우스 오른쪽 버튼으로 클릭하고 페이지 나누기 제거를 선택하여 나누기를 삭제할 수도 있습니다. 또는 Excel에서 끌어서 놓기 기능이 활성화된 경우 나누기 선을 페이지 나누기 미리 보기 영역 밖으로 직접 끕니다.
시트에서 모든 수동 페이지 나누기 제거
시트에 여러 개의 수동 페이지 나누기가 있는 경우 한 번에 모두 제거하면 시간을 절약할 수 있습니다. 아래 단계를 따르십시오.
-
시트에서 아무 셀이나 선택합니다.
-
리본의 페이지 레이아웃 탭으로 이동합니다.
-
나누기 > 모든 페이지 나누기 다시 설정을 클릭합니다.
활성 워크시트에서 수동으로 삽입된 모든 페이지 나누기를 제거합니다.
VBA로 여러 시트에서 수동 페이지 나누기 삭제
여러 시트에서 동시에 수동 페이지 나누기를 제거해야 하는 경우 VBA(Visual Basic for Applications)를 사용하는 것이 가장 효율적인 솔루션입니다. 방법은 다음과 같습니다.
-
Alt + F11(Windows) 또는 Option + F11(Mac)을 눌러 VBA 편집기를 엽니다.
-
편집기에서 삽입 > 모듈로 이동합니다.
-
다음 코드를 복사하여 붙여넣습니다.
Sub ResetPageBreaksAllSheets() Dim ws As Worksheet For Each ws In ActiveWorkbook.Worksheets ws.ResetAllPageBreaks Next ws End Sub -
F5를 눌러 매크로를 실행합니다.
활성 통합 문서의 모든 워크시트에 있는 모든 수동 페이지 나누기가 한 번에 제거됩니다.
Excel에서 자동 페이지 나누기를 제거하는 방법
Excel의 자동 페이지 나누기는 완전히 제거할 수 없습니다. 그러나 배율, 여백, 페이지 방향 및 인쇄 영역과 같은 레이아웃 설정을 조정하여 제어할 수 있습니다. 이러한 설정을 최적화하면 각 페이지에 더 많은 콘텐츠를 맞출 수 있고 원치 않는 나누기를 줄일 수 있습니다.
자동 페이지 나누기를 줄이려면:
- 배율 변경
페이지 레이아웃 > 맞춤 배율로 이동하여 너비와 높이를 자동으로 설정하거나 배율 백분율을 높입니다.
페이지당 더 많은 콘텐츠를 맞추면 자동 페이지 나누기가 줄어듭니다. - 여백 조정
페이지 레이아웃 > 여백으로 이동하여 좁게 또는 사용자 지정 여백을 선택합니다.
여백이 작을수록 인쇄 가능 영역이 확장되고 페이지 나누기를 줄이는 데 도움이 됩니다. - 페이지 방향 변경
페이지 레이아웃 > 방향으로 이동하여 세로에서 가로로 전환합니다.
페이지가 넓을수록 더 많은 열을 맞출 수 있어 세로 페이지 나누기가 줄어듭니다. - 인쇄 영역 지우기
페이지 레이아웃 > 인쇄 영역으로 이동하여 콘텐츠 범위를 제한하는 경우 인쇄 영역을 지웁니다.
인쇄 영역을 지우면 Excel이 자동 페이지 나누기를 정확하게 계산하고 불필요한 나누기를 방지할 수 있습니다.
기본 보기에서 페이지 나누기 숨기기
때로는 사용자가 인쇄 동작을 변경하지 않고 Excel에서 페이지 나누기 선을 숨기기를 원합니다. 이는 인쇄 미리 보기에 들어간 후 나누기 선이 나타나는 경우에 유용합니다. 다음 단계를 따르십시오.
-
파일 > 옵션을 클릭합니다.
-
고급으로 이동합니다.
-
이 워크시트에 대한 표시 옵션으로 스크롤합니다.
-
페이지 나누기 표시 선택을 취소합니다.
-
확인을 클릭합니다.
참고: 이 작업은 페이지 나누기를 제거하지 않습니다. 화면의 페이지 나누기 선만 숨기고 인쇄 레이아웃에는 영향을 미치지 않습니다. 페이지 나누기 표시 상자를 선택 취소할 수 없는 경우 워크시트가 페이지 나누기 미리 보기 모드가 아닌 기본 보기에 있는지 확인하십시오.
Python으로 Excel에서 페이지 나누기 일괄 제거
여러 Excel 통합 문서에서 수동으로 페이지 나누기를 제거하는 것은 시간이 많이 걸릴 수 있습니다. Python 및 Spire.XLS for Python과 같은 라이브러리를 사용하면 여러 파일에서 모든 페이지 나누기를 일괄적으로 제거하여 시간을 절약하고 일관된 서식을 보장할 수 있습니다.
Python을 사용한 일괄 제거 단계:
-
pip를 사용하여 PyPI에서 Spire.XLS 설치:
pip install spire.xls -
여러 Excel 파일에서 페이지 나누기를 일괄 제거하는 Python 스크립트 작성
from spire.xls import * import os input_folder = "input_excels" output_folder = "output_excels" for file_name in os.listdir(input_folder): if file_name.endswith(".xlsx"): # Load workbook workbook = Workbook() workbook.LoadFromFile(os.path.join(input_folder, file_name)) # Clear page breaks in all worksheets for sheet in workbook.Worksheets: sheet.HPageBreaks.Clear() sheet.VPageBreaks.Clear() sheet.ViewMode = ViewMode.Preview # Save updated workbook workbook.SaveToFile(os.path.join(output_folder, file_name), ExcelVersion.Version2013) workbook.Dispose() -
코드 실행
스크립트를 실행하여 대상 Excel 시트에서 페이지 나누기를 자동으로 제거합니다.
팁: 코드에서 시트 배율, 여백 및 페이지 방향을 조정하여 자동 페이지 나누기를 줄일 수도 있습니다.
관련 기사: Python: Excel에서 페이지 나누기 삽입 또는 제거
결론
이 가이드에서는 수동 및 자동 페이지 나누기를 포함하여 Excel에서 페이지 나누기를 제거하는 방법을 다루었습니다. 이 단계를 따르면 워크시트를 효과적으로 정리하고 정리되고 인쇄 준비가 된 상태로 유지할 수 있습니다.
더 많은 고품질 Excel 자습서를 찾고 계십니까? 무료 Excel 리소스를 확인하십시오.
자주 묻는 질문: Excel에서 페이지 나누기 제거
Q1: 수동 페이지 나누기와 자동 페이지 나누기의 차이점은 무엇입니까?
A1: 수동 페이지 나누기는 인쇄 중에 페이지가 나뉘는 위치를 정확하게 제어하기 위해 사용자가 삽입하는 반면, 자동 페이지 나누기는 인쇄 설정 및 레이아웃에 따라 Excel에서 추가합니다.
Q2: 인쇄에 영향을 주지 않고 페이지 나누기를 제거할 수 있습니까?
A2: 예. 일반 워크시트 보기에서 페이지 나누기 선을 숨길 수 있습니다. 이것은 화면 표시에만 영향을 미칩니다. 나누기는 파일에 남아 있으며 여전히 인쇄에 영향을 줄 수 있습니다.
Q3: Excel에서 일부 페이지 나누기를 제거할 수 없는 이유는 무엇입니까?
A3: 자동 페이지 나누기는 직접 삭제할 수 없습니다. 인쇄 레이아웃을 유지하기 위해 Excel에서 제어하지만 여백, 배율, 용지 크기 또는 인쇄 영역을 조정하여 영향을 줄 수 있습니다.
Q4: 여러 워크시트에서 페이지 나누기를 한 번에 제거하는 방법은 무엇입니까?
A4: Excel의 여러 워크시트에서 페이지 나누기를 제거하는 가장 효율적인 방법은 VBA 또는 Python을 사용하는 것입니다. 이를 통해 대규모 통합 문서 또는 여러 파일에서 모든 수동 페이지 나누기를 빠르고 일관되게 지울 수 있습니다.
참고 항목
Rimuovere le interruzioni di pagina in Excel: Guida manuale e automatica (2025)
Indice dei contenuti
- Comprendere le interruzioni di pagina in Excel (manuali e automatiche)
- Come rimuovere le interruzioni di pagina manuali in Excel
- Come rimuovere le interruzioni di pagina automatiche in Excel
- Nascondere le interruzioni di pagina nella visualizzazione normale
- Rimuovere in blocco le interruzioni di pagina in Excel con Python
Le interruzioni di pagina indesiderate in Excel possono disturbare il layout del foglio di lavoro e rendere frustrante la stampa dei dati. Spesso compaiono dopo aver modificato le impostazioni di stampa, regolato i margini o cambiato visualizzazione. Che le interruzioni di pagina siano inserite manualmente o aggiunte automaticamente da Excel, sapere come rimuoverle aiuta a mantenere un foglio di lavoro pulito e professionale.
Questo articolo mostra come rimuovere le interruzioni di pagina in Excel, incluse sia le interruzioni di pagina manuali che quelle automatiche. Tratta anche come nascondere le interruzioni di pagina e fornisce soluzioni per la rimozione in blocco per più fogli di lavoro o cartelle di lavoro.
- Comprendere le interruzioni di pagina in Excel (manuali e automatiche)
- Come rimuovere le interruzioni di pagina manuali in Excel
- Come rimuovere le interruzioni di pagina automatiche in Excel
- Nascondere le interruzioni di pagina nella visualizzazione normale
- Rimuovere in blocco le interruzioni di pagina in Excel con Python
Comprendere le interruzioni di pagina in Excel (manuali e automatiche)
Prima di rimuovere le interruzioni di pagina, è importante conoscere i due tipi principali utilizzati da Excel:
- Interruzioni di pagina manuali: Inserite dagli utenti per controllare dove termina una pagina durante la stampa.
- Interruzioni di pagina automatiche: Aggiunte da Excel in base a margini, dimensioni del foglio, impostazioni di scala e area di stampa.
È possibile utilizzare Anteprima interruzioni di pagina per identificare i tipi di interruzione di pagina. Le interruzioni manuali appaiono come linee blu continue, mentre le interruzioni automatiche appaiono come linee blu tratteggiate.
Il metodo di rimozione dipende dal tipo di interruzione di pagina con cui si ha a che fare.
Come rimuovere le interruzioni di pagina manuali in Excel
È possibile rimuovere singole interruzioni di pagina manuali o cancellare tutte le interruzioni di pagina manuali all'interno di un foglio di lavoro, se necessario. Per operazioni in blocco, gli script VBA di Excel consentono di rimuovere in modo efficiente le interruzioni di pagina su più fogli di lavoro.
Rimuovere un'interruzione di pagina manuale
È possibile rimuovere una specifica interruzione di pagina manuale in un foglio di Excel selezionando la cella corretta vicino all'interruzione. Ecco come fare:
-
Andare alla scheda Visualizza sulla barra multifunzione e fare clic su Anteprima interruzioni di pagina nel gruppo Visualizzazioni cartella di lavoro.
È anche possibile fare clic sull'icona Anteprima interruzioni di pagina sulla barra di stato (in basso a destra).
-
Identificare l'interruzione di pagina manuale (linea blu continua) che si desidera rimuovere.
-
Selezionare una cella vicino all'interruzione di pagina:
-
Per un'interruzione di pagina orizzontale, selezionare una cella qualsiasi sotto l'interruzione.
-
Per un'interruzione di pagina verticale, selezionare una cella qualsiasi a destra dell'interruzione.
-
-
Andare alla scheda Layout di pagina sulla barra multifunzione.
-
Fare clic su Interruzioni, quindi scegliere Rimuovi interruzione di pagina.
Questo rimuove solo l'interruzione di pagina manuale selezionata e il resto del foglio rimarrà invariato.
Suggerimento: è anche possibile fare clic con il pulsante destro del mouse sulla cella e selezionare Rimuovi interruzione di pagina per eliminare l'interruzione. Oppure, trascinare direttamente la linea di interruzione fuori dall'area di anteprima delle interruzioni di pagina se la funzione di trascinamento è abilitata in Excel.
Rimuovere tutte le interruzioni di pagina manuali da un foglio
Se il foglio ha più interruzioni di pagina manuali, rimuoverle tutte in una volta può far risparmiare tempo. Seguire i passaggi seguenti:
-
Selezionare una cella qualsiasi nel foglio.
-
Andare alla scheda Layout di pagina sulla barra multifunzione.
-
Fare clic su Interruzioni > Ripristina tutte le interruzioni di pagina.
Questo rimuove tutte le interruzioni di pagina inserite manualmente dal foglio di lavoro attivo.
Eliminare le interruzioni di pagina manuali da più fogli con VBA
Se è necessario rimuovere le interruzioni di pagina manuali da più fogli contemporaneamente, l'utilizzo di VBA (Visual Basic for Applications) è la soluzione più efficiente. Ecco come è possibile farlo:
-
Premere Alt + F11 (Windows) o Opzione + F11 (Mac) per aprire l'editor VBA.
-
Nell'editor, andare su Inserisci > Modulo.
-
Copiare e incollare il seguente codice:
Sub ResetPageBreaksAllSheets() Dim ws As Worksheet For Each ws In ActiveWorkbook.Worksheets ws.ResetAllPageBreaks Next ws End Sub -
Premere F5 per eseguire la macro.
Tutte le interruzioni di pagina manuali in ogni foglio di lavoro della cartella di lavoro attiva verranno rimosse contemporaneamente.
Come rimuovere le interruzioni di pagina automatiche in Excel
Le interruzioni di pagina automatiche in Excel non possono essere rimosse completamente. Tuttavia, è possibile controllarle regolando le impostazioni di layout come la scala, i margini, l'orientamento della pagina e l'area di stampa. L'ottimizzazione di queste impostazioni consente di inserire più contenuto in ogni pagina e riduce le interruzioni indesiderate.
Per ridurre le interruzioni di pagina automatiche:
- Modifica scala
Andare su Layout di pagina > Adatta alla pagina, impostare Larghezza e Altezza su Automatico o aumentare la percentuale di scala.
Adattare più contenuto per pagina riduce le interruzioni di pagina automatiche. - Regola margini
Andare su Layout di pagina > Margini e selezionare Stretti o Margini personalizzati.
Margini più piccoli espandono l'area stampabile e aiutano a ridurre le interruzioni di pagina. - Modifica orientamento pagina
Andare su Layout di pagina > Orientamento e passare da Verticale a Orizzontale.
Pagine più larghe si adattano a più colonne, riducendo le interruzioni di pagina verticali. - Cancella area di stampa
Andare su Layout di pagina > Area di stampa e cancellare l'area di stampa se limita l'intervallo di contenuto.
La cancellazione dell'area di stampa garantisce che Excel calcoli accuratamente le interruzioni di pagina automatiche ed eviti interruzioni non necessarie.
Nascondere le interruzioni di pagina nella visualizzazione normale
A volte, gli utenti desiderano nascondere le linee di interruzione di pagina in Excel senza modificare il comportamento di stampa. Ciò è utile se le linee di interruzione compaiono dopo essere entrati in Anteprima di stampa. Seguire questi passaggi:
-
Fare clic su File > Opzioni.
-
Andare su Avanzate.
-
Scorrere fino a Opzioni di visualizzazione per il foglio di lavoro.
-
Deselezionare Mostra interruzioni di pagina.
-
Fare clic su OK.
Nota: questa azione non rimuove le interruzioni di pagina. Nasconde solo le linee di interruzione di pagina sullo schermo e non influisce sul layout di stampa. Se la casella Mostra interruzioni di pagina non può essere deselezionata, assicurarsi che il foglio di lavoro sia in visualizzazione Normale anziché in modalità Anteprima interruzioni di pagina.
Rimuovere in blocco le interruzioni di pagina in Excel con Python
La rimozione manuale delle interruzioni di pagina da più cartelle di lavoro di Excel può richiedere molto tempo. Utilizzando Python e librerie come Spire.XLS per Python, è possibile rimuovere in blocco tutte le interruzioni di pagina su più file, risparmiando tempo e garantendo una formattazione coerente.
Passaggi per la rimozione in blocco con Python:
-
Installare Spire.XLS da PyPI usando pip:
pip install spire.xls -
Scrivere uno script Python per rimuovere in blocco le interruzioni di pagina da più file Excel
from spire.xls import * import os input_folder = "input_excels" output_folder = "output_excels" for file_name in os.listdir(input_folder): if file_name.endswith(".xlsx"): # Load workbook workbook = Workbook() workbook.LoadFromFile(os.path.join(input_folder, file_name)) # Clear page breaks in all worksheets for sheet in workbook.Worksheets: sheet.HPageBreaks.Clear() sheet.VPageBreaks.Clear() sheet.ViewMode = ViewMode.Preview # Save updated workbook workbook.SaveToFile(os.path.join(output_folder, file_name), ExcelVersion.Version2013) workbook.Dispose() -
Eseguire il codice
Eseguire lo script per rimuovere automaticamente le interruzioni di pagina nel foglio Excel di destinazione.
Suggerimento: è anche possibile regolare la scala del foglio, i margini e l'orientamento della pagina nel codice per ridurre le interruzioni di pagina automatiche.
Articolo correlato: Python: Inserire o rimuovere le interruzioni di pagina in Excel
Conclusione
In questa guida, abbiamo trattato come rimuovere le interruzioni di pagina in Excel, incluse sia le interruzioni di pagina manuali che quelle automatiche. Seguendo questi passaggi, è possibile pulire efficacemente i fogli di lavoro e mantenerli organizzati e pronti per la stampa.
Cerchi altri tutorial di alta qualità su Excel? Dai un'occhiata alle nostre risorse gratuite su Excel.
Domande frequenti: Rimuovere le interruzioni di pagina in Excel
D1: Qual è la differenza tra interruzioni di pagina manuali e automatiche?
R1: Le interruzioni di pagina manuali vengono inserite dagli utenti per controllare esattamente dove le pagine si interrompono durante la stampa, mentre le interruzioni di pagina automatiche vengono aggiunte da Excel in base alle impostazioni di stampa e al layout.
D2: Posso rimuovere le interruzioni di pagina senza influire sulla stampa?
R2: Sì. È possibile nascondere le linee di interruzione di pagina nella visualizzazione normale del foglio di lavoro. Ciò influisce solo sulla loro visualizzazione su schermo; le interruzioni rimangono nel file e possono comunque influenzare la stampa.
D3: Perché non riesco a rimuovere alcune interruzioni di pagina in Excel?
R3: Le interruzioni di pagina automatiche non possono essere eliminate direttamente. Sono controllate da Excel per mantenere il layout di stampa, ma è possibile influenzarle regolando i margini, la scala, le dimensioni del foglio o l'area di stampa.
D4: Come rimuovere le interruzioni di pagina in più fogli di lavoro contemporaneamente?
R4: Il modo più efficiente per rimuovere le interruzioni di pagina in più fogli di lavoro in Excel è utilizzare VBA o Python. Ciò consente di cancellare tutte le interruzioni di pagina manuali su grandi cartelle di lavoro o più file in modo rapido e coerente.
Vedi anche
- Impostare l'area di stampa in Excel: Manuale, VBA e Python
- Annullare l'unione di celle in Excel (Manuale, VBA e Python)
- Copiare un foglio di lavoro in Excel (Manuale, VBA e Python)
- Rimuovere le righe duplicate da Excel - 6 modi semplici
- Convertire Excel in ODS: 4 modi semplici (locale, online e automazione)
Supprimer les sauts de page dans Excel : Guide manuel et automatique (2025)
Table des matières
Les sauts de page indésirables dans Excel peuvent perturber la mise en page de votre feuille de calcul et rendre l'impression de vos données frustrante. Ils apparaissent souvent après avoir modifié les paramètres d'impression, ajusté les marges ou changé d'affichage. Que les sauts de page soient insérés manuellement ou ajoutés automatiquement par Excel, savoir comment les supprimer vous aide à conserver une feuille de calcul propre et professionnelle.
Cet article vous montre comment supprimer les sauts de page dans Excel, y compris les sauts de page manuels et automatiques. Il explique également comment masquer les sauts de page et fournit des solutions de suppression en masse pour plusieurs feuilles de calcul ou classeurs.
- Comprendre les sauts de page dans Excel (manuels ou automatiques)
- Comment supprimer les sauts de page manuels dans Excel
- Comment supprimer les sauts de page automatiques dans Excel
- Masquer les sauts de page en affichage Normal
- Supprimer en masse les sauts de page dans Excel avec Python
Comprendre les sauts de page dans Excel (manuels ou automatiques)
Avant de supprimer les sauts de page, il est important de connaître les deux principaux types utilisés par Excel :
- Sauts de page manuels : insérés par les utilisateurs pour contrôler où une page se termine lors de l'impression.
- Sauts de page automatiques : ajoutés par Excel en fonction des marges, de la taille du papier, des paramètres de mise à l'échelle et de la zone d'impression.
Vous pouvez utiliser l'Aperçu des sauts de page pour identifier les types de sauts de page. Les sauts manuels apparaissent comme des lignes bleues pleines, tandis que les sauts automatiques apparaissent comme des lignes bleues pointillées.
La méthode de suppression dépend du type de saut de page auquel vous avez affaire.
Comment supprimer les sauts de page manuels dans Excel
Vous pouvez supprimer des sauts de page manuels individuels ou effacer tous les sauts de page manuels d'une feuille de calcul selon les besoins. Pour les opérations en masse, les scripts VBA d'Excel vous permettent de supprimer efficacement les sauts de page sur plusieurs feuilles de calcul.
Supprimer un saut de page manuel
Vous pouvez supprimer un saut de page manuel spécifique dans une feuille Excel en sélectionnant la cellule correcte près du saut. Voici comment faire :
-
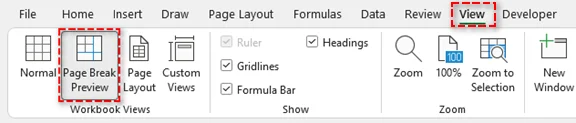
Allez dans l'onglet Affichage du ruban et cliquez sur Aperçu des sauts de page dans le groupe Affichages classeur.
Vous pouvez également cliquer sur l'icône Aperçu des sauts de page dans la barre d'état (en bas à droite).
-
Identifiez le saut de page manuel (ligne bleue pleine) que vous souhaitez supprimer.
-
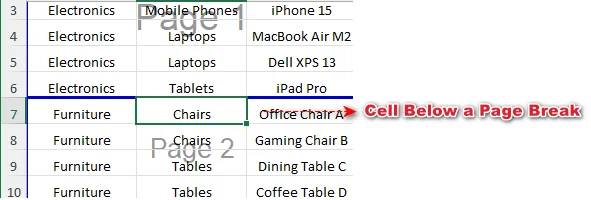
Sélectionnez une cellule près du saut de page :
-
Pour un saut de page horizontal, sélectionnez n'importe quelle cellule en dessous du saut.
-
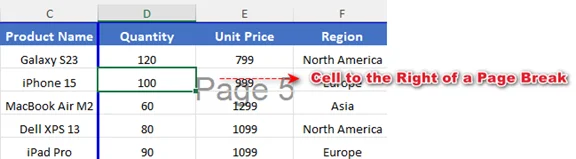
Pour un saut de page vertical, sélectionnez n'importe quelle cellule à droite du saut.
-
-
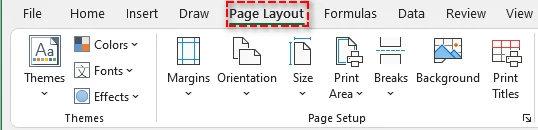
Allez dans l'onglet Mise en page du ruban.
-
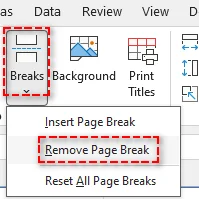
Cliquez sur Sauts de page, puis choisissez Supprimer le saut de page.
Cela ne supprime que le saut de page manuel sélectionné, et le reste de la feuille restera inchangé.
Astuce : Vous pouvez également faire un clic droit sur la cellule et sélectionner Supprimer le saut de page pour supprimer le saut. Ou, faites glisser directement la ligne de saut en dehors de la zone d'aperçu des sauts de page si la fonction glisser-déposer est activée dans votre Excel.
Supprimer tous les sauts de page manuels d'une feuille
Si votre feuille comporte plusieurs sauts de page manuels, les supprimer tous en une seule fois peut vous faire gagner du temps. Suivez les étapes ci-dessous :
-
Sélectionnez n'importe quelle cellule de la feuille.
-
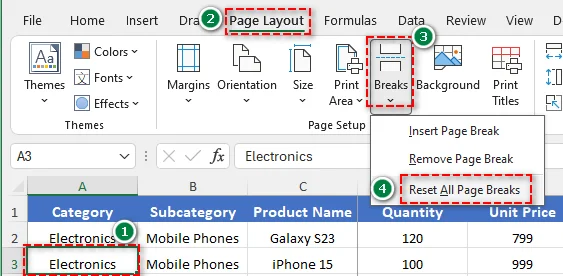
Allez dans l'onglet Mise en page du ruban.
-
Cliquez sur Sauts de page > Rétablir tous les sauts de page.
Cela supprime tous les sauts de page insérés manuellement de la feuille de calcul active.
Supprimer les sauts de page manuels de plusieurs feuilles avec VBA
Si vous devez supprimer simultanément les sauts de page manuels de plusieurs feuilles, l'utilisation de VBA (Visual Basic for Applications) est la solution la plus efficace. Voici comment vous pouvez le faire :
-
Appuyez sur Alt + F11 (Windows) ou Option + F11 (Mac) pour ouvrir l'éditeur VBA.
-
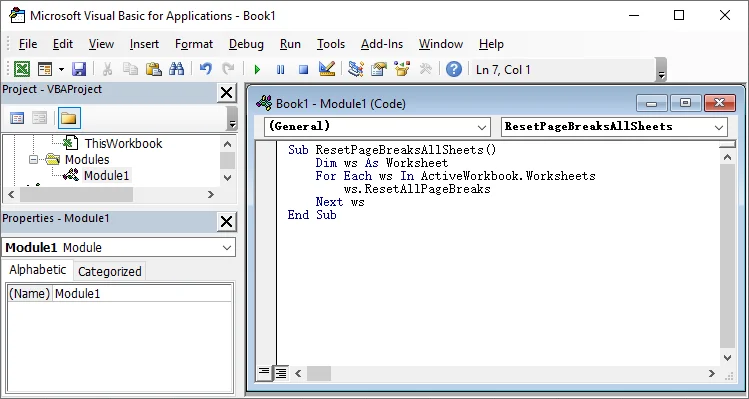
Dans l'éditeur, allez dans Insertion > Module.
-
Copiez et collez le code suivant :
Sub ResetPageBreaksAllSheets() Dim ws As Worksheet For Each ws In ActiveWorkbook.Worksheets ws.ResetAllPageBreaks Next ws End Sub -
Appuyez sur F5 pour exécuter la macro.
Tous les sauts de page manuels de chaque feuille de calcul du classeur actif seront supprimés en une seule fois.
Comment supprimer les sauts de page automatiques dans Excel
Les sauts de page automatiques dans Excel ne peuvent pas être supprimés complètement. Cependant, vous pouvez les contrôler en ajustant les paramètres de mise en page tels que la mise à l'échelle, les marges, l'orientation de la page et la zone d'impression. L'optimisation de ces paramètres permet de faire tenir plus de contenu on chaque page et de réduire les sauts indésirables.
Pour réduire les sauts de page automatiques :
- Modifier la mise à l'échelle
Allez dans Mise en page > Mise à l'échelle, réglez Largeur et Hauteur sur Automatique, ou augmentez le pourcentage de mise à l'échelle.
Faire tenir plus de contenu par page réduit les sauts de page automatiques. - Ajuster les marges
Allez dans Mise en page > Marges et sélectionnez Étroites ou Marges personnalisées.
Des marges plus petites agrandissent la zone imprimable et aident à réduire les sauts de page. - Changer l'orientation de la page
Allez dans Mise en page > Orientation et passez de Portrait à Paysage.
Les pages plus larges peuvent contenir plus de colonnes, ce qui réduit les sauts de page verticaux. - Définir la zone d'impression
Allez dans Mise en page > Zone d'impression et effacez la zone d'impression si elle restreint la plage de contenu.
Effacer la zone d'impression garantit qu'Excel calcule les sauts de page automatiques avec précision et évite les sauts inutiles.
Masquer les sauts de page en affichage Normal
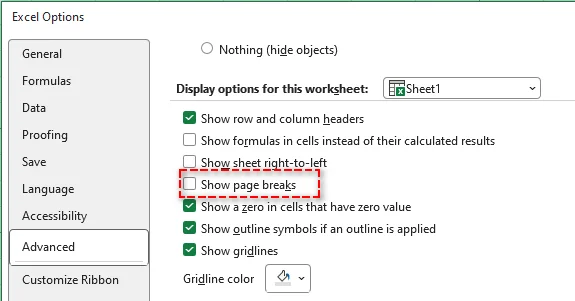
Parfois, les utilisateurs souhaitent masquer les lignes de saut de page dans Excel sans modifier le comportement d'impression. Ceci est utile si les lignes de saut apparaissent après être entré en Aperçu avant impression. Suivez ces étapes :
-
Cliquez sur Fichier > Options.
-
Allez dans Options avancées.
-
Faites défiler jusqu'à Options d'affichage de cette feuille de calcul.
-
Décochez Afficher les sauts de page.
-
Cliquez sur OK.
Remarque : Cette action ne supprime pas les sauts de page. Elle ne fait que masquer les lignes de saut de page à l'écran et n'affecte pas la mise en page d'impression. Si la case Afficher les sauts de page ne peut pas être décochée, assurez-vous que la feuille de calcul est en affichage Normal plutôt qu'en mode Aperçu des sauts de page.
Supprimer en masse les sauts de page dans Excel avec Python
La suppression manuelle des sauts de page de plusieurs classeurs Excel peut prendre beaucoup de temps. En utilisant Python et des bibliothèques comme Spire.XLS for Python, vous pouvez supprimer en masse tous les sauts de page sur plusieurs fichiers, ce qui permet de gagner du temps et d'assurer un formatage cohérent.
Étapes pour la suppression en masse avec Python :
-
Installez Spire.XLS depuis PyPI en utilisant pip :
pip install spire.xls -
Écrivez un script Python pour supprimer en masse les sauts de page de plusieurs fichiers Excel
from spire.xls import * import os input_folder = "input_excels" output_folder = "output_excels" for file_name in os.listdir(input_folder): if file_name.endswith(".xlsx"): # Load workbook workbook = Workbook() workbook.LoadFromFile(os.path.join(input_folder, file_name)) # Clear page breaks in all worksheets for sheet in workbook.Worksheets: sheet.HPageBreaks.Clear() sheet.VPageBreaks.Clear() sheet.ViewMode = ViewMode.Preview # Save updated workbook workbook.SaveToFile(os.path.join(output_folder, file_name), ExcelVersion.Version2013) workbook.Dispose() -
Exécutez le code
Exécutez le script pour supprimer automatiquement les sauts de page dans la feuille Excel ciblée.
Astuce : Vous pouvez également ajuster la mise à l'échelle de la feuille, les marges et l'orientation de la page dans votre code pour réduire les sauts de page automatiques.
Article connexe : Python : Insérer ou supprimer des sauts de page dans Excel
Conclusion
Dans ce guide, nous avons expliqué comment supprimer les sauts de page dans Excel, y compris les sauts de page manuels et automatiques. En suivant ces étapes, vous pouvez nettoyer efficacement vos feuilles de calcul et les garder organisées et prêtes à être imprimées.
Vous cherchez d'autres tutoriels Excel de haute qualité ? Consultez nos ressources Excel gratuites.
Foire aux questions : Supprimer les sauts de page dans Excel
Q1 : Quelle est la différence entre les sauts de page manuels et automatiques ?
R1 : Les sauts de page manuels sont insérés par les utilisateurs pour contrôler exactement où les pages se coupent lors de l'impression, tandis que les sauts de page automatiques sont ajoutés par Excel en fonction des paramètres d'impression et de la mise en page.
Q2 : Puis-je supprimer les sauts de page sans affecter l'impression ?
R2 : Oui. Vous pouvez masquer les lignes de saut de page en affichage Normal de la feuille de calcul. Cela n'affecte que leur affichage à l'écran ; les sauts restent dans le fichier et peuvent toujours influencer l'impression.
Q3 : Pourquoi ne puis-je pas supprimer certains sauts de page dans Excel ?
R3 : Les sauts de page automatiques ne peuvent pas être supprimés directement. Ils sont contrôlés par Excel pour maintenir la mise en page d'impression, mais vous pouvez les influencer en ajustant les marges, la mise à l'échelle, la taille du papier ou la zone d'impression.
Q4 : Comment supprimer les sauts de page de plusieurs feuilles de calcul à la fois ?
R4 : La manière la plus efficace de supprimer les sauts de page de plusieurs feuilles de calcul dans Excel est d'utiliser VBA ou Python. Cela vous permet d'effacer tous les sauts de page manuels sur de grands classeurs ou plusieurs fichiers rapidement et de manière cohérente.
Voir aussi
- Définir la zone d'impression dans Excel : Manuel, VBA & Python
- Défusionner des cellules dans Excel (Manuel, VBA & Python)
- Copier une feuille de calcul dans Excel (Manuel, VBA & Python)
- Supprimer les lignes en double d'Excel - 6 méthodes faciles
- Convertir Excel en ODS : 4 méthodes faciles (Local, en ligne & automatisation)
Eliminar saltos de página en Excel: Guía manual y automática (2025)
Tabla de Contenidos
Los saltos de página no deseados en Excel pueden alterar el diseño de su hoja de cálculo y hacer que la impresión de sus datos sea frustrante. A menudo aparecen después de cambiar la configuración de impresión, ajustar los márgenes o cambiar de vista. Ya sea que los saltos de página se inserten manualmente o los agregue Excel automáticamente, saber cómo eliminarlos le ayuda a mantener una hoja de cálculo limpia y profesional.
Este artículo le muestra cómo quitar los saltos de página en Excel, incluidos los saltos de página manuales y automáticos. También cubre cómo ocultar los saltos de página y proporciona soluciones de eliminación por lotes para varias hojas de cálculo o libros de trabajo.
- Entender los Saltos de Página en Excel (Manuales vs. Automáticos)
- Cómo Quitar Saltos de Página Manuales en Excel
- Cómo Quitar Saltos de Página Automáticos en Excel
- Ocultar Saltos de Página en la Vista Normal
- Eliminar Saltos de Página en Lote en Excel con Python
Entender los Saltos de Página en Excel (Manuales vs. Automáticos)
Antes de quitar los saltos de página, es importante conocer los dos tipos principales que utiliza Excel:
- Saltos de página manuales: insertados por los usuarios para controlar dónde termina una página al imprimir.
- Saltos de página automáticos: agregados por Excel según los márgenes, el tamaño del papel, la configuración de escala y el área de impresión.
Puede usar la Vista previa de salto de página para identificar los tipos de saltos de página. Los saltos manuales aparecen como líneas azules continuas, mientras que los saltos automáticos aparecen como líneas azules discontinuas.
El método de eliminación depende del tipo de salto de página con el que esté tratando.
Cómo Quitar Saltos de Página Manuales en Excel
Puede quitar saltos de página manuales individuales o borrar todos los saltos de página manuales dentro de una hoja de cálculo según sea necesario. Para operaciones masivas, los scripts de Excel VBA le permiten quitar saltos de página en varias hojas de cálculo de manera eficiente.
Quitar un Salto de Página Manual
Puede quitar un salto de página manual específico en una hoja de Excel seleccionando la celda correcta cerca del salto. A continuación, le indicamos cómo hacerlo:
-
Vaya a la pestaña Vista en la cinta de opciones y haga clic en Vista previa de salto de página en el grupo Vistas de libro.
También puede hacer clic en el icono Vista previa de salto de página en la barra de estado (abajo a la derecha).
-
Identifique el salto de página manual (línea azul continua) que desea quitar.
-
Seleccione una celda cerca del salto de página:
-
Para un salto de página horizontal, seleccione cualquier celda debajo del salto.
-
Para un salto de página vertical, seleccione cualquier celda a la derecha del salto.
-
-
Vaya a la pestaña Diseño de página en la cinta de opciones.
-
Haga clic en Saltos y, a continuación, elija Quitar salto de página.
Esto solo quita el salto de página manual seleccionado, y el resto de la hoja permanecerá sin cambios.
Consejo: También puede hacer clic con el botón derecho en la celda y seleccionar Quitar salto de página para eliminar el salto. O bien, arrastre directamente la línea de salto fuera del área de vista previa de salto de página si la función de arrastrar y soltar está habilitada en su Excel.
Quitar Todos los Saltos de Página Manuales de una Hoja
Si su hoja tiene varios saltos de página manuales, quitarlos todos a la vez puede ahorrar tiempo. Siga estos pasos a continuación:
-
Seleccione cualquier celda de la hoja.
-
Vaya a la pestaña Diseño de página en la cinta de opciones.
-
Haga clic en Saltos > Restablecer todos los saltos de página.
Esto quita todos los saltos de página insertados manualmente de la hoja de cálculo activa.
Eliminar Saltos de Página Manuales de Varias Hojas con VBA
Si necesita quitar saltos de página manuales de varias hojas simultáneamente, usar VBA (Visual Basic para Aplicaciones) es la solución más eficiente. A continuación, le indicamos cómo puede hacerlo:
-
Presione Alt + F11 (Windows) u Opción + F11 (Mac) para abrir el editor de VBA.
-
En el editor, vaya a Insertar > Módulo.
-
Copie y pegue el siguiente código:
Sub ResetPageBreaksAllSheets() Dim ws As Worksheet For Each ws In ActiveWorkbook.Worksheets ws.ResetAllPageBreaks Next ws End Sub -
Presione F5 para ejecutar la macro.
Todos los saltos de página manuales en cada hoja de cálculo del libro de trabajo activo se quitarán de una vez.
Cómo Quitar Saltos de Página Automáticos en Excel
Los saltos de página automáticos en Excel no se pueden quitar por completo. Sin embargo, puede controlarlos ajustando la configuración de diseño, como la escala, los márgenes, la orientación de la página y el área de impresión. La optimización de esta configuración permite que quepa más contenido en cada página y reduce los saltos no deseados.
Para reducir los saltos de página automáticos:
- Cambiar escala
Vaya a Diseño de página > Ajustar escala, establezca Ancho y Alto en Automático, o aumente el porcentaje de escala.
Ajustar más contenido por página reduce los saltos de página automáticos. - Ajustar márgenes
Vaya a Diseño de página > Márgenes y seleccione Estrecho o Márgenes personalizados.
Los márgenes más pequeños amplían el área de impresión y ayudan a reducir los saltos de página. - Cambiar la orientación de la página
Vaya a Diseño de página > Orientación y cambie de Vertical a Horizontal.
Las páginas más anchas se ajustan a más columnas, lo que reduce los saltos de página verticales. - Borrar área de impresión
Vaya a Diseño de página > Área de impresión y borre el área de impresión si restringe el rango de contenido.
Borrar el área de impresión garantiza que Excel calcule los saltos de página automáticos con precisión y evite saltos innecesarios.
Ocultar Saltos de Página en la Vista Normal
A veces, los usuarios quieren ocultar las líneas de salto de página en Excel sin cambiar el comportamiento de impresión. Esto es útil si las líneas de salto aparecen después de ingresar a la Vista previa de impresión. Siga estos pasos:
-
Haga clic en Archivo > Opciones.
-
Vaya a Avanzado.
-
Desplácese hasta Opciones de visualización para esta hoja de cálculo.
-
Desmarque Mostrar saltos de página.
-
Haga clic en Aceptar.
Nota: Esta acción no quita los saltos de página. Solo oculta las líneas de salto de página en la pantalla y no afecta el diseño de impresión. Si la casilla Mostrar saltos de página no se puede desmarcar, asegúrese de que la hoja de cálculo esté en la vista Normal en lugar del modo Vista previa de salto de página.
Eliminar Saltos de Página en Lote en Excel con Python
Quitar manualmente los saltos de página de varios libros de Excel puede llevar mucho tiempo. Usando Python y bibliotecas como Spire.XLS para Python, puede eliminar por lotes todos los saltos de página en varios archivos, ahorrando tiempo y garantizando un formato coherente.
Pasos para la eliminación por lotes con Python:
-
Instale Spire.XLS desde PyPI usando pip:
pip install spire.xls -
Escriba un script de Python para eliminar por lotes los saltos de página de varios archivos de Excel
from spire.xls import * import os input_folder = "input_excels" output_folder = "output_excels" for file_name in os.listdir(input_folder): if file_name.endswith(".xlsx"): # Load workbook workbook = Workbook() workbook.LoadFromFile(os.path.join(input_folder, file_name)) # Clear page breaks in all worksheets for sheet in workbook.Worksheets: sheet.HPageBreaks.Clear() sheet.VPageBreaks.Clear() sheet.ViewMode = ViewMode.Preview # Save updated workbook workbook.SaveToFile(os.path.join(output_folder, file_name), ExcelVersion.Version2013) workbook.Dispose() -
Ejecute el código
Ejecute el script para quitar automáticamente los saltos de página en la hoja de Excel de destino.
Consejo: También puede ajustar la escala de la hoja, los márgenes y la orientación de la página en su código para reducir los saltos de página automáticos.
Artículo relacionado: Python: Insertar o quitar saltos de página en Excel
Conclusión
En esta guía, hemos cubierto cómo quitar los saltos de página en Excel, incluidos los saltos de página manuales y automáticos. Siguiendo estos pasos, puede limpiar eficazmente sus hojas de cálculo y mantenerlas organizadas y listas para imprimir.
¿Busca más tutoriales de Excel de alta calidad? Consulte nuestros recursos gratuitos de Excel.
Preguntas frecuentes: Quitar saltos de página en Excel
P1: ¿Cuál es la diferencia entre los saltos de página manuales y automáticos?
R1: Los saltos de página manuales los insertan los usuarios para controlar exactamente dónde se producen los saltos de página durante la impresión, mientras que los saltos de página automáticos los agrega Excel en función de la configuración de impresión y el diseño.
P2: ¿Puedo quitar los saltos de página sin que afecte a la impresión?
R2: Sí. Puede ocultar las líneas de salto de página en la vista de hoja de cálculo Normal. Esto solo afecta a su visualización en pantalla; los saltos permanecen en el archivo y aún pueden influir en la impresión.
P3: ¿Por qué no puedo quitar algunos saltos de página en Excel?
R3: Los saltos de página automáticos no se pueden eliminar directamente. Excel los controla para mantener el diseño de impresión, pero puede influir en ellos ajustando los márgenes, la escala, el tamaño del papel o el área de impresión.
P4: ¿Cómo quitar los saltos de página en varias hojas de cálculo a la vez?
R4: La forma más eficiente de quitar los saltos de página en varias hojas de cálculo en Excel es usar VBA o Python. Esto le permite borrar todos los saltos de página manuales en libros de trabajo grandes o en varios archivos de forma rápida y coherente.
Ver también
- Establecer área de impresión en Excel: Manual, VBA y Python
- Descombinar celdas en Excel (Manual, VBA y Python)
- Copiar una hoja de cálculo en Excel (Manual, VBA y Python)
- Eliminar filas duplicadas de Excel: 6 formas sencillas
- Convertir Excel a ODS: 4 formas sencillas (local, en línea y automatización)
Seitenumbrüche in Excel entfernen: Handbuch für manuelle und automatische Methoden (2025)
Inhaltsverzeichnis
Unerwünschte Seitenumbrüche in Excel können Ihr Arbeitsblattlayout stören und das Drucken Ihrer Daten frustrierend machen. Sie treten häufig nach dem Ändern von Druckeinstellungen, dem Anpassen von Rändern oder dem Wechseln der Ansichten auf. Unabhängig davon, ob die Seitenumbrüche manuell eingefügt oder von Excel automatisch hinzugefügt werden, hilft Ihnen das Wissen, wie Sie sie entfernen können, ein sauberes und professionelles Arbeitsblatt zu erhalten.
Dieser Artikel zeigt Ihnen, wie Sie Seitenumbrüche in Excel entfernen, einschließlich manueller und automatischer Seitenumbrüche. Er behandelt auch, wie Sie Seitenumbrüche ausblenden können, und bietet Lösungen zur Stapelentfernung für mehrere Arbeitsblätter oder Arbeitsmappen.
- Seitenumbrüche in Excel verstehen (manuell vs. automatisch)
- So entfernen Sie manuelle Seitenumbrüche in Excel
- So entfernen Sie automatische Seitenumbrüche in Excel
- Seitenumbrüche in der Normalansicht ausblenden
- Seitenumbrüche in Excel stapelweise mit Python entfernen
Seitenumbrüche in Excel verstehen (manuell vs. automatisch)
Bevor Sie Seitenumbrüche entfernen, ist es wichtig, die beiden Haupttypen zu kennen, die Excel verwendet:
- Manuelle Seitenumbrüche: Von Benutzern eingefügt, um zu steuern, wo eine Seite beim Drucken endet.
- Automatische Seitenumbrüche: Von Excel basierend auf Rändern, Papiergröße, Skalierungseinstellungen und Druckbereich hinzugefügt.
Sie können die Seitenumbruchvorschau verwenden, um die Arten von Seitenumbrüchen zu identifizieren. Manuelle Umbrüche erscheinen als durchgezogene blaue Linien, während automatische Umbrüche als gestrichelte blaue Linien erscheinen.
Die Entfernungsmethode hängt davon ab, mit welcher Art von Seitenumbruch Sie es zu tun haben.
So entfernen Sie manuelle Seitenumbrüche in Excel
Sie können einzelne manuelle Seitenumbrüche entfernen oder alle manuellen Seitenumbrüche innerhalb eines Arbeitsblatts nach Bedarf löschen. Für Massenoperationen ermöglichen Excel-VBA-Skripte das effiziente Entfernen von Seitenumbrüchen über mehrere Arbeitsblätter hinweg.
Einen manuellen Seitenumbruch entfernen
Sie können einen bestimmten manuellen Seitenumbruch in einem Excel-Blatt entfernen, indem Sie die richtige Zelle in der Nähe des Umbruchs auswählen. So geht's:
-
Gehen Sie zum Tab Ansicht im Menüband und klicken Sie auf Seitenumbruchvorschau in der Gruppe Arbeitsmappenansichten.
Sie können auch auf das Symbol Seitenumbruchvorschau in der Statusleiste (unten rechts) klicken.
-
Identifizieren Sie den manuellen Seitenumbruch (durchgezogene blaue Linie), den Sie entfernen möchten.
-
Wählen Sie eine Zelle in der Nähe des Seitenumbruchs aus:
-
Für einen horizontalen Seitenumbruch wählen Sie eine beliebige Zelle unterhalb des Umbruchs aus.
-
Für einen vertikalen Seitenumbruch wählen Sie eine beliebige Zelle rechts neben dem Umbruch aus.
-
-
Gehen Sie zum Tab Seitenlayout im Menüband.
-
Klicken Sie auf Umbrüche und wählen Sie dann Seitenumbruch entfernen.
Dadurch wird nur der ausgewählte manuelle Seitenumbruch entfernt, und der Rest des Blattes bleibt unverändert.
Tipp: Sie können auch mit der rechten Maustaste auf die Zelle klicken und Seitenumbruch entfernen auswählen, um den Umbruch zu löschen. Oder ziehen Sie die Umbruchlinie direkt aus dem Vorschaufenster für Seitenumbrüche, wenn die Drag-and-Drop-Funktion in Ihrem Excel aktiviert ist.
Alle manuellen Seitenumbrüche von einem Blatt entfernen
Wenn Ihr Blatt mehrere manuelle Seitenumbrüche aufweist, können Sie Zeit sparen, indem Sie sie alle auf einmal entfernen. Befolgen Sie die folgenden Schritte:
-
Wählen Sie eine beliebige Zelle im Blatt aus.
-
Gehen Sie zum Tab Seitenlayout im Menüband.
-
Klicken Sie auf Umbrüche > Alle Seitenumbrüche zurücksetzen.
Dadurch werden alle manuell eingefügten Seitenumbrüche aus dem aktiven Arbeitsblatt entfernt.
Manuelle Seitenumbrüche aus mehreren Blättern mit VBA löschen
Wenn Sie manuelle Seitenumbrüche aus mehreren Blättern gleichzeitig entfernen müssen, ist die Verwendung von VBA (Visual Basic for Applications) die effizienteste Lösung. So können Sie es tun:
-
Drücken Sie Alt + F11 (Windows) oder Option + F11 (Mac), um den VBA-Editor zu öffnen.
-
Gehen Sie im Editor zu Einfügen > Modul.
-
Kopieren Sie den folgenden Code und fügen Sie ihn ein:
Sub ResetPageBreaksAllSheets() Dim ws As Worksheet For Each ws In ActiveWorkbook.Worksheets ws.ResetAllPageBreaks Next ws End Sub -
Drücken Sie F5, um das Makro auszuführen.
Alle manuellen Seitenumbrüche auf jedem Arbeitsblatt in der aktiven Arbeitsmappe werden auf einmal entfernt.
So entfernen Sie automatische Seitenumbrüche in Excel
Automatische Seitenumbrüche in Excel können nicht vollständig entfernt werden. Sie können sie jedoch steuern, indem Sie Layouteinstellungen wie Skalierung, Ränder, Seitenausrichtung und Druckbereich anpassen. Die Optimierung dieser Einstellungen ermöglicht es, mehr Inhalt auf jede Seite zu bringen und unerwünschte Umbrüche zu reduzieren.
Um automatische Seitenumbrüche zu reduzieren:
- Skalierung ändern
Gehen Sie zu Seitenlayout > Anpassen, setzen Sie Breite und Höhe auf Automatisch oder erhöhen Sie den Skalierungsprozentsatz.
Wenn mehr Inhalt pro Seite passt, werden automatische Seitenumbrüche reduziert. - Ränder anpassen
Gehen Sie zu Seitenlayout > Ränder und wählen Sie Schmal oder Benutzerdefinierte Ränder.
Kleinere Ränder erweitern den druckbaren Bereich und helfen, Seitenumbrüche zu reduzieren. - Seitenausrichtung ändern
Gehen Sie zu Seitenlayout > Ausrichtung und wechseln Sie von Hochformat zu Querformat.
Breitere Seiten passen mehr Spalten, was vertikale Seitenumbrüche reduziert. - Druckbereich löschen
Gehen Sie zu Seitenlayout > Druckbereich und löschen Sie den Druckbereich, wenn er den Inhaltsbereich einschränkt.
Das Löschen des Druckbereichs stellt sicher, dass Excel automatische Seitenumbrüche genau berechnet und unnötige Umbrüche vermeidet.
Seitenumbrüche in der Normalansicht ausblenden
Manchmal möchten Benutzer Seitenumbruchlinien in Excel ausblenden, ohne das Druckverhalten zu ändern. Dies ist nützlich, wenn die Umbruchlinien nach dem Aufrufen der Druckvorschau angezeigt werden. Befolgen Sie diese Schritte:
-
Klicken Sie auf Datei > Optionen.
-
Gehen Sie zu Erweitert.
-
Scrollen Sie zu Anzeigeoptionen für dieses Arbeitsblatt.
-
Deaktivieren Sie Seitenumbrüche anzeigen.
-
Klicken Sie auf OK.
Hinweis: Diese Aktion entfernt keine Seitenumbrüche. Sie blendet nur die Seitenumbruchlinien auf dem Bildschirm aus und beeinflusst nicht das Drucklayout. Wenn das Kontrollkästchen Seitenumbrüche anzeigen nicht deaktiviert werden kann, stellen Sie sicher, dass sich das Arbeitsblatt in der Normalansicht und nicht im Modus Seitenumbruchvorschau befindet.
Seitenumbrüche in Excel stapelweise mit Python entfernen
Das manuelle Entfernen von Seitenumbrüchen aus mehreren Excel-Arbeitsmappen kann zeitaufwändig sein. Mit Python und Bibliotheken wie Spire.XLS for Python können Sie alle Seitenumbrüche stapelweise über mehrere Dateien entfernen, was Zeit spart und eine konsistente Formatierung gewährleistet.
Schritte zur Stapelentfernung mit Python:
-
Installieren Sie Spire.XLS von PyPI mit pip:
pip install spire.xls -
Schreiben Sie ein Python-Skript, um Seitenumbrüche aus mehreren Excel-Dateien stapelweise zu entfernen
from spire.xls import * import os input_folder = "input_excels" output_folder = "output_excels" for file_name in os.listdir(input_folder): if file_name.endswith(".xlsx"): # Load workbook workbook = Workbook() workbook.LoadFromFile(os.path.join(input_folder, file_name)) # Clear page breaks in all worksheets for sheet in workbook.Worksheets: sheet.HPageBreaks.Clear() sheet.VPageBreaks.Clear() sheet.ViewMode = ViewMode.Preview # Save updated workbook workbook.SaveToFile(os.path.join(output_folder, file_name), ExcelVersion.Version2013) workbook.Dispose() -
Führen Sie den Code aus
Führen Sie das Skript aus, um Seitenumbrüche im Ziel-Excel-Blatt automatisch zu entfernen.
Tipp: Sie können auch die Skalierung, die Ränder und die Seitenausrichtung des Blattes in Ihrem Code anpassen, um automatische Seitenumbrüche zu reduzieren.
Verwandter Artikel: Python: Seitenumbrüche in Excel einfügen oder entfernen
Fazit
In dieser Anleitung haben wir behandelt, wie man Seitenumbrüche in Excel entfernt, einschließlich manueller und automatischer Seitenumbrüche. Indem Sie diesen Schritten folgen, können Sie Ihre Arbeitsblätter effektiv bereinigen und sie organisiert und druckbereit halten.
Suchen Sie nach weiteren hochwertigen Excel-Tutorials? Schauen Sie sich unsere kostenlosen Excel-Ressourcen an.
Häufig gestellte Fragen: Seitenumbrüche in Excel entfernen
F1: Was ist der Unterschied zwischen manuellen und automatischen Seitenumbrüchen?
A1: Manuelle Seitenumbrüche werden von Benutzern eingefügt, um genau zu steuern, wo Seiten beim Drucken umgebrochen werden, während automatische Seitenumbrüche von Excel basierend auf Druckeinstellungen und Layout hinzugefügt werden.
F2: Kann ich Seitenumbrüche entfernen, ohne das Drucken zu beeinflussen?
A2: Ja. Sie können Seitenumbruchlinien in der normalen Arbeitsblattansicht ausblenden. Dies beeinflusst nur ihre Anzeige auf dem Bildschirm; die Umbrüche bleiben in der Datei und können das Drucken weiterhin beeinflussen.
F3: Warum kann ich einige Seitenumbrüche in Excel nicht entfernen?
A3: Automatische Seitenumbrüche können nicht direkt gelöscht werden. Sie werden von Excel gesteuert, um das Drucklayout beizubehalten, aber Sie können sie durch Anpassen von Rändern, Skalierung, Papiergröße oder dem Druckbereich beeinflussen.
F4: Wie entfernt man Seitenumbrüche in mehreren Arbeitsblättern auf einmal?
A4: Der effizienteste Weg, Seitenumbrüche in mehreren Arbeitsblättern in Excel zu entfernen, ist die Verwendung von VBA oder Python. Dies ermöglicht es Ihnen, alle manuellen Seitenumbrüche in großen Arbeitsmappen oder mehreren Dateien schnell und konsistent zu löschen.