Converting Word documents to XPS format is a useful way to preserve layout, ensure consistent viewing, and prepare files for sharing or printing. Whether you're working with reports, contracts, or technical documents, XPS provides a fixed-layout format similar to PDF but natively supported in Windows environments.
In this guide, you’ll learn four easy methods to convert Word to XPS, including manual approaches, online tools, and automated solutions for batch processing.
Quick Navigation:
- Method 1 - Using Microsoft Word
- Method 2 - Using Windows Print to XPS
- Method 3 - Using Online Converters
- Method 4 - Using Python (Batch Processing)
Why Convert Word to XPS?
XPS (XML Paper Specification) is designed to maintain document fidelity across different systems and devices. It locks in formatting, fonts, and layout, making it ideal for final versions of documents that should not be edited.
Additionally, XPS files integrate well with Windows systems and can be viewed without needing third-party software. For developers and businesses, XPS is also useful in workflows that require consistent document rendering.
Method 1 – Using Microsoft Word
Microsoft Word includes a built-in feature that allows you to save documents directly as XPS files. Since the conversion is handled internally by Word, this method offers both simplicity and high fidelity.
Best for: Quick, one-off conversions where accuracy is important.
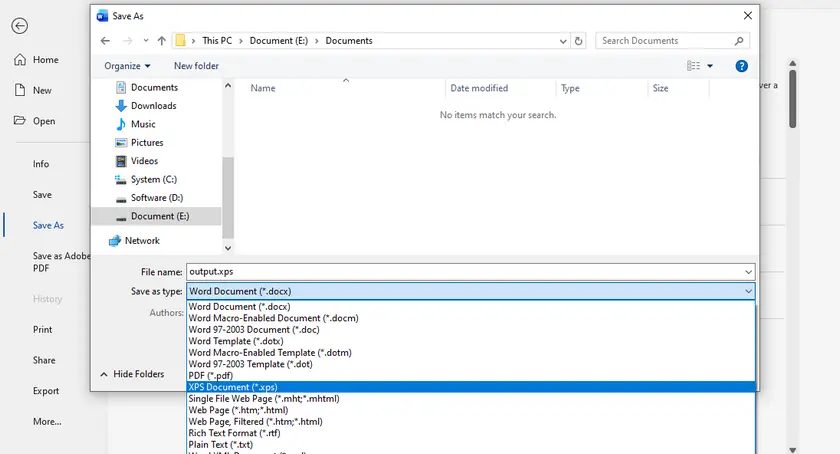
Steps to Convert Word to XPS Using MS Word
- Open your Word document in Microsoft Word.
- Click File → Save As .
- Choose the location where you want to save the file.
- Select XPS Document (*.xps) from the file type dropdown.
- Click Save .
Pros
- High-quality output with accurate formatting.
- Simple and beginner-friendly.
Cons
- Requires Microsoft Word installation.
- No support for batch processing.
Method 2 – Using Windows Print to XPS
Windows includes a virtual printer called Microsoft XPS Document Writer that allows you to convert any printable document to XPS format. This method works with virtually any application that supports printing—not just Word.
Best for: When you prefer not to rely on application-specific export features.
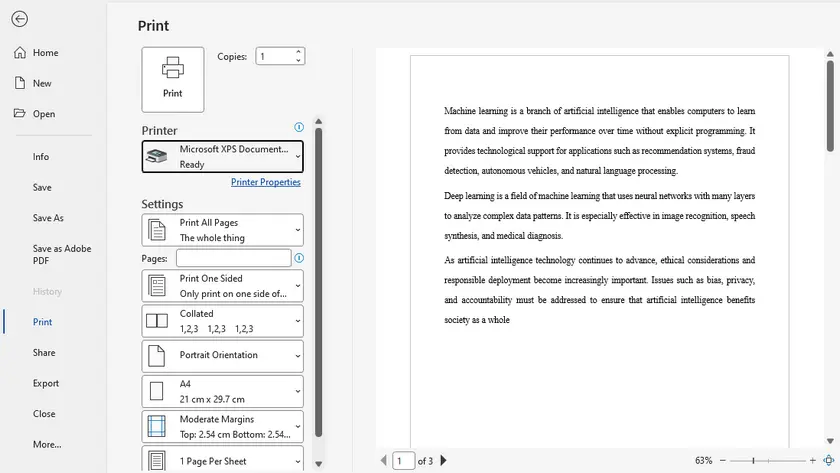
Steps to Convert Word to XPS Using XPS Document Writer
- Open the Word document.
- Go to File → Print .
- Select Microsoft XPS Document Writer as the printer.
- Click Print .
- Choose a file name and save location.
Pros
- Built into Windows (no installation needed).
- Works with multiple applications.
- Reliable for preserving layout.
Cons
- Manual process, not suitable for bulk conversion.
- Slightly slower than direct export.
Method 3 – Using Online Converters
Online converters offer a convenient way to convert Word files to XPS without installing any software. These tools typically support drag-and-drop uploads and quick downloads, making them accessible on any device.
Best for: Occasional use or when working on systems where you cannot install software.
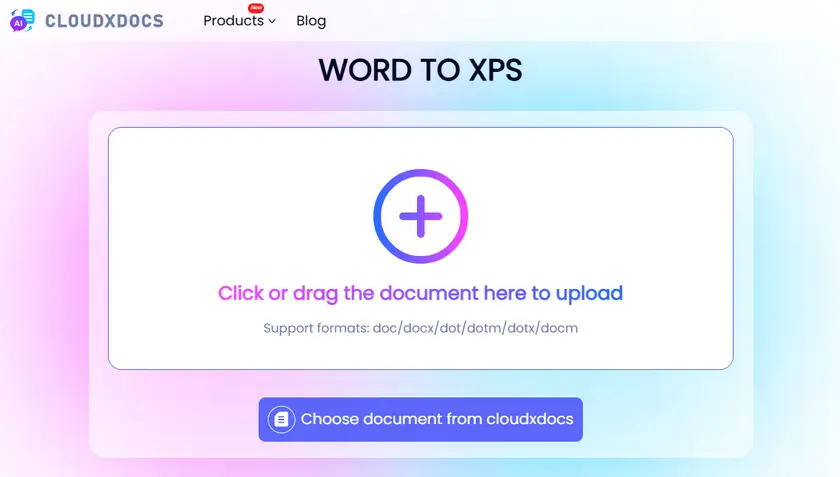
Steps to Convert Word to XPS Online
- Open an online converter website (e.g., cloudxdocs).
- Upload your Word document.
- The conversion automatically starts as soon as uploading is finished.
- Download the converted file.
Pros
- No installation required.
- Accessible from any device.
- Quick and easy for occasional use.
Cons
- File size limits on free plans.
- Potential privacy/security concerns.
- Requires internet connection.
Method 4 – Using Python (Batch Processing)
For developers or users handling multiple files, automation is the most efficient solution. Using libraries like Spire.Doc for Python, you can programmatically convert Word documents to XPS in bulk with minimal effort.
This approach is ideal for backend systems, document workflows, or large-scale processing tasks where manual conversion would be too time-consuming.
Steps to Batch Convert Word to XPS in Python
- Create a Python program.
- Install the Spire.Doc library for Python.
- Run the following script to perform the conversion.
import os
from spire.doc import *
from spire.doc.common import *

# Input and output folders
input_folder = "input_docs"
output_folder = "output_xps"

# Create output folder if it doesn't exist
if not os.path.exists(output_folder):
    os.makedirs(output_folder)

# Loop through all files in the input folder
for file_name in os.listdir(input_folder):
    if file_name.endswith((".doc", ".docx")):
        input_path = os.path.join(input_folder, file_name)
        output_name = os.path.splitext(file_name)[0] + ".xps"
        output_path = os.path.join(output_folder, output_name)

        # Create a Document object
        doc = Document()

        # Load the Word document
        doc.LoadFromFile(input_path)

        # Save as XPS
        doc.SaveToFile(output_path, FileFormat.XPS)

        # Dispose the document
        doc.Dispose()

        print(f"Converted: {file_name} → {output_name}")

print("Batch conversion completed.")
Pros
- Supports batch conversion (high efficiency).
- Fully automated workflow.
- Easy to integrate into systems or pipelines.
Cons
- Requires programming knowledge.
- Needs environment setup and dependencies.
- Initial setup takes more time than manual methods.
In addition to XPS conversion, Spire.Doc allows you to convert Word to PDF, or export Word as images, giving you full control over how your documents are shared and displayed.
Comparison Table – Which Method Should You Choose?
| Method | Best For | Ease of Use | Batch Support | Requires Installation | Cost |
|---|---|---|---|---|---|
| Microsoft Word | Quick, high-quality conversion | ★★★★★ | x | √ | Paid (Office license) |
| Print to XPS | Flexible, works with any app | ★★★★★ | x | x (built-in) | Free |
| Online Tools | Convenience, no setup | ★★★★★ | x | x | Free (limited) / Paid |
| Python (Spire.Doc) | Automation, bulk processing | ★★★☆☆ | √ | √ | Free (limited) / Paid |
Best Practices for High-Quality XPS Output
Before converting, make sure your Word document is finalized, including fonts, images, and layout. Since XPS preserves formatting exactly, any issues in the original file will carry over to the output.
It’s also a good idea to embed fonts and avoid unsupported elements to ensure compatibility across different systems. For batch processing, test a few files first to confirm consistent results.
Conclusion
Converting Word to XPS can be done using a variety of methods depending on your needs. For quick and reliable results, built-in options like Microsoft Word or Windows Print to XPS work well. If you need flexibility or portability, online tools are a solid choice.
For advanced users and developers, Python automation with libraries like Spire.Doc provides a powerful way to handle large volumes of documents efficiently.
FAQs
Q1: Is XPS better than PDF?
XPS and PDF are similar in that both preserve document layout. PDF is more widely supported, while XPS is more tightly integrated with Windows systems.
Q2: Can I convert XPS back to Word?
Yes, but it usually requires third-party tools or intermediate conversion (e.g., XPS → PDF → Word), and formatting may not be perfectly preserved.
Q3: Does converting to XPS reduce file quality?
No, XPS maintains the original layout and quality. However, compression settings and embedded resources can affect file size.
Q4: Which method is best for bulk conversion?
The Python method using Spire.Doc is the best choice for batch processing and automation.
Q5: How to open an XPS file?
You can open an XPS file using the built-in XPS Viewer on Windows. Simply double-click the file, or right-click and choose Open with → XPS Viewer .