
Converting images to PPT is a quick and efficient way to present visual content in a dynamic format. Whether it's photos, charts, or infographics, transforming them into PowerPoint slides can make your presentations more engaging and impactful.
In this guide, we will show you three simple methods to convert images to PPT, including manual techniques, online tools, and Python automation. These methods are suitable for all skill levels, from beginners to advanced users, providing easy solutions to help you create professional and visually appealing presentations from your images.
Contents Overview
- Why Convert Images to PPT
- Method 1. Convert Images to PPT Manually Using Microsoft PowerPoint
- Method 2. Convert Images to PPT using Free Online Tools
- Method 3. Automate Image to PPT Conversion Using Python
- Best Practices for Converting Images to PPT
- Conclusion
- FAQs: Converting Images to PowerPoint
Why Convert Images to PPT?
Before we explore the methods, let's first look at the benefits of converting images to PPT slides:
- Showcasing Visual Content: Images often speak louder than words. Whether it's a photo, infographic, or chart, inserting images into PowerPoint slides allows you to highlight and discuss them more effectively during presentations.
- Ease of Editing: Images in PowerPoint are easier to manage, resize, and reposition compared to raw images inserted into documents or emails.
- Professional Presentations: PowerPoint allows you to create professional slides with added animations, text overlays, and transitions that enhance the presentation experience.
- Integration with Other Content: PowerPoint slides are often used in conjunction with other forms of media. Converting images to PPT allows seamless integration of visual elements with text and graphs.
Now, let's explore the different ways to convert images to PowerPoint slides.
Method 1. Convert Images to PPT Manually Using Microsoft PowerPoint
Microsoft PowerPoint offers two methods for inserting images into a PowerPoint presentation. Here's a step-by-step guide for both methods.
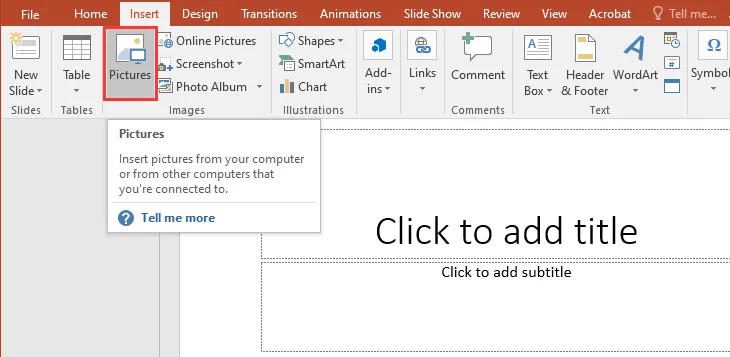
Option 1: Using the Insert Tab in PowerPoint
If you're working with a small number of images, the Insert Tab is ideal for adding individual images to your slides. It allows you to completely control how the images are positioned and formatted.
Steps to Manually Insert Images:
- Open PowerPoint: First, launch PowerPoint and choose the "Blank Presentation" option to start a new presentation.
- Add a Blank Slide: Next, go to the Home tab and click the "New Slide" button. From the dropdown menu, select "Blank" to add a slide without preformatted placeholders.
- Insert an Image: Then, go to the Insert tab on the ribbon. Click Pictures (or Online Pictures if you want to use images from the web). Navigate to the image you want to insert, select it, and click Insert.
- Adjust Image Position and Size: After inserting the image, resize it by dragging the corners and move it around the slide to your preferred position.
- Repeat for Additional Images: To add more images, repeat steps 2-4.
- Save Your Presentation: Once all images are added and arranged, click File > Save As to save your PowerPoint file to the desired file location.
Pros:
- Simple and easy to use.
- Provides full control over image positioning and formatting.
- No additional tools or software required.
Cons:
- Can be time-consuming if you have many images to insert.
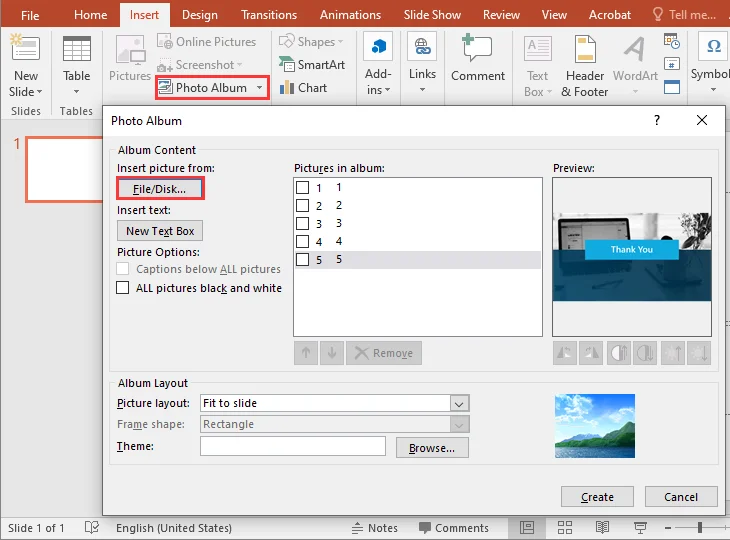
Option 2: Using the Photo Album Feature in PowerPoint
If you have multiple images or photos and need to convert them to separate slides quickly, the Photo Album feature in PowerPoint is a more efficient solution.
Steps to Convert Multiple Images:
- Open PowerPoint: First, launch PowerPoint and select the "Blank Presentation" option to start a new presentation.
- Navigate to the Photo Album Feature: Next, go to the Insert tab on the ribbon, click Photo Album, and select New Photo Album from the drop-down menu.
- Select Your Images: In the Photo Album dialog box, click File/Disk to browse and select the images you want to add. Choose all the images you want to convert, and click Insert.
- Customize the Layout (Optional): Choose how the images should appear on the slides, such as one image per slide or multiple images on each slide. You can also add captions and select a theme for the slides if desired.
- Create the Album: After making your selections, click Create. PowerPoint will automatically generate a new slide for each image.
- Save Your Presentation: Once the album is created, click File > Save As to save your PowerPoint file to the desired location.
Pros:
- Quick and efficient for bulk image conversion.
- Customizable slide layouts.
- Saves time when adding multiple images at once.
Cons:
- Limited control over individual image formatting.
- Not ideal for complex layouts or detailed image editing.
Pro Tip: For a more polished and efficient design, you can download professionally crafted PowerPoint Photo Album templates from Microsoft. These ready-made templates can streamline the process, giving your presentation a sleek, visually appealing look in no time.
Method 2. Convert Images to PPT using Free Online Tools
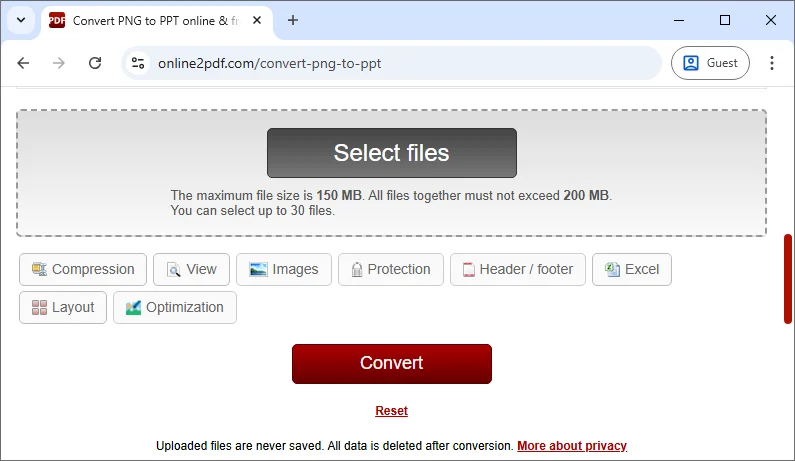
If you don't have Microsoft PowerPoint installed, some online tools offer a free, easy way to convert images to PowerPoint. One such tool is Online2PDF.
Steps to Convert Images using the Online Tool:
- Go to Online2PDF: Visit the online Image to PPT Converter.
- Upload Your Images: Click Select files and upload the images from your computer. You can also drag and drop your images directly into the conversion area.
- Select the Output Format: Choose .ppt or .pptx as the output format.
- Convert the Files: Click Convert to start the conversion process.
- Download the PPT: After the conversion is complete, download your PPT file.
Pros:
- No software installation needed.
- Fast and simple conversion process.
- Works across devices, web-based.
Cons:
- Privacy concerns when uploading files to third-party websites.
- Some converters may have size or format limitations on free accounts.
- Limited customization options for image layout and formatting.
Method 3. Convert Images to PPT Automatically using Python
For those looking to automate the conversion of multiple images into PowerPoint presentations, Python offers a powerful solution. By leveraging the Spire.Presentation for Python library, users can automate the process of inserting images, adjusting layouts, and saving presentations-all with minimal code.
Key Features:
- Create and Manage Slides: Effortlessly add or remove slides within a PowerPoint presentation.
- Insert Images and Shapes: Insert images, text, shapes, charts, and other objects into slides.
- Customizable Layouts: Adjust image size, position, and format to match the desired layout.
- Apply Animations and Transitions: Enhance presentations with customizable transitions and animations.
- Export in Various Formats: Save presentations in formats such as PPTX, PDF, and images.
- No Dependency on Microsoft Office: Operates independently, offering all the functionality needed to create and modify presentations without requiring Microsoft Office.
Steps to Convert Images to a PowerPoint Presentation using Python:
-
Install the Spire.Presentation for Python library from PyPI:
pip install spire-presentation -
Add the following code to convert images to a PowerPoint presentation:
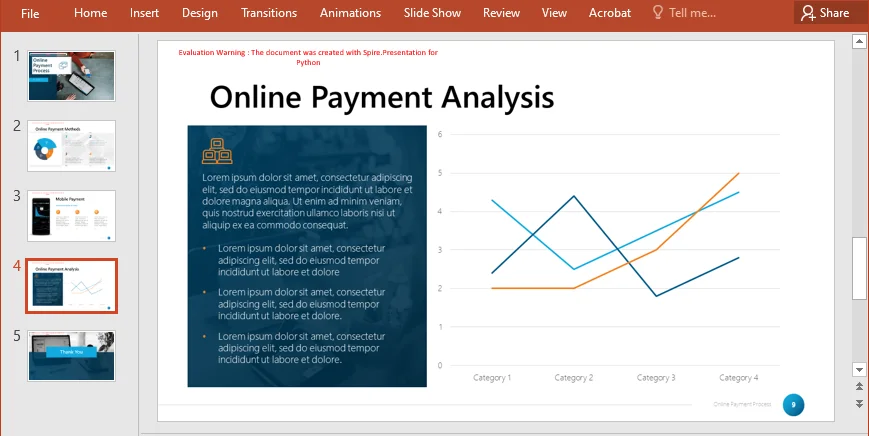
  import os
  from spire.presentation import *

  # Create a new Presentation object
  presentation = Presentation()

  # Remove the default first slide
  presentation.Slides.RemoveAt(0)

  # Define the image directory
  baseDir = r"C:\Users\Administrator\Downloads\Images"

  # Get all file paths in the specified directory
  picFiles = [f for f in os.listdir(baseDir) if os.path.isfile(os.path.join(baseDir, f))]

  # Loop through the images
  for picFile in picFiles:
      # Add a new slide
      slide = presentation.Slides.Append()

      # Create the full image path
      imagePath = os.path.join(baseDir, picFile)

      # Load the image using Stream and get image data
      stream = Stream(imagePath)
      imageData = presentation.Images.AppendStream(stream)
      stream.Close()

      # Get the image width and height from the imageData
      imageWidth = float(imageData.Width)
      imageHeight = float(imageData.Height)

      # Set the slide size to match the image size
      presentation.SlideSize.Type = SlideSizeType.Custom
      presentation.SlideSize.Size = SizeF(imageWidth, imageHeight)

      # Define the position for the image (position at top-left corner)
      rect = RectangleF(0.0, 0.0, imageWidth, imageHeight)  # Use full image size

      # Insert the image into the slide (make it fit the entire slide)
      pptImage = slide.Shapes.AppendEmbedImageByImageData(ShapeType.Rectangle, imageData, rect)

      # Remove the border around the shape (optional)
      pptImage.Line.FillType = FillFormatType.none

  # Save the presentation to a file
  presentation.SaveToFile("ImagesToPPT.pptx", FileFormat.Pptx2013)
  # Clean up resources
  presentation.Dispose()
Pros:
- Fully automated for batch processing.
- Customizable for different image sizes, layouts, and formatting.
- Ideal for large-scale or recurring tasks.
Cons:
- Requires Python knowledge and setup.
- Needs Python and the necessary libraries installed.
For more details, refer to the full official guide: Python: Add Images to PowerPoint Presentations.
Best Practices for Converting Images to PPT
Regardless of the method you choose to create PowerPoint slides from images, adhering to some best practices can help ensure your slides are professional, efficient, and visually appealing. Here are a few tips to keep in mind:
- Optimize Image Size: Large images can increase the file size of your PowerPoint presentation, making it slow to load. Resize the images if needed before adding them.
- Use Consistent Layouts: When inserting multiple images, use consistent formatting for a polished, professional look.
- Consider Aspect Ratio: Ensure that the images fit well within the slide dimensions without distortion.
- Add Captions or Descriptions: Use text boxes to describe the images or provide additional context.
Conclusion
Converting images to PPT slides can significantly improve your presentation quality. Whether you prefer the manual method for small projects, need an online tool for quick conversions, or want to automate the process with Python, each method has its own advantages.
- Manual methods are great for simple, small-scale tasks.
- Online converters are perfect for quick, one-time conversions.
- Python automation is ideal for bulk tasks or when automation is required.
Choose the method that best suits your needs and start converting your images to PowerPoint today!
FAQs: Converting Images to PowerPoint
Q1: What's the easiest method to convert images to PPT?
A1: For beginners, using Microsoft PowerPoint's Insert Tab or Photo Album Feature is the easiest and quickest way to add images to slides manually.
Q2: Can I convert images to PPT without PowerPoint?
A2: Yes, free online tools like online2pdf allow you to convert images to PPT without the need to install any software.
Q3: How can I automate image conversion to PPT?
A3: You can automate the process using Python and Spire.Presentation, which allows for batch processing and customization for large numbers of images.