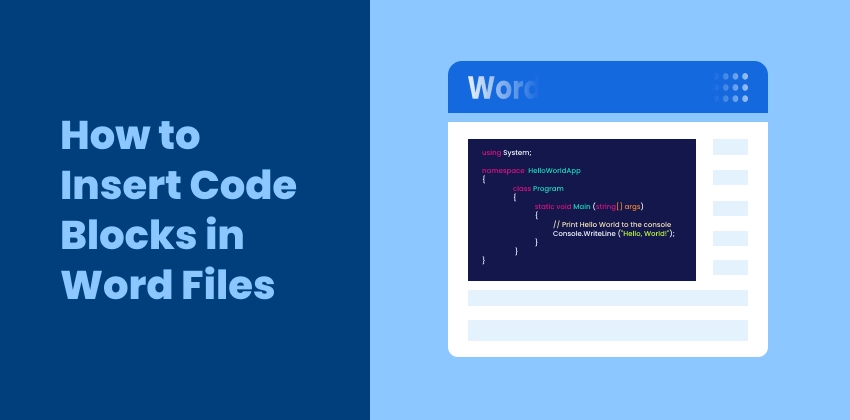
Including code snippets in Word documents is a common need for developers, technical writers, and educators. However, achieving readable, visually appealing, and maintainable code blocks in Word can be tricky.
Some users simply copy and paste from an IDE, which can disrupt formatting, while others manually style text or use screenshots, which may be time-consuming. For documents that require consistency, editing, or automation, choosing the right method can save hours of work.
In this guide, we cover seven smart ways to insert code blocks in Word — from quick manual approaches to fully automated workflows using Python and Spire.Doc — so you can select the method that best fits your needs.
Method Overview
- Method 1: Copy Code from an IDE (Syntax Highlighting)
- Method 2: Apply a Custom Code Style in Word
- Method 3: Box Code Using 1-Cell Tables
- Method 4: Add Code Snippets to Word as Images
- Method 5: Embed Code as a Document Object
- Method 6: Format Code Blocks Using Word Add-ins
- Method 7: Automate Code Insertion via Python
Method 1: Copy Code from an IDE (Syntax Highlighting)
This method involves copying code directly from an IDE (such as VS Code, Visual Studio, or IntelliJ IDEA) and pasting it into a Word document. Most modern IDEs preserve syntax highlighting and basic formatting automatically when copying code.
When to Use This Method:
This approach is well suited for short code examples in tutorials, technical guides, or reports where the document is largely read-only. It works best when the code does not require frequent updates after being added to Word.
How to Copy Code from an IDE into Word:
- Open the code file in your IDE and select the desired lines.
- Copy the selection using the standard copy command.
- Paste the code into Word and choose Keep Source Formatting.
You may adjust font size or line spacing to better match the surrounding content.
Pros:
- Fast and convenient
- Preserves syntax highlighting
- No additional tools required
Cons:
- Formatting may vary across Word versions
- Not ideal for large or frequently updated code blocks
Best for: Short code examples in tutorials or one-off documents
Method 2: Apply a Custom Code Style in Word
This method uses Word’s built-in styles to create a dedicated “Code” style for formatting code snippets consistently. You can control font, size, color, line spacing, and background shading, ensuring all code blocks look uniform throughout your document.
When to Use This Method:
Ideal for documents that require multiple code examples with consistent formatting, especially when edits or updates are expected. It works well for tutorials, guides, or reports that will be maintained over time.
How to Apply a Custom Code Style:
- Select your code in Word.
- Open the Styles pane and create a new style named “Code.”
- Set the font to a monospace type (e.g., Consolas, Courier New), adjust font size and line spacing, and optionally add a light background color (found under Format > Borders).
- Apply this style to all code blocks for consistent formatting.

Pros:
- Consistent and professional appearance
- Fully editable and searchable
- Easily reusable across the document
Cons:
- Requires initial setup
- Less visually striking than IDE syntax highlighting
- Needs manual style application for each new code block
Best for: Medium to long documents with multiple, editable code examples
Method 3: Box Code Using 1-Cell Tables
This approach involves placing each code snippet inside a single-cell table. The table acts as a container, helping the code stand out and preventing text from flowing around it.
When to Use This Method:
Useful for short commands or snippets where visual separation from surrounding text is important. It’s also handy for documents that may be printed or exported to PDF.
How to Box Code in a Table:
- Insert a 1×1 table in Word.
- Paste your code into the table cell.
- Apply monospace font and optionally set a light background shading.
- Adjust cell padding or remove borders as needed.
Pros:
- Clear visual separation
- Layout stays stable across pages and exports
- Works without additional tools
Cons:
- Editing long code inside a table can be cumbersome
- Adding many code blocks can clutter the document
- Table borders may require fine-tuning for aesthetics
Best for: Short commands or snippets needing a clear, isolated layout
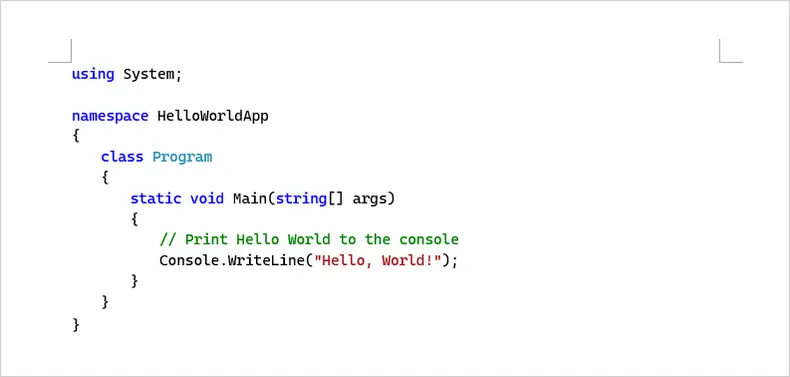
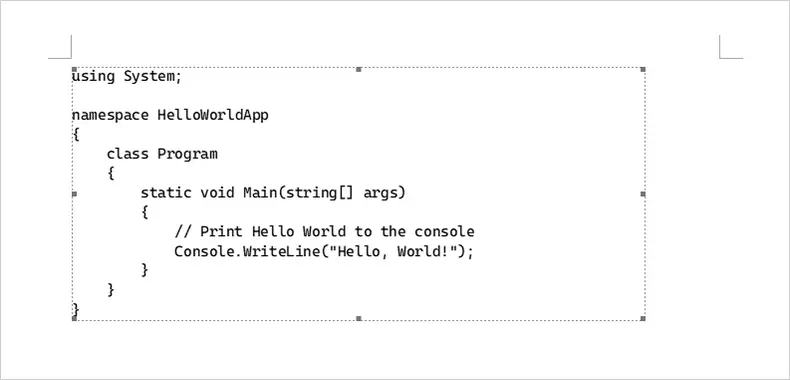
Method 4: Add Code Snippets to Word as Images
This method converts code into an image, ensuring that formatting, colors, and alignment appear exactly as intended in Word.
When to Use This Method:
Perfect for documents where visual fidelity is critical and code does not need to be edited. Examples include marketing materials, reports for external clients, or PDFs intended for distribution.
How to Insert Code as an Image:
- Use a screenshot tool or IDE export feature to create an image of your code.
- Insert the image into Word using Insert → Pictures.
- Resize as needed and optionally add a border.
Pros:
- Formatting and colors are preserved exactly
- Looks professional and polished
- Safe for printed or shared PDFs
Cons:
- Code is not editable
- Not searchable or copyable
- Accessibility issues for screen readers
Best for: Final presentation documents where editing code is not required
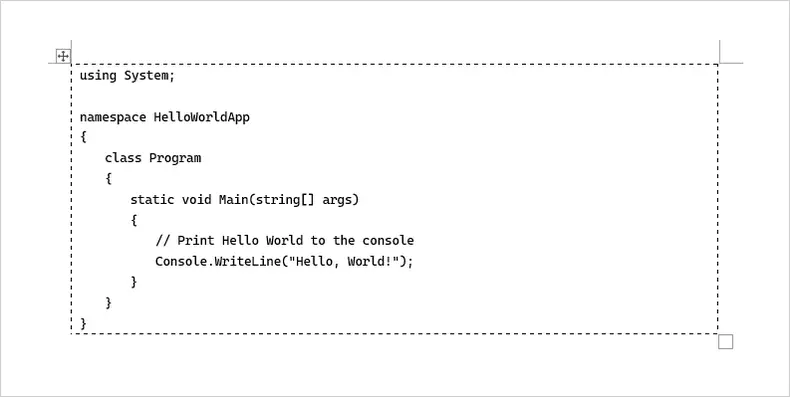
Method 5: Embed Code as a Document Object
This method embeds code inside the Word document as a separate object rather than inline text. Instead of pasting code directly into the document body, you insert a small embedded document that contains the code. This keeps the code visually isolated and prevents Word from interfering with formatting.
When to Use This Method:
This method works well when you want to visually separate code from surrounding content or when the code should remain unchanged and read-only. It is particularly useful for reports, specifications, or documents where code is included for reference rather than active editing.
How to Embed Code as an Object in Word:
- Go to the Insert tab in Word.
- Click the Object drop-down arrow and select Object.
- On the Create New tab, choose OpenDocument Text as the object type.
- Click OK. A new document window will open.
- Paste or type your code into the new document.
- Close the embedded document window.
Once closed, the code appears in your original Word document as an embedded object. You can move it or resize it as needed.
Pros:
- Keeps code clearly separated from main document text
- Prevents Word from altering formatting
- Object can be resized or repositioned easily
- Suitable for read-only code blocks
Cons:
- Code cannot be edited directly inline
- Not ideal for long or frequently updated code
Best for: Embedding stable, read-only code snippets in reports or documentation where layout control matters more than editability
Method 6: Format Code Blocks Using Word Add-ins
This approach uses a dedicated Word add-in to format and highlight code snippets directly inside your document. One popular add-in available in the Office Add-ins store is Easy Syntax Highlighter (free), which supports many programming languages and themes.
When to Use This Method:
Use this method when you want syntax highlighting and code formatting applied automatically without pasting images or styling manually. It’s especially useful for larger sets of snippets in documentation where consistent highlighting is important.
How to Use the Easy Syntax Highlighter Add-in:
- In Word, go to the Insert tab and choose Get Add-ins (or Office Add-ins).
- Search for Easy Syntax Highlighter and install it.
- After installing, select the block of code you want formatted.
- Use the add-in’s ribbon or pane to choose a language and apply highlighting.
- The selected code will be formatted with syntax colors and styles.
(An alternative add-in you can mention is Easy Code Formatter, which also formats selected text as code using built-in themes.)
Pros:
- Applies syntax highlighting directly in Word
- Supports many languages and themes
- Makes repeated insertion much easier than manual styling
Cons:
- Requires installing an add-in
- Some features/themes may require configuration
Best for: Medium to large documents where consistency and formatting speed matter
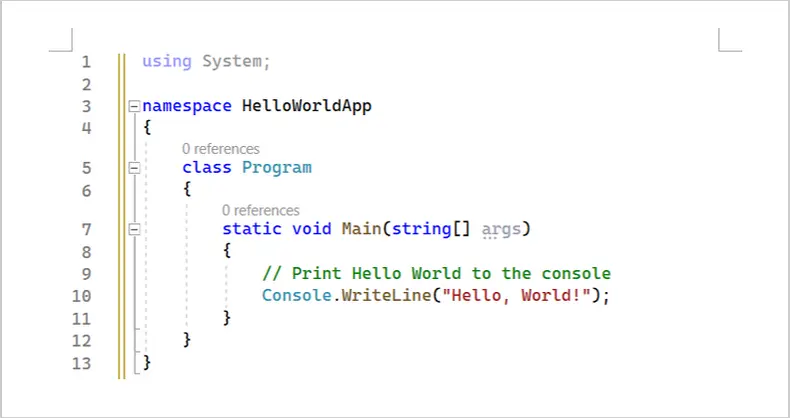
Method 7: Automate Code Insertion via Python
For large documents or repeated code insertions, you can automate the process using Python. This method leverages Spire.Doc for Python to create Word documents and Pygments to apply syntax highlighting automatically. It works for Python, C#, Java, and many other languages, making it a universal solution for technical documentation.
When to Use This Method:
Use this method when you have many code snippets, need consistent syntax highlighting, or want to generate documents automatically (for reports, tutorials, or manuals). It’s ideal for situations where manual copy-paste or add-ins are impractical.
How to Automate Code Insertion:
-
Install the required libraries if you haven’t already:
pip install spire.doc pygments -
Prepare your code as a string.
-
Use Pygments to convert the code into RTF with syntax highlighting, specifying the appropriate lexer for the language, or use guess_lexer to automatically detect it.
-
Use Spire.Doc to create a Word document, add a paragraph, and insert the RTF string.
-
Save the document as DOCX.
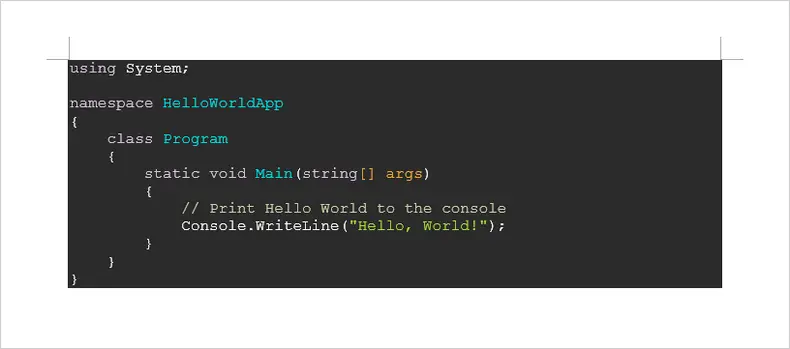
Here’s an example using Python code:
from pygments import highlight
from pygments.lexers import CSharpLexer, guess_lexer
from pygments.formatters import RtfFormatter
from spire.doc import *

# Define the code to insert (C#, Java, Python, etc.)
code = """
using System;

namespace HelloWorldApp
{
    class Program
    {
        static void Main(string[] args)
        {
            // Print Hello World to the console
            Console.WriteLine("Hello, World!");
        }
    }
}
"""

# Set font name
formatter = RtfFormatter(fontface="Consolas")

# Option 1: Specify the lexer explicitly (recommended when language is known)
rtf_text = highlight(code, CSharpLexer(), formatter)
rtf_text = rtf_text.replace(r"\f0", r"\f0\fs21")  # font size

# Option 2: Automatically detect the programming language
# This is useful when processing mixed or unknown code snippets
# lexer = guess_lexer(code)
# rtf_text = highlight(code, lexer, formatter)

# Load a Word document
doc = Document()
doc.LoadFromFile("Input.docx")

# Add a paragraph
section = doc.Sections.get_Item(0)
para = section.AddParagraph()

# Insert the syntax-highlighted code as RTF
para.AppendRTF(rtf_text)

# Save the document
doc.SaveToFile("InsertCode.docx", FileFormat.Docx2016)
doc.Close()
After running the script, the resulting Word document contains fully formatted and syntax-highlighted code, editable and consistent, regardless of the programming language used.

Pros:
- Fully automated and scalable for multiple code blocks
- Works for Python, C#, Java, and many other languages
- Consistent syntax highlighting and editable Word output
Cons:
- Requires Python environment and libraries
- Slight setup and learning curve for first-time users
Best for: Generating large technical documents, tutorials, or reports with multiple code snippets where automation and consistency are priorities
Beyond inserting syntax-highlighted code blocks via RTF, Spire.Doc for Python also supports adding code snippets to Word documents using HTML or images, which can be useful when the formatting is already prepared elsewhere. In addition, Markdown files that contain code blocks can be converted into Word documents, preserving structure and readability.
Once the document is generated, it can be exported directly to PDF, making this approach suitable for end-to-end documentation workflows that start from code and finish with a distributable file format.
Comparison: Choosing the Right Method
| Method | Ease of Use | Setup / Tools Required | Scalability | Best For |
|---|---|---|---|---|
| Copy from IDE | ★★★★★ | None | Low | Short, one-off code examples |
| Custom Word Style | ★★★★☆ | Manual style setup | Medium | Documents with repeated code blocks |
| 1-Cell Table | ★★★★☆ | Word only | Low | Boxed code with layout control |
| Code as Images | ★★★★☆ | Screenshot tool or IDE export | Low | Read-only or design-focused docs |
| Document Object | ★★★☆☆ | Word object support | Low | Embedded, isolated code blocks |
| Word Add-ins | ★★★★☆ | Add-in installation | Medium | Quick formatting without coding |
| Programmatic (Python) | ★★☆☆☆ | Python + Libraries | High | Large or frequently updated docs |
Final Thoughts
There’s no one-size-fits-all approach to inserting code into Word. For quick, one-off snippets, manual copy or tables may suffice. If your document will be edited frequently or contains multiple snippets, using custom Word styles or a snippet add-in ensures consistency. For large-scale or automated workflows, Python with Spire.Doc and Pygments offers maximum efficiency and control.
By understanding the strengths and limitations of each method, you can produce documents that are professional, readable, and maintainable, while minimizing the frustration often associated with formatting code in Word.
FAQs
Q1: Can I copy code from any IDE into Word and keep formatting?
Most modern IDEs, including VS Code, Visual Studio, and IntelliJ IDEA, preserve basic formatting and syntax highlighting when copying. Some differences may occur depending on Word themes and fonts.
Q2: Can I include multiple programming languages in a single Word document?
Yes. Methods 1–6 work for any language as long as you choose the correct formatting. Method 7 (Python + Pygments) supports many languages, and guess_lexer can detect the language automatically.
Q3: Is the automated Python method difficult to set up?
It requires installing Python and the required libraries (Spire.Doc and pygments), but the workflow is simple once set up and saves time for large or repeated code insertions.
Q4: Which method is best for final, presentation-ready documents?
If visual fidelity is critical and editing isn’t needed, inserting the code as an image (Method 4) ensures perfect formatting.