If you're formatting an academic paper, bibliography, or APA/MLA reference list, you may need to create a hanging indent in Word. Although Microsoft Word includes built-in formatting tools for this, many users still struggle to find the correct button, especially in newer versions of Word. In this guide, you'll learn how to make a hanging indent in Word using three simple methods: manual formatting, keyboard shortcuts, and Python automation for batch document processing.
- Make a Hanging Indent in Microsoft Word Manually
- Create a Hanging Indent in Word Using Shortcut
- Automating Make Hanging Indent in Word with Python
- Troubleshooting & FAQs
- Method Comparison
Make a Hanging Indent in Microsoft Word Manually
If you are wondering how to do a hanging indent on Word for a single document, the Paragraph settings menu is your most reliable approach. This method works in most versions of Microsoft Word and allows you to customize the indent size precisely.
How to set it up:
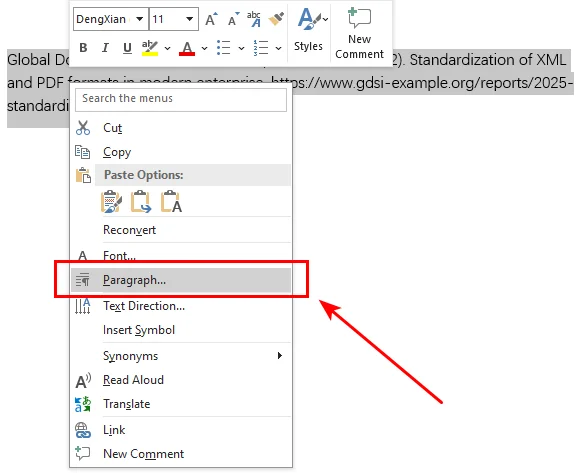
- Step 1. Highlight the specific paragraphs or the entire bibliography you want to format.
- Step 2. Right-click the highlighted text and select Paragraph... from the context menu. This will instantly open the Indents and Spacing tab.
- Step 3. In the Indentation section, find the Special drop-down menu and select Hanging.
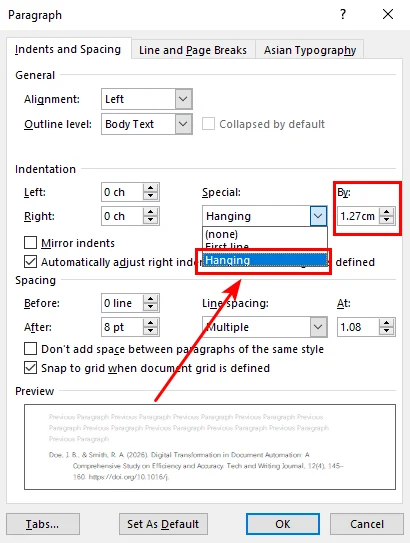
- Step 4. The standard offset for APA or MLA styles is 0.5" (1.27 cm). Hit OK, and your text will snap into place.
Create a Hanging Indent in Word Using Shortcut
While adding a hanging indent in Word using the menu offers precise control, repeatedly opening the Paragraph dialog can become inefficient when working with long citation lists. If you have a long list of citations and want to speed things up, using a keyboard shortcut is more efficient for power users.
Hanging indent shortcut for Windows and Mac:
- On Windows: Press Ctrl + T. Each press increases the indent. To undo it or move it back, press Ctrl + Shift + T.
- On Mac: Press Command + T. macOS does not have a default shortcut to decrease the indent; you can use Command + Z to undo the action immediately, or press Option + Command + Q to reset all paragraph formatting.
These shortcuts are especially useful when editing long documents and applying formatting repeatedly.
Tip: While adjusting your layout, you might encounter stubborn blank lines that disrupt the flow. To tidy up your document efficiently, you can follow this guide to remove blank lines in Word quickly.
Automating Make Hanging Indent in Word with Python
While the manual and shortcut methods are sufficient for casual users, they lose efficiency when you need to handle hundreds of documents or paragraphs scattered across different pages. For large-scale document processing, automation helps maintain consistent formatting while reducing manual work.
In this section, we will demonstrate how to add a hanging indent in Word documents using Free Spire.Doc for Python. This is a free professional library designed for creating, editing, and converting Word documents. It features the ParagraphFormat.SetFirstLineIndent() method, which allows you to shift between first-line and hanging indents simply by adjusting a single parameter.
Install Free Spire.Doc for Python
Before running the code, install the library using pip:
pip install Spire.Doc.Free
Python Code Example (using Free Spire.Doc)
The following Python code shows how to target the first and third paragraphs within an existing Word document and set a hanging indent on these paragraphs.
from spire.doc import *
from spire.doc.common import *

# Load an existing Word document
doc = Document()
doc.LoadFromFile("/input/apa style.docx")

# Access the first section of the document
section = doc.Sections.get_Item(0)

# Format the first paragraph
para1 = section.Paragraphs.get_Item(0)
para1.Format.SetLeftIndent(36.0)
para1.Format.SetFirstLineIndent(-36.0)

# Format the fifth paragraph
para3 = section.Paragraphs.get_Item(4)
para3.Format.SetLeftIndent(36.0)
para3.Format.SetFirstLineIndent(-36.0)

# Save the updated document
doc.SaveToFile("/output/Hanging_Indent.docx", FileFormat.Docx2013)
doc.Close()
In the code above, we use get_Item(4) to target what appears to be the third paragraph. This is because empty lines between text blocks are often counted as individual paragraph objects by the library. If your document has no empty lines, you may need to adjust the index to 2 instead.
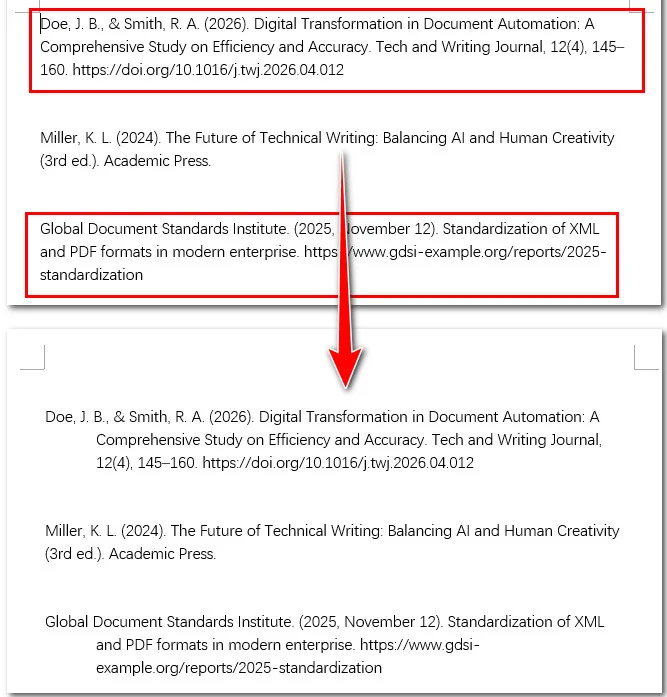
Here's the preview of the resulting file and the original Word document:
Tip: Once you've perfected your layout, you can also use Free Spire.Doc to convert the Word documents to PDF. This ensures your hanging indents and overall formatting remain perfectly intact across all platforms and devices.
Troubleshooting & FAQs
Q1: Why is Ctrl + T not working in my Word?
This usually happens if another background app has the same shortcut. Check if you have any specialized translation or screen-recording software running. If all else fails, use the manual method above.
Q2: How do I set a hanging indent in Word Online?
The web version is slightly different. Go to the Home tab, click the three dots (...) for more options, select Paragraph Options, and find Special Indent.
Q3: What is the standard size for APA or MLA?
The standard is 0.5 inches (1.27 cm). Most Word versions set this by default as soon as you select "Hanging."
Hanging Indent Method Comparison
Now that we've covered both manual and automated approaches, let's briefly compare when each method works best.
| Method | Best For | Advantages | Limitations |
|---|---|---|---|
| Manual Formatting | One-time edits | Simple and built into Word | Slower for repeated tasks |
| Keyboard Shortcut | Fast document editing | Quick and convenient | Limited customization |
| Python Automation | Batch document processing | Efficient and consistent | Requires coding knowledge |
Conclusion
In summary, manual clicks and shortcuts within Microsoft Word offer a quick, convenient solution for occasional edits and one-off tasks. However, for those looking to bypass the office suite and automate formatting workflows, Free Spire.Doc for Python delivers speed and precision. Choose the tool that aligns with your project goals and start building professional, perfectly formatted documents today!