BMP is one of the oldest and simplest image formats still in use today. Unlike JPEG, it does not apply lossy compression, making it a popular choice for OCR systems, document archiving, image analysis, and legacy software that requires raw bitmap images.
However, converting a PDF to BMP is not always as straightforward as it seems. Many users find that the resulting images appear blurry, especially when text, diagrams, or scanned pages are involved. In most cases, the issue is not caused by the BMP format itself but by the resolution used during the PDF rendering process.
In this guide, we'll explore three practical methods to achieve sharp, high-quality BMP output — including an online converter, a local command-line solution, and a Python-based automation approach. The focus is on how to properly control rendering resolution (DPI) to get the best results.
On this page:
- Understanding BMP Output Quality
- Method 1: Convert PDF to BMP Online Using CloudConvert
- Method 2: Convert PDF to BMP Using Ghostscript + ImageMagick
- Method 3: Convert PDF to BMP Programmatically with Python
- Comparison Table: Choosing the Right Method
- FAQs
- Conclusion
Understanding BMP Output Quality
BMP stores image data without compression, preserving every pixel. This makes it a common choice for OCR, document digitization, and image analysis — scenarios where fidelity matters more than file size.
However, saving as BMP does not automatically guarantee sharp results. The output quality depends primarily on the rendering resolution (DPI) used when converting the PDF page into bitmap data. A low DPI setting will produce blurry images regardless of the format.
| DPI | Typical Use |
|---|---|
| 72 DPI | Screen preview |
| 150 DPI | General viewing |
| 300 DPI | Printing and OCR |
| 600 DPI | Archiving and detailed documents |
The rendering engine also plays a role — different tools may handle fonts, vector graphics, and embedded images differently even at the same DPI. But in most cases, setting the right resolution is the single biggest factor in getting usable output.
Method 1: Convert PDF to BMP Online Using CloudConvert
Online converters provide the simplest way to convert PDF files to BMP without installing any software. Among them, CloudConvert offers good control over output resolution, making it suitable for users who need higher-quality results.
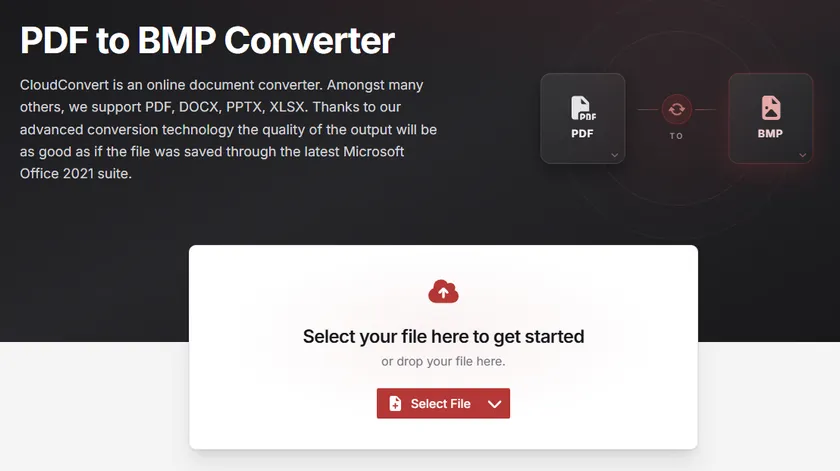
Steps to Convert PDF to BMP Online
- Go to the CloudConvert PDF-to-BMP converter in your web browser.
- Click Select File and upload your PDF document.
- Open the Options section.
- Set Pixel Density to 300 .
- Click Convert .
- Download the generated BMP files after conversion completes.
Pros
- No software installation required
- Easy to use for beginners
- Works on all operating systems
Cons
- Requires uploading files to a third-party server
- Not ideal for sensitive or confidential documents
- Limited automation support
CloudConvert is ideal for users who only need occasional conversions and prefer a fast, browser-based solution.
Method 2: Convert PDF to BMP Using Ghostscript + ImageMagick
For users who prefer local processing and do not want to upload sensitive documents to third-party servers, a combination of Ghostscript and ImageMagick provides a reliable offline solution. This method gives you full control over rendering resolution while keeping all files on your machine.
Ghostscript handles the PDF rendering, while ImageMagick manages the final image format conversion to BMP.
Step 1: Install Ghostscript
Download and install Ghostscript from the official website:
https://www.ghostscript.com/releases/gsdnld.html
Make sure it is properly added to your system PATH after installation.
Step 2: Install ImageMagick
Download ImageMagick from the official website:
https://imagemagick.org/script/download.php
During installation, ensure that "Install legacy utilities (convert, magick)" is enabled.
Step 3: Convert PDF to BMP
Use the following command:
magick -density 300 input.pdf output-%d.bmp
For multi-page PDFs, each page will be saved as a separate file (e.g., output-0.bmp, output-1.bmp).
How It Works
- The
-density 300parameter sets the rendering resolution to 300 DPI. - ImageMagick delegates the PDF rendering to Ghostscript internally.
- The rendered bitmap data is then saved as a BMP file.
- Higher DPI values result in sharper images due to increased pixel density.
Pros
- Full control over image quality and DPI
- Supports batch processing
- No file upload required
- Ideal for automation and scripting workflows
Cons
- Requires installation and initial setup
- Command-line usage may be unfamiliar for beginners
This method is recommended for developers or power users who need consistent, high-quality output without relying on cloud services.
Method 3: Convert PDF to BMP Programmatically with Python
For developers, programmatic conversion is often the most efficient approach. It allows precise control over image quality while making it possible to process large numbers of PDF files automatically.
In this example, we'll use Spire.PDF for Python to render each PDF page at 300 DPI and save it as a separate BMP image.
Install Spire.PDF for Python
pip install Spire.PDF
Convert PDF to BMP
from spire.pdf.common import *
from spire.pdf import *
from io import BytesIO
import os

# Create output folder if not exists
output_dir = "Output"
if not os.path.exists(output_dir):
    os.makedirs(output_dir)

# Create a PdfDocument object
doc = PdfDocument()

# Load a PDF document
doc.LoadFromFile(r"input.pdf")

# Iterate through all pages in the document
for page_idx in range(doc.Pages.Count):
    # Convert page to image stream, resolution 300 DPI
    with doc.SaveAsImage(page_idx, 300, 300) as imageData:

        # Save each page as separate BMP file
        save_path = os.path.join(output_dir, f"page_{page_idx + 1}.bmp")
        imageData.save(save_path, format="BMP")
        print(f"Saved: {save_path}")

# Dispose resources
doc.Dispose()
Output:

How It Works
The script first loads the PDF document and creates an output directory for storing the generated images.
Next, it iterates through all pages and renders each one at the specified resolution. The rendered image stream is then saved as a BMP file.
The key factor affecting output quality is the following line:
doc.SaveAsImage(page_idx, 300, 300)
The two values represent the horizontal and vertical rendering resolution in DPI. Increasing these values produces larger and sharper images, which is especially useful for OCR, printing, and image-processing applications.
Besides BMP, Spire.PDF also supports exporting PDF pages to a variety of other image formats, including PNG, JPG, SVG, and TIFF. This flexibility allows you to choose the most suitable format for different scenarios. Beyond image conversion, you can also use Spire.PDF to merge or split PDF files, add watermarks and page numbers, extract text and images, and automate a wide range of document-processing tasks in Python.
Comparison Table: Choosing the Right Method
| CloudConvert | Ghostscript + ImageMagick | Spire.PDF for Python | |
|---|---|---|---|
| Difficulty | Easy | Moderate | Moderate |
| Installation Required | No | Yes | Yes (pip install) |
| DPI Control | Yes (limited options) | Yes (fully customizable) | Yes (fully customizable) |
| Batch Processing | Limited | Yes | Yes |
| Automation Support | No | Yes (CLI scripting) | Yes (Python scripting) |
| Local Processing | No (cloud-based) | Yes | Yes |
| Pricing | Free (with daily limits) | Free and open-source | Free / Paid |
| Best For | Quick one-off conversions | DevOps and CLI workflows | Python-based applications |
Conclusion
Achieving high-quality BMP output from a PDF is primarily a matter of choosing the right rendering resolution. While the BMP format itself preserves image data without compression, low-resolution rendering can still produce blurry results.
The key factor is not the conversion tool, but the DPI setting used during the rendering step. A value of 300 DPI or higher is typically recommended to ensure sharp text and clear details across all methods.
Whether you prefer a quick online converter, a local command-line workflow, or a Python-based automation pipeline, controlling the rendering resolution is the single most important step toward getting crisp, usable BMP images.
FAQs
Why does my BMP output look blurry?
The most common cause is low rendering resolution. Many tools default to 72 or 96 DPI, which is fine for screen preview but too low for printing or OCR. Try setting the DPI to 300 or higher before exporting.
Is BMP higher quality than JPG?
BMP does not use lossy compression, while JPG does. As a result, BMP preserves more image detail and avoids the compression artifacts commonly seen in JPEG files, especially around text edges.
What DPI should I use?
It depends on your use case. For general viewing, 150 DPI is usually sufficient. For printing, OCR, or document archiving, 300 DPI is recommended. For highly detailed technical drawings, 600 DPI may be worth the larger file size.
Can I convert multi-page PDFs to BMP?
Yes. Most tools export each page as a separate BMP file. Both the Ghostscript + ImageMagick command and the Python example above handle multi-page documents automatically.
Is BMP better than PNG?
Both formats support lossless image quality. BMP is uncompressed and produces larger files, while PNG uses lossless compression to significantly reduce file size without sacrificing quality. PNG also supports transparency. For most modern workflows, PNG is the more practical choice unless your application specifically requires BMP.