
.NET (1327)
Children categories
How to Mix Font Styles within a Single TextRange in C#, VB.NET
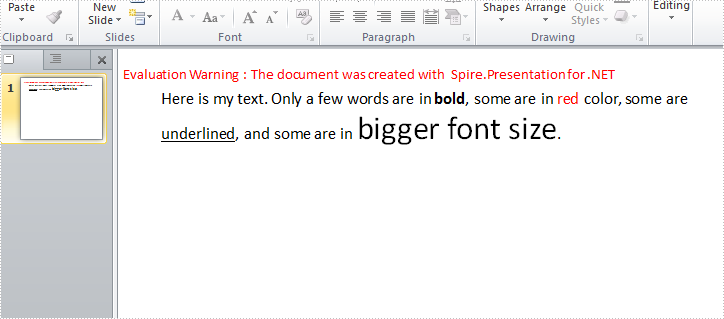
2015-05-12 05:10:51 Written by KoohjiTo emphasize some words or phrases in a sentence, most probably you will set different formats such as font type, color, and size to these parts. When we programmatically insert a sentence with various kinds of font styles into a PowerPoint slide, it is an easy task if we format the text at the first place and then append the text to a paragraph. In this article, we attach more importance to introduce how to mix font styles within a single TextRange on an existing PowerPoint slide.
Test File:
As is shown in test file, all words in this TextRange are in the same font style. Now we would like to make some changes.

Code Snippet:
Step 1: Create a new PowerPoint document and load the test file.
Presentation ppt = new Presentation("Sample.pptx", FileFormat.Pptx2010);
Step 2: Get the shape from PowerPoint slide, get the text from shape and save to a new string variable.
IAutoShape shape = ppt.Slides[0].Shapes[0] as IAutoShape;
string originalText = shape.TextFrame.Text;
Step 3: Split the string by specified words and return substrings to a string array.
string[] splitArray = originalText.Split(new string[] { "bold", "red","underlined","bigger font size" }, StringSplitOptions.None);
Step 4: Remove the paragraph from TextRange.
TextParagraph tp = shape.TextFrame.TextRange.Paragraph;
tp.TextRanges.Clear();
Step 5: Append normal text that is in front of ‘bold’ to the paragraph.
TextRange tr = new TextRange(splitArray[0]);
tp.TextRanges.Append(tr);
Step 6: Set font style of the text ‘bold’ as bold, and append it to the paragraph.
tr = new TextRange("bold");
tr.IsBold = TriState.True;
tp.TextRanges.Append(tr);
Step 7: Repeat step 5 and step 6 to append the rest normal texts and formatted texts to the paragraph.
//normal text
tr = new TextRange(splitArray[1]);
tp.TextRanges.Append(tr);
//red text
tr = new TextRange("red");
tr.Fill.FillType = Spire.Presentation.Drawing.FillFormatType.Solid;
tr.Format.Fill.SolidColor.Color = Color.Red;
tp.TextRanges.Append(tr);
//normal text
tr = new TextRange(splitArray[2]);
tp.TextRanges.Append(tr);
//underline text
tr = new TextRange("underlined");
tr.TextUnderlineType = TextUnderlineType.Single;
tp.TextRanges.Append(tr);
//normal text
tr = new TextRange(splitArray[3]);
tp.TextRanges.Append(tr);
//bigger size text
tr = new TextRange("bigger font size");
tr.FontHeight = 35;
tp.TextRanges.Append(tr);
//normal text
tr = new TextRange(splitArray[4]);
tp.TextRanges.Append(tr);
Step 8: Save the file.
ppt.SaveToFile("Result.pptx", FileFormat.Pptx2010);
Output:
Full Code:
using Spire.Presentation;
using System;
using System.Drawing;
namespace MixFontStyle
{
    class Program
    {
        static void Main(string[] args)
        {
            Presentation ppt = new Presentation("Sample.pptx", FileFormat.Pptx2010);
            IAutoShape shape = ppt.Slides[0].Shapes[0] as IAutoShape;
            string originalText = shape.TextFrame.Text;
            string[] splitArray = originalText.Split(new string[] { "bold", "red", "underlined", "bigger font size" }, StringSplitOptions.None);
            TextParagraph tp = shape.TextFrame.TextRange.Paragraph;
            tp.TextRanges.Clear();
            //normal text
            TextRange tr = new TextRange(splitArray[0]);
            tp.TextRanges.Append(tr);
            //bold text
            tr = new TextRange("bold");
            tr.IsBold = TriState.True;
            tp.TextRanges.Append(tr);
            //normal text
            tr = new TextRange(splitArray[1]);
            tp.TextRanges.Append(tr);
            //red text
            tr = new TextRange("red");
            tr.Fill.FillType = Spire.Presentation.Drawing.FillFormatType.Solid;
            tr.Format.Fill.SolidColor.Color = Color.Red;
            tp.TextRanges.Append(tr);
            //normal text
            tr = new TextRange(splitArray[2]);
            tp.TextRanges.Append(tr);
            //underline text
            tr = new TextRange("underlined");
            tr.TextUnderlineType = TextUnderlineType.Single;
            tp.TextRanges.Append(tr);
            //normal text
            tr = new TextRange(splitArray[3]);
            tp.TextRanges.Append(tr);
            //bigger size text
            tr = new TextRange("bigger font size");
            tr.FontHeight = 35;
            tp.TextRanges.Append(tr);
            //normal text
            tr = new TextRange(splitArray[4]);
            tp.TextRanges.Append(tr);
            ppt.SaveToFile("Result.pptx", FileFormat.Pptx2010);

        }
    }
}
Imports Spire.Presentation
Imports System.Drawing
Namespace MixFontStyle
	Class Program
		Private Shared Sub Main(args As String())
			Dim ppt As New Presentation("Sample.pptx", FileFormat.Pptx2010)
			Dim shape As IAutoShape = TryCast(ppt.Slides(0).Shapes(0), IAutoShape)
			Dim originalText As String = shape.TextFrame.Text
			Dim splitArray As String() = originalText.Split(New String() {"bold", "red", "underlined", "bigger font size"}, StringSplitOptions.None)
			Dim tp As TextParagraph = shape.TextFrame.TextRange.Paragraph
			tp.TextRanges.Clear()
			'normal text
			Dim tr As New TextRange(splitArray(0))
			tp.TextRanges.Append(tr)
			'bold text
			tr = New TextRange("bold")
			tr.IsBold = TriState.[True]
			tp.TextRanges.Append(tr)
			'normal text
			tr = New TextRange(splitArray(1))
			tp.TextRanges.Append(tr)
			'red text
			tr = New TextRange("red")
			tr.Fill.FillType = Spire.Presentation.Drawing.FillFormatType.Solid
			tr.Format.Fill.SolidColor.Color = Color.Red
			tp.TextRanges.Append(tr)
			'normal text
			tr = New TextRange(splitArray(2))
			tp.TextRanges.Append(tr)
			'underline text
			tr = New TextRange("underlined")
			tr.TextUnderlineType = TextUnderlineType.[Single]
			tp.TextRanges.Append(tr)
			'normal text
			tr = New TextRange(splitArray(3))
			tp.TextRanges.Append(tr)
			'bigger size text
			tr = New TextRange("bigger font size")
			tr.FontHeight = 35
			tp.TextRanges.Append(tr)
			'normal text
			tr = New TextRange(splitArray(4))
			tp.TextRanges.Append(tr)
			ppt.SaveToFile("Result.pptx", FileFormat.Pptx2010)

		End Sub
	End Class
End Namespace
Spire.Doc has a powerful ability to operate RTF file formats in C# and VB.NET. By using Spire.Doc, developers can convert RTF to PDF, HTML and word documents in .doc, .docx. This article will show you how to convert RTF into image and then reset the image resolution.
Download and install Spire.Doc for .NET and then add Spire.Doc.dll as reference in the downloaded Bin folder though the below path: "..\Spire.Doc\Bin\NET4.0\ Spire.Doc.dll". Here comes to the details of how to convert RTF into PNG and reset image resolution in C#.
Step 1: Create a new document and load from file.
Document doc = new Document();
doc.LoadFromFile("sample.rtf", FileFormat.Rtf);
Step 2: Save the RTF to image
Image[] images = doc.SaveToImages(Spire.Doc.Documents.ImageType.Metafile);
Step 3: Traverse the elements in the list of images and save them into .Png format.
for (int i = 0; i < images.Length; i++)
{
    Metafile mf = images[i] as Metafile;
    Image newimage = ResetResolution(mf, 200);
    string outputfile = String.Format("image-{0}.png", i);
    newimage.Save(outputfile, System.Drawing.Imaging.ImageFormat.Png);
}
Step 4: Set the image resolution call the method: ResetResolution.
public static Image ResetResolution(Metafile mf, float resolution)
{
    int width = (int)(mf.Width * resolution / mf.HorizontalResolution);
    int height = (int)(mf.Height * resolution / mf.VerticalResolution);
    Bitmap bmp = new Bitmap(width, height);
    bmp.SetResolution(resolution, resolution);
    using (Graphics g = Graphics.FromImage(bmp))
    {
        g.DrawImage(mf, Point.Empty);
    }
    return bmp;
}
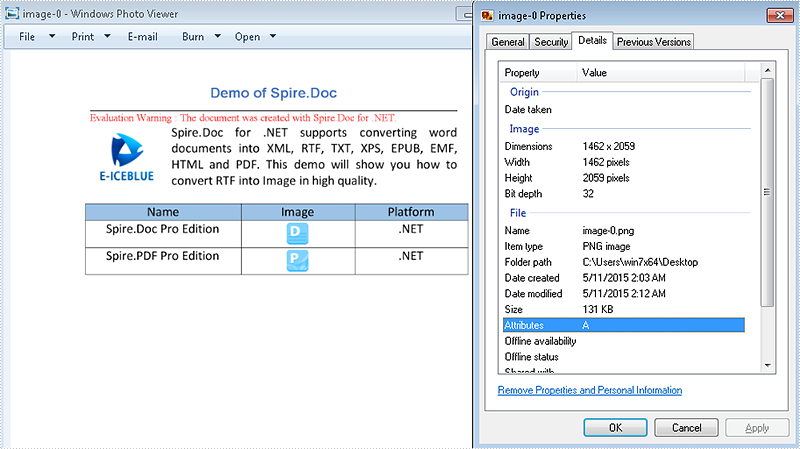
Effective screenshot of the image before reset the image resolution:
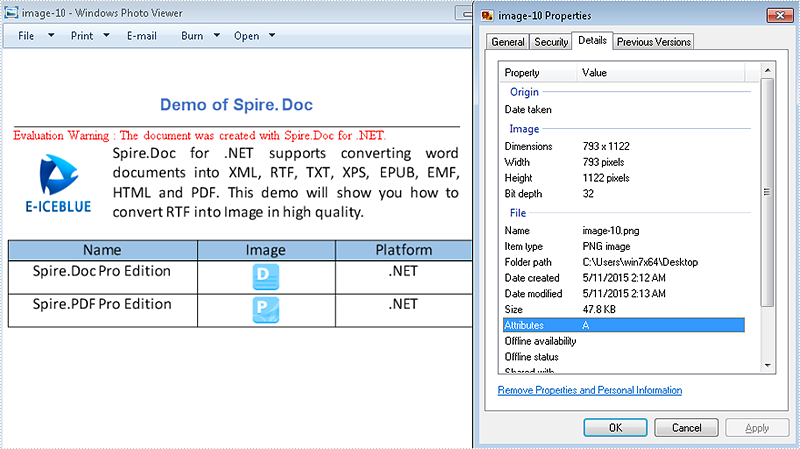
The image after reset the image resolution:
Full codes:
using Spire.Doc;
using System.Drawing;
using System.Drawing.Imaging;

namespace RTFtoImage
{
    class Program
    {
        static void Main(string[] args)
        {
            //Create a new document and load from file.
            Document doc = new Document();
            doc.LoadFromFile("sample.rtf", FileFormat.Rtf);
            // save the RTF to image
            Image[] images = doc.SaveToImages(Spire.Doc.Documents.ImageType.Metafile);
            for (int i = 0; i < images.Length; i++)
            {
                Metafile mf = images[i] as Metafile;
                Image newimage = ResetResolution(mf, 200);
                string outputfile = String.Format("image-{0}.png", i);
                newimage.Save(outputfile, System.Drawing.Imaging.ImageFormat.Png);
            }
        }
        //set the image resolution by the ResetResolution() method
        public static Image ResetResolution(Metafile mf, float resolution)
        {
            int width = (int)(mf.Width * resolution / mf.HorizontalResolution);
            int height = (int)(mf.Height * resolution / mf.VerticalResolution);
            Bitmap bmp = new Bitmap(width, height);
            bmp.SetResolution(resolution, resolution);
            using (Graphics g = Graphics.FromImage(bmp))
            {
                g.DrawImage(mf, Point.Empty);
            }
            return bmp;
        }
    }
}
Split PDF into Multiple PDFs using a Range of Pages in C#/VB.NET
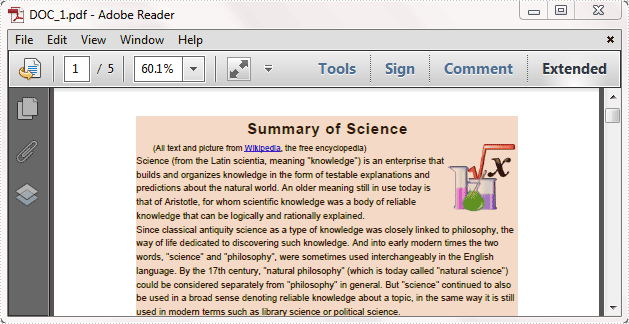
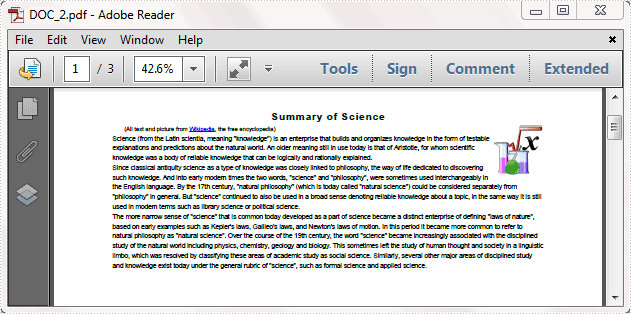
2015-05-08 02:59:51 Written by KoohjiSplitting a multi-page PDF into single pages is perfectly supported by Spire.PDF. However, it's more common that you may want to extract selected range of pages and save as a new PDF document. In this post, you'll learn how to split a PDF file based on a range of pages via Spire.PDF in C#, VB.NET.
Here come the detailed steps:
Step 1: Initialize a new instance of PdfDocument class and load the test file.
PdfDocument pdf = new PdfDocument();
pdf.LoadFromFile("Sample.pdf");
Step 2: Create a new PDF document named as pdf1, initialize a new instance of PdfPageBase class.
PdfDocument pdf1 = new PdfDocument();
PdfPageBase page;
Step 3: Add new page to pdf1 based on the original page size and the specified margins, draw the original page element to the new page using Draw() method. Use for loop to select pages that you want them to be divided.
for (int i = 0; i < 5; i++)
{
    page = pdf1.Pages.Add(pdf.Pages[i].Size, new Spire.Pdf.Graphics.PdfMargins(0));
    pdf.Pages[i].CreateTemplate().Draw(page, new System.Drawing.PointF(0, 0));
}
Step 4: Save the file.
pdf1.SaveToFile("DOC_1.pdf");
Step 5: Repeat step 2 to step 4 to extract another range of pages to a new PDF file. Change the parameter i to choose the pages.
PdfDocument pdf2 = new PdfDocument();
for (int i = 5; i < 8; i++)
{
    page = pdf2.Pages.Add(pdf.Pages[i].Size, new Spire.Pdf.Graphics.PdfMargins(0));
    pdf.Pages[i].CreateTemplate().Draw(page, new System.Drawing.PointF(0, 0));
}
pdf2.SaveToFile("DOC_2.pdf");
Result:
Full code:
using Spire.Pdf;

namespace SplitPDFFile
{
    class Program
    {
        static void Main(string[] args)
        {
            PdfDocument pdf = new PdfDocument();
            pdf.LoadFromFile("Sample.pdf");

            PdfDocument pdf1 = new PdfDocument();
            PdfPageBase page;
            for (int i = 0; i < 5; i++)
            {
                page = pdf1.Pages.Add(pdf.Pages[i].Size, new Spire.Pdf.Graphics.PdfMargins(0));
                pdf.Pages[i].CreateTemplate().Draw(page, new System.Drawing.PointF(0, 0));
            }
            pdf1.SaveToFile("DOC_1.pdf");

            PdfDocument pdf2 = new PdfDocument();
            for (int i = 5; i < 8; i++)
            {
                page = pdf2.Pages.Add(pdf.Pages[i].Size, new Spire.Pdf.Graphics.PdfMargins(0));
                pdf.Pages[i].CreateTemplate().Draw(page, new System.Drawing.PointF(0, 0));
            }
            pdf2.SaveToFile("DOC_2.pdf");
        }
    }
}
Imports Spire.Pdf

Namespace SplitPDFFile
	Class Program
		Private Shared Sub Main(args As String())
			Dim pdf As New PdfDocument()
pdf.LoadFromFile("Sample.pdf")

Dim pdf1 As New PdfDocument()
Dim page As PdfPageBase
For i As Integer = 0 To 4
	page = pdf1.Pages.Add(pdf.Pages(i).Size, New Spire.Pdf.Graphics.PdfMargins(0))
	pdf.Pages(i).CreateTemplate().Draw(page, New System.Drawing.PointF(0, 0))
Next
pdf1.SaveToFile("DOC_1.pdf")

Dim pdf2 As New PdfDocument()
For i As Integer = 5 To 7
	page = pdf2.Pages.Add(pdf.Pages(i).Size, New Spire.Pdf.Graphics.PdfMargins(0))
	pdf.Pages(i).CreateTemplate().Draw(page, New System.Drawing.PointF(0, 0))
Next
pdf2.SaveToFile("DOC_2.pdf")
		End Sub
	End Class
End Namespace
How to get the height and width of text in word document in C#
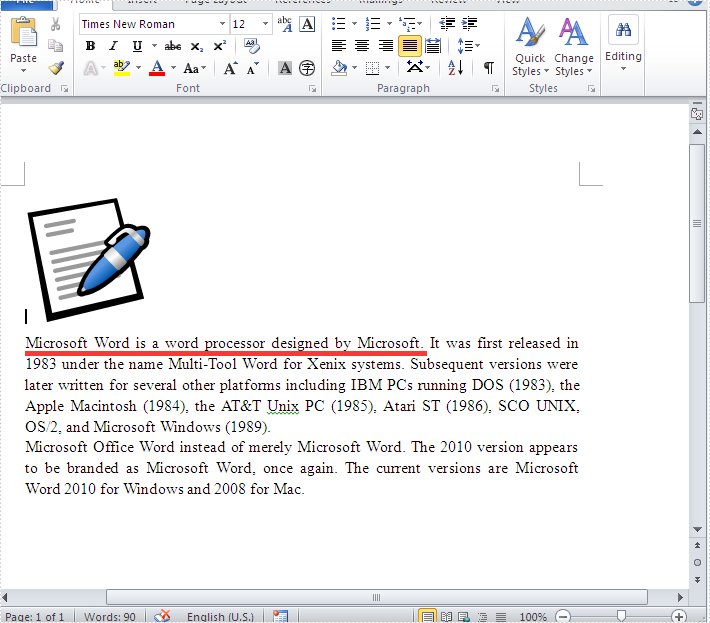
2015-05-06 08:27:14 Written by KoohjiBy using Spire.Doc, developers can find and highlight the text, extract the text in word document. This article will show you how to get the height and width of text in a word document in C# with the help of Spire.Doc.
Firstly, Download and install Spire.Doc for .NET and then add Spire.Doc.dll as reference in the downloaded Bin folder though the below path: "..\Spire.Doc\Bin\NET4.0\ Spire.Doc.dll". Here comes to the details of how to get the height and width of text in a word document in C#.
Check the original word document at first:
Step 1: Create a new document and load from file.
Document doc = new Document();
doc.LoadFromFile("Word.doc");
Step 2: Define the text string that we need to get the height and width.
string text = "Microsoft Word is a word processor designed by Microsoft.";
Step 3: Get the text string and measure the string.
//finds and returns the string with formatting
TextSelection selection = doc.FindString(text, true, true);
//get the font
Font font = selection.GetAsOneRange().CharacterFormat.Font;
//initialize graphics object
Image fakeImage = new Bitmap(1, 1);
Graphics graphics = Graphics.FromImage(fakeImage);
//measure string
SizeF size = graphics.MeasureString(text, font);
Step 4: Get the text height and width and read it.
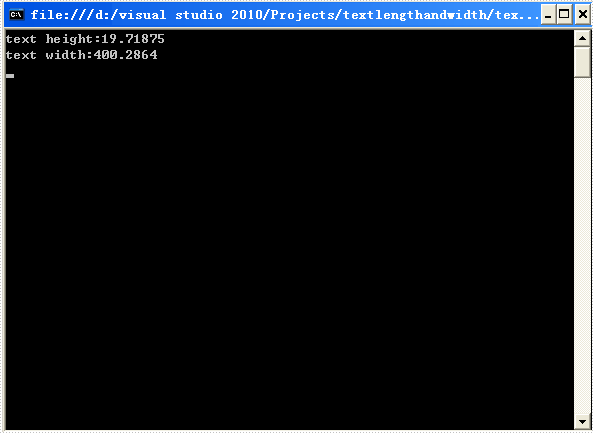
Console.WriteLine("text height:{0}",size.Height);
Console.WriteLine("text width:{0}", size.Width);
Console.ReadLine();
Effective screenshot:
Full codes:
using Spire.Doc;
using Spire.Doc.Documents;
using System;
using System.Drawing;
namespace GetHeightandWidth
{

    class Program
    {
        static void Main(string[] args)
        {
            Document doc = new Document();
            doc.LoadFromFile("Word.doc");
            string text = "Microsoft Word is a word processor designed by Microsoft.";

            TextSelection selection = doc.FindString(text, true, true);
            Font font = selection.GetAsOneRange().CharacterFormat.Font;
            Image fakeImage = new Bitmap(1, 1);
            Graphics graphics = Graphics.FromImage(fakeImage);
            SizeF size = graphics.MeasureString(text, font);

            Console.WriteLine("text height:{0}", size.Height);
            Console.WriteLine("text width:{0}", size.Width);
            Console.ReadLine();
        }
    }
}
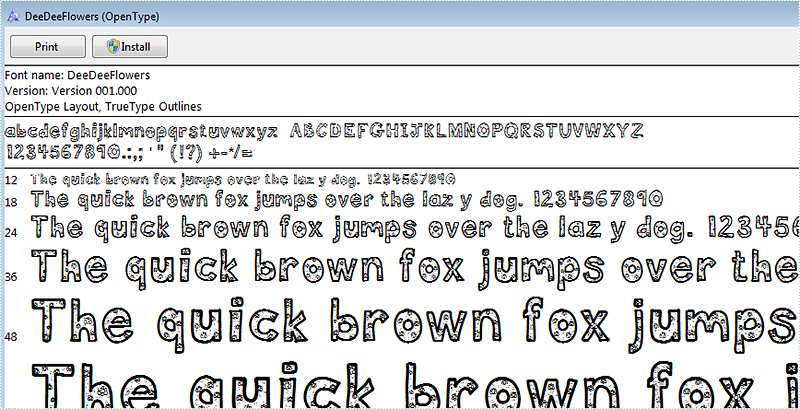
Change font can offer more variability to PDF files, now Spire.PDF can allow developers change font of pdf files without install the font to the disk. This article is talk about this realization process.
Below is the screenshot of the uninstalled font DeeDeeFlowers.ttf
Here are the steps:
Step 1: Create a new blank PDF document.
PdfDocument doc = new PdfDocument();
Step 2: Add a new page to the PDF.
PdfPageBase page = doc.Pages.Add();
Step 3: Create a TrueType font object with DeeDeeFlowers.ttf as parameter
String fontFileName = "DeeDeeFlowers.ttf";
PdfTrueTypeFont trueTypeFont = new PdfTrueTypeFont(fontFileName, 20f);
Step 4: Add text and set property.
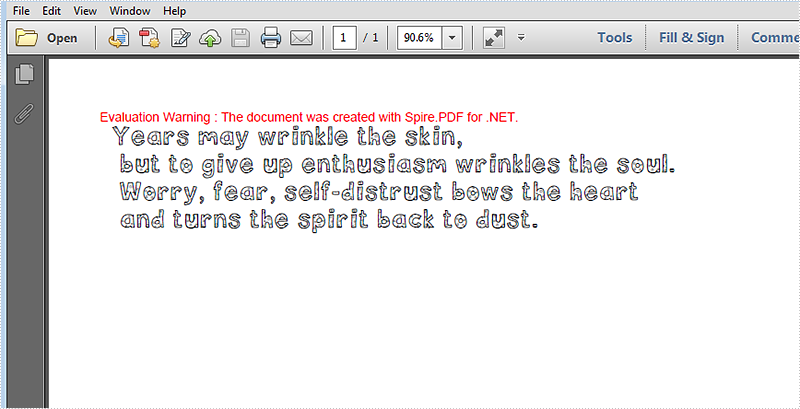
page.Canvas.DrawString("Years may wrinkle the skin,\n"
+ " but to give up enthusiasm wrinkles the soul.\n"
+ " Worry, fear, self-distrust bows the heart\n"
+" and turns the spirit back to dust.", trueTypeFont, new PdfSolidBrush(Color.Black), 10, 10);
Step 5: Save and review.
doc.SaveToFile("result.pdf");
System.Diagnostics.Process.Start("result.pdf");
Here is the screenshot of result.pdf.
Full Code:
using Spire.Pdf;
using Spire.Pdf.Graphics;
using System;
using System.Drawing;


namespace EmbedPrivateFont
{
    class Program
    {
        static void Main(string[] args)
        {
            PdfDocument doc = new PdfDocument();
            PdfPageBase page = doc.Pages.Add();
            String fontFileName = "DeeDeeFlowers.ttf";
            PdfTrueTypeFont trueTypeFont = new PdfTrueTypeFont(fontFileName, 20f);
            page.Canvas.DrawString("Years may wrinkle the skin,\n"
            + " but to give up enthusiasm wrinkles the soul.\n"
            + " Worry, fear, self-distrust bows the heart\n"
            + " and turns the spirit back to dust.", trueTypeFont, new PdfSolidBrush(Color.Black), 10, 10);
            doc.SaveToFile("result.pdf");
            System.Diagnostics.Process.Start("result.pdf");
        }
    }
}
Introduction to SQL CLR and Spire.PDF
SQL CLR is technology for hosting of the Microsoft .NET common language runtime engine within SQL Server. The SQLCLR allows managed code to be hosted by, and run in, the Microsoft SQL Server environment.
This technology, introduced in Microsoft SQL Server 2005, allow users for example to create the following types of managed code objects in SQL Server in .NET languages such as C# or VB.NET.
- Stored Procedures
- User defined aggregates
- Triggers
- User defined types
- User defined functions
Spire.PDF is a PDF library which contains an incredible wealth of features to create, read, edit and manipulate PDF documents on .NET, Silverlight and WPF Platform. As an independent PDF library, it does not need users to install Adobe Acrobat or any other third party libraries. Spire.PDF for .NET is completely written in C#, but also supports VB.NET, Windows Forms and ASP.NET Applications.
How to Utilize Spire.PDF in SQL CLR?
In this article we will see, how to create a simple PDF document in SQL CLR using Spire.PDF and how to deploy it in SQL Server. Just follow following steps and it will get done.
Enabling SQL CLR Integration
For SQL Server is, SQL CLR assembly is an external code, so in SQL Server default installation configuration, SQL CLR is blocked not used, to use it, we must first open it.
- Open SQL Server Management Studio, connect and create a new database named SpirePDFCLR.
- Enable the SQL CLR with the following code.
sp_configure 'clr enabled', 1
GO
RECONFIGURE
GO
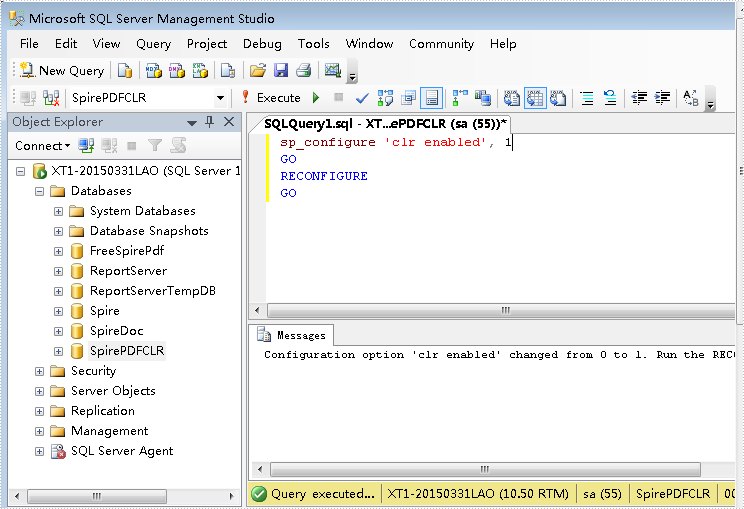
Now the SQL Server is ready to execute the database objects that are built using the C# programming language.
Adding Dependency Assemblies
For the sake of using non-SAFE CLR Assemblies, firstly we need to turn Trustworthy on.
ALTER DATABASE SpirePDFCLR SET TRUSTWORTHY ON
Now, we can add the dependency assemblies by following code.
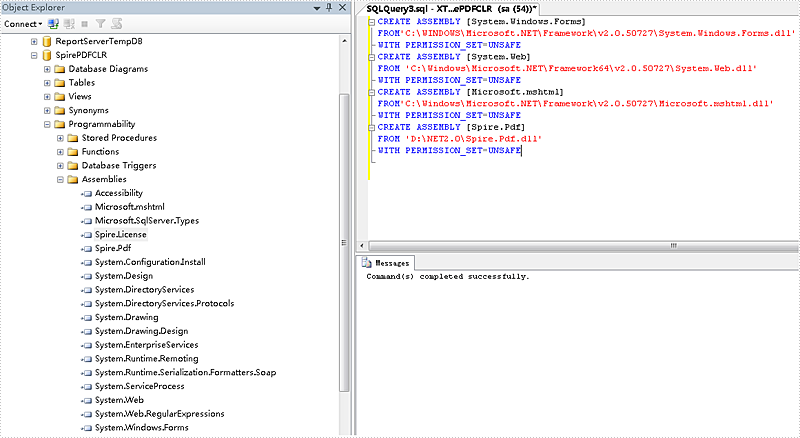
CREATE ASSEMBLY [System.Windows.Forms]
FROM'C:\WINDOWS\Microsoft.NET\Framework\v2.0.50727\System.Windows.Forms.dll'
WITH PERMISSION_SET=UNSAFE
CREATE ASSEMBLY [System.Web]
FROM 'C:\Windows\Microsoft.NET\Framework\v2.0.50727\System.Web.dll'
WITH PERMISSION_SET=UNSAFE
CREATE ASSEMBLY [Microsoft.mshtml]
FROM'C:\Windows\Microsoft.NET\Framework\v2.0.50727\Microsoft.mshtml.dll'
WITH PERMISSION_SET=UNSAFE
Once these assemblies are added, we can add the Spire.Pdf.Dll.
CREATE ASSEMBLY [Spire.Pdf]
FROM 'D:\NET2.0\Spire.Pdf.dll'
WITH PERMISSION_SET=UNSAFE
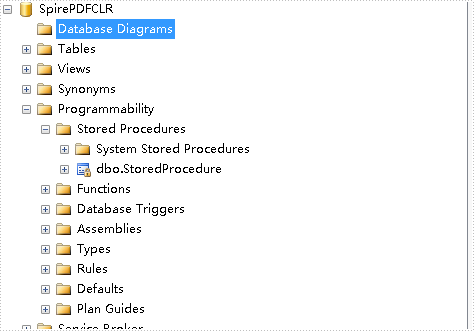
Then go to the Object Browser, select the SpirePDFCLR database, right-click and choose "Refresh". They will be shown under Assemblies as below.
Creating and Manipulate PDF document in SQL CLR
Once the Spire.Pdf.dll is added into the database, we can create and manipulate the PDF document in SQL CLR. Here we will take a Stored Procedure as an example.
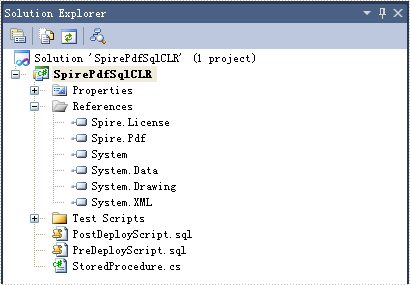
Put the following code in the Stored Procedure. It will create a PDF document when we execute the Stored Procedure.
using System;
using System.Data;
using System.Data.SqlClient;
using System.Data.SqlTypes;
using Microsoft.SqlServer.Server;
using Spire.Pdf;
using Spire.Pdf.Graphics;

public partial class UserDefinedFunctions
{
    [Microsoft.SqlServer.Server.SqlProcedure]
    public static void StoreProcedure()
    {
        PdfDocument doc = new PdfDocument();
        PdfPageBase page = doc.Pages.Add();
        page.Canvas.DrawString("Hello world", new PdfFont(PdfFontFamily.Courier, 100), PdfBrushes.Black, 0, 0);
        doc.SaveToFile("d:\\result.pdf");
    }
};
Next build and deploy the solution. If everything is fine then it will say that the deployment was successful. Then we will see the Store Procedure in the SpirePDFCLR database.
Now we will run the Stored Procedure from SQL Server, but here we will get an error as below.
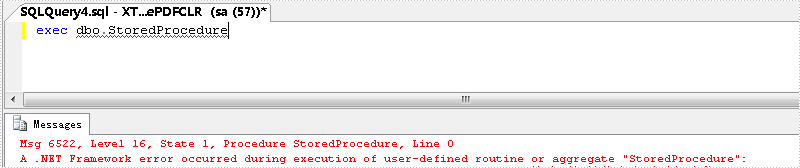
We need to change the permission level of the CLR project as unsafe and deploy it again.

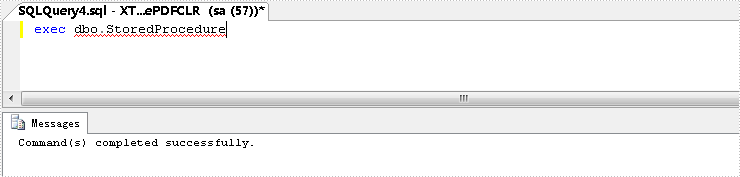
Now run it again, it will work fine and we will get the PDF document.
One of our customers has a requirement to insert text to a Word document in an exact location (horizontal and vertical coordinates). Generally, people position text in a Word document by using other tools such as tables and text boxes, since the positioning of tables and text boxes is much easier to control. In this article, we'll introduce how to position text in Word through text box in C#, VB.NET.
Firstly download Spire.Doc for .NET and reference the dll file to your project. Before we start to code, we also need following namespaces to be extra added.
using System.Drawing;
using Spire.Doc;
using Spire.Doc.Documents;
using Spire.Doc.Fields;
using Spire.Doc.Formatting;
Code Snippet:
Step 1: Create a new Word document, add a section for it, and then add a paragraph on the section.
Document doc = new Document();
Section sec = doc.AddSection();
Paragraph par = sec.AddParagraph();
Step 2: Append a new text box to the paragraph. Here we logically set VerticalOrigin and HorizontalOrigin as Margin because horizontal and vertical coordinate is a relative value to his reference object. By giving the variable VerticalPosition and HorizontalPosition a certain value, the text box will be fixed at the position.
TextBox textBox = par.AppendTextBox(180, 30);
textBox.Format.VerticalOrigin = VerticalOrigin.Margin;
textBox.Format.VerticalPosition = 100;
textBox.Format.HorizontalOrigin = HorizontalOrigin.Margin;
textBox.Format.HorizontalPosition = 50;
textBox.Format.NoLine = true;
Step 3: Define a new format style.
CharacterFormat format = new CharacterFormat(doc);
format.FontName = "Calibri";
format.FontSize = 15;
format.Bold = true;
Step 4: Add text to text box, and apply the preset format to the text.
Paragraph par1 = textBox.Body.AddParagraph();
par1.AppendText("This is my new string").ApplyCharacterFormat(format);
Step 5: Save the file.
doc.SaveToFile("result.docx", FileFormat.Docx);
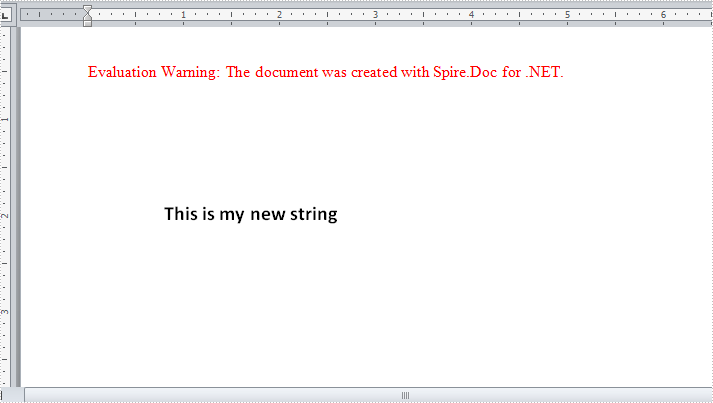
Result:
The border line of text box has been set as invisible, therefore we only see the text being added at the specified horizontal and vertical coordinates.
Full Code:
using Spire.Doc;
using Spire.Doc.Documents;
using Spire.Doc.Fields;
using Spire.Doc.Formatting;
using System.Collections.Generic;
namespace InsertText
{

    class Program
    {
        static void Main(string[] args)
        {
            Document doc = new Document();
            Section sec = doc.AddSection();
            Paragraph par = sec.AddParagraph();

            TextBox textBox = par.AppendTextBox(180, 30);
            textBox.Format.VerticalOrigin = VerticalOrigin.Margin;
            textBox.Format.VerticalPosition = 100;
            textBox.Format.HorizontalOrigin = HorizontalOrigin.Margin;
            textBox.Format.HorizontalPosition = 50;
            textBox.Format.NoLine = true;

            CharacterFormat format = new CharacterFormat(doc);
            format.FontName = "Calibri";
            format.FontSize = 15;
            format.Bold = true;

            Paragraph par1 = textBox.Body.AddParagraph();
            par1.AppendText("This is my new string").ApplyCharacterFormat(format);
            doc.SaveToFile("result.docx", FileFormat.Docx);
        }
    }
}
Imports Spire.Doc
Imports Spire.Doc.Documents
Imports Spire.Doc.Fields
Imports Spire.Doc.Formatting
Imports System.Collections.Generic
Namespace InsertText

	Class Program
		Private Shared Sub Main(args As String())
			Dim doc As New Document()
			Dim sec As Section = doc.AddSection()
			Dim par As Paragraph = sec.AddParagraph()

			Dim textBox As TextBox = par.AppendTextBox(180, 30)
			textBox.Format.VerticalOrigin = VerticalOrigin.Margin
			textBox.Format.VerticalPosition = 100
			textBox.Format.HorizontalOrigin = HorizontalOrigin.Margin
			textBox.Format.HorizontalPosition = 50
			textBox.Format.NoLine = True

			Dim format As New CharacterFormat(doc)
			format.FontName = "Calibri"
			format.FontSize = 15
			format.Bold = True

			Dim par1 As Paragraph = textBox.Body.AddParagraph()
			par1.AppendText("This is my new string").ApplyCharacterFormat(format)
			doc.SaveToFile("result.docx", FileFormat.Docx)
		End Sub
	End Class
End Namespace
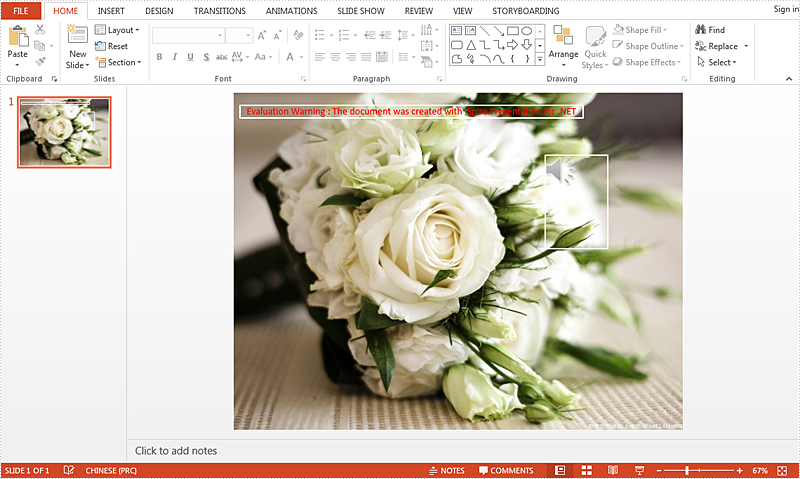
Insert audio to PowerPoint document at specified position in C#, VB.NET
2015-04-30 07:58:39 Written by KoohjiAudio can be used in PowerPoint document to create a more interesting and dynamic PowerPoint effect. Using the Spire.presention you can now use the Shapes.AppendVideoMedia() method to insert audio in your PowerPoint document at specific position with C#, VB.NET. There is guide will introduce the method.
Here are the steps:
Step 1: Create a new PowerPoint document first.
Presentation presentation = new Presentation();
Step 2: Then set the backgroung image before inserting Audio file.
string ImageFile = "2.jpg";
RectangleF rect = new RectangleF(0, 0, presentation.SlideSize.Size.Width, presentation.SlideSize.Size.Height);
presentation.Slides[0].Shapes.AppendEmbedImage(ShapeType.Rectangle, ImageFile, rect);
presentation.Slides[0].Shapes[0].Line.FillFormat.SolidFillColor.Color = Color.FloralWhite;
Step 3: Load the Audio file from disk and set properties of AutoShape
presentation.Slides[0].Shapes.AppendAudioMedia(@"1.mp3",500,100,true);
IAutoShape shape = presentation.Slides[0].Shapes.AppendShape(ShapeType.Rectangle, new RectangleF(500, 100, 100, 150));
shape.ShapeStyle.LineColor.Color = Color.White;
shape.Fill.FillType = Spire.Presentation.Drawing.FillFormatType.None;
Step 4: Save the PowerPoint file and review.
presentation.SaveToFile("audio.pptx", FileFormat.Pptx2010);
System.Diagnostics.Process.Start("audio.pptx");
Effect Screenshot:
Full code:
using Spire.Presentation;
using System.Drawing;

namespace InsertAudio
{

    class Program
    {

        static void Main(string[] args)
        {
            Presentation presentation = new Presentation();

            string ImageFile = "2.jpg";
            RectangleF rect = new RectangleF(0, 0, presentation.SlideSize.Size.Width, presentation.SlideSize.Size.Height);
            presentation.Slides[0].Shapes.AppendEmbedImage(ShapeType.Rectangle, ImageFile, rect);
            presentation.Slides[0].Shapes[0].Line.FillFormat.SolidFillColor.Color = Color.FloralWhite;

            presentation.Slides[0].Shapes.AppendAudioMedia(@"1.mp3", 500, 100, true);
            IAutoShape shape = presentation.Slides[0].Shapes.AppendShape(ShapeType.Rectangle, new RectangleF(500, 100, 100, 150));
            shape.ShapeStyle.LineColor.Color = Color.White;
            shape.Fill.FillType = Spire.Presentation.Drawing.FillFormatType.None;

            presentation.SaveToFile("audio.pptx", FileFormat.Pptx2010);
            System.Diagnostics.Process.Start("audio.pptx");

        }

    }
}
Imports Spire.Presentation
Imports System.Drawing

Namespace InsertAudio

	Class Program

		Private Shared Sub Main(args As String())
			Dim presentation As New Presentation()

			Dim ImageFile As String = "2.jpg"
			Dim rect As New RectangleF(0, 0, presentation.SlideSize.Size.Width, presentation.SlideSize.Size.Height)
			presentation.Slides(0).Shapes.AppendEmbedImage(ShapeType.Rectangle, ImageFile, rect)
			presentation.Slides(0).Shapes(0).Line.FillFormat.SolidFillColor.Color = Color.FloralWhite

			presentation.Slides(0).Shapes.AppendAudioMedia("1.mp3", 500, 100, True)
			Dim shape As IAutoShape = presentation.Slides(0).Shapes.AppendShape(ShapeType.Rectangle, New RectangleF(500, 100, 100, 150))
			shape.ShapeStyle.LineColor.Color = Color.White
			shape.Fill.FillType = Spire.Presentation.Drawing.FillFormatType.None

			presentation.SaveToFile("audio.pptx", FileFormat.Pptx2010)
			System.Diagnostics.Process.Start("audio.pptx")

		End Sub

	End Class
End Namespace
When we add image into word document, of course we want to move it exactly where we want to make our page tidy and beautiful. With the help of Spire.Doc, we can set the wrapping style to adjust the position of the image. Usually there are seven kinds of wrapping styles: In Line with Text, Square, Tight, Through, Top and Bottom, Behind the Text, In Front of Text and Spire.Doc supports all of them. This article will show you how to wrap text around image in C#. Here comes to the steps:
Step 1: Create a new word document and load the document from the file.
Document document = new Document();
document.LoadFromFile("Sample.docx");
Step 2: Add a paragraph for the first section.
Paragraph paragraph = document.Sections[0].AddParagraph();
Step 3: Add a picture in the paragraph.
DocPicture picture = paragraph.AppendPicture(Image.FromFile("image.jpg"));
Step 4: Set text wrapping style to Square.
picture.TextWrappingStyle = TextWrappingStyle.Square;
Step 5: Set text wrapping type to both.
picture.TextWrappingType = TextWrappingType.Both;
Step 6: Save the document to file and process it.
document.SaveToFile(output,FileFormat.Docx);
System.Diagnostics.Process.Start(output);
Effective screenshot of warp text around image:

Full codes:
using Spire.Doc;
using Spire.Doc.Documents;
using Spire.Doc.Fields;
using System.Drawing;

namespace wrap_text_around_image
{
    class Program
    {
        static void Main(string[] args)
        {
            Document document = new Document();
            document.LoadFromFile("Sample.docx");
            Paragraph paragraph = document.Sections[0].AddParagraph();

            DocPicture picture = paragraph.AppendPicture(Image.FromFile("image.jpg"));
            picture.TextWrappingStyle = TextWrappingStyle.Square;
            picture.TextWrappingType = TextWrappingType.Both;
            string output = "output.docx";
            document.SaveToFile(output,FileFormat.Docx);
            System.Diagnostics.Process.Start(output);

        }

    }
}
PDF format is the best choice in many cases, but Word is more flexible when editing or modification is needed. PDF files are typically used for online sharing, printing and archiving, while Word documents are used for creating, editing and formatting documents. Converting a PDF to Word is a good option if you want to re-edit the PDF document. In this article, you will learn how to programmatically convert PDF to Word in C# and VB.NET using Spire.PDF for .NET.
Install Spire.PDF for .NET
To begin with, you need to add the DLL files included in the Spire.PDF for.NET package as references in your .NET project. The DLL files can be either downloaded from this link or installed via NuGet.
PM> Install-Package Spire.PDF
Background Knowledge
Spire.PDF for .NET provides two modes of conversion. The advantages and disadvantages of these two modes are as follows:
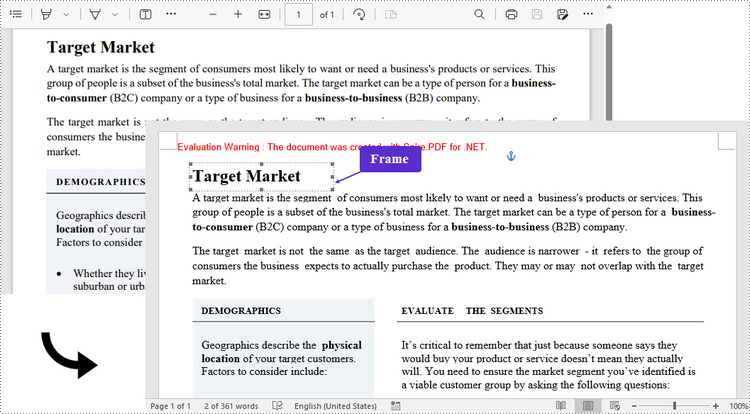
- Fixed Layout Mode: The fixed layout mode has fast conversion speed and is conducive to maintaining the original appearance of PDF files to the greatest extent. However, the editability of the resulting document will be limited since each line of text in PDF will be presented in a separate frame in the generated Word document.
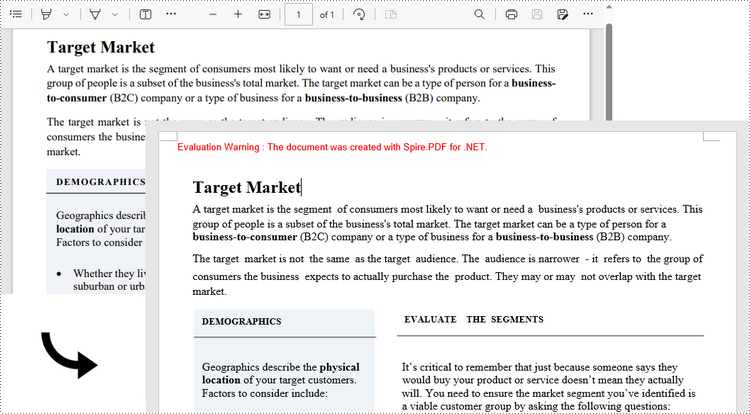
- Flow Recognition Mode: The flow recognition mode is a full recognition mode. The converted content will not be presented in frames, and the structure of the resulting document is flowable. The generated Word document is easy to re-edit but may look different from the original PDF file.
Convert PDF to Fixed-Layout Doc/Docx in C#, VB.NET
By default, the PdfDcoument.SaveToFile() method will convert PDF to Word with fixed layout. The following are the detailed steps.
- Create a PdfDocument object.
- Load a PDF file using PdfDocument.LoadFromFile() method.
- Convert the PDF document to a Doc or Docx format file using PdfDocument.SaveToFile(String fileName, FileFormat fileFormat) method.
- C#
- VB.NET
using Spire.Pdf;

namespace ConvertPdfToFixedLayoutWord
{
    class Program
    {
        static void Main(string[] args)
        {
            //Create a PdfDocument object
            PdfDocument doc = new PdfDocument();

            //Load a PDF document
            doc.LoadFromFile("C:\\Users\\Administrator\\Desktop\\sample.pdf");

            //Convert PDF to Doc and save it to a specified path
            doc.SaveToFile("output/ToDoc.doc", FileFormat.DOC);

            //Convert PDF to Docx and save it to a specified path
            doc.SaveToFile("output/ToDocx.docx", FileFormat.DOCX);
            doc.Close();
        }
    }
}
Convert PDF to Flexible-Structured Doc/Docx in C#, VB.NET
In addition to the default conversion engine, Spire.PDF for .NET provides another engine called Ps mode, which works better with the flow recognition mode. To enable Ps conversion engine and flow recognition mode, pass (true, true) as the parameters of the PdfDocument.ConvertOptions.SetPdfToDocOptions(bool usePsMode, bool useFlowRecognitionMode) method. The entire steps are as follows.
- Create a PdfDocument object.
- Load a PDF file using PdfDocument.loadFromFile() method.
- Enable Ps conversion engine and flow recognition mode using PdfDocument.ConvertOptions.SetPdfToDocOptions(true, true) method.
- Convert the PDF document to a Doc or Docx format file using PdfDocument.SaveToFile() method.
- C#
- VB.NET
using Spire.Pdf;

namespace ConvertPdfToFlexibleLayoutWord
{
    class Program
    {
        static void Main(string[] args)
        {
            //Create a PdfDocument object
            PdfDocument doc = new PdfDocument();

            //Load a PDF document
            doc.LoadFromFile("C:\\Users\\Administrator\\Desktop\\sample.pdf");

            //Specify the PDF to Word conversion options
            doc.ConvertOptions.SetPdfToDocOptions(true, true);

            //Convert PDF to Doc
            doc.SaveToFile("output/ToDoc.doc", FileFormat.DOC);

            //Convert PDF to Docx
            doc.SaveToFile("output/ToDocx.docx", FileFormat.DOCX);
            doc.Close();
        }
    }
}
Apply for a Temporary License
If you'd like to remove the evaluation message from the generated documents, or to get rid of the function limitations, please request a 30-day trial license for yourself.
