
.NET (1327)
Children categories
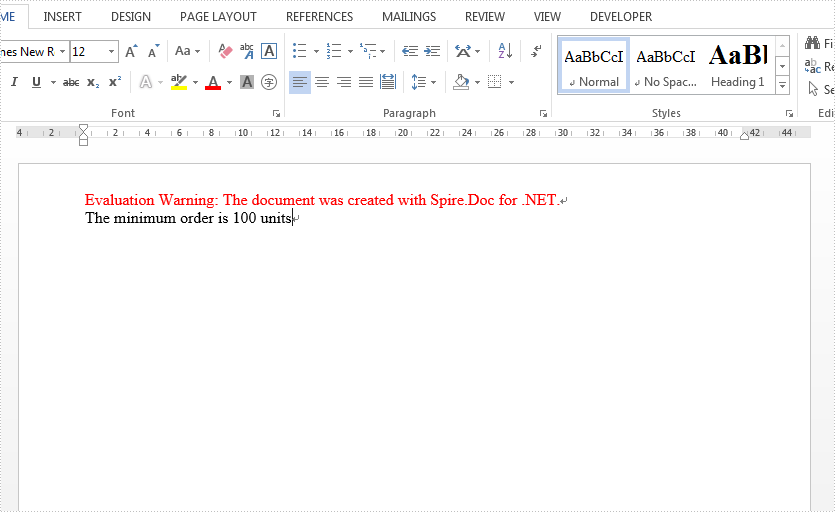
Usually we need to display different text and message to our readers based on the different conditions. In such situation, we need to create if field to decide which result to be displayed to readers. This article focuses on show you how to create an IF Field in C# with the help of Spire.Doc for .NET. We use the IF field and MERGEFIELD field together.
{IF { MERGEFIELD Count } > "100" "Thanks" "The minimum order is 100 units"}
Step 1: Create a new word document.
Document document = new Document();
Step 2: Add a new section for the document.
Section section = document.AddSection();
Step 3: Add a new paragraph for the section.
Paragraph paragraph = section.AddParagraph();
Step 4: Define a method of creating an IF Field.
CreateIfField(document, paragraph);
Step 5: Define merged data.
string[] fieldName = {"Count"};
string[] fieldValue = { "2" };
Step 6: Merge data into the IF Field.
document.MailMerge.Execute(fieldName, fieldValue);
Step 7: Update all fields in the document.
document.IsUpdateFields = true;
Step 8: Save the document to file.
document.SaveToFile("sample.docx", FileFormat.Docx);
The following CreateIfField() method shows how to create the IF Field like:
{IF { MERGEFIELD Count } > "100" "Thanks" " The minimum order is 100 units "}
static void CreateIfField(Document document, Paragraph paragraph)
{
IfField ifField = new IfField(document);
ifField.Type = FieldType.FieldIf;
ifField.Code = "IF ";
paragraph.Items.Add(ifField);

paragraph.AppendField("Count",FieldType.FieldMergeField);
paragraph.AppendText(" > ");
paragraph.AppendText("\"100\" ");
paragraph.AppendText("\"Thanks\" ");
paragraph.AppendText("\"The minimum order is 100 units\"");

IParagraphBase end = document.CreateParagraphItem(ParagraphItemType.FieldMark);
(end as FieldMark).Type = FieldMarkType.FieldEnd;
paragraph.Items.Add(end);
ifField.End = end as FieldMark;
}
Check the effective screenshot as below:
Full Code:
using Spire.Doc;
using Spire.Doc.Documents;
using Spire.Doc.Fields;
using Spire.Doc.Interface;
namespace CreatIF
{
    class Program
    {
        static void Main(string[] args)
        {
            Document document = new Document();
            Section section = document.AddSection();
            Paragraph paragraph = section.AddParagraph();
            CreateIfField(document, paragraph);
            string[] fieldName = { "Count" };
            string[] fieldValue = { "2" };

            document.MailMerge.Execute(fieldName, fieldValue);
            document.IsUpdateFields = true;
            document.SaveToFile("sample.docx", FileFormat.Docx);
        }

        static void CreateIfField(Document document, Paragraph paragraph)
        {
            IfField ifField = new IfField(document);
            ifField.Type = FieldType.FieldIf;
            ifField.Code = "IF ";
            paragraph.Items.Add(ifField);
            paragraph.AppendField("Count", FieldType.FieldMergeField);
            paragraph.AppendText(" > ");
            paragraph.AppendText("\"100\" ");
            paragraph.AppendText("\"Thanks\" ");
            paragraph.AppendText("\"The minimum order is 100 units\"");
            IParagraphBase end = document.CreateParagraphItem(ParagraphItemType.FieldMark);
            (end as FieldMark).Type = FieldMarkType.FieldEnd;
            paragraph.Items.Add(end);
            ifField.End = end as FieldMark;
        }

    }
}
The task of searching for specific text within a PDF document and highlighting it serves as a valuable function across various situations. Whether you aim to find critical information, make annotations on significant details, or extract specific content, the capability to locate and highlight text within a PDF significantly enhances productivity and understanding.
This article provides guidance on how to effectively find and highlight text in a PDF document in C# using Spire.PDF for .NET.
- Find and Highlight Text in a Specific PDF Page in C#
- Find and Highlight Text in a Rectangular Area in C#
- Find and Highlight Text in an Entire PDF Document in C#
- Find and Highlight Text in PDF Using a Regular Expression in C#
Install Spire.PDF for .NET
To begin with, you need to add the DLL files included in the Spire.PDF for.NET package as references in your .NET project. The DLL files can be either downloaded from this link or installed via NuGet.
PM> Install-Package Spire.PDF
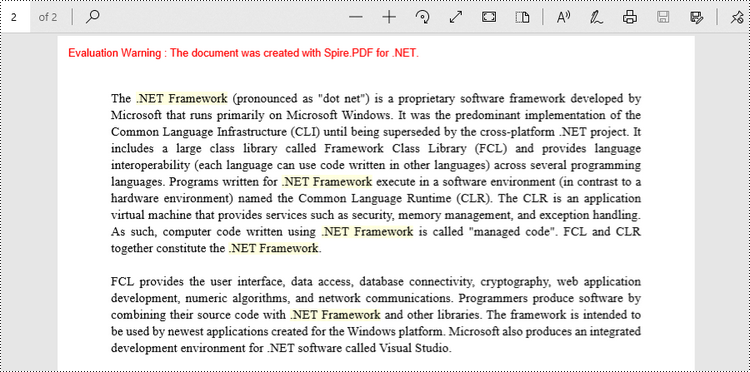
Find and Highlight Text in a Specific PDF Page in C#
Spire.PDF provides the PdfTextFinder class, which allows users to search for specific text within a page. By utilizing the Options property of this class, users have the ability to define search options such as WholeWord, IgnoreCase, and Regex. When utilizing the Find method of the class, users can locate all occurrences of the searched text within a page.
The following are the steps to find and highlight text in a specific PDF page in C#.
- Create a PdfDocument object.
- Load a PDF file from a given path.
- Get a specific page from the document.
- Create a PdfTextFinder object based on the page.
- Specify search options using PdfTextFinder.Options property.
- Find all instance of searched text using PdfTextFinder.Find() method.
- Iterate through the find results, and highlight each instance using PdfTextFragment.Highlight() method.
- Save the document to a different PDF file.
- C#
using Spire.Pdf;
using Spire.Pdf.Texts;
using System.Drawing;

namespace FindAndHighlightTextInPage
{
    class Program
    {
        static void Main(string[] args)
        {
            // Create a PdfDocument object
            PdfDocument doc = new PdfDocument();

            // Load a PDF file
            doc.LoadFromFile("C:\\Users\\Administrator\\Desktop\\Input.pdf");

            // Get a specific page
            PdfPageBase page = doc.Pages[1];

            // Create a PdfTextFinder object based on the page
            PdfTextFinder finder = new PdfTextFinder(page);

            // Specify the find options
            finder.Options.Parameter = TextFindParameter.WholeWord;
            finder.Options.Parameter = TextFindParameter.IgnoreCase;

            // Find the instances of the specified text
            List<PdfTextFragment> finds = finder.Find(".NET Framework");

            // Iterate through the find results
            foreach (PdfTextFragment fragment in finds)
            {
                // Highlight text
                fragment.HighLight(Color.LightYellow);
            }

            // Save to a different PDF file
            doc.SaveToFile("HighlightTextInPage.pdf", FileFormat.PDF);

            // Dispose resources
            doc.Dispose();
        }
    }
}
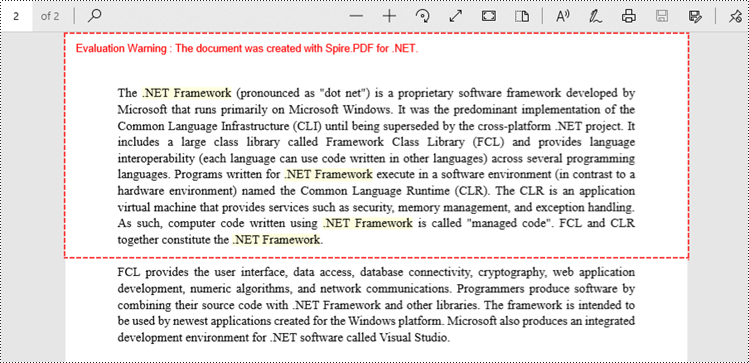
Find and Highlight Text in a Rectangular Area in C#
By highlighting text within a rectangular area of a page, users can draw attention to a specific section or piece of information within the document. To specify a rectangular area, you can use the Options.Area property.
The following are the steps to find and highlight text in a rectangular area in C#.
- Create a PdfDocument object.
- Load a PDF file from a given path.
- Get a specific page from the document.
- Create a PdfTextFinder object based on the page.
- Specify a rectangular area to search text using PdfTextFinder.Options.Area property.
- Find all instance of searched text within the rectangular area using PdfTextFinder.Find() method.
- Iterate through the find results, and highlight each instance using PdfTextFragment.Highlight() method.
- Save the document to a different PDF file.
- C#
using Spire.Pdf;
using Spire.Pdf.Texts;
using System.Drawing;

namespace FindAndHighlightTextInRectangularArea
{
    class Program
    {
        static void Main(string[] args)
        {
            // Create a PdfDocument object
            PdfDocument doc = new PdfDocument();

            // Load a PDF file
            doc.LoadFromFile("C:\\Users\\Administrator\\Desktop\\Input.pdf");

            // Get a specific page
            PdfPageBase page = doc.Pages[1];

            // Create a PdfTextFinder object based on the page
            PdfTextFinder finder = new PdfTextFinder(page);

            // Specify a rectangular area for searching text
            finder.Options.Area = new RectangleF(0, 0, 841, 200);

            // Specify other options
            finder.Options.Parameter = TextFindParameter.WholeWord;
            finder.Options.Parameter = TextFindParameter.IgnoreCase;

            // Find the instances of the specified text
            List<PdfTextFragment> finds = finder.Find(".NET Framework");

            // Iterate through the find results
            foreach (PdfTextFragment fragment in finds)
            {
                // Highlight text
                fragment.HighLight(Color.LightYellow);
            }

            // Save to a different PDF file
            doc.SaveToFile("HighlightTextInRectangularArea.pdf", FileFormat.PDF);

            // Dispose resources
            doc.Dispose();
        }
    }
}
Find and Highlight Text in an Entire PDF Document in C#
The initial code example illustrates how to highlight text in a specific page. To extend this functionality and find and highlight text throughout the entire document, you can iterate through each page of the document and sequentially apply the highlighting to the searched text.
The steps to find and highlight text in an entire PDF document using C# are as follows.
- Create a PdfDocument object.
- Load a PDF file from a given path.
- Iterate through each page in the document.
- Create a PdfTextFinder object based on a certain page.
- Specify search options using PdfTextFinder.Options property.
- Find all instance of searched text using PdfTextFinder.Find() method.
- Iterate through the find results, and highlight each instance using PdfTextFragment.Highlight() method.
- Save the document to a different PDF file.
- C#
using Spire.Pdf;
using Spire.Pdf.Texts;
using System.Drawing;

namespace FindAndHighlightTextInDocument
{
    class Program
    {
        static void Main(string[] args)
        {
            // Create a PdfDocument object
            PdfDocument doc = new PdfDocument();

            // Load a PDF file
            doc.LoadFromFile("C:\\Users\\Administrator\\Desktop\\Input.pdf");

            // Iterate through each page of the document
            foreach(PdfPageBase page in doc.Pages){

                // Create a PdfTextFinder object for the current page
                PdfTextFinder finder = new PdfTextFinder(page);

                // Specify the find options
                finder.Options.Parameter = TextFindParameter.WholeWord;
                finder.Options.Parameter = TextFindParameter.IgnoreCase;

                // Find the instances of the specified text
                List<PdfTextFragment> finds = finder.Find(".NET Framework");

                // Iterate through the find results
                foreach (PdfTextFragment fragment in finds)
                {
                    // Highlight text
                    fragment.HighLight(Color.LightYellow);
                }
            }

            // Save to a different PDF file
            doc.SaveToFile("HighlightAll.pdf", FileFormat.PDF);

            // Dispose resources
            doc.Dispose();
        }
    }
}
Find and Highlight Text in PDF Using a Regular Expression in C#
When searching for text in a document, using regular expressions can provide more flexibility and control over the search criteria. To utilize a regular expression, you need to configure the PdfTextFinder.Options.Parameter property to TextFindParameter.Regex, and provide the regular expression pattern as an input to the Find() method.
Here are the steps to find and highlight text in PDF using a regular expression in C#.
- Create a PdfDocument object.
- Load a PDF file from a given path.
- Iterate through each page in the document.
- Create a PdfTextFinder object based on a certain page.
- Set the PdfTextFinder.Options.Parameter property to TextFindParameter.Regex.
- Create a regular expression pattern that matches the specific text patterns you are seeking.
- Find all instance of the searched text using PdfTextFinder.Find() method.
- Iterate through the find results, and highlight each instance using PdfTextFragment.Highlight() method.
- Save the document to a different PDF file.
- C#
using Spire.Pdf;
using Spire.Pdf.Texts;
using System.Drawing;

namespace FindAndHighlightUsingRegularExpression
{
    class Program
    {
        static void Main(string[] args)
        {
            // Create a PdfDocument object
            PdfDocument doc = new PdfDocument();

            // Load a PDF file
            doc.LoadFromFile("C:\\Users\\Administrator\\Desktop\\Input.pdf");

            // Iterate through each page of the document
            foreach (PdfPageBase page in doc.Pages)
            {
                // Create a PdfTextFinder object based on the page
                PdfTextFinder finder = new PdfTextFinder(page);

                // Specify the search model as Regex
                finder.Options.Parameter = TextFindParameter.Regex;

                // Find the text that conforms to a regular expression
                string pattern = @"\bM\w*t\b";
                List<PdfTextFragment> finds = finder.Find(pattern);

                // Iterate through the find results
                foreach (PdfTextFragment fragment in finds)
                {
                    // Highlight text
                    fragment.HighLight(Color.LightYellow);
                }
            }

            // Save to a different PDF file
            doc.SaveToFile("HighlightTextUsingRegex.pdf", FileFormat.PDF);

            // Dispose resources
            doc.Dispose();
        }
    }
}
Apply for a Temporary License
If you'd like to remove the evaluation message from the generated documents, or to get rid of the function limitations, please request a 30-day trial license for yourself.
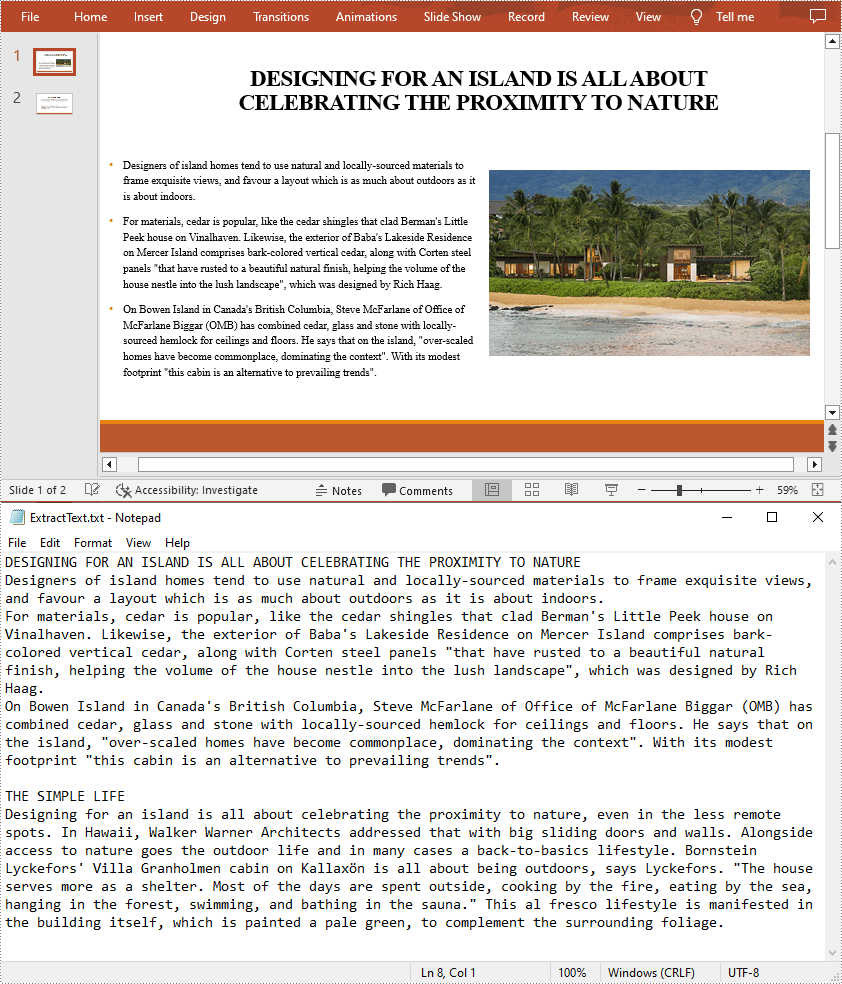
When sending a PowerPoint document containing a lot of media files and images to others for text proofreading, you may find that the transfer speed is quite slow because of the large file size. In such a case, it is better to extract the text from PowerPoint to MS Word or Notepad first, and then send only the text content. In addition, the extracted text content can also be archived or backed up for future reference. In this article, you will learn how to extract text from a PowerPoint Presentation in C# and VB.NET using Spire.Presentation for .NET.
Install Spire.Presentation for .NET
To begin with, you need to add the DLL files included in the Spire.Presentation for.NET package as references in your .NET project. The DLL files can be either downloaded from this link or installed via NuGet.
PM> Install-Package Spire.Presentation
Extract Text from PowerPoint Presentations in C# and VB.NET
To facilitate the sharing or delivery of text information in a PowerPoint document, text extraction is an operation occasionally required. The following are the steps to extract text from all presentation slides and save in a TXT file.
- Initialize an instance of the Presentation class.
- Load a sample PowerPoint document using Presentation.LoadFromFile() method.
- Create a StringBuilder instance.
- Iterate through each slide in the document, and then iterate through all the shapes in each slide.
- Determine whether the shapes are of IAutoShape type. If yes, iterate through all the paragraphs in each shape and get the paragraph text using TextParagraph.Text property.
- Append the extracted text to the StringBuilder instance using StringBuilder.AppendLine() method
- Create a new txt file and write the extracted text to the file using File.WriteAllText() method.
- C#
- VB.NET
using Spire.Presentation;
using System.IO;
using System.Text;
namespace ExtractText
{
    class Program
    {
        static void Main(string[] args)
        {
            //Initialize an instance of the Presentation class
            Presentation presentation = new Presentation();

            //Load a sample PowerPoint document
            presentation.LoadFromFile("Island.pptx");
            //Create a StringBuilder instance
            StringBuilder sb = new StringBuilder();

            //Iterate through each slide in the document
            foreach (ISlide slide in presentation.Slides)
            {
                //Iterate through each shape in each slide
                foreach (IShape shape in slide.Shapes)
                {
                    //Check if the shape is of IAutoShape type
                    if (shape is IAutoShape)
                    {
                        //Iterate through all paragraphs in each shape
                        foreach (TextParagraph tp in (shape as IAutoShape).TextFrame.Paragraphs)
                        {
                            //Extract text and save to StringBuilder instance
                            sb.AppendLine(tp.Text);
                        }
                    }
                }
            }
            //Create a new txt file to save the extracted text
            File.WriteAllText("ExtractText.txt", sb.ToString());
        }
    }
}
Apply for a Temporary License
If you'd like to remove the evaluation message from the generated documents, or to get rid of the function limitations, please request a 30-day trial license for yourself.
Hyperlinks can easily guide the readers to the place you want to point to and it displays large amount of information to readers. Spire.Presentation for .NET enables developers to insert hyperlinks in PowerPoint presentations. Developers can also modify the existing hyperlinks and replace with new link text or target URL. This section will show how to edit hyperlinks from presentation slides in C#. Firstly check the screenshot of the original hyperlink:
Spire.Presentation offers a ClickAction class for users to edit the hyperlinks. You can call the function ClickHyperlink to edit the hyperlinks. Here comes to the steps.
Step 1: Load a PowerPoint documents with hyperlinks.
Presentation pre = new Presentation();
pre.LoadFromFile(@"..\..\sample.pptx");
Step 2: Find the hyperlinks you want to edit.
IAutoShape shape = (IAutoShape)pre.Slides[0].Shapes[2];
Step 3: Edit the link text and the target URL.
shape.TextFrame.TextRange.ClickAction.Address = "http://www.e-iceblue.com";
shape.TextFrame.TextRange.Text = "E-iceblue";
Step 4: Save the document.
pre.SaveToFile(@"..\..\result.pptx",FileFormat.Pptx2010);
Effective screenshot after edit the hyperlink on presentation slide:
Full codes:
namespace EditHyperlink
{
    class Program
    {
        static void Main(string[] args)
        {
            Presentation pre = new Presentation();
            pre.LoadFromFile(@"..\..\sample.pptx");
            IAutoShape shape = (IAutoShape)pre.Slides[0].Shapes[2];
            shape.TextFrame.TextRange.ClickAction.Address = "http://www.e-iceblue.com";
            shape.TextFrame.TextRange.Text = "E-iceblue";
            pre.SaveToFile(@"..\..\result.pptx",FileFormat.Pptx2010);
            System.Diagnostics.Process.Start(@"..\..\result.pptx");
        }
    }
}
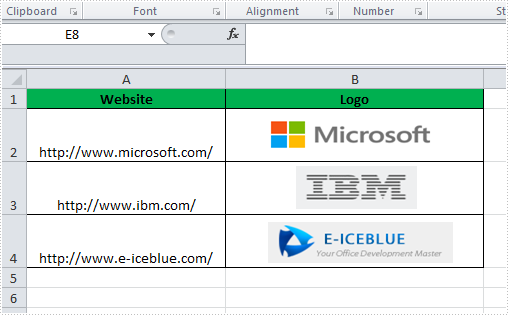
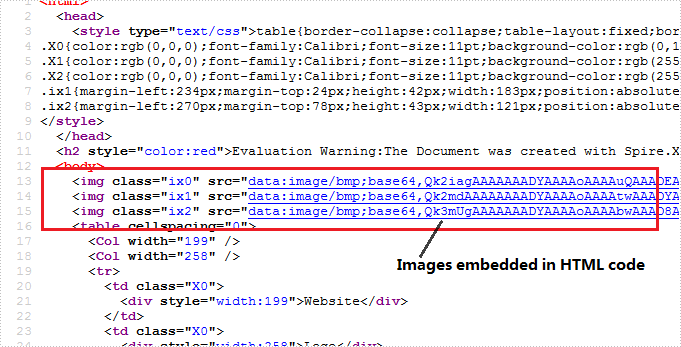
If you created a pretty Excel table and now want to publish it online as a web page, the simplest way is to export it to an old good HTML file. However a problem may occur if you just simply transform image in Excel to HTML code with a relative link (URL). This way, your web page may no longer display properly on client machines since the image can't be reached through that URL on client-side. In this article, we’re going to resolve this issue by embedding image in HTML code when converting Excel to HTML.
Here is an Excel table with some images embedded in.
We're able to convert this Excel file to HTML by following below code snippet:
Step 1: Create a new instance of workbook.
Workbook book = new Workbook();
book.LoadFromFile("Book1.xlsx");
Step 2: Embed images into HTML code using Data URI scheme.
HTMLOptions options = new HTMLOptions();
options.ImageEmbedded = true;
Step 3: Save the worksheet to HTML.
book.Worksheets[0].SaveToHtml("sample.html", options);
System.Diagnostics.Process.Start("sample.html");
Output:
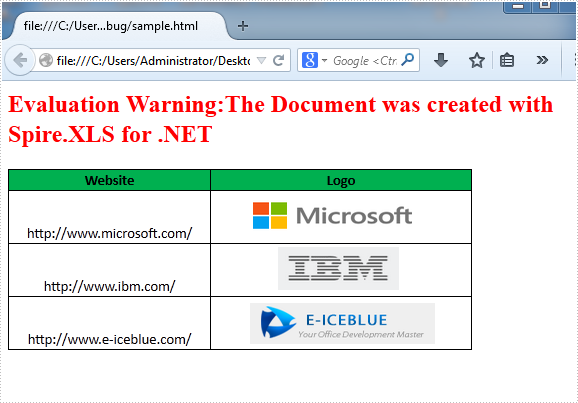
HTML Code:
Since the HTML code is too long to be displayed here, we have to present it by a screenshot.
Full C# Code:
using Spire.Xls;
using Spire.Xls.Core.Spreadsheet;
namespace CreateWorkbook
{
    class Program
    {
        static void Main(string[] args)
        {
            // create Workbook instance and load file
            Workbook book = new Workbook();
            book.LoadFromFile("Book1.xlsx");

            // embed image into html when converting
            HTMLOptions options = new HTMLOptions();
            options.ImageEmbedded = true;

            // save the sheet to html
            book.Worksheets[0].SaveToHtml("sample.html", options);
            System.Diagnostics.Process.Start("sample.html");

        }
    }
}
Remove borderline of textbox in Excel chart in C#, VB.NET
2014-08-12 07:57:21 Written by AdministratorThere is an article in the tutorials which demonstrates how to insert textbox with contents in Excel. Sometime back, a user of Spire.XLS wanted to know if it is possible to remove the borderline of the textbox that has been inserted in Excel chart. Yes, of course. This article focuses on delivering a solution to this issue.
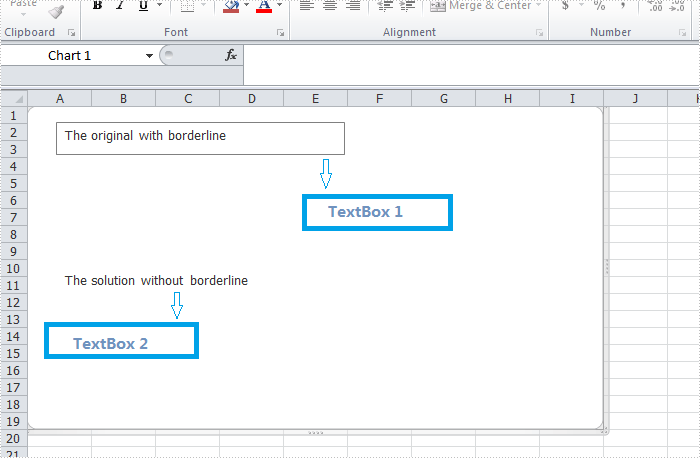
In the following section, we're going to create two textboxes in the same chart, one textbox is built with borderline, the other one without. Then we can learn how to remove borderline using Spire.XLS by comparison.
Code snippet for remove borderline of textbox:
Step 1: Create a new instance of workbook.
Workbook workbook = new Workbook();
workbook.Version=ExcelVersion.Version2010;
Step 2: Create a new worksheet named "Remove Borderline" and add a chart to the worksheet.
Worksheet sheet = workbook.Worksheets[0];
sheet.Name = "Remove Borderline";
Chart chart = sheet.Charts.Add();
Step 3: Create textbox1 in the chart and input text information.
XlsTextBoxShape textbox1 = chart.TextBoxes.AddTextBox(50, 50, 100, 500) as XlsTextBoxShape;
Step 4: Create textbox2 in the chart, input text information and remove borderline.
XlsTextBoxShape textbox = chart.TextBoxes.AddTextBox(500, 50, 100, 500) as XlsTextBoxShape;
textbox.Text = "The solution without borderline";
textbox.Line.Weight = 0;
Step 5: Save and launch the file.
workbook.SaveToFile("Sample.xlsx", ExcelVersion.Version2010);
Process.Start("Sample.xlsx");
Result:
Full code:
using Spire.Xls;
using Spire.Xls.Core.Spreadsheet.Shapes;
using System.Diagnostics;

namespace RemoveBorderlineofTextbox
{
    class Program
    {
        static void Main(string[] args)
        {
            // Create a new workbook
            Workbook workbook = new Workbook();
            workbook.Version = ExcelVersion.Version2010;
            // Get the first worksheet and rename it
            Worksheet sheet = workbook.Worksheets[0];
            sheet.Name = "Remove Borderline";
            // Add a chart to the worksheet
            Chart chart = sheet.Charts.Add();
            // Add the first text box (with visible border)
            XlsTextBoxShape textbox1 = chart.TextBoxes.AddTextBox(50, 50, 100, 500) as XlsTextBoxShape ;
            textbox1.Text = "The original with borderline";
            // Add the second text box (border will be hidden)
            XlsTextBoxShape textbox2 = chart.TextBoxes.AddTextBox(500, 50, 100, 500) as XlsTextBoxShape;
            textbox2.Text = "The solution without borderline";
            // Hide the border by setting line weight to 0
            textbox2.Line.Weight = 0;
            // Save the result file
            workbook.SaveToFile("Sample.xlsx", ExcelVersion.Version2010);
            Process.Start("Sample.xlsx");
        }
    }
}
Imports Spire.Xls
Imports Spire.Xls.Core.Spreadsheet.Shapes
Imports System.Diagnostics
Namespace RemoveBorderlineofTextbox
	Class Program

		Private Shared Sub Main(args As String())
			'Create a new workbook
			Dim workbook As New Workbook()
			workbook.Version = ExcelVersion.Version2010
			'  Get the first worksheet And rename it
			Dim sheet As Worksheet = workbook.Worksheets(0)
			sheet.Name = "Remove Borderline"
			'  Add a chart to the worksheet
			Dim chart As Chart = sheet.Charts.Add()
			'  Add the first text box (with visible border)
			Dim textbox1 As XlsTextBoxShape = TryCast(chart.TextBoxes.AddTextBox(50, 50, 100, 500), XlsTextBoxShape)
			textbox1.Text = "The original with borderline"
			'Add the second text box (border will be hidden)
			Dim textbox2 As XlsTextBoxShape = TryCast(chart.TextBoxes.AddTextBox(500, 50, 100, 500), XlsTextBoxShape)
			textbox2.Text = "The solution without borderline"
			'Hide the border by setting line weight to 0
			textbox2.Line.Weight = 0
			'Save the result file
			workbook.SaveToFile("Sample.xlsx", ExcelVersion.Version2010)
			Process.Start("Sample.xlsx")

		End Class
End Namespace
Various kinds of shapes like triangle, rectangle, ellipse, star, line and etc, can be created with Spire.Presentation. To make shapes more compatible with the entire slide, not only can we set color and choose fill style of the shape, we can also rotate shapes to a desired degree. This article is aimed to provide a simple example.
To begin with, create or open a .NET class application in Visual Studio 2005 or above versions, add Spire.Presentation.dll to your .NET project assemblies. Then, you are able create and format shapes using the sample C# code we have offered below.
Code snippets for rotate shapes on slide:
Step 1: Create an instance of Presentation class.
Presentation presentation = new Presentation();
Step 2: Add a new shape - Triangle ,to PPT slide.
IAutoShape shape = presentation.Slides[0].Shapes.AppendShape(ShapeType.Triangle, new RectangleF(100, 100, 100, 100));
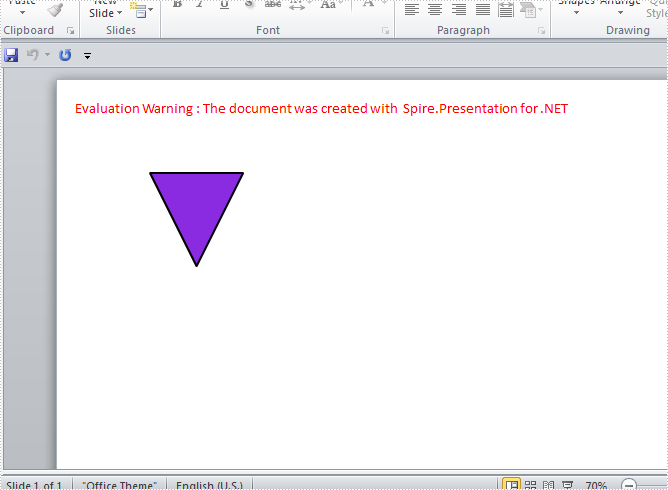
Step 3: Rotate the shape to 180 degree.
shape.Rotation = 180;
Step 4: Set the color and fill style of shape.
shape.Fill.FillType = FillFormatType.Solid;
shape.Fill.SolidColor.Color = Color.BlueViolet;
shape.ShapeStyle.LineColor.Color = Color.Black;
Step 5: Save and launch the file.
presentation.SaveToFile("shape.pptx", FileFormat.Pptx2010);
System.Diagnostics.Process.Start("shape.pptx");
Effect Screenshot:
Full code:
using Spire.Presentation;
using Spire.Presentation.Drawing;
using System.Drawing;

namespace RotateShape
{

    class Program
    {

        static void Main(string[] args)
        {
           //create PPT document
            Presentation presentation = new Presentation();

            //append new shape - Triangle
            IAutoShape shape = presentation.Slides[0].Shapes.AppendShape(ShapeType.Triangle, new RectangleF(100, 100, 100, 100));
            //set rotation to 180
            shape.Rotation = 180;

            //set the color and fill style of shape
            shape.Fill.FillType = FillFormatType.Solid;
            shape.Fill.SolidColor.Color = Color.BlueViolet;
            shape.ShapeStyle.LineColor.Color = Color.Black;

            //save the document
            presentation.SaveToFile("shape.pptx", FileFormat.Pptx2010);
            System.Diagnostics.Process.Start("shape.pptx");
        }

        }
    }
Imports Spire.Presentation
Imports Spire.Presentation.Drawing
Imports System.Drawing

Namespace RotateShape

	Class Program

		Private Shared Sub Main(args As String())
			'create PPT document
			Dim presentation As New Presentation()

			'append new shape - Triangle
			Dim shape As IAutoShape = presentation.Slides(0).Shapes.AppendShape(ShapeType.Triangle, New RectangleF(100, 100, 100, 100))
			'set rotation to 180
			shape.Rotation = 180

			'set the color and fill style of shape
			shape.Fill.FillType = FillFormatType.Solid
			shape.Fill.SolidColor.Color = Color.BlueViolet
			shape.ShapeStyle.LineColor.Color = Color.Black

			'save the document
			presentation.SaveToFile("shape.pptx", FileFormat.Pptx2010)
			System.Diagnostics.Process.Start("shape.pptx")
		End Sub

	End Class
End Namespace
This topic is just another request from one of our users on Spire.Doc Forum. In order to let more people know about this function, we’re going to present the whole procedure through a sample demo in the article. Additionally, we would like to remind you that we offer free customized demo for both pay users and test users.
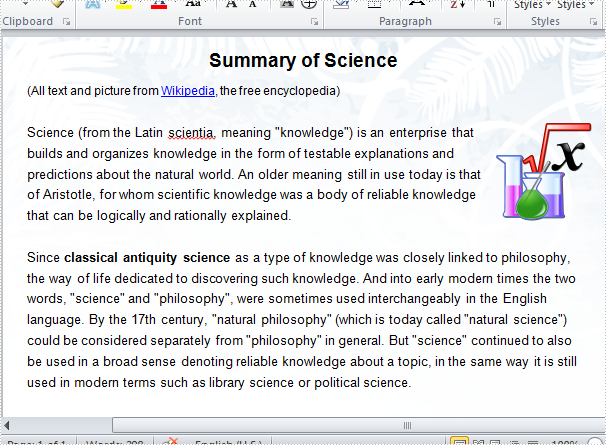
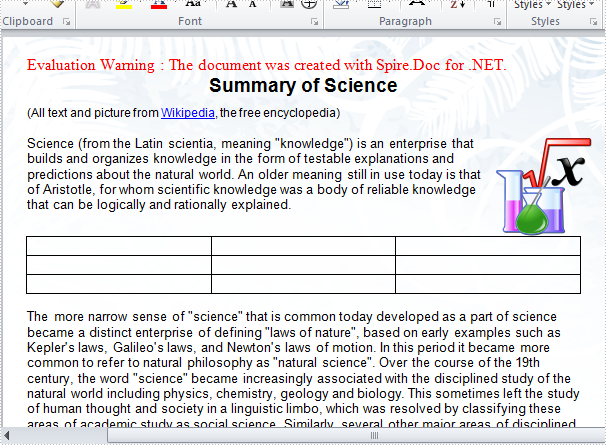
As a professional .NET Word component, Spire.Doc enables developers to replace specified paragraph with a newly created table or an existing table. In this example, the paragraph 3 in main body of the sample word file will be replaced by a newly-built table.
Test file:
Code snippets for replacing text with table:
Step 1: Create a new word document and load the test file.
Document doc = new Document();
doc.LoadFromFile(@"..\..\test.docx");
Step 2: Return TextSection by finding the key text string "classical antiquity science".
Section section = doc.Sections[0];
TextSelection selection = doc.FindString("classical antiquity science", true, true);
Step 3: Return TextRange from TextSection, then get OwnerParagraph through TextRange.
TextRange range = selection.GetAsOneRange();
Paragraph paragraph = range.OwnerParagraph;
Step 4: Return the zero-based index of the specified paragraph.
Body body = paragraph.OwnerTextBody;
int index = body.ChildObjects.IndexOf(paragraph);
Step 5: Create a new table.
Table table = section.AddTable(true);
table.ResetCells(3, 3);
Step 6: Remove the paragraph and insert table into the collection at the specified index.
body.ChildObjects.Remove(paragraph);
body.ChildObjects.Insert(index, table);
Step 7: Save and launch the file.
doc.SaveToFile("result.doc", FileFormat.Doc);
System.Diagnostics.Process.Start("result.doc");
Result:
Full C# code:
using Spire.Doc;
using Spire.Doc.Documents;
using Spire.Doc.Fields;
namespace ReplaceText
{

    class Program
    {
        static void Main(string[] args)
        {
            Document doc = new Document();
            doc.LoadFromFile(@"..\..\test.docx");
            Section section = doc.Sections[0];
            TextSelection selection = doc.FindString("classical antiquity science", true, true);
            TextRange range = selection.GetAsOneRange();
            Paragraph paragraph = range.OwnerParagraph;
            Body body = paragraph.OwnerTextBody;
            int index = body.ChildObjects.IndexOf(paragraph);

            Table table = section.AddTable(true);
            table.ResetCells(3, 3);
            body.ChildObjects.Remove(paragraph);
            body.ChildObjects.Insert(index, table);

            doc.SaveToFile("result.doc", FileFormat.Doc);
            System.Diagnostics.Process.Start("result.doc");

        }
    }
}
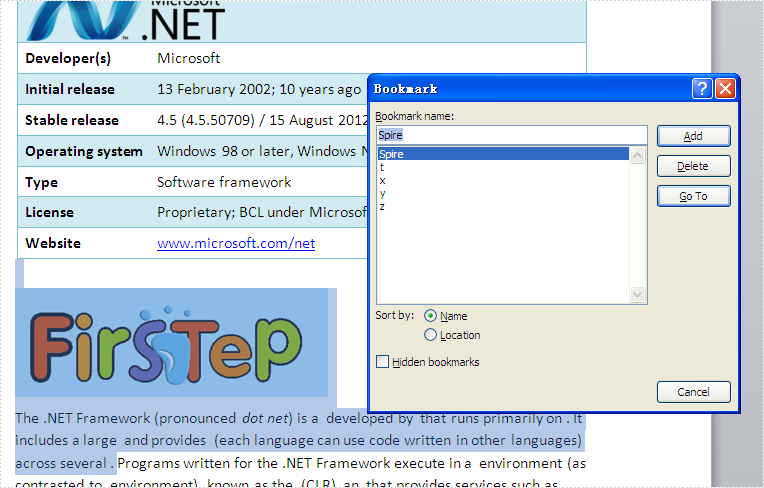
Word bookmarks are widely used for point out a specified location or give brief information of the paragraph. If you add an image into the bookmark position, the bookmarks will be more obviously and clearly. This article will show you how to insert an image at bookmark position in C# with the help of Spire.Doc.
Spire.Doc offers an instance of BookmarksNavigator to find the bookmarks, and then developers use AppendPicture to add an image. Here comes to the steps:
Step 1: Load a word documents with bookmarks.
Document document = new Document();
document.LoadFromFile("Test.docx");
Step 2: Create an instance of BookmarksNavigator and find the bookmark where you want to insert an image.
//Create an instance of BookmarksNavigator
BookmarksNavigator bn = new BookmarksNavigator(document);
//Find a bookmark and its name is Spire
bn.MoveToBookmark("Spire", true, true);
Step 3: Insert an image at the position of bookmarks you found.
//Add a section and named it section0
Section section0 = document.AddSection();
//Add a paragraph for section0
Paragraph paragraph = section0.AddParagraph();
Image image = Image.FromFile("step.png");
//Add a picture into paragraph
DocPicture picture = paragraph.AppendPicture(image);
//Add a paragraph with picture at the position of bookmark
bn.InsertParagraph(paragraph);
document.Sections.Remove(section0);
Step 4: Save the new document and process it.
string output = "sample3.docx";
document.SaveToFile(output, FileFormat.Docx);
System.Diagnostics.Process.Start(output);
Spire.Doc also offers the following properties to set the image position based on developers' requirements.
picture.TextWrappingStyle
picture.HorizontalAlignment
picture.HorizontalOrigin
picture.HorizontalPosition
picture.VerticalAlignment
picture.VerticalOrigin
picture.VerticalPosition
Effective screenshot:
Full codes:
using Spire.Doc;
using Spire.Doc.Documents;
using Spire.Doc.Fields;
using System.Drawing;
namespace InsertImage
{
    class Program
    {

        static void Main(string[] args)
        {

            Document document = new Document();
            document.LoadFromFile("Test.docx");
            BookmarksNavigator bn = new BookmarksNavigator(document);
            bn.MoveToBookmark("Spire", true, true);
            Section section0 = document.AddSection();
            Paragraph paragraph = section0.AddParagraph();
            Image image = Image.FromFile("step.png");
            DocPicture picture = paragraph.AppendPicture(image);
            bn.InsertParagraph(paragraph);
            document.Sections.Remove(section0);
            string output = "sample.docx";
            document.SaveToFile(output, FileFormat.Docx);
            System.Diagnostics.Process.Start(output);
        }
    }
}
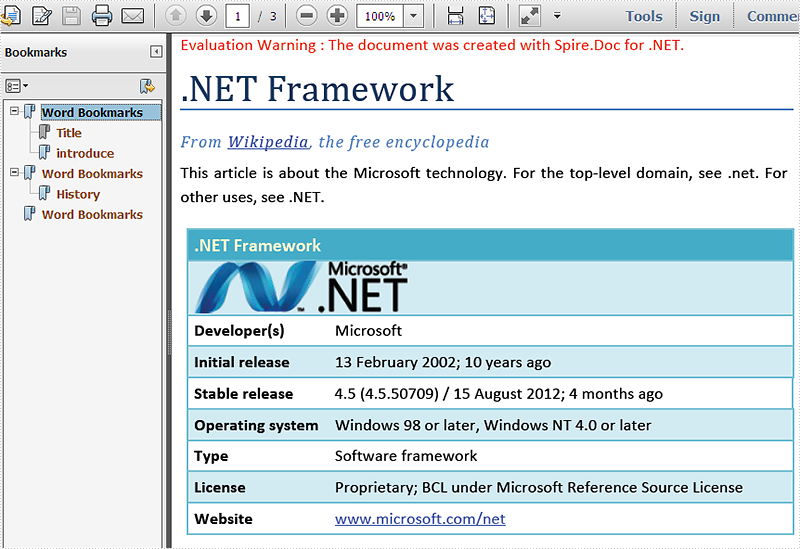
Bookmarks give convenience when users want go to specified location and it is clearly to know the contents brief information. Spire.Doc for .NET has a powerful function of operating the word elements of bookmarks. Developers can add bookmarks, Edit/replace bookmarks and remove bookmarks in word documents. Now Spire.Doc starts to support preserve bookmarks in DOCX to PDF conversion. This article will show you how to preserve bookmarks in C# when converting word document into PDF file format.
Download and install Spire.Doc for .NET (Version 5.2.20 or above) and then add Spire.Doc.dll as reference in the downloaded Bin folder though the below path: "..\Spire.Doc\Bin\NET4.0\ Spire.Doc.dll".
Here comes to the details of how to preserve the bookmarks from word to PDF conversion in C#.
Step 1: Load a word documents with bookmarks.
Document doc = new Document();
doc.LoadFromFile("test.docx", FileFormat.Docx);
Step 2: Create an instance of ToPdfParameterList
ToPdfParameterList toPdf = new ToPdfParameterList();
Step 3: Set CreateWordBookmarks to true to use word bookmarks when create the bookmarks.
toPdf.CreateWordBookmarks = true;
Step 4: Save the PDF file.
doc.SaveToFile("test.Pdf",toPdf);
Effective screenshot of preserve the bookmarks in result PDF page:
Full codes:
using Spire.Doc;
namespace PreventBookmark
{
    class Program
    {

        static void Main(string[] args)
        {
            Document doc = new Document();
            doc.LoadFromFile("test.docx", FileFormat.Docx);
            ToPdfParameterList toPdf = new ToPdfParameterList();
            toPdf.CreateWordBookmarks = true;
            doc.SaveToFile("test.Pdf", toPdf);
            System.Diagnostics.Process.Start("test.Pdf");

        }
    }
}
