
.NET (1327)
Children categories
Apply Built-In Table Styles to Existing Word Tables in C#, VB.NET
2014-10-28 08:07:45 Written by KoohjiEvery time we create a plain table in a Word document, we may want to change the style of the table so as to make it more vivid and attractive. In our previous article, we have demonstrated how to set Word table formatting with custom style. However, if we do not have much time to do so, we can apply built-in table styles to own a better appearance within a few minutes. This article focuses on how to apply built-in table styles to existing Word tables using Spire.Doc with C#, VB.NET.
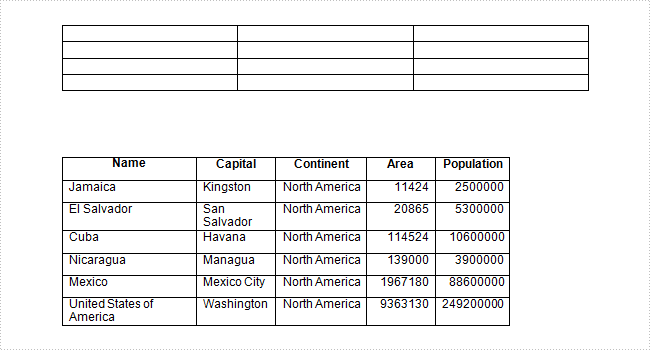
In the class of Spire.Doc.Table, it provides Table.ApplyStyle() method which enable us to easily change the layout of tables with default styles. As is shown below, here is a Word document that contains two plain tables in the first page. Let us see how we can format the table style with several lines of code.
Test File:
Code Snippet:
Step 1: Create a new Word document and load the test file.
Document doc = new Document("table.docx", FileFormat.Docx2010);
Step 2: Get the two tables from document.
Section section = doc.Sections[0];
Table table1 = section.Tables[0] as Table;
Table table2 = section.Tables[1] as Table;
Step 3: Apply tables with built-in table styles separately.
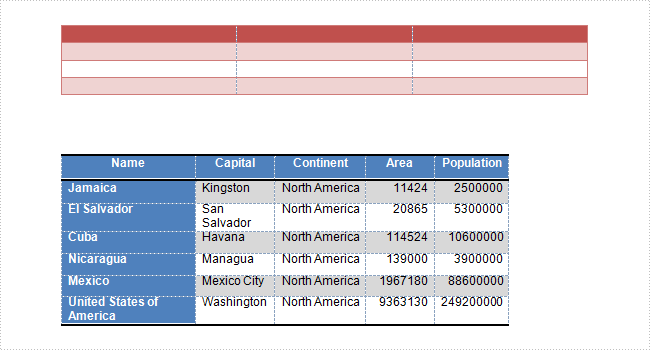
table1.ApplyStyle(DefaultTableStyle.MediumShading1Accent2);
table2.ApplyStyle(DefaultTableStyle.MediumShading2Accent1);
Step 4: Save the file.
doc.SaveToFile("result.docx", FileFormat.Docx);
Output:
Entire Code:
using Spire.Doc;
using Spire.Doc.Documents;
namespace ApplyTableStyles
{
    class Program
    {

        static void Main(string[] args)
        {

            Document doc = new Document("table.docx", FileFormat.Docx2010);
            Section section = doc.Sections[0];
            Table table1 = section.Tables[0] as Table;
            Table table2 = section.Tables[1] as Table;

            table1.ApplyStyle(DefaultTableStyle.MediumShading1Accent2);
            table2.ApplyStyle(DefaultTableStyle.MediumShading2Accent1);
            doc.SaveToFile("result.docx", FileFormat.Docx);

        }
    }
}
Imports Spire.Doc
Imports Spire.Doc.Documents
Namespace ApplyTableStyles
	Class Program

		Private Shared Sub Main(args As String())

			Dim doc As New Document("table.docx", FileFormat.Docx2010)
			Dim section As Section = doc.Sections(0)
			Dim table1 As Table = TryCast(section.Tables(0), Table)
			Dim table2 As Table = TryCast(section.Tables(1), Table)

			table1.ApplyStyle(DefaultTableStyle.MediumShading1Accent2)
			table2.ApplyStyle(DefaultTableStyle.MediumShading2Accent1)
			doc.SaveToFile("result.docx", FileFormat.Docx)

		End Sub
	End Class
End Namespace
Building Error
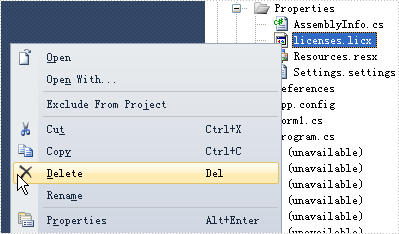
Q: When I drag and drop the PdfDocumentViewer control on the winform application and build the project, I get an error like this:

What should I do?
A: To get rid of this error, please delete "licenses.licx" file in Properties folder and rebuild the project.
Users can change the Excel view mode according to reading habit. By default, there are several view modes we can choose, including Normal View, Page Layout View, Page Break Preview, Full Screen View and Custom Views. Besides, Microsoft Excel also enables us to zoom in/out the document to a specified level. In this article, I'll make a brief introduction about how to set Excel view mode using Spire.XLS in C# and VB.NET.
In this sample, the Excel view mode will be set as Page Break Preview with zoom in 80 percent. Download the Spire.XLS for .NET, add the Spire.Xls.dll as a reference into assemblies, then we can use the following code snippet to achieve this end goal.
Detailed Steps
Step 1: Create a new instance of Workbook and load the sample file.
Workbook workbook = new Workbook();
workbook.LoadFromFile("Sample.xlsx", ExcelVersion.Version2010);
Step 2: Get the first the worksheet from the Excel workbook.
Worksheet sheet = workbook.Worksheets[0];
Step 3: Set view mode as Page Break Preview and Zoom in the sheet with 80 percent.
sheet.ViewMode = ViewMode.Preview;
sheet.ZoomScalePageBreakView = 80;
Step 4: Save the changes to workbook in a new file.
workbook.SaveToFile("Result.xlsx", ExcelVersion.Version2010);
Output:

Full Code:
using Spire.Xls;
namespace SetExcelViewMode
{
    class Program
    {

        static void Main(string[] args)
        {
            Workbook workbook = new Workbook();
            workbook.LoadFromFile("Sample.xlsx", ExcelVersion.Version2010);
            Worksheet sheet = workbook.Worksheets[0];
            ////Page Layout
            //sheet.ViewMode = ViewMode.Layout;
            //sheet.ZoomScalePageLayoutView = 80;
            ////Normal View(Default)
            //sheet.ViewMode = ViewMode.Normal;
            //sheet.ZoomScaleNormal = 80;
            //Preview
            sheet.ViewMode = ViewMode.Preview;
            sheet.ZoomScalePageBreakView = 80;

            workbook.SaveToFile("Result.xlsx", ExcelVersion.Version2010);

        }

    }
}
Imports Spire.Xls
Namespace SetExcelViewMode
	Class Program

		Private Shared Sub Main(args As String())
			Dim workbook As New Workbook()
			workbook.LoadFromFile("Sample.xlsx", ExcelVersion.Version2010)
			Dim sheet As Worksheet = workbook.Worksheets(0)
			'''/Page Layout
			'sheet.ViewMode = ViewMode.Layout;
			'sheet.ZoomScalePageLayoutView = 80;
			'''/Normal View(Default)
			'sheet.ViewMode = ViewMode.Normal;
			'sheet.ZoomScaleNormal = 80;
			'Preview
			sheet.ViewMode = ViewMode.Preview
			sheet.ZoomScalePageBreakView = 80

			workbook.SaveToFile("Result.xlsx", ExcelVersion.Version2010)

		End Sub

	End Class
End Namespace
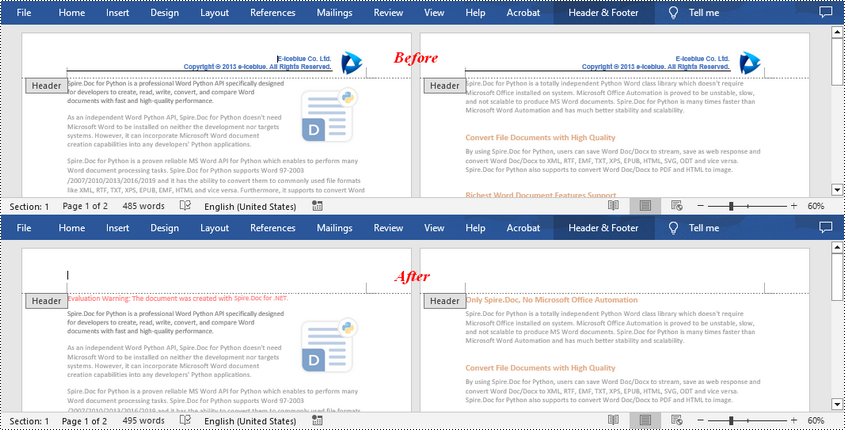
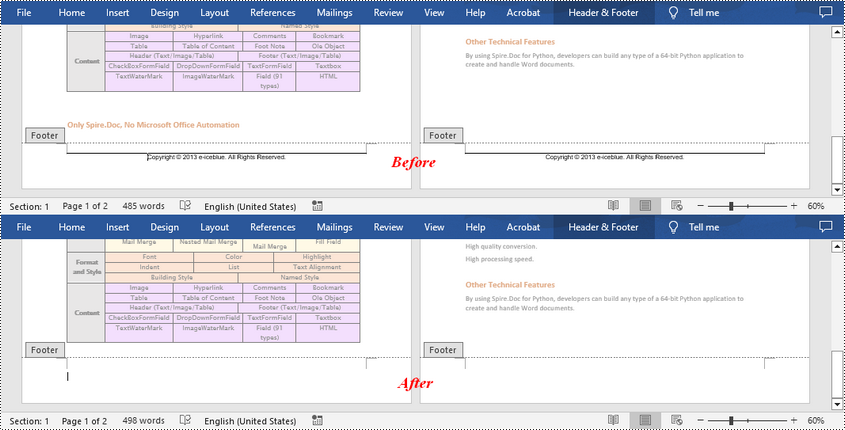
If the headers or footers in a Word document contains unnecessary information, such as outdated version numbers, redundant company logos, or incorrect author names, removing them can make the document look more professional and concise. In this article, you will learn how to remove headers or footers in Word in C# using Spire.Doc for .NET.
Install Spire.Doc for .NET
To begin with, you need to add the DLL files included in the Spire.Doc for.NET package as references in your .NET project. The DLL files can be either downloaded from this link or installed via NuGet.
PM> Install-Package Spire.Doc
Remove Headers in Word in C#
Spire.Doc for .NET supports getting different headers in the first pages, odd pages, and even pages, and then delete all of them through the HeaderFooter.ChildObjects.Clear() method. The following are the detailed steps:
- Create a Document instance.
- Load a Word document using Document.LoadFromFile() method.
- Get a specified section using Document.Sections[] property.
- Iterate through all paragraphs in the section, and then all child objects in each paragraph.
- Get the headers for the first, odd, and even pages using Section.HeadersFooters[HeaderFooterType hfType] property, and then delete them using HeaderFooter.ChildObjects.Clear() method.
- Save the result document using Document.SaveToFile() method.
- C#
using Spire.Doc;
using Spire.Doc.Documents;

namespace RemoveHeader
{
    class Program
    {
        static void Main(string[] args)
        {
            //Create a Document instance
            Document doc = new Document();

            //Load a Word document
            doc.LoadFromFile("HeaderFooter.docx");

            //Get the first section
            Section section = doc.Sections[0];

            //Iterate through all paragraphs in the section
            foreach (Paragraph para in section.Paragraphs)
            {
                //Iterate through all child objects in each paragraph
                foreach (DocumentObject obj in para.ChildObjects)
                {
                    //Delete header in the first page
                    HeaderFooter header;
                    header = section.HeadersFooters[HeaderFooterType.HeaderFirstPage];
                    if (header != null)
                        header.ChildObjects.Clear();

                    //Delete headers in the odd pages
                    header = section.HeadersFooters[HeaderFooterType.HeaderOdd];
                    if (header != null)
                        header.ChildObjects.Clear();

                    //Delete headers in the even pages
                    header = section.HeadersFooters[HeaderFooterType.HeaderEven];
                    if (header != null)
                        header.ChildObjects.Clear();
                }
            }

            //Save the result document
            doc.SaveToFile("RemoveHeader.docx", FileFormat.Docx);
        }
    }
}
Remove Footers in Word in C#
Deleting footers is similar to that of deleting headers, you can also get the footers on different pages first and then delete them at once. The following are the detailed steps:
- Create a Document instance.
- Load a Word document using Document.LoadFromFile() method.
- Get a specified section using Document.Sections[] property.
- Iterate through all paragraphs in the section, and then all child objects in each paragraph.
- Get the footers for the first, odd, and even pages using Section.HeadersFooters[HeaderFooterType hfType] property, and then delete them using HeaderFooter.ChildObjects.Clear() method.
- Save the result document using Document.SaveToFile() method.
- C#
using Spire.Doc;
using Spire.Doc.Documents;

namespace RemoveHeader
{
    class Program
    {
        static void Main(string[] args)
        {
            //Create a Document instance
            Document doc = new Document();

            //Load a Word document
            doc.LoadFromFile("HeaderFooter.docx");

            //Get the first section
            Section section = doc.Sections[0];

            //Iterate through all paragraphs in the section
            foreach (Paragraph para in section.Paragraphs)
            {
                //Iterate through all child objects in each paragraph
                foreach (DocumentObject obj in para.ChildObjects)
                {
                    //Delete footer in the first page
                    HeaderFooter footer;
                    footer = section.HeadersFooters[HeaderFooterType.FooterFirstPage];
                    if (footer != null)
                        footer.ChildObjects.Clear();

                    //Delete footer in the odd page
                    footer = section.HeadersFooters[HeaderFooterType.FooterOdd];
                    if (footer != null)
                        footer.ChildObjects.Clear();

                    //Delete footer in the even page
                    footer = section.HeadersFooters[HeaderFooterType.FooterEven];
                    if (footer != null)
                        footer.ChildObjects.Clear();
                }
            }

            //Save the result document
            doc.SaveToFile("RemoveFooter.docx", FileFormat.Docx);
        }
    }
}
Apply for a Temporary License
If you'd like to remove the evaluation message from the generated documents, or to get rid of the function limitations, please request a 30-day trial license for yourself.
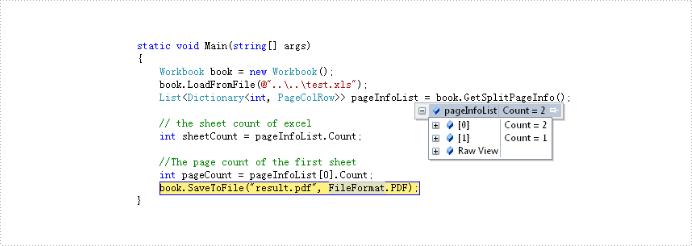
When we print Word and PDF documents which have regular page size, we can clearly know the pagination information for Word and PDF by delimiters. Excel document is different since Excel pagination is based on its content when we print Excel document or convert to Pdf. So get Excel pagination information is important to developer. Below would introduce a solution to get pagination information in Excel document.
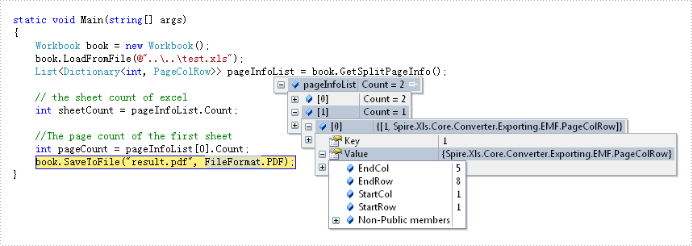
The solution call book.GetSplitPageInfo() method to obtain information of excel document and return this information to the List<Dictionary<int, PageColRow>> object via Spire.XLS. By the object we can get this information about: sheet count, page count and the start and end column and row of every page in excel document. Below is effect screenshots:
The main steps of the solution are:
Step 1: Create and load an excel document.
Workbook book = new Workbook();
book.LoadFromFile(@"test.xlsx");
Step 2: Call GetSplitPageInfo() method to Excel information.
List> pageInfoList = book.GetSplitPageInfo();
The full code:
using Spire.Xls;

namespace GetPageInformation
{
    class Program
    {
        static void Main(string[] args)
        {
            // create and load Excel document
            Workbook book = new Workbook();
            book.LoadFromFile(@"test.xlsx");
            // get the Excel document information and save in pageInfoList object
            var pageInfoList = book.GetSplitPageInfo();

            // the sheet count of excel
            int sheetCount = pageInfoList.Count;

            //The page count of the first sheet
            int pageCount = pageInfoList[0].Count;
            book.SaveToFile("result.pdf", FileFormat.PDF);
        }
    }
}
Imports Spire.Xls
Module Module1

    Sub Main()
        'create and load Excel document
        Dim book As New Workbook()
        book.LoadFromFile("test.xlsx")
        ' get the Excel document information and save in pageInfoList object
        Dim pageInfoList As List(Of Dictionary(Of Integer, PageColRow)) = book.GetSplitPageInfo()

        ' the sheet count of excel
        Dim sheetCount As Integer = pageInfoList.Count

        'The page count of the first sheet
        Dim pageCount As Integer = pageInfoList(0).Count
        book.SaveToFile("result.pdf", FileFormat.PDF)
    End Sub

End Module
Why we convert PDF to image?
- PDF requires an external application like Adobe Acrobat Reader while image does not.
- Browsers have the built-in capability to display images while handling PDF documents requires an external application or plug-in.
So, in some specific cases converting your PDF documents to an image format like PNG or JPEG could be the solution we are looking for.
How to convert PDF to image in WPF?
For developers, we can easily render PDF pages to images with high quality by using Spire.PDF for WPF, which is a professional PDF component providing tons of useful methods to manipulate PDF document in your WPF applications. Now, follow the below steps to achieve this purpose.
Detailed steps:
Step 1: Create a new project by choosing WPF Application in Visual Studio, add a button in MainWindow, double click the button to write code.
    public partial class MainWindow : Window
    {
        public MainWindow()
        {
            InitializeComponent();
        }

        private void button1_Click(object sender, RoutedEventArgs e)
        {

        }
}
Step 2: Create a new instance of Spire.Pdf.Document and load the sample PDF file.
PdfDocument pdf = new PdfDocument();
pdf.LoadFromFile("sample.pdf");
Step 3: To convert PDF to image, we need firstly save PDF pages as BitmapSource by calling the method pdf.SaveAsImage, then convert BitmapSource to Bitmap, then save the Bitmap as image with a specified format using Image.Save().
               BitmapSource source;
            Bitmap bmp;

            for(int i=0;i<pdf.Pages.Count;i++)
            {
                source = pdf.SaveAsImage(i);
                bmp = SourceToBitmap(source);
                bmp.Save(string.Format("result-{0}.png", i), ImageFormat.Png);
            }
        }

        private Bitmap SourceToBitmap(BitmapSource source)
        {
            Bitmap bmp;
            using (MemoryStream ms = new MemoryStream())
            {
                PngBitmapEncoder encoder = new PngBitmapEncoder();
                encoder.Frames.Add(BitmapFrame.Create(source));
                encoder.Save(ms);
                bmp = new Bitmap(ms);
            }
            return bmp;
        }
Output of the first page:

Full code:
using Spire.Pdf;

namespace ConvertPdfToImage
{
    ///
    /// Interaction logic for MainWindow.xaml
    ///
    public partial class MainWindow : Window
    {
        public MainWindow()
        {
            InitializeComponent();
        }

        private void button1_Click(object sender, RoutedEventArgs e)
        {
            PdfDocument pdf = new PdfDocument();
            pdf.LoadFromFile("1.pdf");

            BitmapSource source;
            Bitmap bmp;

            for(int i=0;i<pdf.Pages.Count;i++)
            {
                source = pdf.SaveAsImage(i);
                bmp = SourceToBitmap(source);
                bmp.Save(string.Format("result-{0}.png", i), ImageFormat.Png);
            }
        }

        private Bitmap SourceToBitmap(BitmapSource source)
        {
            Bitmap bmp;
            using (MemoryStream ms = new MemoryStream())
            {
                PngBitmapEncoder encoder = new PngBitmapEncoder();
                encoder.Frames.Add(BitmapFrame.Create(source));
                encoder.Save(ms);
                bmp = new Bitmap(ms);
            }
            return bmp;
        }

    }
}
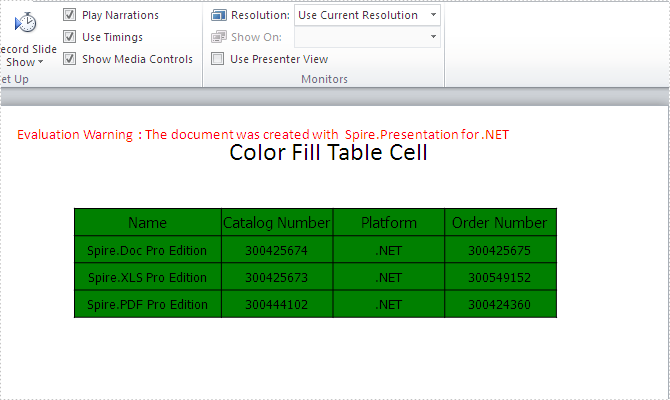
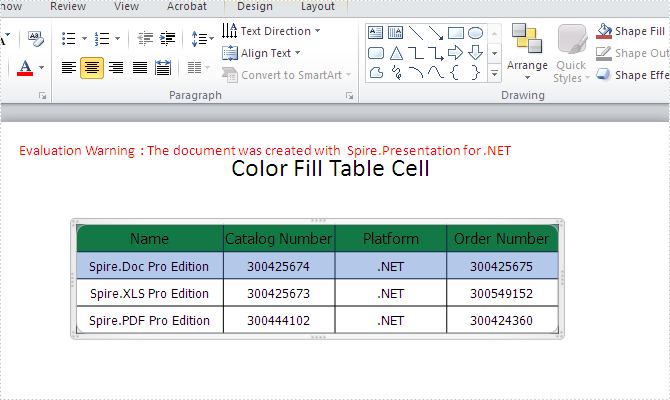
How to fill the table cell with color in PowerPoint document in C#
2014-10-13 08:24:52 Written by KoohjiA table provides a visual grouping of information and gives more convenience for writer to modify and query data in table. In particular when you have a table with colorful cells, your document would be more attractive. With the help of Spire.Presentation, developers can easily add tables and set table styles in PowerPoint document. This tutorial shows you how to fill the table cells with color in C#.
Step 1: Create a presentation document and load the file from disk.
Presentation presentation = new Presentation();
presentation.LoadFromFile("sample.pptx");
Step 2: Fill the table cell with color. You can fill all the cells or only fill one single row of cell in table with color.
foreach (TableRow row in table.TableRows)
  {
     foreach (Cell cell in row)
    {
      cell.FillFormat.FillType = FillFormatType.Solid;
      cell.FillFormat.SolidColor.Color = Color.Green;
     }
  }
Step 3: Save the presentation documents to file.
presentation.SaveToFile("result.pptx", FileFormat.Pptx2010);
Effective screenshot for fill the color in all the table cells:
Effective screenshot for fill the color for the first row of table cell:
Full codes:
using System;
using System.Collections.Generic;
using System.Linq;
using System.Text;
using Spire.Presentation;
using Spire.Presentation.Drawing;
using System.Drawing;

namespace colorfilltablecell
{
    class Program
    {
        static void Main(string[] args)
        {
            Presentation presentation = new Presentation();
            presentation.LoadFromFile("sample.pptx");
            ITable table = null;
            foreach (IShape shape in presentation.Slides[0].Shapes)
            {
                if (shape is ITable)
                {
                    table = (ITable)shape;

                    foreach (TableRow row in table.TableRows)

                    {
                        //TableRow row = table.TableRows[0];
                        foreach (Cell cell in row)
                        {
                            cell.FillFormat.FillType = FillFormatType.Solid;
                            cell.FillFormat.SolidColor.Color = Color.Green;
                        }
                    }
                }
            }
            presentation.SaveToFile("result.pptx", FileFormat.Pptx2010);
        }
    }
}
When you type in a document, Word automatically counts the number of pages and words in your document and displays them on the status bar – Word Count, at the bottom of the workspace. But how can we get the number of words, characters in an existing Word document through programming? This article aims to give you a simple solution offered by Spire.Doc.
Test file:
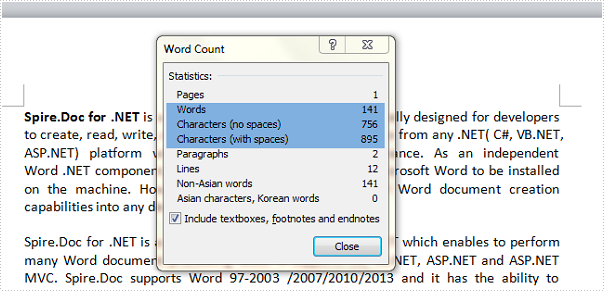
Detailed Steps for Getting the Number of Words and Characters
Step 1: Create a new instance of Spire.Doc.Document class and load the test file.
Document doc = new Document();
doc.LoadFromFile("test.docx", FileFormat.Docx2010);
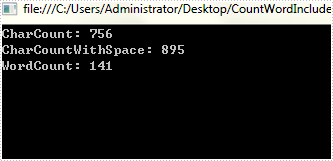
Step 2: Display the number of words, characters including or excluding spaces on console.
Console.WriteLine("CharCount: " + doc.BuiltinDocumentProperties.CharCount);
Console.WriteLine("CharCountWithSpace: " + doc.BuiltinDocumentProperties.CharCountWithSpace);
Console.WriteLine("WordCount: " + doc.BuiltinDocumentProperties.WordCount);
Output:
Full Code:
using Spire.Doc;
using System;
namespace CountNumber
{
    class Program
    {
        static void Main(string[] args)
        {
            Document doc = new Document();
            doc.LoadFromFile("test.docx", FileFormat.Docx2010);
            Console.WriteLine("CharCount: " + doc.BuiltinDocumentProperties.CharCount);
            Console.WriteLine("CharCountWithSpace: " + doc.BuiltinDocumentProperties.CharCountWithSpace);
            Console.WriteLine("WordCount: " + doc.BuiltinDocumentProperties.WordCount);
            Console.ReadKey();
        }
    }
}
Imports Spire.Doc
Namespace CountNumber
	Class Program
		Private Shared Sub Main(args As String())
			Dim doc As New Document()
			doc.LoadFromFile("test.docx", FileFormat.Docx2010)
			Console.WriteLine("CharCount: " + doc.BuiltinDocumentProperties.CharCount)
			Console.WriteLine("CharCountWithSpace: " + doc.BuiltinDocumentProperties.CharCountWithSpace)
			Console.WriteLine("WordCount: " + doc.BuiltinDocumentProperties.WordCount)
			Console.ReadKey()
		End Sub
	End Class
End Namespace
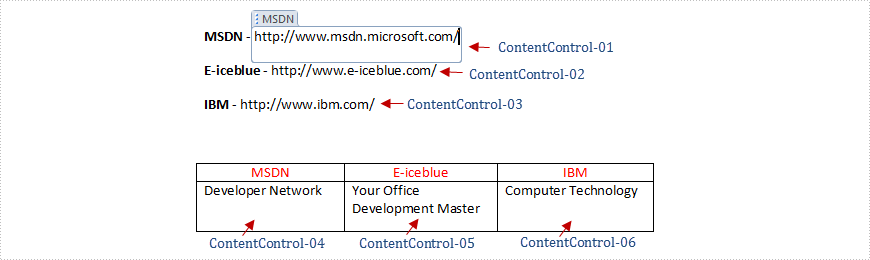
Get alias, tag and id of content controls in a Word document in C#
2014-10-11 06:28:55 Written by AdministratorContent controls provide a way for you to design documents. When you add a content control to a document, the control is identified by a border, a title, and temporary text that can provide instructions to the user. According to Microsoft, content controls mainly benefit from two features:
- Prevent users from editing or deleting protected sections of a document.
- Bind parts of a document or template to data. You can bind content controls to database fields, managed objects in the .NET Framework, XML elements that are stored in the document, and other data sources.
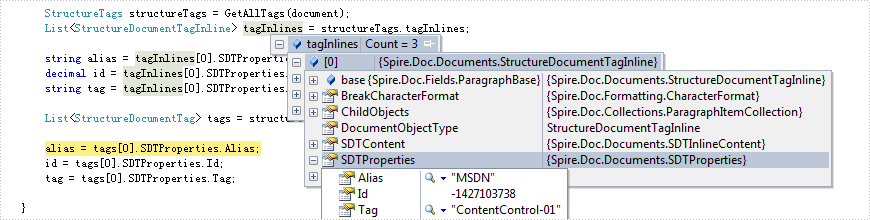
Therefore, it is necessary for developers to get the properties of content controls when dealing content controls at run time. This article illustrates how to get all controls and their properties including alias, id and tag via Spire.Doc.
Firstly, check the test file that contains six content controls distributed in lines and a table. By default, the border and the title of the control do not appear if we don't click the protected section.
Test File:
Main Steps:
Step 1: Create a new Word document and load the test file.
Step 2: Create two lists to store tags which are distributed in lines and a table separately. Here, each content control will be identified by tag.
Step 3: Use foreach sentence to get all tags in the Word document.
Full Code:
static void Main(string[] args)
{
using (Document document = new Document(@"..\..\TestData\test.docx"))
{
StructureTags structureTags = GetAllTags(document);
List<StructureDocumentTagInline> tagInlines = structureTags.tagInlines;
string alias = tagInlines[0].SDTProperties.Alias;
decimal id = tagInlines[0].SDTProperties.Id;
string tag = tagInlines[0].SDTProperties.Tag;
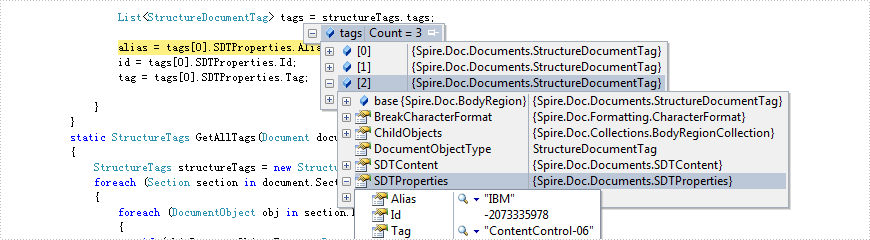
List<StructureDocumentTag> tags = structureTags.tags;
alias = tags[0].SDTProperties.Alias;
id = tags[0].SDTProperties.Id;
tag = tags[0].SDTProperties.Tag;
}
}
static StructureTags GetAllTags(Document document)
{
StructureTags structureTags = new StructureTags();
foreach (Section section in document.Sections)
{
foreach (DocumentObject obj in section.Body.ChildObjects)
{
if (obj.DocumentObjectType == DocumentObjectType.Paragraph)
{
foreach (DocumentObject pobj in (obj as Paragraph).ChildObjects)
{
if (pobj.DocumentObjectType == DocumentObjectType.StructureDocumentTagInline)
{
structureTags.tagInlines.Add(pobj as StructureDocumentTagInline);
}
}
}
else if (obj.DocumentObjectType == DocumentObjectType.Table)
{
foreach (TableRow row in (obj as Table).Rows)
{
foreach (TableCell cell in row.Cells)
{
foreach (DocumentObject cellChild in cell.ChildObjects)
{
if (cellChild.DocumentObjectType == DocumentObjectType.StructureDocumentTag)
{
structureTags.tags.Add(cellChild as StructureDocumentTag);
}
else if (cellChild.DocumentObjectType == DocumentObjectType.Paragraph)
{
foreach (DocumentObject pobj in (cellChild as Paragraph).ChildObjects)
{
if (pobj.DocumentObjectType == DocumentObjectType.StructureDocumentTagInline)
{
structureTags.tagInlines.Add(pobj as StructureDocumentTagInline);
}
}
}
}
}
}
}
}
}
return structureTags;
}
public class StructureTags
{
List<StructureDocumentTagInline> m_tagInlines;
public List<StructureDocumentTagInline> tagInlines
{
get
{
if (m_tagInlines == null)
m_tagInlines = new List<StructureDocumentTagInline>();
return m_tagInlines;
}
set
{
m_tagInlines = value;
}
}
List<StructureDocumentTag> m_tags;
public List<StructureDocumentTag> tags
{
get
{
if (m_tags == null)
m_tags = new List<StructureDocumentTag>();
return m_tags;
}
set
{
m_tags = value;
}
}
}
Effect Screenshot:
Content controls in lines
Content controls in table
As a powerful PDF component, Spire.PDF supports to work with page setting for PDF well, such as set PDF properties, view preference, and set background color etc. This article will focus on show you how to add image as page background to an existing PDF file in C#.
Make sure Spire.PDF for .NET has been installed correctly and then add Spire.Pdf.dll as reference in the downloaded Bin folder though the below path: "..\Spire.Pdf\Bin\NET4.0\ Spire.Pdf.dll".
Firstly, check the original PDF file without background image.
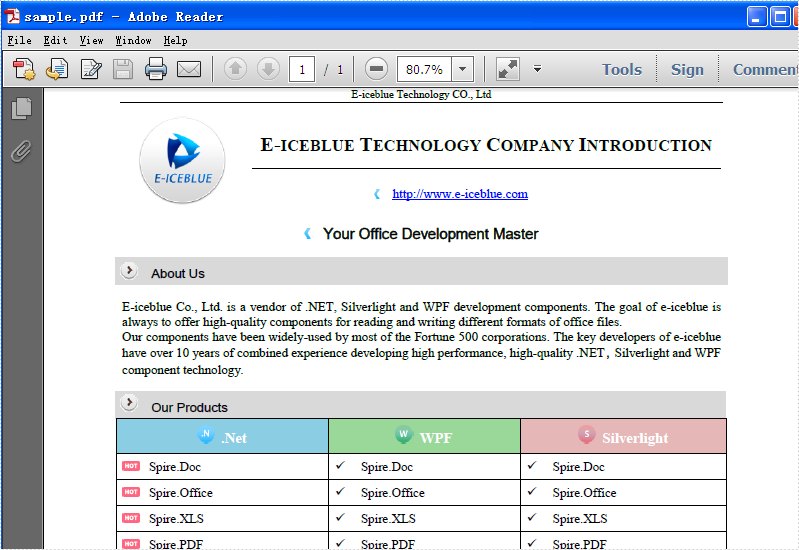
The following code snippet shows you how to add image as background for PDF in C#.
Step 1: Create a PDF document and load from file.
PdfDocument doc = new PdfDocument();
doc.LoadFromFile("sample.pdf");
Step 2: Get the first page in PDF file
PdfPageBase page = doc.Pages[0];
Step 3: Load the image from file and set it as background image.
Image backgroundImage = Image.FromFile("background.png");
page.BackgroundImage = backgroundImage;
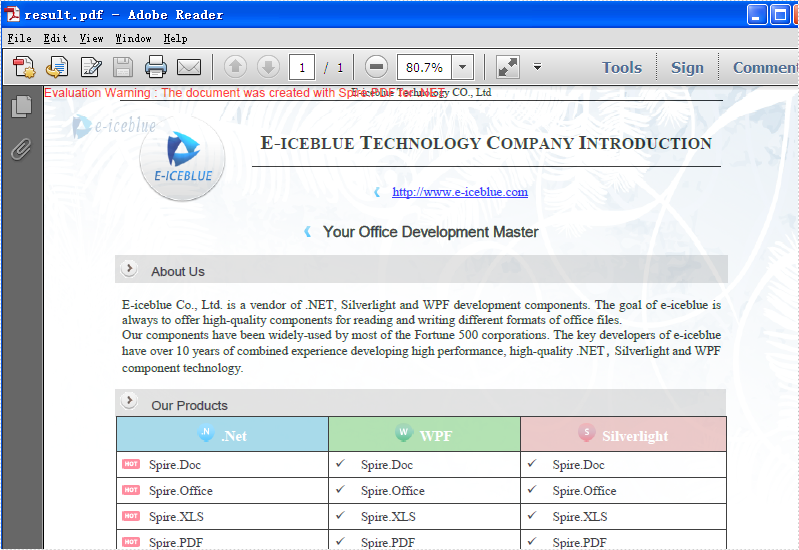
Step 4: Save the document to file and launch it.
doc.SaveToFile("result.pdf");
System.Diagnostics.Process.Start("result.pdf");
Effective Screenshot:
Full Codes:
using Spire.Pdf;
using System.Drawing;

namespace Addimagebackground
{
    class Program
    {
        static void Main(string[] args)
        {
            PdfDocument doc = new PdfDocument();
            doc.LoadFromFile("sample.pdf");
            PdfPageBase page = doc.Pages[0];
            Image backgroundImage = Image.FromFile("background.png");
            page.BackgroundImage = backgroundImage;
            doc.SaveToFile("result.pdf");
            System.Diagnostics.Process.Start("result.pdf");
        }
    }
}
