
Knowledgebase (2370)
Children categories
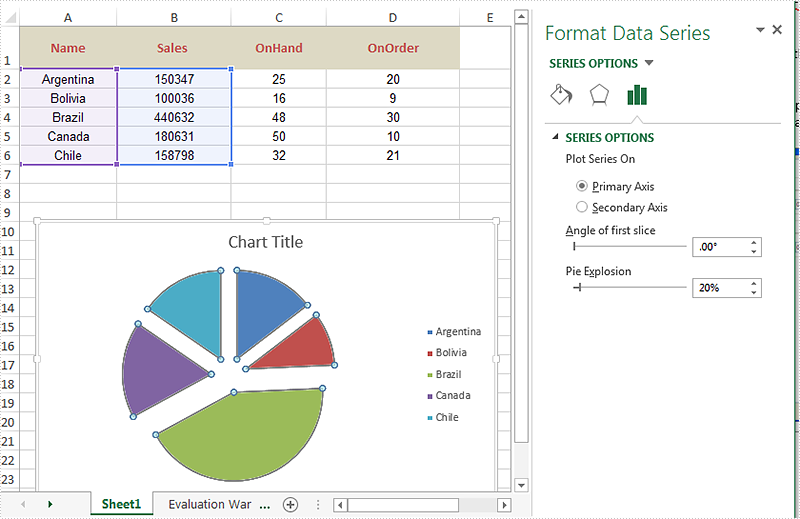
When we work with Excel pie chart, we may need to separate each part of pie chart to make them stand out. Spire.XLS offers a property of Series.DataFormat.Percent to enable developers to pull the whole pie apart. It also offers a property of Series.DataPoints.DataFormat.Percent to pull apart a single slice from the whole pie chart.
This article is going to introduce the method of how to set the separation width between slices in pie chart in C# by using Spire.XLS.
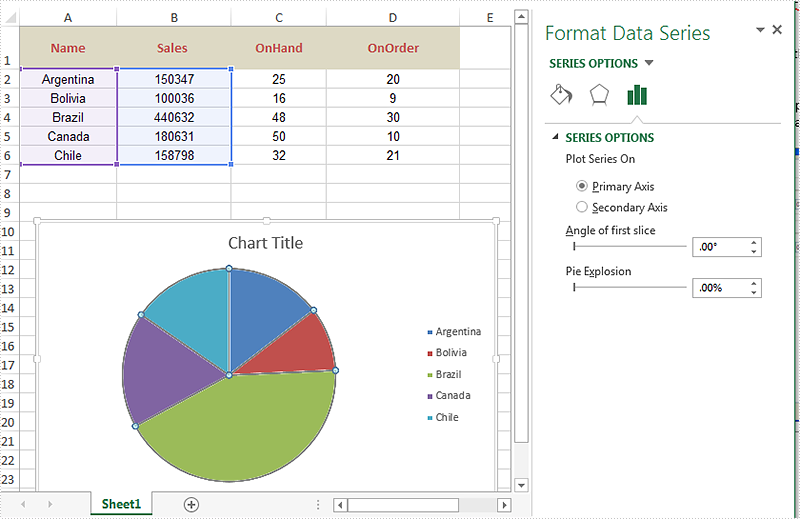
On MS Excel, We can adjust the percentage of "Pie Explosion" on the Series Options at the "format data series" area to control the width between each section in the chart.
Code Snippet of how to set the separation width between slices in pie chart.
using Spire.Xls;
namespace ExplodePieChart
{

    class Program
    {

        static void Main(string[] args)
        {
            Workbook workbook = new Workbook();
            workbook.LoadFromFile("Sample.xlsx");

            Worksheet ws = workbook.Worksheets[0];
            Chart chart = ws.Charts[0];

            // Set the separation width between slices in pie chart.
            for (int i = 0; i < chart.Series.Count; i++)
            {
                chart.Series[i].DataFormat.Percent = 20;
            }

            workbook.SaveToFile("result.xlsx", ExcelVersion.Version2010);

        }
    }
}
Effective screenshot after pull the whole pie apart.
Code Snippet of how to split a single slice from the whole pie chart.
using Spire.Xls;
namespace ExplodePieChart
{

    class Program
    {

        static void Main(string[] args)
        {
            {
                Workbook workbook = new Workbook();
                workbook.LoadFromFile("Sample.xlsx");

                Worksheet ws = workbook.Worksheets[0];
                Chart chart = ws.Charts[0];

                chart.Series[0].DataPoints[0].DataFormat.Percent = 20;

                workbook.SaveToFile("ExplodePieChart.xlsx", ExcelVersion.Version2013);
            }


        }
    }
}
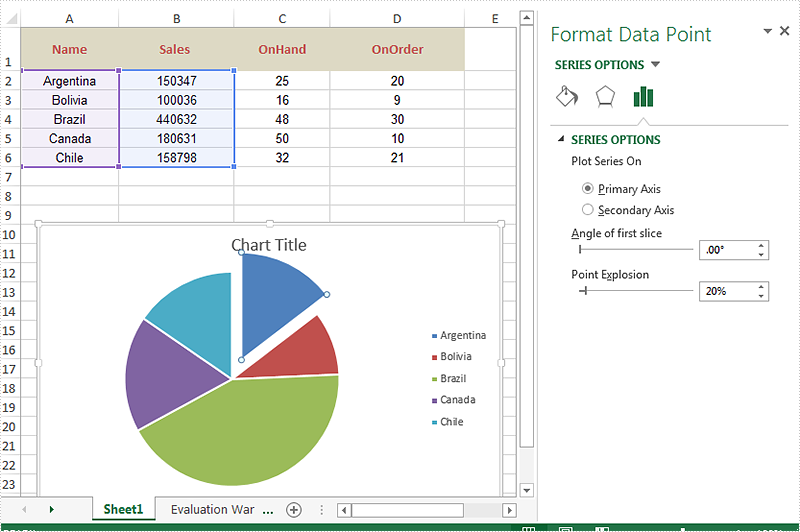
Effective screenshot after pull a single part from the pie chart apart.
How to Set the Play Mode for Video in PowerPoint using C#, VB.NET
2016-01-04 03:15:56 Written by KoohjiVideo is often used to create a more attractive and interesting effect in PowerPoint, there are two modes to play video in PowerPoint: on click and automatically. In general, the video would be played by clicking on it, people who want to play the video automatically needs to set the default play mode as auto style. This article will demonstrate how to set the play mode for video in PowerPoint using C#, VB.NET.
Note: Before start, please download and install Spire.Presentation correctly, after that add the Spire.Presentation.dll file as the reference of your project.
Detail steps overview:
Step 1: Initialize a new presentation instance and load the original document from file.
Presentation presentation = new Presentation();
presentation.LoadFromFile(@"C:\Users\Administrator\Desktop\Sample.pptx");
Step 2: Find the video by looping through all the slides and set its play mode as auto.
foreach (ISlide slide in presentation.Slides)
{
    foreach (IShape shape in slide.Shapes)
        {
            if (shape is IVideo)
            {
                (shape as IVideo).PlayMode = VideoPlayMode.Auto;
            }
        }
}
Step 3: Save the file as Video.pptx.
presentation.SaveToFile("Video.pptx", FileFormat.Pptx2010);
Full codes:
using Spire.Presentation;

namespace Set_Video_Play_Mode
{
    class Program
    {
        static void Main(string[] args)
        {
            Presentation presentation = new Presentation();
            presentation.LoadFromFile(@"C:\Users\Administrator\Desktop\Sample.pptx");
            foreach (ISlide slide in presentation.Slides)
            {
                foreach (IShape shape in slide.Shapes)
                {
                    if (shape is IVideo)
                    {
                        (shape as IVideo).PlayMode = VideoPlayMode.Auto;
                    }
                }
            }
            presentation.SaveToFile("Video.pptx", FileFormat.Pptx2010);
        }
    }
}
Imports Spire.Presentation
Namespace Set_Video_Play_Mode
	Class Program
		Private Shared Sub Main(args As String())
			Dim presentation As New Presentation()
	presentation.LoadFromFile("C:\Users\Administrator\Desktop\Sample.pptx")
			For Each slide As ISlide In presentation.Slides
				For Each shape As IShape In slide.Shapes
					If TypeOf shape Is IVideo Then
						TryCast(shape, IVideo).PlayMode = VideoPlayMode.Auto
					End If
				Next
			Next
			presentation.SaveToFile("Video.pptx", FileFormat.Pptx2010)
		End Sub
	End Class
End Namespace
If you couldn't use Spire.Presentation successfully, please refer the Spire.Presentation Quick Start which will guide you to quickly use the Spire.Presentation.
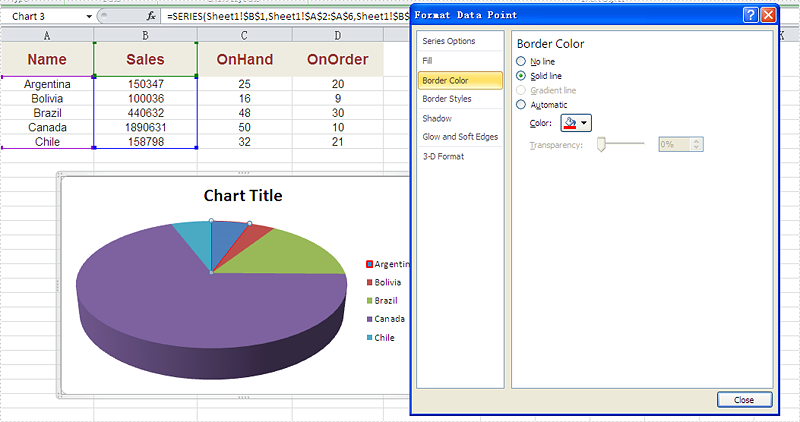
The different border color and styles on the Excel Chart can distinguish the chart categories easily. Spire.XLS offers a property of LineProperties to enables developers to set the color and styles for the data point. This article is going to introduce the method of how to format data series for Excel charts in C# using Spire.XLS.
Note: Before Start, please download the latest version of Spire.XLS and add Spire.xls.dll in the bin folder as the reference of Visual Studio.
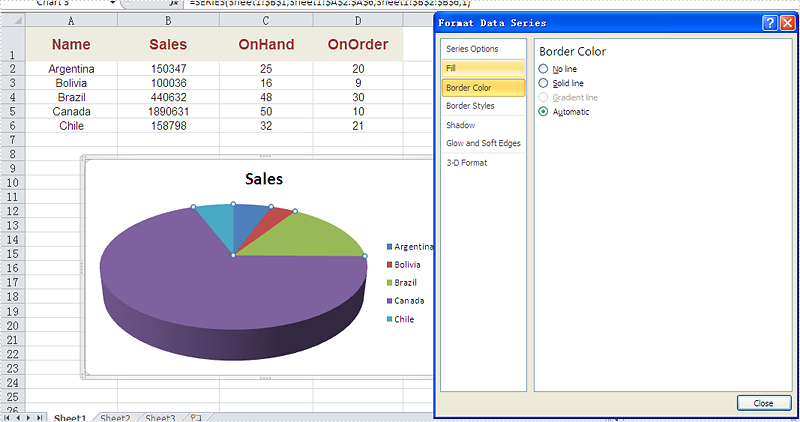
Firstly, please check the original screenshot of excel chart with the automatic setting for border.
Code Snippet of how to set the border color and border styles for Excel chart data series.
Step 1: Create a new workbook and load from file.
Workbook workbook = new Workbook();
workbook.LoadFromFile("sample.xlsx");
Step 2: Get the first worksheet from workbook and then get the first chart from the worksheet.
Worksheet ws = workbook.Worksheets[0];
Chart chart = ws.Charts[0];
Step 3: Set CustomLineWeight property for Series line.
(chart.Series[0].DataPoints[0].DataFormat.LineProperties as XlsChartBorder).CustomLineWeight = 1.5f;
Step 4: Set Color property for Series line.
(chart.Series[0].DataPoints[0].DataFormat.LineProperties as XlsChartBorder).Color = Color.Red;
Step 5: Save the document to file.
workbook.SaveToFile("result.xlsx", FileFormat.Version2013);
Effective screenshot after set the color and width of excel chart border.
Full codes:
using Spire.Xls;
using Spire.Xls.Charts;
using Spire.Xls.Core.Spreadsheet.Charts;
using System.Drawing;
namespace SetBoarderColor
{

    class Program
    {

        static void Main(string[] args)
        {
            Workbook workbook = new Workbook();
            workbook.LoadFromFile("sample.xlsx");
            Worksheet ws = workbook.Worksheets[0];
            Chart chart = ws.Charts[0];

            (chart.Series[0].DataPoints[0].DataFormat.LineProperties as XlsChartBorder).CustomLineWeight = 1.5f;
            (chart.Series[0].DataPoints[0].DataFormat.LineProperties as XlsChartBorder).Color = Color.Red;

            workbook.SaveToFile("result.xlsx", FileFormat.Version2013);


        }
    }
}
