Преобразование электронной почты в PDF — универсальные и программные методы
Оглавление
Установка через Nuget
Install-Package Spire.Email
Install-Package Spire.Doc
Электронные письма часто содержат важную информацию: контракты, квитанции, маршруты путешествий, обновления проектов или душевные сообщения, которые вы хотите сохранить навсегда. Но полагаться исключительно на свой почтовый ящик для долгосрочного хранения рискованно. Учетные записи взламываются, сервисы меняются, а письма могут быть случайно удалены. Преобразование электронных писем в PDF решает эту проблему, создавая универсально доступные документы, идеально подходящие для записей, юридических доказательств или обмена с клиентами.
В этом руководстве рассматриваются как удобные для пользователя, так и программные подходы к сохранению файлов электронной почты (MSG, EML) в виде файлов PDF.
- Как преобразовать электронное письмо в PDF: универсальные методы
- Преобразование электронной почты в PDF на C#: для разработчиков
- Какой метод выбрать?
- Заключение
Как преобразовать электронное письмо в PDF: универсальные методы
Универсальные методы идеально подходят для пользователей, которые не хотят писать код. Вот наиболее распространенные подходы к преобразованию электронной почты в PDF:
Метод 1: Встроенная функция «Печать»
Это самый надежный и широко применимый метод на настольных компьютерах (Windows, macOS, Linux) и в почтовых клиентах (веб-почта, Outlook, Apple Mail).
1. Откройте электронное письмо
2. Найдите опцию печати:
- Веб-почта (Gmail, Outlook.com, Yahoo): Найдите значок принтера или нажмите меню с тремя точками и выберите «Печать».
- Клиенты для настольных компьютеров (Outlook, Apple Mail): Перейдите в «Файл > Печать» или используйте сочетание клавиш «Ctrl+P» (Windows) / «Cmd+P» (Mac).
3. Выберите PDF-принтер:
- «Сохранить как PDF» (распространено на Mac, в браузере Chrome)
- «Microsoft Print to PDF» (по умолчанию в Windows)
- «Adobe PDF» (если установлен Adobe Acrobat)
4. Настройте параметры (необязательно):
- Установите размер страницы, ориентацию, поля и т. д.
- Отключите верхние/нижние колонтитулы для более чистого вида, содержащего только содержимое письма.
5. Сохраните в PDF:
- Нажмите «Печать», «Сохранить» или аналогичную кнопку.
- Назовите файл, выберите место для сохранения и нажмите «Сохранить».

Метод 2: Бесплатные онлайн-конвертеры (использовать с осторожностью)
Нужно конвертировать электронные письма в PDF без установки программного обеспечения? Вы можете использовать Zamzar, бесплатный конвертер, который позволяет конвертировать файлы .msg/.eml:
Шаги:
- Посетите Zamzar.
- Загрузите свой файл электронной почты.
- Выберите PDF в качестве выходного формата и нажмите «Конвертировать».
Примечание по безопасности: избегайте загрузки конфиденциальных писем в онлайн-инструменты. Используйте офлайн-методы для конфиденциальных данных.
Преобразование электронной почты в PDF на C#: для разработчиков
Для разработчиков, нуждающихся в автоматизации, пакетной обработке или интеграции в рабочие процессы .NET, используйте Spire.Doc for .NET в сочетании с библиотекой Spire.Email for .NET, чтобы без труда выполнять преобразование MSG или EML в PDF на C#.
Настройка:
Установите пакеты NuGet:
Install-Package Spire.Email
Install-Package Spire.Doc
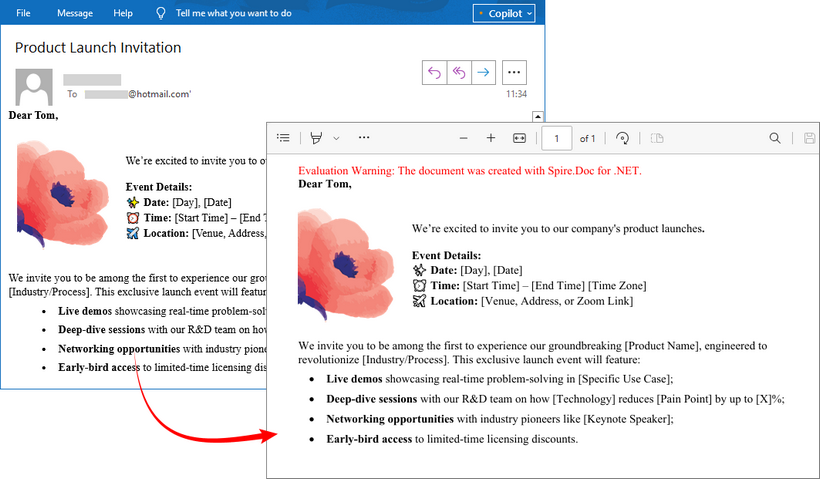
Ниже приведен код на C# для преобразования файла .msg Outlook в PDF.
using Spire.Doc;
using Spire.Doc.Documents;
using Spire.Email;

namespace EmailToPdf
{
    class Program
    {
        static void Main(string[] args)
        {

            // Загрузить файл электронной почты (.msg или .eml)
            MailMessage mail = MailMessage.Load("sample.msg", MailMessageFormat.Msg);

            // Проанализировать содержимое письма и вернуть его в формате HTML
            string htmlBody = mail.BodyHtml;

            // Создать документ Word
            Document doc = new Document();
            Section section = doc.AddSection();
            Paragraph paragraph = section.AddParagraph();

            // Добавить содержимое HTML в документ
            paragraph.AppendHTML(htmlBody);

            // Преобразовать в формат PDF
            doc.SaveToFile("EmailToPdf.pdf", FileFormat.PDF);
        }
    }
}
Ключевые шаги:
- Загрузить письмо: Метод MailMessage.Load() считывает файл электронной почты (.msg или .eml) в объект MailMessage.
- Извлечь содержимое HTML: HTML-тело письма извлекается через свойство MailMessage.BodyHtml.
- Создать документ: Документ Word создается с помощью Spire.Doc.
- Добавить HTML в документ: Содержимое HTML добавляется в документ с помощью Paragraph.AppendHTML().
- Сохранить как PDF: Документ сохраняется в формате PDF с помощью Document.SaveToFile().
Вывод:
Какой метод выбрать?
| Сценарий | Рекомендуемый подход |
| Единичные преобразования | Встроенная функция «Печать в PDF» |
| Пакетные задания с неконфиденциальными данными | Надежные онлайн-инструменты |
| Автоматизированные рабочие процессы/ конфиденциальные письма | Библиотеки Spire (C#/.NET) |
Заключение
Независимо от того, нужна ли вам быстрая ручная конвертация или автоматизированное решение для вашего приложения, преобразование электронных писем в PDF является простым с правильными инструментами. Универсальные методы отлично подходят для одноразовых преобразований, в то время как программирование на C# обеспечивает масштабируемость и возможности интеграции для разработчиков. Выберите подход, который наилучшим образом соответствует вашим потребностям, чтобы обеспечить эффективное сохранение ваших важных писем.
ТАКЖЕ ЧИТАЙТЕ:
Convert Email to PDF - Universal & Programming Methods
Table of Contents
Install with Nuget
Install-Package Spire.Email
Install-Package Spire.Doc
Emails often contain crucial information: contracts, receipts, travel itineraries, project updates, or heartfelt messages you want to keep forever. But relying solely on your inbox for long-term storage is risky. Accounts get hacked, services change, and emails can accidentally be deleted. Converting emails to PDF solves this by creating universally accessible documents perfect for records, legal evidence, or client sharing.
This guide explores both user-friendly and programmatic approaches to save email files (MSG, EML) as PDF files.
- How to Convert Email to PDF: Universal Methods
- Convert Email to PDF in C#: Developer-Focused
- Which Method Should You Choose?
- Conclusion
How to Convert Email to PDF: Universal Methods
Universal methods are ideal for users who don’t want to write code. Here are the most common email-to-PDF conversion approaches:
Method 1: Built-in "Print" Function
This is the most reliable and widely applicable method across desktops (Windows, macOS, Linux) and email clients (Webmail, Outlook, Apple Mail).
1. Open the Email
2. Find the Print Option:
- Webmail (Gmail, Outlook.com, Yahoo): Look for the printer icon or click the three-dot menu and select "Print."
- Desktop Clients (Outlook, Apple Mail): Go to “File > Print”, or use the “Ctrl+P” (Windows) / “Cmd+P” (Mac) keyboard shortcut.
3. Choose the PDF Printer:
- "Save as PDF" (common on Mac, Chrome browser)
- "Microsoft Print to PDF" (Windows default)
- "Adobe PDF" (if Adobe Acrobat is installed)
4. Configure Settings (Optional):
- Set the page size, orientation, margins, etc.
- Disable headers/footers for a cleaner look, containing just the email content.
5. Save to PDF:
- Click "Print," "Save," or similar.
- Name your file, choose a save location, and click "Save."
Method 2: Free Online Converters (Use with Caution)
Need to convert emails to PDFs without installing software? You can use Zamzar, a free converter that allows you to convert .msg/.eml files:
Steps:
- Visit Zamzar.
- Upload your email file.
- Select PDF as the output format and click Convert.
Security Note: Avoid uploading confidential emails to online tools. Use offline methods for sensitive data.
Convert Email to PDF in C#: Developer-Focused
For developers needing automation, batch processing, or integration into .NET workflows, use Spire.Doc for .NET in conjunction with Spire.Email for .NET library to effortlessly achieve MSG or EML to PDF conversion in C#.
Setup:
Install NuGet packages:
Install-Package Spire.Email
Install-Package Spire.Doc
Below is the C# code to convert an Outlook msg file to PDF.
using Spire.Doc;
using Spire.Doc.Documents;
using Spire.Email;

namespace EmailToPdf
{
    class Program
    {
        static void Main(string[] args)
        {

            // Load an email file (.msg or .eml)
            MailMessage mail = MailMessage.Load("sample.msg", MailMessageFormat.Msg);

            // Parse email content and return it in HTML format
            string htmlBody = mail.BodyHtml;

            // Create a Word document
            Document doc = new Document();
            Section section = doc.AddSection();
            Paragraph paragraph = section.AddParagraph();

            // Add the HTML content to the document
            paragraph.AppendHTML(htmlBody);

            // Convert to PDF format
            doc.SaveToFile("EmailToPdf.pdf", FileFormat.PDF);
        }
    }
}
Key Steps:
- Load the Email: The MailMessage.Load() method reads an email file (.msg or .eml) into a MailMessage object.
- Extract HTML Content: The email’s HTML body is retrieved via MailMessage.BodyHtml property.
- Create a Document: A Word document is instantiated using Spire.Doc.
- Add HTML to Document: The HTML content is appended to the document using Paragraph.AppendHTML().
- Save as PDF: The document is saved as a PDF using Document.SaveToFile().
Output:
Which Method Should You Choose?
| Scenario | Recommended Approach |
| Single conversions | Built-in Print to PDF |
| Non-sensitive batch jobs | Trusted online tools |
| Automated workflows/ sensitive emails | Spire libraries (C#/.NET) |
Conclusion
Whether you need a quick manual conversion or an automated solution for your application, converting emails to PDF is straightforward with the right tools. Universal methods are great for one-off conversions, while C# programming provides scalability and integration capabilities for developers. Choose the approach that best fits your needs to ensure your important emails are preserved effectively.
ALSO READ:
How to Create PowerPoint Documents in Python

Creating PowerPoint presentations programmatically can save time and enhance efficiency in generating reports, slideshows, and other visual presentations. By automating the process, you can focus on content and design rather than manual formatting.
In this tutorial, we will explore how to create PowerPoint documents in Python using Spire.Presentation for Python. This powerful tool allows developers to manipulate and generate PPT and PPTX files seamlessly.
Table of Contents:
- Python Library to Work with PowerPoint Files
- Installing Spire.Presentation for Python
- Creating a PowerPoint Document from Scratch
- Creating PowerPoint Documents Based on a Template
- Best Practices for Python PowerPoint Generation
- Wrap Up
- FAQs
1. Python Library to Work with PowerPoint Files
Spire.Presentation is a robust library for creating, reading, and modifying PowerPoint files in Python , without requiring Microsoft Office. This library supports a wide range of features, including:
- Create PowerPoint documents from scratch or templates.
- Add text, images, lists, tables, charts, and shapes.
- Customize fonts, colors, backgrounds, and layouts.
- Save as or export to PPT, PPTX, PDF, or images.
In the following sections, we will walk through the steps to install the library, create presentations, and add various elements to your slides.
2. Installing Spire.Presentation for Python
To get started, you need to install the Spire.Presentation library. You can install it using pip:
pip install spire.presentation
Once installed, you can begin utilizing its features in your Python scripts to create PowerPoint documents.
3. Creating a PowerPoint Document from Scratch
3.1 Generate and Save a Blank Presentation
Let's start by creating a basic PowerPoint presentation from scratch. The following code snippet demonstrates how to generate and save a blank presentation:
from spire.presentation.common import *
from spire.presentation import *

# Create a Presentation object
presentation = Presentation()

# Set the slide size type
presentation.SlideSize.Type = SlideSizeType.Screen16x9

# Add a slide (there is one slide in the document by default)
presentation.Slides.Append()

# Save the document as a PPT or PPTX file
presentation.SaveToFile("BlankPowerPoint.pptx", FileFormat.Pptx2019)
presentation.Dispose()
In this code:
- Presentation : Root class representing the PowerPoint file.
- SlideSize.Type : Sets the slide dimensions (e.g., SlideSizeType.Screen16x9 for widescreen).
- Slides.Append() : Adds a new slide to the presentation. By default, a presentation starts with one slide.
- SaveToFile() : Saves the presentation to the specified file format (PPTX in this case).
3.2 Add Basic Elements to Your Slides
Now that we have a blank presentation, let's add some basic elements like text, images, lists, and tables.
Add Formatted Text
To add formatted text, we can use the following code:
# Get the first slide
first_slide = presentation.Slides[0]

# Add a shape to the slide
rect = RectangleF.FromLTRB (30, 60, 900, 150)
shape = first_slide.Shapes.AppendShape(ShapeType.Rectangle, rect)
shape.ShapeStyle.LineColor.Color = Color.get_Transparent()
shape.Fill.FillType = FillFormatType.none

# Add text to the shape
shape.AppendTextFrame("This guide demonstrates how to create a PowerPoint document using Python.")

# Get text of the shape as a text range
textRange = shape.TextFrame.TextRange

# Set font name, style (bold & italic), size and color
textRange.LatinFont = TextFont("Times New Roman")
textRange.IsBold = TriState.TTrue
textRange.FontHeight = 32
textRange.Fill.FillType = FillFormatType.Solid
textRange.Fill.SolidColor.Color = Color.get_Black()

# Set alignment
textRange.Paragraph.Alignment = TextAlignmentType.Left
In this code:
- AppendShape() : Adds a shape to the slide. We create a rectangle shape that will house our text.
- AppendTextFrame() : Adds a text frame to the shape, allowing us to insert text into it.
- TextFrame.TextRange : Accesses the text range of the shape, enabling further customization such as font style, size, and color.
- Paragraph.Alignment : Sets the alignment of the text within the shape.
Add an Image
To include an image in your presentation, use the following code snippet:
# Get the first slide
first_slide = presentation.Slides[0]

# Load an image file
imageFile = "C:\\Users\\Administrator\\Desktop\\logo.png"
stream = Stream(imageFile)
imageData = presentation.Images.AppendStream(stream)

# Reset size
width = imageData.Width * 0.6
height = imageData.Height * 0.6

# Append it to the slide
rect = RectangleF.FromLTRB (750, 50, 750 + width, 50 + height)
image = first_slide.Shapes.AppendEmbedImageByImageData(ShapeType.Rectangle, imageData, rect)
image.Line.FillType = FillFormatType.none
In this code:
- Stream() : Creates a stream from the specified image file path.
- AppendStream() : Appends the image data to the presentation's image collection.
- AppendEmbedImageByImageData() : Adds the image to the slide at the specified rectangle coordinates.
You may also like: Insert Shapes in PowerPoint in Python
Add a List
To add a bulleted list to your slide, we can use:
# Get the first slide
first_slide = presentation.Slides[0]

# Specify list bounds and content
listBounds = RectangleF.FromLTRB(30, 150, 500, 350)
listContent = [
    " Step 1. Install Spire.Presentation for Python.",
    " Step 2. Create a Presentation object.",
    " Step 3. Add text, images, etc. to slides.",
    " Step 5. Set a background image or color.",
    " Step 6. Save the presentation to a PPT(X) file."
]

# Add a shape
autoShape = first_slide.Shapes.AppendShape(ShapeType.Rectangle, listBounds)
autoShape.TextFrame.Paragraphs.Clear()
autoShape.Fill.FillType = FillFormatType.none
autoShape.Line.FillType = FillFormatType.none

for content in listContent:
    # Create paragraphs based on the list content and add them to the shape
    paragraph = TextParagraph()
    autoShape.TextFrame.Paragraphs.Append(paragraph)
    paragraph.Text = content
    paragraph.TextRanges[0].Fill.FillType = FillFormatType.Solid
    paragraph.TextRanges[0].Fill.SolidColor.Color = Color.get_Black()
    paragraph.TextRanges[0].FontHeight = 20
    paragraph.TextRanges[0].LatinFont = TextFont("Arial")

    # Set the bullet type for these paragraphs
    paragraph.BulletType = TextBulletType.Symbol

    # Set line spacing
    paragraph.LineSpacing = 150
In this code:
- AppendShape() : Creates a rectangle shape for the list.
- TextFrame.Paragraphs.Append() : Adds paragraphs for each list item.
- BulletType : Sets the bullet style for the list items.
Add a Table
To include a table, you can use the following:
# Get the first slide
first_slide = presentation.Slides[0]

# Define table dimensions and data
widths = [200, 200, 200]
heights = [18, 18, 18, 18]
dataStr = [
    ["Slide Number", "Title", "Content Type"],
    ["1", "Introduction", "Text/Image"],
    ["2", "Project Overview", "Chart/Graph"],
    ["3", "Key Findings", "Text/List"]
]

# Add table to the slide
table = first_slide.Shapes.AppendTable(30, 360, widths, heights)

# Fill table with data and apply formatting
for rowNum, rowData in enumerate(dataStr):
    for colNum, cellData in enumerate(rowData):
        cell = table[colNum, rowNum]
        cell.TextFrame.Text = cellData

        textRange = cell.TextFrame.Paragraphs[0].TextRanges[0]
        textRange.LatinFont = TextFont("Times New Roman")
        textRange.FontHeight = 20

        cell.TextFrame.Paragraphs[0].Alignment = TextAlignmentType.Center

# Apply a built-in table style
table.StylePreset = TableStylePreset.MediumStyle2Accent1
In this code:
- AppendTable() : Adds a table to the slide at specified coordinates with defined widths and heights for columns and rows.
- Cell.TextFrame.Text : Sets the text for each cell in the table.
- StylePreset : Applies a predefined style to the table for enhanced aesthetics.
3.3 Apply a Background Image or Color
To set a custom background for your slide, use the following code:
# Get the first slide
first_slide = presentation.Slides[0]

# Get the background of the first slide
background = first_slide.SlideBackground

# Create a stream from the specified image file
stream = Stream("C:\\Users\\Administrator\\Desktop\\background.jpg")
imageData = presentation.Images.AppendStream(stream)

# Set the image as the background
background.Type = BackgroundType.Custom
background.Fill.FillType = FillFormatType.Picture
background.Fill.PictureFill.FillType = PictureFillType.Stretch
background.Fill.PictureFill.Picture.EmbedImage = imageData
In this code:
- SlideBackground : Accesses the background properties of the slide.
- Fill.FillType : Specifies the type of fill (in this case, an image).
- PictureFill.FillType : Sets how the background image is displayed (stretched, in this case).
- Picture.EmbedImage : Sets image data for the background.
For additional background options, refer to this tutorial: Set Background Color or Picture for PowerPoint Slides in Python
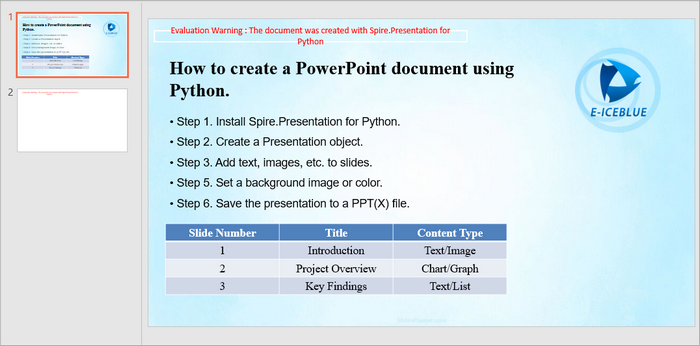
Output:
Below is a screenshot of the PowerPoint document generated by the code snippets provided above.
4. Creating PowerPoint Documents Based on a Template
Using templates can simplify the process of creating presentations by allowing you to replace placeholders with actual data. Below is an example of how to create a PowerPoint document based on a template:
from spire.presentation.common import *
from spire.presentation import *

# Create a Presentation object
presentation = Presentation()

# Load a PowerPoint document from a specified file path
presentation.LoadFromFile("C:\\Users\\Administrator\\Desktop\\template.pptx")

# Get a specific slide from the presentation
slide = presentation.Slides[0]

# Define a list of replacements where each tuple consists of the placeholder and its corresponding replacement text
replacements = [
    ("{project_name}", "GreenCity Solar Initiative"),
    ("{budget}", "$1,250,000"),
    ("{status}", "In Progress (65% Completion)"),
    ("{start_date}", "March 15, 2023"),
    ("{end_date}", "November 30, 2024"),
    ("{manager}", "Emily Carter"),
    ("{client}", "GreenCity Municipal Government")
]

# Iterate through each replacement pair
for old_string, new_string in replacements:

    # Replace the first occurrence of the old string in the slide with the new string
    slide.ReplaceFirstText(old_string, new_string, False)

# Save the modified presentation to a new file
presentation.SaveToFile("Template-Based.pptx", FileFormat.Pptx2019)
presentation.Dispose()
In this code:
- LoadFromFile() : Loads an existing PowerPoint file that serves as the template.
- ReplaceFirstText() : Replaces placeholders within the slide with actual values. This is useful for dynamic content generation.
- SaveToFile() : Saves the modified presentation as a new file.
Output:

5. Best Practices for Python PowerPoint Generation
When creating PowerPoint presentations using Python, consider the following best practices:
- Maintain Consistency : Ensure that the formatting (fonts, colors, styles) is consistent across slides for a professional appearance.
- Modular Code: Break document generation into functions (e.g., add_list(), insert_image()) for reusability.
- Optimize Images : Resize and compress images before adding them to presentations to reduce file size and improve loading times.
- Use Templates : Whenever possible, use templates to save time and maintain a cohesive design.
- Test Your Code : Always test your presentation generation code to ensure that all elements are added correctly and appear as expected.
6. Wrap Up
In this tutorial, we explored how to create PowerPoint documents in Python using the Spire.Presentation library. We covered the installation, creation of presentations from scratch, adding various elements, and using templates for dynamic content generation. With these skills, you can automate the creation of presentations, making your workflow more efficient and effective.
7. FAQs
Q1. What is Spire.Presentation?
Spire.Presentation is a powerful library used for creating, reading, and modifying PowerPoint files in various programming languages, including Python.
Q2. Does this library require Microsoft Office to be installed?
No, Spire.Presentation operates independently and does not require Microsoft Office.
Q3. Can I customize the layout of slides in my presentation?
Yes, you can customize the layout of each slide by adjusting properties such as size, background, and the placement of shapes, text, and images.
Q4. Does Spire.Presentation support both PPT and PPTX format?
Yes, Spire.Presentation supports both PPT and PPTX formats, allowing you to create and manipulate presentations in either format.
Q5. Can I add charts to my presentations?
Yes, Spire.Presentation supports the addition of charts to your slides, allowing you to visualize data effectively. For detailed instruction, refer to: How to Create Column Charts in PowerPoint Using Python
Get a Free License
To fully experience the capabilities of Spire.Presentation for Python without any evaluation limitations, you can request a free 30-day trial license.
Spire.XLS for C++ 15.7.1 enhances the conversion from Excel to PDF
We're pleased to announce the release of Spire.XLS for C++ 15.7.1. This release fixes several issues that occurred when converting Excel to PDF and calculating the AGGREGATE formula. Details are shown below.
Here is a list of all changes made in this release
| Category | ID | Description |
| Bug | - | Fixes the issue of incorrect checkboxes when converting Excel to PDF. |
| Bug | - | Fixes the issue of incorrect calculation with the AGGREGATE formula. |
| Bug | - | Fixes the issue of overlapping content when converting Excel to PDF. |
| Bug | - | Fixes the issue of incorrect text wrapping when converting Excel to PDF. |
Spire.Presentation 10.7.7 supports loading Markdown files
We're excited to announce the release of Spire.Presentation 10.7.7. The latest version supports loading Markdown files. Besides, the issue that files were corrupted when opening presentations containing copied slides is fixed. Check below for the details.
Here is a list of changes made in this release
| Category | ID | Description |
| New feature | - | Supports loading Markdown files.
Presentation pt = new Presentation();
pt.LoadFromFile(inputFilePath, FileFormat.Markdown);
pt.SaveToFile("out.pptx", FileFormat.Pptx2013);
|
| Bug | SPIREPPT-2849 | Fixes the issue that files were corrupted when opening presentations containing copied slides. |
OCR Tutorial: Extract Text from Images in C#
Optical Character Recognition (OCR) technology bridges the physical and digital worlds by converting text within images into machine-readable data. For .NET developers, the ability to extract text from images in C# is essential for building intelligent document processing, automated data entry, and accessibility solutions.
In this article, we’ll explore how to implement OCR in C# using the Spire.OCR for .NET library, covering basic extraction, advanced features like coordinate tracking, and best practices to ensure accuracy and efficiency.
Table of Contents:
- Understanding OCR and Spire.OCR
- Setting Up Your OCR Environment
- Basic Recognition: Extract Text from Images in C#
- Advanced Extraction: Extract Text with Coordinates in C#
- Tips to Optimize OCR Accuracy
- FAQs (Supported Languages and Image Formats)
- Conclusion & Free License
Understanding OCR and Spire.OCR
What is OCR?
OCR technology analyzes images of text - such as scanned documents, screenshots, or photos - and converts them into text strings that can be edited, searched, or processed programmatically.
Why Spire.OCR Stands Out?
Spire.OCR for .NET is a powerful, developer-friendly library that enables highly accurate text recognition from images in C# applications. Key features include:
- Support for multiple languages (English, Chinese, Japanese, etc.).
- High accuracy recognition algorithms optimized for various fonts and styles.
- Text coordinate extraction for precise positioning.
- Batch processing capabilities.
- Compatibility with .NET Framework and .NET Core.
Setting Up Your OCR Environment
Before diving into the C# code for image to text OCR operations, configure your development environment first:
1. Install via NuGet:
Open the NuGet Package Manager in Visual Studio. Search for "Spire.OCR" and install the latest version in your project. Alternatively, use the Package Manager Console:
Install-Package Spire.OCR
2. Download OCR Models:
Spire.OCR relies on pre-trained models to recognize image text. Download the model files for your operating system:
After downloading, extract to a directory (e.g., F:\OCR Model\win-x64)
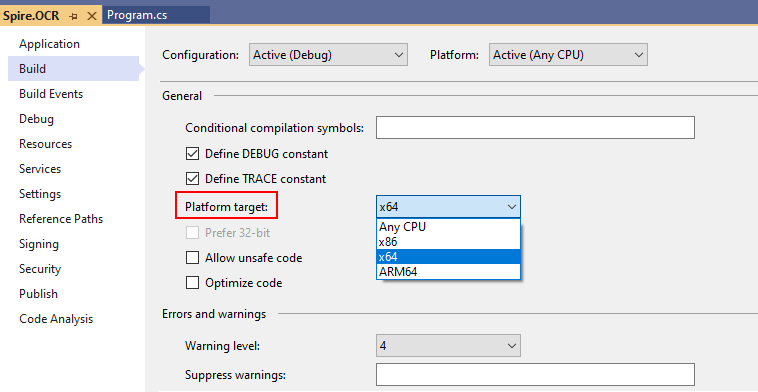
Important Note: Remember to change the platform target of your solution to x64 as Spire.OCR only supports 64-bit platforms.
Basic Recognition: Extract Text from Images in C#
Let’s start with a simple example that demonstrates how to read text from an image using Spire.OCR.
C# code to get text from an image:
using Spire.OCR;
using System.IO;

namespace OCRTextFromImage
{
    internal class Program
    {
        static void Main(string[] args)
        {

            // Create an instance of the OcrScanner class
            OcrScanner scanner = new OcrScanner();

            // Create an instance of the ConfigureOptions class
            ConfigureOptions configureOptions = new ConfigureOptions();

            // Set the path to the OCR model
            configureOptions.ModelPath = "F:\\OCR Model\\win-x64";

            // Set the language for text recognition. (The default is English.)
            configureOptions.Language = "English";

            // Apply the configuration options to the scanner
            scanner.ConfigureDependencies(configureOptions);

            // Scan image and extract text
            scanner.Scan("sample.png");

            // Save the extracted text to a txt file
            string text = scanner.Text.ToString();
            File.WriteAllText("output.txt", text);
        }
    }
}
Code Explanation:
- OcrScanner: Core class for text recognition.
- ConfigureOptions: Sets OCR parameters:
- ModelPath: Specifies the path to the OCR model files.
- Language: Defines the recognition language (e.g., "English", "Chinese").
- Scan(): Processes image and extracts text using the configured settings.
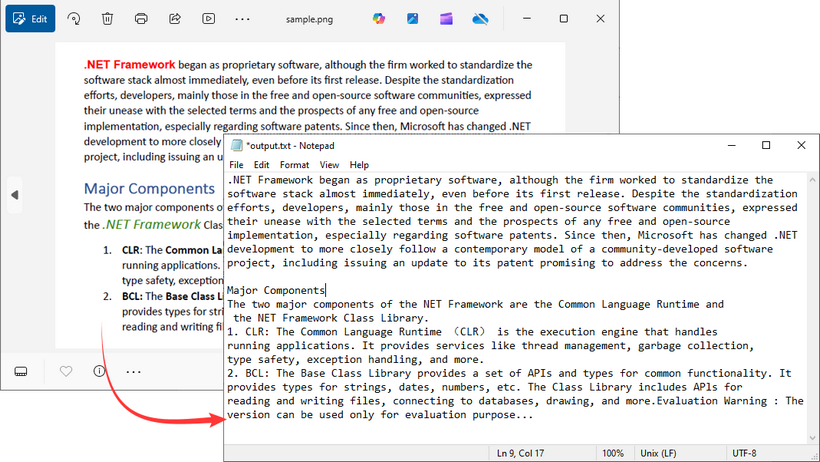
Output:
This C# code processes an image file (sample.png) and saves the extracted text to a text file (output.txt) using File.WriteAllText().
Advanced Extraction: Extract Text with Coordinates in C#
In many cases, knowing the position of extracted text within an image is as important as the text itself - for example, when processing invoices, forms, or structured documents. Spire.OCR allows you to extract not just text but also the coordinates of the text blocks, enabling precise analysis.
C# code to extract text with coordinates from an Image:
using Spire.OCR;
using System.Collections.Generic;
using System.IO;

namespace OCRWithCoordinates
{
    internal class Program
    {
        static void Main(string[] args)
        {

            // Create an instance of the OcrScanner class
            OcrScanner scanner = new OcrScanner();

            // Create an instance of the ConfigureOptions class
            ConfigureOptions configureOptions = new ConfigureOptions();

            // Set the path to the OCR model
            configureOptions.ModelPath = "F:\\OCR Model\\win-x64";

            // Set the language for text recognition. (The default is English.)
            configureOptions.Language = "English";

            // Apply the configuration options to the scanner
            scanner.ConfigureDependencies(configureOptions);

            // Extract text from an image
            scanner.Scan("invoice.png");

            // Get the OCR result text
            IOCRText text = scanner.Text;

            // Create a list to store information
            List<string> results = new List<string>();

            // Iterate through each block of the OCR result text
            foreach (IOCRTextBlock block in text.Blocks)
            {
                // Add the text of each block and its location information to the list
                results.Add($"Block Text: {block.Text}");
                results.Add($"Coordinates: {block.Box}");
                results.Add("---------");
            }

            // Save the extracted text with coordinates to a txt file
            File.WriteAllLines("ExtractWithCoordinates.txt", results);
        }
    }
}
Critical Details
- IOCRText: Represents the entire OCR result.
- IOCRTextBlock: Represents a block of contiguous text (e.g., a paragraph, line, or word).
- IOCRTextBlock.Box: Contains the rectangular coordinates of the text block:
- X (horizontal position)
- Y (vertical position)
- Width
- Height
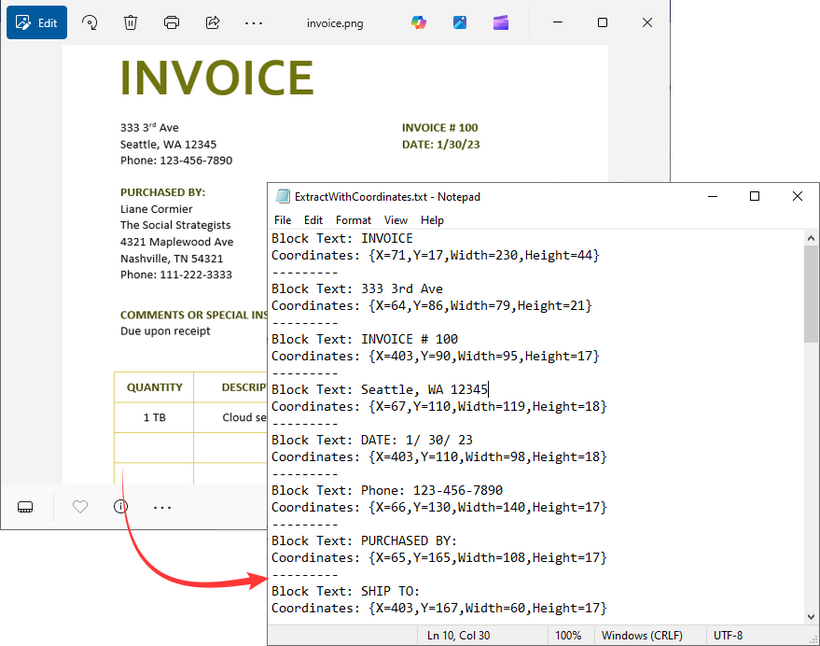
Output:
This C# code performs OCR on an image file (invoice.png), extracting both the recognized text and its position coordinates in the image, then saves this information to a text file (ExtractWithCoordinates.txt).
Tips to Optimize OCR Accuracy
To ensure reliable results when using C# to recognize text from images, consider these best practices:
- Use high-resolution images (300 DPI or higher).
- Preprocess images (e.g., resize, deskew) for better results.
- Ensure correct language settings correspond to the text in image.
- Store OCR models in a secure, accessible location.
FAQs (Supported Languages and Image Formats)
Q1: What image formats does Spire.OCR support?
A: Spire.OCR supports all common formats:
- PNG
- JPEG/JPG
- BMP
- TIFF
- GIF
Q2: What languages does Spire.OCR support?
A: Multiple languages are supported:
- English (default)
- Chinese (Simplified and Traditional)
- Japanese
- Korean
- German
- French
Q3: Can I use Spire.OCR in ASP.NET Core applications?
A: Yes. Supported environments:
- .NET Framework 2.0+
- .NET Standard 2.0+
- .NET Core 2.0+
- .NET 5
Q4: Can Spire.OCR extract text from scanned PDFs in C#?
A: The task requires the Spire.PDF integration to convert PDFs to images or extract images from scanned PDFs first, and then use the above C# examples to get text from the images.
Conclusion & Free License
Spire.OCR for .NET provides a powerful yet straightforward solution for extracting text from images in C# applications. Whether you’re building a simple tool to convert images to text or a complex system for processing thousands of invoices, by following the techniques and best practices outlined in this guide, you can integrate OCR functionality into your C# applications with ease.
Request a 30-day trial license here to get unlimited OCR capabilities and unlock valuable information trapped in visual format.
Spire.Presentation for Python 10.7.1 supports adding SVG to PowerPoint presentations
We are pleased to announce the release of Spire.Presentation for Python 10.7.1. This version adds support for inserting SVG images into PowerPoint presentations and enhances the namespace structure. Detailed information is provided below.
Here are the changes included in this release.
| Category | ID | Description |
| Optimization | - | Optimizes and modularizes the namespace structure. |
| New Feature | SPIREPPT-2925 | Supports adding SVG to PowerPoint presentations.
#Load a PowerPoint document presentation = Presentation() #Insert svg to PPT presentation.Slides[0].Shapes.AddFromSVGAsShapes(SvgFile); #Save the document presentation.SaveToFile(outputFile, FileFormat.Pptx2010) presentation.Dispose() |
Spire.PDF for Java 11.7.5 supports converting PDF to Markdown
We’re glad the announce the release of Spire.PDF for Java 11.7.5. This version introduces support for converting PDFs to Markdown and resolves several known issues, including garbled text during PDF-to-image conversions and content rotation problems when converting OFD to PDF. For more details, please see the information below.
Here is a list of changes made in this release:
| Category | ID | Description |
| New feature | SPIREPDF-5995 | Added support for converting PDF files to Markdown format.
PdfDocument doc = new PdfDocument("input.pdf");
doc.saveToFile("output.md", FileFormat.Markdown);
|
| Adjustment | SPIREPDF-7597 | Internal adjustments were made to references of "sun.misc.BASE64Decoder". |
| Bug | SPIREPDF-7405 | Fixed the issue where text became garbled when converting PDF to images. |
| Bug | SPIREPDF-7546 | Fixed the issue that caused the program to throw a "NegativeArraySizeException" when converting PDF to images. |
| Bug | SPIREPDF-7563 | Fixed the issue where the CSS directory name was incorrect when converting PDF to HTML on Linux systems. |
| Bug | SPIREPDF-7564 | Fixed the issue where content was rotated when converting OFD to PDF. |
| Bug | SPIREPDF-7596 | Fixed the issue that caused the program to throw a "NegativeArraySizeException" when using pdfGrayConverter.toGrayPdf. |
| Bug | SPIREPDF-7599 | Fixed the issue where bookmark navigation positions were incorrect when merging PDFs. |
| Bug | SPIREPDF-7622 | Fixed the issue where LicenseProvider.setLicense(path) would throw an error if the path contained backslashes (""). |
Como adicionar marcas d'água no Word (guia manual e com automação em C#)
Índice
- O que é uma Marca d'Água no Microsoft Word?
- Benefícios de Usar Marcas d'Água em Documentos do Word
- Parte 1: Como Adicionar Marcas d'Água no Word Manualmente (Guia Passo a Passo)
- Parte 2: Como Adicionar Marcas d'Água ao Word Programaticamente Usando C# e Spire.Doc
- Considerações Finais sobre Adicionar Marcas d'Água no Word
- Perguntas Frequentes (FAQs)
Instalar com Nuget
PM> Install-Package Spire.Doc
Links Relacionados

Se você precisa rotular seus documentos do Word como “Confidencial”, “Rascunho” ou aplicar uma marca personalizada, adicionar uma marca d'água é uma das soluções mais eficazes. Ajuda a proteger conteúdo sensível, indicar o status do documento e reforçar a identidade da marca - tudo isso mantendo uma aparência limpa e profissional. Esteja você trabalhando em relatórios de negócios, memorandos internos ou materiais de marketing, as marcas d'água podem impedir o compartilhamento não autorizado e comunicar claramente o propósito do seu documento.
Neste guia passo a passo, você aprenderá duas maneiras práticas de adicionar marcas d'água a documentos do Word: manualmente usando as ferramentas de marca d'água integradas do Microsoft Word e programaticamente através da automação em C# com a biblioteca Spire.Doc for .NET. Não importa seu fluxo de trabalho - manual ou automatizado - você descobrirá técnicas eficientes para inserir marcas d'água de texto ou imagem que aprimoram e protegem seus arquivos do Word.
O que você aprenderá
- O que é uma Marca d'Água no Microsoft Word?
- Benefícios de Usar Marcas d'Água em Documentos do Word
- Parte 1: Como Adicionar Marcas d'Água no Word Manualmente (Guia Passo a Passo)
- Parte 2: Como Adicionar Marcas d'Água ao Word Programaticamente Usando C# e Spire.Doc
- Considerações Finais sobre Adicionar Marcas d'Água no Word
- Perguntas Frequentes (FAQs)
O que é uma Marca d'Água no Microsoft Word?
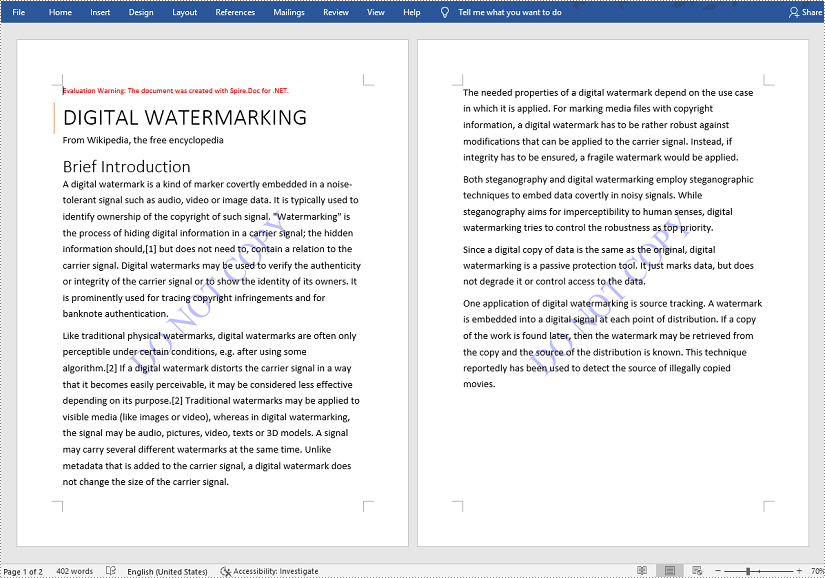
Uma marca d'água no Word é um design, texto ou imagem semitransparente que aparece atrás do conteúdo principal de uma página do documento. Não interfere no próprio conteúdo, mas permanece visível para os leitores.
Tipos comuns de marca d'água incluem:
- Marcas d'Água de Texto: "Confidencial", "Rascunho", "Amostra", etc.
- Marcas d'Água de Imagem: Logos de empresas ou imagens de fundo
- Marcas d'Água Personalizadas: Elementos de branding ou identificadores únicos
Benefícios de Usar Marcas d'Água em Documentos do Word
As marcas d'água servem a vários propósitos importantes:
- Proteger conteúdo sensível marcando claramente os documentos como confidenciais
- Indicar o status do documento, como rascunho, revisão ou final
- Marcar documentos com logos ou nomes de empresas
- Desencorajar a distribuição não autorizada ou o uso indevido
Parte 1: Como Adicionar Marcas d'Água no Word Manualmente (Guia Passo a Passo)
O Microsoft Word facilita a adição de marcas d'água, quer você esteja usando uma opção integrada ou criando a sua própria. Você pode escolher entre um conjunto de marcas d'água predefinidas como “Confidencial” ou “Rascunho”, ou criar marcas d'água de texto e imagem personalizadas para alinhar com o propósito e a marca do seu documento.
Inserir uma Marca d'Água Predefinida no Word
O Microsoft Word inclui vários modelos de marca d'água prontos para casos de uso comuns, como marcar um documento como confidencial ou como rascunho.
Passos para Adicionar uma Marca d'Água Predefinida ao Seu Documento
-
Abra seu documento no Microsoft Word.
-
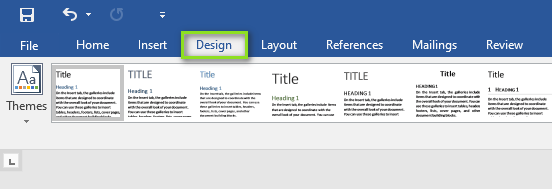
Vá para a guia Design na barra de menus.
-
No lado direito, clique em Marca d'Água no grupo Plano de Fundo da Página.
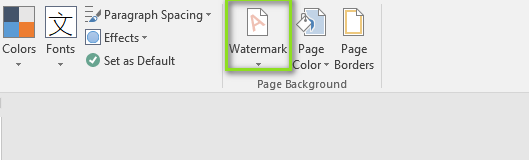
-
Na caixa de diálogo aberta, selecione uma marca d'água predefinida de acordo com sua necessidade (por exemplo, "Confidencial", "Não Copiar", “Amostra”).
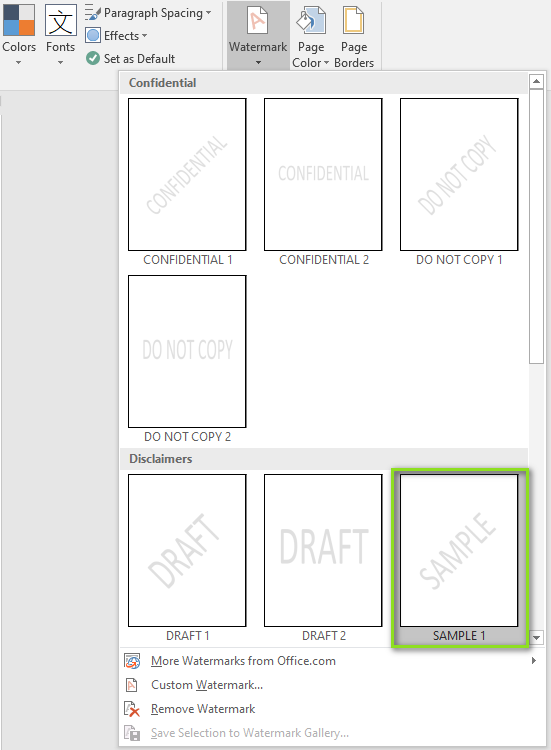
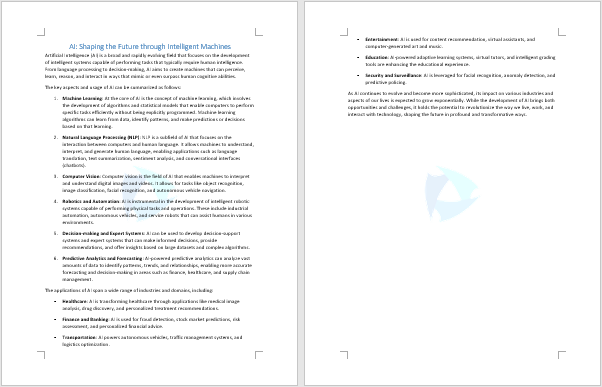
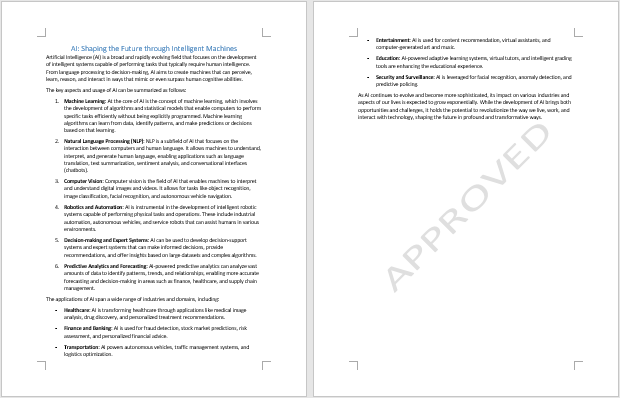
Resultado:
A marca d'água selecionada é aplicada automaticamente a todas as páginas do documento.
Criar uma Marca d'Água de Texto ou Imagem Personalizada no Word
Se você sentir que as opções predefinidas não atendem às suas necessidades, pode criar uma marca d'água personalizada usando texto ou uma imagem.
Passos para Adicionar uma Marca d'Água Personalizada ao Seu Documento
-
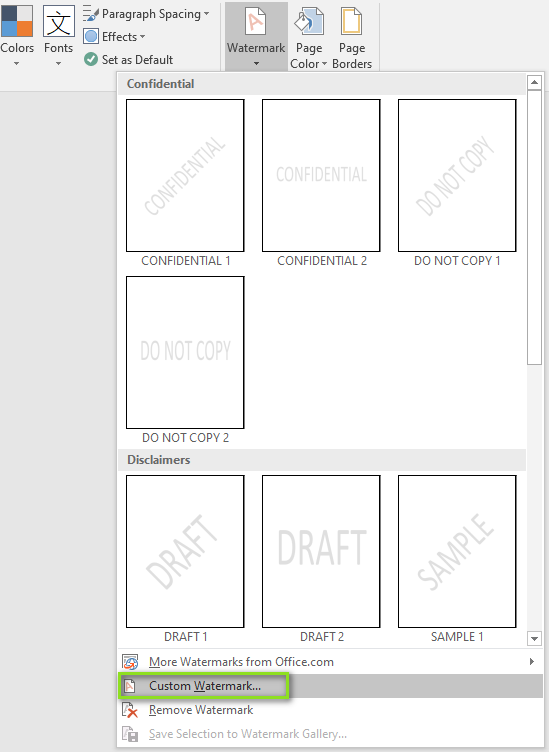
Na barra de menus, clique em Design > Marca d'Água > Marca d'Água Personalizada.
-
Na caixa de diálogo Marca d'Água Impressa aberta:
- Selecione Marca d'água de texto:
-
Digite seu texto (por exemplo, "Apenas para Uso Interno")
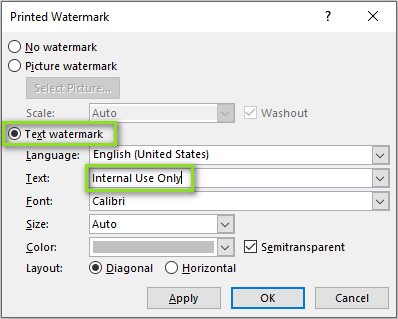
- Escolha fonte, tamanho, cor e layout (horizontal ou diagonal)
-
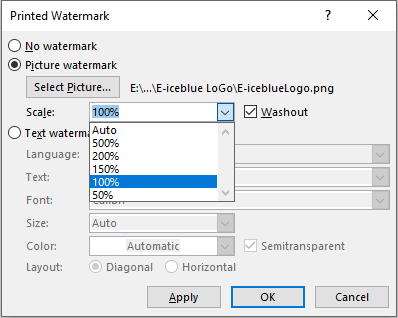
- Ou selecione Marca d'água de imagem:
- Clique em Selecionar Imagem… para procurar e inserir uma imagem (por exemplo, logo da empresa).

- Defina a Escala e habilite Desbotar para um efeito transparente
- Clique em Selecionar Imagem… para procurar e inserir uma imagem (por exemplo, logo da empresa).
- Selecione Marca d'água de texto:
-
Clique em Aplicar e, em seguida, em OK.
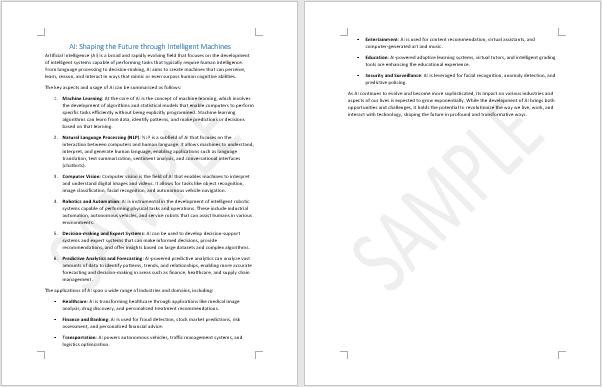
Resultado:
A marca d'água de imagem é adicionada automaticamente a todas as páginas do documento.
Dica: Usar uma marca d'água transparente melhora o documento sem interferir na sua legibilidade.
Aplicar uma Marca d'Água a Apenas Uma Página no Word
Por padrão, o Word aplica a marca d'água a todo o documento. Se você deseja aplicar a marca d'água apenas a uma página específica, siga os passos abaixo.
Passos para Adicionar uma Marca d'Água a Apenas Uma Página
-
Clique na página onde você deseja adicionar a marca d'água.
-
Na barra de menus, clique em Design > Marca d'Água.
-
Na caixa de diálogo aberta, clique com o botão direito em uma das marcas d'água predefinidas e selecione Inserir na Posição Atual do Documento.
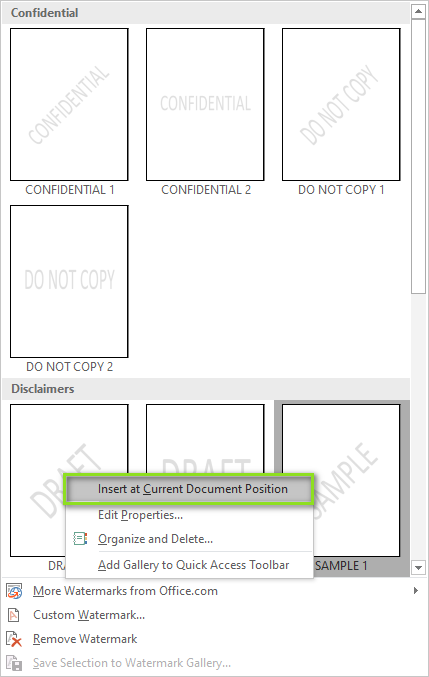
-
A marca d'água será inserida como uma caixa de texto na página selecionada. Se o conteúdo da marca d'água não for o que você deseja, clique na marca d'água para ativar a caixa de texto.

-
Clique no texto na caixa de texto e altere-o para o conteúdo da marca d'água desejado.

-
Clique em qualquer lugar fora da caixa de texto para aplicar a alteração.
Resultado:
Agora você tem uma marca d'água que aparece apenas na página selecionada, sem afetar o resto do documento.
Parte 2: Como Adicionar Marcas d'Água ao Word Programaticamente Usando C# e Spire.Doc
Ao automatizar a geração de documentos ou o processamento em lote de arquivos do Word, o Spire.Doc for .NET oferece uma maneira simples de adicionar marcas d'água programaticamente.
Começando com o Spire.Doc
Spire.Doc for .NET é uma biblioteca amigável ao desenvolvedor que simplifica o processo de geração e manipulação de documentos do Word. Ela permite que os desenvolvedores adicionem programaticamente marcas d'água de texto e imagem a documentos .doc ou .docx sem a necessidade de instalar o Microsoft Word.
Instale o Spire.Doc via NuGet
Você pode instalar facilmente a biblioteca necessária a partir do NuGet abrindo o Console do Gerenciador de Pacotes e executando o seguinte comando:
Install-Package Spire.Doc
Uma vez instalado, você estará pronto para adicionar marcas d'água aos seus documentos sem problemas.
Adicionar uma Marca d'Água de Texto ao Word em C#
Para adicionar uma marca d'água de texto a um documento do Word com C#, siga os passos abaixo:
Passo 1: Importar Namespaces Necessários
Certifique-se de incluir os namespaces necessários para trabalhar com documentos e formatação:
using Spire.Doc;
using Spire.Doc.Documents;
using System.Drawing;
Passo 2: Carregar o Documento do Word
Crie um objeto Document e carregue o arquivo do Word que você deseja marcar com água:
Document document = new Document();
document.LoadFromFile("input.docx");
Passo 3: Criar e Configurar a Marca d'Água de Texto
Crie uma instância de TextWatermark e personalize o conteúdo e a aparência da marca d'água:
TextWatermark watermark = new TextWatermark();
watermark.Text = "NÃO COPIAR"; // Texto da marca d'água
watermark.FontSize = 50; // Tamanho do texto
watermark.Color = Color.Blue; // Cor da marca d'água
watermark.Layout = WatermarkLayout.Diagonal; // Layout: Diagonal ou Horizontal
Passo 4: Aplicar a Marca d'Água e Salvar o Documento
Atribua a marca d'água ao documento e salve-o em um novo arquivo:
document.Watermark = watermark;
document.SaveToFile("output_with_text_watermark.docx", FileFormat.Docx);
Código Completo: Inserir Marca d'Água de Texto no Word em C#
using Spire.Doc;
using Spire.Doc.Documents;
using System.Drawing;

namespace TextWatermarkExample
{
    class Program
    {
        static void Main(string[] args)
        {
            // Passo 1: Carregar o documento do Word
            Document document = new Document();
            document.LoadFromFile("input.docx");

            // Passo 2: Criar e configurar a marca d'água de texto
            TextWatermark watermark = new TextWatermark();
            watermark.Text = "NÃO COPIAR";
            watermark.FontSize = 50;
            watermark.Color = Color.Blue;
            watermark.Layout = WatermarkLayout.Diagonal;

            // Passo 3: Aplicar a marca d'água e salvar o documento
            document.Watermark = watermark;
            document.SaveToFile("output_with_text_watermark.docx", FileFormat.Docx);
        }
    }
}
Adicionar uma Marca d'Água de Imagem ao Word em C#
Para inserir uma marca d'água de imagem usando C#, siga os passos abaixo:
Passo 1: Importar Namespaces Necessários
Adicione estes no topo do seu arquivo C# para habilitar o manuseio de documentos e imagens:
using Spire.Doc;
using System.Drawing;
Passo 2: Carregar o Documento do Word
Crie um objeto Document e carregue seu arquivo do Word de origem:
Document document = new Document();
document.LoadFromFile("input.docx");
Passo 3: Criar e Configurar a Marca d'Água de Imagem
Instancie um PictureWatermark, carregue a imagem, defina a escala e habilite o desbotamento:
PictureWatermark watermark = new PictureWatermark();
watermark.Picture = Image.FromFile("logo.png"); // Sua imagem de marca d'água
watermark.Scaling = 150; // Definir escala da imagem (porcentagem)
watermark.IsWashout = true; // Habilitar desbotamento
Passo 4: Aplicar a Marca d'Água e Salvar o Arquivo
Atribua a marca d'água ao documento e salve-o:
document.Watermark = watermark;
document.SaveToFile("output_with_image_watermark.docx", FileFormat.Docx);
Código Completo: Inserir Marca d'Água de Imagem no Word em C#
using Spire.Doc;
using System.Drawing;

namespace ImageWatermarkExample
{
    class Program
    {
        static void Main(string[] args)
        {
            // Passo 1: Carregar o documento do Word
            Document document = new Document();
            document.LoadFromFile("input.docx");

            // Passo 2: Criar e configurar a marca d'água de imagem
            PictureWatermark watermark = new PictureWatermark();
            watermark.Picture = Image.FromFile("logo.png");
            watermark.Scaling = 150;
            watermark.IsWashout = true;

            // Passo 3: Aplicar a marca d'água e salvar o documento
            document.Watermark = watermark;
            document.SaveToFile("output_with_image_watermark.docx", FileFormat.Docx);
        }
    }
}
Considerações Finais sobre Adicionar Marcas d'Água no Word
Adicionar marcas d'água a documentos do Word ajuda a proteger conteúdo sensível, indicar o status do documento e aprimorar a identidade da marca. Dependendo de suas necessidades, você pode escolher entre:
- Usar o Microsoft Word:
- Inserir marcas d'água de texto/imagem integradas ou personalizadas
- Aplicar marcas d'água a todas as páginas ou seções específicas manualmente
- Automatizar com C# e Spire.Doc for .NET:
- Adicionar programaticamente marcas d'água de texto ou imagem a arquivos do Word
- Ideal para processamento em lote ou geração automatizada de documentos
Perguntas Frequentes (FAQs)
Q1: Posso remover a marca d'água do documento mais tarde?
A1: Sim. No Word, vá para Design > Marca d'Água > Remover Marca d'Água. Em C# e Spire.Doc, defina document.Watermark = null;.
Q2: As marcas d'água serão impressas com o documento?
A2: Sim, as marcas d'água aparecem tanto na tela quanto nas impressões.
Q3: Quais formatos do Word são suportados pelo Spire.Doc?
A3: O Spire.Doc suporta uma vasta gama de formatos de documentos do Word, incluindo Doc, Docx, Docm, Dot, Dotx, Dotm e mais.
Veja Também
Come aggiungere filigrane in Word (guida manuale e automatizzata con C#)
Indice
- Cos'è una filigrana in Microsoft Word?
- Vantaggi dell'uso delle filigrane nei documenti di Word
- Parte 1: Come aggiungere filigrane in Word manualmente (Guida passo-passo)
- Parte 2: Come aggiungere filigrane a Word programmaticamente usando C# e Spire.Doc
- Considerazioni finali sull'aggiunta di filigrane in Word
- Domande Frequenti (FAQ)
Installa con Nuget
PM> Install-Package Spire.Doc
Link correlati
Se hai bisogno di etichettare i tuoi documenti di Word come "Riservato", "Bozza" o di applicare un marchio personalizzato, l'aggiunta di una filigrana è una delle soluzioni più efficaci. Aiuta a proteggere i contenuti sensibili, a indicare lo stato del documento e a rafforzare l'identità del marchio, il tutto mantenendo un aspetto pulito e professionale. Che tu stia lavorando a rapporti aziendali, memo interni o materiali di marketing, le filigrane possono scoraggiare la condivisione non autorizzata e comunicare chiaramente lo scopo del tuo documento.
In questa guida passo-passo, imparerai due modi pratici per aggiungere filigrane ai documenti di Word: manualmente utilizzando gli strumenti di filigrana integrati di Microsoft Word, e programmaticamente tramite l'automazione in C# con la libreria Spire.Doc for .NET. Indipendentemente dal tuo flusso di lavoro - manuale o automatizzato - scoprirai tecniche efficienti per inserire filigrane di testo o di immagine che migliorano e proteggono i tuoi file di Word.
Cosa imparerai
- Cos'è una filigrana in Microsoft Word?
- Vantaggi dell'uso delle filigrane nei documenti di Word
- Parte 1: Come aggiungere filigrane in Word manualmente (Guida passo-passo)
- Parte 2: Come aggiungere filigrane a Word programmaticamente usando C# e Spire.Doc
- Considerazioni finali sull'aggiunta di filigrane in Word
- Domande Frequenti (FAQ)
Cos'è una filigrana in Microsoft Word?
Una filigrana in Word è un disegno, un testo o un'immagine semitrasparente che appare dietro il contenuto principale di una pagina del documento. Non interferisce con il contenuto stesso, ma rimane visibile ai lettori.
I tipi comuni di filigrana includono:
- Filigrane di testo: "Riservato", "Bozza", "Esempio", ecc.
- Filigrane di immagine: Loghi aziendali o immagini di sfondo
- Filigrane personalizzate: Elementi di branding o identificatori unici
Vantaggi dell'uso delle filigrane nei documenti di Word
Le filigrane servono a diversi scopi importanti:
- Proteggere i contenuti sensibili contrassegnando chiaramente i documenti come riservati
- Indicare lo stato del documento, come bozza, in revisione o finale
- Marchiare i documenti con loghi o nomi aziendali
- Scoraggiare la distribuzione non autorizzata o l'uso improprio
Parte 1: Come aggiungere filigrane in Word manualmente (Guida passo-passo)
Microsoft Word semplifica l'aggiunta di filigrane, sia che si utilizzi un'opzione integrata sia che se ne crei una personalizzata. Puoi scegliere tra una serie di filigrane predefinite come “Riservato” o “Bozza”, oppure creare filigrane di testo e immagine personalizzate per allinearle allo scopo e al marchio del tuo documento.
Inserire una filigrana predefinita in Word
Microsoft Word include diversi modelli di filigrana pronti all'uso per i casi d'uso più comuni, come contrassegnare un documento come riservato o come bozza.
Passaggi per aggiungere una filigrana predefinita al tuo documento
-
Apri il tuo documento in Microsoft Word.
-
Vai alla scheda Progettazione sulla barra dei menu.
-
Sul lato destro, fai clic su Filigrana nel gruppo Sfondo pagina.
-
Nella finestra di dialogo aperta, seleziona una filigrana predefinita in base alle tue esigenze (ad es. "Riservato", "Non copiare", “Esempio”).
Risultato:
La filigrana selezionata viene applicata automaticamente a tutte le pagine del documento.
Creare una filigrana di testo o immagine personalizzata in Word
Se ritieni che le opzioni predefinite non soddisfino le tue esigenze, puoi creare una filigrana personalizzata utilizzando testo o un'immagine.
Passaggi per aggiungere una filigrana personalizzata al tuo documento
-
Sulla barra dei menu, fai clic su Progettazione > Filigrana > Filigrana personalizzata.
-
Nella finestra di dialogo Filigrana stampata aperta:
- Seleziona Filigrana testo:
-
Inserisci il tuo testo (ad es. "Solo per uso interno")
- Scegli carattere, dimensione, colore e layout (orizzontale o diagonale)
-
- Oppure seleziona Filigrana immagine:
- Fai clic su Seleziona immagine… per sfogliare e inserire un'immagine (ad es. il logo aziendale).
- Imposta Scala e abilita Sbiadisci per un effetto trasparente
- Fai clic su Seleziona immagine… per sfogliare e inserire un'immagine (ad es. il logo aziendale).
- Seleziona Filigrana testo:
-
Fai clic su Applica, quindi su OK.
Risultato:
La filigrana dell'immagine viene aggiunta automaticamente a tutte le pagine del documento.
Suggerimento: l'uso di una filigrana trasparente migliora il documento senza interferire con la sua leggibilità.
Applicare una filigrana a una sola pagina in Word
Per impostazione predefinita, Word applica la filigrana all'intero documento. Se desideri applicare la filigrana solo a una pagina specifica, segui i passaggi seguenti.
Passaggi per aggiungere una filigrana a una sola pagina
-
Fai clic sulla pagina in cui desideri aggiungere la filigrana.
-
Sulla barra dei menu, fai clic su Progettazione > Filigrana.
-
Nella finestra di dialogo aperta, fai clic con il pulsante destro del mouse su una delle filigrane predefinite e seleziona Inserisci nella posizione corrente del documento.
-
La filigrana verrà inserita come casella di testo nella pagina selezionata. Se il contenuto della filigrana non è quello desiderato, fai clic sulla filigrana per attivare la casella di testo.
-
Fai clic sul testo nella casella di testo e modificalo con il contenuto della filigrana desiderato.
-
Fai clic in un punto qualsiasi al di fuori della casella di testo per applicare la modifica.
Risultato:
Ora hai una filigrana che appare solo sulla pagina selezionata senza influire sul resto del documento.
Parte 2: Come aggiungere filigrane a Word programmaticamente usando C# e Spire.Doc
Quando si automatizza la generazione di documenti o l'elaborazione in batch di file di Word, Spire.Doc for .NET offre un modo semplice per aggiungere filigrane a livello di codice.
Introduzione a Spire.Doc
Spire.Doc for .NET è una libreria intuitiva per gli sviluppatori che semplifica il processo di generazione e manipolazione di documenti di Word. Consente agli sviluppatori di aggiungere programmaticamente filigrane di testo e di immagine a documenti .doc o .docx senza richiedere l'installazione di Microsoft Word.
Installa Spire.Doc tramite NuGet
Puoi installare facilmente la libreria richiesta da NuGet aprendo la Console di Gestione Pacchetti ed eseguendo il seguente comando:
Install-Package Spire.Doc
Una volta installato, sarai pronto per aggiungere filigrane ai tuoi documenti senza problemi.
Aggiungere una filigrana di testo a Word in C#
Per aggiungere una filigrana di testo a un documento di Word con C#, segui i passaggi seguenti:
Passaggio 1: Importa gli spazi dei nomi richiesti
Assicurati di includere gli spazi dei nomi necessari per lavorare con documenti e formattazione:
using Spire.Doc;
using Spire.Doc.Documents;
using System.Drawing;
Passaggio 2: Carica il documento di Word
Crea un oggetto Document e carica il file di Word a cui vuoi aggiungere la filigrana:
Document document = new Document();
document.LoadFromFile("input.docx");
Passaggio 3: Crea e configura la filigrana di testo
Crea un'istanza di TextWatermark e personalizza il contenuto e l'aspetto della filigrana:
TextWatermark watermark = new TextWatermark();
watermark.Text = "NON COPIARE"; // Testo della filigrana
watermark.FontSize = 50; // Dimensione del testo
watermark.Color = Color.Blue; // Colore della filigrana
watermark.Layout = WatermarkLayout.Diagonal; // Layout: Diagonale o Orizzontale
Passaggio 4: Applica la filigrana e salva il documento
Assegna la filigrana al documento e salvalo in un nuovo file:
document.Watermark = watermark;
document.SaveToFile("output_with_text_watermark.docx", FileFormat.Docx);
Codice completo: Inserire una filigrana di testo in Word in C#
using Spire.Doc;
using Spire.Doc.Documents;
using System.Drawing;

namespace TextWatermarkExample
{
    class Program
    {
        static void Main(string[] args)
        {
            // Passaggio 1: Carica il documento di Word
            Document document = new Document();
            document.LoadFromFile("input.docx");

            // Passaggio 2: Crea e configura la filigrana di testo
            TextWatermark watermark = new TextWatermark();
            watermark.Text = "NON COPIARE";
            watermark.FontSize = 50;
            watermark.Color = Color.Blue;
            watermark.Layout = WatermarkLayout.Diagonal;

            // Passaggio 3: Applica la filigrana e salva il documento
            document.Watermark = watermark;
            document.SaveToFile("output_with_text_watermark.docx", FileFormat.Docx);
        }
    }
}
Aggiungere una filigrana di immagine a Word in C#
Per inserire una filigrana di immagine usando C#, segui i passaggi seguenti:
Passaggio 1: Importa gli spazi dei nomi richiesti
Aggiungi questi all'inizio del tuo file C# per abilitare la gestione di documenti e immagini:
using Spire.Doc;
using System.Drawing;
Passaggio 2: Carica il documento di Word
Crea un oggetto Document e carica il tuo file di Word di origine:
Document document = new Document();
document.LoadFromFile("input.docx");
Passaggio 3: Crea e configura la filigrana di immagine
Crea un'istanza di PictureWatermark, carica l'immagine, imposta la scala e abilita lo sbiadimento:
PictureWatermark watermark = new PictureWatermark();
watermark.Picture = Image.FromFile("logo.png"); // La tua immagine per la filigrana
watermark.Scaling = 150; // Imposta la scala dell'immagine (percentuale)
watermark.IsWashout = true; // Abilita lo sbiadimento
Passaggio 4: Applica la filigrana e salva il file
Assegna la filigrana al documento e salvalo:
document.Watermark = watermark;
document.SaveToFile("output_with_image_watermark.docx", FileFormat.Docx);
Codice completo: Inserire una filigrana di immagine in Word in C#
using Spire.Doc;
using System.Drawing;

namespace ImageWatermarkExample
{
    class Program
    {
        static void Main(string[] args)
        {
            // Passaggio 1: Carica il documento di Word
            Document document = new Document();
            document.LoadFromFile("input.docx");

            // Passaggio 2: Crea e configura la filigrana di immagine
            PictureWatermark watermark = new PictureWatermark();
            watermark.Picture = Image.FromFile("logo.png");
            watermark.Scaling = 150;
            watermark.IsWashout = true;

            // Passaggio 3: Applica la filigrana e salva il documento
            document.Watermark = watermark;
            document.SaveToFile("output_with_image_watermark.docx", FileFormat.Docx);
        }
    }
}
Considerazioni finali sull'aggiunta di filigrane in Word
L'aggiunta di filigrane ai documenti di Word aiuta a proteggere i contenuti sensibili, a indicare lo stato del documento e a rafforzare l'identità del marchio. A seconda delle tue esigenze, puoi scegliere tra:
- Utilizzo di Microsoft Word:
- Inserire filigrane di testo/immagine integrate o personalizzate
- Applicare filigrane a tutte le pagine o a sezioni specifiche manualmente
- Automazione con C# e Spire.Doc for .NET:
- Aggiungere programmaticamente filigrane di testo o di immagine ai file di Word
- Ideale per l'elaborazione in batch o la generazione automatizzata di documenti
Domande Frequenti (FAQ)
D1: Posso rimuovere la filigrana dal documento in un secondo momento?
R1: Sì. In Word, vai su Progettazione > Filigrana > Rimuovi filigrana. In C# e Spire.Doc, imposta document.Watermark = null;.
D2: Le filigrane verranno stampate con il documento?
R2: Sì, le filigrane appaiono sia sullo schermo che nelle stampe.
D3: Quali formati di Word sono supportati da Spire.Doc?
R3: Spire.Doc supporta un'ampia gamma di formati di documenti di Word, tra cui Doc, Docx, Docm, Dot, Dotx, Dotm e altri.