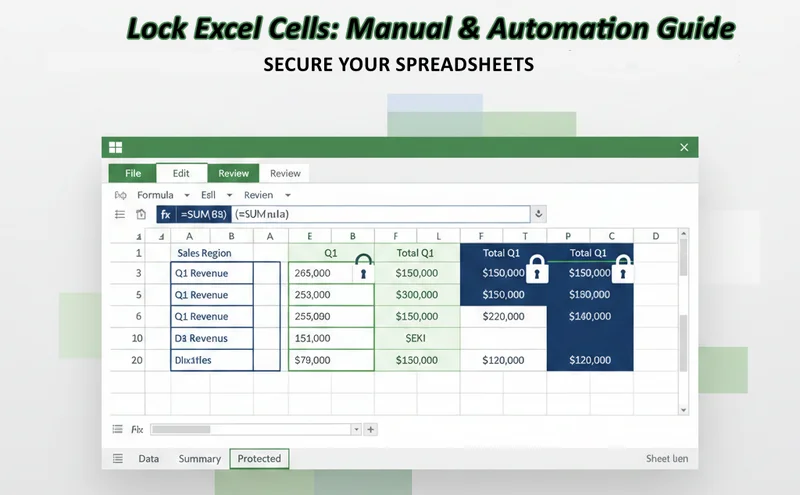
Protecting your data from accidental changes is a fundamental skill for anyone managing sensitive information. Whether you are building a financial model or a shared tracking sheet, knowing how to lock Excel cells ensures that your core data and complex calculations remain intact. This guide will walk you through the standard manual methods and advanced Python techniques to secure your spreadsheets effectively, helping you understand how to lock a cell in Excel with precision.
- Locking Cells in MS Excel
- Locking Cells in Excel via Spire.XLS for Python
- Lock Cells with Formula with Spire.XLS
- Troubleshooting & Tips
1. The Manual Method: Locking Cells in MS Excel
For most daily tasks, the built-in interface in Microsoft Excel is the quickest way to safeguard your work. It is designed for accessibility, allowing users to toggle protection settings through a few clicks in the ribbon. Understanding the workflow is essential, as it establishes the core logic of Excel's security layers.
1.1 Lock All Cells in a Worksheet
By default, every cell in an Excel sheet is technically marked as "Locked," but this property remains dormant until worksheet protection is activated. This global approach is ideal for creating read-only distributions where no data should be modified. To apply a total lock, follow these steps:
-
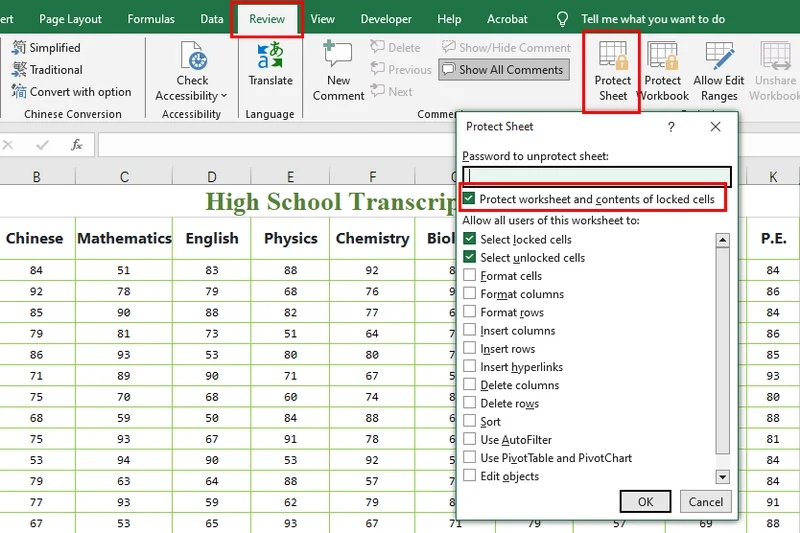
Open your Excel workbook and navigate to the Review tab on the top ribbon.
-
Click the Protect Sheet button.
-
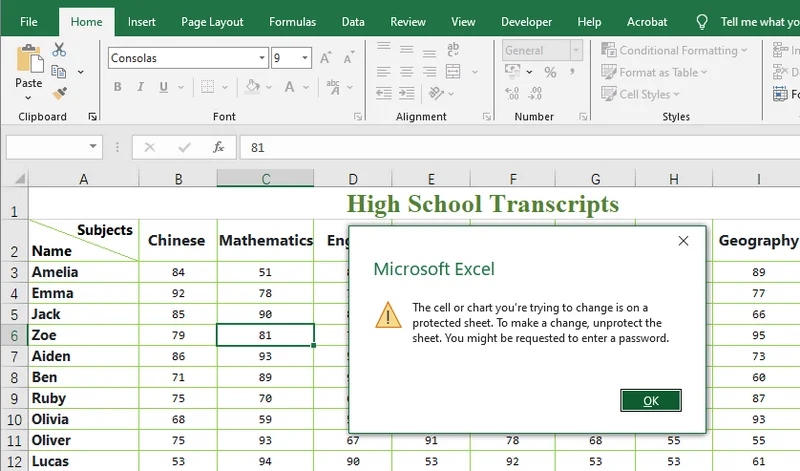
In the pop-up window, enter an optional password and ensure the box "Protect worksheet and contents of locked cells" is checked.
- Click OK and confirm your password. This is the simplest way when you want to lock a cell in Excel for a secure, final document.
1.2 How to Lock Certain Cells in Excel
In many professional scenarios, you need users to enter data in specific cells while keeping headers and core values protected. This requires reversing the default settings so that only a chosen selection remains restricted. This selective approach is the most common answer to locking certain cells in Excel without hindering user collaboration:
-
Select the entire worksheet (click the triangle in the top-left corner or press Ctrl + A).
-
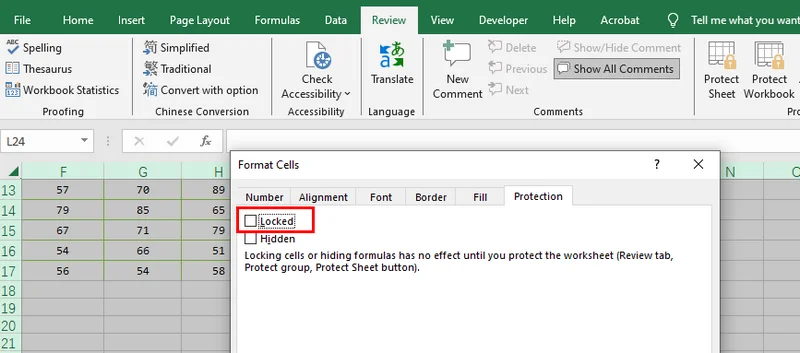
Right-click any cell, select Format Cells, go to the Protection tab, and uncheck Locked. (All cells are now editable).
-
Highlight only the specific cells or ranges you wish to protect.
-
Right-click the selection, return to Format Cells > Protection, and check the Locked box.
-
Go to the Review tab and click Protect Sheet to activate these restrictions.
1.3 How to Lock the Cell in Excel with Formula
Formulas are the brain of your spreadsheet. After you insert formulas into Excel, protecting them from accidental overwrites becomes essential for maintaining long-term accuracy. Instead of checking for every calculation manually, Excel offers a specialized tool to identify them instantly. To lock the cell in Excel with a formula ensures your logic remains tamper-proof:
-
Select all cells in your worksheet, go to Format Cells > Protection, and uncheck Locked so the sheet starts as fully editable.
-
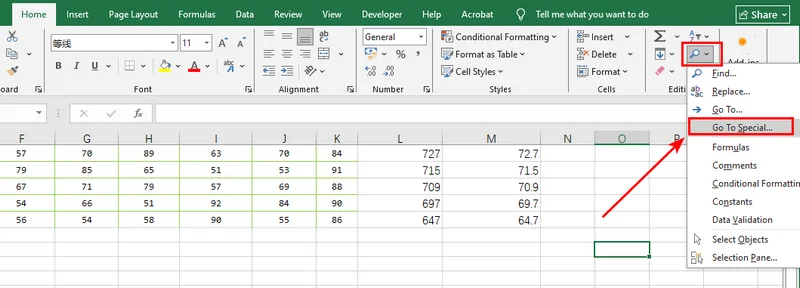
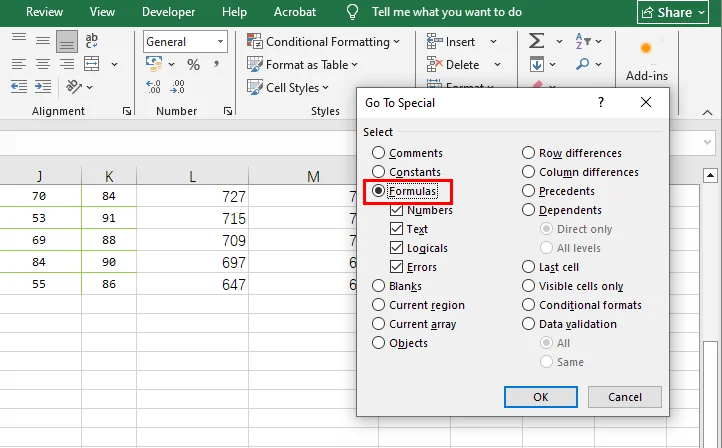
On the Home tab, click Find & Select in the Editing group and choose Go To Special.
- Select the Formulas radio button and click OK; Excel will automatically highlight every cell containing a calculation.
-
With the formulas still highlighted, right-click one of them, choose Format Cells, and check the Locked box.
-
Finally, navigate to the Review tab and select Protect Sheet to lock down your calculations while leaving raw data cells open for input.
2. Locking Cells in Excel via Free Spire.XLS for Python
Manual clicking quickly becomes a liability when managing hundreds of files or dynamic reports. By using a Python library like Free Spire.XLS, you can implement robust protection using either specific coordinates or the allocated range to target only cells containing actual content. This programmatic approach is perfect for developers who need to enforce data integrity across massive datasets. To achieve a professional lock of certain cells in Excel automatically, you can utilize the following script, which offers the flexibility to protect specific coordinates or the entire used area via simple comment toggles:
from spire.xls import *
from spire.xls.common import *

# Specify the file path
inputFile = "/input/sample.xlsx"
outputFile = "/output/LockAllUsedCells.xlsx"

# Create a Workbook instance and load the file
workbook = Workbook()
workbook.LoadFromFile(inputFile)

# Get the first worksheet
sheet = workbook.Worksheets[0]

# Use AllocatedRange to get all cells that contain data or formatting
usedRange = sheet.AllocatedRange

# Lock a specific cell in the sheet
#sheet.Range["A1"].Text = "Locked"
#sheet.Range["A1"].Style.Locked = True

# Lock a specific range of cells in the sheet
#sheet.Range["C1:E3"].Text = "Locked"
#sheet.Range["C1:E3"].Style.Locked = True

# Set the range to locked
usedRange.Style.Locked = True

# Set sheet protection for locking
sheet.Protect("123456", SheetProtectionType.All)

# Save the result file
workbook.SaveToFile(outputFile, ExcelVersion.Version2013)
workbook.Dispose()
The preview of the Excel file modified with Free Spire.XLS for Python:
3. How to Lock a Cell in Excel with Formula Using Free Spire.XLS
Static ranges are easy to protect, but relying on fixed addresses can lead to security gaps if your data structure evolves or expands. The most efficient solution is to programmatically scan the workbook using the HasFormula property, which identifies calculations regardless of their position.
This API-driven approach effectively replicates the manual "Go To Special" feature with speed and repeatability, offering a professional way to lock cells in Excel with a formula. To implement this dynamic protection, you can use the following script to iterate through the used area and secure every formula automatically:
from spire.xls import *
from spire.xls.common import *

# Define input and output paths
inputFile = "/input/sample.xlsx"
outputFile = "/output/LockFormulaCells.xlsx"

# Create a Workbook instance and load the file
workbook = Workbook()
workbook.LoadFromFile(inputFile)

# Get the first worksheet
sheet = workbook.Worksheets[0]

# Iterate through all used cells in the worksheet
for cell in sheet.AllocatedRange:
    # Check if the cell contains a formula
    if cell.HasFormula:
        # Lock the cell if it contains a formula
        cell.Style.Locked = True
    else:
        # Unlock the cell if it's just data, so users can still edit it
        cell.Style.Locked = False

# Apply protection with a password to make the locking effective
sheet.Protect("123456", SheetProtectionType.All)

# Save the result file
workbook.SaveToFile(outputFile, ExcelVersion.Version2013)
workbook.Dispose()
4. Troubleshooting & Tips
To ensure your protection works flawlessly, keep these essential tips in mind for both manual and programmatic methods:
Common Pitfalls in MS Excel
-
The "Two-Step" Rule: To activate protection, always perform both: (1) Check the "Locked" box in Format Cells and (2) Click "Protect Sheet" in the Review tab.
-
Default Locking: Remember that Excel locks all cells by default. If you want to lock only a few, you must first select the whole sheet and uncheck "Locked" before targeting your specific cells.
-
Overlapping Permissions: If you allow "Select locked cells" in the Protection menu, users can still click them, which sometimes leads to confusion about whether the lock is active.
Performance & Logic in Python
-
Activation: Just like the manual method,
Style.Locked = Trueonly flags a cell. You must callWorksheet.Protect()in your code to turn the key. -
Optimization: Use
Worksheet.AllocatedRangeto ensure your script only processes cells that actually contain data.
Password Security
-
Unlocking Difficulty: Free Spire.XLS and Excel use strong encryption. If you set a password, store it safely; recovering a protected sheet without it is nearly impossible.
-
Read-Only vs. Locked: Locking cells prevents editing, but if you need to hide formulas entirely, remember to check the "Hidden" box in the "Format Cells" menu as well.
Conclusion
Mastering how to lock Excel cells is a vital step in maintaining the security and professionalism of your digital workspace. Whether you prefer the visual simplicity of the MS Excel ribbon for one-off tasks or the scalable power of Free Spire.XLS for Python automation, the core principles remain the same: unlock your inputs, lock your logic, and always enable sheet protection. If you are ready to streamline your data management, start by applying these protection strategies to your most critical workbooks today.