
Java (485)
We have already demonstrated how to protect the Excel file in Java; this article will show you how to unprotect the Excel workbook or a single worksheet in Java applications.
Unprotect the Excel workbook:
import com.spire.xls.*;

public class UnprotectExcel {
    public static void main(String[] args) {

        //Create a workbook
        Workbook workbook = new Workbook();

        //Use the password to open the sample document
        workbook.setOpenPassword("E-iceblue");
        workbook.loadFromFile("ProtectWorkbook.xlsx");

        //Unprotect the whole workbook
        workbook.unProtect();

        //Save the document to file
        workbook.saveToFile("UnprotectWb.xlsx");
        workbook.dispose();
    }
}
Unprotect a single Excel worksheet:
import com.spire.xls.*;

public class UnprotectExcel {
    public static void main(String[] args) {

        //Create a workbook and load a sample file with protected worksheet
        Workbook workbook = new Workbook();
        workbook.loadFromFile("ProtectWS.xlsx");

        //Get the first worksheet
        Worksheet sheet = workbook.getWorksheets().get(0);

        //Unprotect the first worksheet
        sheet.unprotect("iceblue");

        //Save the document to file
        workbook.saveToFile("Unprotectworksheet.xlsx");
        workbook.dispose();
    }
}
As you create or review a worksheet, you may want to change the font style in some cells to make them stand out. For example, you can apply a different font type, font color, and font size to text, as well as make text bold. In this article, you will learn how to apply font styles to Excel cells using Spire.XLS for Java.
Install Spire.XLS for Java
First of all, you’re required to add the Spire.Xls.jar file as a dependency in your Java program. The JAR file can be downloaded from this link. If you use Maven, you can easily import the JAR file in your application by adding the following code to your project's pom.xml file.
<repositories>
    <repository>
        <id>com.e-iceblue</id>
        <name>e-iceblue</name>
        <url>https://repo.e-iceblue.com/nexus/content/groups/public/</url>
    </repository>
</repositories>
<dependencies>
    <dependency>
        <groupId>e-iceblue</groupId>
        <artifactId>spire.xls</artifactId>
        <version>16.6.5</version>
    </dependency>
</dependencies>
Apply Different Fonts to Different Cells
Spire.XLS provides the ExcelFont class which you can use to set or change the font name, color, size, and style in a cell easily. The following are the steps to apply a font style to a specific cell using Spire.XLS for Java.
- Create a Workbook object.
- Get a specific worksheet using Workbook.getWorksheets().get() method.
- Get a specific cell using Worksheet.getCellRange() method.
- Set the value of the cell using CellRange.setText() method.
- Set the font name, color, size and style of the cell value using setFontName(), setFontColor(), setFontSize(), isBlod() methods under the ExcelFont object.
- Save the workbook to an Excel file using Workbook.saveToFile() method.
- Java
import com.spire.xls.ExcelVersion;
import com.spire.xls.FontUnderlineType;
import com.spire.xls.Workbook;
import com.spire.xls.Worksheet;
import java.awt.*;
public class ApplyFontToCell {
public static void main(String[] args) {
//Create a workbook
Workbook workbook = new Workbook();
//Get the first sheet
Worksheet sheet = workbook.getWorksheets().get(0);
//Set font name
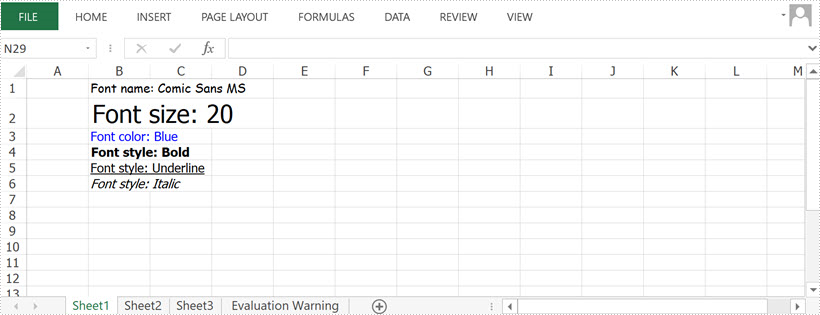
sheet.getCellRange("B1").setText("Font name: Comic Sans MS");
sheet.getCellRange("B1").getCellStyle().getExcelFont().setFontName("Comic Sans MS");
//Set font size
sheet.getCellRange("B2").setText("Font size: 20");
sheet.getCellRange("B2").getCellStyle().getExcelFont().setSize(20);
//Set font color
sheet.getCellRange("B3").setText("Font color: Blue");
sheet.getCellRange("B3").getCellStyle().getExcelFont().setColor(Color.blue);
//Make text bold
sheet.getCellRange("B4").setText("Font style: Bold");
sheet.getCellRange("B4").getCellStyle().getExcelFont().isBold(true);
//Make text italic
sheet.getCellRange("B5").setText("Font style: Italic");
sheet.getCellRange("B5").getCellStyle().getExcelFont().isItalic(true);
//Underline text
sheet.getCellRange("B6").setText("Font style: Underline");
sheet.getCellRange("B6").getCellStyle().getExcelFont().setUnderline(FontUnderlineType.Single);
//Strikethrough text
sheet.getCellRange("B7").setText("Font style: Strikethrough");
sheet.getCellRange("B7").getCellStyle().getExcelFont().isStrikethrough(true);
//Save the result file
workbook.saveToFile("output/ApplyFontToCell.xlsx", ExcelVersion.Version2016);
}
}
Apply Multiple Fonts to a Single Cell
Mixing different font styles can help you emphasize some specific characters in a cell. The following are the steps to apply multiple fonts in a cell using Spire.XLS for Java.
- Create a Workbook object.
- Get a specific worksheet using Workbook.getWorksheets().get() method.
- Create two ExcelFont objects using Workbook.createFont() method.
- Get a specific cell using Worksheet.getCellRange() method, and set the rich text content of the cell using CellRange.getRichText().setText() method.
- Apply the two ExcelFont objects to the rich text using RichText.setFont() method.
- Save the workbook to an Excel file using Workbook.saveToFile() method.
- Java
import com.spire.xls.*;

import java.awt.*;

public class ApplyMultipleFontsToCell {

    public static void main(String[] args) {

        //Create a Workbook instance
        Workbook wb = new Workbook();

        //Get the first worksheet
        Worksheet sheet = wb.getWorksheets().get(0);

        //Create one Excel font
        ExcelFont font1 = wb.createFont();
        font1.setFontName("Arial Black");
        font1.setColor(Color.blue);
        font1.setSize(13f);
        font1.isBold(true);

        //Create another Excel font
        ExcelFont font2 = wb.createFont();
        font2.setFontName("Algerian");
        font2.setColor(Color.red);
        font2.setSize(15f);
        font2.isBold(true);
        font2.isItalic(true);

        //Insert text to cell B5
        RichText richText = sheet.getCellRange("B5").getRichText();
        richText.setText("Buy One, Get One Free");

        //Apply two fonts to the text in the cell B5
        richText.setFont(0, 8, font1);
        richText.setFont(9, 21, font2);

        //Save the document
        wb.saveToFile("output/ApplyMultipleFontsToCell.xlsx", ExcelVersion.Version2016);
    }
}

Apply for a Temporary License
If you'd like to remove the evaluation message from the generated documents, or to get rid of the function limitations, please request a 30-day trial license for yourself.
Images are universally supported and can be seamlessly embedded and displayed in a variety of web platforms and documents. When you intend to publish Excel charts on websites or include them in videos or presentations, converting them to images is a practical option. By doing so, you can eliminate any potential compatibility issues and ensure that these charts are accessible to a wider audience. In this article, we will demonstrate how to convert Excel charts to images in Java using Spire.XLS for Java.
- Convert a Specific Chart in an Excel Worksheet to an Image in Java
- Convert All Charts in an Excel Worksheet to Images in Java
- Convert a Chart Sheet to an Image in Excel in Java
Install Spire.XLS for Java
First of all, you're required to add the Spire.Xls.jar file as a dependency in your Java program. The JAR file can be downloaded from this link. If you use Maven, you can easily import the JAR file in your application by adding the following code to your project's pom.xml file.
<repositories>
    <repository>
        <id>com.e-iceblue</id>
        <name>e-iceblue</name>
        <url>https://repo.e-iceblue.com/nexus/content/groups/public/</url>
    </repository>
</repositories>
<dependencies>
    <dependency>
        <groupId>e-iceblue</groupId>
        <artifactId>spire.xls</artifactId>
        <version>16.6.5</version>
    </dependency>
</dependencies>
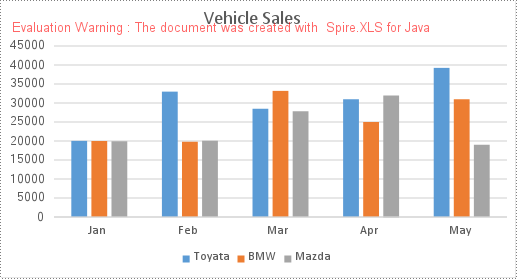
Convert a Specific Chart in an Excel Worksheet to an Image in Java
Spire.XLS for Java provides the Workbook.saveChartAsImage(Worksheet worksheet, int chartIndex) method to convert a specific chart in a worksheet as an image. The following are the detailed steps:
- Initialize an instance of the Workbook class.
- Load a sample Excel file using Workbook.loadFromFile() method.
- Get a specific worksheet by its index using Workbook.getWorksheets().get(int index) method.
- Save a specific chart in the worksheet as an image using Workbook.saveChartAsImage(Worksheet worksheet, int chartIndex) method.
- Save the image to a PNG file.
- Java
import com.spire.xls.Workbook;
import com.spire.xls.Worksheet;

import javax.imageio.ImageIO;
import java.awt.image.BufferedImage;
import java.io.File;
import java.io.IOException;

public class ConvertAExcelChartToImage {
    public static void main(String[] args) throws IOException {
        //Initialize an instance of the Workbook class
        Workbook workbook = new Workbook();
        //Load a sample Excel file
        workbook.loadFromFile("Charts.xlsx");

        //Get the first worksheet
        Worksheet sheet = workbook.getWorksheets().get(0);

        //Save the first chart in the first worksheet as an image
        BufferedImage image = workbook.saveChartAsImage(sheet, 0);

        //Save the image to a .png file
        ImageIO.write(image, "PNG", new File("output\\chart.png"));

        workbook.dispose();
    }
}
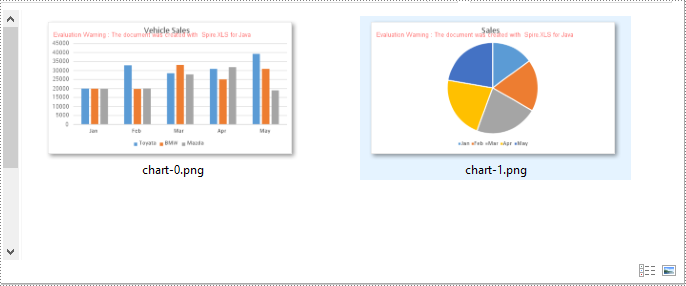
Convert All Charts in an Excel Worksheet to Images in Java
To convert all charts in an Excel worksheet to images, you can use the Workbook.saveChartAsImage(Worksheet worksheet) method. The following are the detailed steps:
- Initialize an instance of the Workbook class.
- Load a sample Excel file using Workbook.loadFromFile() method.
- Get a specific worksheet by its index using Workbook.getWorksheets().get(int index) method.
- Save all charts in the worksheet as images using Workbook.saveChartAsImage(Worksheet worksheet) method.
- Save the images to PNG files.
- Java
import com.spire.xls.Workbook;
import com.spire.xls.Worksheet;

import javax.imageio.ImageIO;
import java.awt.image.BufferedImage;
import java.io.File;
import java.io.IOException;

public class ConvertAllExcelChartsToImage {
    public static void main(String[] args) throws IOException {
        //Initialize an instance of the Workbook class
        Workbook workbook = new Workbook();
        //Load a sample Excel file
        workbook.loadFromFile("Charts.xlsx");

        //Get the first worksheet
        Worksheet sheet = workbook.getWorksheets().get(0);

        //Save all charts in the first worksheet as images
        BufferedImage[] imgs = workbook.saveChartAsImage(sheet);

        //Save the images to .png files
        for (int i = 0; i < imgs.length; i++)
        {
            File file = new File("output\\" + String.format(("chart-%d.png"), i));
            ImageIO.write(imgs[i], "PNG", file);
        }

        workbook.dispose();
    }
}
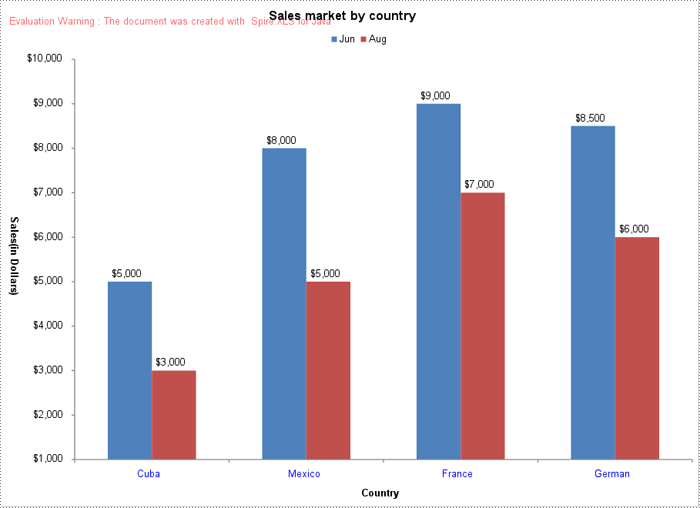
Convert a Chart Sheet to an Image in Excel in Java
A chart sheet in Excel is a separate sheet dedicated solely to displaying a chart. You can use the Workbook.saveChartAsImage(ChartSheet chartSheet) method to convert a chart sheet in an Excel workbook to an image. The following are the detailed steps:
- Initialize an instance of the Workbook class.
- Load a sample Excel file using Workbook.loadFromFile() method.
- Get a specific chart sheet by its index using Workbook.getChartsheets().get(int index) method.
- Save the chart sheet as an image using Workbook.saveChartAsImage(ChartSheet chartSheet) method.
- Save the image to a .png file.
- Java
import com.spire.xls.ChartSheet;
import com.spire.xls.Workbook;

import javax.imageio.ImageIO;
import java.awt.image.BufferedImage;
import java.io.File;
import java.io.IOException;

public class ConvertExcelChartSheetToImage {
    public static void main(String[] args) throws IOException {
        //Initialize an instance of the Workbook class
        Workbook workbook = new Workbook();
        //Load a sample Excel file
        workbook.loadFromFile("ChartSheet.xlsx");

        //Get the first chart sheet
        ChartSheet chartSheet = workbook.getChartsheets().get(0);

        //Save the first chart sheet as an image
        BufferedImage image = workbook.saveChartAsImage(chartSheet);

        //Save the image to a .png file
        ImageIO.write(image, "PNG", new File("output\\chartSheet.png"));

        workbook.dispose();
    }
}
Apply for a Temporary License
If you'd like to remove the evaluation message from the generated documents, or to get rid of the function limitations, please request a 30-day trial license for yourself.
