
Program Guide (137)
Children categories
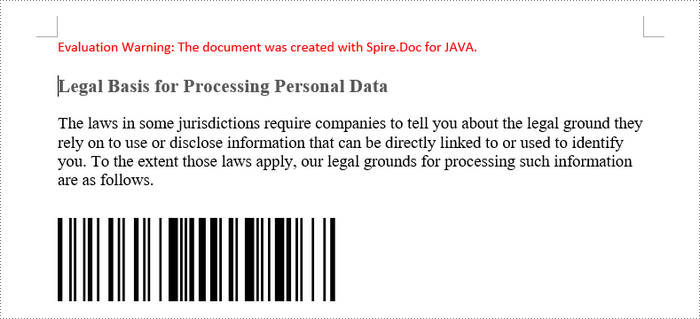
Creating barcodes in a Word document is a powerful way to enhance efficiency and organization. Barcodes streamline data management by enabling quick scanning and tracking, making them invaluable for businesses, events, and personal projects.
This article outlines two methods for generating barcodes in a Word document using Java: one method uses barcode fonts with Spire.Doc for Java, while the other utilizes Spire.Barcode for Java in conjunction with Spire.Doc for Java.
- Create Barcodes in Word Documents Using Barcode Fonts
- Create Barcodes in Word Documents Using Barcode API
Install Spire.Doc for Java
First, you're required to add the Spire.Doc.jar file as a dependency in your Java program. The JAR file can be downloaded from this link. If you use Maven, you can easily import the JAR file in your application by adding the following code to your project's pom.xml file.
<repositories>
    <repository>
        <id>com.e-iceblue</id>
        <name>e-iceblue</name>
        <url>https://repo.e-iceblue.com/nexus/content/groups/public/</url>
    </repository>
</repositories>
<dependencies>
    <dependency>
        <groupId>e-iceblue</groupId>
        <artifactId>spire.doc</artifactId>
        <version>14.7.0</version>
    </dependency>
</dependencies>
Create Barcodes in Word Documents Using Barcode Fonts
A barcode font is a special typeface designed to represent data in a format that can be scanned by barcode readers. Unlike standard fonts that display alphanumeric characters, barcode fonts convert text into a series of lines and spaces that make up a barcode.
To use a barcode font, you typically install the font on your system and then apply it to the text you want to convert into a barcode.
The steps to create barcodes in a Word document using barcode fonts are as follows:
- Download and install the desired barcode font on your computer.
- Create a Document object.
- Load a Word file using Document.loadFromFile() method.
- Get a specific section and add a paragraph using Section.addParagraph() method.
- Add text to the paragraph using Paragraph.appendText() method.
- Apply the barcode font to the text using TextRange.getCharacterFormat().setFontName() method.
- Set the font size and color for the text.
- Save the document to a different Word file.
- Java
import com.spire.doc.Document;
import com.spire.doc.FileFormat;
import com.spire.doc.Section;
import com.spire.doc.documents.Paragraph;
import com.spire.doc.fields.TextRange;

import java.awt.*;

public class CreateBarcodeInWordUsingBarcodeFont {

    public static void main(String[] args) {

        // Create a Document object
        Document document = new Document();

        // Load a Word file
        document.loadFromFile("C:\\Users\\Administrator\\Desktop\\input.docx");

        // Get a specific section
        Section section = document.getSections().get(0);

        // Add a paragraph
        Paragraph paragraph = section.addParagraph();

        // Append text to the paragraph
        TextRange txtRang = paragraph.appendText("Hello,World");

        // Apply barcode font to the text
        txtRang.getCharacterFormat().setFontName("Code 128");

        // Set the font size and text color
        txtRang.getCharacterFormat().setFontSize(80f);
        txtRang.getCharacterFormat().setTextColor(Color.black);

        // Save the document to a different Word file
        document.saveToFile("CreateBarcode.docx", FileFormat.Docx);

        // Dispose resources
        document.dispose();
    }
}
Create Barcodes in Word Documents Using Barcode API
Spire.Barcode for Java is an API that enables you to easily generate barcode images with customizable options, including barcode type, data, size, and color. To use it, you need to download the library and add it as a dependency in your project.
Once the barcode image is created, you can insert it into a Word document using the Paragraph.appendPicture() method provided by Spire.Doc for Java.
The steps to create barcode in a Word document using a Barcode API are as follows:
- Import Spire.Barcode for Java as a dependency in your project.
- Create a BarcodeSettings object.
- Specify the barcode type, data, width and other attributes using the methods under the BarcodeSettings object.
- Generate a barcode image based on the settings using BarCodeGenerator.generateImage() method.
- Create a Document object.
- Load a Word file using Document.loadFromFile() method.
- Get a specific section and add a paragraph using Section.addParagraph() method.
- Add the barcode image to the paragraph using Paragraph.appendPicture() method.
- Save the document to a different Word file.
- Java
import com.spire.barcode.BarCodeGenerator;
import com.spire.barcode.BarCodeType;
import com.spire.barcode.BarcodeSettings;
import com.spire.barcode.QRCodeECL;
import com.spire.doc.Document;
import com.spire.doc.FileFormat;
import com.spire.doc.Section;
import com.spire.doc.documents.Paragraph;

import java.awt.image.BufferedImage;

public class CreateBarcodesInWordUsingAPI {

    public static void main(String[] args) {

        // Create a BarcodeSettings object
        BarcodeSettings settings = new BarcodeSettings();

        // Set barcode type
        settings.setType(BarCodeType.QR_Code);

        // Set barcode data
        settings.setData2D("Hello, World");

        // Set the other attributes of the barcode
        settings.setX(2f);
        settings.setQRCodeECL(QRCodeECL.H);
        settings.setShowText(false);
        settings.setLeftMargin(0f);
        settings.setRightMargin(0f);

        // Create a BarCodeGenerator object
        BarCodeGenerator generator = new BarCodeGenerator(settings);

        // Generate a barcode image
        BufferedImage image = generator.generateImage();

        // Create a Document object
        Document document = new Document();

        // Load a Word file
        document.loadFromFile("C:\\Users\\Administrator\\Desktop\\input.docx");

        // Get a specific section
        Section section = document.getSections().get(0);

        // Add a paragraph
        Paragraph paragraph = section.addParagraph();

        // Add the barcode image to the paragraph
        paragraph.appendPicture(image);

        // Save the document to a different Word file
        document.saveToFile("CreateBarcode.docx", FileFormat.Docx);

        // Dispose resources
        document.dispose();
    }
}

Apply for a Temporary License
If you'd like to remove the evaluation message from the generated documents, or to get rid of the function limitations, please request a 30-day trial license for yourself.
The table of contents is a field in a Word document that displays the headings of all levels and their corresponding page numbers in the document. Moreover, the table of contents can be updated after changes are made to the content of the document, and new headings and page numbers can be generated according to the new document content. Therefore, the table of contents can be a great convenience both when editing documents and reading them, while also making them more professional. This article is going to show how to insert the table of contents into Word documents through Java programs using Spire.Doc for Java.
- Create a Table of Contents with the Default Format
- Create a Table of Contents with Customized Format
Install Spire.Doc for Java
First, you're required to add the Spire.Doc.jar file as a dependency in your Java program. The JAR file can be downloaded from this link. If you use Maven, you can easily import the JAR file in your application by adding the following code to your project's pom.xml file.
<repositories>
    <repository>
        <id>com.e-iceblue</id>
        <name>e-iceblue</name>
        <url>https://repo.e-iceblue.com/nexus/content/groups/public/</url>
    </repository>
</repositories>
<dependencies>
    <dependency>
        <groupId>e-iceblue</groupId>
        <artifactId>spire.doc</artifactId>
        <version>14.7.0</version>
    </dependency>
</dependencies>
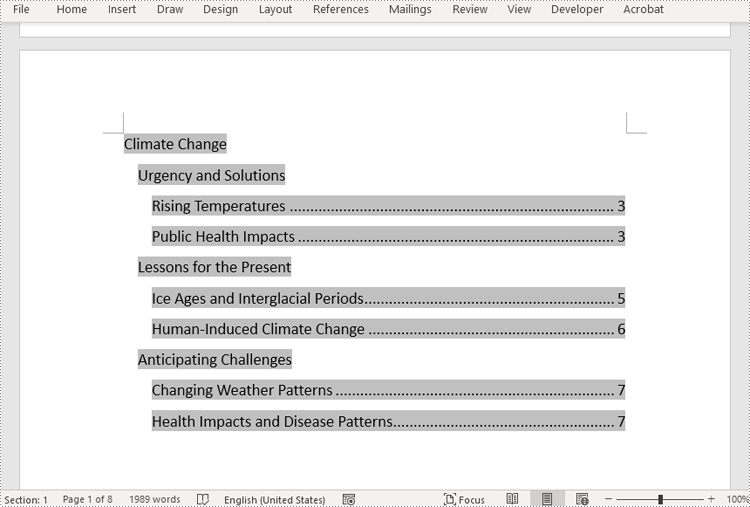
Create a Table of Contents with the Default Format
Before creating a table of contents, it is necessary to set the level for each heading, so that the table of contents can be generated according to each heading and its level. The level of a heading can be set by using the Paragraph.getListFormat().setListLevelNumber(int) method.
Spire.Doc for Java provides the Paragraph.appendTOC() method to insert a table of contents into a paragraph. The detailed steps for inserting a table of contents with the default style in a Word document are as follows:
- Create an object of Document class.
- Load a Word document using Document.loadFromFile() method.
- Add a section to the document using Document.addSection() method and insert it into the document after the cover section using Document.getSections().insert() method.
- Add a paragraph to the section using Section.addParagraph() method.
- Create a table of contents in the paragraph using Paragraph.appendTOC() method.
- Update the table of contents to display the headings in the document and their page numbers using Document.updateTableOfContents() method.
- Save the document using Document.saveToFile() method.
- Java
import com.spire.doc.Document;
import com.spire.doc.Section;
import com.spire.doc.documents.Paragraph;
import com.spire.doc.fields.TableOfContent;

public class insertTableOfContents {
    public static void main(String[] args) {
        //Create an object of Document class
        Document doc = new Document();

        //Load a Word document
        doc.loadFromFile("Sample.docx");

        //Add a section and insert it into the document after the cover section
        Section section = doc.addSection();
        doc.getSections().insert(1, section);

        //Add a paragraph to the section
        Paragraph paragraph = section.addParagraph();
        paragraph.appendText("Table of Contents\r\n");
        paragraph.getStyle().getCharacterFormat().setFontSize(14f);

        //Create a table of contents in the paragraph
        paragraph.appendTOC(2, 3);

        //Update the table of contents
        doc.updateTableOfContents();

        //Save the document
        doc.saveToFile("CreateTableOfContents.docx");
    }
}
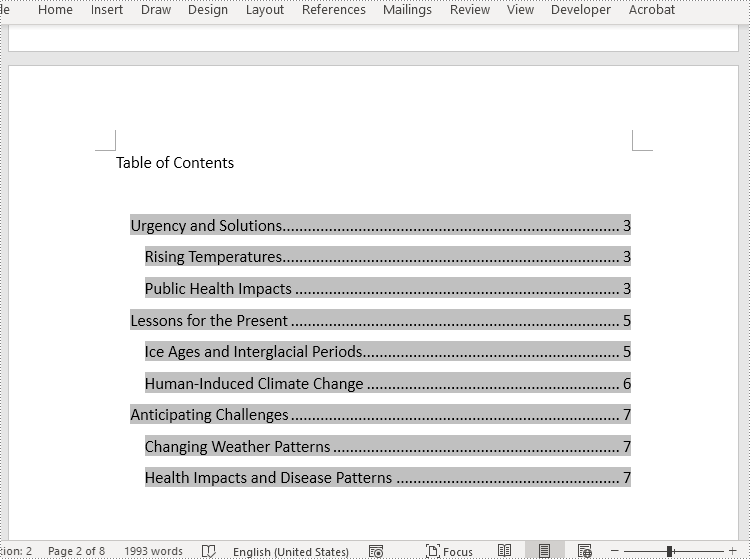
Create a Table of Contents with Customized Format
In Spire.Doc for Java, the TableOfContent class represents a table of contents of a Word document. The parts displayed in the table of contents can be customized by the switches while initializing an instance of the TableOfContent class. For example, the switches, "{\\o \"1-3\" \\n 1-2}", mean displaying the first to third level headings while omitting the page numbers of the first and second level headings.
The detailed steps for customizing a table of contents in a Word document are as follows:
- Create an object of Document class.
- Load a Word document using Document.loadFromFile() method.
- Insert a section after the cover section using Document.getSections().insert() method and add a paragraph to the section using Section.addParagraph() method.
- Create an instance of TableOfContent class to create a table of contents that displays the first to third level headings and omits page numbers of the first and second level headings.
- Insert the table of contents to the paragraph using Paragraph.getItems().add() method.
- Insert a field separator mark and a field end mark to the paragraph using Paragraph.appendFieldMark() method to end the table of contents field.
- Set the instance as the table of contents of the document using Document.setTOC() method.
- Update the table of contents to display the current contents for the document using Document.updateTableOfContents() method.
- Save the document using Document.saveToFile() method.
- Java
import com.spire.doc.Document;
import com.spire.doc.Section;
import com.spire.doc.documents.FieldMarkType;
import com.spire.doc.documents.Paragraph;
import com.spire.doc.fields.TableOfContent;

public class insertTableOfContentsWithCustomizedStyle {
    public static void main(String[] args) {
        //Create an object of Document class
        Document doc = new Document();

        //Load a Word document
        doc.loadFromFile("Sample.docx");

        //Insert a section after the first section and add a paragraph in the section
        Section section = doc.addSection();
        doc.getSections().insert(1, section);
        Paragraph paragraph = section.addParagraph();
        paragraph.getStyle().getCharacterFormat().setFontSize(14f);

        //Initialize an instance of TableOfContent class
        TableOfContent toc = new TableOfContent(doc, "{\\o \"1-3\" \\n 1-2}");

        //Insert the table of contents to the document
        paragraph.getItems().add(toc);

        //Insert field marks to end the field
        paragraph.appendFieldMark(FieldMarkType.Field_Separator);
        paragraph.appendFieldMark(FieldMarkType.Field_End);

        //Set the created table of contents as the table of contents of the document
        doc.setTOC(toc);

        //Update the table of contents
        doc.updateTableOfContents();

        //Save the document
        doc.saveToFile("TableOfContentsWithCustomizedStyle.docx");
        doc.dispose();
    }
}
Apply for a Temporary License
If you'd like to remove the evaluation message from the generated documents, or to get rid of the function limitations, please request a 30-day trial license for yourself.
Page numbers in Word documents are marked on each page to indicate the order and the number of pages. They can facilitate document creators to manage the document content and help users quickly find specific content in the document, thus improving reading speed and reading experience. This article is going to show how to use Spire.Doc for Java to add page numbers to Word documents programmatically.
- Add Page Numbers to a Word Document in Java
- Restart Page Numbering for Each Section in a Word Document in Java
- Add Page Numbers to a Specific Section in a Word Document in Java
Install Spire.Doc for Java
First of all, you're required to add the Spire.Doc.jar file as a dependency in your Java program. The JAR file can be downloaded from this link. If you use Maven, you can easily import the JAR file in your application by adding the following code to your project's pom.xml file.
<repositories>
    <repository>
        <id>com.e-iceblue</id>
        <name>e-iceblue</name>
        <url>https://repo.e-iceblue.com/nexus/content/groups/public/</url>
    </repository>
</repositories>
<dependencies>
    <dependency>
        <groupId>e-iceblue</groupId>
        <artifactId>spire.doc</artifactId>
        <version>14.7.0</version>
    </dependency>
</dependencies>
Add Page Numbers to a Word Document in Java
Page numbers in Word are displayed using specific types of fields. For example, the Page field displays the page number of the current page, the NumPages field displays the total number of pages in a document, and the SectionPages field displays the total number of pages in a section.
Spire.Doc for Java provides the Paragraph.appendField(String fieldName, FieldType fieldType) method to add various types of fields to a Word document, including the Page field (FieldType.Field_Page), the NumPages field (FieldType.Field_Num_Pages), and the SectionPages field (FieldType.Field_Section_Pages).
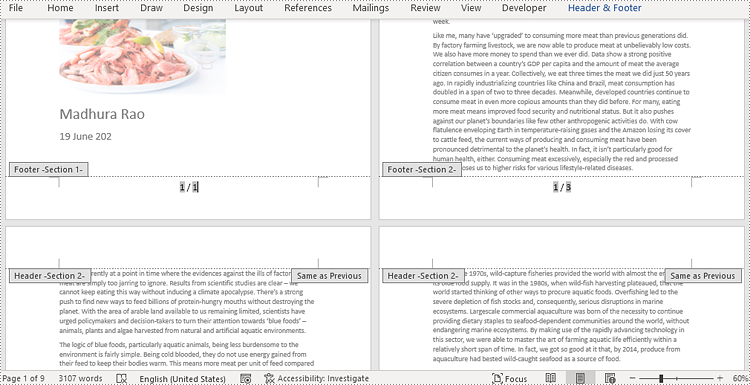
The following steps explain how to add a Page field and a NumPages field to the footer of a Word document to display the current page number and the total number of pages in the document using Spire.Doc for Java:
- Create an object of Document class.
- Load a Word document using Document.loadFromFile() method.
- Get the first section using Document.getSections().get() method.
- Get the footer of the first section using Section.getHeadersFooters().getFooter() method.
- Add a paragraph to the footer, and then add a Page field and a NumPages field to the paragraph using Paragraph.appendField(String fieldName, FieldType fieldType) method.
- Save the document using Document.saveToFile() method.
- Java
import com.spire.doc.Document;
import com.spire.doc.FieldType;
import com.spire.doc.HeaderFooter;
import com.spire.doc.Section;
import com.spire.doc.documents.HorizontalAlignment;
import com.spire.doc.documents.Paragraph;

public class addPageNumbersWholeDocument {
    public static void main(String[] args) {

        //Create an object of Document class
        Document document = new Document();

        //Load a Word document
        document.loadFromFile("Sample.docx");

        //Get the first section
        Section section = document.getSections().get(0);

        //Get the footer of the section
        HeaderFooter footer = section.getHeadersFooters().getFooter();

        //Add Page and NumPages fields to the footer and set the format
        Paragraph footerParagraph = footer.addParagraph();
        footerParagraph.appendField("page number", FieldType.Field_Page);
        footerParagraph.appendText(" / ");
        footerParagraph.appendField("page count", FieldType.Field_Num_Pages);
        footerParagraph.getFormat().setHorizontalAlignment(HorizontalAlignment.Center);
        footerParagraph.getStyle().getCharacterFormat().setFontSize(16);

        //Save the document
        document.saveToFile("PageNumberWholeDocument.docx");
        document.dispose();
    }
}
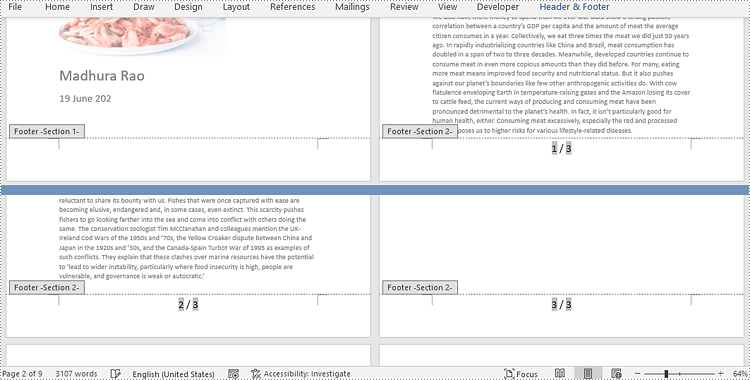
Restart Page Numbering for Each Section in a Word Document in Java
Restarting page numbering allows you to start the page numbers at a particular number in each section, rather than continuing from the page numbers of the previous section.
To restart page numbering for each section of a Word document, you need to loop through all sections in the document and add a Page field and a SectionPages field to each section. Then use the Section.getPageSetup().setRestartPageNumbering(true) method to enable restarting page numbering and the Section.getPageSetup().setPageStartingNumber(int value) method to set the starting page number for each section. The detailed steps are as follows:
- Create an object of Document class.
- Load a Word document using Document.loadFromFile() method.
- Loop through the sections in the document.
- Call the Paragraph.appendField(String fieldName, FieldType fieldType) method to add a Page field and a SectionPages field to each section.
- Call the Section.getPageSetup().setRestartPageNumbering(true) method to enable restarting page numbering and the Section.getPageSetup().setPageStartingNumber(int value) method to set the starting page number for each section.
- Save the document using Document.saveToFile() method.
- Java
import com.spire.doc.Document;
import com.spire.doc.FieldType;
import com.spire.doc.HeaderFooter;
import com.spire.doc.documents.HorizontalAlignment;
import com.spire.doc.documents.Paragraph;

public class addPageNumbersEachSection {
    public static void main(String[] args) {

        //Create an object of Document class
        Document document = new Document();

        //Load a Word document
        document.loadFromFile("Sample.docx");

        //Get the count of sections in the document
        int s = document.getSections().getCount();

        //Loop through the sections in the document
        for (int i = 0; i < s; i++) {

            //Add Page and SectionPages fields to each section
            HeaderFooter footer = document.getSections().get(i).getHeadersFooters().getFooter();
            Paragraph footerParagraph = footer.addParagraph();
            footerParagraph.appendField("page number", FieldType.Field_Page);
            footerParagraph.appendText(" / ");
            footerParagraph.appendField("section page count", FieldType.Field_Section_Pages);
            footerParagraph.getFormat().setHorizontalAlignment(HorizontalAlignment.Center);
            footerParagraph.getStyle().getCharacterFormat().setFontSize(16);

            //Restart page numbering for each section
            if (i == s-1)
                break;
            else {
                document.getSections().get(i + 1).getPageSetup().setRestartPageNumbering(true);
                document.getSections().get(i + 1).getPageSetup().setPageStartingNumber(1);
            }
        }

        //Save the document
        document.saveToFile("PageNumbersSections.docx");
        document.dispose();
    }
}
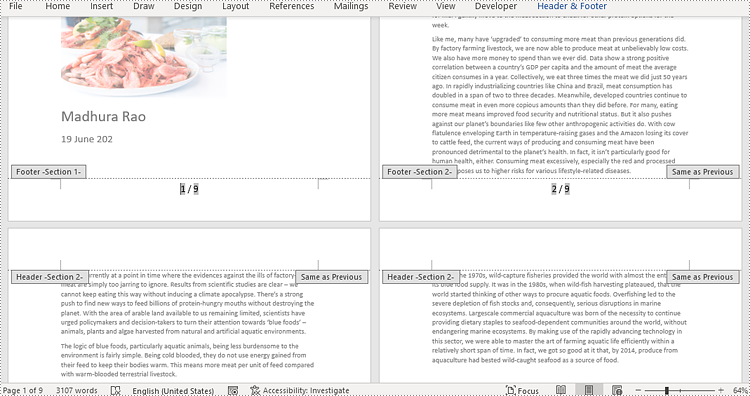
Add Page Numbers to a Specific Section in a Word Document in Java
By default, when you insert page numbers into the footer of a section, the subsequent sections will automatically link to the previous section to continue displaying the page numbers. If you want to add page numbers to only a specific section, you will need to unlink the subsequent sections from the previous section, and then delete the content of the footers in the subsequent sections. The detailed steps are as follows:
- Create an object of Document class.
- Load a Word document using Document.loadFromFile() method.
- Get the second section of the document using Document.getSections().get() method.
- Call the Section.getPageSetup().setRestartPageNumbering(true) method to enable restarting page numbering and the Section.getPageSetup().setPageStartingNumber(int value) method to set the starting page number for the section.
- Call the Paragraph.appendField(String fieldName, FieldType fieldType) method to add a Page field and a SectionPages field to the section.
- Unlink the subsequent section from the second section using the Section.getHeadersFooters().getFooter().setLinkToPrevious(false) method.
- Delete the content of the footers in the subsequent sections.
- Save the document using Doucment.saveToFile() method.
- Java
import com.spire.doc.Document;
import com.spire.doc.FieldType;
import com.spire.doc.HeaderFooter;
import com.spire.doc.Section;
import com.spire.doc.documents.HorizontalAlignment;
import com.spire.doc.documents.Paragraph;

public class addPageNumbersToSpecificSection {
    public static void main(String[] args) {

        //Create an object of Document
        Document document = new Document();

        //Load a Word document
        document.loadFromFile("Sample.docx");

        //Get the second section
        Section section = document.getSections().get(1);

        //Get the footer of the second section
        HeaderFooter footer = section.getHeadersFooters().getFooter();

        //Set the start page as the first page of the second section and the starting number as 1
        section.getPageSetup().setRestartPageNumbering(true);
        section.getPageSetup().setPageStartingNumber(1);

        //Add page numbers to the footer and set the format
        Paragraph footerParagraph = footer.addParagraph();
        footerParagraph.appendField("Page number", FieldType.Field_Page);
        footerParagraph.appendText(" / ");
        footerParagraph.appendField("Number of pages", FieldType.Field_Section_Pages);
        footerParagraph.getFormat().setHorizontalAlignment(HorizontalAlignment.Center);
        footerParagraph.getStyle().getCharacterFormat().setFontSize(12);

        //Unlink the subsequent section from the second section
        document.getSections().get(2).getHeadersFooters().getFooter().setLinkToPrevious(false);
        //Delete the content of the footers in the subsequent sections
        for (int i = 2; i < document.getSections().getCount(); i++)
        {
            document.getSections().get(i).getHeadersFooters().getFooter().getChildObjects().clear();
            document.getSections().get(i).getHeadersFooters().getFooter().addParagraph();
        }

        //Save the document
        document.saveToFile("PageNumberOneSection.docx");
        document.dispose();
    }
}
Apply for a Temporary License
If you'd like to remove the evaluation message from the generated documents, or to get rid of the function limitations, please request a 30-day trial license for yourself.
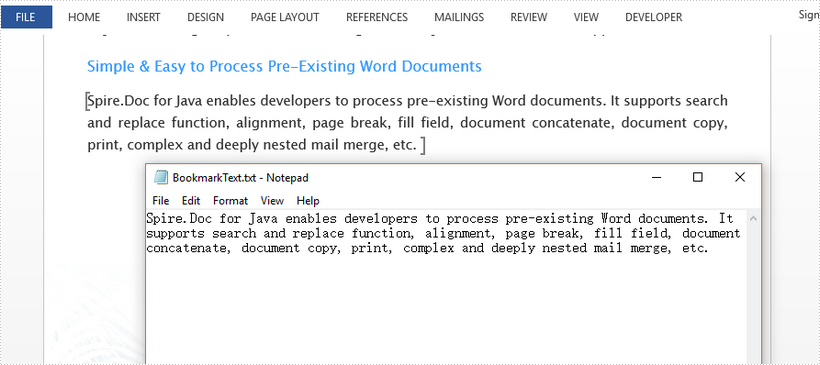
This article demonstrates how to get the text inside a bookmark in a Word document using Spire.Doc for Java.
import com.spire.doc.Document;
import com.spire.doc.documents.BookmarksNavigator;
import com.spire.doc.documents.Paragraph;
import com.spire.doc.documents.TextBodyPart;
import com.spire.doc.fields.TextRange;

import java.io.FileNotFoundException;
import java.io.PrintWriter;

public class GetBookmarkText {

    public static void main(String[] args) throws FileNotFoundException {

        //create a Document object
        Document doc = new Document();

        //load a sample Word file
        doc.loadFromFile("C:\\Users\\Administrator\\Desktop\\sample.docx");

        //get the specific bookmark
        BookmarksNavigator navigator = new BookmarksNavigator(doc);
        navigator.moveToBookmark("MyBookmark");

        //get the bookmark content
        TextBodyPart textBodyPart = navigator.getBookmarkContent();

        //declare a String variable
        String text = "";

        //loop through body items
        for (Object item : textBodyPart.getBodyItems()) {

            //determine if an item is a paragraph
            if (item instanceof Paragraph) {
                Paragraph paragraph = (Paragraph) item;

                //loop through the child objects of the paragraph
                for (Object childObj : paragraph.getChildObjects()) {

                    //determine if a child object is a text range
                    if (childObj instanceof TextRange) {

                        //get text from the text range
                        TextRange textRange = (TextRange) childObj;
                        text = text + textRange.getText();
                    }
                }
            }
        }

        //write the bookmark text to a .txt file
        PrintWriter printWriter = new PrintWriter("output/BookmarkText.txt");
        printWriter.println(text);
        printWriter.close();
    }
}
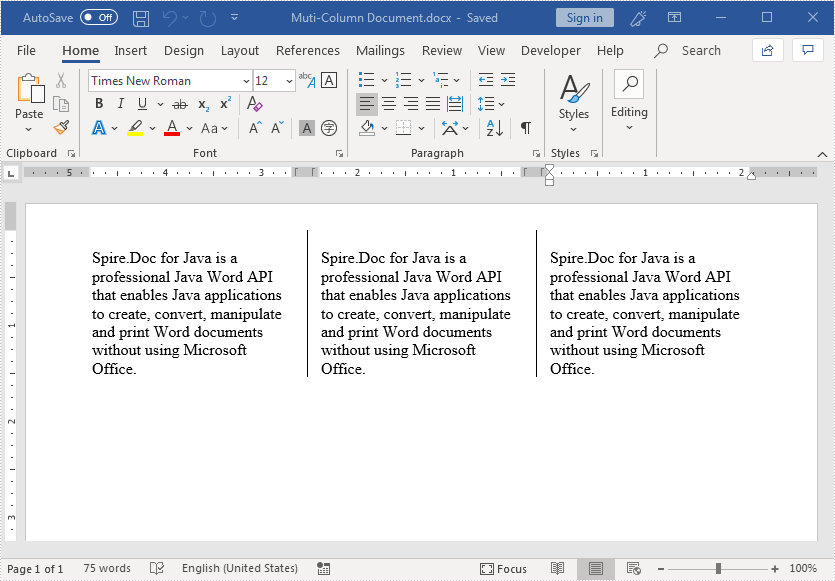
We can format Word document in a multi-column newsletter layout by adding columns. This article demonstrates how to add multiple columns to a Word document and specify the column width and the spacing between columns using Spire.Doc for Java.
import com.spire.doc.*;
import com.spire.doc.documents.*;

public class CreateMutiColumnWordDocument {
    public static void main(String[] args){
        //create a Document object
        Document document = new Document();
        //add a section
        Section section = document.addSection();

        //add 3 columns to the section
        section.addColumn(100, 20);
        section.addColumn(100, 20);
        section.addColumn(100, 20);

        //add a paragraph to the section
        Paragraph paragraph = section.addParagraph();
        //add a paragraph to the section
        paragraph = section.addParagraph();
        String text = "Spire.Doc for Java is a professional Java Word API that enables Java applications "
        +"to create, convert, manipulate and print Word documents without using Microsoft Office.";
        //add text to the paragraph
        paragraph.appendText(text);
        //add column break to the paragraph
        paragraph.appendBreak(BreakType.Column_Break);

        //add a paragraph to the section
        paragraph = section.addParagraph();
        //add text to the paragraph
        paragraph.appendText(text);
        //add column break to the paragraph
        paragraph.appendBreak(BreakType.Column_Break);

        //add a paragraph to the section
        paragraph = section.addParagraph();
        //add text to the paragraph
        paragraph.appendText(text);

        //add line between columns
        section.getPageSetup().setColumnsLineBetween(true);

        //save the resultant document
        document.saveToFile("Muti-Column Document.docx", FileFormat.Docx_2013);

    }
}
Output:
This article demonstrates how to add combo box, check box, text, picture, date picker and drop-down list content controls to a Word document using Spire.Doc for Java.
import com.spire.doc.*;
import com.spire.doc.documents.*;
import com.spire.doc.fields.*;

import java.util.Date;

public class ContentControls {
    public static void main(String[] args){
        //create a new Word document
        Document document = new Document();
        Section section = document.addSection();
        Paragraph paragraph = section.addParagraph();
        TextRange txtRange = paragraph.appendText("The following example shows how to add content controls in a Word document.");
        section.addParagraph();

        //add combo box content control
        paragraph = section.addParagraph();
        txtRange = paragraph.appendText("Add Combo Box Content Control:  ");
        txtRange.getCharacterFormat().setItalic(true);
        StructureDocumentTagInline sd = new StructureDocumentTagInline(document);
        paragraph.getChildObjects().add(sd);
        sd.getSDTProperties().setSDTType(SdtType.Combo_Box);
        sd.getSDTProperties().setAlias("ComboBox");
        sd.getSDTProperties().setTag("ComboBox");
        SdtComboBox cb = new SdtComboBox();
        cb.getListItems().add(new SdtListItem("Spire.Doc"));
        cb.getListItems().add(new SdtListItem("Spire.XLS"));
        cb.getListItems().add(new SdtListItem("Spire.PDF"));
        sd.getSDTProperties().setControlProperties(cb);
        TextRange rt = new TextRange(document);
        rt.setText(cb.getListItems().get(0).getDisplayText());
        sd.getSDTContent().getChildObjects().add(rt);
        section.addParagraph();

        //Add checkbox content control
        paragraph = section.addParagraph();
        txtRange = paragraph.appendText("Add Check Box Content Control:  ");
        txtRange.getCharacterFormat().setItalic(true);
        sd = new StructureDocumentTagInline(document);
        paragraph.getChildObjects().add(sd);
        sd.getSDTProperties().setSDTType(SdtType.Check_Box);
        sd.getSDTProperties().setAlias("CheckBox");
        sd.getSDTProperties().setTag("CheckBox");
        SdtCheckBox scb = new SdtCheckBox();
        sd.getSDTProperties().setControlProperties(scb);
        rt = new TextRange(document);
        sd.getChildObjects().add(rt);
        scb.setChecked(true);
        section.addParagraph();

        //add text content control
        paragraph = section.addParagraph();
        txtRange = paragraph.appendText("Add Text Content Control:  ");
        txtRange.getCharacterFormat().setItalic(true);
        sd = new StructureDocumentTagInline(document);
        paragraph.getChildObjects().add(sd);
        sd.getSDTProperties().setSDTType(SdtType.Text);
        sd.getSDTProperties().setAlias("Text");
        sd.getSDTProperties().setTag("Text");
        SdtText text = new SdtText(true);
        text.isMultiline(true);
        sd.getSDTProperties().setControlProperties(text);
        rt = new TextRange(document);
        rt.setText("Text");
        sd.getSDTContent().getChildObjects().add(rt);
        section.addParagraph();

        //add picture content control
        paragraph = section.addParagraph();
        txtRange = paragraph.appendText("Add Picture Content Control:  ");
        txtRange.getCharacterFormat().setItalic(true);
        sd = new StructureDocumentTagInline(document);
        paragraph.getChildObjects().add(sd);
        sd.getSDTProperties().setControlProperties(new SdtPicture());
        sd.getSDTProperties().setAlias("Picture");
        sd.getSDTProperties().setTag("Picture");
        DocPicture pic = new DocPicture(document);
        pic.setWidth(10f);
        pic.setHeight(10f);
        pic.loadImage("logo.png");
        sd.getSDTContent().getChildObjects().add(pic);
        section.addParagraph();

        //add date picker content control
        paragraph = section.addParagraph();
        txtRange = paragraph.appendText("Add Date Picker Content Control:  ");
        txtRange.getCharacterFormat().setItalic(true);
        sd = new StructureDocumentTagInline(document);
        paragraph.getChildObjects().add(sd);
        sd.getSDTProperties().setSDTType(SdtType.Date_Picker);
        sd.getSDTProperties().setAlias("Date");
        sd.getSDTProperties().setTag("Date");
        SdtDate date = new SdtDate();
        date.setCalendarType(CalendarType.Default);
        date.setDateFormat("yyyy.MM.dd");
        date.setFullDate(new Date());
        sd.getSDTProperties().setControlProperties(date);
        rt = new TextRange(document);
        rt.setText("2018.12.25");
        sd.getSDTContent().getChildObjects().add(rt);
        section.addParagraph();

        //add drop-down list content control
        paragraph = section.addParagraph();
        txtRange = paragraph.appendText("Add Drop-Down List Content Control:  ");
        txtRange.getCharacterFormat().setItalic(true);
        sd = new StructureDocumentTagInline(document);
        paragraph.getChildObjects().add(sd);
        sd.getSDTProperties().setSDTType(SdtType.Drop_Down_List);
        sd.getSDTProperties().setAlias("DropDownList");
        sd.getSDTProperties().setTag("DropDownList");
        SdtDropDownList sddl = new SdtDropDownList();
        sddl.getListItems().add(new SdtListItem("Harry"));
        sddl.getListItems().add(new SdtListItem("Jerry"));
        sd.getSDTProperties().setControlProperties(sddl);
        rt = new TextRange(document);
        rt.setText(sddl.getListItems().get(0).getDisplayText());
        sd.getSDTContent().getChildObjects().add(rt);

        //save the resultant document
        document.saveToFile("addContentControls.docx", FileFormat.Docx_2013);
    }
}
Output:

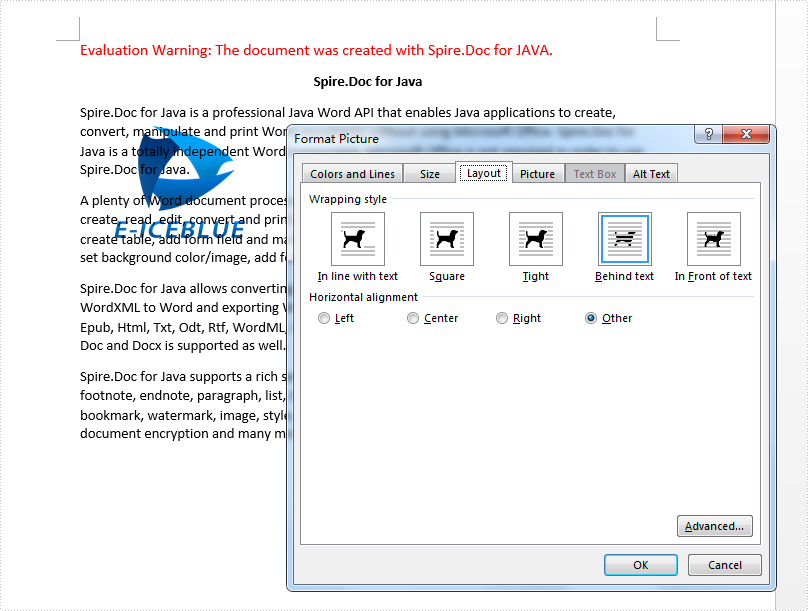
This article will show you how to set the wrapping style to adjust the position of the image in Java applications with the help of Spire.Doc for Java.
import com.spire.doc.*;
import com.spire.doc.documents.Paragraph;
import com.spire.doc.documents.TextWrappingStyle;
import com.spire.doc.documents.TextWrappingType;
import com.spire.doc.fields.DocPicture;

public class ImageWrappingStyle {
    public static void main(String[] args) throws Exception {

        Document doc = new Document();
        doc.loadFromFile("Sample.docx");

        Section sec = doc.getSections().get(0);

        Paragraph para = sec.getParagraphs().get(0);
        DocPicture picture = para.appendPicture("logo.png");

        //Set image width and height
        picture.setWidth(150f);
        picture.setHeight(125f);

        //Set text wrapping style to Behind
        picture.setTextWrappingStyle(TextWrappingStyle.Behind);
        picture.setTextWrappingType(TextWrappingType.Both);

        //Save the document to file
        doc.saveToFile("Output/WrapStyle.docx");
        doc.close();

    }
}
Effective screenshot after setting the wrapping style for image:
In document creation, divisions of content are frequently required to fulfill specific layout requirements and establish logical structures. The insertion of section breaks and page breaks is the most commonly employed method for dividing content, as it enables flexible control over page and section organization. Moreover, page breaks and section breaks are quite helpful in formatting purposes and the establishment of distinct document styles. This article aims to demonstrate how to use Spire.Doc for Java to insert page breaks and section breaks into Word documents through Java programs.
Install Spire.Doc for Java
First, you're required to add the Spire.Doc.jar file as a dependency in your Java program. The JAR file can be downloaded from this link. If you use Maven, you can easily import the JAR file in your application by adding the following code to your project's pom.xml file.
<repositories>
    <repository>
        <id>com.e-iceblue</id>
        <name>e-iceblue</name>
        <url>https://repo.e-iceblue.com/nexus/content/groups/public/</url>
    </repository>
</repositories>
<dependencies>
    <dependency>
        <groupId>e-iceblue</groupId>
        <artifactId>spire.doc</artifactId>
        <version>14.7.0</version>
    </dependency>
</dependencies>
Insert Page Breaks into Word Documents
Spire.Doc for Java provides the Paragraph.appendBreak(BreakType.PageBreak) method to insert a page break at the end of a paragraph. The detailed steps are as follows:
- Create an object of Document class.
- Load a Word document using Document.loadFromFile() method.
- Get the first section using Document.getSections().get() method.
- Get the eighth paragraph of the section using Section.getParagraphs().get() method.
- Add a page break to the end of the paragraph using Paragraph.appendBreak(BreakType.PageBreak) method.
- Save the document using Document.saveToFile() method.
- Java
import com.spire.doc.Document;
import com.spire.doc.FileFormat;
import com.spire.doc.Section;
import com.spire.doc.documents.BreakType;
import com.spire.doc.documents.Paragraph;

public class InsertPageBreak {
    public static void main(String[] args) {
        //Create an object of Document class
        Document doc = new Document();

        //Load a Word document
        doc.loadFromFile("Sample.docx");

        //Get the first section
        Section section = doc.getSections().get(0);

        //Get the eighth paragraph
        Paragraph paragraph = section.getParagraphs().get(7);

        //Add a page break to the end of the paragraph
        paragraph.appendBreak(BreakType.Page_Break);

        //Save the document
        doc.saveToFile("PageBreak.docx", FileFormat.Auto);
    }
}
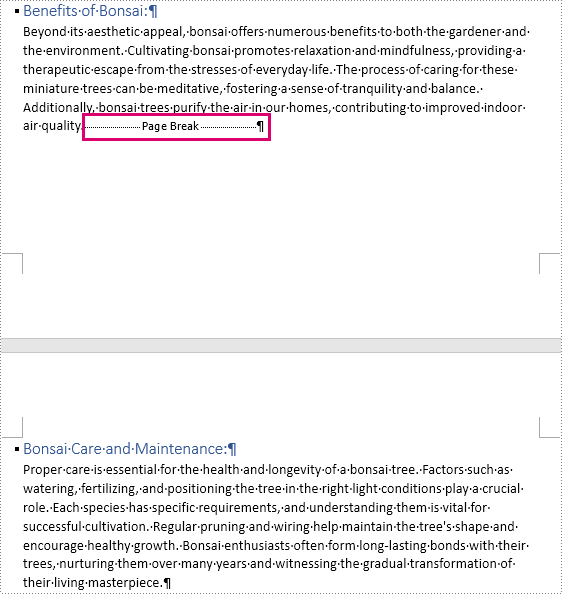
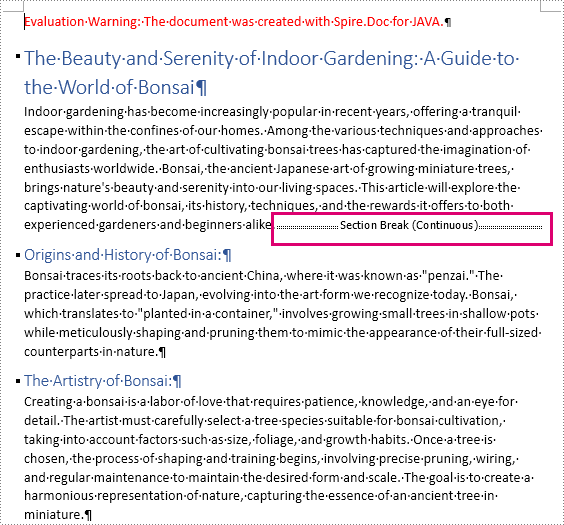
Insert Section Breaks into Word Documents
Inserting section breaks involves using the Paragraph.insertSectionBreak(SectionBreakType) method. This method allows users to specify the type of section break you want to insert. he following table provides an overview of the section break types, along with their corresponding Enums and descriptions:
| Section Break | Enum | Description |
| New page | SectionBreakType.New_Page | Start the new section on a new page. |
| Continuous | SectionBreakType.No_Break | Start the new section without starting a new page, allowing for continuous content flow. |
| Odd page | SectionBreakType.Odd_Page | Start the new section on the next odd-numbered page. |
| Even page | SectionBreakType.Even_Page | Start the new section on the next even-numbered page. |
| New column | SectionBreakType.New_Column | Start the new section in the next column if columns are enabled. |
The detailed steps for inserting a continuous section break are as follows:
- Create an object of Document class.
- Load a Word document using Document.loadFromFile() method.
- Get the first section using Document.getSections().get() method.
- Get the second paragraph of the section using Section.getParagraphs().get() method.
- Add a continuous section break to the end of the paragraph using Paragraph.insertSectionBreak(SectionBreakType.No_Break) method.
- Save the document using Document.saveToFile() method.
- Java
import com.spire.doc.Document;
import com.spire.doc.FileFormat;
import com.spire.doc.Section;
import com.spire.doc.documents.Paragraph;
import com.spire.doc.documents.SectionBreakType;

public class InsertSectionBreak {
    public static void main(String[] args) {
        //Create an object of Document class
        Document doc = new Document();

        //Load a Word document
        doc.loadFromFile("Sample.docx");

        //Get the first section
        Section section = doc.getSections().get(0);

        //Get the second paragraph
        Paragraph paragraph = section.getParagraphs().get(1);

        //Insert a section break
        paragraph.insertSectionBreak(SectionBreakType.No_Break);

        //Save the document
        doc.saveToFile("SectionBreak.docx", FileFormat.Auto);
    }
}
Apply for a Temporary License
If you'd like to remove the evaluation message from the generated documents, or to get rid of the function limitations, please request a 30-day trial license for yourself.
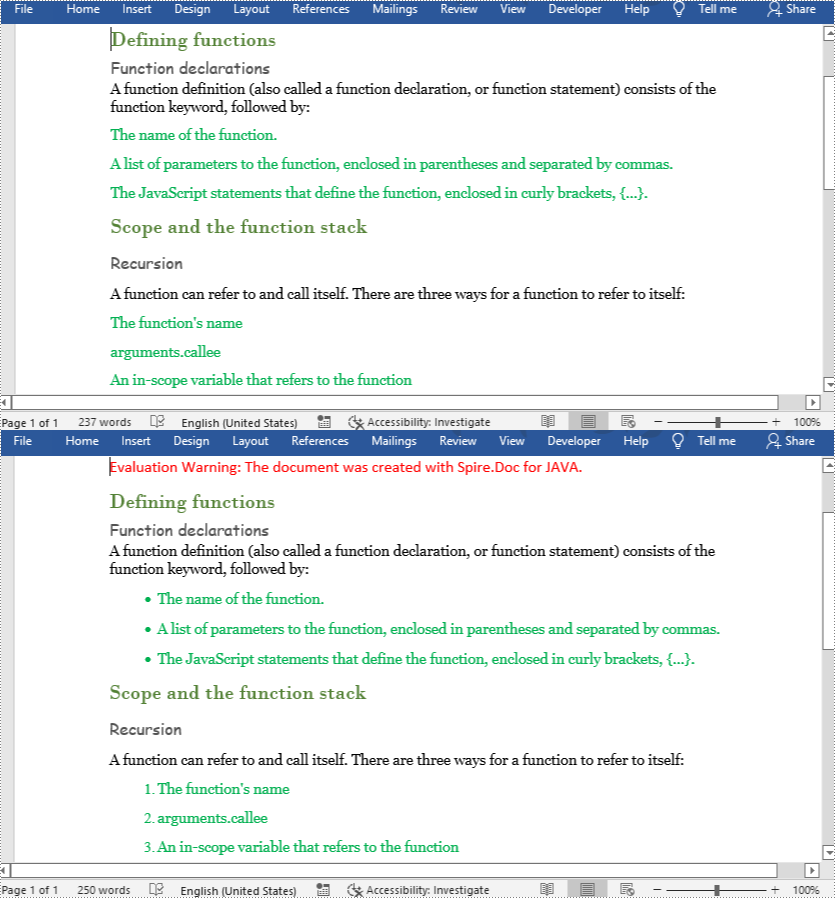
Java: Create Bulleted or Numbered Lists from Existing Text in Word Documents
2022-07-18 08:26:00 Written by KoohjiA bulleted list is a list with dots in the front and the same indentation for each item, while a numbered list with numbers in the front. Bulleted lists and numbered lists work much better than lengthy text content because, with a well-organized list, readers can easily get the structure and the point of each item. This article shows how to create lists from existing text in Word documents with Spire.Doc for Java.
Install Spire.Doc for Java
First of all, you're required to add the Spire.Doc.jar file as a dependency in your Java program. The JAR file can be downloaded from this link. If you use Maven, you can easily import the JAR file in your application by adding the following code to your project's pom.xml file.
<repositories>
    <repository>
        <id>com.e-iceblue</id>
        <name>e-iceblue</name>
        <url>https://repo.e-iceblue.com/nexus/content/groups/public/</url>
    </repository>
</repositories>
<dependencies>
    <dependency>
        <groupId>e-iceblue</groupId>
        <artifactId>spire.doc</artifactId>
        <version>14.7.0</version>
    </dependency>
</dependencies>
Create a Bulleted List and a Numbered List from Existing Text in a Word Document
Spire.Doc for Java provides two methods, ListFormat.applyBulletStyle() and ListFormat.applyNumberedStyle(), to create bulleted and numbered lists.
The detailed steps of creating bulleted and numbered lists are as follows.
- Create an object of Document class.
- Load a Word document from file using Document.loadFromFile() method.
- Get the first section using Document.getSections().get() method.
- Loop through the 4th to 6th paragraphs.
- Apply bulleted list style to these paragraphs using ListFormat.applyBulletStyle() method and set their position using ListFormat.getCurrentListLevel().setNumberPosition() method.
- Loop through the 10th to 12th paragraphs.
- Apply numbered list style to these paragraphs using ListFormat.applyNumberedStyle() method and set their position using ListFormat.getCurrentListLevel().setNumberPosition() method.
- Save the document using Document.saveToFile() method.
- Java
import com.spire.doc.Document;
import com.spire.doc.FileFormat;
import com.spire.doc.Section;
import com.spire.doc.documents.Paragraph;
import com.spire.doc.formatting.ListFormat;

public class CreateLists {
    public static void main(String[] args) {

        //Create an object of Document class
        Document document = new Document();

        //Load a Word document from file
        document.loadFromFile("C:/Samples/Sample2.docx");

        //Get the first section
        Section section = document.getSections().get(0);

        //Loop through the 4th to the 6th paragraphs
        for(int i = 3; i <= 5; i++){
            Paragraph para = section.getParagraphs().get(i);
            ListFormat listFormat = para.getListFormat();

            //Apply bulleted list style
            listFormat.applyBulletStyle();

            //Set list position
            listFormat.getCurrentListLevel().setNumberPosition(-10);
        }

        //Loop through the 10th to the 12th paragraphs
        for(int i = 9; i <= 11; i++){
            Paragraph para = section.getParagraphs().get(i);
            ListFormat listFormat = para.getListFormat();

            //Apply numbered list style
            listFormat.applyNumberedStyle();

            //Set list position
            listFormat.getCurrentListLevel().setNumberPosition(-10);

        }

        //Save the document
        document.saveToFile("CreateLists.docx", FileFormat.Docx_2013);
    }
}
Apply for a Temporary License
If you'd like to remove the evaluation message from the generated documents, or to get rid of the function limitations, please request a 30-day trial license for yourself.
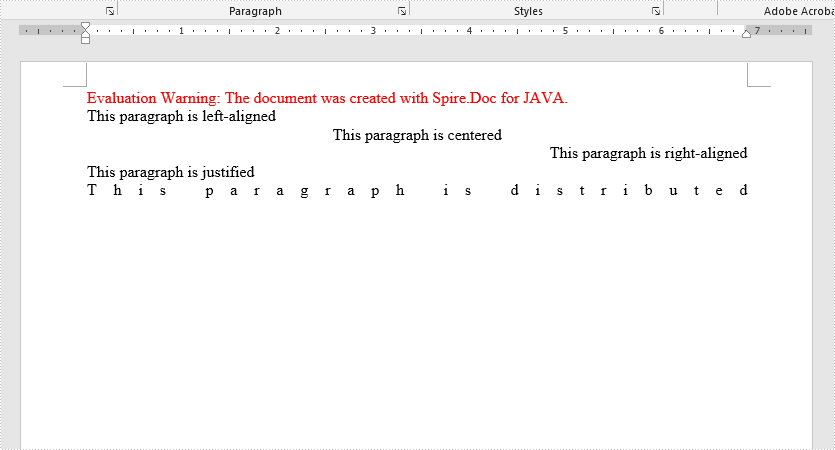
In Microsoft Word, we can set the text alignment of a paragraph as left/center/right/justified/distributed. In this article, we will demonstrate how to achieve this function programmatically in Java using Spire.Doc for Java.
Install Spire.Doc for Java
First of all, you're required to add the Spire.Doc.jar file as a dependency in your Java program. The JAR file can be downloaded from this link. If you use Maven, you can easily import the JAR file in your application by adding the following code to your project's pom.xml file.
<repositories>
    <repository>
        <id>com.e-iceblue</id>
        <name>e-iceblue</name>
        <url>https://repo.e-iceblue.com/nexus/content/groups/public/</url>
    </repository>
</repositories>
<dependencies>
    <dependency>
        <groupId>e-iceblue</groupId>
        <artifactId>spire.doc</artifactId>
        <version>14.7.0</version>
    </dependency>
</dependencies>
Set Paragraph Alignments in Word
Spire.Doc for Java provides the ParagraphFormat class to work with paragraph formatting. You can use Paragraph.getFormat() method to get the ParagraphFormat object, and then use ParagraphFormat.setHorizontalAlignment() method to set the text alignment for the paragraph.
The following are the steps to set the text alignment for a paragraph in a Word document:
- Create a Document instance.
- Add a section to the document using Document.addSection() method.
- Add a paragraph to the section using Section.addParagraph() method, then append text to the paragraph using Paragraph.appendText() method.
- Get the ParagraphFormat object using Paragraph.getFormat() method.
- Set text alignment for the paragraph using ParagraphFormat.setHorizontalAlignment() method.
- Save the result document using Document.saveToFile() method.
- Java
import com.spire.doc.Document;
import com.spire.doc.FileFormat;
import com.spire.doc.Section;
import com.spire.doc.documents.HorizontalAlignment;
import com.spire.doc.documents.Paragraph;
import com.spire.doc.formatting.ParagraphFormat;

public class ParagraphAlignments {
    public static void main(String[] args) {
        //Create a Document instance
        Document document = new Document();

        //Add a section
        Section section = document.addSection();

        //Add a paragraph and make it left-aligned
        Paragraph para = section.addParagraph();
        para.appendText("This paragraph is left-aligned");
        ParagraphFormat format = para.getFormat();
        format.setHorizontalAlignment(HorizontalAlignment.Left);

        //Add a paragraph and make it centered
        para = section.addParagraph();
        para.appendText("This paragraph is centered");
        format = para.getFormat();
        format.setHorizontalAlignment(HorizontalAlignment.Center);

        //Add a paragraph and make it right-aligned
        para = section.addParagraph();
        para.appendText("This paragraph is right-aligned");
        format = para.getFormat();
        format.setHorizontalAlignment(HorizontalAlignment.Right);

        //Add a paragraph and make it justified
        para = section.addParagraph();
        para.appendText("This paragraph is justified");
        format = para.getFormat();
        format.setHorizontalAlignment(HorizontalAlignment.Justify);

        //Add a paragraph and make it distributed
        para = section.addParagraph();
        para.appendText("This paragraph is distributed");
        format = para.getFormat();
        format.setHorizontalAlignment(HorizontalAlignment.Distribute);

        //Save the result document
        document.saveToFile("ParagraphAlignments.docx", FileFormat.Docx_2013);
    }
}
Apply for a Temporary License
If you'd like to remove the evaluation message from the generated documents, or to get rid of the function limitations, please request a 30-day trial license for yourself.
