
.NET (1327)
Children categories
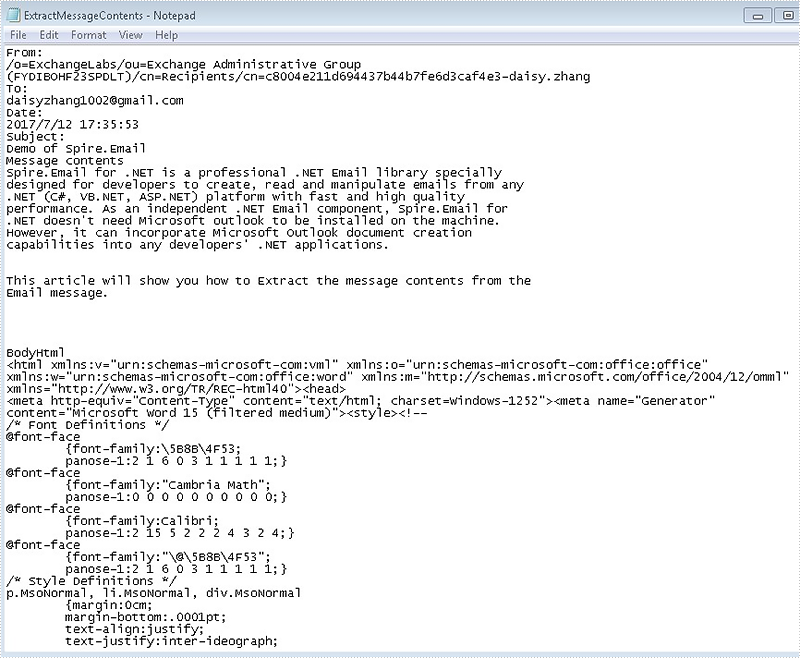
This article illustrates how to get message contents such as from address, send to address, subject, date and the body of the message by using Spire.Email.
Code snippets of how to extract the message contents:
Step 1: Load the mail message.
MailMessage mail = MailMessage.Load("Sample.msg");
Step 2: Create a new instance of StringBuilder.
StringBuilder sb = new StringBuilder();
Step 3: Get the message contents as we want.
//get the From address
sb.AppendLine("From:");
sb.AppendLine(mail.From.Address);

//get the To address
sb.AppendLine("To:");
foreach (MailAddress toAddress in mail.To)
{
    sb.AppendLine(toAddress.Address);
}

//get the date
sb.AppendLine("Date:");
sb.AppendLine(mail.Date.ToString());

//get the subject
sb.AppendLine("Subject:");
sb.AppendLine(mail.Subject);

//get the BodyText
sb.AppendLine("Message contents");
sb.AppendLine(mail.BodyText);

//get the BodyHtml
sb.AppendLine("BodyHtml");
sb.AppendLine(mail.BodyHtml);
Step 4: Write all contents in .txt
File.WriteAllText("ExtractMessageContents.txt", sb.ToString());
The extracted message contents in .txt file format.
Full codes:
using Spire.Email;
using System.IO;
using System.Text;

namespace ExtractMessage
{
    class Program
    {
        static void Main(string[] args)
        {

            MailMessage mail = MailMessage.Load("Sample.msg");

            StringBuilder sb = new StringBuilder();

            sb.AppendLine("From:");
            sb.AppendLine(mail.From.Address);

            sb.AppendLine("To:");
            foreach (MailAddress toAddress in mail.To)
            {
                sb.AppendLine(toAddress.Address);
            }

            sb.AppendLine("Date:");
            sb.AppendLine(mail.Date.ToString());

            sb.AppendLine("Subject:");
            sb.AppendLine(mail.Subject);

            sb.AppendLine("Message contents");
            sb.AppendLine(mail.BodyText);

            sb.AppendLine("BodyHtml");
            sb.AppendLine(mail.BodyHtml);

            File.WriteAllText("ExtractMessageContents.txt", sb.ToString());
        }
    }
}
Dim mail As MailMessage = MailMessage.Load("Sample.msg")

Dim sb As New StringBuilder()

sb.AppendLine("From:")
sb.AppendLine(mail.From.Address)

sb.AppendLine("To:")
For Each toAddress As MailAddress In mail.[To]
	sb.AppendLine(toAddress.Address)
Next

sb.AppendLine("Date:")
sb.AppendLine(mail.[Date].ToString())

sb.AppendLine("Subject:")
sb.AppendLine(mail.Subject)

sb.AppendLine("Message contents")
sb.AppendLine(mail.BodyText)

sb.AppendLine("BodyHtml")
sb.AppendLine(mail.BodyHtml)

File.WriteAllText("ExtractMessageContents.txt", sb.ToString())
Sending bulk emails means that you can send a batch of emails to multiple recipients and they will not be able to determine the others you've sent the message to.
The following code snippets demonstrate how to send bulk emails using Spire.Email in C# and VB.NET.
Step 1: Create instances of MailMessage class and specify sender and recipients.
MailMessage message1 = new MailMessage("sender@e-iceblue.com", "recipient1@e-iceblue.com");
MailMessage message2 = new MailMessage("sender@e-iceblue.com", " recipient2@e-iceblue.com");
MailMessage message3 = new MailMessage("sender@e-iceblue.com", " recipient3@e-iceblue.com");
Step 2: Set the subject and body text of the messages.
message1.Subject = message2.Subject = message3.Subject = "Subject";
message1.BodyText = message2.BodyText = message3.BodyText = "This is body text.";
Step 3: Initialize an object of MailMessageCollection class and add the instances of MailMessage class into the object.
List msgs = new List();
msgs.Add(message1);
msgs.Add(message2);
msgs.Add(message3);
Step 4: Create a SmtpClient instance with host, port, username and password, and send batch of emails using SendSome method.
SmtpClient client = new SmtpClient();
client.Host = "smtp.outlook.com";
client.Port = 587;
client.Username = "sender@e-iceblue.com";
client.Password = "password";
client.ConnectionProtocols = ConnectionProtocols.Ssl;
client.SendSome(msgs);
Console.WriteLine("Message sent");
Full Code:
MailMessage message1 = new MailMessage("sender@e-iceblue.com", "recipient1@e-iceblue.com");
MailMessage message2 = new MailMessage("sender@e-iceblue.com", " recipient2@e-iceblue.com");
MailMessage message3 = new MailMessage("sender@e-iceblue.com", " recipient3@e-iceblue.com");
message1.Subject = message2.Subject = message3.Subject = "subject";
message1.BodyText = message2.BodyText = message3.BodyText = "This is body text.";

List msgs = new List();
msgs.Add(message1);
msgs.Add(message2);
msgs.Add(message3);

SmtpClient client = new SmtpClient();
client.Host = "smtp.outlook.com";
client.Port = 587;
client.Username = "sender@e-iceblue.com";
client.Password = "password";
client.ConnectionProtocols = ConnectionProtocols.Ssl;
client.SendSome(msgs);
Console.WriteLine("Message sent");
Dim message1 As New MailMessage("sender@e-iceblue.com", "recipient1@e-iceblue.com")
Dim message2 As New MailMessage("sender@e-iceblue.com", " recipient2@e-iceblue.com")
Dim message3 As New MailMessage("sender@e-iceblue.com", " recipient3@e-iceblue.com")
message1.Subject = InlineAssignHelper(message2.Subject, InlineAssignHelper(message3.Subject, "subject"))
message1.BodyText = InlineAssignHelper(message2.BodyText, InlineAssignHelper(message3.BodyText, "This is body text."))

Dim msgs As New List(Of MailMessage)()
msgs.Add(message1)
msgs.Add(message2)
msgs.Add(message3)

Dim client As New SmtpClient()
client.Host = "smtp.outlook.com"
client.Port = 587
client.Username = "sender@e-iceblue.com"
client.Password = "password"
client.ConnectionProtocols = ConnectionProtocols.Ssl
client.SendSome(msgs)
Console.WriteLine("Message sent")
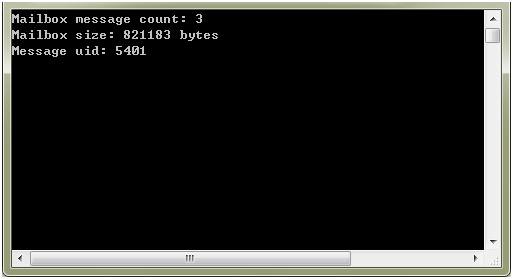
This article illustrates how to get mailbox information such as the number of messages, the size of mailbox and the unique id of a specific message using Spire.Email component.
Detail steps:
Step 1: Create a pop3 client.
Pop3Client pop = new Pop3Client();
Step 2: Set host, authentication, port and connection protocol.
pop.Host = "outlook.office365.com";
pop.Username = "LeonDavisLD@outlook.com";
pop.Password = "password";
pop.Port = 995;
pop.EnableSsl = true;
Step 3: Connect the pop server.
pop.Connect();
Step 4: Get information of mailbox.
//Get the number of messages
Console.WriteLine("Mailbox message count: " + pop.GetMessageCount());

//Get the size of mailbox
Console.WriteLine("Mailbox size: " + pop.GetSize() + " bytes");

//Get the unique id of the first message
Console.WriteLine("Message uid: " + pop.GetMessagesUid(1));
Screenshot:
Full code:
using System;
using Spire.Email.Pop3;

namespace Get_mailbox_information
{
    class Program
    {
        static void Main(string[] args)
        {
            //Create a pop3 client
            using (Pop3Client pop = new Pop3Client())
            {
                //Set host, authentication, port and connection protocol
                pop.Host = "outlook.office365.com";
                pop.Username = "LeonDavisLD@outlook.com";
                pop.Password = "password";
                pop.Port = 995;
                pop.EnableSsl = true;

                //Connect the pop server
                pop.Connect();

                //Get the number of messages
                Console.WriteLine("Mailbox message count: " + pop.GetMessageCount());

                //Get the size of mailbox
                Console.WriteLine("Mailbox size: " + pop.GetSize() + " bytes");

                //Get the unique id of the first message
                Console.WriteLine("Message uid: " + pop.GetMessagesUid(1));
            }
        }
    }
}
Imports Spire.Email.Pop3

Namespace Get_mailbox_information
	Class Program
		Private Shared Sub Main(args As String())
			'Create a pop3 client
			Using pop As New Pop3Client()
				'Set host, authentication, port and connection protocol
				pop.Host = "outlook.office365.com"
				pop.Username = "LeonDavisLD@outlook.com"
				pop.Password = "password"
				pop.Port = 995
				pop.EnableSsl = True

				'Connect the pop server
				pop.Connect()

				'Get the number of messages
				Console.WriteLine("Mailbox message count: " + pop.GetMessageCount())

				'Get the size of mailbox
				Console.WriteLine("Mailbox size: " + pop.GetSize() + " bytes")

				'Get the unique id of the first message
				Console.WriteLine("Message uid: " + pop.GetMessagesUid(1))
			End Using
		End Sub
	End Class
End Namespace
Following code snippets demonstrate how to create, rename and delete a folder on mail server by using ImapClient class in Spire.Email.
Create a mail folder
using Spire.Email;
using Spire.Email.IMap;
using System;
namespace CreateMailFolder
{
class Program
{
static void Main(string[] args)
{
//create an imapclient with username, password and host
ImapClient client = new ImapClient();
client.Username = "test@outlook.com";
client.Password = "password";
client.Host = "outlook.office365.com";
//specify the port
client.Port = 143;
//specify the connection protocol
client.ConnectionProtocols = ConnectionProtocols.Ssl;
//connect to imap mail server
client.Connect();
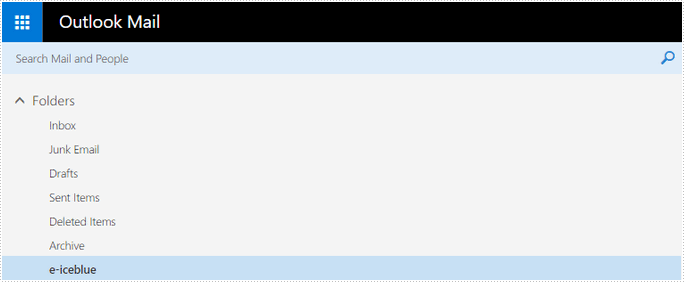
//create a folder named ‘e-iceblue’
client.CreateFolder("e-iceblue");
Console.WriteLine("Done!");
}
}
}
Rename a mail folder
using Spire.Email;
using Spire.Email.IMap;
using System;

namespace RenameMailFolder
{
    class Program
    {
        static void Main(string[] args)
        {
            //create an imapclient with username, password and host
            ImapClient client = new ImapClient();
            client.Username = "test@outlook.com";
            client.Password = "password";
            client.Host = "outlook.office365.com";
            //specify the port
            client.Port = 143;
            //specify the connection protocol
            client.ConnectionProtocols = ConnectionProtocols.Ssl;
            //connect to imap mail server
            client.Connect();
            //rename an existing folder with a new name
            client.RenameFolder("e-iceblue", "E-ICEBLUE");
            Console.WriteLine("Done!");
        }
    }

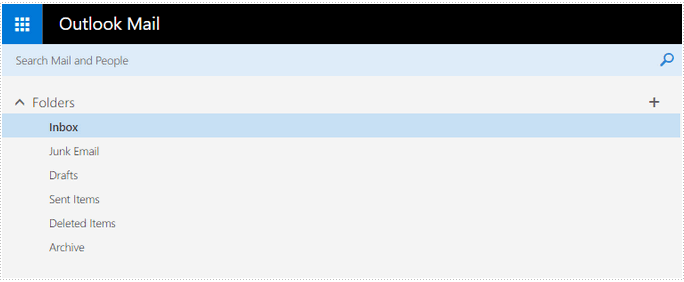
Delete a mail folder
using Spire.Email;
using Spire.Email.IMap;
using System;

namespace DeleteMailFolder
{
    class Program
    {
        static void Main(string[] args)
        {
            //create an imapclient with username, password and host
            ImapClient client = new ImapClient();
            client.Username = "test@outlook.com";
            client.Password = "password";
            client.Host = "outlook.office365.com";
            //specify the port
            client.Port = 143;
            //specify the connection protocol
            client.ConnectionProtocols = ConnectionProtocols.Ssl;
            //connect to imap mail server
            client.Connect();
            //delete an existing folder
            client.DeleteFolder("E-ICEBLUE");
            Console.WriteLine("Done!");
        }
    }
}
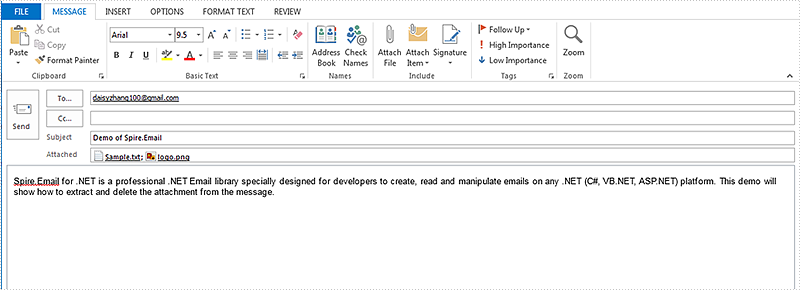
This article demonstrates how to extract the attachment from an email message and delete the attachment via Spire.Email in C# and VB.NET. Spire.Email supports to work with MSG, EML, EMLX, MHTML, PST, OST and TNEF email file formats. On this article we use .msg message format for example.
Firstly, please view the sample email message with attachments:
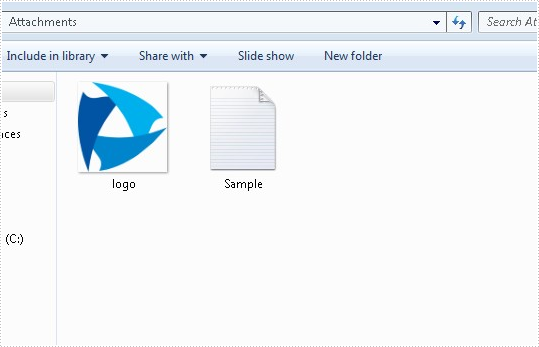
How to extract the attachment from an Email message:
using Spire.Email;
using System.IO;


namespace ExtractAttachment
{
    class Program
    {
        static void Main(string[] args)
        {
            //Load the mail message from file
            MailMessage mail = MailMessage.Load("Test.msg");

            //Create a folder named Attachments
            if (!Directory.Exists("Attachments"))
            {
                Directory.CreateDirectory("Attachments");
            }

            foreach (Attachment attach in mail.Attachments)
            {
                //To get and save the attachment
                string filePath = string.Format("Attachments\\{0}", attach.ContentType.Name);
                if (File.Exists(filePath))
                {
                    File.Delete(filePath);
                }
                FileStream fs = File.Create(filePath);
                attach.Data.CopyTo(fs);
            }
        }
    }
}
Imports Spire.Email
Imports System.IO


Namespace ExtractAttachment
	Class Program
		Private Shared Sub Main(args As String())
			'Load the mail message from file
			Dim mail As MailMessage = MailMessage.Load("Test.msg")

			'Create a folder named Attachments
			If Not Directory.Exists("Attachments") Then
				Directory.CreateDirectory("Attachments")
			End If

			For Each attach As Attachment In mail.Attachments
				'To get and save the attachment
				Dim filePath As String = String.Format("Attachments\{0}", attach.ContentType.Name)
				If File.Exists(filePath) Then
					File.Delete(filePath)
				End If
				Dim fs As FileStream = File.Create(filePath)
				attach.Data.CopyTo(fs)
			Next
		End Sub
	End Class
End Namespace
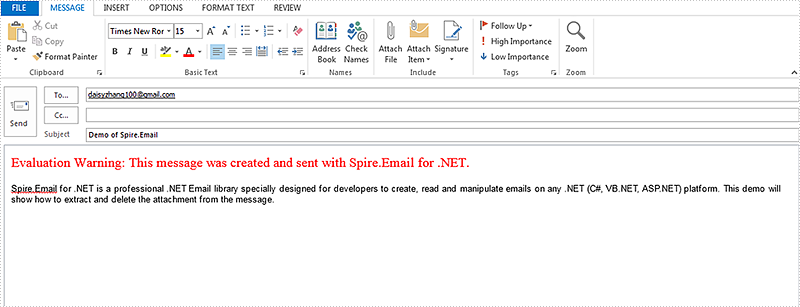
How to delete the attachment from an Email message:
using Spire.Email;


namespace DeleteAttachment
{
    class Program
    {
        static void Main(string[] args)
        {
            MailMessage mail = MailMessage.Load("Test.msg");
            // Delete the attachment by index
            mail.Attachments.RemoveAt(0);
            // Delete the attachment by attachment name
            for (int i = 0; i < mail.Attachments.Count; i++)
            {
                Attachment attach = mail.Attachments[i];
                if (attach.ContentType.Name == "logo.png")
                {
                    mail.Attachments.Remove(attach);
                }
            }
            mail.Save("HasDeletedAttachment.msg", MailMessageFormat.Msg);
        }
    }
}
Imports Spire.Email


Namespace DeleteAttachment
	Class Program
		Private Shared Sub Main(args As String())
			Dim mail As MailMessage = MailMessage.Load("Test.msg")
			' Delete the attachment by index
			mail.Attachments.RemoveAt(0)
			' Delete the attachment by attachment name
			For i As Integer = 0 To mail.Attachments.Count - 1
				Dim attach As Attachment = mail.Attachments(i)
				If attach.ContentType.Name = "logo.png" Then
					mail.Attachments.Remove(attach)
				End If
			Next
			mail.Save("HasDeletedAttachment.msg", MailMessageFormat.Msg)
		End Sub
	End Class
End Namespace
Spire.Email allows receiving email messages with POP3 client and IMAP client. The following examples demonstrate how to retrieve an email using both POP3 and IMAP clients and save it to disk in C# and VB.NET.
Use POP3 client
using Spire.Email;
using Spire.Email.Pop3;
using System;
using System.Globalization;

namespace ReceiveAndSaveEmailByUsingPOP3client
{
    class Program
    {
        static void Main(string[] args)
        {
            //Create a POP3 client
            Pop3Client pop = new Pop3Client();
            //Set host, username, password etc. for the client
            pop.Host = "outlook.office365.com";
            pop.Username = "LeonDavisLD@outlook.com";
            pop.Password = "password";
            pop.Port = 995;
            pop.EnableSsl = true;
            //Connect the server
            pop.Connect();

            //Get the first message by its sequence number
            MailMessage message = pop.GetMessage(1);

            //Parse the message
            Console.WriteLine("------------------ HEADERS ---------------");
            Console.WriteLine("From   : " + message.From.ToString());
            Console.WriteLine("To     : " + message.To.ToString());
            Console.WriteLine("Date   : " + message.Date.ToString(CultureInfo.InvariantCulture));
            Console.WriteLine("Subject: " + message.Subject);
            Console.WriteLine("------------------- BODY -----------------");
            Console.WriteLine(message.BodyText);
            Console.WriteLine("------------------- END ------------------");

            //Save the message to disk using its subject as file name
            message.Save(message.Subject + ".eml", MailMessageFormat.Eml);

            Console.WriteLine("Message Saved.");
            Console.ReadKey();
        }
    }
}
Imports Spire.Email
Imports Spire.Email.Pop3
Imports System.Globalization

Namespace ReceiveAndSaveEmailByUsingPOP3client
	Class Program
		Private Shared Sub Main(args As String())
			'Create a POP3 client
			Dim pop As New Pop3Client()
			'Set host, username, password etc. for the client
			pop.Host = "outlook.office365.com"
			pop.Username = "LeonDavisLD@outlook.com"
			pop.Password = "password"
			pop.Port = 995
			pop.EnableSsl = True
			'Connect the server
			pop.Connect()

			'Get the first message by its sequence number
			Dim message As MailMessage = pop.GetMessage(1)

			'Parse the message
			Console.WriteLine("------------------ HEADERS ---------------")
			Console.WriteLine("From   : " + message.From.ToString())
			Console.WriteLine("To     : " + message.[To].ToString())
			Console.WriteLine("Date   : " + message.[Date].ToString(CultureInfo.InvariantCulture))
			Console.WriteLine("Subject: " + message.Subject)
			Console.WriteLine("------------------- BODY -----------------")
			Console.WriteLine(message.BodyText)
			Console.WriteLine("------------------- END ------------------")

			'Save the message to disk using its subject as file name
			message.Save(message.Subject + ".eml", MailMessageFormat.Eml)

			Console.WriteLine("Message Saved.")
			Console.ReadKey()
		End Sub
	End Class
End Namespace
Use IMAP client
using Spire.Email;
using Spire.Email.IMap;
using System;
using System.Globalization;


namespace ReceiveAndSaveEmailByUsingIMAPclient
{
    class Program
    {
        static void Main(string[] args)
        {
            //Create an IMAP client
            ImapClient imap = new ImapClient();
            // Set host, username, password etc. for the client
            imap.Host = "outlook.office365.com";
            imap.Port = 143;
            imap.Username = "LeonDavisLD@outlook.com";
            imap.Password = "password";
            imap.ConnectionProtocols = ConnectionProtocols.Ssl;
            //Connect the server
            imap.Connect();

            //Select Inbox folder
            imap.Select("Inbox");

            //Get the first message by its sequence number
            MailMessage message = imap.GetFullMessage(1);

            //Parse the message
            Console.WriteLine("------------------ HEADERS ---------------");
            Console.WriteLine("From   : " + message.From.ToString());
            Console.WriteLine("To     : " + message.To.ToString());
            Console.WriteLine("Date   : " + message.Date.ToString(CultureInfo.InvariantCulture));
            Console.WriteLine("Subject: " + message.Subject);
            Console.WriteLine("------------------- BODY -----------------");
            Console.WriteLine(message.BodyText);
            Console.WriteLine("------------------- END ------------------");

            //Save the message to disk using its subject as file name
            message.Save(message.Subject + ".eml", MailMessageFormat.Eml);

            Console.WriteLine("Message Saved.");
            Console.ReadKey();
        }
    }
}
Imports Spire.Email
Imports Spire.Email.IMap
Imports System.Globalization


Namespace ReceiveAndSaveEmailByUsingIMAPclient
	Class Program
		Private Shared Sub Main(args As String())
			'Create an IMAP client
			Dim imap As New ImapClient()
			' Set host, username, password etc. for the client
			imap.Host = "outlook.office365.com"
			imap.Port = 143
			imap.Username = "LeonDavisLD@outlook.com"
			imap.Password = "password"
			imap.ConnectionProtocols = ConnectionProtocols.Ssl
			'Connect the server
			imap.Connect()

			'Select Inbox folder
			imap.[Select]("Inbox")

			'Get the first message by its sequence number
			Dim message As MailMessage = imap.GetFullMessage(1)

			'Parse the message
			Console.WriteLine("------------------ HEADERS ---------------")
			Console.WriteLine("From   : " + message.From.ToString())
			Console.WriteLine("To     : " + message.[To].ToString())
			Console.WriteLine("Date   : " + message.[Date].ToString(CultureInfo.InvariantCulture))
			Console.WriteLine("Subject: " + message.Subject)
			Console.WriteLine("------------------- BODY -----------------")
			Console.WriteLine(message.BodyText)
			Console.WriteLine("------------------- END ------------------")

			'Save the message to disk using its subject as file name
			message.Save(message.Subject + ".eml", MailMessageFormat.Eml)

			Console.WriteLine("Message Saved.")
			Console.ReadKey()
		End Sub
	End Class
End Namespace
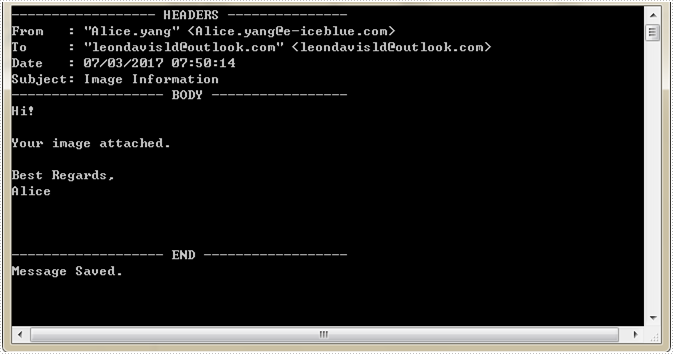
Screenshot:
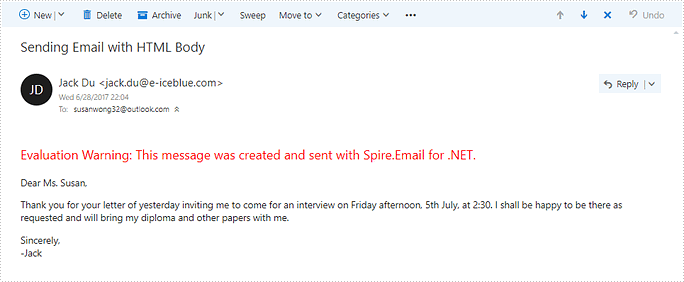
Following code snippets demonstrate how to send an email with HTML body using Spire.Email in C# and VB.NET.
Step 1: Create an instance of MailMessage class and specify sender and recipient in its constructor.
MailAddress addressFrom = new MailAddress("jack.du@e-iceblue.com", "Jack Du");
MailAddress addressTo = new MailAddress("susanwong32@outlook.com");
MailMessage message = new MailMessage(addressFrom, addressTo);
Step 2: Set the creation date, subject and html body of the message.
message.Date = DateTime.Now;
message.Subject = "Sending Email with HTML Body";
string htmlString = @"<html>
                      <body>
                      <p>Dear Ms. Susan,</p>
                      <p>Thank you for your letter of yesterday inviting me to come for an interview on Friday afternoon, 5th July, at 2:30.
                              I shall be happy to be there as requested and will bring my diploma and other papers with me.</p>
                      <p>Sincerely,<br>-Jack</br></p>
                      </body>
                      </html>
                     ";
message.BodyHtml = htmlString;
Step 3: Create a SmtpClient instance, set its properties, and send the email using SendOne() medthod.
SmtpClient client= new SmtpClient();
client.Host = "smtp.outlook.com";
client.Port = 587;
client.Username = addressFrom.Address;
client.Password = "password";
client.ConnectionProtocols = ConnectionProtocols.Ssl;
client.SendOne(message);
Output:
Full Code:
MailAddress addressFrom = new MailAddress("jack.du@e-iceblue.com", "Jack Du");
MailAddress addressTo = new MailAddress("susanwong32@outlook.com");
MailMessage message = new MailMessage(addressFrom, addressTo);

message.Date = DateTime.Now;
message.Subject = "Sending Email with HTML Body";
string htmlString = @"<html>
                      <body>
                      <p>Dear Ms. Susan,</p>
                      <p>Thank you for your letter of yesterday inviting me to come for an interview on Friday afternoon, 5th July, at 2:30.
                              I shall be happy to be there as requested and will bring my diploma and other papers with me.</p>
                      <p>Sincerely,<br>-Jack</br></p>
                      </body>
                      </html>
                     ";
message.BodyHtml = htmlString;

SmtpClient client= new SmtpClient();
client.Host = "smtp.outlook.com";
client.Port = 587;
client.Username = addressFrom.Address;
client.Password = "password";
client.ConnectionProtocols = ConnectionProtocols.Ssl;
client.SendOne(message);

Console.WriteLine("Sent Successfully!");
Console.Read();
using Spire.Email;
using Spire.Email.IMap;
using Spire.Email.Smtp;
using System;

namespace SendEmailwithHTMLBody
{
    class Program
    {
        static void Main(string[] args)
        {
            MailAddress addressFrom = new MailAddress("jack.du@e-iceblue.com", "Jack Du");
            MailAddress addressTo = new MailAddress("susanwong32@outlook.com");
            MailMessage message = new MailMessage(addressFrom, addressTo);

            message.Date = DateTime.Now;
            message.Subject = "Sending Email with HTML Body";
            string htmlString = @"<html>
                      <body>
                      <p>Dear Ms. Susan,</p>
                      <p>Thank you for your letter of yesterday inviting me to come for an interview on Friday afternoon, 5th July, at 2:30.
                              I shall be happy to be there as requested and will bring my diploma and other papers with me.</p>
                      <p>Sincerely,<br>-Jack</br></p>
                      </body>
                      </html>
                     ";
            message.BodyHtml = htmlString;

            SmtpClient client = new SmtpClient();
            client.Host = "smtp.outlook.com";
            client.Port = 587;
            client.Username = addressFrom.Address;
            client.Password = "password";
            client.ConnectionProtocols = ConnectionProtocols.Ssl;
            client.SendOne(message);

            Console.WriteLine("Sent Successfully!");
            Console.Read();
        }
    }
}
Sending emails with file attachments using C# is a common requirement in .NET development — whether it’s for sharing reports, invoices, or log files. While .NET’s built-in namespaces offer basic email support, things can become difficult when dealing with attachments, encoding, or dynamically generated content.
To simplify these tasks, this guide introduces how to send an email with attachment in C# using Spire.Email for .NET. We’ll cover how to attach files from disk, memory streams, or byte arrays, and walk you through configuring SMTP clients — including settings for Outlook. Whether you're working on a C# console app, an ASP.NET project, or other types of .NET applications, this guide provides practical examples to help you get started.
Table of Contents
- 1. Getting Started: Sending Emails in C# Using Spire.Email
- 2. Send Email with File Attachment from Disk in C#
- 3. Attach Files from MemoryStream or Byte Array
- 4. Send Email with Outlook SMTP in C#
- 5. Real-World Example
- 6. Troubleshooting Tips and Best Practices
- 7. Summary and Next Steps
- 8. Frequently Asked Questions (FAQ)
1. Getting Started: Sending Emails in C# Using Spire.Email
Spire.Email for .NET is a professional email library that enables .NET applications to create, send, receive, and manage emails without relying on Outlook or other third-party clients. It supports SMTP, POP3, and IMAP protocols, and handles attachments, HTML formatting, and inline resources with ease.
Installation
You can install the library via NuGet with the following command:
Install-Package Spire.Email
Download Spire.Email for .NET from the official page and install manually.
2. Send Email with File Attachment from Disk in C#
Sending file attachments via email is a common requirement in many C# applications—especially when automating tasks like batch reporting or file distribution. This section demonstrates how to send an email with a PDF file attached from the local disk using Spire.Email.
Key steps include:
- Setting up sender and recipient addresses
- Composing an HTML-formatted email body
- Adding a file attachment using the Attachment class
- Configuring and authenticating the SMTP client
This hands-on example provides a clear overview of how to send emails with attachments in C#, using just a few lines of code.
Example Code
using Spire.Email;
using Spire.Email.Smtp;

class Program
{
    static void Main()
    {
        try
        {
            // Create MailAddress objects for sender, recipient, and CC
            MailAddress addressFrom = new MailAddress("user@yourcompany.com", "Sender Name");
            MailAddress addressTo = new MailAddress("recipient@yourcompany.com", "Recipient Name");
            MailAddress addressCc = new MailAddress("copy@yourcompany.com", "Cc Name");

            // Create a new MailMessage and set From and To addresses
            MailMessage message = new MailMessage(addressFrom, addressTo);

            // Add CC recipient
            message.Cc.Add(addressCc);

            // Set the email subject and body
            message.Subject = "Monthly Report - June 2025";
            message.BodyHtml = "<div style='font-family:Segoe UI, sans-serif; font-size:14px; color:#333; line-height:1.6;'>" +
                               "<p>Dear all,</p>" +
                               "<p>Please find the <strong style='color:#2E86C1;'>monthly report</strong> attached.</p>" +
                               "<p>If you have any questions, feel free to reach out at your convenience.</p>" +
                               "<p style='margin-top:30px;'>Best regards,</p>" +
                               "<p style='font-style:italic; color:#555;'>Sender Name</p>" +
                               "</div>";

            // Add an attachment from file
            String filePath = @"Sample.pdf";
            Attachment attachment = new Attachment(filePath);
            message.Attachments.Add(attachment);

            // Configure the SMTP client
            SmtpClient smtp = new SmtpClient();
            smtp.Host = "smtp.yourcompany.com";
            smtp.Port = 587;
            smtp.Username = "your_username";
            smtp.Password = "your_password";
            smtp.ConnectionProtocols = ConnectionProtocols.StartTls;

            // Attempt to send the email
            smtp.SendOne(message);

            // If no exception is thrown, email was sent successfully
            Console.WriteLine("Email sent successfully.");
        }
        catch (Exception ex)
        {
            // If an error occurs, print the error message
            Console.WriteLine("Failed to send email.");
            Console.WriteLine("Error: " + ex.Message);
        }
    }
}
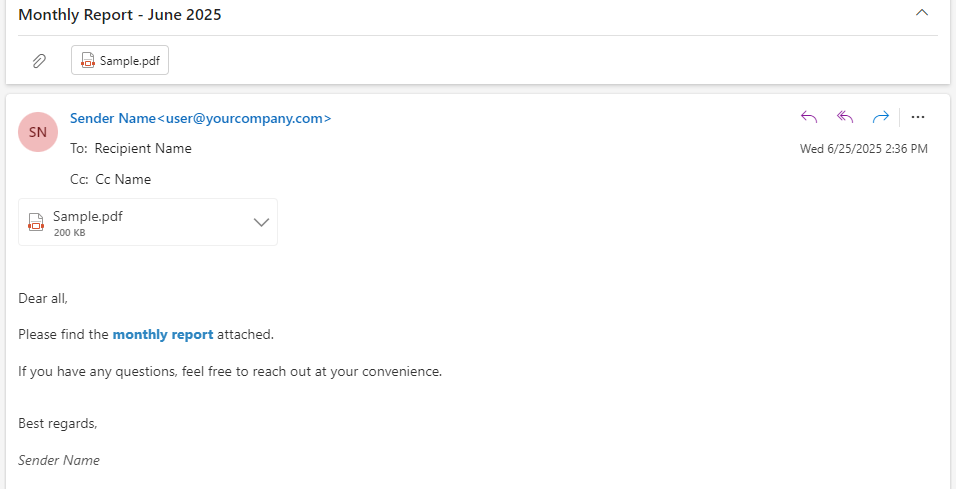
The following screenshot shows the result of sending a simple email with a PDF attachment using the C# code above:
You may also like: Extract and Delete Email Attachments Using C#
3. Attach Files from MemoryStream or Byte Array to an Email
In many scenarios — such as exporting a document or image on the fly — you may need to send an email with attachment from a memory stream using C#, without saving the file to disk. Spire.Email makes this easy by allowing you to attach files directly from a MemoryStream or byte array.
Example: Attach a PDF from MemoryStream
using System.IO;
using Spire.Email;

String filePath = @"Sample.pdf";
MemoryStream stream = new MemoryStream(File.ReadAllBytes(filePath));
Attachment attachment = new Attachment(stream, Path.GetFileName(filePath);
message.Attachments.Add(attachment);
You can also attach from a byte array:
String filePath = @"Sample.pdf";
byte[] fileBytes = File.ReadAllBytes(filePath);
MemoryStream memStream = new MemoryStream(fileBytes);
Attachment imgAttachment = new Attachment(memStream, Path.GetFileName(filePath));
message.Attachments.Add(imgAttachment);
This is especially useful in web applications or services where you generate documents dynamically.
When creating an Attachment object using a stream, make sure the file name includes a valid extension (e.g., .pdf, .xlsx) to ensure the correct MIME type is recognized.
4. Send Email with Outlook SMTP in C#
If you're using an Outlook or Microsoft 365 account, you can send emails through their SMTP server using Spire.Email.
Outlook SMTP Configuration
smtp.Host = "smtp.office365.com";
smtp.Port = 587;
smtp.Username = "your_outlook_email@domain.com";
smtp.Password = "your_password";
smtp.ConnectionProtocols = ConnectionProtocols.StartTls;
Spire.Email fully supports TLS and STARTTLS, ensuring secure connections to Microsoft’s mail servers.
If you want to send emails in Outlook MSG format, please refer to: How to Send Outlook MSG Emails with Attachments in C#
5. Real-World Example: Sending C# Emails with Attachments and Dynamic Content
In a real-world business scenario, you often need to send project progress reports to multiple recipients, each with personalized content. Using Spire.Email for .NET, you can easily send individual emails with attachments and customized greetings—all within a simple C# application.
The example below demonstrates how to send a project status report to multiple clients, using dynamic recipient names in the greeting line and attaching PDF or Excel documents.
Full Code Example
using Spire.Email;
using Spire.Email.Smtp;

class Program
{
    static void Main()
    {
        // Define sender
        MailAddress addressFrom = new MailAddress("user@yourcompany.com", "Sender");

        // Define recipient list with name and email
        List<MailAddress> recipients = new List<MailAddress>
        {
            new MailAddress("sales@clientA.com", "Sales Team A"),
            new MailAddress("manager@clientB.com", "Manager B"),
            new MailAddress("support@clientC.com", "Support Team C")
        };

        // Attachments to be included
        string[] attachmentFiles = { @"Sample.pdf", @"Sample.xlsx" };

        // Configure SMTP once
        SmtpClient smtp = new SmtpClient();
        smtp.Host = "smtp.yourcompany.com";
        smtp.Port = 587;
        smtp.Username = "your_username";
        smtp.Password = "your_password";
        smtp.ConnectionProtocols = ConnectionProtocols.StartTls;

        // Send email to each recipient individually
        foreach (var recipient in recipients)
        {
            try
            {
                // Create a new message for each recipient
                MailMessage message = new MailMessage(addressFrom, recipient);
                message.Subject = "Project Status Update - Q2 2025";

                // Use the display name in the greeting
                string greetingName = string.IsNullOrEmpty(recipient.DisplayName)
                    ? "team"
                    : recipient.DisplayName;

                // Mail content
                message.BodyHtml = $@"
                  <div style='font-family:Segoe UI, sans-serif; font-size:14px; color:#333; line-height:1.6;'>
                    <p>Dear {greetingName},</p>

                    <p>Please find attached the <strong>Q2 2025 Project Status Report</strong>, covering:</p>
                    <ul style='padding-left:18px; margin:0;'>
                      <li>Milestones achieved</li>
                      <li>Pending tasks</li>
                      <li>Key insights</li>
                    </ul>

                    <p>If you have any questions or would like to discuss the details, feel free to reach out.</p>

                    <p>Best regards,<br><strong>Sender</strong></p>
                  </div>";

                // Send the message
                smtp.SendOne(message);

                Console.WriteLine($"Email sent to {recipient.Address}.");
            }
            catch (Exception ex)
            {
                Console.WriteLine($"Failed to send email to {recipient.Address}.");
                Console.WriteLine("Error: " + ex.Message);
            }
        }
    }
}
This example is applicable to C# console applications, ASP.NET apps, or any .NET project requiring email functionality.
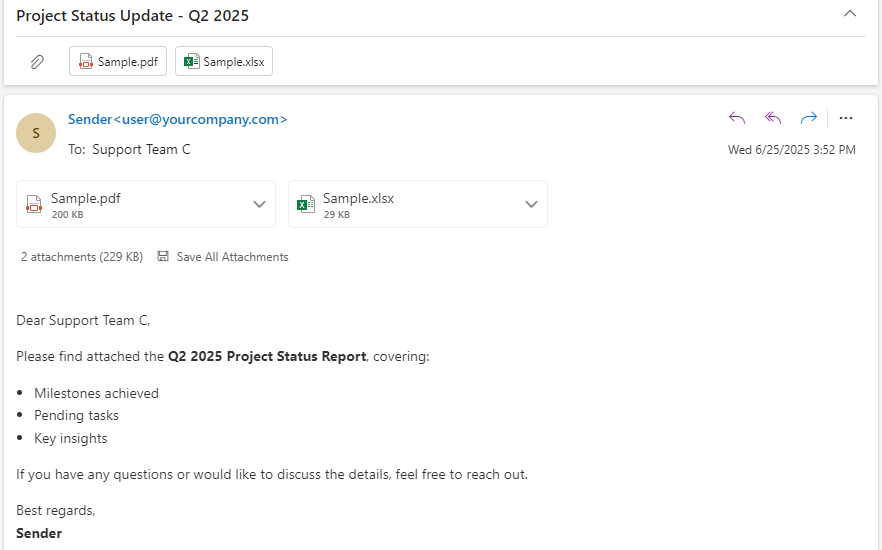
Below is a sample of the personalized project status email generated in the complete working example:
6. Troubleshooting Tips and Best Practices
Here are some common issues developers encounter when sending email with attachments in C#:
- Authentication errors: Ensure your SMTP credentials are correct and SSL/TLS is properly set.
- Blocked ports: Many hosting environments block port 25. Use 465 (SSL) or 587 (TLS) instead.
- Attachment size limits: Most SMTP servers restrict attachment size. Consider compressing or splitting files.
- Secure credential handling: Avoid hardcoding sensitive credentials in code. Use secure storage or environment variables.
- MIME type issues: If you're attaching files from byte arrays or memory streams, make sure the attachment name includes a valid extension so the MIME type can be correctly inferred.
By using Spire.Email, you can handle encoding, multi-format attachments, and protocol security with ease—without writing verbose code.
7. Summary and Next Steps
In this tutorial, we’ve shown how to send an email with attachment in C# using Spire.Email for .NET. From basic file attachments to advanced scenarios involving memory streams or Outlook SMTP integration, Spire.Email provides a streamlined and developer-friendly API.
If you're looking for a way to simplify email functionality in your .NET applications, Spire.Email is worth exploring. You can apply for a free temporary license and try it in your own projects.
8. Frequently Asked Questions (FAQ)
❓ How do I attach a file in an email using C#?
You can use the Attachment class from Spire.Email to attach a file like this:
message.Attachments.Add(new Attachment(@"file.pdf"));
You can also attach files from a MemoryStream or byte array if the file is generated in memory.
❓ How can I send an email with an attached file?
Use the SmtpClient.SendOne() method in Spire.Email to send the message after adding attachments with MailMessage.Attachments.Add(). Ensure your SMTP configuration and authentication details are correct.
❓ Can I send an email with attachment in .NET Core?
Yes. Spire.Email for .NET supports .NET Core, .NET Standard, .NET 5+, .NET Framework, ASP.NET, MonoAndroid, Xamarin.iOS, and works with both C# and VB.NET.
❓ How do I send an email with Excel attachment in C#?
You can attach Excel files like .xlsx or .xls just like any other file:
message.Attachments.Add(new Attachment(@"report.xlsx"));
Make sure the file path is valid and the file is accessible to the application.
We have already demonstrated how to generate 1D barcode and 2D barcodes by using Spire.Barcode. This article will demonstrate how to scan the barcode images with Spire.Barcode. Spire.Barcode supports scanning the barcode image in .bmp, .png and .jpg image format. We will use Spire.Barcode to scan both 1D barcode and 2D barcode for example.
Scan Code39 barcode image:
string[] data = Spire.Barcode.BarcodeScanner.Scan("Code39.png",
Spire.Barcode.BarCodeType.Code39);

Scan QRCode barcode image:
string[] data = Spire.Barcode.BarcodeScanner.Scan("QRCode.png", Spire.Barcode.BarCodeType.QRCode);

When working with Word templates, it's common to replace specific placeholders with real content—like names, dates, or even company logos. Manually updating each instance may take lots of effort and time. Fortunately, you can automate this process using code. In this tutorial, we'll show you how to use C# regex replace to find and replace text in Word documents. You'll learn how to apply regular expressions across the entire document, target specific paragraphs, and even replace matched text with images.
- Before We Start: Install Word Library
- Replace Text in an Entire Word Document
- Replace Text within Specific Paragraph in C#
- Replace Regex Matches with Images
- Replace Text with Regex in VB.NET
- Conclusion
Before We Start: Install Word Library
To make this task easier, we recommend using Spire.Doc for .NET — a powerful Word library designed to automate common document operations such as reading, editing, and converting Word files. With Spire.Doc, performing a C# regex replace in Word documents can be done in just a few lines of code.
You can install the library via NuGet with the following command:
PM> Install-Package Spire.Doc
Alternatively, you can download the Spire.Doc package and install it with custom settings. A free version is also available, ideal for small projects or evaluation purposes.
Use Regex to Replace Text in an Entire Word Document
Let's start with the most common scenario — replacing text throughout the entire Word document. You can use regular expressions to match all patterns like #name or #tel, then replace them with actual values such as a person's name or phone number.
With the help of the Document.Replace() method provided by Spire.Doc, this task becomes incredibly simple. Here's a step-by-step explanation along with sample code to show how to replace text using regex in C#.
Code example - replacing #name with "May" in the entire Word document using C#:
using Spire.Doc;
using System.Text.RegularExpressions;
namespace FindText
{
    class Program
    {
        static void Main(string[] args)
        {
            // Create an object of Document class and load a Word document
            Document doc = new Document();
            doc.LoadFromFile("/input/replace template.docx");
            // Set the regular expression
            Regex regex = new Regex(@"#\w+\b");
            // Replace all matches with "May"
            doc.Replace(regex, "May");
            // Save the document
            doc.SaveToFile("/output/replacealloccurences.docx", FileFormat.Docx2013);
        }
    }
}
Here is a comparison preview of the results before and after using regex to replace text in C#: 
Steps Explained:
- Create a Document instance and load a Word document from files.
- Set the regular expression.
- Replace all matches in the document with Documet.Replace() method.
- Save the updated document.
Apply Regex Replace to a Specific Paragraph in C#
Replacing text across the entire document may seem straightforward, but how can we achieve the same result within a specific paragraph? When you need more precise control, such as performing regex replace only within a paragraph range, you can retrieve the paragraph text and reset its content manually. In code, this means using regular expressions to locate matches within the target paragraph, remove the original text, and insert the replacement.
Let’s first look at a real-world code example — we’ll break down the detailed steps right after.
Code example - replacing #name with "Lily" in the first paragraph using regular expression:
using Spire.Doc;
using Spire.Doc.Documents;
using System.Text.RegularExpressions;

class Program
{
    static void Main(string[] args)
    {
        // Create a Document object and load a template
        Document doc = new Document();
        doc.LoadFromFile("/input/replace template.docx");

        Regex regex = new Regex(@"#\w+\b");

        // Get the first paragraph
        Paragraph para = doc.Sections[0].Paragraphs[0];
        string originalText = para.Text;

        if (regex.IsMatch(originalText))
        {
            string newText = regex.Replace(originalText, "Lily");

            // Clear the content and append the new text
            para.ChildObjects.Clear();
            para.AppendText(newText);
        }

        // Save the updated document
        doc.SaveToFile("/output/replacefirstpara.docx", FileFormat.Docx2013);
    }
}
Here is a before-and-after comparison of using regular expressions in C# to replace text in the first paragraph: 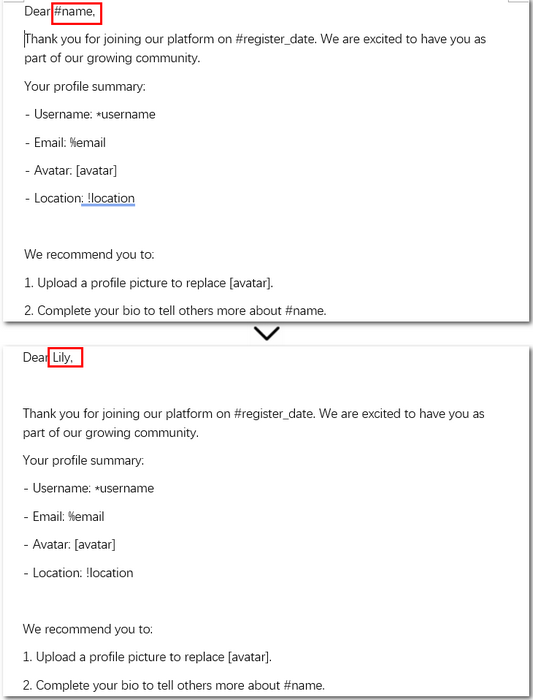
Detailed steps explained:
- Create a Document object and load the Word file.
- Access the target paragraph using Sections[].Paragraphs[] property.
- Get the original text from the paragraph.
- Use a regular expression to find and replace matching text.
- Clear the original content and append the updated text to the paragraph.
- Save the modified document.
Replace Regex Matches with Images in Word Using C#
Now that we’ve covered how to replace text in the entire document or within a single paragraph, let’s move on to something more advanced—replacing text with images. This is often used in practical scenarios like generating reports or company brochures. For instance, you might want to replace a placeholder such as [logo] with your company’s actual logo.
With the help of C# regex replace and Spire.Doc’s image insertion APIs, this task can also be automated. Let’s take a look at a real code example first, then we’ll explain how it works.
Code example – replacing [avatar] with an image:
using Spire.Doc;
using Spire.Doc.Documents;
using Spire.Doc.Fields;
using System.Text.RegularExpressions;

namespace RegexReplaceWithImage
{
    class Program
    {
        static void Main(string[] args)
        {
            // Create a Document object and load a Word file from disk
            Document document = new Document();
            document.LoadFromFile(@"\input\replace template.docx");

            // Define a regular expression to match placeholders
            Regex regex = new Regex(@"\[\w+\]", RegexOptions.IgnoreCase);

            // Find all matches in the document that match the pattern
            TextSelection[] selections = document.FindAllPattern(regex);

            // Loop through each matched placeholder
            foreach (TextSelection selection in selections)
            {
                // Create a picture object and load the image from disk
                DocPicture pic = new DocPicture(document);
                pic.LoadImage(@"\avatar-1.png");

                // Get the matched text as a single text range
                TextRange textRange = selection.GetAsOneRange();

                // Get the index of the text range in its parent paragraph
                int index = textRange.OwnerParagraph.ChildObjects.IndexOf(textRange);

                // Insert the image at the matched position
                textRange.OwnerParagraph.ChildObjects.Insert(index, pic);

                // Remove the original placeholder text
                textRange.OwnerParagraph.ChildObjects.Remove(textRange);
            }

            // Save the modified document to disk
            document.SaveToFile(@"\output\ReplaceTextWithImage.docx", FileFormat.Docx2016);
            document.Close();
        }
    }
}
Here is a before-and-after comparison of replacing text with an image using regex in C#: 
Detailed steps explained:
- Create an object of Document class and read a Word document.
- Define a regular expression to match target content.
- Find all occurrences using Document.FindAllPattern() method.
- Loop through the collection of matches.
- Create a DocPicture instance and load an image.
- Get the matched text as a text range and retrieve its index in the parent paragraph.
- Insert the image at the position and remove the original text.
- Save the Word document as a new file.
Replace Text with Regex in VB.NET
If you're working with VB.NET instead of C#, you can achieve the same result using regular expressions to search and replace text throughout a Word document. The approach is similar—load the file, apply a regex pattern, and update the content. Here's a simple example to get you started.
Imports Spire.Doc
Imports System.Text.RegularExpressions

Module Module1
	Sub Main()
		Dim doc As New Document()
		doc.LoadFromFile("/input/replace template.docx")

		Dim regex As New Regex("#\w+\b")
		doc.Replace(regex, "Lena")

		doc.SaveToFile("/output/regexreplace.docx", FileFormat.Docx2013)
	End Sub
End Module
Above is the VB.NET code for replacing text throughout an entire Word document using regular expressions.
If you need to perform other tasks, such as replacing text in specific paragraphs or replacing text with images, you can easily convert the C# code examples into VB.NET using the C# Code ⇆ VB.NET Code Converter — a handy tool developed by the Spire.Doc team.
The Conclusion
With the help of regular expressions, replacing text or even inserting images in Word documents using C# becomes a smooth and efficient process. Whether you're working on templates, reports, or personalized documents, this approach saves time and reduces manual work. Ready to try it out? Download Spire.Doc and get started with a free 30-day trial license—perfect for evaluation and small projects.
