
.NET (1327)
Children categories
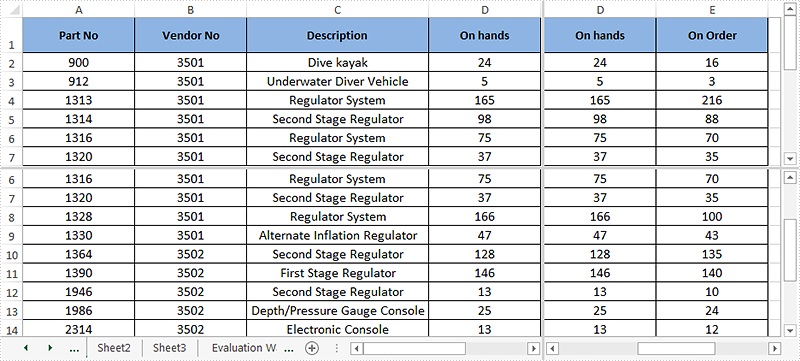
Excel enables us to split an excel worksheet into two or four independent panes. After splitting up the window into panes, we can use the horizontal and vertical scroll bars to view and compare data in different parts of the same worksheet. This article demonstrates how to vertical and horizontal split an excel worksheet into four panes programmatically using Spire.XLS.
Detail steps:
Step 1: Instantiate a Workbook instance and load the excel document.
Workbook workbook = new Workbook();
workbook.LoadFromFile("Sample.xlsx");
Step 2: Get the first worksheet.
Worksheet sheet = workbook.Worksheets[0];
Step 3: Split the worksheet horizontally and vertically.
sheet.FirstVisibleColumn = 3;

sheet.FirstVisibleRow = 5;

sheet.VerticalSplit = 110;

sheet.HorizontalSplit = 100;
sheet.ActivePane = 1;
Step 4: Save the excel document.
workbook.SaveToFile("Output.xlsx", ExcelVersion.Version2013);
Screenshot after splitting:
Full codes:
using Spire.Xls;

namespace Split_Panes
{
    class Program
    {
        static void Main(string[] args)
        {
            //Load the excel document
            Workbook workbook = new Workbook();
            workbook.LoadFromFile("Sample.xlsx");

            //Get the first worksheet
            Worksheet sheet = workbook.Worksheets[0];

            //Vertical and horizontal split the worksheet into four panes

            sheet.FirstVisibleColumn = 3;

            sheet.FirstVisibleRow = 5;

            sheet.VerticalSplit = 110;

            sheet.HorizontalSplit = 100;

            sheet.ActivePane = 1;

            //Save the excel document
            workbook.SaveToFile("Output.xlsx", ExcelVersion.Version2013);

            workbook.Dispose();
        }
    }
}
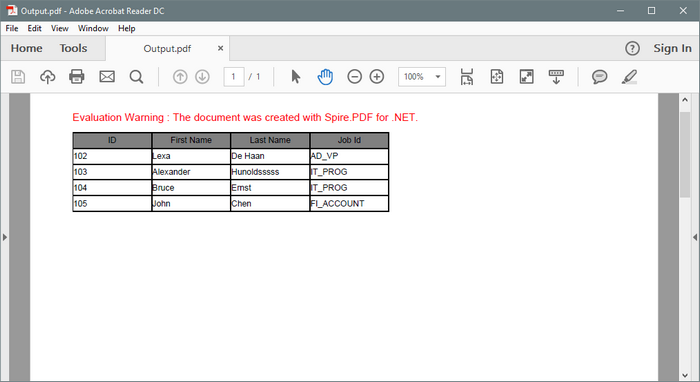
When creating a PDF table using PdfTable, there is no direct API available in this class that allows to change the row height of the table. However, it is possible to change the row height through BeginRowLayout event.
Step 1: Create a new PDF document.
PdfDocument doc = new PdfDocument();
PdfPageBase page = doc.Pages.Add();
Step 2: Initialize an instance of PdfTable class.
PdfTable table = new PdfTable();
Step 3: Create a DataTable.
DataTable dataTable = new DataTable();
dataTable.Columns.Add("ID");
dataTable.Columns.Add("First Name");
dataTable.Columns.Add("Last Name");
dataTable.Columns.Add("Job Id");
dataTable.Rows.Add(new string[] { "102", "Lexa", "De Haan","AD_VP" });
dataTable.Rows.Add(new string[] { "103", "Alexander", "Hunoldsssss","IT_PROG" });
dataTable.Rows.Add(new string[] { "104", "Bruce", "Ernst", "IT_PROG" });
dataTable.Rows.Add(new string[] { "105", "John", "Chen", "FI_ACCOUNT" })
Step 4: Assign data table as data source to the table.
table.DataSource = dataTable;
table.Style.ShowHeader = true;
Step 5: Subscribe to event.
table.BeginRowLayout += Table_BeginRowLayout;
Step 6: Draw the table on the page and save the document.
table.Draw(page, new RectangleF(0,20,300,90));
doc.SaveToFile("Output.pdf");
Step 7: Set the row height in the BeginRowLayout event.
private static void Table_BeginRowLayout(object sender, BeginRowLayoutEventArgs args)
{
    args.MinimalHeight = 15f;
}
Output:
Full Code:
using Spire.Pdf;
using Spire.Pdf.Graphics;
using Spire.Pdf.Tables;
using System.Data;
using System.Drawing;


namespace SetRowHeight
{
    class Program
    {
        static void Main(string[] args)
        {
            PdfDocument doc = new PdfDocument();
            PdfPageBase page = doc.Pages.Add();

            PdfTable table = new PdfTable();
            DataTable dataTable = new DataTable();
            dataTable.Columns.Add("ID");
            dataTable.Columns.Add("First Name");
            dataTable.Columns.Add("Last Name");
            dataTable.Columns.Add("Job Id");
            dataTable.Rows.Add(new string[] { "102", "Lexa", "De Haan", "AD_VP" });
            dataTable.Rows.Add(new string[] { "103", "Alexander", "Hunoldsssss", "IT_PROG" });
            dataTable.Rows.Add(new string[] { "104", "Bruce", "Ernst", "IT_PROG" });
            dataTable.Rows.Add(new string[] { "105", "John", "Chen", "FI_ACCOUNT" });
            table.DataSource = dataTable;
            table.Style.ShowHeader = true;

            foreach (PdfColumn col in table.Columns)
            {
                col.StringFormat = new PdfStringFormat(PdfTextAlignment.Left, PdfVerticalAlignment.Middle);
            }
            table.Style.HeaderStyle.StringFormat = new PdfStringFormat(PdfTextAlignment.Center, PdfVerticalAlignment.Middle);
            table.Style.HeaderStyle.BackgroundBrush = PdfBrushes.Gray;

            table.BeginRowLayout += Table_BeginRowLayout;
            table.Draw(page, new RectangleF(0, 20, 300, 90));
            doc.SaveToFile("Output.pdf");


            System.Diagnostics.Process.Start("Output.pdf");

        }
        private static void Table_BeginRowLayout(object sender, BeginRowLayoutEventArgs args)
        {
            args.MinimalHeight = 15f;
        }
    }
}
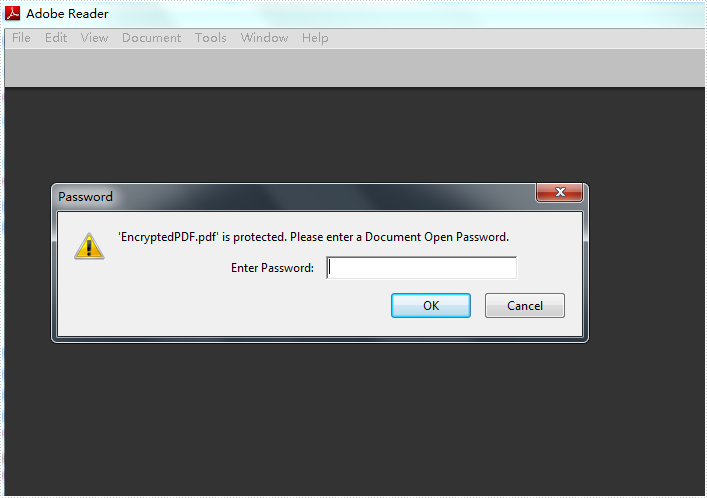
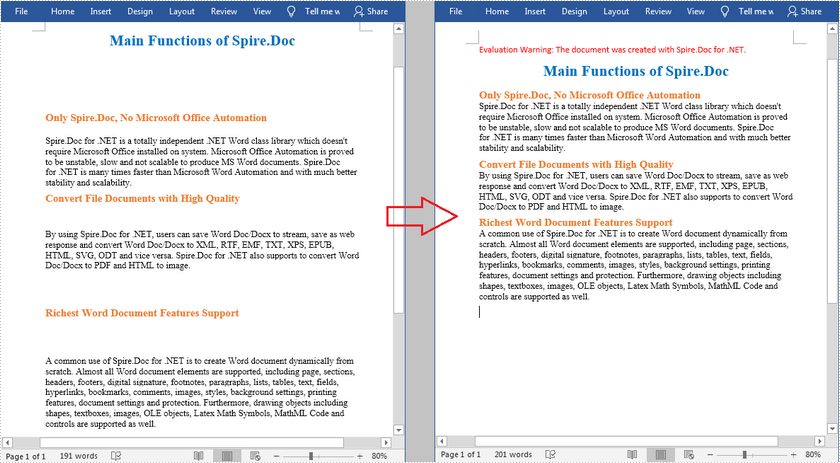
With the help of Spire.Doc, developers can encrypt word with password, and also convert the word document to PDF. This article will show you how to convert Word to PDF with encrypted password for the resulted PDF file.
Make sure Spire.Doc for .NET Version 5.8.92 (or above) has been installed correctly and then add Spire.Doc.dll as reference in the downloaded Bin folder though the below path: "..\Spire.Doc\Bin\NET4.0\ Spire.Doc.dll".
Here comes to the code snippets of how to create password encrypted PDF directly from word to PDF conversion.
Step 1: Create a new word document and load the document from file.
Document document = new Document(false);
document.LoadFromFile("Sample.docx");
Step 2: Create an instance of ToPdfParameterList.
ToPdfParameterList toPdf = new ToPdfParameterList();
Step 3: Set open password, permission password and user's permission over the PDF document
toPdf.PdfSecurity.Encrypt("open password","permission password", PdfPermissionsFlags.None, PdfEncryptionKeySize.Key128Bit);
Step 4: Save the document to file.
document.SaveToFile("EncryptedPDF.pdf",toPdf);
Effective screenshot:
Full codes:
using Spire.Doc;
namespace EncryptPDF
{
    class Program
    {
        static void Main(string[] args)
        {
            Document document = new Document(false);
            document.LoadFromFile("Sample.docx");

            ToPdfParameterList toPdf = new ToPdfParameterList();
            toPdf.PdfSecurity.Encrypt("open password","permission password", PdfPermissionsFlags.None, PdfEncryptionKeySize.Key128Bit);

            document.SaveToFile("EncryptedPDF.pdf", toPdf);
        }
    }
}
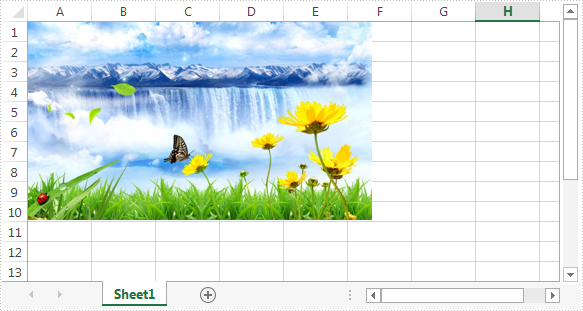
In the previous article, we've introduced how to insert image into excel worksheet. In this article, we'll demonstrate how to extract image from Excel worksheet. Please check the below screenshot of the source excel worksheet which contains an image:
Code snippet:
Step 1: Instantiate an instance of Workbook class and load the excel file.
Workbook workbook = new Workbook();
workbook.LoadFromFile(@"C:\Users\Administrator\Desktop\test.xlsx");
Step 2: Get the first worksheet.
Worksheet sheet = workbook.Worksheets[0];
Step 3: Get the first picture in the worksheet and save it to disk.
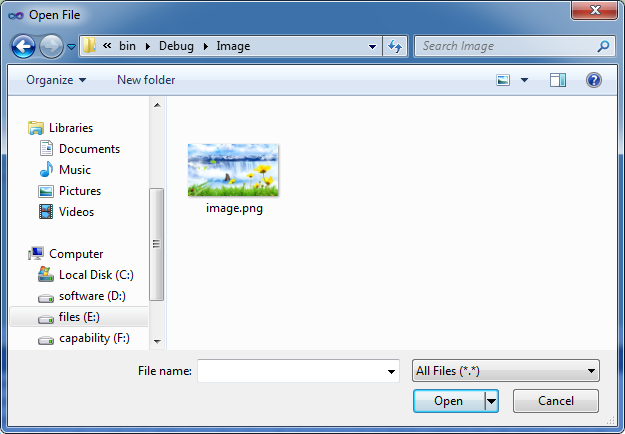
ExcelPicture picture = sheet.Pictures[0];
picture.Picture.Save(@"Image\image.png", ImageFormat.Png);
Screenshot:
Full code:
using System.Drawing.Imaging;
using Spire.Xls;

namespace Extract_Image
{
    class Program
    {
        static void Main(string[] args)
        {
            Workbook workbook = new Workbook();
            workbook.LoadFromFile(@"C:\Users\Administrator\Desktop\test.xlsx");
            Worksheet sheet = workbook.Worksheets[0];
            ExcelPicture picture = sheet.Pictures[0];
            picture.Picture.Save(@"Image\image.png", ImageFormat.Png);
        }
    }
}
Imports System.Drawing.Imaging
Imports Spire.Xls

Namespace Extract_Image
	Class Program
		Private Shared Sub Main(args As String())
			Dim workbook As New Workbook()
			workbook.LoadFromFile("C:\Users\Administrator\Desktop\test.xlsx")
			Dim sheet As Worksheet = workbook.Worksheets(0)
			Dim picture As ExcelPicture = sheet.Pictures(0)
			picture.Picture.Save("Image\image.png", ImageFormat.Png)
		End Sub
	End Class
End Namespace
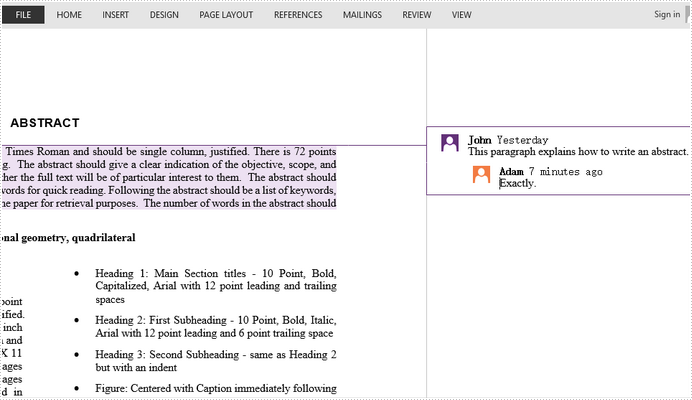
In Word 2013 and later version, you can reply to a comment, so it's easier to follow the whole conversation. Spire.Doc also allows programmers to insert a comment as a reply to a selected comment through ReplyToComment method.
Step 1: Create an object of Document and load a Word document containing comments.
Document doc = new Document();
doc.LoadFromFile("Comment.docx");
Step 2: Get the first comment.
Comment comment = doc.Comments[0];
Step 3: Create a new comment and specify the author and content.
Comment replyComment = new Comment(doc);
replyComment.Format.Author = "Adam";
replyComment.Body.AddParagraph().AppendText("Exactly.");
Step 4: Add the new comment as a reply to the selected comment.
comment.ReplyToComment(replyComment);
Step 5: Save to file.
doc.SaveToFile("ReplyToComment.docx", FileFormat.Docx2013);
Full Code:
using Spire.Doc;
using Spire.Doc.Fields;
namespace ReplyComment
{
    class Program
    {

        static void Main(string[] args)
        {

            Document doc = new Document();
            doc.LoadFromFile("Comment.docx");
            Comment comment = doc.Comments[0];

            Comment replyComment = new Comment(doc);
            replyComment.Format.Author = "Adam";
            replyComment.Body.AddParagraph().AppendText("Exactly.");
            comment.ReplyToComment(replyComment);

            doc.SaveToFile("ReplyToComment.docx", FileFormat.Docx2013);

        }
    }
}
Imports Spire.Doc
Imports Spire.Doc.Fields
Namespace ReplyComment
	Class Program

		Private Shared Sub Main(args As String())

			Dim doc As New Document()
			doc.LoadFromFile("Comment.docx")
			Dim comment As Comment = doc.Comments(0)

			Dim replyComment As New Comment(doc)
			replyComment.Format.Author = "Adam"
			replyComment.Body.AddParagraph().AppendText("Exactly.")
			comment.ReplyToComment(replyComment)

			doc.SaveToFile("ReplyToComment.docx", FileFormat.Docx2013)

		End Sub
	End Class
End Namespace
When coping content from the Internet into a Word document, you may find that there are a lot of blank lines between paragraphs, which will not only make the document look lengthier but also affect the readability. In this article, you will learn how to programmatically remove empty lines/blank paragraphs in an existing Word document using Spire.Doc for .NET.
Install Spire.Doc for .NET
To begin with, you need to add the DLL files included in the Spire.Doc for .NET package as references in your .NET project. The DLL files can be either downloaded from this link or installed via NuGet.
PM> Install-Package Spire.Doc
Remove Empty Lines in an Existing Word Document
The detailed steps are as follows:
- Create a Document instance.
- Load a sample Word document using Document.LoadFromFile() method.
- Loop through all paragraphs in the document and determine whether the paragraph is a blank paragraph.
- Remove blank paragraphs from the document using DocumentObjectCollection.Remove() method.
- Save the document to another file using Document.SaveToFile() method.
- C#
- VB.NET
using Spire.Doc;
using Spire.Doc.Documents;
using System;

namespace RemoveEmptyLines
{
    class Program
    {

        static void Main(string[] args)
        {

            //Create a Document instance
            Document doc = new Document();

            //Load a sample Word document
            doc.LoadFromFile(@"D:\Files\input.docx");

            //Loop through all paragraphs in the document
            foreach (Section section in doc.Sections)
            {
                for (int i = 0; i < section.Body.ChildObjects.Count; i++)
                {
                    if (section.Body.ChildObjects[i].DocumentObjectType == DocumentObjectType.Paragraph)
                    {
                        //Determine if the paragraph is a blank paragraph
                        if (String.IsNullOrEmpty((section.Body.ChildObjects[i] as Paragraph).Text.Trim()))
                        {
                            //Remove blank paragraphs
                            section.Body.ChildObjects.Remove(section.Body.ChildObjects[i]);
                            i--;
                        }
                    }

                }
            }

            //Save the document
            doc.SaveToFile("RemoveEmptyLines.docx", FileFormat.Docx2013);

        }

    }
}
Apply for a Temporary License
If you'd like to remove the evaluation message from the generated documents, or to get rid of the function limitations, please request a 30-day trial license for yourself.
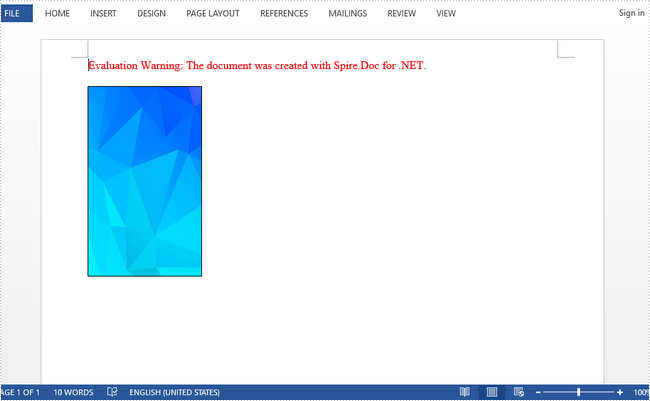
Spire.Doc supports to insert a picture to text box as a background image or as a part of body content. This article demonstrates how to achieve these purposes through following code snippets.
Part 1. Insert Background Image to Text Box
using Spire.Doc;
using Spire.Doc.Documents;
using Spire.Doc.Fields;
using System.Drawing;
namespace InsertTextBox
{
    class Program
    {

        static void Main(string[] args)
        {

            //Create a Word document
            Document doc = new Document();
            Section section = doc.AddSection();
            Paragraph paragraph = section.AddParagraph();

            //Append a Textbox to paragraph
            TextBox tb = paragraph.AppendTextBox(120, 200);

            //Set the position of Textbox
            tb.Format.HorizontalOrigin = HorizontalOrigin.Page;
            tb.Format.HorizontalPosition = 50;
            tb.Format.VerticalOrigin = VerticalOrigin.Page;
            tb.Format.VerticalPosition = 50;

            //Set the fill effect of Textbox as picture
            tb.Format.FillEfects.Type = BackgroundType.Picture;

            //Fill the Textbox with a picture
            tb.Format.FillEfects.Picture = Image.FromFile("Background.jpg");

            //Save to file
            doc.SaveToFile("InsertBackgroundImage.docx", FileFormat.Docx2013);

        }
    }
}
Output:
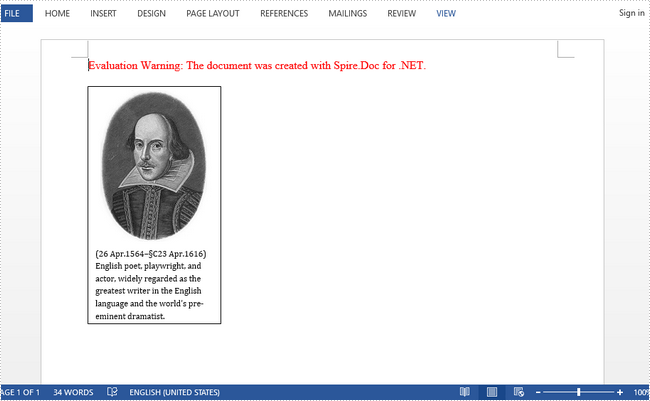
Part 2. Insert Image to Body of Text Box
using Spire.Doc;
using Spire.Doc.Documents;
using Spire.Doc.Fields;
using System.Drawing;
namespace InsertTextBox
{
    class Program
    {

        static void Main(string[] args)
        {

            //Create a Word document
            Document doc = new Document();
            Section section = doc.AddSection();
            Paragraph paragraph = section.AddParagraph();

            //Append a Textbox to paragraph
            TextBox tb = paragraph.AppendTextBox(140, 250);

            //Set the position of Textbox
            tb.Format.HorizontalOrigin = HorizontalOrigin.Page;
            tb.Format.HorizontalPosition = 50;
            tb.Format.VerticalOrigin = VerticalOrigin.Page;
            tb.Format.VerticalPosition = 50;

            //Insert an image to body of Textbox
            Paragraph para1 = tb.Body.AddParagraph();
            Image image = Image.FromFile("Shakespeare.jpg");
            DocPicture picture = para1.AppendPicture(image);
            para1.Format.AfterSpacing = 8;
            para1.Format.HorizontalAlignment = HorizontalAlignment.Center;

            //Insert text to body of Textbox
            Paragraph para2 = tb.Body.AddParagraph();
            TextRange textRange = para2.AppendText("(26 Apr.1564–§C23 Apr.1616) English poet, playwright, and actor, widely regarded as the greatest writer in the English language and the world's pre-eminent dramatist.");
            textRange.CharacterFormat.FontName = "Cambria";
            textRange.CharacterFormat.FontSize = 9;
            para2.Format.LineSpacing = 15;
            para2.Format.HorizontalAlignment = HorizontalAlignment.Left;
            para2.Format.SuppressAutoHyphens = true;

            //Save to file
            doc.SaveToFile("InsertToBody.docx", FileFormat.Docx2013);


        }
    }
}
Output:
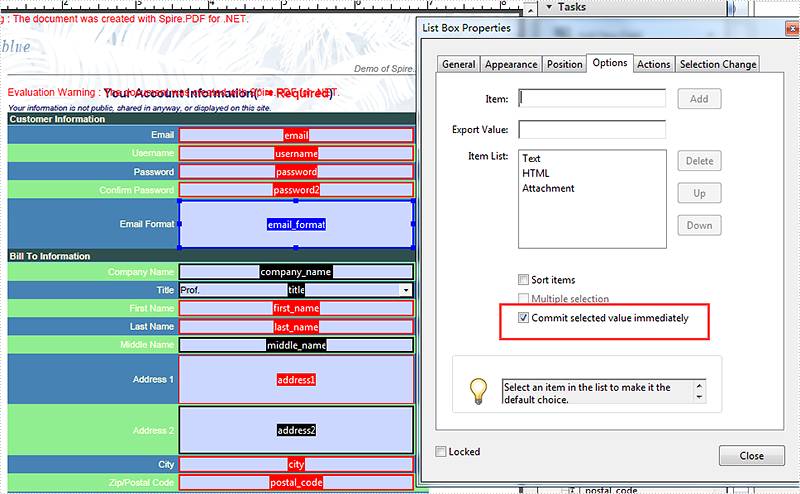
Set "Commit selected value immediately" property for ComboBox field and ListBox field
2017-04-12 09:06:28 Written by KoohjiWhen we operate the ComboBox field and ListBox field on PDF files, we can set the options for Dropdown Properties. This article will focus on how you how to set "Commit selected value immediately" property for ComboBox field and ListBox field. We will divide into two parts for how to set the property of "Commit selected value immediately", one is for the existing field on PDF and the other is for the new field added to the PDF file.
The following code is for how to set "Commit selected value immediately" property for the existing ListBox field on PDF:
//create a PDF document and load the document from file
 PdfDocument pdf = new PdfDocument();
 pdf.LoadFromFile("FormField.pdf");

 //get the existing form
 PdfFormWidget fw = pdf.Form as PdfFormWidget;

 //get the ListBox field and set the field of CommitOnSelChange property as true
 if (fw != null)
 {
     for (int i = 0; i < fw.FieldsWidget.Count; i++)
     {
         if (fw.FieldsWidget[i] != null)
         {
             if (fw.FieldsWidget[i] is PdfListBoxWidgetFieldWidget)
             {

                 (fw.FieldsWidget[i] as PdfListBoxWidgetFieldWidget).CommitOnSelChange = true;
             }
         }
     }
 }
 pdf.SaveToFile("Result.pdf");
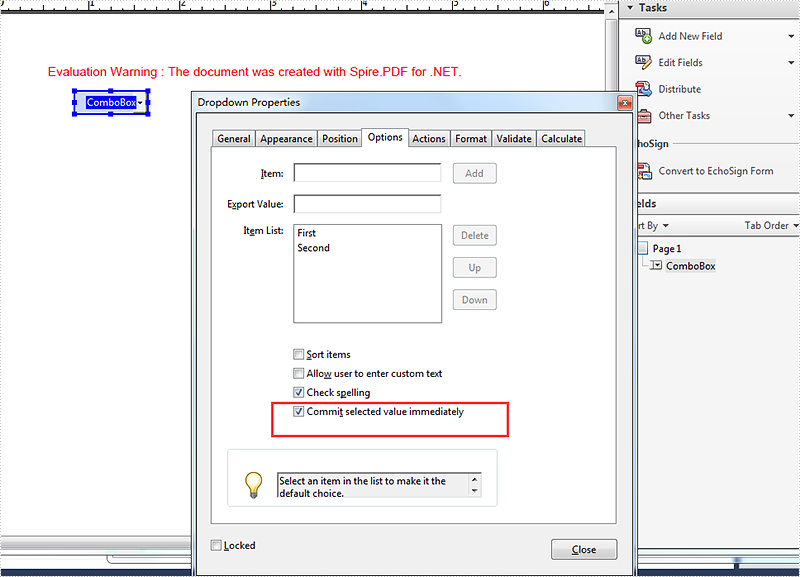
The following code is for how to set the property of "Commit selected value immediately" for ComboBox field when we add a new ComboBox field on PDF:
using (PdfDocument pdf = new PdfDocument())
{
    PdfPageBase page = pdf.Pages.Add();

     //add a new ComboBox Field and add data to it
PdfComboBoxField combo = new PdfComboBoxField(page, "ComboBox");
    combo.Bounds = new RectangleF(20, 20,60, 20);
    PdfListFieldItem item1 = new PdfListFieldItem("First", "1");
    PdfListFieldItem item2 = new PdfListFieldItem("Second", "2");
    combo.Items.Add(item1);
    combo.Items.Add(item2);

//set the field of CommitOnSelChange property as true
    combo.CommitOnSelChange = true;

    pdf.Form.Fields.Add(combo);
    pdf.SaveToFile("Result2.Pdf");
}
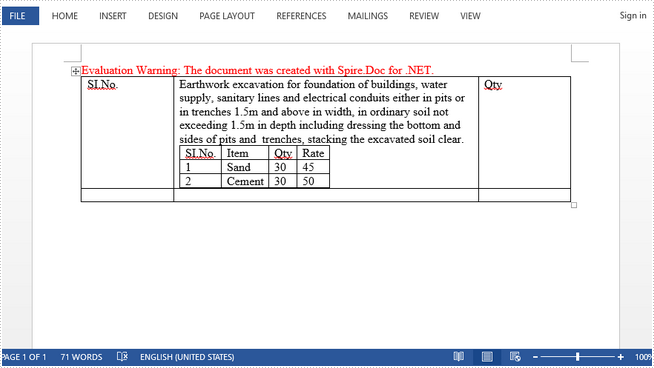
A nested table is one table placed inside of another, where the larger table functions as a container for the smaller one. Nested tables allow you to arrange different sets of data in groups to show clients.
This article presents how we can create a nested table using Spire.Doc in C#.
Step 1: Create a new PDF document and add a section to it.
Document doc = new Document();
Section section = doc.AddSection();
Step 2: Add a table to the section.
Table table = section.AddTable(true);
table.ResetCells(2, 3);
Step 3: Adjust the column with.
table.Rows[0].Cells[0].Width = table.Rows[0].Cells[2].Width = 50F;
table.Rows[1].Cells[0].Width = table.Rows[1].Cells[2].Width = 50F;
table.AutoFitBehavior(AutoFitBehaviorType.wdAutoFitWindow);
Step 4: Insert content to the cells of the table.
table[0, 0].AddParagraph().AppendText("SI.No.");
string text = "Earthwork excavation for foundation of buildings, water supply, "
             + "sanitary lines and electrical conduits either in pits or in "
             + "trenches 1.5m and above in width, in ordinary soil not exceeding "
             + "1.5m in depth including dressing the bottom and sides of pits and  "
             + "trenches, stacking the excavated soil clear.";
table[0, 1].AddParagraph().AppendText(text);
table[0, 2].AddParagraph().AppendText("Qty");
Step 5: Insert a nested table to the cell (first row, second column).
Table nestedTable= table[0, 1].AddTable(true);
nestedTable.ResetCells(3, 4);
nestedTable.AutoFitBehavior(AutoFitBehaviorType.wdAutoFitContents);
Step 6: Add content to nested cells.
nestedTable[0, 0].AddParagraph().AppendText("SI.No.");
nestedTable[0, 1].AddParagraph().AppendText("Item");
nestedTable[0, 2].AddParagraph().AppendText("Qty");
nestedTable[0, 3].AddParagraph().AppendText("Rate");
nestedTable[1, 0].AddParagraph().AppendText("1");
nestedTable[1, 1].AddParagraph().AppendText("Sand");
nestedTable[1, 2].AddParagraph().AppendText("30");
nestedTable[1, 3].AddParagraph().AppendText("45");
nestedTable[2, 0].AddParagraph().AppendText("2");
nestedTable[2, 1].AddParagraph().AppendText("Cement");
nestedTable[2, 2].AddParagraph().AppendText("30");
nestedTable[2, 3].AddParagraph().AppendText("50");
Step 7: Save the file.
doc.SaveToFile("Nested_Table.docx", FileFormat.Docx2013);
Output:
Full Code:
//create a new pdf document
Document doc = new Document();
Section section = doc.AddSection();

//add a table
Table table = section.AddTable(true);
table.ResetCells(2, 3);

//set column width
table.Rows[0].Cells[0].SetCellWidth(50F,CellWidthType.Point);
table.Rows[0].Cells[2].SetCellWidth(50F, CellWidthType.Point);
table.Rows[1].Cells[0].SetCellWidth(50F, CellWidthType.Point);
table.Rows[1].Cells[2].SetCellWidth(50F, CellWidthType.Point);
table.AutoFit(AutoFitBehaviorType.AutoFitToWindow);
nestedTable.AutoFit(AutoFitBehaviorType.AutoFitToContents);

//insert content to cells
table[0, 0].AddParagraph().AppendText("SI.No.");
string text = "Earthwork excavation for foundation of buildings, water supply, "
             + "sanitary lines and electrical conduits either in pits or in "
             + "trenches 1.5m and above in width, in ordinary soil not exceeding "
             + "1.5m in depth including dressing the bottom and sides of pits and  "
             + "trenches, stacking the excavated soil clear.";
table[0, 1].AddParagraph().AppendText(text);
table[0, 2].AddParagraph().AppendText("Qty");

//add a nested table to cell(first row, second column)
Table nestedTable= table[0, 1].AddTable(true);
nestedTable.ResetCells(3, 4);
nestedTable.AutoFitBehavior(AutoFitBehaviorType.wdAutoFitContents);

//add content to nested cells
nestedTable[0, 0].AddParagraph().AppendText("SI.No.");
nestedTable[0, 1].AddParagraph().AppendText("Item");
nestedTable[0, 2].AddParagraph().AppendText("Qty");
nestedTable[0, 3].AddParagraph().AppendText("Rate");
nestedTable[1, 0].AddParagraph().AppendText("1");
nestedTable[1, 1].AddParagraph().AppendText("Sand");
nestedTable[1, 2].AddParagraph().AppendText("30");
nestedTable[1, 3].AddParagraph().AppendText("45");
nestedTable[2, 0].AddParagraph().AppendText("2");
nestedTable[2, 1].AddParagraph().AppendText("Cement");
nestedTable[2, 2].AddParagraph().AppendText("30");
nestedTable[2, 3].AddParagraph().AppendText("50");

//save
doc.SaveToFile("Nested_Table.docx", FileFormat.Docx2013);
Spire.PDF allows extracting images from signatures using ExtractSignatureAsImages method in PdfFormWidget class. This article demonstrates how we can use Spire.PDF to implement this feature.
Code Snippet:
Step 1: Instantiate an object of PdfDocument class and load the PDF document.
PdfDocument document = new PdfDocument("sample.pdf");
Step 2: Get the existing forms of the document.
PdfFormWidget form = document.Form as PdfFormWidget;
Step 3: Extract images from signatures in the existing forms and put them into an Image Array.
Image[] images = form.ExtractSignatureAsImages();
Step 4: Save the images to disk.
int i = 0;
for (int j = 0; j < images.Length; j++)
{
    images[j].Save(String.Format(@"Image/Image-{0}.png", i), ImageFormat.Png);
    i++;
}
Screenshot:
Full code:
using Spire.Pdf;
using Spire.Pdf.Widget;
using System;
using System.Drawing;
using System.Drawing.Imaging;


namespace ExtractImage
{
    class Program
    {
        static void Main(string[] args)
        {
            //Load the PDF document
            PdfDocument document = new PdfDocument("sample.pdf");

            //Get the existing forms of the document
            PdfFormWidget form = document.Form as PdfFormWidget;

            //Extract images from signatures in the existing forms
            Image[] images = form.ExtractSignatureAsImages();

            //Save the images to disk
            int i = 0;
            for (int j = 0; j < images.Length; j++)
            {
                images[j].Save(String.Format(@"Image/Image-{0}.png", i), ImageFormat.Png);
                i++;
            }

            //Close the document
            document.Close();
        }
    }
}
Imports Spire.Pdf
Imports Spire.Pdf.Widget
Imports System.Drawing
Imports System.Drawing.Imaging


Namespace ExtractImage
	Class Program
		Private Shared Sub Main(args As String())
			'Load the PDF document
			Dim document As New PdfDocument("sample.pdf")

			'Get the existing forms of the document
			Dim form As PdfFormWidget = TryCast(document.Form, PdfFormWidget)

			'Extract images from signatures in the existing forms
			Dim images As Image() = form.ExtractSignatureAsImages()

			'Save the images to disk
			Dim i As Integer = 0
			For j As Integer = 0 To images.Length - 1
				images(j).Save([String].Format("Image/Image-{0}.png", i), ImageFormat.Png)
				i += 1
			Next

			'Close the document
			document.Close()
		End Sub
	End Class
End Namespace
