.NET (1327)
Children categories
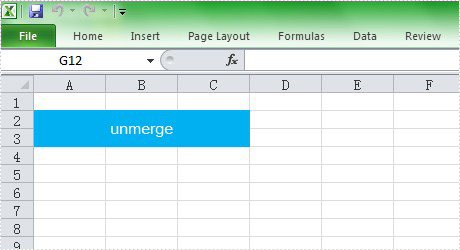
Unmerging and merging Excel cells are indispensable for handling Excel worksheet. This article aims at introducing the solution to unmerge Excel cells in c# through several lines of code. We need an Excel .NET component called Spire.XLS to help us complete the process.
First we need to complete the preparatory work before unmerge Excel cells in C#:
- Download the Spire.XLS and install it on your machine.
- Add the Spire.XLS.dll files as reference.
- Open bin folder and select the three dll files under .NET 4.0.
- Right click property and select properties in its menu.
- Set the target framework as .NET 4.
- Add Spire.XLS as namespace.
Here comes to the explanation of the code:
Step 1: Create an instance of Spire.XLS.Workbook.
Workbook book = new Workbook();
Step 2: Load the file base on a specified file path.
book.LoadFromFile(@"..\..\abc.xlsx");
Step 3: Get the first worksheet.
Worksheet sheet = book.Worksheets[0];
Step 4: Unmerge the cells.
sheet.Range["A2"].UnMerge();
Step5: Save as the generated file.
book.SaveToFile(@"..\..\result.xlsx", ExcelVersion.Version2010);
Here is the whole code:
using Spire.Xls;
namespace UnmergeExcelCell
{
    class Program
    {

        static void Main(string[] args)
        {
            Workbook book = new Workbook();
            book.LoadFromFile(@"..\..\abc.xlsx");
            Worksheet sheet = book.Worksheets[0];
            sheet.Range["A2"].UnMerge();
            book.SaveToFile(@"..\..\result.xlsx", ExcelVersion.Version2010);
        }

    }
}
Please preview the original effect screenshot:
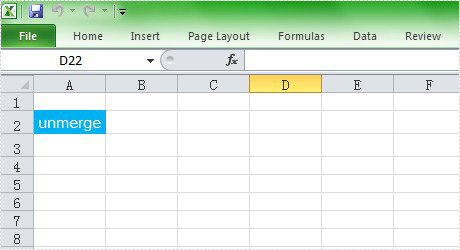
And the generated effect screenshot:
C#/VB.NET: Alternate Row Colors in Excel Using Conditional Formatting
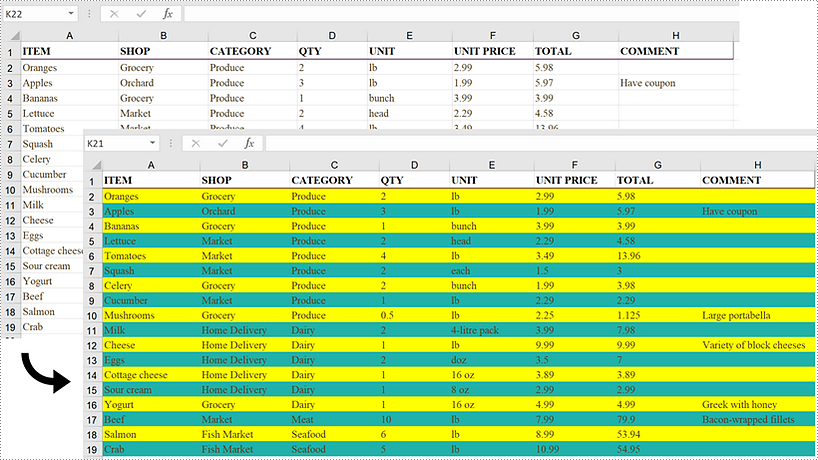
2022-09-08 08:20:00 Written by AdministratorA large worksheet can be made easier to scan and read by adding color to alternative rows or columns. Applying a built-in table style or using conditional formatting are two quick ways to alternate row colors. This article focuses on how to highlight alternative rows using conditional formatting in C# and VB.NET using Spire.XLS for .NET.
Install Spire.XLS for .NET
To begin with, you need to add the DLL files included in the Spire.XLS for .NET package as references in your .NET project. The DLL files can be either downloaded from this link or installed via NuGet.
PM> Install-Package Spire.XLS
Alternate Row Colors in Excel Using Conditional Formatting
The following are the steps to add color to alternative rows in Excel using Spire.XLS for .NET.
- Create a Workbook object.
- Load an Excel file using Workbook.LoadFromFile() method.
- Get a specific worksheet from the workbook through Workbook.Worsheets[index] property.
- Add a conditional formatting to the worksheet using Worksheet.ConditionalFormats.Add() method and return an object of XlsConditionalFormats class.
- Set the cell range where the conditional formatting will be applied using XlsConditionalFormats.AddRange() method.
- Add a condition using XlsConditionalFormats.AddCondition() method, then set the conditional formula and the cell color of even rows.
- Add another condition to change the format of the cells of odd rows.
- Save the workbook to an Excel file using Workbook.SaveToFile() method.
- C#
- VB.NET
using Spire.Xls;
using Spire.Xls.Core;
using Spire.Xls.Core.Spreadsheet.Collections;
using System.Drawing;

namespace AlternateRowColors
{
    class Program
    {
        static void Main(string[] args)
        {
            //Create a Workbook object
            Workbook workbook = new Workbook();

            //Load an Excel file
            workbook.LoadFromFile(@"C:\Users\Administrator\Desktop\sample.xlsx");

            //Get the first worksheet
            Worksheet sheet = workbook.Worksheets[0];

            //Add a conditional format to the worksheet
            XlsConditionalFormats format = sheet.ConditionalFormats.Add();

            //Set the range where the conditional format will be applied
            format.AddRange(sheet.Range[2, 1, sheet.LastRow, sheet.LastColumn]);

            //Add a condition to change the format of the cells based on formula
            IConditionalFormat condition1 = format.AddCondition();
            condition1.FirstFormula = "=MOD(ROW(),2)=0";
            condition1.FormatType = ConditionalFormatType.Formula;
            condition1.BackColor = Color.Yellow;

            //Add another condition to change the format of the cells based on formula
            IConditionalFormat condition2 = format.AddCondition();
            condition2.FirstFormula = "=MOD(ROW(),2)=1";
            condition2.FormatType = ConditionalFormatType.Formula;
            condition2.BackColor = Color.LightSeaGreen;

            //Save the workbook to an Excel file
            workbook.SaveToFile("AlternateRowColors.xlsx", ExcelVersion.Version2016);
        }
    }
}
Apply for a Temporary License
If you'd like to remove the evaluation message from the generated documents, or to get rid of the function limitations, please request a 30-day trial license for yourself.
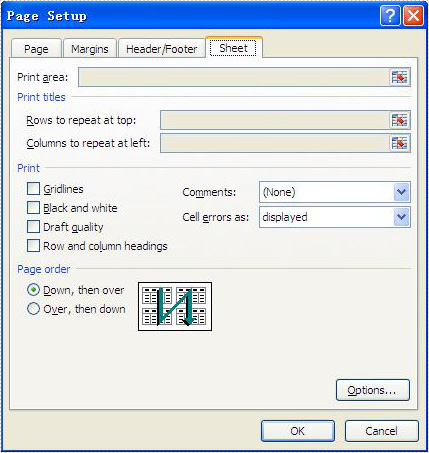
Excel print options (also called as sheet options) allow users to control how worksheet pages are printed, such as set print paper size, print area, print titles, page order and so on. This article mainly discusses how developers set print options in C# by using Spire.XLS.
Here comes to the details of how developers configure print options in C#:
- Download Spire.XLS for .NET (or Spire.Office for .NET) and install it on your system.
- Add Spire.XLS.dll as reference in the downloaded Bin folder thought the below path: "..\Spire.XLS\Bin\NET4.0\ Spire.XLS.dll".
- You can use the class PageSetup to set the print options.
Set print paper size:
By default, the paper size is A4; you can set the PaperSize property of the worksheet to set the print paper size you desired.
//set print paper size as A3
sheet.PageSetup.PaperSize = PaperSizeType.PaperA3;
Set Print Area:
By default, the print area means all areas of the worksheet that contain data. You can set the PrintArea property of the worksheet to set the print area you want.
//set print area from cell "B2" to cell "F8"
sheet.PageSetup.PrintArea = "B2:F8";
Set Print Titles:
Spire.XLS allows you to designate row and column headers to repeat on all pages of a printed worksheet. To do so, use the PageSetup class' PrintTitleColumns and PrintTitleRows properties.
//Set column numbers A & B as title columns
sheet.PageSetup.PrintTitleColumns = "$A:$B";

//Set row numbers 1 & 2 as title rows
sheet.PageSetup.PrintTitleRows = "$1:$2";
Set Page Order:
The PageSetup class provides the Order property that is used to order multiple pages of your worksheet to be printed. There are two possibilities to order the pages as follows:
//set page order from down then over
sheet.PageSetup.Order = OrderType.DownThenOver;

//set page order from over then down
sheet.PageSetup.Order = OrderType.OverThenDown;
Below picture shows the Microsoft Excel's page print options:
In document-centric workflows, combining multiple PDF files into a single document is a critical functionality in many .NET applications, ranging from enterprise document management systems to customer-facing invoicing platforms. While many tools exist for this PDF merging task, Spire.PDF for .NET stands out with its balance of simplicity, performance, and cost-effectiveness.
This guide explores how to merge PDF in C# using Spire.PDF, covering basic merging to advanced techniques with practical code examples.
- Why Programmatic PDF Merging Matters
- How to Merge PDFs in C#: Step-by-Step Guide
- Practical Example: Merge Selected Pages from Different PDFs
- Memory Efficient Solution: Merge PDF Files using Streams
- Conclusion
- FAQs
Why Programmatic PDF Merging Matters
In enterprise applications, PDF merging is crucial for:
- Consolidating financial reports
- Combining scanned document batches
- Assembling legal documentation packages
- Automated archiving systems
Spire.PDF for .NET stands out with:
- ✅ Pure .NET solution (no Acrobat dependencies)
- ✅ Cross-platform support (.NET framework, .NET Core, .NET 5+)
- ✅ Flexible page manipulation capabilities
How to Merge PDFs in C#: Step-by-Step Guide
Step 1. Install Spire.PDF
Before diving into the C# code to combine PDF files, it’s necessary to install the .NET PDF library via NuGet Package Manager.
- In Visual Studio, right-click your project in Solution Explorer
- Select Manage NuGet Packages
- Search for Spire.PDF and install
Or in Package Manager Console, run the following:
PM> Install-Package Spire.PDF
Step 2: Basic PDF Merging - C# / ASP.NET Sample
Spire.PDF provides a direct method PdfDocument.MergeFiles() method to merge multiple PDFs into a single file. The below C# code example defines three PDF file paths, merges them, and saves the result as a new PDF.
using Spire.Pdf;

namespace MergePDFs
{
    class Program
    {
        static void Main(string[] args)
        {
            // Specify the PDF files to be merged
            string[] files = new string[] {"sample0.pdf", "sample1.pdf", "sample2.pdf"};

            // Merge PDF files
            PdfDocumentBase pdf = PdfDocument.MergeFiles(files);

            // Save the result file
            pdf.Save("MergePDF.pdf", FileFormat.PDF);
        }
    }
}
Result: Combine three PDF files (total of 7 pages) into one PDF file.

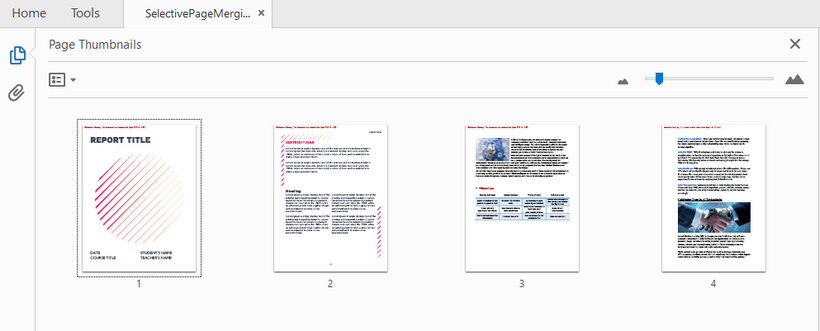
Practical Example: Merge Selected Pages from Different PDFs
Merging selected pages involves combining specific pages from multiple PDFs into a new PDF document. Here’s how to achieve the task:
- Define the PDF files to be merged.
- Load PDFs into an array:
- Create an array of PdfDocument objects.
- Loops through to load each PDF into the array.
- Create a new PDF: Initializes a new PDF document to hold the merged pages.
- Insert specific pages into the new PDF:
- InsertPage(): Insert a specified page to the new PDF (Page index starts at 0).
- InsertPageRange(): Insert a range of pages to the new PDF.
- Save the merged PDF: Save the new document to a PDF file.
Code Example:
using Spire.Pdf;

namespace MergePDFs
{
    class Program
    {
        static void Main(string[] args)
        {
            // Specify the PDF files to be merged
            string[] files = new string[] {"sample0.pdf", "sample1.pdf", "sample2.pdf"};

            // Create an array of PdfDocument
            PdfDocument[] pdfs = new PdfDocument[files.Length];

            // Loop through each PDF file
            for (int i = 0; i < files.Length; i++)
            {
                pdfs[i] = new PdfDocument(files[i]);
            }

            // Create a new PdfDocument object
            PdfDocument newPDF = new PdfDocument();

            // Insert the selected pages from different PDFs to the new PDF file
            newPDF.InsertPageRange(pdfs[0], 1, 2);
            newPDF.InsertPage(pdfs[1], 0);
            newPDF.InsertPage(pdfs[2], 1);

            // Save the new PDF file
            newPDF.SaveToFile("SelectivePageMerging.pdf");
        }
    }
}
Result: Combine selected pages from three separate PDF files into a new PDF.
Memory Efficient Solution: Merge PDF Files using Streams
For stream-based merging, refer to the C# code below:
using System.IO;
using Spire.Pdf;

namespace MergePDFsByStream
{
    class Program
    {
        static void Main(string[] args)
        {
            // Specify the PDF files to be merged
            string[] pdfFiles = {
                "MergePdfsTemplate_1.pdf",
                "MergePdfsTemplate_2.pdf",
                "MergePdfsTemplate_3.pdf"
            };

            // Initialize a MemoryStream array
            MemoryStream[] ms = new MemoryStream[pdfFiles.Length];

            // Read all PDF files to the MemoryStream
            for (int i = 0; i < pdfFiles.Length; i++)
            {
                byte[] fileBytes = File.ReadAllBytes(pdfFiles[i]);
                ms[i] = new MemoryStream(fileBytes);
            }

            // Merge PDF files using streams
            PdfDocumentBase pdf = PdfDocument.MergeFiles(ms);

            // Save the merged PDF file
            pdf.Save("MergePDFByStream.pdf", FileFormat.PDF);
        }
    }
}
Pro Tip: Learn more stream-based PDF handling techniques via the article: Load and Save PDF Files in Streams Using C#
Conclusion
Spire.PDF simplifies PDF merging in C# with its intuitive API and robust feature set. Whether you need to combine entire documents or specific pages, this library provides a reliable solution. By following the steps outlined in this guide, you can efficiently merge PDFs in your .NET applications while maintaining high quality and performance.
FAQs
Q1: Is Spire.PDF free to use?
A: Spire.PDF offers a free Community Edition with limitations (max 10 pages per document). To evaluate the commercial version without any limitations, request a free trial license here.
Q2: Can I merge PDFs from different sources?
A: Yes. Spire.PDF supports merging PDFs from various sources:
- Local Files: Use LoadFromFile() method.
- Streams: Use LoadFromStream() method.
- Base64: Convert Base64 to a byte array first, then use LoadFromBytes() method.
- URLs: Download the PDF to a stream or file first, then load it.
Q3: Can I add page numbers during merging?
A: After merging, you can add page numbers by following this guide: Add Page Numbers to a PDF in C#.
Q4. Where can I get support for Spire.PDF?
A: Check below resources:
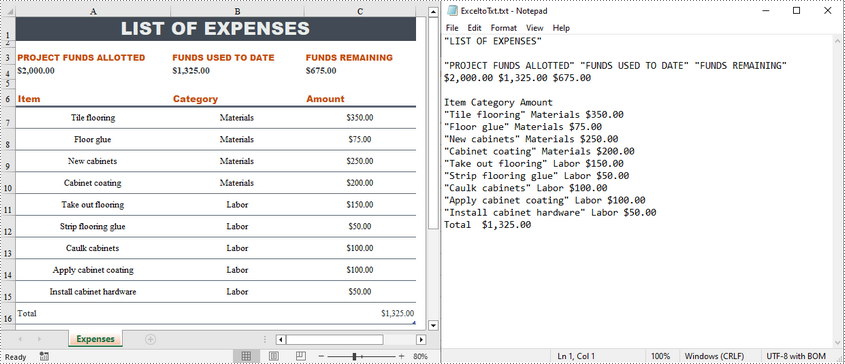
Compared with Excel files, text files are easier to read and take up less memory as they contain only plain text data without any formatting or complex structure. Therefore, in certain situations where simplicity and efficiency are required, converting Excel files to text files can be beneficial. This article will demonstrate how to programmatically convert Excel to TXT format using Spire.XLS for .NET.
Install Spire.XLS for .NET
To begin with, you need to add the DLL files included in the Spire.XLS for .NET package as references in your .NET project. The DLL files can be either downloaded from this link or installed via NuGet.
PM> Install-Package Spire.XLS
Convert Excel to TXT in C# and VB.NET
Spire.XLS for .NET offers the Worksheet.SaveToFile(string fileName, string separator, Encoding encoding) method to convert a specified worksheet to a txt file. The following are the detailed steps.
- Create a Workbook instance.
- Load a sample Excel file using Workbook.LoadFromFile() method.
- Get a specified worksheet by its index using Workbook.Worksheets[sheetIndex] property.
- Convert the Excel worksheet to a TXT file using Worksheet.SaveToFile() method.
- C#
- VB.NET
using Spire.Xls;
using System.Text;

namespace ExcelToTXT
{
    class Program
    {
        static void Main(string[] args)
        {

            //Create a Workbook instance
            Workbook workbook = new Workbook();

            //Load a sample Excel file
            workbook.LoadFromFile("sample.xlsx");

            //Get the first worksheet
            Worksheet sheet = workbook.Worksheets[0];

            //Save the worksheet as a txt file
            sheet.SaveToFile("ExceltoTxt.txt", " ", Encoding.UTF8);

        }
    }
}
Apply for a Temporary License
If you'd like to remove the evaluation message from the generated documents, or to get rid of the function limitations, please request a 30-day trial license for yourself.
Convert PDF Page to Image with Specified Resolution
2013-11-15 08:01:20Spire.PDF is an easy-to-use and powerful .NET PDF library. It can do a lot of conversions, and one of them is converting PDF page to image. As to converting PDF page to image, it works conveniently and flexibly. It has 6 overloaded functions named SaveAsImage that can make sure you find one meeting your need.
You can use Spire.PDF to convert any specific page of PDF document to BMP and Metafile image. Check it here.
In this article, we will discuss conversion with specified resolution.
public Image SaveAsImage(int pageIndex, int dpiX, int dpiY)
- pageIndex: specify which page to convert, 0 indicates the first page.
- dpiX: specify the resolution of x coordinate axis in PDF page when converting.
- dpiX: specify the resolution of y coordinate axis in PDF page when converting.
Image image = documemt.SaveAsImage(0, PdfImageType.Bitmap, false, 400, 400)
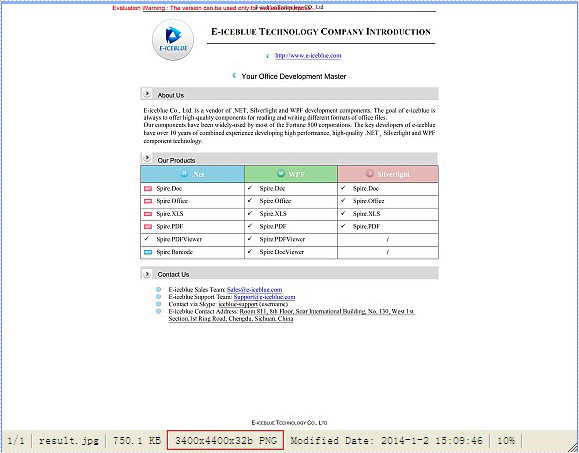
In the sample code, the size of PDF page is Width = 612.0, Height = 792.0. We set the resolution to 400, 400. And we will get an image with width = 3400, height = 4400.
Here is sample code:
PdfDocument documemt = new PdfDocument();
documemt.LoadFromFile(@"..\..\EnglishText.pdf");
Image image = documemt.SaveAsImage(0, PdfImageType.Bitmap, false, 400, 400);
image.Save(@"..\..\result.jpg");
documemt.Close();
Effect Screentshot:
Convert Word document to HTML is popular and widely used by programmers and developers. With the help of Spire.Doc for .NET, a professional word component, without installing MS Word, developers can convert word to html with only two lines of key code in C#. At the same time, Spire.Doc supports convert HTML to word document easily and quickly.
This article still focuses on convert word from/to HTML, while it mainly about the supports of embed image in the word document and HTML. With the improvements of Spire.Doc (starts from Spire.Doc V. 4.9.32), now it supports the new function of ImageEmbedded.
Please download Spire.Doc (version 4.9.32 or above) with .NET framework together and follow the simple steps as below:
Convert Word to HTML in C#:
Step 1: Create the word document.
Document document = new Document();
Step 2: Set the value of imageEmbedded attribute.
doc.HtmlExportOptions.ImageEmbedded=true;
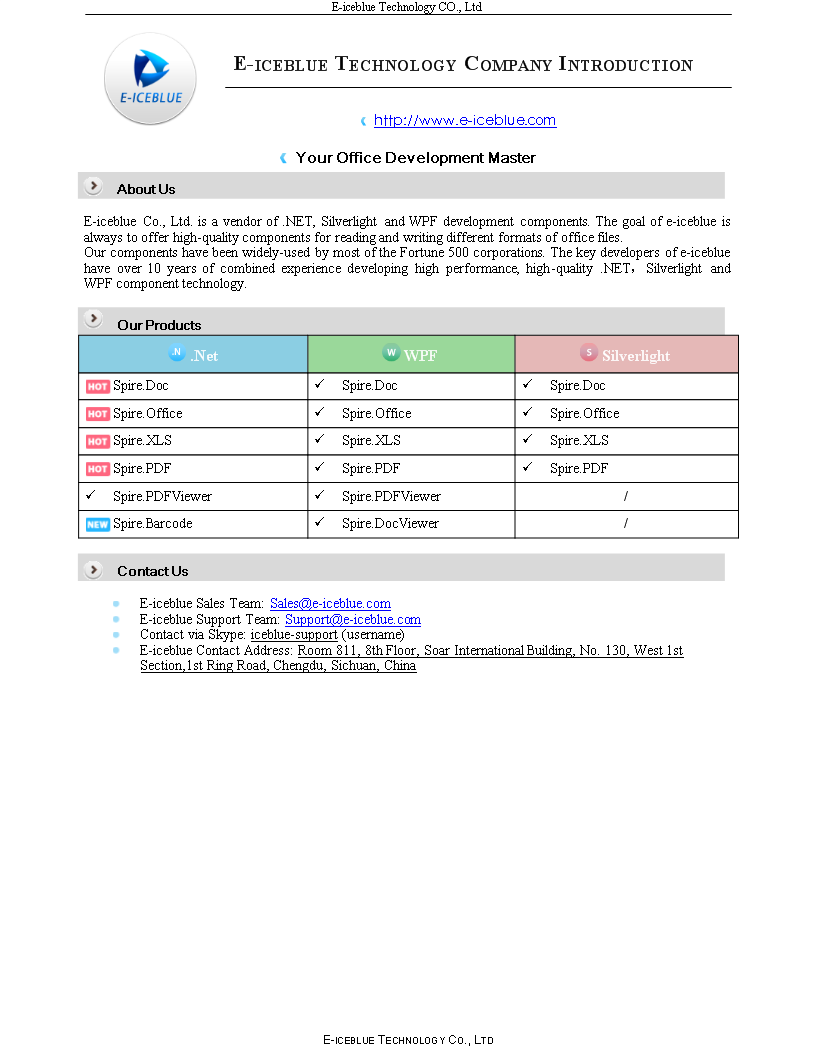
Step 3: Save word document to HTML.
doc.SaveToFile("result.html",FileFormat.Html);
Spire.Doc also supports load the result HTML page and convert it into word document in only three lines of codes as below.
doc.SaveToFile("htmltoword.docx",FileFormat.Docx);
Besides conversion of word from/to HTML, Spire.Doc also supports Convert Word to PDF, Convert Word to Image and Convert Word to XPS in C#.
For the function of converting image to PDF, Spire.PDF can handle it quickly and effectively. This .NET PDF library can not only convert images of commonly used formats to PDF document such as jpg, bmp, png, but also convert gif, tif and ico images to PDF. Just download it here.
To convert multipage image to a PDF file with Spire.PDF, just copy the following code to your application and call method ConvertImagetoPDF and you will get it done.
Step 1: Method to split multipage image
Spire.Pdf has a method called DrawImage to convert image to PDF. But it cannot handle multipage image directly. So before conversion, multipage image need to be split into several one-page images.
Guid guid = image.FrameDimensionsList[0];
FrameDimension dimension = new FrameDimension(guid);
int pageCount = image.GetFrameCount(dimension);
This step is to get the total number of frames (pages) in the multipage image.
image.SelectActiveFrame(dimension, i);
And this step is to select one frame of frames within this image object.
image.Save(buffer, format);
Save the selected frame to the buffer.
Step 2: Convert image to PDF
After splitting multipage image, Spire.Pdf can draw these split images directly to PDF using method DrawImage.
PdfImage pdfImg = PdfImage.FromImage(img[i])
Load image file as PdfImage.
page.Canvas.DrawImage(pdfImg, x, 0, width, height);
Draw PdfImage to PDF. The only thing to do is to specify the location of image on PDF. Width and height is the size of area that image will be drawn on. Sometimes we need to scale up or down the size of the original size of image until it fit the PDF page. x and 0 locate the coordinate.
Check the effective screenshots for the original TIF file.
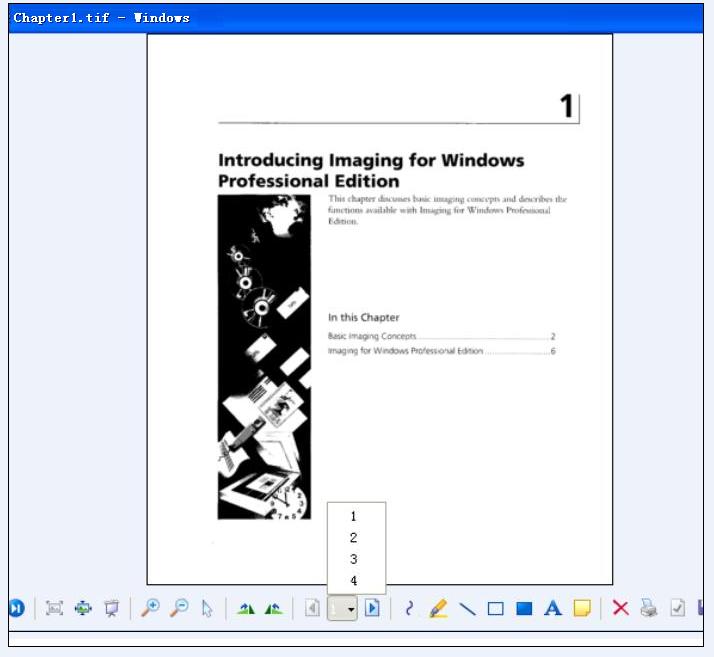
The target PDF file:

Full demo:
using Spire.Pdf;
using Spire.Pdf.Graphics;
using System;
using System.Drawing;
using System.Drawing.Imaging;
using System.IO;

namespace ConvertMultipageImagetoPDF
{
    class Program
    {
        static void Main(string[] args)
        {
            {
                ConvertImagetoPDF(@"..\..\Chapter1.tif");
            }
        }

        public static void ConvertImagetoPDF(String ImageFilename)
        {
            using (PdfDocument pdfDoc = new PdfDocument())
            {
                Image image = Image.FromFile(ImageFilename);

                Image[] img = SplitImages(image, ImageFormat.Png);

                for (int i = 0; i < img.Length; i++)
                {
                    PdfImage pdfImg = PdfImage.FromImage(img[i]);
                    PdfPageBase page = pdfDoc.Pages.Add();
                    float width = pdfImg.Width * 0.3f;
                    float height = pdfImg.Height * 0.3f;
                    float x = (page.Canvas.ClientSize.Width - width) / 2;

                    page.Canvas.DrawImage(pdfImg, x, 0, width, height);
                }

                string PdfFilename = "result.pdf";
                pdfDoc.SaveToFile(PdfFilename);
                System.Diagnostics.Process.Start(PdfFilename);
            }
        }

        public static Image[] SplitImages(Image image, ImageFormat format)
        {
            Guid guid = image.FrameDimensionsList[0];
            FrameDimension dimension = new FrameDimension(guid);
            int pageCount = image.GetFrameCount(dimension);

            Image[] frames = new Image[pageCount];

            for (int i = 0; i < pageCount; i++)
            {
                using (MemoryStream buffer = new MemoryStream())
                {
                    image.SelectActiveFrame(dimension, i);
                    image.Save(buffer, format);
                    frames[i] = Image.FromStream(buffer);
                }
            }
            return frames;
        }
    }
}
The article will introduce an easy way to convert Word to Emf by a powerful and independent Word .NET component called Spire.Doc, without Microsoft Word installed on the machine. It also offers support for converting Word and HTML to frequently-used image formats like Jpeg, Png, Gif, Bmp and Tiff, etc. Just click here to have a try.
Emf is a file extension for Enhanced MetaFile, used as a graphics language for printer drivers by the Windows operating system. In 1993, a newer version with additional commands 32-bit version of Win32/GDI introduced the Enhanced Metafile (Emf). Microsoft also recommends enhanced-format (Emf) functions to be used instead of rarely being used Windows-format (WMF) functions.
Spire.Doc presents almost the easiest solution to convert Word to Emf through the following 5 lines simple code.
using Spire.Doc;
using System.Drawing.Imaging;


namespace DOCEMF
{
    class Program
    {
        static void Main(string[] args)
        {
            // create an instance of Spire.Doc.Document
            Document doc = new Document();
            // load the file base on a specified file name
            doc.LoadFromFile(@"../../Original Word.docx", FileFormat.Docx);
            //convert the first page of document to image
            System.Drawing.Image image = doc.SaveToImages(0, Spire.Doc.Documents.ImageType.Metafile);
            // save the document object to Emf file
            image.Save(@"../../Convert Word to Image.emf", ImageFormat.Emf);
            //close the document
            doc.Close();

        }
    }
}
Check the effect screenshot below:
Converting HTML to PDF with C# PDF component is so important that we always try our best to improve our Spire.PDF better and better. We aim to make it is much more convenient for our developers to use. Now besides the previous method of converting HTML to PDF offered by Spire.PDF, we have a new plugin for html conversion to PDF. This section will focus on the new plugin of convert HTML to PDF. With this new plugin, we support to convert the HTML page with rich elements, such as HTTPS, CSS3, HTML5, JavaScript.
You need to download Spire.PDF and install it on your system, add Spire.PDF.dll as reference in the downloaded Bin folder thought the below path '..\Spire.PDF\Bin\NET4.0\Spire.PDF.dll'. And for gain the new plugin, you could get the new plugin from the download file directly: windows-x86.zip windows-x64.zip macosx_x64.zip linux_x64.tar.gz .
On Windows system, you need to unzip the convertor plugin package and copy the folder 'plugins' under the same folder of Spire.Pdf.dll. Before you use QT plugin for converting HTML to PDF, please ensure you have installed Microsoft Visual C++ 2015 Redistributable on your computer.
On Mac and Linux system, you need to copy the zip file under the system and then unzip the convertor plugin package there to use the plugins successfully.
C# HtmlToPdf.zip and VB.NET HtmlToPdfVB.zip, you could download and try it.
Calling the plugins is very simple, please check the below C# code for convert HTML to PDF.
using System.Drawing;
using Spire.Pdf.Graphics;
using Spire.Pdf.HtmlConverter.Qt;
namespace SPIREPDF_HTMLtoPDF
{
class Program
{
static void Main(string[] args)
{
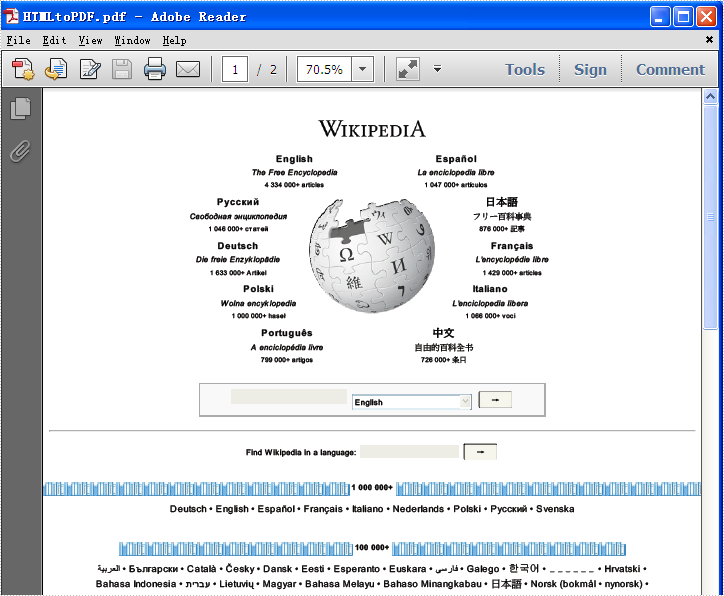
HtmlConverter.Convert("http://www.wikipedia.org/", "HTMLtoPDF.pdf",
//enable javascript
true,
//load timeout
100 * 1000,
//page size
new SizeF(612, 792),
//page margins
new PdfMargins(0, 0));
System.Diagnostics.Process.Start("HTMLtoPDF.pdf");
}
}
}
Imports System.Drawing
Imports Spire.Pdf.Graphics
Imports Spire.Pdf.HtmlConverter.Qt

Module Module1

    Sub Main()
        HtmlConverter.Convert("http://www.wikipedia.org/", "HTMLtoPDF.pdf", True, 100 * 1000, New SizeF(612, 792), New PdfMargins(0, 0))
        System.Diagnostics.Process.Start("HTMLtoPDF.pdf")
    End Sub

End Module
Please check the effective screenshot as below:
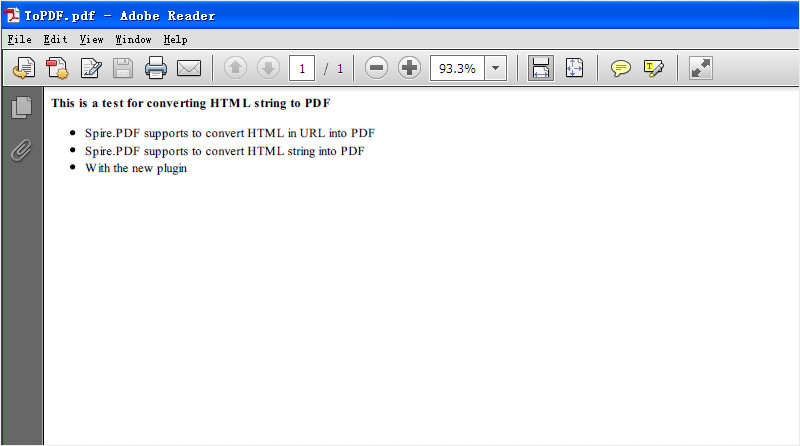
The following sample will focus on the new plugin of convert HTML string to PDF.
using System;
using System.Collections.Generic;
using System.Linq;
using System.Text;
using Spire.Pdf;
using System.IO;
using Spire.Pdf.HtmlConverter;
using System.Drawing;
namespace HTMLToPDFwithPlugins
{
    class Program
    {
        static void Main(string[] args)
        {
            string input =@"<strong>This is a test for converting HTML string to PDF </strong>
                 <ul><li>Spire.PDF supports to convert HTML in URL into PDF</li>
                 <li>Spire.PDF supports to convert HTML string into PDF</li>
                 <li>With the new plugin</li></ul>";

            string outputFile = "ToPDF.pdf";

            Spire.Pdf.HtmlConverter.Qt.HtmlConverter.Convert(input,

            outputFile,
            //enable javascript
            true,
            //load timeout
            10 * 1000,
            //page size
            new SizeF(612, 792),
            //page margins
            new Spire.Pdf.Graphics.PdfMargins(0),
            //load from content type
            LoadHtmlType.SourceCode
            );
            System.Diagnostics.Process.Start(outputFile);
        }
    }
}
Effective screenshot: