
.NET (1327)
Children categories
Background
PDF is now widely used to represent document in independent specification. It encapsulates a complete description of a fixed-layout flat document, including the text, fonts and graphics and so on. Due to its powerful functions, it is difficult for developers to parse its format. Or more specifically, to parse content out from PDF document and convert it to different image format is a tough task for some developers. This article will help you solve this problem by using PDF document viewer component Spire.PDFViewer for WPF by 5 easy steps. Firstly, you can download Spire.PDFViewer for WPF.
Target
To convert a specified or random page including frames of images from PDF file to TIFF programmatically.
Step 1: To create WPF application in Visual Studio and reference Spire.PdfViewer.WPF dlls.
Set .NET 4 as target framework
Step 2: Instance an object of Spire.PdfViewer.Wpf.PdfDocumentViewer
PdfDocumentViewer pdfViewer = new PdfDocumentViewer();
Step 3: Call the “LoadFromFile”of PdfDocumentViewer object and load a PDF file.
pdfViewer.LoadFromFile ("sample.pdf");
Step 4: Create an array and save all pages of this PDF file.
int[] pageNumbers=new int[pageCount];
            for (int i=0;i
Step 5: Save it to Tiff image format
pdfViewer.SaveAsImage("sample.tiff",pageNumbers);
The following code snippet shows all the code when converting pdf page to tiff image:
private void Button_Click(object sender, RoutedEventArgs e)
        {
            // Instance an object of Spire.PdfViewer.Wpf.PdfDocumentViewer
            PdfDocumentViewer pdfViewer = new PdfDocumentViewer();
            //Load a pdf file
            pdfViewer.LoadFromFile("sample.pdf");
            int pageCount = pdfViewer.PageCount;
            // create an array and save all pages of this PDF file.
            int[] pageNumbers=new int[pageCount];
            for (int i=0;i
Screenshot

Spire.PDFViewer for WPF is a powerful WPF PDF Viewer control which enables developers to display PDF documents with their WPF applications without Adobe Reader. It’s available to load and view PDF documents like PDF/A-1B, PDF/X1A, and even encrypted from stream, file and byte array with support for printing, zooming, etc.
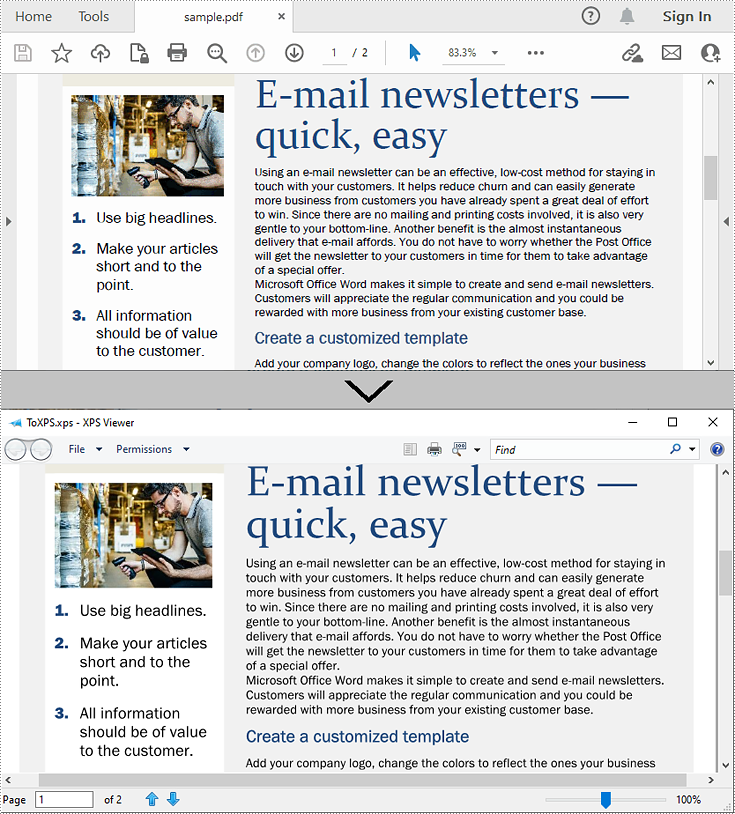
XPS is a format similar to PDF but uses XML in layout, appearance and printing information of a file. XPS format was developed by Microsoft and it is natively supported by the Windows operating systems. If you want to work with your PDF files on a Windows computer without installing other software, you can convert it to XPS format. Likewise, if you need to share a XPS file with a Mac user or use it on various devices, it is more recommended to convert it to PDF. This article will demonstrate how to programmatically convert PDF to XPS or XPS to PDF using Spire.PDF for .NET.
Install Spire.PDF for .NET
To begin with, you need to add the DLL files included in the Spire.PDF for.NET package as references in your .NET project. The DLL files can be either downloaded from this link or installed via NuGet.
PM> Install-Package Spire.PDF
Convert PDF to XPS in C# and VB.NET
Spire.PDF for .NET supports converting PDF to various file formats, and to achieve the PDF to XPS conversion, you just need three lines of core code. The following are the detailed steps.
- Create a PdfDocument instance.
- Load a sample PDF document using PdfDocument.LoadFromFile() method.
- Convert the PDF document to an XPS file using PdfDocument.SaveToFile (string filename, FileFormat.XPS) method.
- C#
- VB.NET
using Spire.Pdf;

namespace ConvertPdfToXps
{
    class Program
    {
        static void Main(string[] args)
        {
            //Create a PdfDocument instance
            PdfDocument pdf = new PdfDocument();

            //Load sample PDF document
            pdf.LoadFromFile("sample.pdf");

            //Save it to XPS format
            pdf.SaveToFile("ToXPS.xps", FileFormat.XPS);
            pdf.Close();
        }
    }
}
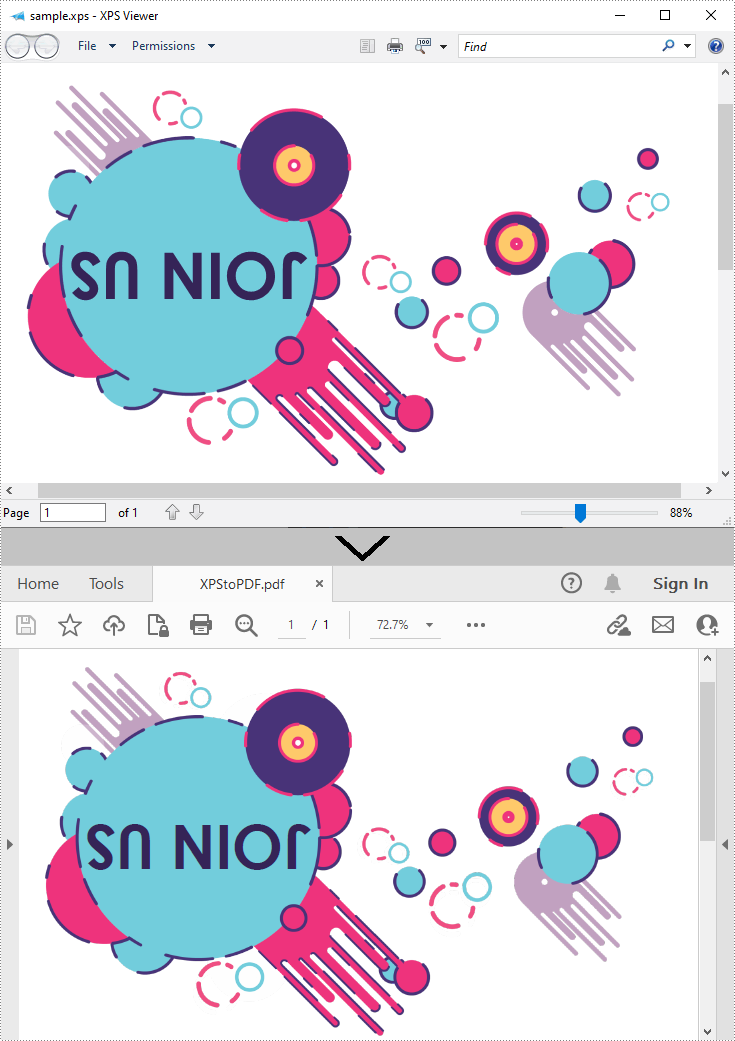
Convert XPS to PDF in C# and VB.NET
Conversion from XPS to PDF can also be achieved with Spire.PDF for .NET. While converting, you can set to keep high quality image on the generated PDF file by using the PdfDocument.ConvertOptions.SetXpsToPdfOptions() method. The following are the detailed steps.
- Create a PdfDocument instance.
- Load an XPS file using PdfDocument.LoadFromFile(string filename, FileFormat.XPS) method or PdfDocument.LoadFromXPS() method.
- While conversion, set the XPS to PDF convert options to keep high quality images using PdfDocument.ConvertOptions.SetXpsToPdfOptions() method.
- Save the XPS file to a PDF file using PdfDocument.SaveToFile(string filename, FileFormat.PDF) method.
- C#
- VB.NET
using Spire.Pdf;

namespace ConvertXPStoPDF
{
    class Program
    {
        static void Main(string[] args)
        {
            //Create a PdfDocument instance
            PdfDocument pdf = new PdfDocument();

            //Load a sample XPS file
            pdf.LoadFromFile("Sample.xps", FileFormat.XPS);
            //pdf.LoadFromXPS("Sample.xps");

            //Keep high quality images when converting XPS to PDF
            pdf.ConvertOptions.SetXpsToPdfOptions(true);

            //Save the XPS file to PDF
            pdf.SaveToFile("XPStoPDF.pdf", FileFormat.PDF);
        }
    }
}
Apply for a Temporary License
If you'd like to remove the evaluation message from the generated documents, or to get rid of the function limitations, please request a 30-day trial license for yourself.
Converting PDF files to images is a common requirement for applications that involve document previews, thumbnails generation, or PDF content archiving. For .NET developers, the Spire.PDF library offers a robust and efficient way to achieve this PDF to image conversion with high fidelity. Its key advantages include:
- High-Fidelity Rendering: Preserve original layouts and graphics.
- Multi-Format Support: Export to PNG, JPEG, BMP, TIFF, and more.
- Cross-Platform: Works with .NET Framework, .NET Core, and .NET 6+.

In this guide, you’ll learn how to use the Spire.PDF for .NET library to convert PDF to JPG or PNG images in C#, with installation guide, practical code snippets, and conversion optimization tips.
- Install the PDF to Image Converter Library
- Convert PDF to JPG Images in C#: Basic Example
- Advanced PDF to Image Conversion Options
- Performance Optimization Tips
- FAQs (PDF to TIFF, PDF to SVG)
Install the PDF to Image Converter Library
Before you can start using C# to convert PDF to PNG or PDF to JPG, it’s necessary to install the Spire.PDF for .NET library first. You can do this via NuGet Package Manager:
- Open your project in Visual Studio
- Go to “Tools > NuGet Package Manager > Manage NuGet Packages for Solution”
- Search for "Spire.PDF"
- Select and install the package
Alternatively, use the Package Manager Console:
PM> Install-Package Spire.PDF
Once installed, you're ready to start writing code to handle PDF to image conversions.
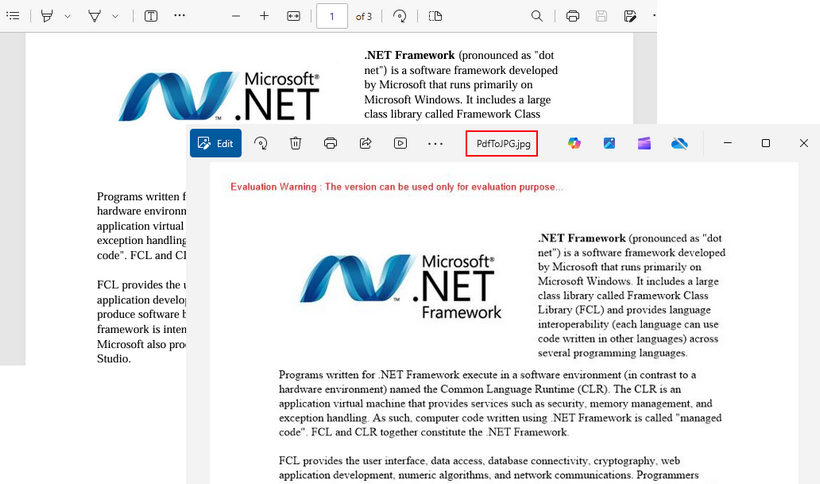
Convert PDF to JPG Images in C#: Basic Example
The SaveAsImage(int pageIndex, PdfImageType type) method of the PdfDocument class can be used to convert a specified PDF page to an image. The two parameters are:
- pageIndex (Int32)
- Description: The index of the PDF page to be converted (page index starts from 0).
- Example:
- 0 = First page
- 1 = Second page
- type (PdfImageType)
- Description: Specifies the type of the PdfImage.
- Enum Values:
- Bitmap
- Metafile
The following code demonstrates how to convert the first page of a PDF to a JPEG image using Spire.PDF:
using Spire.Pdf;
using Spire.Pdf.Graphics;
using System.Drawing;
using System.Drawing.Imaging;

namespace PDFtoJPG
{
    class Program
    {
        static void Main(string[] args)
        {
            // Create a PdfDocument instance
            PdfDocument pdf = new PdfDocument();

            // Load a sample PDF document
            pdf.LoadFromFile("input.pdf");

            // Convert the first page to a bitmap image
            Image image = pdf.SaveAsImage(0, PdfImageType.Bitmap);

            // Save the image as a JPG file
            image.Save("PdfToJPG.jpg", ImageFormat.Jpeg);

            // Disposes PDF resources
            pdf.Dispose();
        }
    }
}
Advanced PDF to Image Conversion Options
1. Set Image Resolution
Spire.PDF offers another overload of the SaveAsImage() method that takes four parameters: the page index, image type, horizontal (dpiX) and vertical (dpiY) resolution. This allows you to control the quality and size of the output image by customizing the DPI settings.
The following code example converts the first page of a PDF to a high-resolution PNG image (300 DPI):
using Spire.Pdf;
using Spire.Pdf.Graphics;
using System.Drawing;
using System.Drawing.Imaging;

namespace PDFtoImage
{
    class Program
    {
        static void Main(string[] args)
        {
            // Create a PdfDocument instance
            PdfDocument pdf = new PdfDocument();

            // Load a sample PDF document
            pdf.LoadFromFile("input.pdf");

            // Convert the first page to an image and with specified image resolution
            Image image = pdf.SaveAsImage(0, PdfImageType.Bitmap, 300, 300);

            // Save the image as a PNG file
            image.Save("PdfToPNG.png", ImageFormat.Png);

            // Disposes PDF resources
            pdf.Dispose();

        }
    }
}
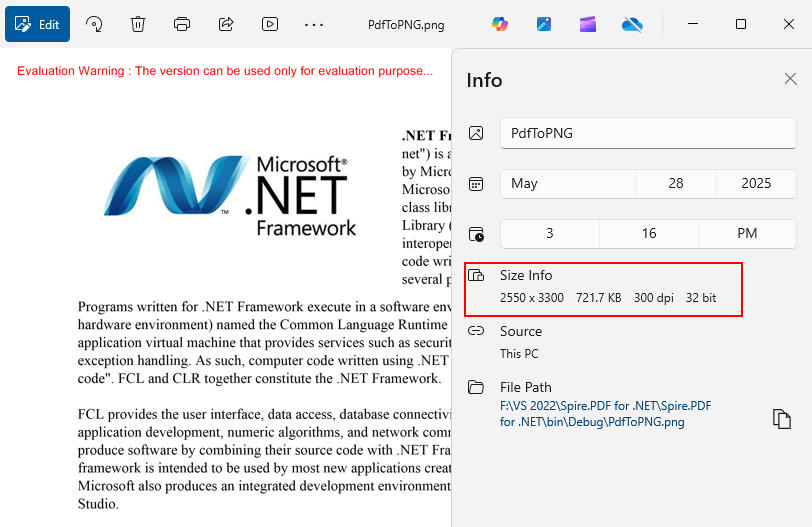
Note: Higher DPI improves image quality but slow down conversion.
2. Convert an Entire PDF File to Images
Loop through all pages in the PDF and then convert each one to a separate image.
// Loop through all pages in the PDF
for (int i = 0; i < pdf.Pages.Count; i++)
{
    // Convert each page to an image and set the image Dpi
    Image image = pdf.SaveAsImage(i, PdfImageType.Bitmap, 300, 300);

    // Save the image as PNG format to a specified folder
    string file = string.Format("Image\\ToImage-{0}.png", i);
    image.Save(file, ImageFormat.Png);
}
3. Convert to Different Image Formats
By changing the ImageFormat parameter of the Image.Save() method, you can convert PDF to JPG, PNG, BMP, or Gif formats:
// Save to JPEG format
image.Save("PDFtoJPG.jpg", ImageFormat.Jpeg);

// Save to PNG format
image.Save("PDFtoPNG.png", ImageFormat.Png);

// Save to BMP format
image.Save("PDFtoBMP.bmp", ImageFormat.Bmp);

// Save to EMF format
image.Save("PDFtoEMF.emf", ImageFormat.Emf);

// Save to GIF format
image.Save("PDFtoGIF.gif", ImageFormat.Gif);
4. Using MemoryStream
For scenarios requiring stream handling, use the following code:
// Create a MemoryStream object
MemoryStream ms = new MemoryStream();

// Convert the first page to an image with specified dpi
Image image = pdf.SaveAsImage(0, PdfImageType.Bitmap, 300, 300);

// Save the image to stream in PNG format
image.Save(ms, ImageFormat.Png);

// Write the Stream object to a byte array for further processing
byte[] imageBytes = ms.ToArray();
Performance Optimization Tips
- Memory Management: Convert pages one by one to avoid memory overload for large PDFs.
- DPI Optimization: High DPI settings improve image quality, but also increase file size and processing time.
- Dispose Resources: Call the Dispose() method of PdfDocument class to free resources.
Conclusion
Spire.PDF provides a straightforward and efficient way to convert PDF files to images in C#. With its rich feature set, high-quality rendering, and support for multiple image formats, it’s a reliable choice for both simple and complex PDF-to-image conversion tasks. By following the examples in this article, you can quickly implement PDF converter functionality in your .NET applications.
FAQs
Q1: How to remove the watermarks on the output images?
A: You can request a free 30-day trial license here to remove the red watermark and fully evaluate the Spire.PDF library. Or you can use its Free version (with certain page limitations).
Q2: Can I convert PDFs to multi-page TIFF files with Spire.PDF?
A: Yes! A detailed guide for this can be found at: Convert PDF to TIFF in C#
Q3: Can I convert PDF to SVG using Spire.PDF?
A: Yes! Spire.PDF for .NET offers the SaveToFile(String, FileFormat.SVG) method to convert a PDF file to a SVG file. You can check out the article for a comprehensive guide.
Q4. Where can I find additional documentation or support?
Background
Excel is widely used to organize data manipulations like arithmetic operations. Excel provides many built-in functions which automate a number of types of calculation. Functions are pre-programmed formulate for example, the square-root function, trigonometric functions, logarithms etc. Excel has more than 300 functions covering a range of statistical, mathematical, financial and logical operations. There is no doubt that using a function offers a shortcut method.
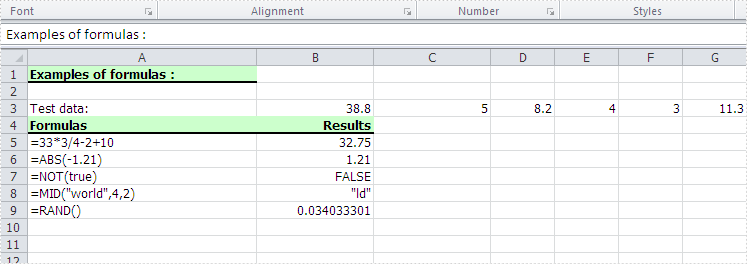
Calculate Formulas in XLS Document
Microsoft Excel is a powerful tool which has many uses, the most basic feature of which is performing functions. The aim of this article is to help you perform simple arithmetic operations on values in programming by using excel functions. Spire.Xls for .NET can help you easily create a new excel document or load an existing excel document into program, and calculate data of designated cell by function. Applied in Console platform, WinForm and Asp.net, It provide different types of mathematical functions, statistical functions , logic functions ,and string functions to calculate data with C# codes.
The following is the method example of using Console application to show how Spire.XLS for .NET realizes the calculation formula:
Step 1: Build a console application, and add spire.XLS.dll, Spire.Common.dll assembly.
Step 2: Instantiate an object of Spire.Xls.WorkBook, and add a “WorkSheet” in WorkBook object.
Workbook workbook = new Workbook();
Worksheet sheet = workbook. Worksheets[0];
Step 3: Set the value and format in Cell A1 and Cell A3.veiwing the C# Code.
//set Column A, B, C width
sheet.SetColumnWidth(1, 32);
sheet.SetColumnWidth(2, 16);
sheet.SetColumnWidth(3, 16);

// Set value of Cell A1
sheet.Range[currentRow++, 1].Value = "Examples of formulas :";
// Set value of Cell A2.
sheet.Range[++currentRow, 1].Value = "Test data:";

// Set text format Of Cell A1
CellRange range = sheet.Range["A1"];
range.Style.Font.IsBold = true;
range.Style.FillPattern = ExcelPatternType.Solid;
range.Style.KnownColor = ExcelColors.LightGreen1;
range.Style.Borders[BordersLineType.EdgeBottom].LineStyle = LineStyleType.Medium;
Step 4: Set some cells value and then to sum up some cells data and the results will be displayed in one of the cells.
sheet.Range[currentRow, 2].NumberValue = 7.3;
sheet.Range[currentRow, 3].NumberValue = 5;
sheet.Range[currentRow, 4].NumberValue = 8.2;
sheet.Range[currentRow, 5].NumberValue = 4;
sheet.Range[currentRow, 6].NumberValue = 3;
sheet.Range[currentRow, 7].NumberValue = 11.3;
//Create arithmetic expression string about cells

currentFormula = "=Sheet1!$B$3 + Sheet1!$C$3+Sheet1!$D$3+Sheet1!$E$3+Sheet1!$F$3+Sheet1!$G$3";
//Caculate arithmetic expression about cells
formulaResult = workbook.CaculateFormulaValue(currentFormula);
value = formulaResult.ToString();
sheet.Range[currentRow, 2].Value = value;
Step 5: Respectively set value and text format of Cell A4, B4.
sheet.Range[++currentRow, 1].Value = "Formulas"; ;
sheet.Range[currentRow, 2].Value = "Results";
range = sheet.Range[currentRow, 1, currentRow, 2];
range.Style.Font.IsBold = true;
range.Style.KnownColor = ExcelColors.LightGreen1;
range.Style.FillPattern = ExcelPatternType.Solid;
range.Style.Borders[BordersLineType.EdgeBottom].LineStyle = LineStyleType.Medium;
Step 6: Realize calculation simple expression.
// Create arithmetic tables enclosed type string
currentFormula = "=33*3/4-2+10";
sheet.Range[++currentRow, 1].Text = currentFormula;
// Caculate arithmetic expression
formulaResult = workbook.CaculateFormulaValue(currentFormula);
value = formulaResult.ToString();
sheet.Range[currentRow, 2].Value = value;
Step 7: Realize some mathematic functions.
//absolute value function .
currentFormula = "=ABS(-1.21)";
sheet.Range[currentRow, 1].Text = currentFormula;
sheet.Range[currentRow++, 2].Formula = currentFormula;
Step 8: Realize some logic function.
//NOT function
//Create NOT function string
currentFormula = "=NOT(true)";
sheet.Range[currentRow, 1].Text = currentFormula;
//Caculate NOT function
formulaResult = workbook.CaculateFormulaValue(currentFormula);
value = formulaResult.ToString();
sheet.Range[currentRow, 2].Value = value;
sheet.Range[currentRow, 2].HorizontalAlignment = HorizontalAlignType.Right;
Step 9: Realize some string handling functions.
//Get the substring
// Build substring function
currentFormula = "=MID(\"world\",4,2)";
sheet.Range[++currentRow, 1].Text = currentFormula;
//Caculate substring function
formulaResult = workbook.CaculateFormulaValue(currentFormula);
value = formulaResult.ToString();
sheet.Range[currentRow, 2].Value = value;
sheet.Range[currentRow, 2].HorizontalAlignment = HorizontalAlignType.Right;
Step 10: Realize a random function.
// Random function
// Create random function string.
currentFormula = "=RAND()";
sheet.Range[++currentRow, 1].Text = currentFormula;
//Caculate random function
formulaResult = workbook.CaculateFormulaValue(currentFormula);
value = formulaResult.ToString();
sheet.Range[currentRow, 2].Value = value;
Step 11: Save workbook object as file.
workbook.SaveToFile("formulaTest.xls",ExcelVersion.Version97to2003);
Viewing the full c# code
using Spire.Xls;

namespace XlsCalculateFormula
{
    class Program
    {
        static void Main(string[] args)
        {
            // Instantiate a new Workbook object
            Workbook workbook = new Workbook();

            // Access the first worksheet in the workbook
            Worksheet sheet = workbook.Worksheets[0];

            int currentRow = 1;
            string currentFormula = string.Empty;
            object formulaResult = null;
            string value = string.Empty;

            // Set column widths for columns A, B, and C (1-based index)
            sheet.SetColumnWidth(1, 32);
            sheet.SetColumnWidth(2, 16);
            sheet.SetColumnWidth(3, 16);

            // Set the value of Cell A1
            sheet.Range[currentRow++, 1].Value = "Examples of formulas :";
            // Set the value of Cell A2
            sheet.Range[++currentRow, 1].Value = "Test data:";
            // Set the style of Cell A1
            CellRange range = sheet.Range["A1"];
            range.Style.Font.IsBold = true;
            range.Style.FillPattern = ExcelPatternType.Solid;
            range.Style.KnownColor = ExcelColors.LightGreen1;
            range.Style.Borders[BordersLineType.EdgeBottom].LineStyle = LineStyleType.Medium;

            // Populate test data in row 3 (columns B to G)
            sheet.Range[currentRow, 2].NumberValue = 7.3;
            sheet.Range[currentRow, 3].NumberValue = 5; ;
            sheet.Range[currentRow, 4].NumberValue = 8.2;
            sheet.Range[currentRow, 5].NumberValue = 4;
            sheet.Range[currentRow, 6].NumberValue = 3;
            sheet.Range[currentRow, 7].NumberValue = 11.3;
            // Define a formula that sums the values in cells B3 through G3
            currentFormula = "=Sheet1!$B$3 + Sheet1!$C$3+Sheet1!$D$3+Sheet1!$E$3+Sheet1!$F$3+Sheet1!$G$3";
            // Calculate the result of the formula
            formulaResult = workbook.CalculateFormulaValue(currentFormula);
            value = formulaResult.ToString();
            sheet.Range[currentRow, 2].Value = value;


            // Set the value and format of two head cell
            sheet.Range[++currentRow, 1].Value = "Formulas"; ;
            sheet.Range[currentRow, 2].Value = "Results";
            sheet.Range[currentRow, 2].HorizontalAlignment = HorizontalAlignType.Right;
            range = sheet.Range[currentRow, 1, currentRow, 2];
            range.Style.Font.IsBold = true;
            range.Style.KnownColor = ExcelColors.LightGreen1;
            range.Style.FillPattern = ExcelPatternType.Solid;
            range.Style.Borders[BordersLineType.EdgeBottom].LineStyle = LineStyleType.Medium;

            // --- Arithmetic Expression Example ---

            // Define a basic arithmetic formula
            currentFormula = "=33*3/4-2+10";
            sheet.Range[++currentRow, 1].Text = currentFormula;
            // Calculate and display the result
            formulaResult = workbook.CalculateFormulaValue(currentFormula);
            value = formulaResult.ToString();
            sheet.Range[currentRow, 2].Value = value;

            // --- Mathematical Function: ABS (Absolute Value) ---

            // Define an ABS function formula
            currentFormula = "=ABS(-1.21)";
            sheet.Range[++currentRow, 1].Text = currentFormula;
            // Calculate and display the absolute value
            formulaResult = workbook.CalculateFormulaValue(currentFormula);
            value = formulaResult.ToString();
            sheet.Range[currentRow, 2].Value = value;


            // --- Statistical Function: SUM ---

            // Define a SUM function formula
            currentFormula = "=SUM(18,29)";
            sheet.Range[++currentRow, 1].Text = currentFormula;
            // Calculate and display the sum
            formulaResult = workbook.CalculateFormulaValue(currentFormula);
            value = formulaResult.ToString();
            sheet.Range[currentRow, 2].Value = value;

            // --- Logical Function: NOT ---
            // Define a NOT function formula
            currentFormula = "=NOT(true)";
            sheet.Range[currentRow, 1].Text = currentFormula;
            // Calculate and display the logical result
            formulaResult = workbook.CalculateFormulaValue(currentFormula);
            value = formulaResult.ToString();
            sheet.Range[currentRow, 2].Value = value;
            sheet.Range[currentRow, 2].HorizontalAlignment = HorizontalAlignType.Right;

            // --- Text Function: MID (Substring Extraction) ---
            // Define a MID function to extract characters from a string
            currentFormula = "=MID(\"world\",4,2)";
            sheet.Range[++currentRow, 1].Text = currentFormula;
            // Calculate and display the substring result
            formulaResult = workbook.CalculateFormulaValue(currentFormula);
            value = formulaResult.ToString();
            sheet.Range[currentRow, 2].Value = value;
            sheet.Range[currentRow, 2].HorizontalAlignment = HorizontalAlignType.Right;

            // --- Random Number Function: RAND() ---
            // Define a RAND function to generate a random number between 0 and 1
            currentFormula = "=RAND()";
            sheet.Range[++currentRow, 1].Text = currentFormula;
            // Calculate and display the random value
            formulaResult = workbook.CalculateFormulaValue(currentFormula);
            value = formulaResult.ToString();
            sheet.Range[currentRow, 2].Value = value;

            // Save the workbook to a file
            workbook.SaveToFile("formulaTest2.xls", ExcelVersion.Version97to2003);
            System.Diagnostics.Process.Start("formulaTest2.xls");
        }
    }
}
Screenshot:
C#: Dynamically Create, Load, and Save Excel Files via Stream
2024-12-30 07:36:00 Written by daisy zhangUsing stream operations in C#, developers can dynamically create, load, and save Excel files, enabling flexible and efficient data handling. This approach eliminates the need for physical file storage, improving application performance and responsiveness. Ideal for real-time data manipulation or environments with storage limitations, it streamlines data exchange and system integration. This article demonstrates how to create, load, modify, and save Excel files using streams in C# with Spire.XLS for .NET, offering agile and scalable data management solutions.
- Dynamically Create an Excel File and Save It to Stream
- Load and Read Excel Files from Stream with C#
- Modify an Excel File in Stream with C#
Install Spire.XLS for .NET
To begin with, you need to add the DLL files included in the Spire.XLS for .NET package as references in your .NET project. The DLL files can be either downloaded from this link or installed via NuGet.
PM> Install-Package Spire.XLS
Dynamically Create an Excel File and Save It to Stream
Using Spire.XLS for .NET, developers can dynamically create Excel files in memory by initializing a Workbook object, populating it with data and formatting, and then saving the workbook to a stream using the Workbook.SaveToStream() method. This approach eliminates the need for physical file storage, enhancing both application performance and responsiveness.
Below are the steps for creating an Excel file and saving it to a stream with C#:
- Create an instance of the Workbook class to generate a new Excel workbook, which includes three default worksheets.
- Retrieve a specific worksheet using the Workbook.Worksheets[] property.
- Define the data to write to the worksheet, such as using a DataTable to organize the data.
- Insert the data into the worksheet using the Worksheet.InsertDataTable() method or the Worksheet.Range[].Value property for individual cell values.
- Format the worksheet cells, applying styles like colors, fonts, and borders, or adjusting column widths as needed.
- Save the workbook to a memory stream using the Workbook.SaveToStream() method. The stream can then be used for further processing, such as saving it to a file or transmitting it over a network.
- C#
using Spire.Xls;
using System.Data;
using System.Drawing;

namespace CreateExcelStream
{
    class Program
    {
        static void Main(string[] args)
        {
            // Create a new workbook instance
            Workbook workbook = new Workbook();

            // Access the first worksheet in the workbook
            Worksheet sheet = workbook.Worksheets[0];

            // Create and populate a DataTable with sample data
            DataTable dataTable = new DataTable("Data");
            dataTable.Columns.Add("ID", typeof(int));
            dataTable.Columns.Add("Name", typeof(string));
            dataTable.Columns.Add("Age", typeof(int));
            dataTable.Columns.Add("Country", typeof(string));
            dataTable.Columns.Add("Salary ($)", typeof(decimal));
            dataTable.Rows.Add(101, "John Smith", 28, "USA", 54000m);
            dataTable.Rows.Add(102, "Maria Garcia", 34, "Spain", 65500m);
            dataTable.Rows.Add(103, "Liam Johnson", 22, "Canada", 48000m);
            dataTable.Rows.Add(104, "Emma Brown", 30, "Australia", 72300m);
            dataTable.Rows.Add(105, "Wei Zhang", 40, "China", 58700m);
            dataTable.Rows.Add(106, "Sofia Lopez", 26, "Mexico", 45200m);

            // Insert data from the DataTable into the worksheet
            sheet.InsertDataTable(dataTable, true, 1, 1);

            // Format the worksheet
            // Style the header row
            sheet.Rows[0].Style.Color = Color.LightGreen;
            sheet.Rows[0].Style.Font.FontName = "Arial";
            sheet.Rows[0].Style.Font.Size = 12f;
            sheet.Rows[0].BorderAround(); // Apply borders around the header row
            sheet.Rows[0].Borders.Color = Color.Blue;

            // Style the data rows
            for (int i = 1; i < sheet.AllocatedRange.Rows.Count(); i++)
            {
                sheet.Rows[i].Style.Color = Color.LightGray;
                sheet.Rows[i].Style.Font.FontName = "Arial";
                sheet.Rows[i].Style.Font.Size = 11f;
            }

            // Adjust the column widths to fit the content
            for (int j = 1; j <= sheet.AllocatedRange.Columns.Count(); j++)
            {
                sheet.AutoFitColumn(j);
            }

            // Save the workbook to a memory stream
            MemoryStream stream = new MemoryStream();
            workbook.SaveToStream(stream, FileFormat.Version2016);

            // Write the stream content to a file
            File.WriteAllBytes("output/CreateExcelByStream.xlsx", stream.ToArray());

            // Release resources
            workbook.Dispose();
        }
    }
}

Load and Read Excel Files from Stream with C#
Spire.XLS for .NET simplifies loading Excel files directly from a stream using the Workbook.LoadFromStream() method. Once the file is loaded, developers can easily access and read cell data, optimizing memory usage and enabling fast, flexible data processing without requiring file I/O operations.
The steps for loading and reading Excel files from streams with C# are as follows:
- Create a Workbook instance.
- Create a MemoryStream or FileStream object.
- Use the Workbook.LoadFromStream() method to load the Excel file from the stream into the workbook.
- Retrieve the first worksheet using the Workbook.Worksheets[] property.
- Loop through the rows and columns of the worksheet to extract the cell through the Worksheet.AllocatedRange[].Value property.
- Print the extracted data, or use the data for further operations.
- C#
using Spire.Xls;

namespace LoadExcelStream
{
    class Program
    {
        static void Main(string[] args)
        {
            // Create an instance of the Workbook class
            Workbook workbook = new Workbook();

            // Create a memory stream
            MemoryStream stream = new MemoryStream();
            File.OpenRead("Sample.xlsx").CopyTo(stream);

            // Load the Excel file from the stream
            workbook.LoadFromStream(stream);

            // Access the first worksheet in the workbook
            Worksheet sheet = workbook.Worksheets[0];

            // Initialize a list to store the data retrieved from the worksheet
            List<List<string>> data = new List<List<string>>();
            for (int i = 0; i < sheet.AllocatedRange.Rows.Count(); i++)
            {
                // Create a list to hold each row of data
                List<string> lines = new List<string>();
                for (int j = 0; j < sheet.AllocatedRange.Columns.Count(); j++)
                {
                    // Retrieve the cell text and add it to the row
                    lines.Add(sheet.AllocatedRange[i + 1, j + 1].Text);
                }
                // Add the row to the data list
                data.Add(lines);
            }

            // Print the retrieved data or use it for further operations
            foreach (List<string> lines in data)
            {
                Console.WriteLine(string.Join(" | ", lines));
            }
        }
    }
}

Modify an Excel File in Stream with C#
With Spire.XLS for .NET, developers can modify an Excel file in memory by first loading it into a Workbook object with the LoadFromStream() method. After making updates (such as changing cell values or formatting), the file can be saved back to a stream using the Workbook.SaveToStream() method. This approach allows seamless real-time changes without relying on physical storage.
Follow the steps below to modify Excel files in streams with C#:
- Create a Workbook instance to represent the Excel file.
- Create a MemoryStream or FileStream instance.
- Use the Workbook.LoadFromStream() to load the Excel file from the stream.
- Access the first worksheet through the Workbook.Worksheets[] property.
- Modify the header row and the data rows' styles (font, size, background color, etc.) through the properties in CellRange.Style.
- Autofit the columns to adjust their width based on the content using the Worksheet.AutoFitColumn() method.
- Save the changes to the stream using the Workbook.SaveToStream() method.
- C#
using Spire.Xls;
using System.Drawing;

namespace ModifyExcelStream
{
    class Program
    {
        static void Main(string[] args)
        {
            // Create a new instance of the Workbook class
            Workbook workbook = new Workbook();

            // Create a memory stream
            MemoryStream stream = new MemoryStream();
            File.OpenRead("Sample.xlsx").CopyTo(stream);

            // Load the Excel file from the stream
            workbook.LoadFromStream(stream);

            // Access the first worksheet in the workbook
            Worksheet sheet = workbook.Worksheets[0];

            // Modify the style of the header row
            CellRange headerRow = sheet.AllocatedRange.Rows[0];
            headerRow.Style.Font.FontName = "Times New Roman";
            headerRow.Style.Font.Size = 12f;
            headerRow.Style.Color = Color.LightBlue;

            // Modify the style of the data rows
            for (int i = 1; i < sheet.AllocatedRange.Rows.Count(); i++)
            {
                CellRange dataRow = sheet.AllocatedRange.Rows[i];
                dataRow.Style.Font.FontName = "Arial";
                dataRow.Style.Font.Size = 10f;
                dataRow.Style.Color = Color.LightGray;
                // Alternate row coloring (even rows)
                if (i % 2 == 0)
                {
                    dataRow.Style.Color = Color.LightSlateGray;
                }
            }

            // Autofit columns to adjust their width based on content
            for (int k = 1; k <= sheet.AllocatedRange.Columns.Count(); k++)
            {
                sheet.AutoFitColumn(k);
            }

            // Change the border color
            sheet.AllocatedRange.Style.Borders.Color = Color.White;

            // Save the modified workbook back to the stream
            workbook.SaveToStream(stream);

            // Write the stream content to a new file
            File.WriteAllBytes("output/ModifyExcelByStream.xlsx", stream.ToArray());

            // Release resources
            workbook.Dispose();
        }
    }
}

Apply for a Temporary License
If you'd like to remove the evaluation message from the generated documents, or to get rid of the function limitations, please request a 30-day trial license for yourself.
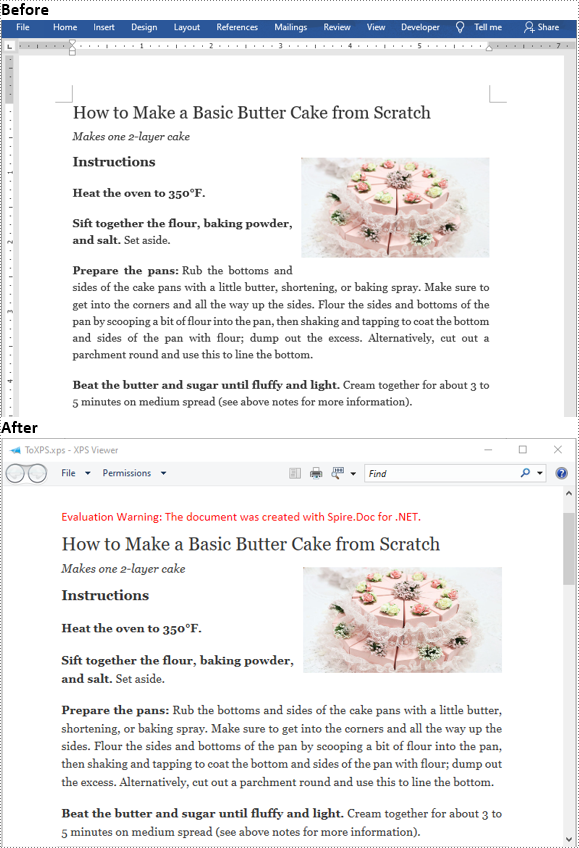
XPS (XML Paper Specification) is a fixed-layout document format designed to preserve document fidelity and provide device-independent document appearance. It is similar to PDF, but is based on XML rather than PostScript. If you want to save a Word document to a fixed-layout file format, XPS would be an option. This article will demonstrate how to convert Word documents to XPS in C# and VB.NET using Spire.Doc for .NET.
Install Spire.Doc for .NET
To begin with, you need to add the DLL files included in the Spire.Doc for.NET package as references in your .NET project. The DLL files can be either downloaded from this link or installed via NuGet.
PM> Install-Package Spire.Doc
Convert Word to XPS in C# and VB.NET
The following are the detailed steps to convert a Word document to XPS using Spire.Doc for .NET:
- Initialize an instance of Document class.
- Load a Word document using Document.LoadFromFile() method.
- Save the Word document to XPS using Document.SaveToFile(string filePath, FileFormat fileFormat) method.
- C#
- VB.NET
using Spire.Doc;
namespace ConvertWordToXps
{
    class Program
    {
        static void Main(string[] args)
        {
            //Create a Document instance
            Document doc = new Document();
            //Load a Word document
            doc.LoadFromFile("Sample.docx");
            //convert the document to XPS
            doc.SaveToFile("ToXPS.xps", FileFormat.XPS);
        }
    }
}
Apply for a Temporary License
If you'd like to remove the evaluation message from the generated documents, or to get rid of the function limitations, please request a 30-day trial license for yourself.
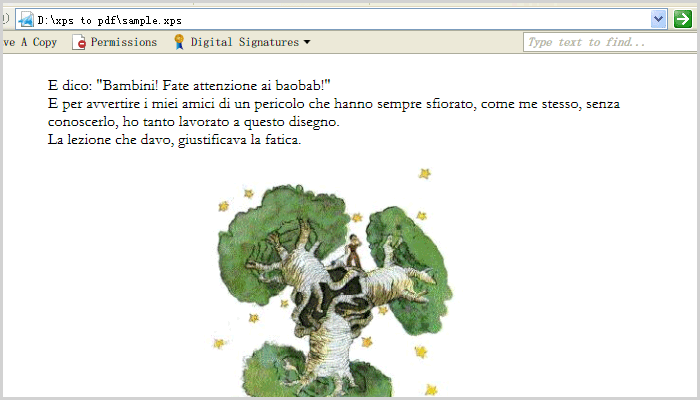
XPS is short for XML Paper Specification developed by Microsoft, which is a specification for a page description language and a fixed-document format. It comes out by Microsoft’s initiative to associate file creation with reading in its Windows operating system. Like PDF, XPS plays a loyal role to preserve document with offering device-independent document appearance. Editing in XPS or in PDF seems difficult.
As a flexible and professional component, Spire.PDF for .NEToffers a large variety conversion, among which the conversion from XPS to PDF is one of its popular feature. In addition, Spire.PDF for .NET can be applied in WinForm, ASP.NET and Console Application.
The following code example shows how to convert XPS files to PDF document.
Step 1: Introduce a class named pdfDocument which is used to initialize a Spire.PDF.PdfDocument, and load a XPS file by calling the method of LoadForm File.
PdfDocument doc = new PdfDocument();
doc.LoadFromFile(xpsFile,FileFormat.XPS);
Step 2: Only needs one row of simple code. Call the SavetoFile method of Spire.PDF.pdfDocument to save all the data as PDF formart.
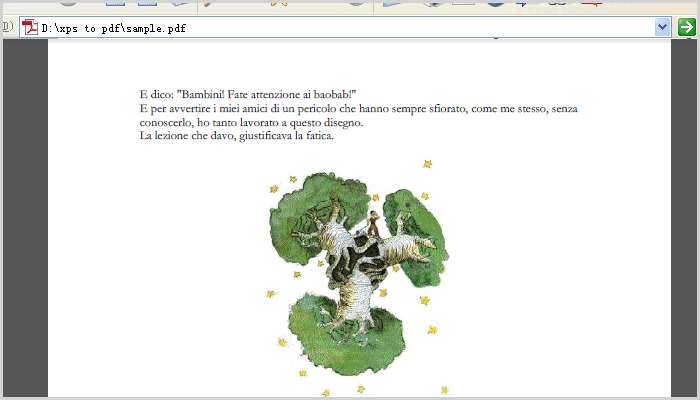
doc.SaveToFile(pdfFile, FileFormat.PDF);
After this code, run this application and you will see the PDF converted from XPS.
Screenshot before converting XPS to PDF:
Screenshot after converting XPS to PDF:
Programme Guide for Spire.Barcode
Spire.BarCode for .NET is a professional barcode component specially designed for .NET developers (C#, VB.NET, ASP.NET) to generate, read 1D & 2D barcodes. Developers and programmers can use Spire.BarCode to add Enterprise-Level barcode formats to their .net applications (ASP.NET, WinForms) quickly and easily. Below is how to use Spire.BarCode for .NET.
Step 1: Create Project
Create a C#/VB.NET Windows Forms Application project in visual studio, name it Barcode.
Step 2: Add Spire.Barcode.dll
- In Toolbox, right-click the blank area, select "Add Tab", name it "Spire.Barcode Controls".
- Right-click "Spire.Barcode Controls", select "Choose Items", select ".NET Framework Components", Click "Browse", find the Spire.Barcode.dll and double-click it.
- Then you will see "BarCodeControl" shown in "Spire.Barcode Controls" in Toolbox.
Step 3: Add Controls
Here is what the window looks like:
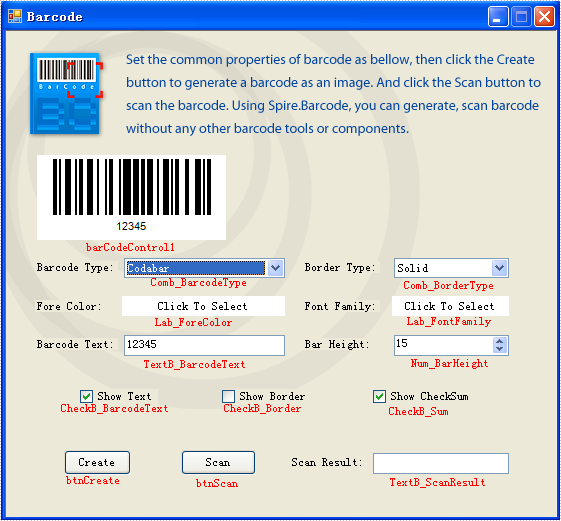
Step 4: Generate Barcode Image
btnCreate_Click is the method to generate barcode image. There are two import classes-BarCodeControl and BarCodeGenerator in this method. BarCodeControl stores information about barcode.
Here are some introductions about some of its properties:
| Name of Property | Description |
| Data | Stores the data that is to be encoded to one-dimension barcode. |
| Data2D | Stores the data that is to be encoded to two-dimension barcode. |
| Type | Indicates the type of barcode that is to be generated. |
| HasBorder | Indicates whether barcode image has border. |
| BorderDashStyle | Stores the type of border barcode image has. |
| BarHeight | Stores the height of barcode image. |
| CheckB_BarcodeText | Indicates whether to show the barcode text. |
| TextFont | Stores the font of barcode text. |
| ForeColor | Stores the fore color of barcode image. |
| CheckB_Sum | Indicates whether to show the checksum digit in Code128 and EAN128 Barcodes. |
BarCodeGenerator is the class to generate barcode image. Its constructor takes one parameter – a BarCodeControl instance. It has a method called GenerateImage() whose return value is Image object to generate image.
//Generate the barcode based on the this.barCodeControl1
BarCodeGenerator generator = new BarCodeGenerator(this.barCodeControl1);
Image barcode = generator.GenerateImage();

//save the barcode as an image
barcode.Save("barcode.png");
'Generate the barcode based on the barCodeControl1
Dim generator As New BarCodeGenerator(barCodeControl1)
Dim barcode As Image = generator.GenerateImage()

'save the barcode as an image
barcode.Save("barcode.png")
Step 5: Scan Barcode Image
BarcodeScanner is the class to scan barcode image. Call its method Scan with the Bitmap object containing the barcode image, it returns a string [] value where the scanning result is stored.
And btnScan_Click uses the class BarcodeScanner to scan barcode image in its code.
Here is the code in btnScan_Click.
private void btnScan_Click(object sender, EventArgs e)
{
//scan the barcode
string[] datas = Spire.Barcode.BarcodeScanner.Scan("barcode.png");

//show the scan result
this.TextB_ScanResult.Text = datas[0];
}
Private Sub btnScan_Click(ByVal sender As Object, ByVal e As EventArgs) Handles btnScan.Click
'scan the barcode
Dim datas() As String = Spire.Barcode.BarcodeScanner.Scan("barcode.png")

'show the scan result
Me.TextB_ScanResult.Text = datas(0)
End Sub
Step 6. Running
Run the project. You will see a window opened.
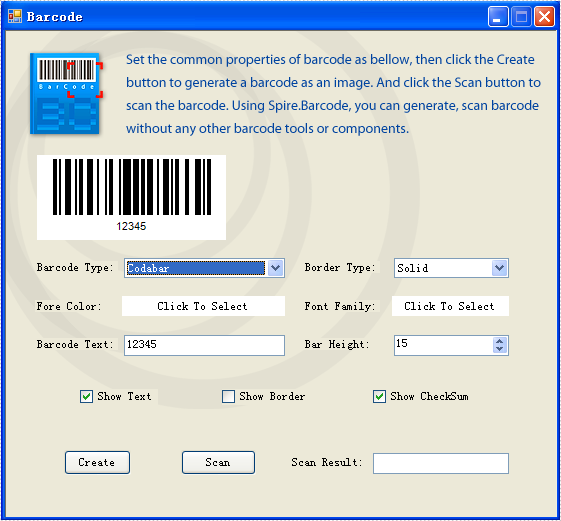
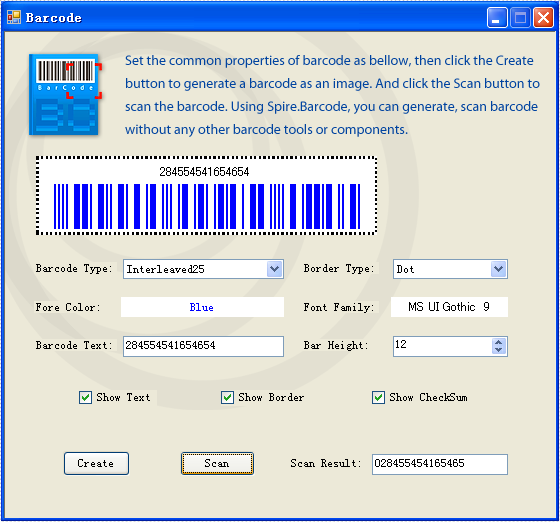
Put in some settings and click the button "Create". You will see the generated barcode image.

Click the button "Scan". You will see the barcode text shown in TextB_ScanResult.
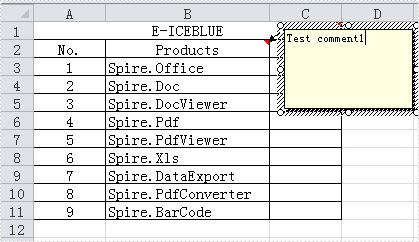
As we know, when we add a comment in MS-Excel, there will be Author appended automatically by Excel program. In fact, there is not the Author property in the comment in MS-Excel, which is just a text with special bold font style, and you can edit, remove, and insert other strings. After adding a comment (e.g., Test comment1) by using Spire.XLS component, there is no author is written into excel file. Check the below picture:
How to add a comment with editable Author property by Spire.XLS component? Just like the comment in the following picture:

Download Spire.XLS for .NET and install it on your computer. Then create CreateComment(CellRange range,string text, string author=null) method to implement it. Firstly, add a comment for a specified range by calling the CellRange.AddComment() method. Then, if the author is specified, create a new font with bold style and apply the font to the author text.
The following is the code for the method:
static ExcelComment CreateComment(CellRange range,string text, string author=null)
        {
           ExcelComment comment= range.AddComment();
           comment.Text = String.IsNullOrEmpty(author) ? text : author + ":\n" + text;
           if (!String.IsNullOrEmpty(author))
           {
               ExcelFont font = range.Worksheet.Workbook.CreateFont();
               font.FontName = "Tahoma";
               font.KnownColor = ExcelColors.Black;
               font.IsBold = true;
               comment.RichText.SetFont(0, author.Length,font);
           }
           return comment;
        }
Private Function CreateComment(ByVal range As CellRange, ByVal text As String, Optional ByVal author As String = Nothing) As ExcelComment
        Dim comment As ExcelComment = range.AddComment()
        comment.Text = If([String].IsNullOrEmpty(author), text, author & ":" & vbLf & text)
        If Not [String].IsNullOrEmpty(author) Then
            Dim font As ExcelFont = range.Worksheet.Workbook.CreateFont()
            font.FontName = "Tahoma"
            font.KnownColor = ExcelColors.Black
            font.IsBold = True
            comment.RichText.SetFont(0, author.Length, font)
        End If
        Return comment
    End Function
Next, you can call the method to add comments with author to your excel file.
CellRange range = sheet.Range["A1"];
CreateComment(range, "Test comment2", "E-iceblue");
Dim range As CellRange = sheet.Range("A1")
CreateComment(range, "Test comment2", "E-iceblue")
Tables in Word documents allow users to organize data in a structured, readable format. However, at times you may find that some tables are outdated or no longer serve their intended purpose, making it necessary to remove them. In this article, you will learn how to remove tables from a Word document in C# using Spire.Doc for .NET.
Install Spire.Doc for .NET
To begin with, you need to add the DLL files included in the Spire.Doc for.NET package as references in your .NET project. The DLL files can be either downloaded from this link or installed via NuGet.
PM> Install-Package Spire.Doc
Remove a Specified Table in Word in C#
Spire.Doc for .NET provides the Section.Tables.RemoveAt(int index) method to delete a specified table in a Word document by index. The following are the detailed steps.
- Create a Document instance.
- Load a Word document using Document.LoadFromFile() method.
- Get a specified section using Document.Sections[] property.
- Delete a specified table by index using Section.Tables.RemoveAt() method.
- Save the result document using Document.SaveToFile() method.
- C#
using Spire.Doc;

namespace RemoveTable
{
    class Program
    {
        static void Main(string[] args)
        {
            //Create a Document instance
            Document doc = new Document();

            //Load a Word document
            doc.LoadFromFile("tables.docx");

            //Get the first section in the document
            Section sec = doc.Sections[0];

            //Remove the first table in the section
            sec.Tables.RemoveAt(0);

            //Save the result document
            doc.SaveToFile("RemoveATable.docx", FileFormat.Docx);
        }
    }
}
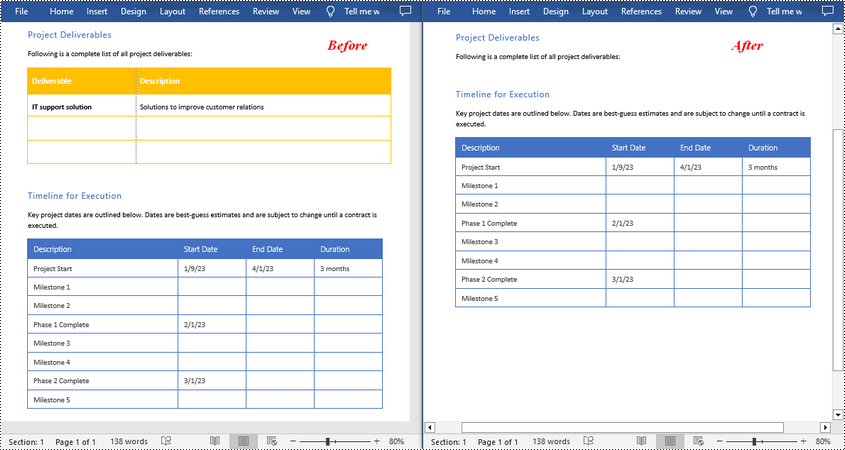
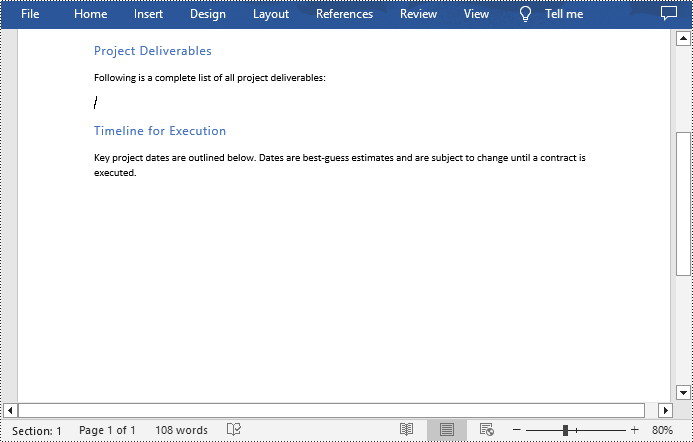
Remove All Tables in Word in C#
To delete all tables from a Word document, you need to iterate through all sections in the document, then iterate through all tables in each section and remove them through the Section.Tables.Remove() method. The following are the detailed steps.
- Create a Document instance.
- Load a Word document using Document.LoadFromFile() method.
- Iterate through all sections in the document.
- Iterate through all tables in each section.
- Delete the tables using Section.Tables.Remove() method.
- Save the result document using Document.SaveToFile() method.
- C#
using Spire.Doc;

namespace RemoveAllTable
{
    class Program
    {
        static void Main(string[] args)
        {
            //Create a Document instance
            Document doc = new Document();

            //Load a Word document
            doc.LoadFromFile("tables.docx");

            //Iterate through all sections in the document
            foreach (Section section in doc.Sections)
            {
                //Iterate through all tables in each section
                foreach (Table table in section.Tables)
                {
                    //Remove the tables
                    section.Tables.Remove(table);
                }
            }

            //Save the result document
            doc.SaveToFile("RemoveTables.docx", FileFormat.Docx);
        }
    }
}
Apply for a Temporary License
If you'd like to remove the evaluation message from the generated documents, or to get rid of the function limitations, please request a 30-day trial license for yourself.
