
.NET (1327)
Children categories
Excel Panes can be frozen in order to keep certain rows or columns visible when scrolling through the worksheet. This is particularly helpful when you have a huge amount of data that you need to deal with. In this article, you will learn how to freeze rows or/and columns in C# and VB.NET using Sprie.XLS for .NET.
Spire.XLS provides the Worksheet.FreezePanes(int rowIndex, int columnIndex) method to freeze all rows and columns above and left of the selected cell which is determined by the rowIndex and the columnIndex.

The following sections will demonstrate how to:
Install Spire.XLS for .NET
To begin with, you need to add the DLL files included in the Spire.XLS for .NET package as references in your .NET project. The DLL files can be either downloaded from this link or installed via NuGet.
PM> Install-Package Spire.XLS
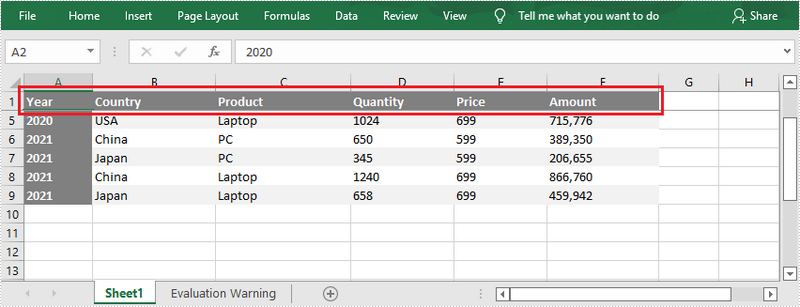
Freeze the Top Row
To freeze the top row, the selected cell should be the cell (2, 1) – “A2”. The following are the steps to freeze the top row using Spire.XLS for .NET.
- Create a Workbook object.
- Load an Excel file using Workbook.LoadFromFile() method.
- Get a specific worksheet through Workbook.Worksheets[sheetIndex] property.
- Freeze the top row by passing (2, 1) to the Worksheet.FreezePanes(int rowIndex, int columnIndex) method as the parameter.
- Save the workbook to another Excel file using Workbook.SaveToFile() method.
- C#
- VB.NET
using Spire.Xls;

namespace FreezeTopRow
{
    class Program
    {
        static void Main(string[] args)
        {
            //Create a Workbook instance
            Workbook workbook = new Workbook();

            //Load an Excel document
            workbook.LoadFromFile(@"C:\Users\Administrator\Desktop\sample.xlsx");

            //Get the first worksheet
            Worksheet sheet = workbook.Worksheets[0];

            //Freeze the top row
            sheet.FreezePanes(2, 1);

            //Save to another file
            workbook.SaveToFile("FreezeTopRow.xlsx", ExcelVersion.Version2016);
        }
    }
}
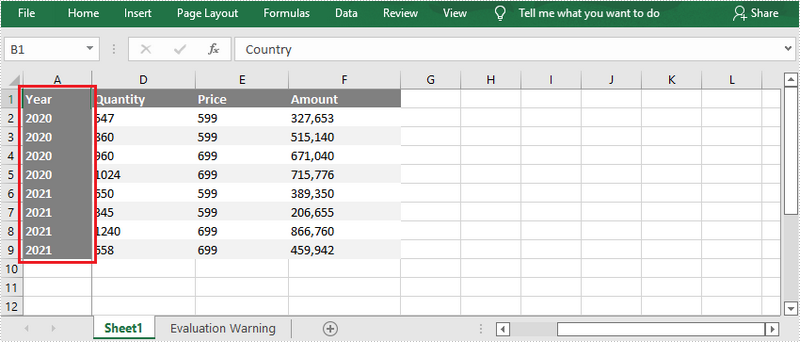
Freeze the First Column
To freeze the first column, the selected cell should be the cell (1, 2) – “B1”. The following are the steps to freeze the first column using Spire.XLS for .NET.
- Create a Workbook object.
- Load an Excel file using Workbook.LoadFromFile() method.
- Get a specific worksheet through Workbook.Worksheets[sheetIndex] property.
- Freeze the top row by passing (1, 2) to the Worksheet.FreezePanes(int rowIndex, int columnIndex) method as the parameter.
- Save the workbook to another Excel file using Workbook.SaveToFile() method.
- C#
- VB.NET
using Spire.Xls;

namespace FreezeFirstColumn
{
    class Program
    {
        static void Main(string[] args)
        {
            //Create a Workbook instance
            Workbook workbook = new Workbook();

            //Load an Excel document
            workbook.LoadFromFile(@"C:\Users\Administrator\Desktop\sample.xlsx");

            //Get the first worksheet
            Worksheet sheet = workbook.Worksheets[0];

            //Freeze the first column
            sheet.FreezePanes(1, 2);

            //Save to another file
            workbook.SaveToFile("FreezeFirstColumn.xlsx", ExcelVersion.Version2016);
        }
    }
}
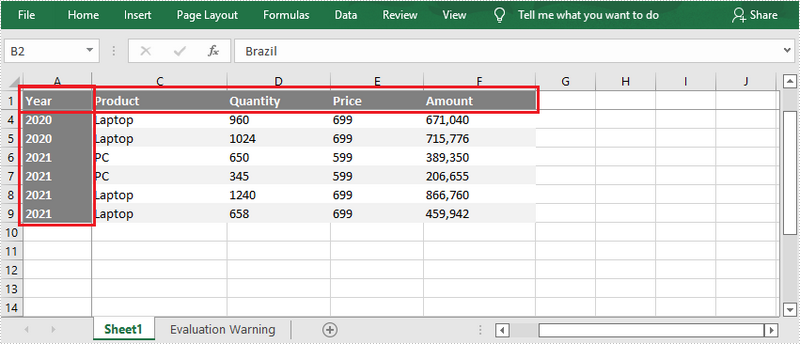
Freeze the First Row and the First Column
To freeze the first row and the first column, the selected cell should be the cell (2, 2) – “B2”. The following are the detailed steps.
- Create a Workbook object.
- Load an Excel file using Workbook.LoadFromFile() method.
- Get a specific worksheet through Workbook.Worksheets[sheetIndex] property.
- Freeze the first row and the first column by passing (2, 2) to the Worksheet.FreezePanes(int rowIndex, int columnIndex) method as the parameter.
- Save the workbook to another Excel file using Workbook.SaveToFile() method.
- C#
- VB.NET
using Spire.Xls;

namespace FreezeFirstRowAndFirstColumn
{
    class Program
    {
        static void Main(string[] args)
        {
            //Create a Workbook instance
            Workbook workbook = new Workbook();

            //Load an Excel document
            workbook.LoadFromFile(@"C:\Users\Administrator\Desktop\sample.xlsx");

            //Get the first worksheet
            Worksheet sheet = workbook.Worksheets[0];

            //Freeze the first row and the first column
            sheet.FreezePanes(2, 2);

            //Save to another file
            workbook.SaveToFile("FreezeFirstRowAndFirstColumn.xlsx", ExcelVersion.Version2016);
        }
    }
}
Apply for a Temporary License
If you'd like to remove the evaluation message from the generated documents, or to get rid of the function limitations, please request a 30-day trial license for yourself.
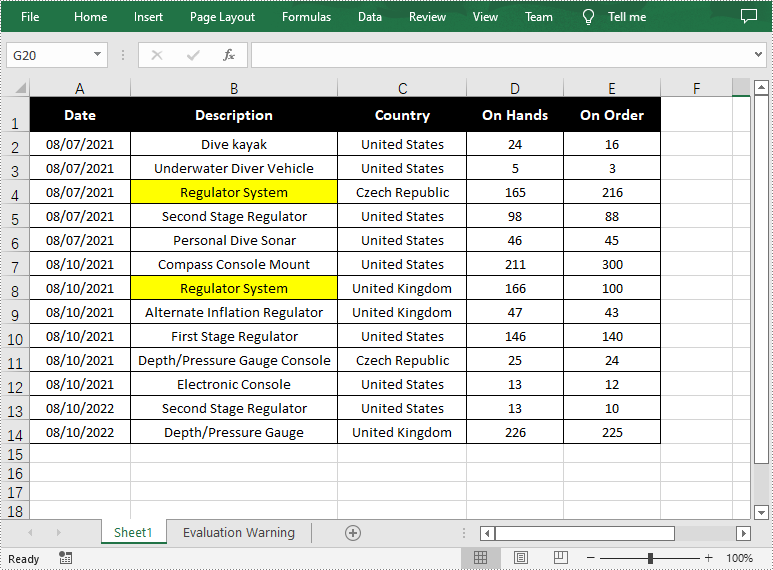
The Find function in Excel is one of the most commonly used functions for quickly locating specified data, and users can also highlight the data to make it more obvious. In this article, you will learn how to programmatically find and highlight cells with a specific value using Spire.XLS for .NET.
Install Spire.XLS for .NET
To begin with, you need to add the DLL files included in the Spire.XLS for .NET package as references in your .NET project. The DLL files can be either downloaded from this link or installed via NuGet.
PM> Install-Package Spire.XLS
Find and Highlight Data in Excel
The detailed steps are as follows.
- Create a Workbook instance.
- Load a sample Excel file using Workbook.LoadFromFile() method.
- Get a specified worksheet using Workbook.Worksheets[sheetIndex] property.
- Find all cells with matching text using Worksheet.FindAllString(string stringValue, bool formula, bool formulaValue) method.
- Set color to highlight the cells using CellRange.Style.Color property.
- Save the result file using Workbook.SaveToFile() method.
- C#
- VB.NET
using Spire.Xls;
using System.Drawing;

namespace FindHighlight
{
    class Program
    {
        static void Main(string[] args)
        {
            //Create a Workbook instance
            Workbook workbook = new Workbook();

            //Load a sample Excel file
            workbook.LoadFromFile("Test.xlsx");

            //Get the first worksheet
            Worksheet sheet = workbook.Worksheets[0];

            //Find all cells with the text "Regulator System"
            foreach (CellRange range in sheet.FindAllString("Regulator System", true, true))
            {
                //Set color to highlight the cells
                range.Style.Color = Color.Yellow;
            }

            //Save the result file
            workbook.SaveToFile("FindHighlight.xlsx", ExcelVersion.Version2016);
        }
    }
}
Apply for a Temporary License
If you'd like to remove the evaluation message from the generated documents, or to get rid of the function limitations, please request a 30-day trial license for yourself.
Excel comments are additional notes or commentary that can be added to specified cells to provide more in-depth explanations or to offer tips to other users. Once a comment’s been added, Excel provides users with the flexibility to format, edit, delete and show/hide the comment in the worksheet. In this article, you will learn how to programmatically edit or delete existing comments in Excel using Spire.XLS for .NET.
Install Spire.XLS for .NET
To begin with, you need to add the DLL files included in the Spire.XLS for.NET package as references in your .NET project. The DLLs files can be either downloaded from this link or installed via NuGet.
PM> Install-Package Spire.XLS
Edit Comments in Excel
After adding comments to your Excel workbook, you may sometimes need to make changes to the added comments. The below table lists some of the core classes and properties used to get the existing comments and then set new text as well as formatting for the comments.
| Name | Description |
| CellRange.Comment Property | Returns a Comment object that represents the comment associated with the cell in the upper-left corner of the range. |
| ExcelCommentObject Class | Represents a comment. |
| ExcelCommentObject.Text Property | Gets or sets the comment text. |
| ExcelCommentObject.Height Property | Gets or sets height of a comment. |
| ExcelCommentObject.Width Property | Gets or sets width of a comment. |
| ExcelCommentObject.AutoSize Property | Indicates whether the size of the specified object is changed automatically to fit text within its boundaries. |
The following are steps to edit comments in Excel:
- Create a Workbook instance.
- Load an Excel file using Workbook.LoadFromFile() method.
- Get the first worksheet of the Excel file using Workbook.Worksheets[] property.
- Get a comment in a specific cell range using Worksheet.Range.Comment property.
- Set new text and height/width or auto size for the existing comment using the properties of ExcelCommentObject class.
- Save the document to another file using Workbook.SaveToFile() method.
- C#
- VB.NET
using Spire.Xls;

namespace EditExcelComment
{
    class Program
    {
        static void Main(string[] args)
        {
            // Create a Workbook instance
            Workbook workbook = new Workbook();

            // Load an Excel file
            workbook.LoadFromFile("Comments.xlsx");

            // Get the first worksheet
            Worksheet sheet = workbook.Worksheets[0];

            //Get comments in specific cells and set new comments
            sheet.Range["A8"].Comment.Text = "Frank has left the company.";
            sheet.Range["F6"].Comment.Text = "Best sales.";

            // Set the height and width of the new comments
            sheet.Range["A8"].Comment.Height = 50;
            sheet.Range["A8"].Comment.Width = 100;
            sheet.Range["F6"].Comment.AutoSize = true;


            // Save to file.
            workbook.SaveToFile("ModifyComment.xlsx", ExcelVersion.Version2013);
        }
    }
}
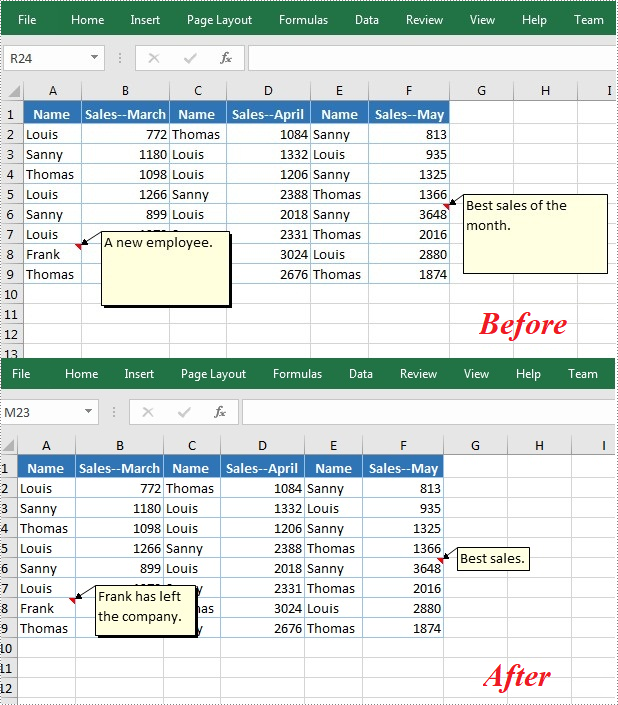
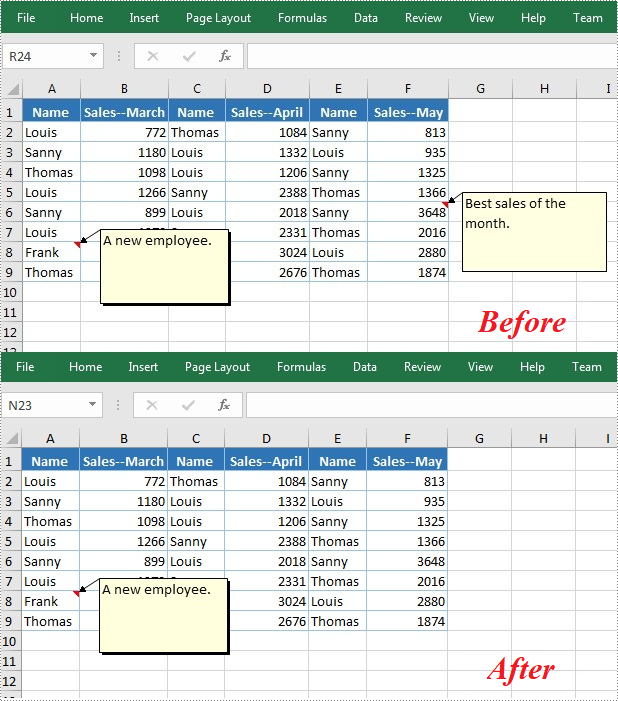
Delete Comments in Excel
The ExcelCommentObject.Remove() method offered by Spire.XLS for .NET allows you to remove a specified comment easily. The detailed steps are as follows:
- Create a Workbook instance.
- Load an Excel file using Workbook.LoadFromFile() method.
- Get the first worksheet of the Excel file using Workbook.Worksheets[] property.
- Get a comment in a specific cell range using Worksheet.Range.Comment property and then delete the comment using ExcelCommentObject.Remove() method.
- Save the document to another file using Workbook.SaveToFile() method.
- C#
- VB.NET
using Spire.Xls;

namespace EditExcelComment
{
    class Program
    {
        static void Main(string[] args)
        {
            // Create a Workbook instance
            Workbook workbook = new Workbook();

            // Load an Excel file
            workbook.LoadFromFile("Comments.xlsx");

            // Get the first worksheet
            Worksheet sheet = workbook.Worksheets[0];

            //Get the comment in a specific cell and remove it
            sheet.Range["F6"].Comment.Remove();

            // Save to file.
            workbook.SaveToFile("DeleteComment.xlsx", ExcelVersion.Version2013);
        }
    }
}
Apply for a Temporary License
If you'd like to remove the evaluation message from the generated documents, or to get rid of the function limitations, please request a 30-day trial license for yourself.
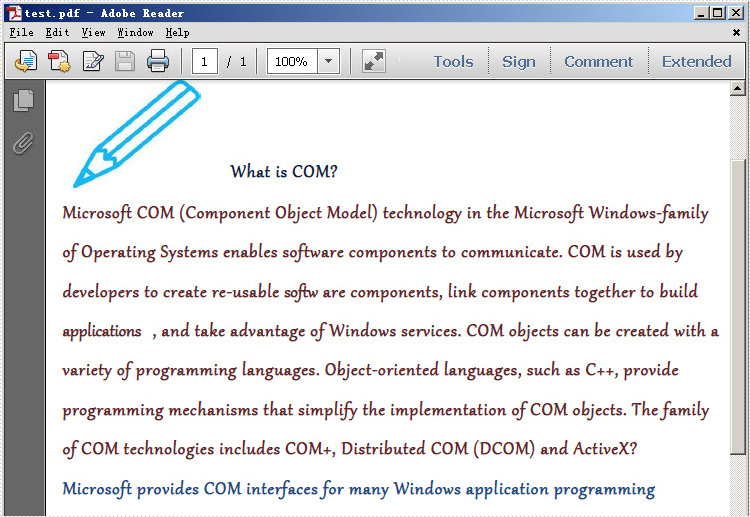
This section will introduce a solution to add two types of hyperlinks in PDF document via a WPF PDF component. One is a hyperlink directly displayed as url address in the PDF file, suppose it is named Hyperlink1; The other is a hyperlink in place of text, you can call it hyperlink2. Both of the two hyperlinks can automatically take you to a webpage, a file or an image when you click them. Before you start, it is very necessary to know some information of this PDF component
Spire.PDF for WPF enables you to directly generate, read, write and manipulate PDF files in your WPF applications without installing Adobe Acrobat or any third party library. Using Spire.PDF for WPF, you can easily add PDF hyperlink by three key steps. Please Download Spire.PDF for WPF and view the effective screenshot of this task as below picture:

Step 1: Set the link location in PDF page.
After you loading an existing PDF file or creating a new PDF file(a PDF file is imported from system in this step), please set the approximate location of hyperlink in PDF page by calling the Spire.Pdf.PdfPageBase: Canvas.ClientSize.Height.
            PdfDocument doc = new PdfDocument();
            doc.LoadFromFile(@"..\image to pdf.pdf");
            PdfPageBase page = doc.Pages[0];

            PdfUnitConvertor unitCvtr = new PdfUnitConvertor();
            PdfMargins margin = new PdfMargins();
            margin.Top = unitCvtr.ConvertUnits(2.54f, PdfGraphicsUnit.Centimeter, PdfGraphicsUnit.Point);
            margin.Bottom = margin.Top;
            margin.Left = unitCvtr.ConvertUnits(3.17f, PdfGraphicsUnit.Centimeter, PdfGraphicsUnit.Point);
            margin.Right = margin.Left;
            PdfTrueTypeFont font = new PdfTrueTypeFont(new Font("Verdana", 17));
            float space = font.Height * 0.75f;
            float y = page.Canvas.ClientSize.Height*0.6f - margin.Bottom + space;
           Dim doc As New PdfDocument()
	   doc.LoadFromFile("D:\michelle\my file\image to pdf.pdf")
	   Dim page As PdfPageBase = doc.Pages(0)
	   Dim unitCvtr As New PdfUnitConvertor()
	   Dim margin As New PdfMargins()
	   margin.Top = unitCvtr.ConvertUnits(2.54F, PdfGraphicsUnit.Centimeter, PdfGraphicsUnit.Point)
	   margin.Bottom = margin.Top
	   margin.Left = unitCvtr.ConvertUnits(3.17F, PdfGraphicsUnit.Centimeter, PdfGraphicsUnit.Point)
	   margin.Right = margin.Left
	   Dim font As New PdfTrueTypeFont(New Font("Verdana", 17))
	   Dim space As Single = font.Height * 0.75F
	   Dim y As Single = page.Canvas.ClientSize.Height * 0.6F - margin.Bottom + space
Step 2: Add Hyperlink1 in PDF.
In this step, you can draw a string in PDF page by calling Spire.Pdf. PdfPageBase method: PdfPageBase.Canvas.DrawString(string s, PdfFontBase font, PdfBrush brush, float x, float y, PdfStringFormat format) method. As the string format is a url address, a link can be drawn. Also by calculating the string width of label, link and PDF page, both link label location and link location can be set. In this method, link label and link are set in the middle.
            String label = "Image Source: ";
            PdfStringFormat format = new PdfStringFormat();
            format.MeasureTrailingSpaces = true;
            float x1 = font.MeasureString(label, format).Width;
            PdfTrueTypeFont font2 = new PdfTrueTypeFont(new Font("Verdana", 17, System.Drawing.FontStyle.Bold));
            String url1 = "http://www.e-iceblue.com";
            float x2 = font2.MeasureString(url1, format).Width;
            float x =( page.Canvas.ClientSize.Width-x1-x2)/2;
            page.Canvas.DrawString(label, font, PdfBrushes.DeepSkyBlue, x, y, format);
            x += x1;
            page.Canvas.DrawString(url1, font2, PdfBrushes.DeepSkyBlue, x, y);
            y = y + font2.MeasureString(url1).Height;
           Dim label As [String] = "Image Source: "
	   Dim format As New PdfStringFormat()
	   format.MeasureTrailingSpaces = True
	   Dim x1 As Single = font.MeasureString(label, format).Width
	   Dim font2 As New PdfTrueTypeFont(New Font("Verdana", 17, System.Drawing.FontStyle.Bold))
	   Dim url1 As [String] = "http://www.e-iceblue.com"
	   Dim x2 As Single = font2.MeasureString(url1, format).Width
	   Dim x As Single = (page.Canvas.ClientSize.Width - x1 - x2) / 2
	   page.Canvas.DrawString(label, font, PdfBrushes.DeepSkyBlue, x, y, format)
	   x += x1
	   page.Canvas.DrawString(url1, font2, PdfBrushes.DeepSkyBlue, x, y)
	   y = y + font2.MeasureString(url1).Height
Step 3: Add hyperlink 2 in place of text.
Use the method in step2 to draw a link label and add hyperlink2 in place of text by the method Spire.Pdf.Annotations. PdfTextWebLink to set link properties such as text, url and so on. Finally, invoke DrawTextWebLink(PdfCanvas graphics, PointF location) method to draw the PDF hyperlink in place of text.
            label = "Simple Link: ";
            x -= x1;
            page.Canvas.DrawString(label, font, PdfBrushes.DarkViolet, x, y, format);
            float xoffset2 = font.MeasureString(label, format).Width;
            x += xoffset2;
            String text = "e-iceblue";
            PdfTextWebLink link2 = new PdfTextWebLink();
            link2.Text = text;
            link2.Url = url1;
            link2.Font = font2;
            link2.Brush = PdfBrushes.DarkViolet;
            link2.DrawTextWebLink(page.Canvas, new PointF(x, y));
        label = "Simple Link: "
	x -= x1
	page.Canvas.DrawString(label, font, PdfBrushes.DarkViolet, x, y, format)
	Dim xoffset2 As Single = font.MeasureString(label, format).Width
	x += xoffset2
	Dim text As [String] = "e-iceblue"
	Dim link2 As New PdfTextWebLink()
	link2.Text = text
	link2.Url = url1
	link2.Font = font2
	link2.Brush = PdfBrushes.DarkViolet
	link2.DrawTextWebLink(page.Canvas, New PointF(x, y))
Spire.PDF is a PDF document creation component that enables your WPF applications to read, write and manipulate PDF documents without using Adobe Acrobat. Now, the new version added Silverlight platform which makes it more powerful.
Word Image can make one document more interesting and impressive. Sometimes, image can be used explain contents. For example, if one document focuses on describing appearance one kind of birds, readers can learn more clearly with a bird picture.
Spire.Doc for WPF, a professional component to manipulate Word documents with WPF, enables users to insert image in Word with WPF. And this guide will show a method about how to insert image Word in WPF quickly.
Users can invoke paragraph.AppendPicture(image) method to insert image in Word directly. If you want to set image height/width to make picture display appropriately in document, you can use Height and Width property provided by DocPicture class which Spire.Doc for .NET offers. Below, there is the result after inserting image in Word.

Download and install Spire.Doc for WPF. Then, add a button in MainWindow. Double click this button and use the following code to insert image in Word.
Code Sample:
          //Create Document
            Document document = new Document();
            Section section = document.AddSection();
            Paragraph Imageparagraph = section.AddParagraph();

            //Insert Image
            Image image = Image.FromFile(@"E:\work\Documents\Image\street.jpg");
            DocPicture picture =Imageparagraph.AppendPicture(image);

            //Set Image
            picture.Height = 360;
            picture.Width = 525;
        'Create Document
        Dim document As New Document()
        Dim section As Section = document.AddSection()
        Dim Imageparagraph As Paragraph = section.AddParagraph()

        'Insert Image
        Dim image As Image = image.FromFile("E:\work\Documents\Image\street.jpg")
        Dim picture As DocPicture = Imageparagraph.AppendPicture(image)

        'Set Image
        picture.Height = 360
        picture.Width = 525
Spire.Doc is a Microsoft Word component, which enables users to perform a wide range of Word document processing tasks directly, such as generate, read, write and modify Word document in WPF, .NET and Silverlight.
Whatever solution you use to convert RTF to PDF before, the solution that will be introduced is the easiest method to clearly realize your RTF to PDF conversion task. The whole process can be accomplished through three lines of key code in your WPF application via a Word component Spire.Doc for WPF.
Now, please download Spire.Doc for WPF and convert your RTF to PDF by the code below:
using Spire.Doc;
namespace WPFRTFtoPDF
{
      public partial class MainWindow : Window
    {
        public MainWindow()
        {
            InitializeComponent();
        }

        private void button1_Click(object sender, RoutedEventArgs e)
        {
            Document doc = new Document();
            doc.LoadFromFile(@"..\WPFRTFtoPDF.rtf", FileFormat.Rtf);
            doc.SaveToFile("test.pdf", FileFormat.PDF);
        }
    }
}
Imports Spire.Doc
Namespace WPFRTFtoPDF

	Public Partial Class MainWindow
		Inherits Window
		Public Sub New()
			InitializeComponent()
		End Sub

		Private Sub button1_Click(sender As Object, e As RoutedEventArgs)
			Dim doc As New Document()
			doc.LoadFromFile("..\WPFRTFtoPDF.rtf", FileFormat.Rtf)
			doc.SaveToFile("test.pdf", FileFormat.PDF)
		End Sub
	End Class
End Namespace
For comparison, I put the original RTF file below:

Spire.Doc is a standalone word component, which enables users to perform a wide range of word document processing tasks in WPF, .NET and Silverlight without installing MS Word on system.
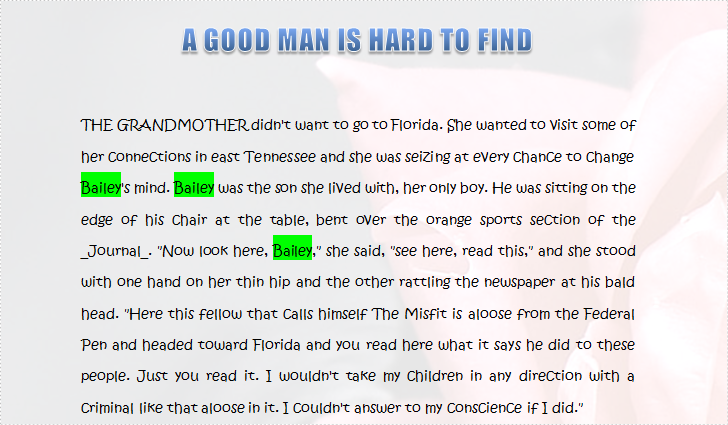
Word Find function can enable users to search for specific text or phrase quickly. Generally speaking, the found text will be highlighted automatically in order to distinguish from other contents. Also, users can format found text, such as set it as italic, bold etc.
Spire.Doc for WPF, a professional WPF component on manipulating Word, enables users to find and highlight text in Word with WPF. With this Word WPF component, developers can invoke doc.FindAllString(text string, bool caseSensitive, bool wholeWord) method directly to find text in Word. And for highlighting found text, developers need Firstly, use TextSelection, the class Spire.Doc for WPF provides, to save found string. Then, use foreach sentence to get each selection in this TextSelection. Finally, set HighlightColor, one properties of TextRange.CharacterFormat, for text in selection.
Below, the screenshot shows a Word document whose specified text has be found and highlighted.
Download and install Spire.Doc for WPF and then use the codes below to Find and Highlight Text in Word
Code Sample:
using Spire.Doc;
using Spire.Doc.Documents;
using System.Drawing;
using System.Windows;

namespace WpfApplication1
{
    public partial class MainWindow : Window
    {
        public MainWindow()
        {
            InitializeComponent();
        }
        private void button1_Click(object sender, RoutedEventArgs e)
        {

            //Load Document
            Document doc = new Document();
            doc.LoadFromFile(@"E:\work\Documents\A GOOD MAN IS HARD TO FIND.docx");

            //Find Text
            TextSelection[] textSelections = doc.FindAllString("Bailey", true, true);

            //Highlight Text
            foreach (TextSelection selection in textSelections)
            {
                selection.GetAsOneRange().CharacterFormat.HighlightColor = Color.Green;
            }

            //Save Document
            doc.SaveToFile("FindText.docx", FileFormat.Docx2010);
            System.Diagnostics.Process.Start("FindText.docx");
        }


    }
}
Imports Spire.Doc
Imports Spire.Doc.Documents
Imports System.Drawing
Imports System.Windows

Namespace WpfApplication1
	Public Partial Class MainWindow
		Inherits Window
		Public Sub New()
			InitializeComponent()
		End Sub
		Private Sub button1_Click(sender As Object, e As RoutedEventArgs)

			'Load Document
			Dim doc As New Document()
			doc.LoadFromFile("E:\work\Documents\A GOOD MAN IS HARD TO FIND.docx")

			'Find Text
			Dim textSelections As TextSelection() = doc.FindAllString("Bailey", True, True)

			'Highlight Text
			For Each selection As TextSelection In textSelections
				selection.GetAsOneRange().CharacterFormat.HighlightColor = Color.Green
			Next

			'Save Document
			doc.SaveToFile("FindText.docx", FileFormat.Docx2010)
			System.Diagnostics.Process.Start("FindText.docx")
		End Sub


	End Class
End Namespace
Spire.Doc is a Microsoft Word component, which enables users to perform a wide range of Word document processing tasks directly, such as generate, read, write and modify Word document in WPF, .NET and Silverlight.
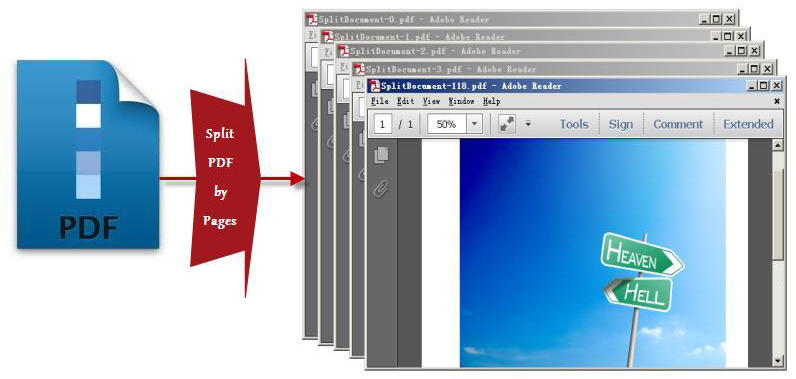
PDF Split is always needed by programmers and developers. It is very convenient to split a PDF file to multiple files by using online PDF split tools, you can split PDF in a page range as well as only extract a unique page. However, if you want to split a huge PDF document to hundreds of files, you have to try at least dozens of times, which, undoubtedly, takes too much time. Furthermore, when the network goes slowly, an error is likely to occur, sometimes, the file is reported to be damaged or corrupted. While using Spire.PDF for WPF, you can easily split huge PDF document up to hundreds of pages without any worry of the document safety in your WPF application.
By using Spire.PDF, you can achieve the effect as below:
Spire.PDF for WPF, as a WPF PDF component, allows users to create, read, write and manipulate PDF documents without using Adobe Acrobat or any third party component library. As for PDF split task, you can realize it by below methods:
doc.Split(pattern):
When splitting a PDF document to multiple PDF files, each PDF file is made of one page from the original PDF file. Split method works well since it can quickly split your PDF file and there is only one parameter passed to provide a template name of the destination PDF file.
String.Format(pattern, doc.Pages.Count - 1):
"String.Format" method provides great convenience for you to preview an existing file by returning the PDF file name that you want to process. The second parameter String.Format method is used to point out the index item which starts from 0.
The key step of PDF split task only requires four lines of code, before your start your PDF split project, please download Spirel.PDF for WPF first, then you can invoke the key code below to split any PDF you want.
        String pattern = "SplitDocument-{0}.pdf";
        doc.Split(pattern);
        String lastPageFileName= String.Format(pattern, doc.Pages.Count - 1);
        doc.Close();
	Dim pattern As String = "SplitDocument-{0}.pdf"
	doc.Split(pattern)
	Dim lastPageFileName As String = String.Format(pattern, doc.Pages.Count - 1)
	doc.Close()
Obviously, using this WPF PDF component, PDF can be split absolutely according to your requirements. Enjoy fast speed, high quality and free choices to build your application to split PDF right now.
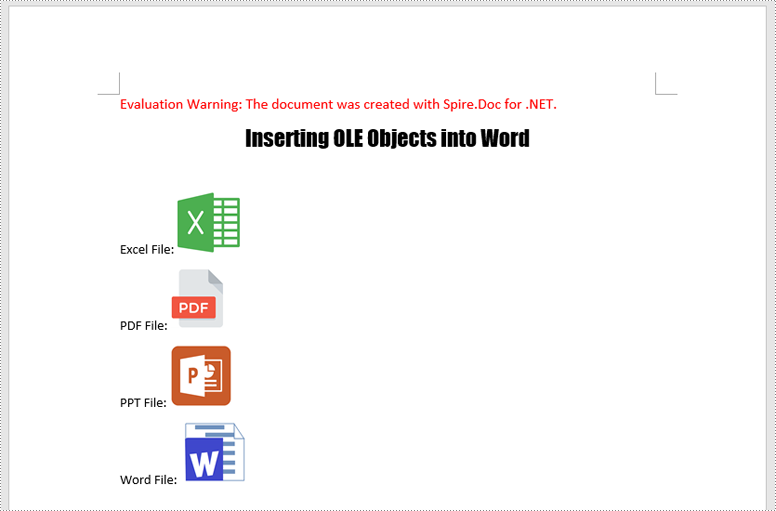
OLE, short for Object Linking and Embedding, is a powerful technology integrated into Microsoft Word and other Microsoft Office applications. Its primary purpose is to seamlessly integrate objects from external programs directly into your documents. These objects can range from simple images or charts to more complex items like spreadsheets, presentations, multimedia files and more. In this article, we will demonstrate how to insert OLE objects as well as extract OLE objects in Word documents in C# using Spire.Doc for .NET.
Install Spire.Doc for .NET
To begin with, you need to add the DLL files included in the Spire.Doc for .NET package as references in your .NET project. The DLL files can be either downloaded from this link or installed via NuGet.
PM> Install-Package Spire.Doc
Insert OLE Objects in Word in C#
Spire.Doc for .NET offers the Paragraph.AppendOleObject(string pathToFile, DocPicture olePicture), OleObjectType type) method, which allows you to insert various types of documents (including Excel spreadsheets, PDF files, Word documents, PowerPoint presentations, and more) as OLE objects into a Word document.
The detailed steps are as follows:
- Create an instance of the Document class.
- Load a Word document using the Document.LoadFromFile() method.
- Get a specific section using the Document.Sections[index] property.
- Add a paragraph to the section using the Section.AddParagraph() method.
- Create an instance of the DocPicture class.
- Load an image that will be used as the icon of the embedded object using the DocPicture.LoadImage() method, and then set image width and height.
- Append an Excel spreadsheet as an OLE object to the paragraph using the Paragraph.AppendOleObject(string pathToFile, DocPicture olePicture, OleObjectType type) method.
- Repeat the above 4-7 steps to add more paragraphs and append more types of documents, like a PDF file, a PowerPoint presentation, and a Word document as OLE objects.
- Save the result file using the Document.SaveToFile() method.
- C#
using Spire.Doc;
using Spire.Doc.Documents;
using Spire.Doc.Fields;

namespace InsertOleObjects
{
    internal class Program
    {
        static void Main(string[] args)
        {
            // Create an instance of the Document class
            Document doc = new Document();
            // Load a Word document
            doc.LoadFromFile("Example.docx");

            // Get the first section
            Section section = doc.Sections[0];

            // Add a paragraph to the section
            Paragraph para1 = section.AddParagraph();
            para1.AppendText("Excel File: ");
            // Load an image that will be used as the icon of the OLE object
            DocPicture picture1 = new DocPicture(doc);
            picture1.LoadImage("Excel-Icon.png");
            picture1.Width = 50;
            picture1.Height = 50;
            // Append an Excel spreadsheet to the paragraph as an OLE object
            para1.AppendOleObject("Budget.xlsx", picture1, OleObjectType.ExcelWorksheet);

            // Add a paragraph to the section
            Paragraph para2 = section.AddParagraph();
            para2.AppendText("PDF File: ");
            // Load an image that will be used as the icon of the OLE object
            DocPicture picture2 = new DocPicture(doc);
            picture2.LoadImage("PDF-Icon.png");
            picture2.Width = 50;
            picture2.Height = 50;
            // Append a PDF file to the paragraph as an OLE object
            para2.AppendOleObject("Report.pdf", picture2, OleObjectType.AdobeAcrobatDocument);

            // Add a paragraph to the section
            Paragraph para3 = section.AddParagraph();
            para3.AppendText("PPT File: ");
            // Load an image that will be used as the icon of the OLE object
            DocPicture picture3 = new DocPicture(doc);
            picture3.LoadImage("PPT-Icon.png");
            picture3.Width = 50;
            picture3.Height = 50;
            // Append a PowerPoint presentation to the paragraph as an OLE object
            para3.AppendOleObject("Plan.pptx", picture3, OleObjectType.PowerPointPresentation);

            // Add a paragraph to the section
            Paragraph para4 = section.AddParagraph();
            para4.AppendText("Word File: ");
            // Load an image that will be used as the icon of the OLE object
            DocPicture picture4 = new DocPicture(doc);
            picture4.LoadImage("Word-Icon.png");
            picture4.Width = 50;
            picture4.Height = 50;
            // Append a Word document to the paragraph as an OLE object
            para4.AppendOleObject("Introduction.docx", picture4, OleObjectType.WordDocument);

            doc.SaveToFile("InsertOLE.docx", FileFormat.Docx2013);
            doc.Close();
        }
    }
}
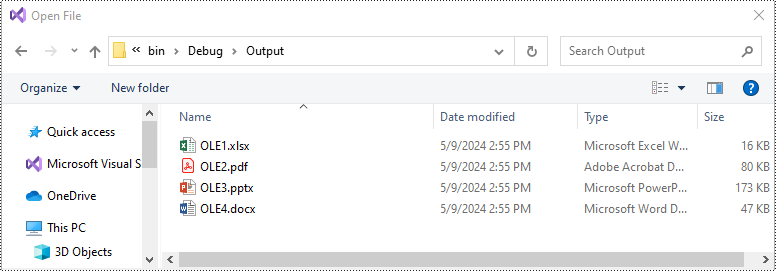
Extract OLE Objects from Word in C#
To extract OLE objects from a Word document, you need to locate the OLE objects within the document first. Once located, identify the file format of each OLE object. Finally, save the data of each OLE object to a file in its original format.
The detailed steps are as follows:
- Create an instance of the Document class.
- Load a Word document using the Document.LoadFromFile() method.
- Iterate through all sections of the document.
- Iterate through all child objects in the body of each section.
- Identify the paragraphs within each section.
- Iterate through the child objects in each paragraph.
- Locate the OLE object within the paragraph.
- Determine the file format of the OLE object.
- Save the data of the OLE object to a file in its native file format.
- C#
using Spire.Doc;
using Spire.Doc.Documents;
using Spire.Doc.Fields;
using System;

namespace InsertOrExtractOleObjects
{
    internal class Program
    {
        static void Main(string[] args)
        {
            // Create an instance of the Document class
            Document doc = new Document();
            // Load a Word document
            doc.LoadFromFile("InsertOLE.docx");

            int i = 1;
            // Iterate through all sections of the Word document
            foreach (Section sec in doc.Sections)
            {
                // Iterate through all child objects in the body of each section
                foreach (DocumentObject obj in sec.Body.ChildObjects)
                {
                    // Check if the child object is a paragraph
                    if (obj is Paragraph par)
                    {
                        // Iterate through the child objects in the paragraph
                        foreach (DocumentObject o in par.ChildObjects)
                        {
                            // Check if the child object is an OLE object
                            if (o is DocOleObject ole)
                            {
                                string s = ole.ObjectType;
                                string ext = "";

                                // Check if the OLE object is a PDF file
                                if (s.StartsWith("AcroExch.Document"))
                                {
                                    ext = ".pdf";
                                }
                                // Check if the OLE object is an Excel spreadsheet
                                else if (s.StartsWith("Excel.Sheet"))
                                {
                                    ext = ".xlsx";
                                }
                                // Check if the OLE object is a PowerPoint presentation
                                else if (s.StartsWith("PowerPoint.Show"))
                                {
                                    ext = ".pptx";
                                }
                                // Check if the OLE object is a Word document
                                else if (s.StartsWith("Word.Document"))
                                {
                                    ext = ".docx";
                                }
                                else
                                {
                                    continue;
                                }

                                // Write the data of OLE into a file in its native format
                                using (var file = System.IO.File.OpenWrite($"Output/OLE{i}{ext}"))
                                {
                                    file.Write(ole.NativeData, 0, ole.NativeData.Length);
                                }

                                i++;
                            }
                        }
                    }
                }
            }

            doc.Close();
        }
    }
}
Apply for a Temporary License
If you'd like to remove the evaluation message from the generated documents, or to get rid of the function limitations, please request a 30-day trial license for yourself.
Digital signature is more advanced and more popular to detect forgery and tampering today compared with traditional handwritten signature. Especially in business world, digital signature becomes an effective method to safeguard and authenticate your documents. As long as a digital signature is created and singed, the document has not been tampered and the recipients can view both the document version history and any changes that were made to it. Now, it is time to see how to create a PDF digital signature via a WPF PDF component Spire.PDF for WPF.
Spire.PDF for WPF, as a PDF component, enables you to create PDF digital signature in a simple way which can not only ensure your data information has not been altered since it was sent but also verify the signer's digital identity. The key procedure only requires six lines of code. Please preview the effective screenshot below, and then, view the key code.
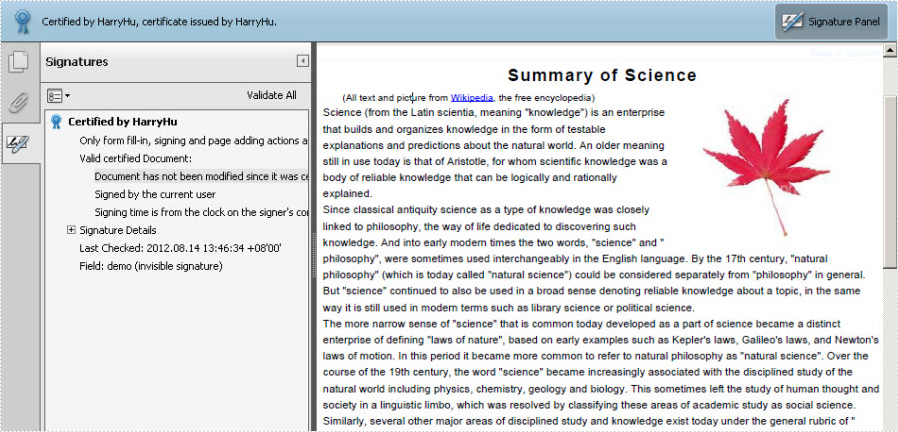
Please feel free to Download Spire.PDF for WPF first before the key code below. In this solution, for constructing one instance of a Spire.Pdf.Sercurity.PdfCertificate class named cert, we reference a certificate file and its file protect password as parameters. Then, cert is applied to create an instance of a PdfSignature class we name it signature. Setting signature “page” parameter allows you to sign the digital signature of any PDF page. And DocumentPermissions, one property of signature, can be set: AllowComments, AllowFormFill and ForbidChanges.
Core Code:
String pfxPath = @"..\Data\Demo.pfx";
PdfCertificate cert = new PdfCertificate(pfxPath, "e-iceblue");
PdfSignature signature = new PdfSignature(doc, page, cert, "demo");
signature.ContactInfo = "Harry Hu";
signature.Certificated = true;
signature.DocumentPermissions = PdfCertificationFlags.AllowFormFill;
Dim pfxPath As String = "..\Data\Demo.pfx"
Dim cert As New PdfCertificate(pfxPath, "e-iceblue")
Dim signature As New PdfSignature(doc, page, cert, "demo")
signature.ContactInfo = "Harry Hu"
signature.Certificated = True
signature.DocumentPermissions = PdfCertificationFlags.AllowFormFill
