
.NET (1327)
Children categories
PDF barcode is mainly used in commodity transaction which, to a large extent, increases efficiency and escapes human errors. The most frequently case we use barcode is that when we go shopping in the supermarket, the operator only needs to scan the barcodes, the price of the goods will automatically show. Obviously, all the information has been input in the customer data table system. Through barcode, people can easily find the details of a good in a short time. Since barcode is so wonderful, let me share a solution to draw barcode in PDF document.
Spire.PDF for WPF enables users to easily draw barcode in PDF document with C#, VB.NET for WPF. Before you start, please freely Download Spire.PDF (Spire.Office) and install it with .NET Framework 2.0 (or above) together on your system. The detail procedure can be shown below.
Step 1: Create a new project
- Create a new project in WPF Application
- Add a button in MainWindow and set the button Content property to be "Run".
- Add Spire.Pdf.Wpf.dll and System.Drawing as references. After adding the namespaces, you can view the below codes.
using System.Drawing;
using Spire.Pdf;
using Spire.Pdf.Graphics;
using Spire.Pdf.Barcode;

namespace PDFWPFbarcode
{
    ///
    /// Interaction logic for MainWindow.xaml
    ///
    public partial class MainWindow : Window
    {
        public MainWindow()
        {
            InitializeComponent();
        }

        private void button1_Click(object sender, RoutedEventArgs e)
        {

        }
    }
}
Imports System.Drawing
Imports Spire.Pdf
Imports Spire.Pdf.Graphics
Imports Spire.Pdf.Barcode

Namespace PDFWPFbarcode
	'''
	''' Interaction logic for MainWindow.xaml
	'''
	Public Partial Class MainWindow
		Inherits Window
		Public Sub New()
			InitializeComponent()
		End Sub

		Private Sub button1_Click(sender As Object, e As RoutedEventArgs)
	          End Sub
	End Class
End Namespace
Step 2: Draw barcodes in PDF document
Create a PDF document, set its margin and add one page in it
            //Create a pdf document.
            PdfDocument doc = new PdfDocument();

            //margin
            PdfUnitConvertor unitCvtr = new PdfUnitConvertor();
            PdfMargins margin = new PdfMargins();
            margin.Top = unitCvtr.ConvertUnits(2.54f, PdfGraphicsUnit.Centimeter, PdfGraphicsUnit.Point);
            margin.Bottom = margin.Top;
            margin.Left = unitCvtr.ConvertUnits(3.17f, PdfGraphicsUnit.Centimeter, PdfGraphicsUnit.Point);
            margin.Right = margin.Left;

            PdfSection section = doc.Sections.Add();
            section.PageSettings.Margins = margin;
            section.PageSettings.Size = PdfPageSize.A4;

            // Create one page
            PdfPageBase page = section.Pages.Add();
            float y = 10;
            PdfTrueTypeFont font1 = new PdfTrueTypeFont(new Font("Arial", 12f, System.Drawing.FontStyle.Bold), true);
        'Create a pdf document.
	Dim doc As New PdfDocument()

	'margin
	Dim unitCvtr As New PdfUnitConvertor()
	Dim margin As New PdfMargins()
	margin.Top = unitCvtr.ConvertUnits(2.54F, PdfGraphicsUnit.Centimeter, PdfGraphicsUnit.Point)
	margin.Bottom = margin.Top
	margin.Left = unitCvtr.ConvertUnits(3.17F, PdfGraphicsUnit.Centimeter, PdfGraphicsUnit.Point)
	margin.Right = margin.Left

	Dim section As PdfSection = doc.Sections.Add()
	section.PageSettings.Margins = margin
	section.PageSettings.Size = PdfPageSize.A4

	' Create one page
	Dim page As PdfPageBase = section.Pages.Add()
	Dim y As Single = 40
        Dim font1 As New PdfTrueTypeFont(New Font("Arial", 12F, System.Drawing.FontStyle.Bold), True)
Draw barcodes in PDF document
//draw Codebar
PdfTextWidget text = new PdfTextWidget();
text.Font = font1;
text.Text = "Codebar:";
PdfLayoutResult result = text.Draw(page, 0, y);
page = result.Page;
y = result.Bounds.Bottom + 2;
PdfCodabarBarcode barcode1 = new PdfCodabarBarcode("00:12-3456/7890");
barcode1.BarcodeToTextGapHeight = 1f;
barcode1.EnableCheckDigit = true;
barcode1.ShowCheckDigit = true;
barcode1.TextDisplayLocation = TextLocation.Bottom;
barcode1.TextColor = System.Drawing.Color.Blue;
barcode1.Draw(page, new PointF(0, y));
y = barcode1.Bounds.Bottom + 5;
//draw Code11Barcode
text.Text = "Code11:";
result = text.Draw(page, 0, y);
page = result.Page;
y = result.Bounds.Bottom + 2;
PdfCode11Barcode barcode2 = new PdfCode11Barcode("123-4567890");
barcode2.BarcodeToTextGapHeight = 1f;
barcode2.TextDisplayLocation = TextLocation.Bottom;
barcode2.TextColor = System.Drawing.Color.Blue;
barcode2.Draw(page, new PointF(0, y));
y = barcode2.Bounds.Bottom + 5;
//draw Code128-A
text.Text = "Code128-A:";
result = text.Draw(page, 0, y);
page = result.Page;
y = result.Bounds.Bottom + 2;
PdfCode128ABarcode barcode3 = new PdfCode128ABarcode("HELLO 00-123");
barcode3.BarcodeToTextGapHeight = 1f;
barcode3.TextDisplayLocation = TextLocation.Bottom;
barcode3.TextColor = System.Drawing.Color.Blue;
barcode3.Draw(page, new PointF(0, y));
y = barcode3.Bounds.Bottom + 5;
//draw Code128-B
text.Text = "Code128-B:";
result = text.Draw(page, 0, y);
page = result.Page;
y = result.Bounds.Bottom + 2;
PdfCode128BBarcode barcode4 = new PdfCode128BBarcode("Hello 00-123");
barcode4.BarcodeToTextGapHeight = 1f;
barcode4.TextDisplayLocation = TextLocation.Bottom;
barcode4.TextColor = System.Drawing.Color.Blue;
barcode4.Draw(page, new PointF(0, y));
y = barcode4.Bounds.Bottom + 5;
//draw Code32
text.Text = "Code32:";
result = text.Draw(page, 0, y);
page = result.Page;
y = result.Bounds.Bottom + 2;
PdfCode32Barcode barcode5 = new PdfCode32Barcode("16273849");
barcode5.BarcodeToTextGapHeight = 1f;
barcode5.TextDisplayLocation = TextLocation.Bottom;
barcode5.TextColor = System.Drawing.Color.Blue;
barcode5.Draw(page, new PointF(0, y));
y = barcode5.Bounds.Bottom + 5;
page = section.Pages.Add();
y = 10;
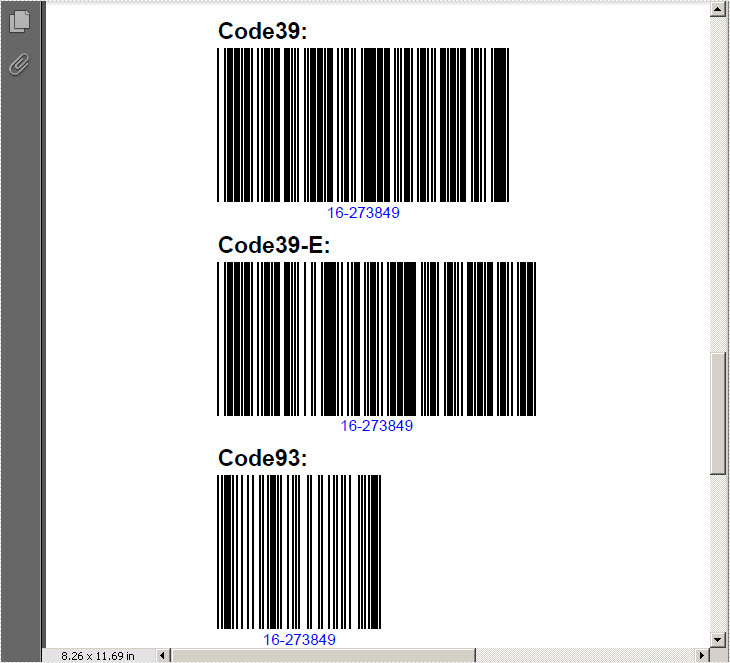
//draw Code39
text.Text = "Code39:";
result = text.Draw(page, 0, y);
page = result.Page;
y = result.Bounds.Bottom + 2;
PdfCode39Barcode barcode6 = new PdfCode39Barcode("16-273849");
barcode6.BarcodeToTextGapHeight = 1f;
barcode6.TextDisplayLocation = TextLocation.Bottom;
barcode6.TextColor = System.Drawing.Color.Blue;
barcode6.Draw(page, new PointF(0, y));
y = barcode6.Bounds.Bottom + 5;
//draw Code39-E
text.Text = "Code39-E:";
result = text.Draw(page, 0, y);
page = result.Page;
y = result.Bounds.Bottom + 2;
PdfCode39ExtendedBarcode barcode7 = new PdfCode39ExtendedBarcode("16-273849");
barcode7.BarcodeToTextGapHeight = 1f;
barcode7.TextDisplayLocation = TextLocation.Bottom;
barcode7.TextColor = System.Drawing.Color.Blue;
barcode7.Draw(page, new PointF(0, y));
y = barcode7.Bounds.Bottom + 5;
//draw Code93
text.Text = "Code93:";
result = text.Draw(page, 0, y);
page = result.Page;
y = result.Bounds.Bottom + 2;
PdfCode93Barcode barcode8 = new PdfCode93Barcode("16-273849");
barcode8.BarcodeToTextGapHeight = 1f;
barcode8.TextDisplayLocation = TextLocation.Bottom;
barcode8.TextColor = System.Drawing.Color.Blue;
barcode8.QuietZone.Bottom = 5;
barcode8.Draw(page, new PointF(0, y));
y = barcode8.Bounds.Bottom + 5;
//draw Code93-E
text.Text = "Code93-E:";
result = text.Draw(page, 0, y);
page = result.Page;
y = result.Bounds.Bottom + 2;
PdfCode93ExtendedBarcode barcode9 = new PdfCode93ExtendedBarcode("16-273849");
barcode9.BarcodeToTextGapHeight = 1f;
barcode9.TextDisplayLocation = TextLocation.Bottom;
barcode9.TextColor = System.Drawing.Color.Blue;
barcode9.Draw(page, new PointF(0, y));
y = barcode9.Bounds.Bottom + 5;
	'draw Codebar
	Dim text As New PdfTextWidget()
	text.Font = font1
	text.Text = "Codebar:"
	Dim result As PdfLayoutResult = text.Draw(page, 0, y)
	page = result.Page
	y = result.Bounds.Bottom + 2

	Dim barcode1 As New PdfCodabarBarcode("00:12-3456/7890")
	barcode1.BarcodeToTextGapHeight = 1F
	barcode1.EnableCheckDigit = True
	barcode1.ShowCheckDigit = True
	barcode1.TextDisplayLocation = TextLocation.Bottom
	barcode1.TextColor = System.Drawing.Color.Blue
	barcode1.Draw(page, New PointF(0, y))
	y = barcode1.Bounds.Bottom + 5


	'draw Code11Barcode
	text.Text = "Code11:"
	result = text.Draw(page, 0, y)
	page = result.Page
	y = result.Bounds.Bottom + 2

	Dim barcode2 As New PdfCode11Barcode("123-4567890")
	barcode2.BarcodeToTextGapHeight = 1F
	barcode2.TextDisplayLocation = TextLocation.Bottom
	barcode2.TextColor = System.Drawing.Color.Blue
	barcode2.Draw(page, New PointF(0, y))
	y = barcode2.Bounds.Bottom + 5


	'draw Code128-A
	text.Text = "Code128-A:"
	result = text.Draw(page, 0, y)
	page = result.Page
	y = result.Bounds.Bottom + 2

	Dim barcode3 As New PdfCode128ABarcode("HELLO 00-123")
	barcode3.BarcodeToTextGapHeight = 1F
	barcode3.TextDisplayLocation = TextLocation.Bottom
	barcode3.TextColor = System.Drawing.Color.Blue
	barcode3.Draw(page, New PointF(0, y))
	y = barcode3.Bounds.Bottom + 5


	'draw Code128-B
	text.Text = "Code128-B:"
	result = text.Draw(page, 0, y)
	page = result.Page
	y = result.Bounds.Bottom + 2

	Dim barcode4 As New PdfCode128BBarcode("Hello 00-123")
	barcode4.BarcodeToTextGapHeight = 1F
	barcode4.TextDisplayLocation = TextLocation.Bottom
	barcode4.TextColor = System.Drawing.Color.Blue
	barcode4.Draw(page, New PointF(0, y))
	y = barcode4.Bounds.Bottom + 5


	'draw Code32
	text.Text = "Code32:"
	result = text.Draw(page, 0, y)
	page = result.Page
	y = result.Bounds.Bottom + 2

	Dim barcode5 As New PdfCode32Barcode("16273849")
	barcode5.BarcodeToTextGapHeight = 1F
	barcode5.TextDisplayLocation = TextLocation.Bottom
	barcode5.TextColor = System.Drawing.Color.Blue
	barcode5.Draw(page, New PointF(0, y))
	y = barcode5.Bounds.Bottom + 5

	page = section.Pages.Add()
	y = 10


	'draw Code39
	text.Text = "Code39:"
	result = text.Draw(page, 0, y)
	page = result.Page
	y = result.Bounds.Bottom + 2

	Dim barcode6 As New PdfCode39Barcode("16-273849")
	barcode6.BarcodeToTextGapHeight = 1F
	barcode6.TextDisplayLocation = TextLocation.Bottom
	barcode6.TextColor = System.Drawing.Color.Blue
	barcode6.Draw(page, New PointF(0, y))
	y = barcode6.Bounds.Bottom + 5


	'draw Code39-E
	text.Text = "Code39-E:"
	result = text.Draw(page, 0, y)
	page = result.Page
	y = result.Bounds.Bottom + 2

	Dim barcode7 As New PdfCode39ExtendedBarcode("16-273849")
	barcode7.BarcodeToTextGapHeight = 1F
	barcode7.TextDisplayLocation = TextLocation.Bottom
	barcode7.TextColor = System.Drawing.Color.Blue
	barcode7.Draw(page, New PointF(0, y))
	y = barcode7.Bounds.Bottom + 5


	'draw Code93
	text.Text = "Code93:"
	result = text.Draw(page, 0, y)
	page = result.Page
	y = result.Bounds.Bottom + 2

	Dim barcode8 As New PdfCode93Barcode("16-273849")
	barcode8.BarcodeToTextGapHeight = 1F
	barcode8.TextDisplayLocation = TextLocation.Bottom
	barcode8.TextColor = System.Drawing.Color.Blue
	barcode8.QuietZone.Bottom = 5
	barcode8.Draw(page, New PointF(0, y))
	y = barcode8.Bounds.Bottom + 5


	'draw Code93-E
	text.Text = "Code93-E:"
	result = text.Draw(page, 0, y)
	page = result.Page
	y = result.Bounds.Bottom + 2

	Dim barcode9 As New PdfCode93ExtendedBarcode("16-273849")
	barcode9.BarcodeToTextGapHeight = 1F
	barcode9.TextDisplayLocation = TextLocation.Bottom
	barcode9.TextColor = System.Drawing.Color.Blue
	barcode9.Draw(page, New PointF(0, y))
	y = barcode9.Bounds.Bottom + 5
Step 3: Save and Launch
            //Save pdf file.
            doc.SaveToFile("Barcode.pdf");
            doc.Close();

            //Launching the Pdf file.
            System.Diagnostics.Process.Start("Barcode.pdf");
	'Save pdf file.
	doc.SaveToFile("Barcode.pdf")
	doc.Close()

	'Launching the Pdf file.
	System.Diagnostics.Process.Start("Barcode.pdf")
Effective Screeshot:
Are there multiple choices for creating Excel worksheets in WPF with quick and steady performance? The answer is definitely positive. The post presents different choices for creating Excel worksheets in WPF.
Each solution will be managed within several lines of code; meanwhile the performance will be perfect for any kind of user. All the solution will be built base on Spire.Xls for WPF, which enables developers to fast generate, edit Excel files. Developers can control Excel on cell formatting, page setup, data sort and filter, chart and formulas. Besides, developers can use this component to import data into Excel from database and export data from Excel to database.
Spire.Xls for WPF is always welcome to any kind of trial and evaluation. So now please feel free to download Spire.XLS for WPF and then follow our guide to easily insert Excel worksheets WPF or try other function of Spire.Xls for WPF.
Friendly Reminder:
- Before we code to insert Excel worksheet in WPF, please add spire.xls dll as reference by Clicking Project → Add Reference → Browse → Choose the folder contains Spire.XLS for WPF → Bin → .NET 4.0.
- Please make sure the namespace-Spire.Xls being imported.
Step 1: Insert a worksheet to Excel in WPF
In this method, we will insert a worksheet to Excel in WPF by calling Workbook.Worksheet.add(string sheetname) function, please check my code examples.
Workbook myWorkbook = new Workbook();
myWorkbook.Worksheets.Add("My New Worksheet");
myWorkbook.SaveToFile("Result.xls");
System.Diagnostics.Process.Start(myWorkbook.FileName);
Dim myWorkbook As New Workbook()
myWorkbook.Worksheets.Add("My New Worksheet")
myWorkbook.SaveToFile("Result.xls")
System.Diagnostics.Process.Start(myWorkbook.FileName)
Effective Screenshot shows we have successfully inserted Excel worksheet in WPF.

Step 2: Create empty Excel worksheet in WPF
In this method, we will insert a worksheet to Excel in WPF using Workbook.CreateEmptySheet(string sheetname) function, please check my code examples.
Workbook workbook = new Workbook();
workbook.CreateEmptySheet("New Empty Worksheet");
workbook.SaveToFile("Sample.xls");
System.Diagnostics.Process.Start(workbook.FileName);
Dim workbook As New Workbook()
workbook.CreateEmptySheet("New Empty Worksheet")
workbook.SaveToFile("Sample.xls")
System.Diagnostics.Process.Start(workbook.FileName)
Effective Screenshot shows we have successfully inserted Excel worksheet in WPF.

Step 3: Insert several worksheet at one time
Workbook workbook = new Workbook();
workbook.CreateEmptySheets(6);
workbook.SaveToFile("Sample.xls");
System.Diagnostics.Process.Start(workbook.FileName);
Dim workbook As New Workbook()
workbook.CreateEmptySheets(6)
workbook.SaveToFile("Sample.xls")
System.Diagnostics.Process.Start(workbook.FileName)
Five worksheet have been inserted at one time, please check the effective screenshot:

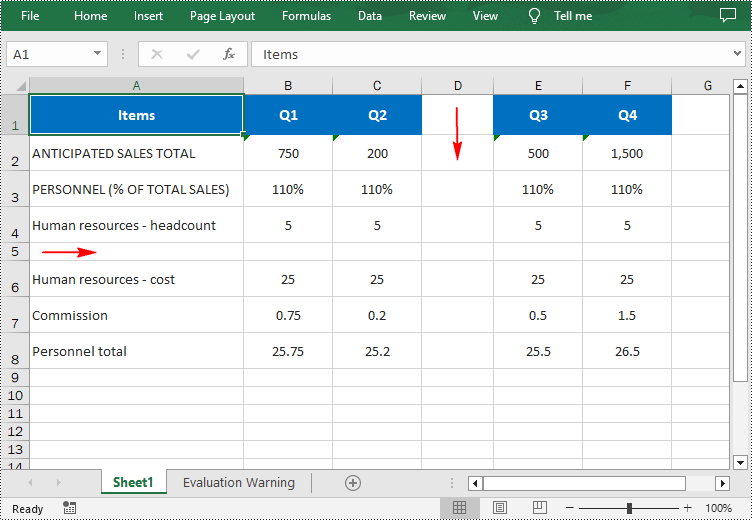
When working with Excel spreadsheets, it is common to add additional rows or columns as your data set grows or the scope of your project expands. By inserting rows and columns, you can quickly modify the structure of your spreadsheet to accommodate new information. In this article, you will learn how to insert rows and columns in Excel in C# using Spire.XLS for .NET.
Install Spire.XLS for .NET
To begin with, you need to add the DLL files included in the Spire.XLS for .NET package as references in your .NET project. The DLL files can be either downloaded from this link or installed via NuGet.
PM> Install-Package Spire.XLS
Insert a Row and a Column in Excel in C#
Spire.XLS for .NET provides the Worksheet.InsertRow(int rowIndex) and Worksheet.InsertColumn(int columnIndex) methods for inserting a blank row and a blank column in an Excel worksheet. The following are the detailed steps:
- Create a Workbook instance.
- Load a sample Excel file using Workbook.LoadFromFile() method.
- Get a specified worksheet using Workbook.Worksheets[sheetIndex] property.
- Insert a row into the worksheet using Worksheet.InsertRow(int rowIndex) method.
- Insert a column into the worksheet using Worksheet.InsertColumn(int columnIndex) method.
- Save the result file using Workbook.SaveToFile() method.
- C#
using Spire.Xls;

namespace InsertRowColumn
{
    class Program
    {
        static void Main(string[] args)
        {
            //Create a Workbook instance
            Workbook workbook = new Workbook();

            //Load an Excel document
            workbook.LoadFromFile("input.xlsx");

            //Get a specified worksheet
            Worksheet worksheet = workbook.Worksheets[0];

            //Insert a blank row as the 5th row in the worksheet
            worksheet.InsertRow(5);

            //Insert a blank column as the 4th column in the worksheet
            worksheet.InsertColumn(4);

            //Save the result file
            workbook.SaveToFile("InsertRowAndColumn.xlsx", ExcelVersion.Version2016);
        }
    }
}
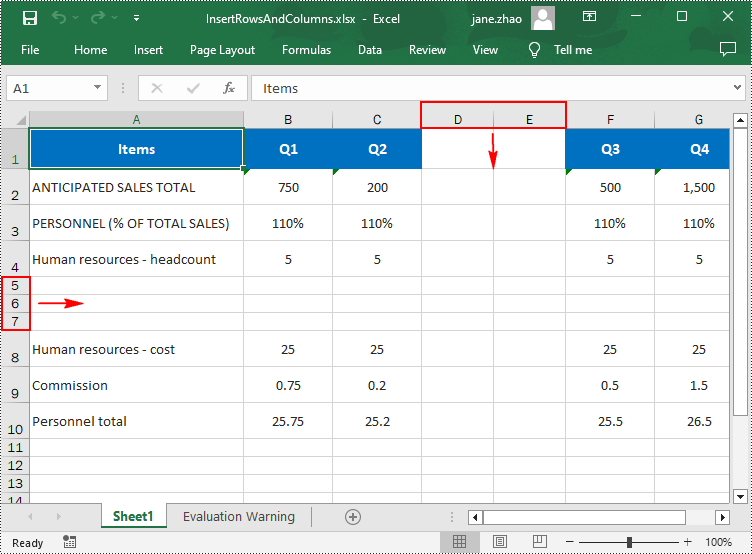
Insert Multiple Rows and Columns in Excel in C#
To insert multiple rows and columns into a worksheet, you can use the Worksheet.InsertRow(int rowIndex, int rowCount) and Worksheet.InsertColumn(int columnIndex, int columnCount) methods. The following are detailed steps.
- Create a Workbook instance.
- Load a sample Excel file using Workbook.LoadFromFile() method.
- Get a specified worksheet using Workbook.Worksheets[sheetIndex] property.
- Insert multiple rows into the worksheet using Worksheet.InsertRow(int rowIndex, int rowCount) method.
- Insert multiple columns into the worksheet using Worksheet.InsertColumn(int columnIndex, int columnCount) method.
- Save the result file using Workbook.SaveToFile() method.
- C#
using Spire.Xls;

namespace InsertRowColumn
{
    class Program
    {
        static void Main(string[] args)
        {
            //Create a Workbook instance
            Workbook workbook = new Workbook();

            //Load an Excel document
            workbook.LoadFromFile(@"E:\PythonExcel\input1.xlsx");

            //Get a specified worksheet
            Worksheet worksheet = workbook.Worksheets[0];

            //Insert three blank rows into the worksheet
            worksheet.InsertRow(5, 3);

            //Insert two blank columns into the worksheet
            worksheet.InsertColumn(4, 2);

            //Save the result file
            workbook.SaveToFile("InsertRowsAndColumns.xlsx", ExcelVersion.Version2016);
        }
    }
}
Apply for a Temporary License
If you'd like to remove the evaluation message from the generated documents, or to get rid of the function limitations, please request a 30-day trial license for yourself.
There can be no doubt that image and text are the most basic elements for a PDF document. In most cases, people need to insert images and text in a PDF file. While actually, things are not as easy as that. For example, you want to insert an image to your PDF document, but this image is in another PDF file, you can neither find a same picture from internet nor paste it directly to your own PDF. In such a situation, you have to extract the PDF image first and then, insert the images you want to your PDF.
This article is designed to share a method to extract images and text from PDF document for WPF via Spire.PDF for WPF. Using Spire.PDF for WPF, you can easily and quickly extract the PDF images and text, then, add any images you want to another PDF. Please follow the below steps.
Download Spire.PDF (Spire.Office) and with .NET Framework 2.0 (or above) together. Install and follow the guide below.
Step 1: Create a new project
- Create a new project in WPF Application
- Add a button in MainWindow and set the button Content property to be "Run".
- Add Spire.Pdf.Wpf.dll and System.Drawing as references. After adding the namespaces, you can view the below codes.
using System.Drawing;
using Spire.Pdf;
using Spire.Pdf.Graphics;
using System.IO;
using System.Drawing.Imaging;

namespace pdfextractwpf
{
    ///
    /// Interaction logic for MainWindow.xaml
    ///
    public partial class MainWindow : Window
    {
        public MainWindow()
        {
            InitializeComponent();
        }

        private void button1_Click(object sender, RoutedEventArgs e)
        {

        }
    }
}
Imports System.Drawing
Imports Spire.Pdf
Imports Spire.Pdf.Graphics
Imports System.IO
Imports System.Drawing.Imaging

Namespace pdfextractwpf
	'''
	''' Interaction logic for MainWindow.xaml
	'''
	Public Partial Class MainWindow
		Inherits Window
		Public Sub New()
			InitializeComponent()
		End Sub

		Private Sub button1_Click(sender As Object, e As RoutedEventArgs)
	          End Sub
	End Class
End Namespace
Step 2: Extract images and text from PDF document
Load a PDF file from system
            //Create a pdf document.
            PdfDocument doc = new PdfDocument();
            doc.LoadFromFile(@"D:\e-iceblue\Spire.PDF\Demos\Data\Sample2.pdf");
	'Create a pdf document.
	Dim doc As New PdfDocument()
        doc.LoadFromFile("D:\e-iceblue\Spire.PDF\Demos\Data\Sample2.pdf")
Extract images and text from PDF document
            StringBuilder buffer = new StringBuilder();
            IList images = new List();

            foreach (PdfPageBase page in doc.Pages)
            {
                buffer.Append(page.ExtractText());
                foreach (System.Drawing.Image image in page.ExtractImages())
                {
                    images.Add(image);
                }
            }

            doc.Close();
	Dim buffer As New StringBuilder()
	Dim images As IList(Of System.Drawing.Image) = New List(Of System.Drawing.Image)()

	For Each page As PdfPageBase In doc.Pages
		buffer.Append(page.ExtractText())
		For Each image As System.Drawing.Image In page.ExtractImages()
			images.Add(image)
		Next
	Next

	doc.Close()
Save the extracted images and text.
            //save text
            String fileName = "TextInPdf.txt";
            File.WriteAllText(fileName, buffer.ToString());

            //save image
            int index = 0;
            foreach (System.Drawing.Image image in images)
            {
                String imageFileName
                    = String.Format("Image-{0}.png", index++);
                image.Save(imageFileName, ImageFormat.Png);
            }
	'save text
	Dim fileName As [String] = "TextInPdf.txt"
	File.WriteAllText(fileName, buffer.ToString())

	'save image
	Dim index As Integer = 0
	For Each image As System.Drawing.Image In images
		Dim imageFileName As [String] = [String].Format("Image-{0}.png", System.Math.Max(System.Threading.Interlocked.Increment(index),index - 1))
		image.Save(imageFileName, ImageFormat.Png)
	Next
Step 3: Insert the extracted image to a newly built PDF file
Create a new PDF document and add a page in it
            PdfDocument newDoc = new PdfDocument();
            PdfPageBase newPage = newDoc.Pages.Add();
	Dim newDoc As New PdfDocument()
        Dim newPage As PdfPageBase = newDoc.Pages.Add()
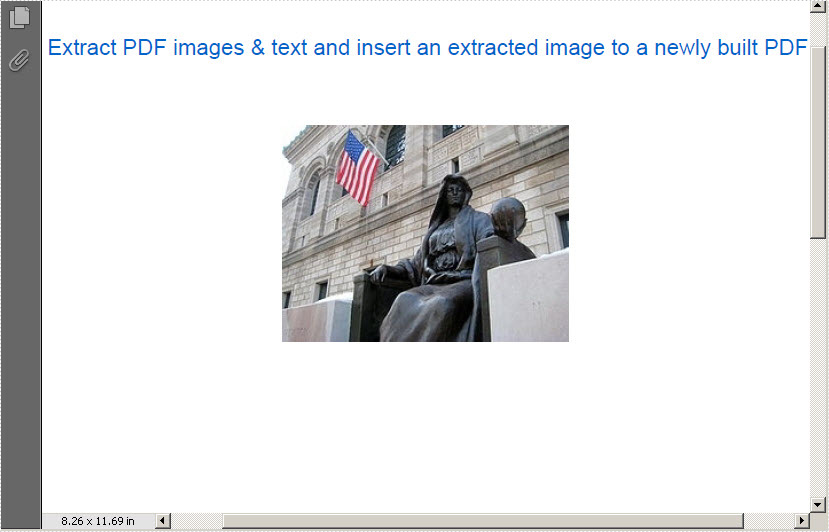
Draw the PDF text. And insert the extracted the third image in the newly built PDF document.
            newPage.Canvas.DrawString("Extract PDF images & text and insert an extracted image to a newly built PDF",
                                   new PdfFont(PdfFontFamily.Helvetica, 14.5f),
                                   new PdfSolidBrush(new PdfRGBColor(0,100,200)),
                                   10, 40);
            PdfImage img = PdfImage.FromImage(images[2]);
            float width = img.Width * 0.75f;
            float height = img.Height * 0.75f;
            float x = (newPage.Canvas.ClientSize.Width - width) / 2;

            newPage.Canvas.DrawImage(img, x, 100, width, height);
	newPage.Canvas.DrawString("Extract PDF images & text and insert an extracted image to a newly built PDF",
                                    New PdfFont(PdfFontFamily.Helvetica, 14.5F),
                                    New PdfSolidBrush(New PdfRGBColor(0, 100, 200)), 10, 40)
	Dim img As PdfImage = PdfImage.FromImage(images(2))
	Dim width As Single = img.Width * 0.75F
	Dim height As Single = img.Height * 0.75F
	Dim x As Single = (newPage.Canvas.ClientSize.Width - width) / 2
          newPage.Canvas.DrawImage(img, x, 100, width, height)
Save and launch the PDF file
            newDoc.SaveToFile("Image.pdf");
            newDoc.Close();
            System.Diagnostics.Process.Start("Image.pdf");
	newDoc.SaveToFile("Image.pdf")
	newDoc.Close()
	System.Diagnostics.Process.Start("Image.pdf")
Effecive Screenshot:
>
Spire.PDF for WPF allows its users not only to extract images and text from PDF document, but also can save the images to the most popular formats such as .PNG, JPG, BMP, GIF and so on. Click to know more
Export data is equally important with import data for excel users. Export data from Exel worksheet directly to datatable escapes many troubles and saves much time. This post will introduce you a method to export data from excel worksheet to datatable for WPF with C#, VB.NET.
Spire.XLS for WPF enables you to quickly export your data from Excel worksheet to datatable by following the below three steps. Spire.XLS for WPF supports to operate Excel 97-2003, Excel 2007 and Excel 2010. However, .NET Framework and Visual Studio must be installed for using Spire.XLS for WPF.
Make sure Spire.XLS and Visual Studio are correctly installed. And then follow steps.
Step 1: Create a new project
Create a new project by choosing WPF Application in Visual Studio.
Add a button and dataGrid in MainWindow. The default button name is "Button1". You can set Button1 Content property to be "Run" in its properties by right clicking it.
Step 2: Add reference and project namespaces
Add Spire.XLS. Wpf.dll as reference in Project. The Default location of Spire.Doc for WPF is "C:\Program Files\e-iceblue\Spire.XLS for WPF".
Double click the "Run" button, you can see the following method has been added automatically:
namespace dataexport

{
    ///
    /// Interaction logic for MainWindow.xaml
    ///
    public partial class MainWindow : Window
    {
        public MainWindow()
        {
            InitializeComponent();
        }

        private void button1_Click(object sender, RoutedEventArgs e)
        {
     }
    }
}
Namespace dataexport

	'''
	''' Interaction logic for MainWindow.xaml
	'''
	Public Partial Class MainWindow
		Inherits Window
		Public Sub New()
			InitializeComponent()
		End Sub

		Private Sub button1_Click(sender As Object, e As RoutedEventArgs)
             End Sub
	 End Class
End Namespace
Add below namespaces at the top of the method
using Spire.Xls;
using System.Data;
Imports Spire.Xls
Imports System.Data
Step 3: Export data from excel worksheet to datatable
Create a new Excel workbook and load an excel file from system
Workbook workbook = new Workbook();
workbook.LoadFromFile(@"D:\michelle\e-iceblue\Spire.XLS\Demos\Data\dataexport.xls", ExcelVersion.Version97to2003);
Worksheet sheet = workbook.Worksheets[0];
Dim workbook As New Workbook()
workbook.LoadFromFile("D:\michelle\e-iceblue\Spire.XLS\Demos\Data\dataexport.xls", ExcelVersion.Version97to2003)
Dim sheet As Worksheet = workbook.Worksheets(0)
Export data from excel worksheet to datatable:
DataTable dataTable = sheet.ExportDataTable();
DataView view = new DataView(dataTable);
this.dataGrid1.ItemsSource = view;
this.dataGrid1.AutoGenerateColumns = true;
Dim dataTable As DataTable = sheet.ExportDataTable()
Dim view As New DataView(dataTable)
Me.dataGrid1.ItemsSource = view
Me.dataGrid1.AutoGenerateColumns = True
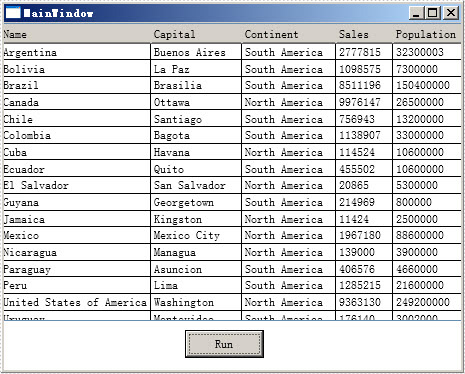
Press F5 and click "Run" in MainWindow, you can see the datatable as below picture.
Effective Screeshot:
PDF Table plays a significant role of clearly displaying data information in PDF document, which cannot be replaced by words. It provides great convenience for its users. For example, a product list can be more easily recognized and checked than numerous words. Thus, it is very necessary to learn how to generate table in PDF document.
In this article, I will not only introduce users how to generate table in PDF document, but also tell you how to set table style such as font, background color and data size by using Spire.PDF for WPF.
Spire.PDF for WPF enables you to quickly realize the task of drawing a PDF table by the below steps.
Step 1: Create a new project
- Create a new project in WPF Application
- Add a button in MainWindow, and set the button Content to be "Run"
Step 2: Add references and namespaces
- Add System.Drawing and Spire.Pdf.Wpf.dll as references
- Add below namespaces at the top of the method
using System.Drawing;
using Spire.Pdf;
using Spire.Pdf.Graphics;
using Spire.Pdf.Graphics.Fonts;
using Spire.Pdf.Tables;
Imports System.Drawing
Imports Spire.Pdf
Imports Spire.Pdf.Graphics
Imports Spire.Pdf.Graphics.Fonts
Imports Spire.Pdf.Tables
Step 3: Draw table in PDF document and set the table style
Create a new PDF document and set its margin
             //create a new PDF document
            PdfDocument doc = new PdfDocument();

            PdfUnitConvertor unitCvtr = new PdfUnitConvertor();
            PdfMargins margin = new PdfMargins();
            margin.Top = unitCvtr.ConvertUnits(2.54f, PdfGraphicsUnit.Centimeter, PdfGraphicsUnit.Point);
            margin.Bottom = margin.Top;
            margin.Left = unitCvtr.ConvertUnits(3.17f, PdfGraphicsUnit.Centimeter, PdfGraphicsUnit.Point);
            margin.Right = margin.Left;

            PdfPageBase page = doc.Pages.Add(PdfPageSize.A4, margin);
            float y = 20;
           'create a new PDF document
	 Dim doc As New PdfDocument()

	 Dim unitCvtr As New PdfUnitConvertor()
	 Dim margin As New PdfMargins()
	  margin.Top = unitCvtr.ConvertUnits(2.54F, PdfGraphicsUnit.Centimeter, PdfGraphicsUnit.Point)
	  margin.Bottom = margin.Top
	  margin.Left = unitCvtr.ConvertUnits(3.17F, PdfGraphicsUnit.Centimeter, PdfGraphicsUnit.Point)
	  margin.Right = margin.Left

	  Dim page As PdfPageBase = doc.Pages.Add(PdfPageSize.A4, margin)
	  Dim y As Single = 20
Set table title and then, add data information in PDF document
//add PDF title
PdfBrush brush1 = PdfBrushes.Black;
PdfTrueTypeFont font1 = new PdfTrueTypeFont(new Font("Verdana", 14f, System.Drawing.FontStyle.Bold));
PdfStringFormat format1 = new PdfStringFormat(PdfTextAlignment.Center);
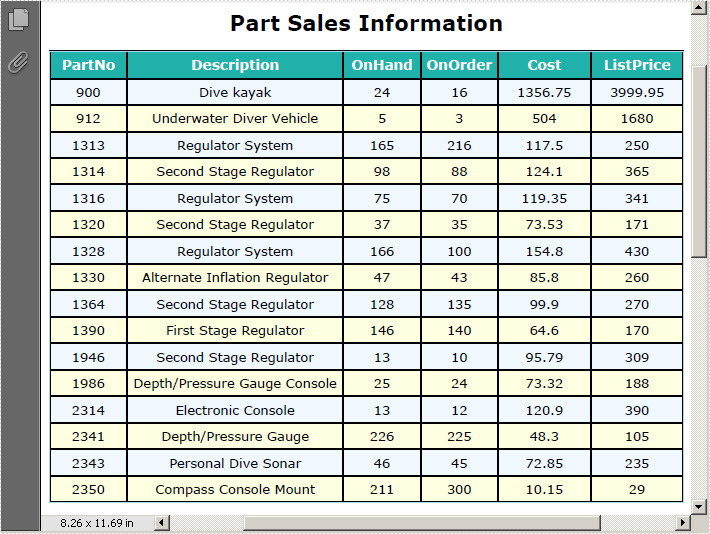
page.Canvas.DrawString("Part Sales Information", font1, brush1, page.Canvas.ClientSize.Width / 2, y, format1);
y = y + font1.MeasureString("Part Sales Information", format1).Height;
y = y + 10;
//add data information
String[] data
= {
"PartNo;Description;OnHand;OnOrder;Cost;ListPrice",
"900;Dive kayak;24;16;1356.75;3999.95",
"912;Underwater Diver Vehicle;5;3;504;1680",
"1313;Regulator System;165;216;117.5;250",
"1314;Second Stage Regulator;98;88;124.1;365",
"1316;Regulator System;75;70;119.35;341",
"1320;Second Stage Regulator;37;35;73.53;171",
"1328;Regulator System;166;100;154.8;430",
"1330;Alternate Inflation Regulator;47;43;85.8;260",
"1364;Second Stage Regulator;128;135;99.9;270",
"1390;First Stage Regulator;146;140;64.6;170",
"1946;Second Stage Regulator;13;10;95.79;309",
"1986;Depth/Pressure Gauge Console;25;24;73.32;188",
"2314;Electronic Console;13;12;120.9;390",
"2341;Depth/Pressure Gauge;226;225;48.3;105",
"2343;Personal Dive Sonar;46;45;72.85;235",
"2350;Compass Console Mount;211;300;10.15;29"
};
String[][] dataSource
= new String[data.Length][];
for (int i = 0; i < data.Length; i++)
{
dataSource[i] = data[i].Split(';');
}
	'add PDF title
	Dim brush1 As PdfBrush = PdfBrushes.Black
	Dim font1 As New PdfTrueTypeFont(New Font("Verdana", 14F, System.Drawing.FontStyle.Bold))
	Dim format1 As New PdfStringFormat(PdfTextAlignment.Center)
	page.Canvas.DrawString("Part Sales Information", font1, brush1, page.Canvas.ClientSize.Width / 2, y, format1)
	y = y + font1.MeasureString("Part Sales Information", format1).Height
	y = y + 10

	'add data information
	Dim data As [String]() = {"PartNo;Description;OnHand;OnOrder;Cost;ListPrice",
"900;Dive kayak;24;16;1356.75;3999.95",
"912;Underwater Diver Vehicle;5;3;504;1680",
       "1313;Regulator System;165;216;117.5;250",
       "1314;Second Stage Regulator;98;88;124.1;365",
       "1316;Regulator System;75;70;119.35;341",
       "1320;Second Stage Regulator;37;35;73.53;171",
       "1328;Regulator System;166;100;154.8;430",
       "1330;Alternate Inflation Regulator;47;43;85.8;260",
       "1364;Second Stage Regulator;128;135;99.9;270",
       "1390;First Stage Regulator;146;140;64.6;170",
       "1946;Second Stage Regulator;13;10;95.79;309",
       "1986;Depth/Pressure Gauge Console;25;24;73.32;188",
       "2314;Electronic Console;13;12;120.9;390",
       "2341;Depth/Pressure Gauge;226;225;48.3;105",
       "2343;Personal Dive Sonar;46;45;72.85;235",
       "2350;Compass Console Mount;211;300;10.15;29"}

	Dim dataSource As [String]()() = New [String](data.Length - 1)() {}
	For i As Integer = 0 To data.Length - 1
		dataSource(i) = data(i).Split(";"C)
	Next
Set PDF table style and data format
            //Set table header
            PdfTable table = new PdfTable();
            table.Style.CellPadding = 3;
            table.Style.HeaderSource = PdfHeaderSource.Rows;
            table.Style.HeaderRowCount = 1;
            table.DataSource = dataSource;
            table.Style.ShowHeader = true;

            table.Style.HeaderStyle.BackgroundBrush = PdfBrushes.LightSeaGreen;
            table.Style.HeaderStyle.Font = new PdfTrueTypeFont(new Font("Verdana", 9f, System.Drawing.FontStyle.Bold));
            table.Style.HeaderStyle.StringFormat = new PdfStringFormat(PdfTextAlignment.Center);
            table.Style.HeaderStyle.TextBrush = PdfBrushes.White;

            //Set table style and data format
            table.Style.BorderPen = new PdfPen(PdfBrushes.LightBlue, 0.5f);
            table.Style.DefaultStyle.BackgroundBrush = PdfBrushes.LightYellow;
            table.Style.DefaultStyle.Font = new PdfTrueTypeFont(new Font("Verdana", 8.5f));
            table.Style.AlternateStyle = new PdfCellStyle();
            table.Style.AlternateStyle.BackgroundBrush = PdfBrushes.AliceBlue;
            table.Style.AlternateStyle.Font = new PdfTrueTypeFont(new Font("Verdana", 8.5f));

            float width
                = page.Canvas.ClientSize.Width
                - (table.Columns.Count + 1) * table.Style.BorderPen.Width;
            table.Columns[0].Width = width * 0.1f * width;
            table.Columns[0].StringFormat
                = new PdfStringFormat(PdfTextAlignment.Center, PdfVerticalAlignment.Middle);

            table.Columns[1].Width = width * 0.28f * width;
            table.Columns[1].StringFormat
                = new PdfStringFormat(PdfTextAlignment.Center, PdfVerticalAlignment.Middle);
            table.Columns[2].Width = width * 0.1f * width;
            table.Columns[2].StringFormat
                = new PdfStringFormat(PdfTextAlignment.Center, PdfVerticalAlignment.Middle);
            table.Columns[3].Width = width * 0.1f * width;
            table.Columns[3].StringFormat
                = new PdfStringFormat(PdfTextAlignment.Center, PdfVerticalAlignment.Middle);
            table.Columns[4].Width = width * 0.12f * width;
            table.Columns[4].StringFormat
                = new PdfStringFormat(PdfTextAlignment.Center, PdfVerticalAlignment.Middle);
            table.Columns[5].Width = width * 0.12f * width;
            table.Columns[5].StringFormat
                = new PdfStringFormat(PdfTextAlignment.Center, PdfVerticalAlignment.Middle);

            PdfLayoutResult result = table.Draw(page, new PointF(0, y));
	'Set table header
	Dim table As New PdfTable()
	table.Style.CellPadding = 3
	table.Style.HeaderSource = PdfHeaderSource.Rows
	table.Style.HeaderRowCount = 1
	table.DataSource = dataSource
	table.Style.ShowHeader = True

	table.Style.HeaderStyle.BackgroundBrush = PdfBrushes.LightSeaGreen
	table.Style.HeaderStyle.Font = New PdfTrueTypeFont(New Font("Verdana", 9F, System.Drawing.FontStyle.Bold))
	table.Style.HeaderStyle.StringFormat = New PdfStringFormat(PdfTextAlignment.Center)
	table.Style.HeaderStyle.TextBrush = PdfBrushes.White

	'Set table style and data format
	table.Style.BorderPen = New PdfPen(PdfBrushes.LightBlue, 0.5F)
	table.Style.DefaultStyle.BackgroundBrush = PdfBrushes.LightYellow
	table.Style.DefaultStyle.Font = New PdfTrueTypeFont(New Font("Verdana", 8.5F))
	table.Style.AlternateStyle = New PdfCellStyle()
	table.Style.AlternateStyle.BackgroundBrush = PdfBrushes.AliceBlue
	table.Style.AlternateStyle.Font = New PdfTrueTypeFont(New Font("Verdana", 8.5F))

	Dim width As Single = page.Canvas.ClientSize.Width - (table.Columns.Count + 1) * table.Style.BorderPen.Width
	table.Columns(0).Width = width * 0.1F * width
	table.Columns(0).StringFormat = New PdfStringFormat(PdfTextAlignment.Center, PdfVerticalAlignment.Middle)

	table.Columns(1).Width = width * 0.28F * width
	table.Columns(1).StringFormat = New PdfStringFormat(PdfTextAlignment.Center, PdfVerticalAlignment.Middle)
	table.Columns(2).Width = width * 0.1F * width
	table.Columns(2).StringFormat = New PdfStringFormat(PdfTextAlignment.Center, PdfVerticalAlignment.Middle)
	table.Columns(3).Width = width * 0.1F * width
	table.Columns(3).StringFormat = New PdfStringFormat(PdfTextAlignment.Center, PdfVerticalAlignment.Middle)
	table.Columns(4).Width = width * 0.12F * width
	table.Columns(4).StringFormat = New PdfStringFormat(PdfTextAlignment.Center, PdfVerticalAlignment.Middle)
	table.Columns(5).Width = width * 0.12F * width
	table.Columns(5).StringFormat = New PdfStringFormat(PdfTextAlignment.Center, PdfVerticalAlignment.Middle)

	Dim result As PdfLayoutResult = table.Draw(page, New PointF(0, y))
Step 4: Save and Launch
            // save and launch the file
            doc.SaveToFile("SimpleTable.pdf");
            doc.Close();
            System.Diagnostics.Process.Start("SimpleTable.pdf");
	' save and launch the file
	doc.SaveToFile("SimpleTable.pdf")
	doc.Close()
	System.Diagnostics.Process.Start("SimpleTable.pdf")
Effective Screeshot:
Footnotes and endnotes are short notes that can be used to provide explanations, comments or references to certain words or sentences in a document. Footnotes usually appear at the bottom of the page containing their reference numbers, while endnotes appear at the end of the document or section. If you are writing an academic paper in Word, inserting footnotes or endnotes may be essential. This article will demonstrate how to insert footnotes and endnotes in Word documents in C# and VB.NET using Spire.Doc for .NET.
Install Spire.Doc for .NET
To begin with, you need to add the DLL files included in the Spire.Doc for .NET package as references in your .NET project. The DLLs files can be either downloaded from this link or installed via NuGet.
PM> Install-Package Spire.Doc
Insert a Footnote in Word in C# and VB.NET
A footnote consists of two parts - a footnote reference mark and the corresponding footnote text. To insert a footnote for a specific text, you need to search for the text and get the paragraph where the text is located, after that add a footnote to the paragraph, then insert the footnote reference mark after the found text and set the footnote text. The detailed steps are as follows:
- Initialize an instance of the Document class.
- Load a Word document using Document.LoadFromFile() method.
- Search for a specific text in the document using Document.FindString() method and get the found text as a single text range using TextSelection.GetAsOneRange() method.
- Access the owner paragraph of the text range through TextRange.OwnerParagraph property and get the index of the text range in the paragraph using Paragraph.ChildObjects.IndexOf() method.
- Add a footnote to the paragraph using Paragraph.AppendFootnote(FootnoteType.Footnote) method.
- Insert the footnote reference mark after the text range using Paragraph.ChildObjects.Insert() method.
- Set the footnote text using Footnote.TextBody.AddParagraph().AppendText() method.
- Set formatting such as font name, font size and text color for the footnote text and reference mark.
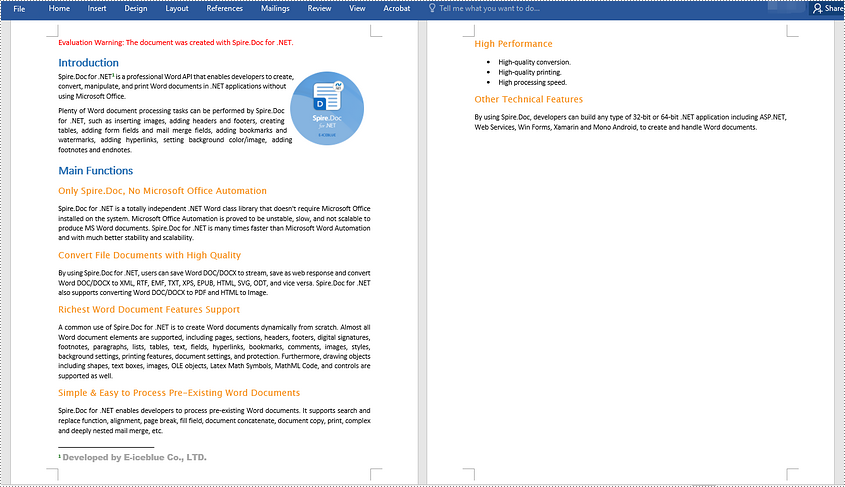
- Save the result document using Document.SaveToFile() method.
- C#
- VB.NET
using Spire.Doc;
using Spire.Doc.Documents;
using Spire.Doc.Fields;
using System.Drawing;

namespace InsertFootnote
{
    internal class Program
    {
        static void Main(string[] args)
        {
            //Initialize an instance of the Document class
            Document document = new Document();
            //Load a Word document
            document.LoadFromFile(@"Sample.docx");

            //Find a specific text in the document
            TextSelection selection = document.FindString("Spire.Doc for .NET", false, true);
            //Get the found text as a single text range
            TextRange textRange = selection.GetAsOneRange();
            //Get the owner paragraph of the text range
            Paragraph paragraph = textRange.OwnerParagraph;
            //Get the index of the text range in the paragraph
            int index = paragraph.ChildObjects.IndexOf(textRange);

            //Add a footnote to the paragraph
            Footnote footnote = paragraph.AppendFootnote(FootnoteType.Footnote);
            //Insert the footnote reference mark after the text range
            paragraph.ChildObjects.Insert(index + 1, footnote);
            //Set the footnote text
            textRange = footnote.TextBody.AddParagraph().AppendText("Developed by E-iceblue Co., LTD.");

            //Set format for the footnote text
            textRange.CharacterFormat.FontName = "Arial Black";
            textRange.CharacterFormat.FontSize = 12;
            textRange.CharacterFormat.TextColor = Color.DarkGray;

            //Set format for the footnote reference mark
            footnote.MarkerCharacterFormat.FontName = "Calibri";
            footnote.MarkerCharacterFormat.FontSize = 12;
            footnote.MarkerCharacterFormat.Bold = true;
            footnote.MarkerCharacterFormat.TextColor = Color.DarkGreen;

            //Save the result document
            document.SaveToFile("InsertFootnote.docx", FileFormat.Docx2013);
            document.Close();
        }
    }
}
Insert an Endnote in Word in C# and VB.NET
An endnote also consists of two parts - an endnote reference mark and the corresponding endnote text. The steps to insert an endnote for a specific text are very similar to that of the above example:
- Initialize an instance of the Document class.
- Load a Word document using Document.LoadFromFile() method.
- Search for a specific text in the document using Document.FindString() method and get the found text as a single text range using TextSelection.GetAsOneRange() method.
- Access the owner paragraph of the text range through TextRange.OwnerParagraph property and get the index of the text range in the paragraph using Paragraph.ChildObjects.IndexOf() method.
- Add an endnote to the paragraph using Paragraph.AppendFootnote(FootnoteType.Endnote) method.
- Insert the endnote reference mark after the text range using Paragraph.ChildObjects.Insert() method.
- Set the endnote text using Footnote.TextBody.AddParagraph().AppendText() method.
- Set formatting such as font name, font size and text color for the endnote text and reference mark.
- Save the result document using Document.SaveToFile() method.
- C#
- VB.NET
using Spire.Doc;
using Spire.Doc.Documents;
using Spire.Doc.Fields;
using System.Drawing;
namespace InsertEndnote
{
internal class Program
{
static void Main(string[] args)
{
//Initialize an instance of the Document class
Document document = new Document();
//Load a Word document
document.LoadFromFile(@"Sample.docx");
//Find a specific text in the document
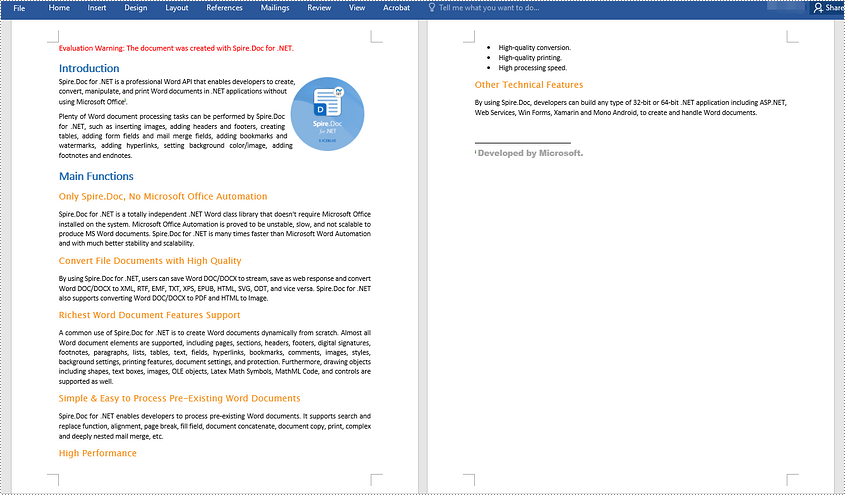
TextSelection selection = document.FindString("Microsoft Office", false, true);
//Get the found text as a single text range
TextRange textRange = selection.GetAsOneRange();
//Get the owner paragraph of the text range
Paragraph paragraph = textRange.OwnerParagraph;
//Get the index of the text range in the paragraph
int index = paragraph.ChildObjects.IndexOf(textRange);
//Add an endnote to the paragraph
Footnote endnote = paragraph.AppendFootnote(FootnoteType.Endnote);
//Insert the endnote reference mark after the text range
paragraph.ChildObjects.Insert(index + 1, endnote);
//Set the endnote text
textRange = endnote.TextBody.AddParagraph().AppendText("Developed by Microsoft.");
//Set format for the endnote text
textRange.CharacterFormat.FontName = "Arial Black";
textRange.CharacterFormat.FontSize = 12;
textRange.CharacterFormat.TextColor = Color.DarkGray;
//Set format for the endnote reference mark
endnote.MarkerCharacterFormat.FontName = "Calibri";
endnote.MarkerCharacterFormat.FontSize = 12;
endnote.MarkerCharacterFormat.Bold = true;
endnote.MarkerCharacterFormat.TextColor = Color.DarkGreen;
//Save the result document
document.SaveToFile("InsertEndnote.docx", FileFormat.Docx2013);
document.Close();
}
}
}
Apply for a Temporary License
If you'd like to remove the evaluation message from the generated documents, or to get rid of the function limitations, please request a 30-day trial license for yourself.
This section will introduce a solution to export data from database to Excel for WPF. The whole solution is easily performed by this WPF Excel component Spire.XLS for WPF.

In the task of database to Excel, first we need to connect with database by this class provided by Microsoft: System.Data.Oledb.OledbConnection. Here we use an MS access database. Then, OleDbCommand can help us specify a datatable from database in order to save the data in Dataset later. Finally fill the data into dataset table. After all the connection, we can see the key source code provided by Spire.XLS to export data columns from datatable to Excel: Spire.Xls.Worksheet.InsertDataTable(System.Data.DataTable dataTable, bool columnHeaders, int firstRow, int firstColumn).
There are four parameters passed.
- dataTable: The first parameter is to export the data column;
- columnHeaders: the second is to indicate whether to import field names;
- firstRow, firstColumn: the third and fourth parameters are index of first row and first column.
Here we can download Spire.XLS for WPF. After installing it on system, and start our database to excel task as below code:
//export datatable to excel
Workbook book = new Workbook();
Worksheet sheet = book.Worksheets[0];
sheet.InsertDataTable(t, true, 1, 1);
book.SaveToFile("insertTableToExcel.xls");
System.Diagnostics.Process.Start("insertTableToExcel.xls");
//export datatable to excel
Dim book As New Workbook()
Dim sheet As Worksheet = book.Worksheets(0)
sheet.InsertDataTable(t, True, 1, 1)
book.SaveToFile("insertTableToExcel.xls")
System.Diagnostics.Process.Start("insertTableToExcel.xls")
End Sub
End Class
End Namespace
In people's daily life, we can open a PDF document by right clicking the open option as well as using C#, VB.NET or other programming languages. Both methods are available as long as you have a PDF Document, but for PDF itself, it has no viewing function, thus, we need to use PDF Viewer to help us view it. This article is designed to open a PDF Document with C#, VB.NET via PDF Viewer by two methods.
Spire. PDFViewer is designed for viewing PDF files from .NET application. It does NOT require Adobe Read or any other 3rd party software/library installed on system. By using Spire.PDFViewer, we can do this job easily. Please just follow the below procedure.
Step 1: Create a new project
- Freely Download Spire.PDFViewer
- Create a new project in Visual Studio and add a toolScript in Form1
- Set its target Framework to be .NET Framework 4
- Add Spire.PdfViewer. Forms as reference in Project. And add using at the top of the method. Please see below:
using System.IO;
using Spire.PdfViewer.Forms;
Imports Sytem. IO
Imports Spire.PdfViewer.Forms
Step 2: Open a PDF Document with C#, VB.NET via Spire.PDFViewer
Method one: This method is to directly load a PDF file from system, then open it.
        public partial class Form1 : Form
    {

        public Form1()
        {
            InitializeComponent();

        }

        private void Form1_Load(object sender, EventArgs e)
        {

        }

        private void toolStripButton1_Click(object sender, EventArgs e)
        {
            string pdfDoc = @"D:\michelle\e-iceblue\Spire.Office.pdf";
            if (File.Exists(pdfDoc))
            {
                this.pdfDocumentViewer1.LoadFromFile(pdfDoc);
            }

        }
    }
 }
Public Partial Class Form1
		Inherits Form

		Public Sub New()

			InitializeComponent()
		End Sub

		Private Sub Form1_Load(sender As Object, e As EventArgs)

		End Sub

		Private Sub toolStripButton1_Click(sender As Object, e As EventArgs)
			Dim pdfDoc As String = "D:\michelle\e-iceblue\Spire.Office.pdf"
			If File.Exists(pdfDoc) Then
				Me.pdfDocumentViewer1.LoadFromFile(pdfDoc)
			End If

		End Sub
	End Class
End Namespace
Method Two: This method allows you to choose the PDF file you want to open in a dialog box from your computer.
public partial class Form1 : Form
 {

        public Form1()
        {
            InitializeComponent();

        }

        private void Form1_Load(object sender, EventArgs e)
        {

        }

        private void toolStripButton1_Click(object sender, EventArgs e)
        {
            OpenFileDialog dialog = new OpenFileDialog();
            dialog.Filter = "PDF document (*.pdf)|*.pdf";
            DialogResult result = dialog.ShowDialog();
            if (result == DialogResult.OK)
            {
                try
                {
                    string pdfFile = dialog.FileName;
                    this.pdfDocumentViewer1.LoadFromFile(pdfFile);
                }
                catch (Exception exe)
                {
                    MessageBox.Show(exe.Message, "Spire.PdfViewer Demo", MessageBoxButtons.OK, MessageBoxIcon.Error);
                }

            }

        }
   }
Public Partial Class Form1
	Inherits Form

	Public Sub New()

		InitializeComponent()
	End Sub

	Private Sub Form1_Load(sender As Object, e As EventArgs)

	End Sub

	Private Sub toolStripButton1_Click(sender As Object, e As EventArgs)
		Dim dialog As New OpenFileDialog()
		dialog.Filter = "PDF document (*.pdf)|*.pdf"
		Dim result As DialogResult = dialog.ShowDialog()
		If result = DialogResult.OK Then
			Try
				Dim pdfFile As String = dialog.FileName
				Me.pdfDocumentViewer1.LoadFromFile(pdfFile)
			Catch exe As Exception
				MessageBox.Show(exe.Message, "Spire.PdfViewer Demo", MessageBoxButtons.OK, MessageBoxIcon.[Error])

			End Try
		End If

	End Sub
End Class
Step 3: Launch the file
Press F5, you can see Form1 display itself as picture below:
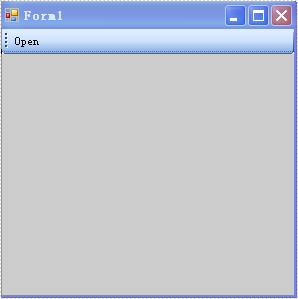
Then click "open" in the Form. When you use method one, you can see the PDF document content shows in the Form1. Also you can set the size of the form according to your own preference. When you use method two, you can choose the PDF Document by yourself in a dialog box. And then preview it in Form1.
Note: I set the default name of toolScript to be "open".
Effective Screenshot:

When working with an existing Excel file or creating an Excel file from scratch, we may need to add one or more worksheets to record data. In this article, we will demonstrate how to add worksheets to Excel in C# and VB.NET using Spire.XLS for .NET library.
- Add a Worksheet to an Existing Excel file
- Add a Worksheet to a New Excel file
- Add Multiple Worksheets to a New Excel file
Install Spire.XLS for .NET
To begin with, you need to add the DLL files included in the Spire.XLS for.NET package as references in your .NET project. The DLLs files can be either downloaded from this link or installed via NuGet.
PM> Install-Package Spire.XLS
Add a Worksheet to an Existing Excel file in C# and VB.NET
The following are the steps to add a worksheet to an existing Excel file:
- Create an instance of Workbook class.
- Load an Excel workbook using Workbook.LoadFromFile() method.
- Add a worksheet to the workbook using Workbook.Worksheets.Add(sheetName) method.
- Add data to a cell using Worksheet.Range[rowIndex, columnIndex].Value property.
- Save the result workbook using Workbook.SaveToFile() method.
- C#
- VB.NET
using Spire.Xls;
namespace AddWorksheet
{
class Program
{
static void Main(string[] args)
{
//Create a Workbook instance
Workbook workbook = new Workbook();
//Load an Excel file
workbook.LoadFromFile("Sample.xlsx");
//Add a worksheet
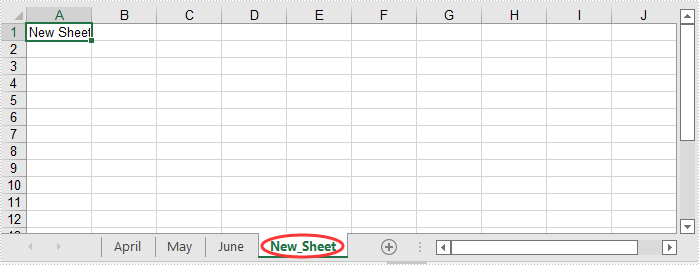
Worksheet sheet = workbook.Worksheets.Add("New_Sheet");
//Add data to cell (1, 1)
sheet.Range[1, 1].Value = "New Sheet";
//Save the result file
workbook.SaveToFile("AddWorksheets.xlsx", ExcelVersion.Version2016);
}
}
}
Add a Worksheet to a New Excel File in C# and VB.NET
The following steps show how to create a new Excel file and add a worksheet to it:
- Create an instance of Workbook class.
- Clear the default worksheets using Workbook.Worksheets.Clear() method.
- Add a worksheet to the workbook using Workbook.Worksheets.Add(sheetName) method.
- Add data to a cell using Worksheet.Range[rowIndex, columnIndex].Value property.
- Save the result workbook using Workbook.SaveToFile() method.
- C#
- VB.NET
using Spire.Xls;
namespace AddWorksheetToNewExcel
{
class Program
{
static void Main(string[] args)
{
//Create a Workbook instance
Workbook workbook = new Workbook();
//Clear the default worksheets
workbook.Worksheets.Clear();
//Add a worksheet with name
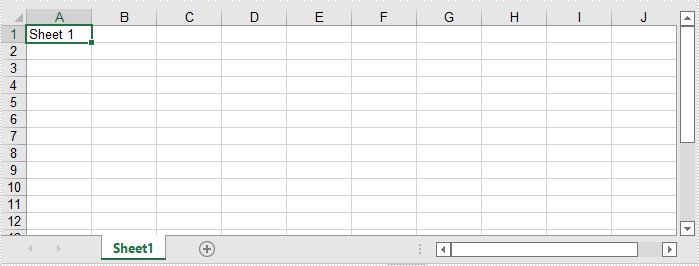
Worksheet sheet = workbook.Worksheets.Add("Sheet1");
//Add data to cell (1, 1)
sheet.Range[1, 1].Value = "Sheet 1";
//Save the result file
workbook.SaveToFile("AddWorksheets.xlsx", ExcelVersion.Version2016);
}
}
}
Add Multiple Worksheets to a New Excel File in C# and VB.NET
The following steps show how to create a new Excel file and add 3 worksheets to it:
- Create an instance of Workbook class.
- Add 3 worksheets to the workbook using Workbook.CreateEmptySheets(sheetCount) method.
- Loop through the worksheets in the workbook, add data to cell (1, 1) in each worksheet using Worksheet.Range[rowIndex, columnIndex].Value property.
- Save the result workbook using Workbook.SaveToFile() method.
- C#
- VB.NET
using Spire.Xls;
namespace AddWorksheetsToNewExcel
{
class Program
{
static void Main(string[] args)
{
//Create a Workbook instance
Workbook workbook = new Workbook();
//Add 3 worksheets
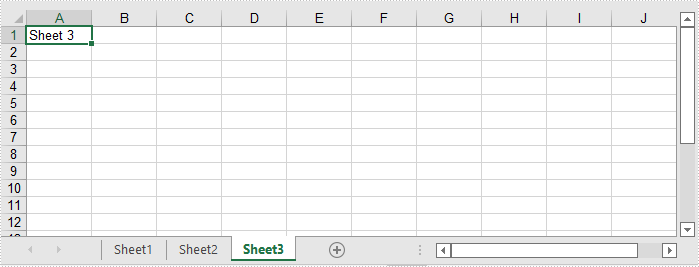
workbook.CreateEmptySheets(3);
//Loop through the worksheets
for (int i = 0; i < workbook.Worksheets.Count; i++)
{
Worksheet sheet = workbook.Worksheets[i];
//Add data to cell (1, 1) in each worksheet
sheet.Range[1, 1].Value = "Sheet " + (i + 1);
}
//Save the result file
workbook.SaveToFile("AddWorksheetsToNewExcel.xlsx", ExcelVersion.Version2016);
}
}
}
Apply for a Temporary License
If you'd like to remove the evaluation message from the generated documents, or to get rid of the function limitations, please request a 30-day trial license for yourself.
