.NET (1327)
Children categories
Spire.PDF can help us draw different shapes in PDF document. We can use Spire.PDF to draw rectangles in PDF, draw circles in PDF, draw arcs in PDF and draw ellipses in PDF. Besides these shapes, we can also use Spire.PDF to draw some other special shapes such as Spiral and five-pointed stars.
Draw Five-Pointed Star in PDF
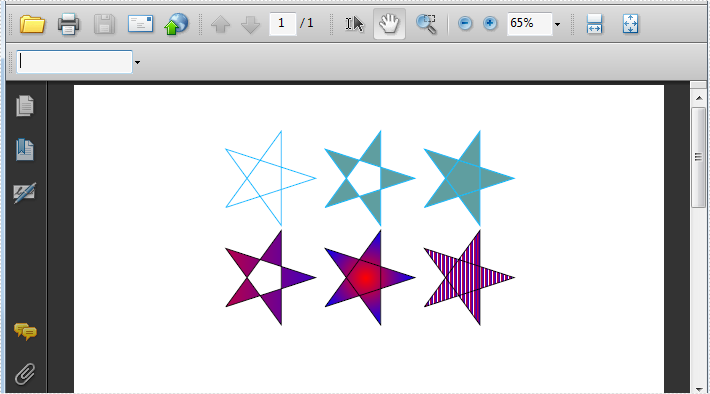
By using Spire.PDF, we can draw different stars in PDF document. The sample below is showing how to draw 6 types of different five-pointed star.
using Spire.Pdf;
using Spire.Pdf.Graphics;
using System;
using System.Drawing;


namespace FivePointedStar
{
    class Program
    {
        private static void DrawStar(PdfPageBase page)
        {
            PdfDocument doc = new PdfDocument();
            PdfPageBase page = doc.Pages.Add();
            PointF[] points = new PointF[5];
            for (int i = 0; i < points.Length; i++)
            {
                float x = (float)Math.Cos(i * 2 * Math.PI / 5);
                float y = (float)Math.Sin(i * 2 * Math.PI / 5);
                points[i] = new PointF(x, y);
            }
            PdfPath path = new PdfPath();
            path.AddLine(points[2], points[0]);
            path.AddLine(points[0], points[3]);
            path.AddLine(points[3], points[1]);
            path.AddLine(points[1], points[4]);
            path.AddLine(points[4], points[2]);

            //save graphics state
            PdfDocument doc = new PdfDocument();
            PdfPageBase page = doc.Pages.Add();
            PdfGraphicsState state = page.Canvas.Save();
            PdfPen pen = new PdfPen(Color.DeepSkyBlue, 0.02f);
            PdfBrush brush1 = new PdfSolidBrush(Color.CadetBlue);

            page.Canvas.ScaleTransform(50f, 50f);
            page.Canvas.TranslateTransform(5f, 1.2f);
            page.Canvas.DrawPath(pen, path);

            page.Canvas.TranslateTransform(2f, 0f);
            path.FillMode = PdfFillMode.Alternate;
            page.Canvas.DrawPath(pen, brush1, path);

            page.Canvas.TranslateTransform(2f, 0f);
            path.FillMode = PdfFillMode.Winding;
            page.Canvas.DrawPath(pen, brush1, path);

            PdfLinearGradientBrush brush2
                = new PdfLinearGradientBrush(new PointF(-2, 0), new PointF(2, 0), Color.Red, Color.Blue);
            page.Canvas.TranslateTransform(-4f, 2f);
            path.FillMode = PdfFillMode.Alternate;
            page.Canvas.DrawPath(pen, brush2, path);

            PdfRadialGradientBrush brush3
                = new PdfRadialGradientBrush(new PointF(0f, 0f), 0f, new PointF(0f, 0f), 1f, Color.Red, Color.Blue);
            page.Canvas.TranslateTransform(2f, 0f);
            path.FillMode = PdfFillMode.Winding;
            page.Canvas.DrawPath(pen, brush3, path);

            PdfTilingBrush brush4 = new PdfTilingBrush(new RectangleF(0, 0, 4f, 4f));
            brush4.Graphics.DrawRectangle(brush2, 0, 0, 4f, 4f);

            page.Canvas.TranslateTransform(2f, 0f);
            path.FillMode = PdfFillMode.Winding;
            page.Canvas.DrawPath(pen, brush4, path);

            //restor graphics
            page.Canvas.Restore(state);
        }
    }
}
Imports Spire.Pdf
Imports Spire.Pdf.Graphics
Imports System.Drawing


Namespace FivePointedStar
	Class Program
		Private Shared Sub DrawStar(page As PdfPageBase)
			Dim doc As New PdfDocument()
			Dim page As PdfPageBase = doc.Pages.Add()
			Dim points As PointF() = New PointF(4) {}
			For i As Integer = 0 To points.Length - 1
				Dim x As Single = CSng(Math.Cos(i * 2 * Math.PI / 5))
				Dim y As Single = CSng(Math.Sin(i * 2 * Math.PI / 5))
				points(i) = New PointF(x, y)
			Next
			Dim path As New PdfPath()
			path.AddLine(points(2), points(0))
			path.AddLine(points(0), points(3))
			path.AddLine(points(3), points(1))
			path.AddLine(points(1), points(4))
			path.AddLine(points(4), points(2))

			'save graphics state
			Dim doc As New PdfDocument()
			Dim page As PdfPageBase = doc.Pages.Add()
			Dim state As PdfGraphicsState = page.Canvas.Save()
			Dim pen As New PdfPen(Color.DeepSkyBlue, 0.02F)
			Dim brush1 As PdfBrush = New PdfSolidBrush(Color.CadetBlue)

			page.Canvas.ScaleTransform(50F, 50F)
			page.Canvas.TranslateTransform(5F, 1.2F)
			page.Canvas.DrawPath(pen, path)

			page.Canvas.TranslateTransform(2F, 0F)
			path.FillMode = PdfFillMode.Alternate
			page.Canvas.DrawPath(pen, brush1, path)

			page.Canvas.TranslateTransform(2F, 0F)
			path.FillMode = PdfFillMode.Winding
			page.Canvas.DrawPath(pen, brush1, path)

			Dim brush2 As New PdfLinearGradientBrush(New PointF(-2, 0), New PointF(2, 0), Color.Red, Color.Blue)
			page.Canvas.TranslateTransform(-4F, 2F)
			path.FillMode = PdfFillMode.Alternate
			page.Canvas.DrawPath(pen, brush2, path)

			Dim brush3 As New PdfRadialGradientBrush(New PointF(0F, 0F), 0F, New PointF(0F, 0F), 1F, Color.Red, Color.Blue)
			page.Canvas.TranslateTransform(2F, 0F)
			path.FillMode = PdfFillMode.Winding
			page.Canvas.DrawPath(pen, brush3, path)

			Dim brush4 As New PdfTilingBrush(New RectangleF(0, 0, 4F, 4F))
			brush4.Graphics.DrawRectangle(brush2, 0, 0, 4F, 4F)

			page.Canvas.TranslateTransform(2F, 0F)
			path.FillMode = PdfFillMode.Winding
			page.Canvas.DrawPath(pen, brush4, path)

			'restor graphics
			page.Canvas.Restore(state)
		End Sub
	End Class
End Namespace
Effective Screenshot:
Draw Spiral in PDF
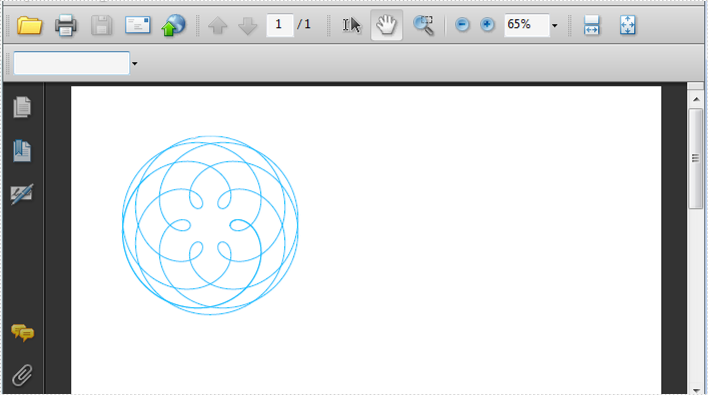
A spiral is a curve which emanates from a central point, getting progressively farther away as it revolves around the point. Spire.PDF can also help us easily draw Spiral in PDF and we can design at will.
using Spire.Pdf;
using Spire.Pdf.Graphics;
using System;

namespace DrawSpiral
{
    class Program
    {
        static void Main(string[] args)
        {
            PdfDocument doc = new PdfDocument();
            PdfPageBase page = doc.Pages.Add();
            //save graphics state
            PdfGraphicsState state = page.Canvas.Save();

            //Draw shap - spiro
            PdfPen pen = PdfPens.DeepSkyBlue;

            int nPoints = 1000;
            double r1 = 30;
            double r2 = 25;
            double p = 35;
            double x1 = r1 + r2 - p;
            double y1 = 0;
            double x2 = 0;
            double y2 = 0;

            page.Canvas.TranslateTransform(100, 100);

            for (int i = 0; i < nPoints; i++)
            {
                double t = i * Math.PI / 90;
                x2 = (r1 + r2) * Math.Cos(t) - p * Math.Cos((r1 + r2) * t / r2);
                y2 = (r1 + r2) * Math.Sin(t) - p * Math.Sin((r1 + r2) * t / r2);
                page.Canvas.DrawLine(pen, (float)x1, (float)y1, (float)x2, (float)y2);
                x1 = x2;
                y1 = y2;
            }

            //restor graphics
            page.Canvas.Restore(state);
        }
    }
}
Imports Spire.Pdf
Imports Spire.Pdf.Graphics
Imports Spire.Pdf.Texts
Imports System.Drawing

Namespace AddLineNumber
    Class Program
		Shared Sub Main(ByVal args() As String)
			Dim doc As New PdfDocument()
			Dim page As PdfPageBase = doc.Pages.Add()
			'save graphics state
			Dim state As PdfGraphicsState = page.Canvas.Save()

			'Draw shap - spiro
			Dim pen As PdfPen = PdfPens.DeepSkyBlue

			Dim nPoints As Integer = 1000
			Dim r1 As Double = 30
			Dim r2 As Double = 25
			Dim p As Double = 35
			Dim x1 As Double = r1 + r2 - p
			Dim y1 As Double = 0
			Dim x2 As Double = 0
			Dim y2 As Double = 0

			page.Canvas.TranslateTransform(100, 100)

			For i As Integer = 0 To nPoints - 1
				Dim t As Double = i * Math.PI / 90
				x2 = (r1 + r2) * Math.Cos(t) - p * Math.Cos((r1 + r2) * t / r2)
				y2 = (r1 + r2) * Math.Sin(t) - p * Math.Sin((r1 + r2) * t / r2)
				page.Canvas.DrawLine(pen, CSng(x1), CSng(y1), CSng(x2), CSng(y2))
				x1 = x2
				y1 = y2
			Next

			'restor graphics
			page.Canvas.Restore(state)

		End Sub
	End Class
End Namespace
Effective Screenshot:
In the realm of PDF creation and editing, the ability to draw different styles of text within a PDF can greatly enhance the visual appeal and functionality of the documents. For example, you can draw transformed text to add a unique touch to the document design, or draw rotated text to create angled headings. In this article, you will learn how to draw text in PDF with different styles in C# using Spire.PDF for .NET.
Install Spire.PDF for .NET
To begin with, you need to add the DLL files included in the Spire.PDF for.NET package as references in your .NET project. The DLL files can be either downloaded from this link or installed via NuGet.
PM> Install-Package Spire.PDF
Coordinate System in Spire.PDF
The text drawn in PDF is based on the page coordinate system. When adding a new page in a PDF, the page usually consists of the content area and margins all around.
In this case, the origin of the coordinate system is located at the top left corner of the content area, with the x-axis extending horizontally to the right and the y-axis extending vertically down.

Transformation of the Coordinate System
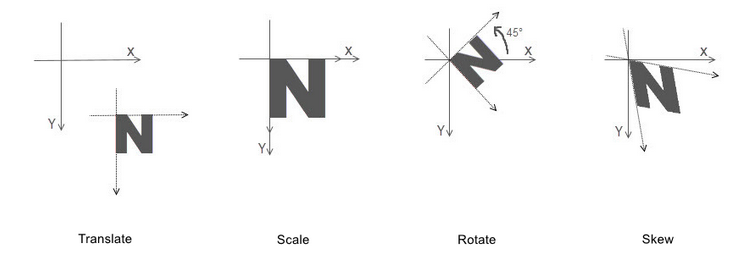
When transforming text in PDF, you are actually transforming the coordinate system where the text is located. Spire.PDF allows to translate, scale, skew, and rotate the page coordinate. The specific methods are introduced below:
- TranslateTransform(5, 5): Translate the coordinate system 5 units to the right and 5 units downward.
- ScaleTransform(2, 2): Scale the unit lengths on both the X-axis and the Y-axis by a factor of 2.
- RotateTransform(-45): Rotate the coordinate system 45 degrees counterclockwise.
- SkewTransform(10, 10): Tilt the X-axis 10 degrees down and the Y-axis 10 degrees to the right
By mastering this background knowledge about the page coordinate system, you can use Spire.PDF more accurately to draw different styles of text in PDFs to achieve complex typography.
Draw Transformed Text in PDF in C#
To accomplish the task, you can scale or skew the coordinate system of a PDF page through the PdfPageBase.Canvas.ScaleTransform() or PdfPageBase.Canvas.SkewTransform() method, and then draw text on the transformed coordinate system. The following are the detailed steps.
- Create a PdfDocument instance.
- Add a page using PdfDocument.Pages.Add() method.
- Save the current drawing state using PdfPageBase.Canvas.Save() method.
- Specify the PDF font and brush.
- Translate the page coordinate system to the specified position using PdfPageBase.Canvas.TranslateTransform() method .
- Scale the current coordinate system using PdfPageBase.Canvas.ScaleTransform() method .
- Skew the current coordinate system using PdfPageBase.Canvas.SkewTransform() method.
- Draw text on the page based on the transformed coordinate system using PdfPageBase.Canvas.DrawString() method.
- Restore the previous drawing state using PdfPageBase.Canvas.Restore(state) method.
- Save the result file using PdfDocument.SaveToFile() method.
- C#
using Spire.Pdf;
using Spire.Pdf.Graphics;
using System.Drawing;

namespace PDFText
{
    class Program
    {
        static void Main(string[] args)
        {
            // Create a PdfDocument instance
            PdfDocument pdf = new PdfDocument();

            // Add a page
            PdfPageBase page = pdf.Pages.Add();

            // Save the current graphics state
            PdfGraphicsState state = page.Canvas.Save();

            // Specify the PDF font and brush
            PdfFont font = new PdfFont(PdfFontFamily.Helvetica, 18f);
            PdfSolidBrush brush1 = new PdfSolidBrush(Color.Green);
            PdfSolidBrush brush2 = new PdfSolidBrush(Color.Blue);
            PdfSolidBrush brush3 = new PdfSolidBrush(Color.Magenta);

            // Translate the coordinate system by specified coordinates
            page.Canvas.TranslateTransform(20, 280);

            // Scale the coordinate system by specified coordinates
            page.Canvas.ScaleTransform(1f, 0.6f);
            // Skew the coordinate system axes
            page.Canvas.SkewTransform(-10, 0);
            // Draw transformed text on the page
            page.Canvas.DrawString("A Powerful PDF Processing Library", font, brush1, 0, -30);

            // Skew the coordinate system axes
            page.Canvas.SkewTransform(10, 0);
            // Draw transformed text on the page
            page.Canvas.DrawString("A Powerful PDF Processing Library", font, brush2, 0, 0);

            //Scale the coordinate system by specified coordinates
            page.Canvas.ScaleTransform(1f, -1f);
            // Draw transformed text on the page
            page.Canvas.DrawString("A Powerful PDF Processing Library", font, brush3, 0, 0);

            // Restor graphics state
            page.Canvas.Restore(state);

            // Save the result document
            pdf.SaveToFile("TransformText.pdf");
            pdf.Close();

        }
    }
}

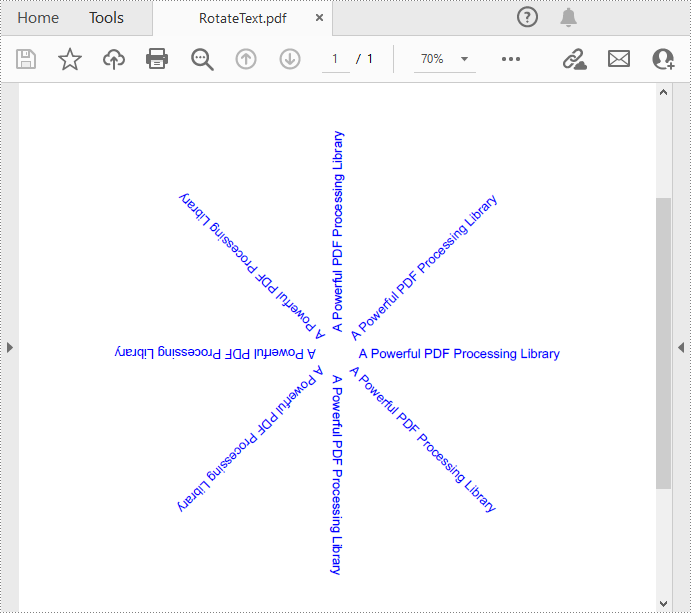
Draw Rotated Text in PDF in C#
The PdfPageBase.Canvas.RotateTransform(float angle) method provided by Spire.PDF allows to rotate the page coordinate system to specified angle, and then the text drawn on the page will be presented as rotated text. The following are the detailed steps.
- Create a PdfDocument instance.
- Add a page using PdfDocument.Pages.Add() method.
- Save the current drawing state using PdfPageBase.Canvas.Save() method.
- Specify the PDF font and brush, and set PDF text alignment.
- Translate the page coordinate system to the specified position using PdfPageBase.Canvas.TranslateTransform() method.
- Rotate the coordinate system by specified degree using PdfPageBase.Canvas.RotateTransform() method.
- Draw text on the page based on the rotated coordinate system using PdfPageBase.Canvas.DrawString() method.
- Restore the previous drawing state using PdfPageBase.Canvas.Restore(state) method.
- Save the result file using PdfDocument.SaveToFile() method.
- C#
using Spire.Pdf;
using Spire.Pdf.Graphics;
using System.Drawing;

namespace PDFText
{
    class Program
    {
        static void Main(string[] args)
        {
            // Create a PdfDocument instance
            PdfDocument pdf = new PdfDocument();

            // Add a page
            PdfPageBase page = pdf.Pages.Add();

            // Save the current graphics state
            PdfGraphicsState state = page.Canvas.Save();

            // Specify the PDF font and brush
            PdfFont font = new PdfFont(PdfFontFamily.Helvetica, 12f);
            PdfSolidBrush brush = new PdfSolidBrush(Color.Blue);

            // Set PDF text alignment
            PdfStringFormat centerAlignment = new PdfStringFormat(PdfTextAlignment.Left, PdfVerticalAlignment.Middle);

            // Translate the coordinate system by specified coordinates
            page.Canvas.TranslateTransform(page.Canvas.ClientSize.Width / 2, 380);

            // Draw rotated text on the PDF page
            for (int i = 0; i < 8; i++)
            {
                page.Canvas.RotateTransform(45);
                page.Canvas.DrawString("A Powerful PDF Processing Library", font, brush, 20, 0, centerAlignment);
            }

            // Restor graphics state
            page.Canvas.Restore(state);

            // Save the result document
            pdf.SaveToFile("RotateText.pdf");
            pdf.Close();

        }
    }
}
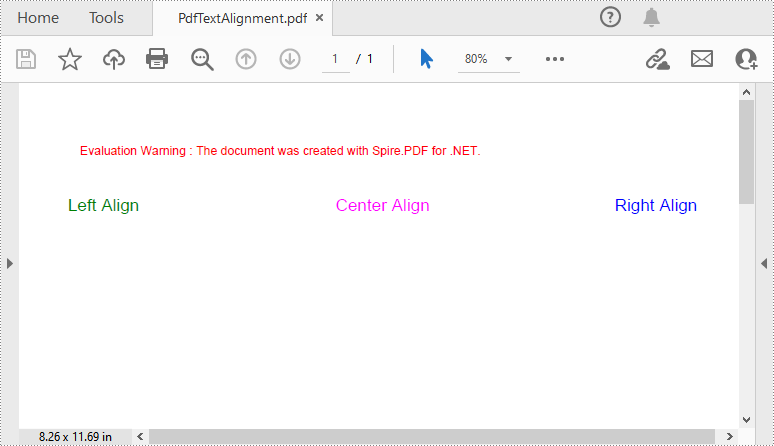
Draw Aligned Text in PDF in C#
Spire.PDF for .NET provides the PdfStringFormat class to represent the text layout information. You can initialize an instance of the PdfStringFormat class and pass in two parameters PdfTextAlignment and PdfVerticalAlignment to specify a text alignment style, then draw text with the alignment style. The following are the detailed steps.
- Create a PdfDocument instance.
- Add a page using PdfDocument.Pages.Add() method.
- Save the current drawing state using PdfPageBase.Canvas.Save() method.
- Specify the PDF font and brush.
- Create a PdfStringFormat instance and pass in the PdfTextAlignment and PdfVerticalAlignment parameters to specify the text alignment style.
- Draw text with the specified alignment style on the PDF page using PdfPageBase.Canvas.DrawString() method.
- Save the result file using PdfDocument.SaveToFile() method.
- C#
using Spire.Pdf;
using Spire.Pdf.Graphics;
using System.Drawing;

namespace PDFText
{
    class Program
    {
        static void Main(string[] args)
        {
            // Create a PdfDocument instance
            PdfDocument pdf = new PdfDocument();

            // Add a page
            PdfPageBase page = pdf.Pages.Add();

            // Specify the PDF font and brush
            PdfFont font = new PdfFont(PdfFontFamily.Helvetica, 14f);
            PdfSolidBrush brush1 = new PdfSolidBrush(Color.Green);
            PdfSolidBrush brush2 = new PdfSolidBrush(Color.Blue);
            PdfSolidBrush brush3 = new PdfSolidBrush(Color.Magenta);

            // Draw left-aligned text on the PDF page
            PdfStringFormat leftAlignment = new PdfStringFormat(PdfTextAlignment.Left, PdfVerticalAlignment.Middle);
            page.Canvas.DrawString("Left Align", font, brush1, 0, 60, leftAlignment);

            // Draw right-aligned text on the PDF page
            PdfStringFormat rightAlignment = new PdfStringFormat(PdfTextAlignment.Right, PdfVerticalAlignment.Middle);
            page.Canvas.DrawString("Right Align", font, brush2, page.Canvas.ClientSize.Width, 60, rightAlignment);

            // Draw center-aligned text on the PDF page
            PdfStringFormat centerAlignment = new PdfStringFormat(PdfTextAlignment.Center, PdfVerticalAlignment.Middle);
            page.Canvas.DrawString("Center Align", font, brush3, page.Canvas.ClientSize.Width / 2, 60, centerAlignment);

            // Save the result document
            pdf.SaveToFile("PdfTextAlignment.pdf");
            pdf.Close();

        }
    }
}
Apply for a Temporary License
If you'd like to remove the evaluation message from the generated documents, or to get rid of the function limitations, please request a 30-day trial license for yourself.
Compared with text-only documents, documents containing images are undoubtedly more vivid and engaging to readers. When generating or editing a PDF document, you may sometimes need to insert images to improve its appearance and make it more appealing. In this article, you will learn how to insert, replace or delete images in PDF documents in C# and VB.NET using Spire.PDF for .NET.
- Insert an Image into a PDF Document
- Replace an Image with Another Image in a PDF Document
- Delete a Specific Image in a PDF Document
Install Spire.PDF for .NET
To begin with, you need to add the DLL files included in the Spire.PDF for.NET package as references in your .NET project. The DLL files can be either downloaded from this link or installed via NuGet.
PM> Install-Package Spire.PDF
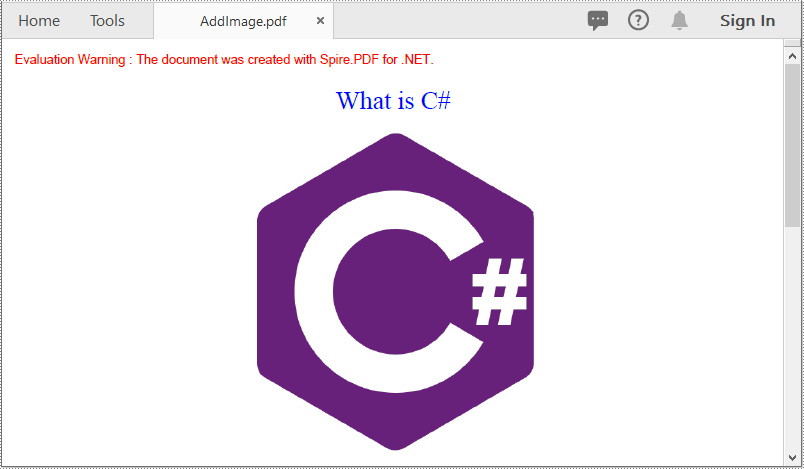
Insert an Image into a PDF Document in C# and VB.NET
The following steps demonstrate how to insert an image into an existing PDF document:
- Initialize an instance of the PdfDocument class.
- Load a PDF document using PdfDocument.LoadFromFile() method.
- Get the desired page in the PDF document through PdfDocument.Pages[pageIndex] property.
- Load an image using PdfImage.FromFile() method.
- Specify the width and height of the image area on the page.
- Specify the X and Y coordinates to start drawing the image.
- Draw the image on the page using PdfPageBase.Canvas.DrawImage() method.
- Save the result document using PdfDocument.SaveToFile() method.
- C#
- VB.NET
using Spire.Pdf;
using Spire.Pdf.Graphics;

namespace InsertImage
{
    class Program
    {
        static void Main(string[] args)
        {
            //Create a PdfDocument instance
            PdfDocument pdf = new PdfDocument();
            pdf.LoadFromFile("Input.pdf");

            //Get the first page in the PDF document
            PdfPageBase page = pdf.Pages[0];

            //Load an image
            PdfImage image = PdfImage.FromFile("image.jpg");

            //Specify the width and height of the image area on the page
            float width = image.Width * 0.50f;
            float height = image.Height * 0.50f;

            //Specify the X and Y coordinates to start drawing the image
            float x = 180f;
            float y = 70f;

            //Draw the image at a specified location on the page
            page.Canvas.DrawImage(image, x, y, width, height);

            //Save the result document
            pdf.SaveToFile("AddImage.pdf", FileFormat.PDF);
        }
    }
}
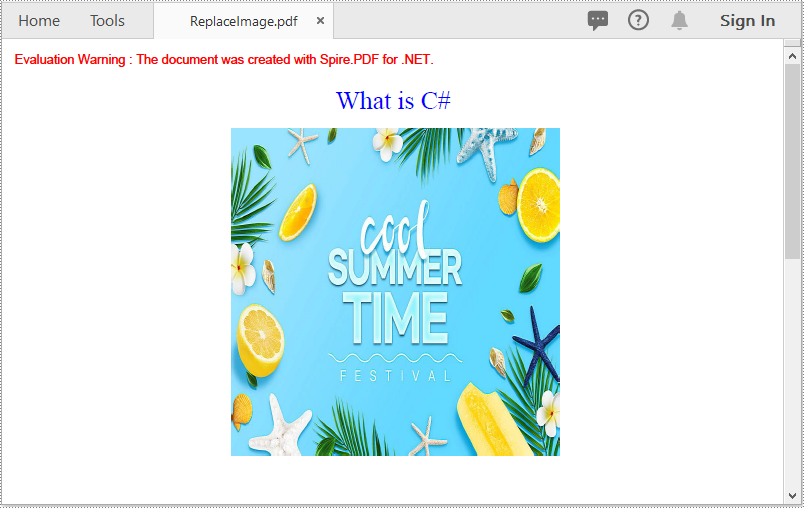
Replace an Image with Another Image in a PDF Document in C# and VB.NET
The following steps demonstrate how to replace an image with another image in a PDF document:
- Initialize an instance of the PdfDocument class.
- Load a PDF document using PdfDocument.LoadFromFile() method.
- Get the desired page in the PDF document through PdfDocument.Pages[pageIndex] property.
- Load an image using PdfImage.FromFile() method.
- Initialize an instance of the PdfImageHelper class.
- Get the image information from the page using PdfImageHelper.GetImagesInfo() method.
- Replace a specific image on the page with the loaded image using PdfImageHelper.ReplaceImage() method.
- Save the result document using PdfDocument.SaveToFile() method.
- C#
- VB.NET
using Spire.Pdf;
using Spire.Pdf.Graphics;
using Spire.Pdf.Utilities;

namespace ReplaceImage
{
    class Program
    {
        static void Main(string[] args)
        {
            //Create a PdfDocument instance
            PdfDocument doc = new PdfDocument();
            //Load a PDF document
            doc.LoadFromFile("AddImage.pdf");

            //Get the first page
            PdfPageBase page = doc.Pages[0];

            //Load an image
            PdfImage image = PdfImage.FromFile("image1.jpg");

            //Create a PdfImageHelper instance
            PdfImageHelper imageHelper = new PdfImageHelper();
            //Get the image information from the page
            PdfImageInfo[] imageInfo = imageHelper.GetImagesInfo(page);
            //Replace the first image on the page with the loaded image
            imageHelper.ReplaceImage(imageInfo[0], image);

            //Save the result document
            doc.SaveToFile("ReplaceImage.pdf", FileFormat.PDF);
        }
    }
}
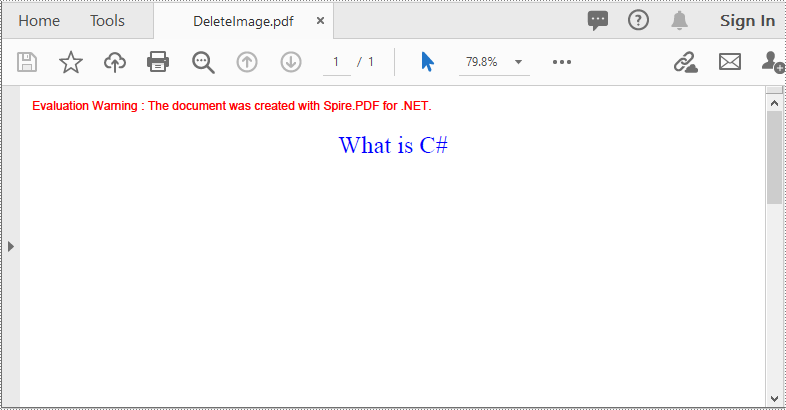
Delete a Specific Image in a PDF Document in C# and VB.NET
The following steps demonstrate how to delete an image from a PDF document:
- Initialize an instance of the PdfDocument class.
- Load a PDF document using PdfDocument.LoadFromFile() method.
- Get the desired page in the PDF document through PdfDocument.Pages[pageIndex] property.
- Delete a specific image on the page using PdfPageBase.DeleteImage() method.
- Save the result document using PdfDocument.SaveToFile() method.
- C#
- VB.NET
using Spire.Pdf;

namespace DeleteImage
{
    class Program
    {
        static void Main(string[] args)
        {
            //Create a PdfDocument instance
            PdfDocument pdf = new PdfDocument();
            //Load a PDF document
            pdf.LoadFromFile("AddImage.pdf");

            //Get the first page
            PdfPageBase page = pdf.Pages[0];

            //Delete the first image on the page
            PdfImageHelper imageHelper = new PdfImageHelper();
            PdfImageInfo[] imageInfos = imageHelper.GetImagesInfo(pdf.Pages[0]);
            for (int i = 0; i < imageInfos.Length; i++)
            { imageHelper.DeleteImage(imageInfos[i], true); }

            //Save the result document
            pdf.SaveToFile("DeleteImage.pdf", FileFormat.PDF);
        }
    }
}
Apply for a Temporary License
If you'd like to remove the evaluation message from the generated documents, or to get rid of the function limitations, please request a 30-day trial license for yourself.
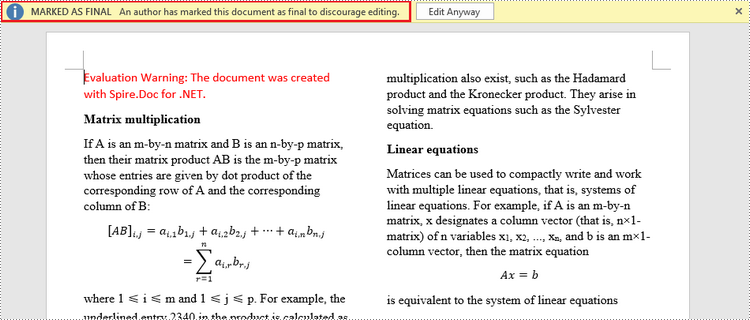
Word documents can be protected in a variety of ways, depending on the security requirements. To prevent unauthorized people from opening a document, you can encrypt it with a password. To allow users to open the document, but not edit or modify its content, you can make the document read-only or mark it as final. To allow users to modify parts of the document, you can lock the entire document but let specified sections available for editing. This article focuses on how to protect or unprotect a Word document in C# and VB.NET using Spire.Doc for .NET.
- Password Protect a Word Document in C#, VB.NET
- Change Permission of a Word Document in C#, VB.NET
- Lock Specified Sections of a Word Document in C#, VB.NET
- Mark a Word Document as Final in C#, VB.NET
- Remove Password from a Word Document in C#, VB.NET
Install Spire.Doc for .NET
To begin with, you need to add the DLL files included in the Spire.Doc for.NET package as references in your .NET project. The DLL files can be either downloaded from this link or installed via NuGet.
PM> Install-Package Spire.Doc
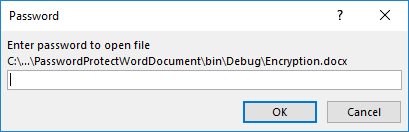
Password Protect a Word Document in C#, VB.NET
Encrypting a document with a password makes sure that only you and certain people can read or edit it. The following are the steps to protect a Word document with a password using Spire.Doc for .NET.
- Create a Document object.
- Load a Word document using Document.LoadFromFile() method.
- Encrypt the document with a password using Document.Encrypt() method.
- Save the document to another Word file using Document.SaveToFile() method.
- C#
- VB.NET
using Spire.Doc;

namespace PasswordProtectWordDocument
{
    class Program
    {
        static void Main(string[] args)
        {
            //Create a Document object
            Document document = new Document();

            //Load a Word file
            document.LoadFromFile(@"C:\Users\Administrator\Desktop\test.docx");

            //Encrypt the document with a password
            document.Encrypt("open-psd");

            //Save the document to another Word file
            document.SaveToFile("Encryption.docx", FileFormat.Docx);
        }
    }
}
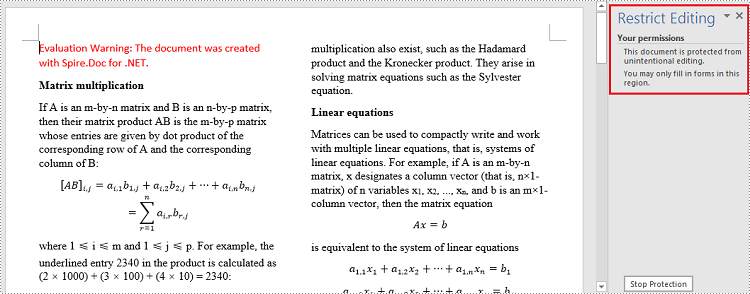
Change Permission of a Word Document in C#, VB.NET
Documents encrypted with an open password cannot be opened by those who do not know the password. If you’d like to grant people permission to read your document but restrict the types of modifications that someone can make, you can set the document permission. The following are the steps to change permission of a Word document using Spire.Doc for .NET.
- Create a Document object.
- Load a Word document using Document.LoadFromFile() method.
- Set the document permission and set the permission password using Document.Protect() method.
- Save the document to another Word file using Document.SaveToFile() method.
- C#
- VB.NET
using Spire.Doc;

namespace ChangeDocumentPermission
{
    class Program
    {
        static void Main(string[] args)
        {
            //Create a Document object
            Document document = new Document();

            //Load a Word document
            document.LoadFromFile(@"C:\Users\Administrator\Desktop\sample.docx");

            //Set the document permission and set the permission password
            document.Protect(ProtectionType.AllowOnlyFormFields, "permission-psd");

            //Save the document to another Word file
            document.SaveToFile("Permission.docx");
        }
    }
}
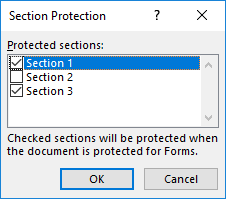
Lock Specified Sections of a Word Document in C#, VB.NET
When you protect your document, you can lock parts of it so that they cannot be changed and leave the unlocked parts available for editing. The following are the steps to protect specified sections of a Word document using Spire.Doc for .NET.
- Create a Document object.
- Load a Word document using Document.LoadFromFile() method.
- Set the editing restriction as AllowOnlyFormFields.
- Unprotect a specific section by setting Document.Sections[index].ProtectForm to false. The rest sections will continue to be protected.
- Save the document to another Word file using Document.SaveToFile() method.
- C#
- VB.NET
using Spire.Doc;

namespace ProtectSpecificSection
{
    class Program
    {
        static void Main(string[] args)
        {
            //Create a Document object
            Document doc = new Document();

            //Load a Word document
            doc.LoadFromFile(@"C:\Users\Administrator\Desktop\sample.docx");

            //Set editing restriction as "AllowOnlyFormFields"
            doc.Protect(ProtectionType.AllowOnlyFormFields, "permissionPsd");

            //Unprotect section 2
            doc.Sections[1].ProtectForm = false;

            //Save the document to another Word file
            doc.SaveToFile("ProtectSection.docx");
        }
    }
}
Mark a Word Document as Final in C#, VB.NET
By marking a document as Final, you disable typing, editing, and format changes capabilities and a message will appear to any reader that the document has been finalized. The following are the steps to mark a Word document as final using Spire.Doc for .NET.
- Create a Document object.
- Load a Word file using Document.LoadFromFile() method.
- Get the CustomDocumentProperties object from the document.
- Add a custom property "_MarkAsFinal" to the document.
- Save the document to another Word file using Document.SaveToFile() method.
- C#
- VB.NET
using Spire.Doc;

namespace MarkAsFinal
{
    class Program
    {
        static void Main(string[] args)
        {
            //Create a Document object
            Document doc = new Document();

            //Load a Word document
            doc.LoadFromFile(@"C:\Users\Administrator\Desktop\sample.docx");

            //Get custom document properties
            CustomDocumentProperties customProperties = doc.CustomDocumentProperties;

            //Add "_MarkAsFinal" property to the document
            customProperties.Add("_MarkAsFinal", true);

            //Save the document to another Word file
            doc.SaveToFile("MarkAsFinal.docx");
        }
    }
}
Remove Password from a Word Document in C#, VB.NET
You can remove the password from an encrypted document if the encryption is no longer needed. The following are the detailed steps.
- Create a Document object.
- Load a Word document using Document.LoadFromFile() method.
- Remove the password using Document.RemoveEncryption() method.
- Save the document to another Word file using Document.SaveToFile() method.
- C#
- VB.NET
using Spire.Doc;

namespace RemovePassword
{
    class Program
    {
        static void Main(string[] args)
        {
            //Create a Document object
            Document document = new Document();

            //Load an encrypted Word document
            document.LoadFromFile(@"C:\Users\Administrator\Desktop\Encryption.docx", FileFormat.Docx, "open-psd");

            //Remove encryption
            document.RemoveEncryption();

            //Save the document to another Word file
            document.SaveToFile("Decryption.docx", FileFormat.Docx);
        }
    }
}
Apply for a Temporary License
If you'd like to remove the evaluation message from the generated documents, or to get rid of the function limitations, please request a 30-day trial license for yourself.
The sample demonstrates how to export doc document to Epub file.

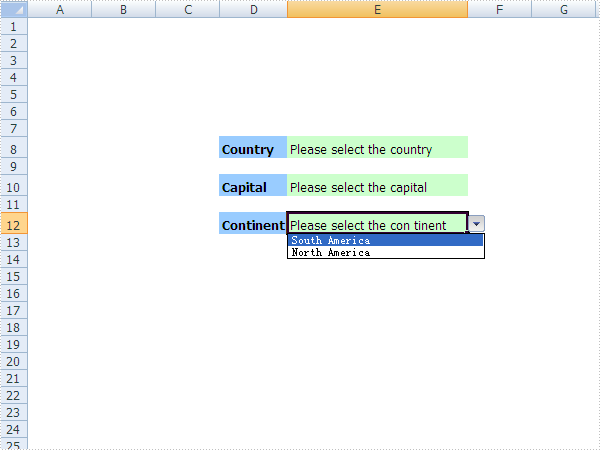
The sample demonstrates how to provide a dropdownlist for valid data
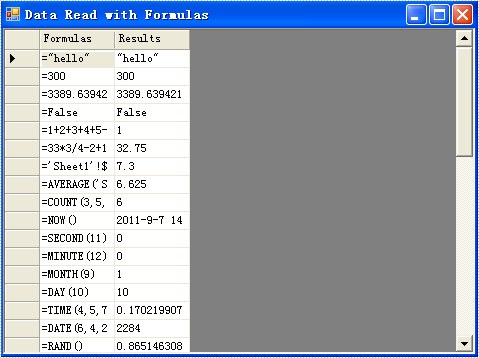
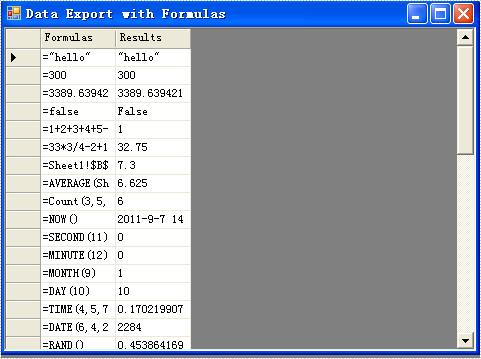
The sample demonstrates how to read data with fomulas
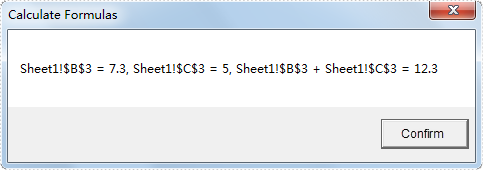
The sample demonstrates how to calculate formulas
The sample demonstrates how to export data to datatable with calculating formulas
The sample demonstrates how to insert SparkLine into an excel workbook.