
.NET (1327)
Children categories
Sorting data in Excel is a fundamental skill that enhances data organization and analysis. By rearranging rows based on specific criteria—such as alphabetical order, numerical value, or date—users can easily identify trends, patterns, and outliers. In this article, you will learn how to sort data in Excel using C# with Spire.XLS for .NET.
Install Spire.XLS for .NET
To begin with, you need to add the DLL files included in the Spire.XLS for .NET package as references in your .NET project. The DLL files can be either downloaded from this link or installed via NuGet.
PM> Install-Package Spire.XLS
Sort a Single Column in Excel in C#
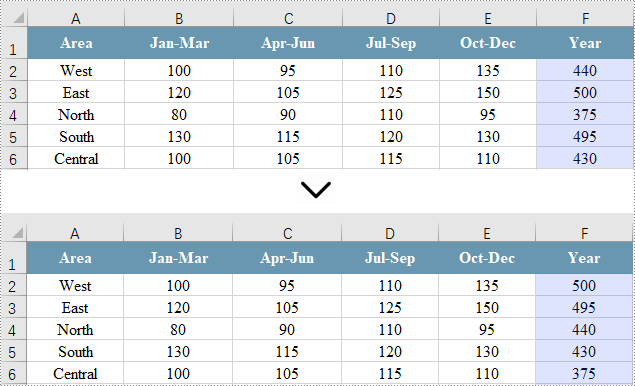
Sorting a single column in Excel enables quick organization of your data in ascending or descending order for easier analysis. However, this method leaves other columns unchanged, potentially leading to misalignment of related data.
Spire.XLS for .NET provides the Workbook.DataSorter.SortColumns.Add(int key, SortComparisonType sortComparisonType, OrderBy orderBy) method. This method enables developers to set sorting criteria by selecting a specific column, defining the comparison type, and specifying the sort order (ascending or descending). To apply the sorting to the defined range, use the Workbook.DataSorter.Sort(CellRange range) method.
Here are the steps to sort a single column in Excel using C#:
- Create a Workbook object.
- Load an Excel file using the Workbook.LoadFromFile() method.
- Get a specific worksheet using the Workbook.Worksheets[index] property.
- Get the column where you want to sort data using the Worksheet.Range property.
- Create sorting criteria for the selected column using the Workbook.DataSorter.SortColumns.Add() method.
- Execute sorting within the column using the Workbook.DataSorter.Sort() method.
- Save the workbook to a different Excel file.
- C#
using Spire.Xls;

namespace SortSingleColumn
{
    class Program
    {
        static void Main(string[] args)
        {
            // Create a Workbook object
            Workbook workbook = new Workbook();

            // Load an Excel file
            workbook.LoadFromFile("C:\\Users\\Administrator\\Desktop\\Input.xlsx");

            // Get a specific worksheet
            Worksheet sheet = workbook.Worksheets[0];

            // Get the cell range (a single column) where you want to sort data
            CellRange cellRange = sheet.Range["F1:F6"];

            // Sort values in the specified column in descending order
            workbook.DataSorter.SortColumns.Add(5, SortComparsionType.Values, OrderBy.Descending);

            // Sort in the specified cell range
            workbook.DataSorter.Sort(cellRange);

            // Save the workbook
            workbook.SaveToFile("SortSingleColumn.xlsx", ExcelVersion.Version2013);

            // Dispose resources
            workbook.Dispose();
        }
    }
}
Sort Multiple Columns in Excel in C#
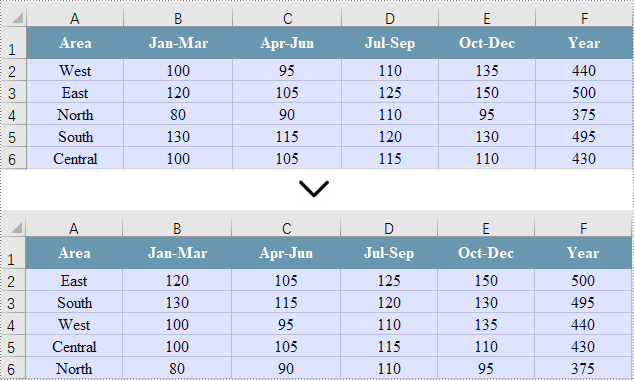
Sorting data across multiple columns ensures that all related data across the selected columns remains aligned and meaningful, which is useful for complex datasets where relationships between data points matter.
Sorting data across multiple columns is similar to sorting a single column. The main difference lies in the CellRange parameter used in Workbook.DataSorter.Sort(CellRange range), which specifies multiple columns instead of just one.
Here are the steps to sort multiple column in Excel using C#:
- Create a Workbook object.
- Load an Excel file using the Workbook.LoadFromFile() method.
- Get a specific worksheet using the Workbook.Worksheets[index] property.
- Get the cell range (columns) where you want to sort data using the Worksheet.Range property.
- Create sorting criteria for the selected column using the Workbook.DataSorter.SortColumns.Add() method.
- Execute sorting within the range using the Workbook.DataSorter.Sort() method.
- Save the workbook to a different Excel file.
- C#
using Spire.Xls;

namespace SortMultipleColumns
{
    class Program
    {
        static void Main(string[] args)
        {
            // Create a new workbook
            Workbook workbook = new Workbook();

            // Load an Excel file
            workbook.LoadFromFile("C:\\Users\\Administrator\\Desktop\\Input.xlsx");

            // Get a specific worksheet
            Worksheet sheet = workbook.Worksheets[0];

            // Get the cell range (multiple columns) where you want to sort data
            CellRange cellRange = sheet.Range["A1:F6"];

            // Sort values in the specified column in descending order
            workbook.DataSorter.SortColumns.Add(5, SortComparsionType.Values, OrderBy.Descending);

            // Sort in the specified cell range
            workbook.DataSorter.Sort(cellRange);

            // Save the workbook
            workbook.SaveToFile("SortMultipleColumns.xlsx", ExcelVersion.Version2013);

            // Dispose resources
            workbook.Dispose();
        }
    }
}
Sort by a Custom List in C#
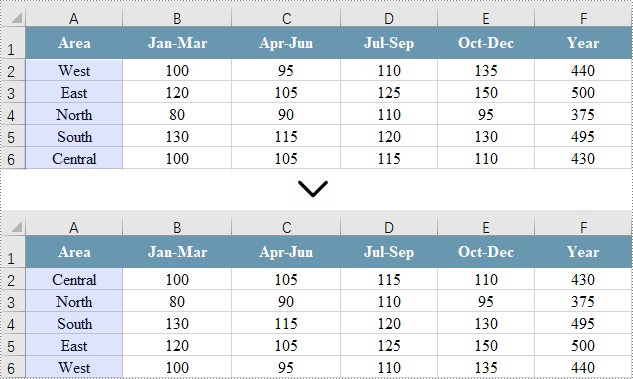
Sorting by a custom list in Excel allows you to arrange data based on specific, non-alphabetical criteria tailored to your needs, ensuring the order is meaningful for your analysis or reporting.
To accomplish this, create an array of strings that defines the custom sorting order. Next, set the sorting criteria using the Workbook.DataSorter.SortColumns.Add(int key, OrderBy orderBy) method. Finally, invoke the Workbook.DataSorter.Sort(CellRange range) method to sort the specified cell range.
Here are the steps to sort data by a custom list in Excel using C#:
- Create a Workbook object.
- Load an Excel file using the Workbook.LoadFromFile() method.
- Get a specific worksheet using the Workbook.Worksheets[index] property.
- Get the cell range where you want to sort data using the Worksheet.Range property.
- Define the custom sorting order with an array of strings.
- Create sorting criteria for the selected column using the Workbook.DataSorter.SortColumns.Add() method.
- Execute sorting within the range using the Workbook.DataSorter.Sort() method.
- Save the workbook to a different Excel file.
- C#
using Spire.Xls;

namespace SortMultipleColumns
{
    class Program
    {
        static void Main(string[] args)
        {
            // Create a new workbook
            Workbook workbook = new Workbook();

            // Load an Excel file
            workbook.LoadFromFile("C:\\Users\\Administrator\\Desktop\\Input.xlsx");

            // Get a specific worksheet
            Worksheet sheet = workbook.Worksheets[0];

            // Get the cell range where you want to sort data
            CellRange cellRange = sheet.Range["A1:F6"];

            String[] customList = { "Central", "North", "South", "East", "West" };

            // Sort a specified column using the custom list
            workbook.DataSorter.SortColumns.Add(0, customList);

            // Sort in the specified cell range
            workbook.DataSorter.Sort(cellRange);

            // Save the workbook
            workbook.SaveToFile("SortByCustomList.xlsx", ExcelVersion.Version2013);

            // Dispose resources
            workbook.Dispose();
        }
    }
}
Apply for a Temporary License
If you'd like to remove the evaluation message from the generated documents, or to get rid of the function limitations, please request a 30-day trial license for yourself.
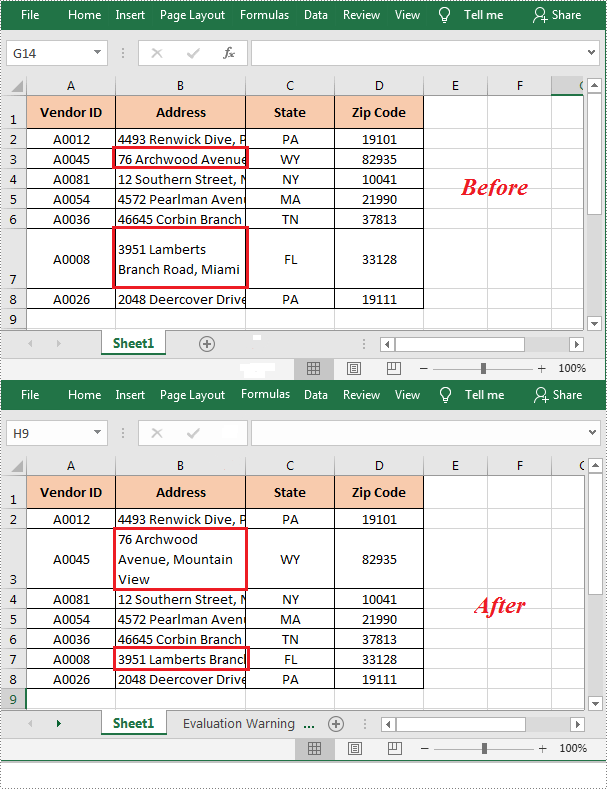
In Excel, the content of a cell may look incomplete when it exceeds the length of the cell. Under the circumstance, you can apply wrap text in the cell to ensure that all content can be viewed at once. This article will demonstrate how to programmatically wrap or unwrap text in Excel cells using Spire.XLS for .NET.
Install Spire.XLS for .NET
To begin with, you need to add the DLL files included in the Spire.XLS for .NET package as references in your .NET project. The DLL files can be either downloaded from this link or installed via NuGet.
PM> Install-Package Spire.XLS
Wrap or Unwrap Text in Excel Cells
The detailed steps are as follows.
- Create a Workbook object.
- Load a sample Excel file using Workbook.LoadFromFile() method.
- Get a specified worksheet using Workbook.Worksheets[] property.
- Get a specified cell using Worksheet.Range[] property.
- Get the style of the specified cell using CellRange.Style property.
- Wrap text in the specified cell by setting the CellStyle.WrapText property to true. Or set the property to false to unwrap text in the specified cell.
- Save the result file using Workbook.SaveToFile() method.
- C#
- VB.NET
using Spire.Xls;

namespace WrapText
{
    class Program
    {
        static void Main(string[] args)
        {
            //Create a Workbook object
            Workbook workbook = new Workbook();

            //Load a sample Excel file
            workbook.LoadFromFile(@"D:\Files\sample.xlsx");

            //Get the first worksheet
            Worksheet sheet = workbook.Worksheets[0];

            //Wrap text in cell B3
            sheet.Range["B3"].Style.WrapText = true;

            //Unwrap text in cell B7
            sheet.Range["B7"].Style.WrapText = false;

            //Save the result file
            workbook.SaveToFile("WarpText.xlsx", ExcelVersion.Version2010);
        }
    }
}
Apply for a Temporary License
If you'd like to remove the evaluation message from the generated documents, or to get rid of the function limitations, please request a 30-day trial license for yourself.
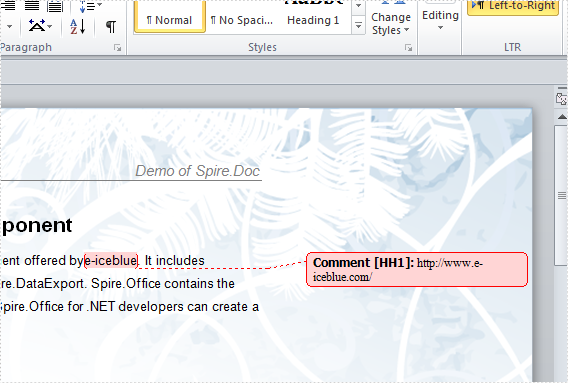
In Excel, comments are used to explain the contents in cells or to add additional information that might be useful to readers. Using Spire.XLS for .NET, we can add comments to Excel cells easily as well as customizing the appearance by setting the size of the comment box or applying a font style to the comment text. In this article, we will demonstrate how to add comments to Excel worksheets programmatically in C#/VB.NET from the following two parts.
Install Spire.XLS for .NET
To begin with, you need to add the DLL files included in the Spire.XLS for.NET package as references in your .NET project. The DLLs files can be either downloaded from this link or installed via NuGet.
PM> Install-Package Spire.XLS
Add Comments in an Excel Worksheet
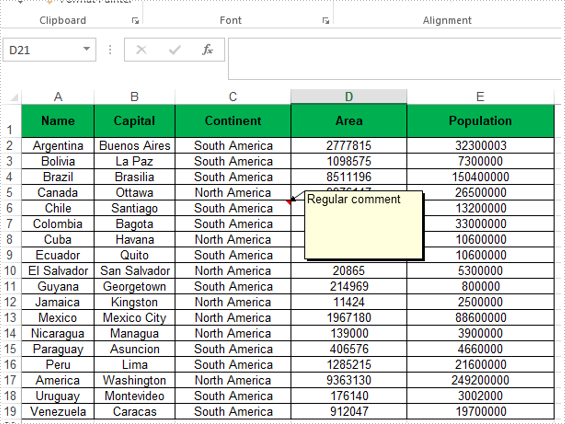
Spire.XLS offers the CellRange.AddComment() method to add the regular text comment to Excel worksheet. The following are the steps.
- Initialize an instance of Workbook class.
- Load an Excel file using Workbook.LoadFromFile() method.
- Get the first worksheet of the Excel file using Workbook.Worksheets[int] property.
- Add a comment in a specific cell range using CellRange.AddComment() method and then set the comment text through the Text property of the ExcelComment object.
- Save the document to another file using Workbook.SaveToFile() method.
- C#
- VB.NET
using Spire.Xls;

namespace WordDemo
{
    class Program
    {
        static void Main(string[] args)
        {
            //Create a Workbook object
            Workbook workbook = new Workbook();

            //Load the sample workbook
            workbook.LoadFromFile("Sample.xlsx");

            //Get the first worksheet
            Worksheet sheet = workbook.Worksheets[0];

            //Add regular comment to specific cell range C6
            CellRange range = sheet.Range["C6"];
            ExcelComment comment = range.AddComment();
            comment.Text = "Regular comment";

            //Save the Excel workbook.
            workbook.SaveToFile("Addcomment.xlsx", ExcelVersion.Version2016);

        }
}
Apply Formatting to Comments in an Excel Worksheet
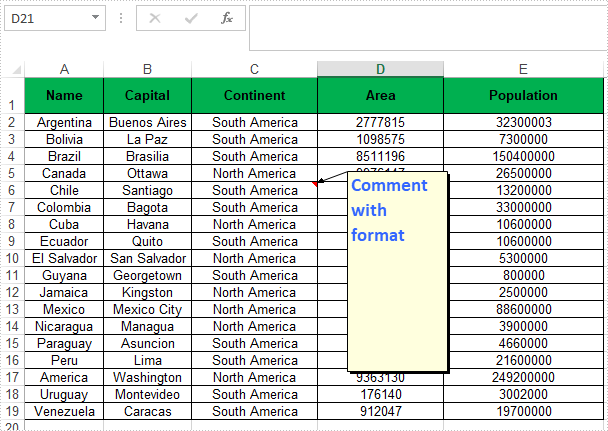
Spire.XLS offers the Comment.RichText.SetFont() method to apply font formatting for comments in Excel worksheets.
- Initialize an instance of Workbook class.
- Load an Excel file using Workbook.LoadFromFile() method.
- Get the first worksheet of the Excel file using Workbook.Worksheets[int] property.
- Add a comment in a specific cell range using CellRange.AddComment() method and then set the comment text.
- Create an ExcelFont object and apply the font to the comment text using ExcelComment.RichText.SetFont() method.
- Save the document to another file using Workbook.SaveToFile() method.
- C#
- VB.NET
using Spire.Xls;

namespace ExcelComment
{
    class Program
    {
        static void Main(string[] args)
        {
            //Create a Workbook object
            Workbook workbook = new Workbook();

            //Load the sample workbook
            workbook.LoadFromFile("Sample.xlsx");

            //Get the first worksheet
            Worksheet sheet = workbook.Worksheets[0];

            //Add comment to specific cell range C6
            CellRange range = sheet.Range["C6"];
            ExcelComment comment = range.AddComment();
            comment.Text = "Comment with format";

            //Set the width and height
            comment.Width = 100;
            comment.Height = 200;

            //Display the comment
            comment.Visible = true;

            //Create a font
            ExcelFont font = workbook.CreateFont();
            font.FontName = "Calibri";
            font.Size = 14;
            font.KnownColor = ExcelColors.LightBlue;
            font.IsBold = true;

            //Apply the font to the comment text
            comment.RichText.SetFont(0,27,font);

            //Save the Excel workbook.
            workbook.SaveToFile("AddcommentwithFormat.xlsx", ExcelVersion.Version2016);

        }
    }
}
Apply for a Temporary License
If you'd like to remove the evaluation message from the generated documents, or to get rid of the function limitations, please request a 30-day trial license for yourself.
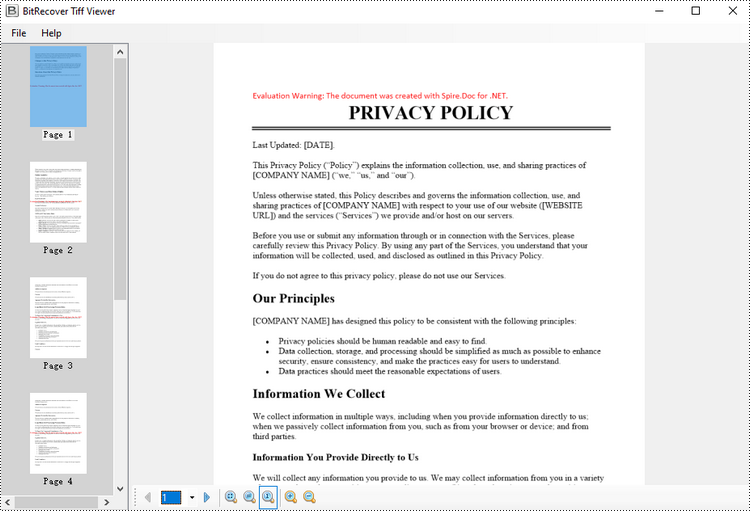
Converting Word to TIFF can be useful in various scenarios. TIFF files have high quality and wide support, making them versatile for sharing documents. The conversion also "flattens" the Word document, preserving the layout so it appears exactly as the original. This can be helpful when the document needs to be incorporated into another application or workflow that requires image-based files.
In this article, you will learn how to convert Word to TIFF using C# and the Spire.Doc for .NET library.
Install Spire.Doc for .NET
To begin with, you need to add the DLL files included in the Spire.Doc for.NET package as references in your .NET project. The DLL files can be either downloaded from this link or installed via NuGet.
PM> Install-Package Spire.Doc
Convert Word to TIFF in C#
Spire.Doc for .NET provides the Document.SaveToImages() method, which enables developers to convert an entire document into an array of images. Subsequently, these individual images can be combined into a single TIFF image using the built-in .NET library.
The steps to convert Word to TIFF using C# are as follows.
- Create a Document object.
- Load a Word document using Document.LoadFile() method.
- Convert the document into an array of images using Document.SaveToImages() method.
- Combine these images into a single TIFF file using the custom method ConvertImagesToTiff().
- C#
using Spire.Doc;
using Spire.Doc.Documents;
using System.Drawing;
using System.Drawing.Imaging;

namespace WordToTiff
{
    class Program
    {
        static void Main(string[] args)
        {
            // Create a Document object
            Document doc = new Document();

            // Load a Word document
            doc.LoadFromFile("C:\\Users\\Administrator\\Desktop\\input.docx");

            // Convert the whole document to images
            Image[] images = doc.SaveToImages(ImageType.Bitmap);

            // Convert multiple images into a TIFF file
            ConvertImagesToTiff(images, "ToTiff.tiff", EncoderValue.CompressionLZW);

            // Dispose resource
            doc.Dispose();
        }

        private static ImageCodecInfo GetEncoderInfo(string mimeType)
        {
            // Get the image encoders
            ImageCodecInfo[] encoders = ImageCodecInfo.GetImageEncoders();
            for (int j = 0; j < encoders.Length; j++)
            {
                // Find the encoder that matches the specified MIME type
                if (encoders[j].MimeType == mimeType)
                    return encoders[j];
            }
            throw new Exception(mimeType + " mime type not found in ImageCodecInfo");
        }

        public static void ConvertImagesToTiff(Image[] images, string outFile, EncoderValue compressEncoder)
        {
            // Set the encoder parameters
            Encoder enc = Encoder.SaveFlag;
            EncoderParameters ep = new EncoderParameters(2);
            ep.Param[0] = new EncoderParameter(enc, (long)EncoderValue.MultiFrame);
            ep.Param[1] = new EncoderParameter(Encoder.Compression, (long)compressEncoder);

            // Get the first image
            Image pages = images[0];

            // Create a variable
            int frame = 0;

            // Get an ImageCodecInfo object for processing TIFF image codec information
            ImageCodecInfo info = GetEncoderInfo("image/tiff");

            // Iterate through each Image
            foreach (Image img in images)
            {
                // If it's the first frame, save it to the output file with specified encoder parameters
                if (frame == 0)
                {
                    pages = img;
                    pages.Save(outFile, info, ep);
                }
                else
                {
                    // Save the intermediate frames
                    ep.Param[0] = new EncoderParameter(enc, (long)EncoderValue.FrameDimensionPage);

                    pages.SaveAdd(img, ep);
                }

                // If it's the last frame, flush the encoder parameters and close the file
                if (frame == images.Length - 1)
                {
                    ep.Param[0] = new EncoderParameter(enc, (long)EncoderValue.Flush);
                    pages.SaveAdd(ep);
                }
                frame++;
            }
        }
    }
}
Apply for a Temporary License
If you'd like to remove the evaluation message from the generated documents, or to get rid of the function limitations, please request a 30-day trial license for yourself.
The sample demonstrates how to set PDF page orientation for Silverlight via Spire.PDF.
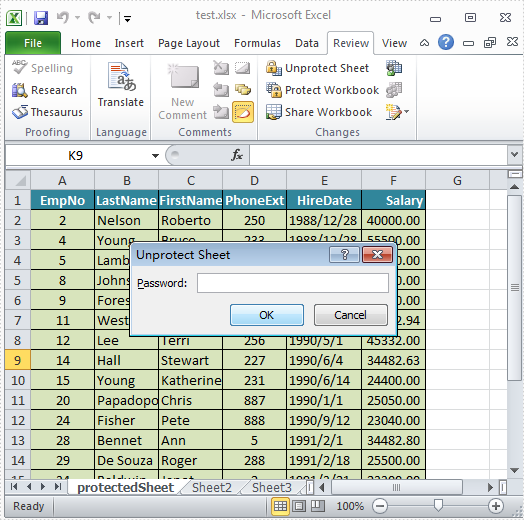
The sample demonstrates how to Lock Worksheet in Silverlight via Spire.XLS.
The sample demonstrates how to insert comments into Word for Silverlight via Spire.Doc.
Document properties, also known as metadata, are a set of data that describe a document. In Excel, you can add built-in document properties such as author, title, and keywords to quickly locate and identify documents in a folder. Or you can also add custom properties to provide more information about the Excel document. In this article, you will learn how to programmatically add built-in and custom document properties to an Excel document using Spire.XLS for .NET.
- Add Built-in Document Properties in Excel in C# and VB.NET
- Add Custom Document Properties in Excel in C# and VB.NET
Install Spire.XLS for .NET
To begin with, you need to add the DLL files included in the Spire.XLS for .NET package as references in your .NET project. The DLL files can be either downloaded from this link or installed via NuGet.
PM> Install-Package Spire.XLS
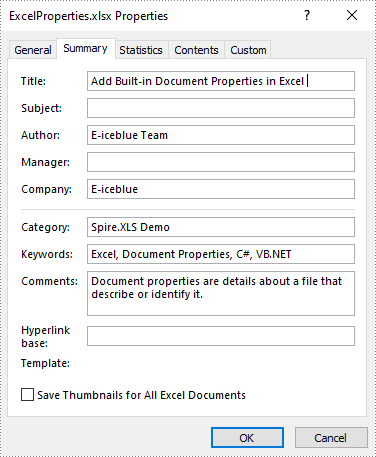
Add Built-in Document Properties in Excel in C# and VB.NET
Built-in document properties are basic information about a document such as title, subject, author, category, etc. The names of these properties are predefined that cannot be edited, but Spire.XLS for .NET allows you to set specific values for these properties. The following are the detailed steps.
- Create a Workbook object.
- Load a sample Excel document using Workbook.LoadFromFile() method.
- Get the built-in document properties of the document using Workbook.DocumentProperties property.
- Set specific document properties such as title, author, keywords and comments using the properties of BuiltInDocumentProperties class.
- Save the result document using Workbook.SaveToFile() method.
- C#
- VB.NET
using Spire.Xls;

namespace ExcelProperties
{
    class Program
    {
        static void Main(string[] args)
        {
            //Create a Workbook object
            Workbook workbook = new Workbook();

            //Load a sample Excel document
            workbook.LoadFromFile("sample.xlsx");

            //Set built-in document properties for the Excel workbook
            workbook.DocumentProperties.Author = "E-iceblue Team";
            workbook.DocumentProperties.Title = "Add Built-in Document Properties in Excel ";
            workbook.DocumentProperties.Keywords = "Excel, Document Properties, C#, VB.NET";
            workbook.DocumentProperties.Category = "Spire.XLS Demo";
            workbook.DocumentProperties.Company = "E-iceblue";
            workbook.DocumentProperties.Comments = "Document properties are details about a file that describe or identify it.";

            //Save the result document
            workbook.SaveToFile("ExcelProperties.xlsx", FileFormat.Version2013);
        }
    }
}
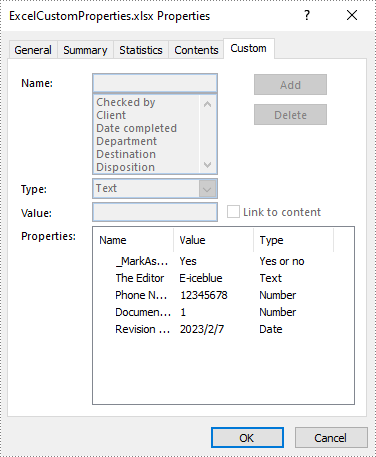
Add Custom Document Properties in Excel in C# and VB.NET
Custom document properties are additional properties that you can define for an Excel document. Spire.XLS for .NET allows you to add custom properties with specified names and values using ICustomDocumentProperties.Add() method. The following are the detailed steps.
- Create a Workbook object.
- Load a sample Excel document using Workbook.LoadFromFile() method.
- Get the custom document properties of the document using Workbook.CustomDocumentProperties property.
- Add custom document properties with different data types to the document using ICustomDocumentProperties.Add() method.
- Save the result document using Workbook.SaveToFile() method.
- C#
- VB.NET
using Spire.Xls;
using System;

namespace CustomExcelProperties
{
    class Program
    {
        static void Main(string[] args)
        {
            //Create a Workbook object
            Workbook workbook = new Workbook();

            //Load a sample Excel document
            workbook.LoadFromFile("sample.xlsx");

            //Add custom document properties to the document
            workbook.CustomDocumentProperties.Add("_MarkAsFinal", true);
            workbook.CustomDocumentProperties.Add("The Editor", "E-iceblue");
            workbook.CustomDocumentProperties.Add("Phone Number", 12345678);
            workbook.CustomDocumentProperties.Add("Document ID", 1);
            workbook.CustomDocumentProperties.Add("Revision Date", DateTime.Now);

            //Save the result document
            workbook.SaveToFile("ExcelCustomProperties.xlsx", FileFormat.Version2013);
        }
    }
}
Apply for a Temporary License
If you'd like to remove the evaluation message from the generated documents, or to get rid of the function limitations, please request a 30-day trial license for yourself.
Sometimes, we may get annoyed when we have to open many Excel files simultaneously. Merging Excel files of the same type or category can help us avoid the trouble and save us much time. This article will demonstrate how to merge Excel files into One in C# and VB.NET using Spire.XLS for .NET library.
- Merge Multiple Excel Workbooks into One in C# and VB.NET
- Merge Multiple Excel Worksheets into One in C# and VB.NET
Install Spire.XLS for .NET
To begin with, you need to add the DLL files included in the Spire.XLS for .NET package as references in your .NET project. The DLL files can be either downloaded from this link or installed via NuGet.
PM> Install-Package Spire.XLS
Merge Multiple Excel Workbooks into One in C# and VB.NET
The following are the steps to merge multiple Excel workbooks into one:
- Create a string array from the Excel file paths.
- Initialize a Workbook object to create a new Excel workbook, and clear the default worksheets in the workbook using Workbook.Worksheets.Clear() method.
- Initialize another temporary Workbook object.
- Loop through the string array, load the current workbook into the temporary Workbook object using Workbook.LoadFromFile() method.
- loop through the worksheets in the current workbook, then copy each worksheet from the current workbook to the new workbook using Workbook.Worksheets.AddCopy() method.
- Save the new workbook to file using Workbook.SaveToFile() method.
- C#
- VB.NET
using Spire.Xls;
namespace MergeExcelFiles
{
class Program
{
static void Main(string[] args)
{
//Create a string array from Excel file paths
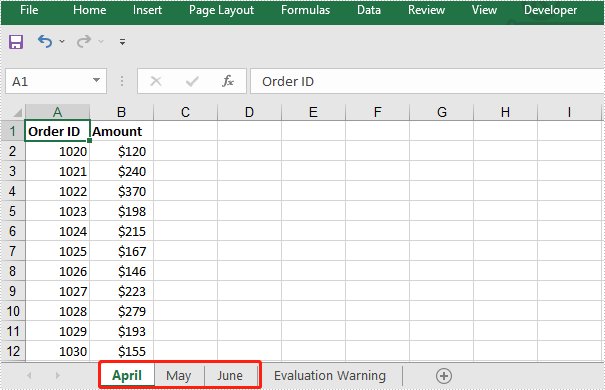
string[] inputFiles = new string[] { "April.xlsx", "May.xlsx", "June.xlsx" };
//Initialize a new Workbook object
Workbook newWorkbook = new Workbook();
//Clear the default worksheets
newWorkbook.Worksheets.Clear();
//Initialize another temporary Workbook object
Workbook tempWorkbook = new Workbook();
//Loop through the string array
foreach (string file in inputFiles)
{
//Load the current workbook
tempWorkbook.LoadFromFile(file);
//Loop through the worksheets in the current workbook
foreach (Worksheet sheet in tempWorkbook.Worksheets)
{
//Copy each worksheet from the current workbook to the new workbook
newWorkbook.Worksheets.AddCopy(sheet, WorksheetCopyType.CopyAll);
}
}
//Save the new workbook to file
newWorkbook.SaveToFile("MergeWorkbooks.xlsx", ExcelVersion.Version2013);
}
}
}
The input Excel workbooks:

The merged Excel workbook:
Merge Multiple Excel Worksheets into One in C# and VB.NET
We can merge multiple worksheets in the same or different workbooks into one. The following steps show how to merge two Excel worksheets in the same workbook into a single worksheet:
- Initialize a Workbook object and load an Excel file using Workbook.LoadFromFile() method.
- Get the two worksheets that need to be merged using Workbook.Worksheets[sheetIndex] property. Note the sheet index is zero-based.
- Get the used range of the second worksheet using Worksheet.AllocatedRange property.
- Specify the destination range in the first worksheet using Worksheet.Range[rowIndex, columnIndex] property. Note the row and column indexes are 1-based.
- Copy the used range of the second worksheet to the destination range in the first worksheet using CellRange.Copy(destRange) method.
- Remove the second worksheet using XlsWorksheet.Remove() method.
- Save the result file using Workbook.SaveToFile() method.
- C#
- VB.NET
using Spire.Xls;

namespace MergeExcelWorksheets
{
    class Program
    {
        static void Main(string[] args)
        {
            //Create a Workbook object
            Workbook workbook = new Workbook();
            //Load an Excel file
            workbook.LoadFromFile("Sample.xlsx");

            //Get the first worksheet
            Worksheet sheet1 = workbook.Worksheets[0];
            //Get the second worksheet
            Worksheet sheet2 = workbook.Worksheets[1];

            //Get the used range in the second worksheet
            CellRange sourceRange = sheet2.AllocatedRange;
            //Specify the destination range in the first worksheet
            CellRange destRange = sheet1.Range[sheet1.LastRow + 1, 1];

            //Copy the used range of the second worksheet to the destination range in the first worksheet
            sourceRange.Copy(destRange);

            //Remove the second worksheet
            sheet2.Remove();

            //Save the result file
            workbook.SaveToFile("MergeWorksheets.xlsx", ExcelVersion.Version2013);
        }
    }
}
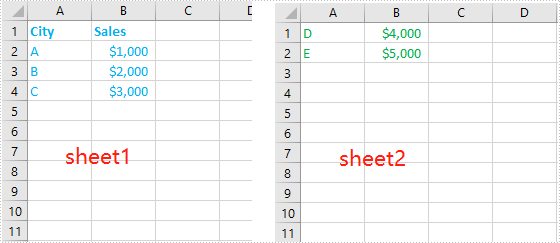
The input Excel worksheets:
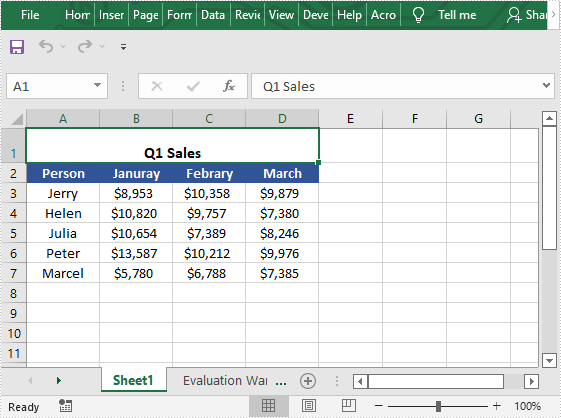
The merged Excel worksheets:

Apply for a Temporary License
If you'd like to remove the evaluation message from the generated documents, or to get rid of the function limitations, please request a 30-day trial license for yourself.
Merging cells means joining two or more separate cells into one large cell, which is useful when you need to create a label that spans multiple columns. In this article, we will demonstrate how to merge or unmerge cells in Excel in C# and VB.NET using Spire.XLS for .NET library.
Install Spire.XLS for .NET
To begin with, you need to add the DLL files included in the Spire.XLS for .NET package as references in your .NET project. The DLL files can be either downloaded from this link or installed via NuGet.
PM> Install-Package Spire.XLS
Merge Cells in Excel in C# and VB.NET
The following are the steps to merge cells in Excel:
- Create a Workbook instance
- Load the Excel file using Workbook.LoadFromFile() method.
- Get the desired worksheet using Workbook.Worksheets[sheetIndex] property.
- Access the specific range of cells and merge them into one using XlsRange.Merge() method.
- Center the text in the merged cell by setting CellRange.Style.HorizontalAlignment property to HorizontalAlignType.Center.
- Save the result file using Workbook.SaveToFile() method.
- C#
- VB.NET
using Spire.Xls;

namespace MergeCells
{
    class Program
    {
        static void Main(string[] args)
        {
            //Create a Workbook instance
            Workbook workbook = new Workbook();
            //Load the Excel file
            workbook.LoadFromFile("Sample.xlsx");

            //Get the first worksheet
            Worksheet sheet = workbook.Worksheets[0];
            //Merge cells A1-D1 into one cell
            CellRange range = sheet.Range["A1:D1"];
            range.Merge();
            //Center the text in the merged cell
            range.Style.HorizontalAlignment = HorizontalAlignType.Center;

            //Save the result file
            workbook.SaveToFile("MergeCells.xlsx", ExcelVersion.Version2013);
        }
    }
}
Unmerge Cells in Excel in C# and VB.NET
The following are the steps to unmerge cells in Excel:
- Create a Workbook instance
- Load the Excel file using Workbook.LoadFromFile() method.
- Get the desired worksheet using Workbook.Worksheets[sheetIndex] property.
- Access the specific range of cells and unmerge them using XlsRange.UnMerge() method.
- Save the result file using Workbook.SaveToFile() method.
- C#
- VB.NET
using Spire.Xls;
namespace UnmergeCells
{
class Program
{
static void Main(string[] args)
{
//Create a Workbook instance
Workbook workbook = new Workbook();
//Load the Excel file
workbook.LoadFromFile("MergeCells.xlsx");
//Get the first worksheet
Worksheet sheet = workbook.Worksheets[0];
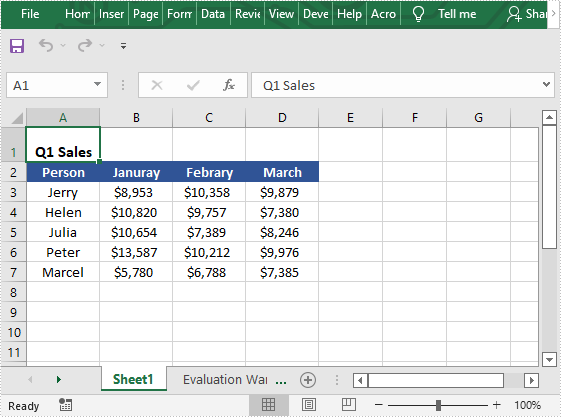
//Unmerge cells A1-D1
CellRange range = sheet.Range["A1:D1"];
range.UnMerge();
//Save the result file
workbook.SaveToFile("UnMergeCells.xlsx", ExcelVersion.Version2013);
}
}
}
Apply for a Temporary License
If you'd like to remove the evaluation message from the generated documents, or to get rid of the function limitations, please request a 30-day trial license for yourself.
