
.NET (1327)
Children categories
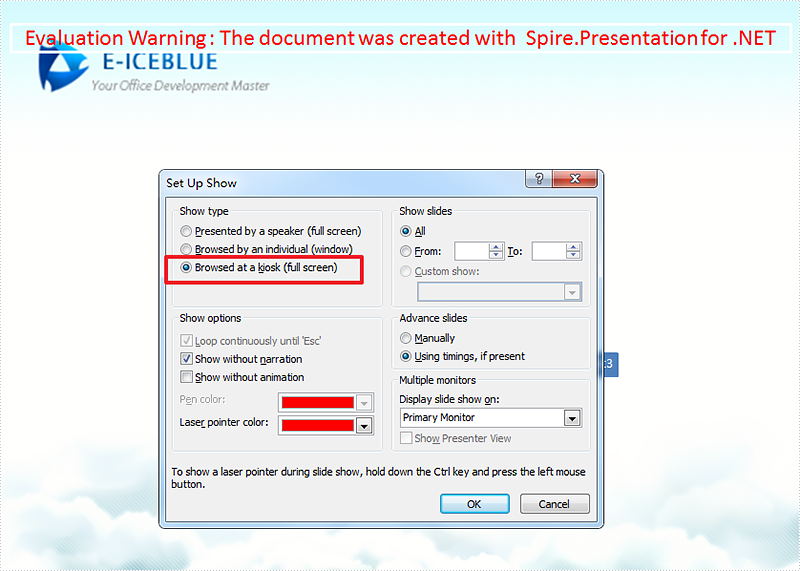
How to set the presentation show type as kiosk (full screen) in C#, VB.NET
2016-11-18 08:30:18 Written by KoohjiBrowsed at a kiosk (full screen) is one kind of the slide show types in PowerPoint, if users choose this option, the Slide Show is full screen but they cannot navigate from slide to slide, for example, move to the next or previous slides.
The following part will demonstrate how to set the presentation show type as kiosk in C# and VB.NET using Spire.Presentation.
Detail steps:
Step 1: Instantiate a Presentation object and load the PPT file.
Presentation presentation = new Presentation();
presentation.LoadFromFile("Sample.pptx");
Step 2: Specify the presentation show type as kiosk.
presentation.ShowType = SlideShowType.Kiosk;
Step 3: Save the file.
presentation.SaveToFile("Result.pptx", FileFormat.Pptx2013);
Output:
Full code:
using Spire.Presentation;

namespace Set_Presentation_show_type_as_ kiosk
{
    class Program
    {
        static void Main(string[] args)
        {
            Presentation presentation = new Presentation();
            presentation.LoadFromFile("Sample.pptx");
            presentation.ShowType = SlideShowType.Kiosk;
            presentation.SaveToFile("Result.pptx", FileFormat.Pptx2013);
        }
    }
}
Imports Spire.Presentation

Namespace Set_Presentation_show_type_as_ kiosk
	Class Program
		Private Shared Sub Main(args As String())
			Dim presentation As New Presentation()
			presentation.LoadFromFile("Sample.pptx")
			presentation.ShowType = SlideShowType.Kiosk
			presentation.SaveToFile("Result.pptx", FileFormat.Pptx2013)
		End Sub
	End Class
End Namespace
Working with Tick-mark Labels on the Category Axis in C#, VB.NET
2016-11-16 08:24:51 Written by KoohjiIn charts, each category on the category axis is identified by a tick-mark label and separated from other categories by tick marks. The tick-mark label text comes from the name of the associated category and is usually placed next to the axis.
In this article, we will introduce how we can custom the tick-mark labels by changing the labels' position, rotating labels and specifying interval between labels in C#, VB.ENT.
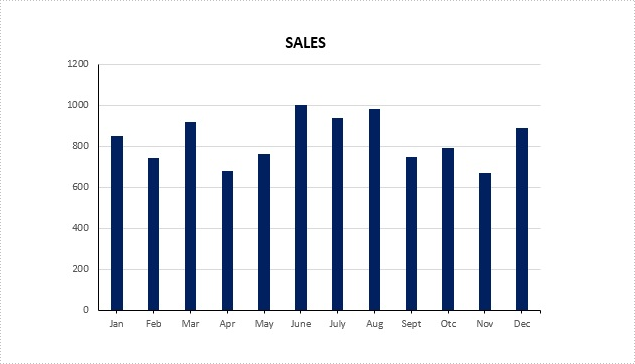
Figure 1 – Chart in Example File
To facilitate the introduction, we prepared a PowerPoint document that contains a column chart looks like the screenshot in Figure 1 and used below code to get the chart from the PowerPoint slide. Then we're able to custom the labels through the following ways.
Presentation ppt = new Presentation(@"C:\Users\Administrator\Desktop\ColumnChart.pptx",FileFormat.Pptx2013);
IChart chart = ppt.Slides[0].Shapes[0] as IChart;
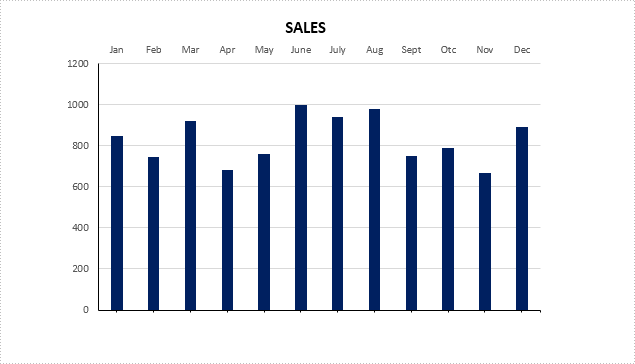
Rotate tick labels
chart.PrimaryCategoryAxis.TextRotationAngle = 45;

Specify interval between labels
To change the number of unlabeled tick marks, we must set IsAutomaticTickLabelSpacing property as false and change the TickLabelSpacing property to any number between 1 - 255.
chart.PrimaryCategoryAxis.IsAutomaticTickLabelSpacing = false;
chart.PrimaryCategoryAxis.TickLabelSpacing = 2;

Change tick labels' position
chart.PrimaryCategoryAxis.TickLabelPosition = TickLabelPositionType.TickLabelPositionHigh;
Full Code:
using Spire.Presentation;
using Spire.Presentation.Charts;

namespace TickMarkLabel
{
    class Program
    {
        static void Main(string[] args)
        {
            Presentation ppt = new Presentation(@"C:\Users\Administrator\Desktop\ColumnChart.pptx", FileFormat.Pptx2013);
            IChart chart = ppt.Slides[0].Shapes[0] as IChart;

            //rotate tick labels
            chart.PrimaryCategoryAxis.TextRotationAngle = 45;

            //specify interval between labels
            chart.PrimaryCategoryAxis.IsAutomaticTickLabelSpacing = false;
            chart.PrimaryCategoryAxis.TickLabelSpacing = 2;

            ////change position
            //chart.PrimaryCategoryAxis.TickLabelPosition = TickLabelPositionType.TickLabelPositionHigh;

            ppt.SaveToFile("result.pptx", FileFormat.Pptx2013);

        }
    }
}
Imports Spire.Presentation
Imports Spire.Presentation.Charts

Namespace TickMarkLabel
	Class Program
		Private Shared Sub Main(args As String())
			Dim ppt As New Presentation("C:\Users\Administrator\Desktop\ColumnChart.pptx", FileFormat.Pptx2013)
			Dim chart As IChart = TryCast(ppt.Slides(0).Shapes(0), IChart)

			'rotate tick labels
			chart.PrimaryCategoryAxis.TextRotationAngle = 45

			'specify interval between labels
			chart.PrimaryCategoryAxis.IsAutomaticTickLabelSpacing = False
			chart.PrimaryCategoryAxis.TickLabelSpacing = 2

			'''/change position
			'chart.PrimaryCategoryAxis.TickLabelPosition = TickLabelPositionType.TickLabelPositionHigh;

			ppt.SaveToFile("result.pptx", FileFormat.Pptx2013)

		End Sub
	End Class
End Namespace
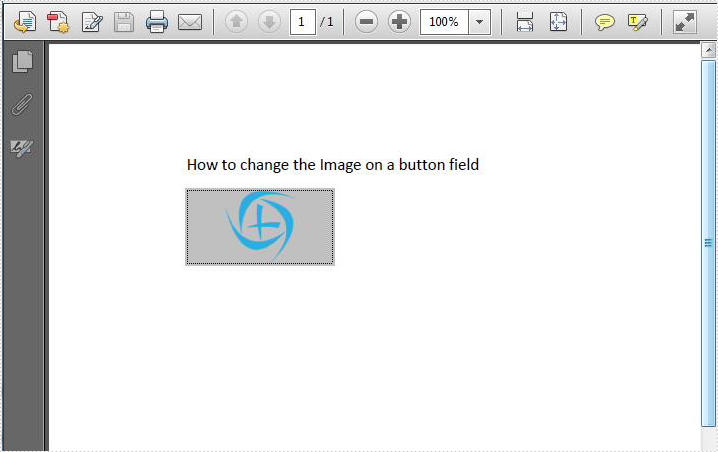
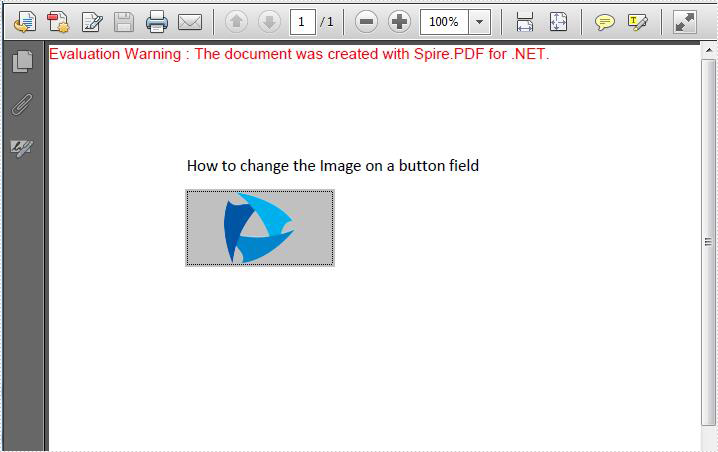
We have already had an article of showing how to replace the image on the existing PDF file. Starts from Spire.PDF V3.8.45, it newly supports to update the image on button field via the method of field.SetButtonImage(PdfImage.FromFile(@"")). This article will focus on demonstrate how to replace the image on the button field in C#.
Firstly, check the original PDF file with the button field.
Step 1: Create a PDF document and load from file.
PdfDocument pdf = new PdfDocument();
pdf.LoadFromFile("Sample.PDF", FileFormat.PDF);
Step 2: Get the form from the loaded PDF document.
PdfFormWidget form = pdf.Form as PdfFormWidget;
Step 3: Find the button field named "Image" and then set a new image for this button field.
for (int i = 0; i < form.FieldsWidget.Count; i++)
{
    if (form.FieldsWidget[i] is PdfButtonWidgetFieldWidget)
    {
        PdfButtonWidgetFieldWidget field = form.FieldsWidget[i] as PdfButtonWidgetFieldWidget;
        if (field.Name == "Image")
        { field.SetButtonImage(PdfImage.FromFile("logo.png")); }
    }
}
Step 4: Save the document to file.
pdf.SaveToFile("result.pdf");
Effective screenshot after replace the image on the button field.
Full codes:
using Spire.Pdf;
using Spire.Pdf.Graphics;
using Spire.Pdf.Widget;


namespace ImageButton
{
    class Program
    {
        static void Main(string[] args)
        {
            PdfDocument pdf = new PdfDocument();
            pdf.LoadFromFile("Sample.PDF", FileFormat.PDF);

            PdfFormWidget form = pdf.Form as PdfFormWidget;

            for (int i = 0; i < form.FieldsWidget.Count; i++)
            {
                if (form.FieldsWidget[i] is PdfButtonWidgetFieldWidget)
                {
                    PdfButtonWidgetFieldWidget field = form.FieldsWidget[i] as PdfButtonWidgetFieldWidget;
                    if (field.Name == "Image")
                    { field.SetButtonImage(PdfImage.FromFile("logo.png")); }

                }
            }

            pdf.SaveToFile("result.pdf");
        }
    }
}
Embed private font into Word document when save as .docx file format
2016-11-09 08:49:02 Written by KoohjiNow Spire.Doc supports to embed private fonts from font files into Word document when save as .docx file format. This article will show you the detail steps of how to accomplish this task by using Spire.Doc.
For demonstration, we used a font file DeeDeeFlowers.ttf.
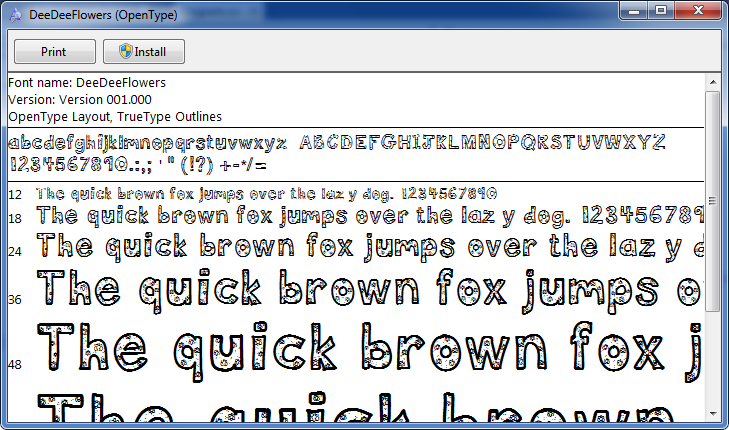
In the following part, we will embed font from above file into a Word document and use it to create text.
Step 1: Create a blank Word document.
Document document = new Document();
Step 2: Add a section and a paragraph to the document.
Section section = document.AddSection();
Paragraph p = section.AddParagraph();
Step 3: Append text to the paragraph, then set the font name and font size for the text.
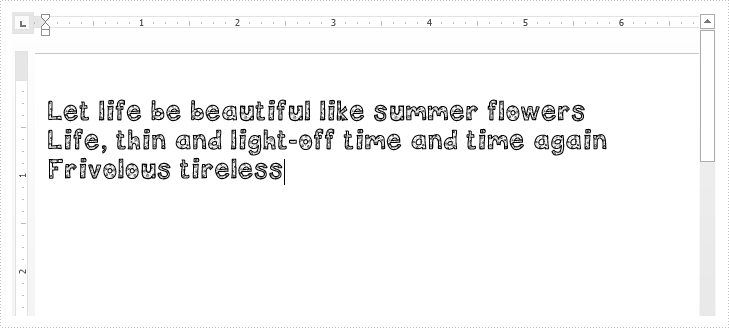
TextRange range = p.AppendText("Let life be beautiful like summer flowers\n"
    +"Life, thin and light-off time and time again\n"
    + "Frivolous tireless");
range.CharacterFormat.FontName = "DeeDeeFlowers";
range.CharacterFormat.FontSize = 20;
Step 4: Allow embedding font in document by setting the Boolean value of EmbedFontsInFile property to true.
document.EmbedFontsInFile = true;
Step 5: Embed private font from font file into the document.
document.PrivateFontList.Add(new PrivateFontPath("DeeDeeFlowers", @"E:\Program Files\DeeDeeFlowers.ttf"));
Step 6: Save as .docx file format.
document.SaveToFile("result.docx", FileFormat.Docx);
After running the code, we'll get the following output:
Full code:
using Spire.Doc;
using Spire.Doc.Documents;
using Spire.Doc.Fields;

namespace Embed_private_font_into_Word
{
    class Program
    {
        static void Main(string[] args)
        {
            Document document = new Document();
            Section section = document.AddSection();
            Paragraph p = section.AddParagraph();

            TextRange range = p.AppendText("Let life be beautiful like summer flowers\n"
                +"Life, thin and light-off time and time again\n"
                + "Frivolous tireless");
            range.CharacterFormat.FontName = "DeeDeeFlowers";
            range.CharacterFormat.FontSize = 20;

            document.EmbedFontsInFile = true;
            document.PrivateFontList.Add(new PrivateFontPath("DeeDeeFlowers", @"E:\Program Files\DeeDeeFlowers.ttf"));

            document.SaveToFile("result.docx", FileFormat.Docx);
        }
    }
}
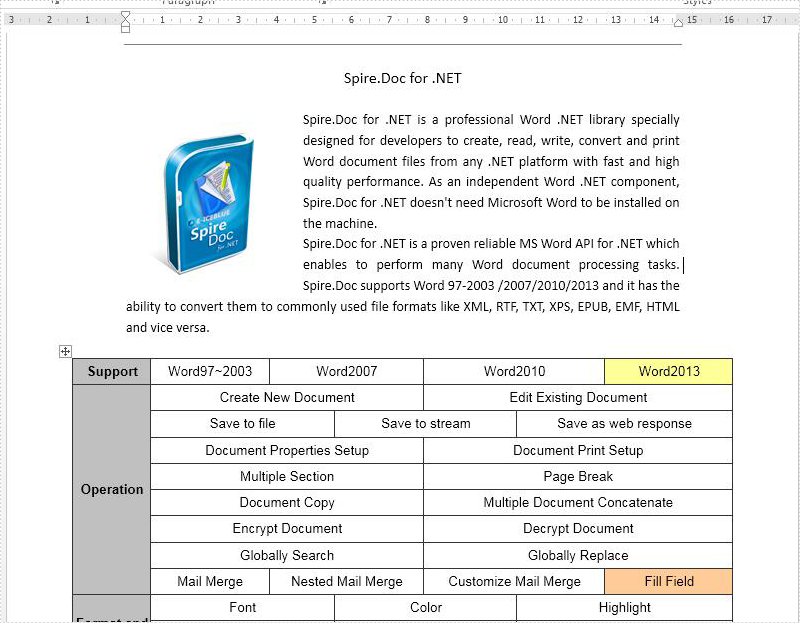
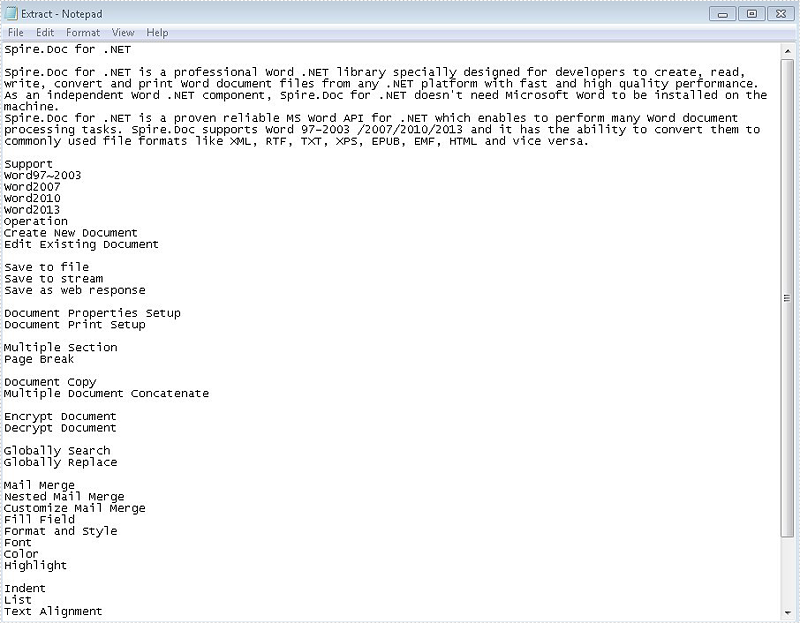
Sometimes we only need to get the text from the word document for other use when we deal with the word documents with large amount of information. With the help of Spire.Doc, we have already demonstrated how to extract the text from the word document by traverse every paragraph on the word document and then append the text accordingly. This article will show you how to use the method of doc.GetText() to extract the text directly from the word documents with texts, images and tables. It is more convenient for developers to extract the text from the word document from code.
Firstly, view the sample word document which will be extracted the text firstly:
Step 1: Create a word instance and load the source word document from file.
Document doc = new Document();
doc.LoadFromFile("Sample.docx");
Step 2: Invoke the doc.GetText() method to get all the texts from the word document.
string s = doc.GetText();
Step 3: Create a New TEXT File to Save Extracted Text.
File.WriteAllText("Extract.txt", s.ToString());
Effective screenshot after get all the text from the word document:
Full codes:
using Spire.Doc;
using System.IO;
namespace GetText
{
   class WordText
 {
   public void GetText()
   {
     Document doc = new Document();
     doc.LoadFromFile("Sample.docx");

     string s = doc.GetText();

     File.WriteAllText("Extract.txt", s.ToString());

    }
 }
}
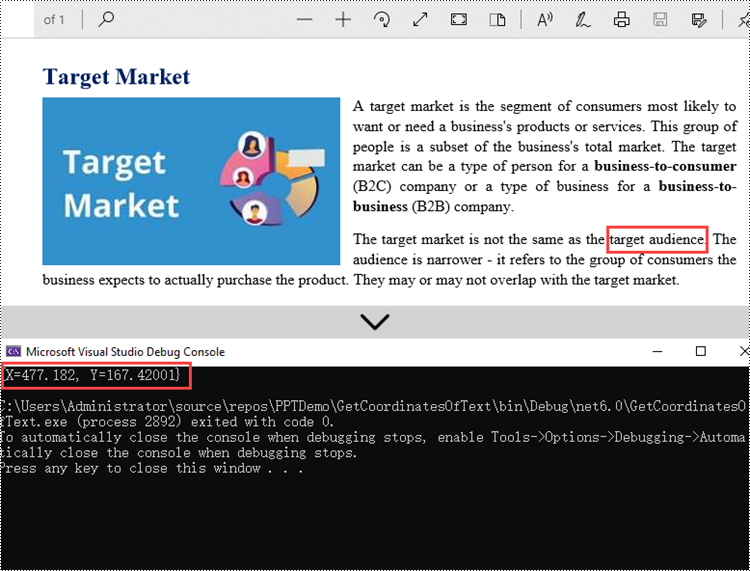
Getting the coordinates of text or an image in a PDF is a useful task that allows precise referencing and manipulation of specific elements within the document. By extracting the coordinates, one can accurately identify the position of text or images on each page. This information proves valuable for tasks like data extraction, text recognition, or highlighting specific areas. This article introduces how to get the coordinate information of text or an image in a PDF document in C# using Spire.PDF for .NET.
Install Spire.PDF for .NET
To begin with, you need to add the DLL files included in the Spire.PDF for .NET package as references in your .NET project. You can download Spire.PDF for .NET from our website or install it directly through NuGet.
PM> Install-Package Spire.PDF
Get Coordinates of Text in PDF in C#
The PdfTextFinder.Find() method provided by Spire.PDF can help us find all instances of the string to be searched in a searchable PDF document. The coordinate information of a specific instance can be obtained through the PdfTextFragment.Positions property. The following are the step to get the (X, Y) coordinates of the specified text in a PDF using Spire.PDF for .NET.
- Create a PdfDocument object.
- Load a PDF file using PdfDocument.LoadFromFile() method.
- Loop through the pages in the document.
- Create a PdfTextFinder object, and get all instances of the specified text from a page using PdfTextFinder.Find() method.
- Loop through the find results and get the coordinate information of a specific result through PdfTextFragment.Positions property.
- C#
using Spire.Pdf;
using Spire.Pdf.Texts;
using System.Collections.Generic;
using System;
using System.Drawing;

namespace GetCoordinatesOfText
{
    class Program
    {
        static void Main(string[] args)
        {
            //Create a PdfDocument object
            PdfDocument doc = new PdfDocument();

            //Load a PDF file
            doc.LoadFromFile("C:\\Users\\Administrator\\Desktop\\input.pdf");

            //Loop through all pages
            foreach (PdfPageBase page in doc.Pages)
            {
                //Create a PdfTextFinder object
                PdfTextFinder finder = new PdfTextFinder(page);

                //Set the find options
                PdfTextFindOptions options = new PdfTextFindOptions();
                options.Parameter = TextFindParameter.IgnoreCase;
                finder.Options = options;

                //Find all instances of a specific text
                List<PdfTextFragment> fragments = finder.Find("target audience");

                //Loop through the instances
                foreach (PdfTextFragment fragment in fragments)
                {
                    //Get the position of a specific instance
                    PointF found = fragment.Positions[0];
                    Console.WriteLine(found);
                }
            }
        }
    }
}
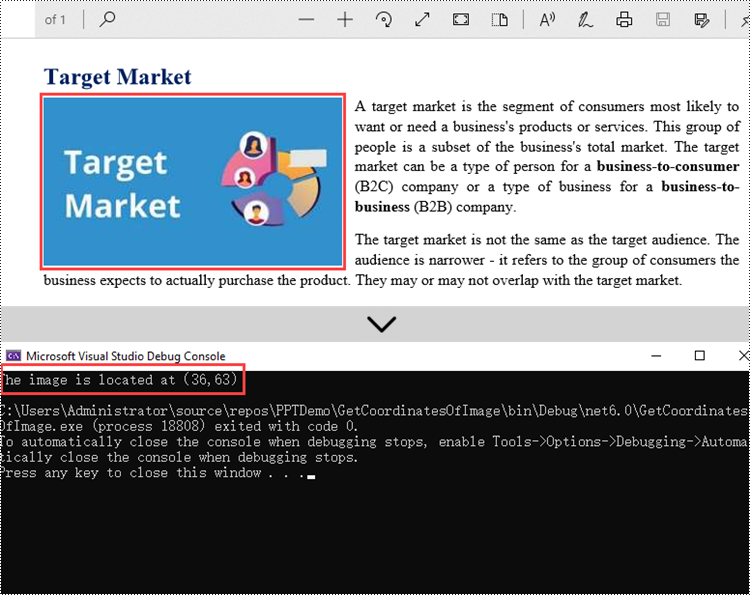
Get Coordinates of an Image in PDF in C#
Spire.PDF provides the PdfImageHelper.GetImagesInfo() method to help us get all image information on a specific page. The coordinate information of a specific image can be obtained through the PdfImageInfo.Bounds property. The following are the steps to get the coordinates of an image in a PDF document using Spire.PDF for .NET.
- Create a PdfDocument object.
- Load a PDF file using PdfDocument.LoadFromFile() method.
- Get a specific page through PdfDocument.Pages[index] property.
- Create a PdfImageHelper object, and get all image information from the page using PdfImageHelper.GetImageInfo() method.
- Get the coordinate information of a specific image through PdfImageInfo.Bounds property.
- C#
using Spire.Pdf;
using Spire.Pdf.Utilities;

namespace GetCoordinatesOfImage
{
    class Program
    {
        static void Main(string[] args)
        {
            //Create a PdfDocument object
            PdfDocument doc = new PdfDocument();

            //Load a PDF file
            doc.LoadFromFile("C:\\Users\\Administrator\\Desktop\\input.pdf");

            //Get a specific page
            PdfPageBase page = doc.Pages[0];

            //Create a PdfImageHelper object
            PdfImageHelper helper = new PdfImageHelper();

            //Get image information from the page
            PdfImageInfo[] images = helper.GetImagesInfo(page);

            //Get X,Y coordinates of a specific image
            float xPos = images[0].Bounds.X;
            float yPos = images[0].Bounds.Y;
            Console.WriteLine("The image is located at({0},{1})", xPos, yPos);
        }
    }
}
Apply for a Temporary License
If you'd like to remove the evaluation message from the generated documents, or to get rid of the function limitations, please request a 30-day trial license for yourself.
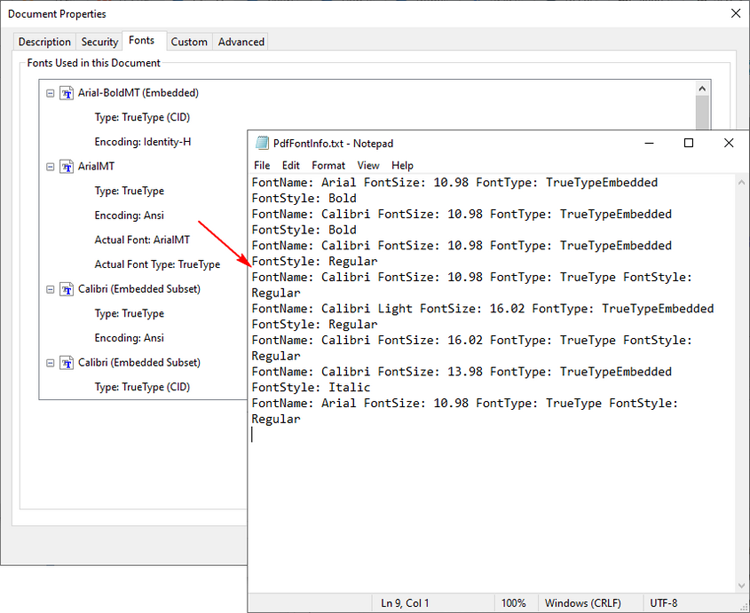
Get PDF font information is the process of extracting details about the fonts used in a PDF document. This information typically includes the font name, size, type, color, and other attributes. Knowing these details can help in ensuring consistency, copyright compliance, and aesthetics of the PDF document. In this article, you will learn how to get the font information in PDF in C# using Spire.PDF for .NET.
Install Spire.PDF for .NET
To begin with, you need to add the DLL files included in the Spire.PDF for.NET package as references in your .NET project. The DLL files can be either downloaded from this link or installed via NuGet.
PM> Install-Package Spire.PDF
Get the Fonts of Specified Text in PDF in C#
With Spire.PDF for .NET, you can find specified text and get its font formatting such as font name, size, style and color through the corresponding properties of the PdfTextFragment class. The following are the detailed steps.
- Create a PdfDocument instance.
- Load a PDF file using PdfDocument.LoadFromFile() method.
- Get a specified page using PdfDocument.Pages[] property.
- Create a PdfTextFinder instance.
- Find the specified text using PdfTextFinder.Find() method and return a PdfTextFragment object.
- Create a StringBuilder instance to store information.
- Iterate through all found text.
- Get the found text using PdfTextFragment.Text property.
- Get the font name of the found text using PdfTextFragment.TextStates[0].FontName property.
- Get the font size of the found text using PdfTextFragment.TextStates[0].FontSize property.
- Get the font family of the found text using PdfTextFragment.TextStates[0].FontFamily property.
- Indicate whether the font is bold or faux bold (font style set to fill and stroke) using PdfTextFragment.TextStates[0].IsSimulateBold and PdfTextFragment.TextStates[0].IsItalic properties.
- Get the font color of the found text using PdfTextFragment.TextStates[0].ForegroundColor property.
- Append the font information to the StringBuilder instance using StringBuilder.AppendLine() method.
- Write to a txt file.
- C#
using Spire.Pdf;
using Spire.Pdf.Texts;
using System.Collections.Generic;
using System.Drawing;
using System.IO;
using System.Text;

namespace GetTextFont
{
    class Program
    {
        static void Main(string[] args)
        {
            // Create a PdfDocument instance
            PdfDocument pdf = new PdfDocument();

            // Load a PDF file
            pdf.LoadFromFile("NET Framework.pdf");

            // Get the first page
            PdfPageBase page = pdf.Pages[0];

            // Create a PdfTextFinder instance
            PdfTextFinder finds = new PdfTextFinder(page);

            // Find specified text on the page
            finds.Options.Parameter = TextFindParameter.None;
            List<PdfTextFragment> result = finds.Find(".NET Framework");

            // Create a StringBuilder instance
            StringBuilder str = new StringBuilder();

            // Iterate through all found text
            foreach (PdfTextFragment find in result)
            {
                // Get the found text
                string text = find.Text;
                // Get the font name
                string FontName = find.TextStates[0].FontName;
                // Get the font size
                float FontSize = find.TextStates[0].FontSize;
                // Get the font family
                string FontFamily = find.TextStates[0].FontFamily;
                // Indicate whether the font is bold or italic
                bool IsBold = find.TextStates[0].IsBold;
                bool IsSimulateBold = find.TextStates[0].IsSimulateBold;
                bool IsItalic = find.TextStates[0].IsItalic;
                // Get the font color
                Color color = find.TextStates[0].ForegroundColor;

                // Append the font information to the StringBuilder instance
                str.AppendLine(text);
                str.AppendLine("FontName: " + FontName);
                str.AppendLine("FontSize: " + FontSize);
                str.AppendLine("FontFamily: " + FontFamily);
                str.AppendLine("IsBold: " + IsBold);
                str.AppendLine("IsSimulateBold: " + IsSimulateBold);
                str.AppendLine("IsItalic: " + IsItalic);
                str.AppendLine("color: " + color);
                str.AppendLine(" ");
            }
            // Write to a txt file
            File.WriteAllText("PdfFont.txt", str.ToString());
        }
    }
}

Get the Used Fonts in PDF in C#
Spire.PDF for .NET also provides the PdfUsedFont class to represent the fonts used in a PDF document. To get the formatting of all used fonts, you can iterate through each font and retrieve its font name, size, type and style using the corresponding properties of the PdfUsedFont class. The following are the detailed steps.
- Create a PdfDocument instance.
- Load a PDF file using PdfDocument.LoadFromFile() method.
- Get all the fonts used in the PDF file using PdfDocument.UsedFonts property.
- Create a StringBuilder instance to store information.
- Iterate through the used fonts.
- Get the font name using PdfUsedFont.Name property.
- Get the font size using PdfUsedFont.Size property.
- Get the font type using PdfUsedFont.Type property.
- Get the font style using PdfUsedFont.Style property.
- Append the font information to the StringBuilder instance using StringBuilder.AppendLine() method.
- Write to a txt file
- C#
using Spire.Pdf;
using Spire.Pdf.Graphics;
using Spire.Pdf.Graphics.Fonts;
using System.IO;
using System.Text;

namespace GetPdfFont
{
    class Program
    {
        static void Main(string[] args)
        {
            // Create a PdfDocument instance
            PdfDocument pdf = new PdfDocument();

            // Load a PDF file
            pdf.LoadFromFile("NET Framework.pdf");

            // Get the used fonts in the PDF file
            PdfUsedFont[] fonts = pdf.UsedFonts;

            // Create a StringBuilder instance
            StringBuilder str = new StringBuilder();

            // Iterate through the used fonts
            foreach (PdfUsedFont font in fonts)
            {
                // Get the font name
                string name = font.Name;

                // Get the font size
                float size = font.Size;

                // Get the font type
                PdfFontType type = font.Type;

                // Get the font style
                PdfFontStyle style = font.Style;

                // Append the font information to the StringBuilder instance
                str.AppendLine("FontName: " + name + " FontSize: " + size + " FontType: " + type + " FontStyle: " + style);

            }

            // Write to a txt file
            File.WriteAllText("PdfFontInfo.txt", str.ToString());
        }
    }
}
Apply for a Temporary License
If you'd like to remove the evaluation message from the generated documents, or to get rid of the function limitations, please request a 30-day trial license for yourself.
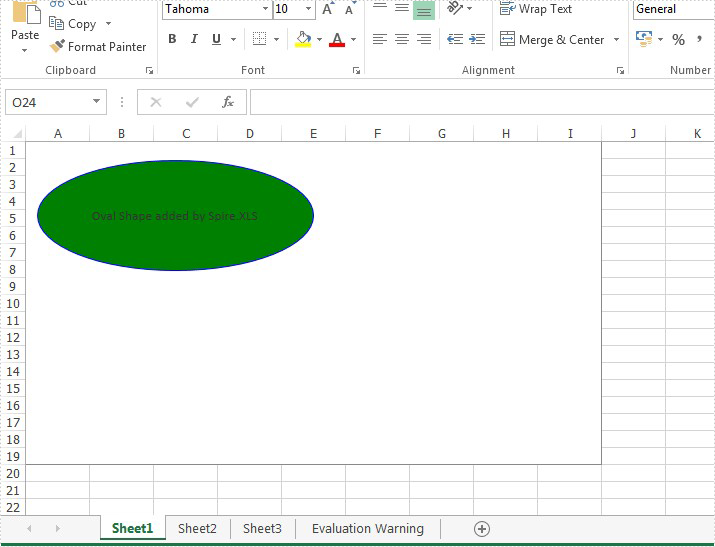
We have demonstrated how to insert textbox to Excel worksheet in C#. Starts from Spire.XLS v7.11.1, we have add a new method of chart.Shapes.AddOval(left,top,right,bottom); to enable developers to add oval shape to excel chart directly. Developers can also add the text contents to the oval shape and format the style for the oval. This article will describe clearly how to insert oval shape to Excel chart in C#.
Step 1: Create a workbook and get the first worksheet from the workbook.
Workbook workbook = new Workbook();
Worksheet sheet = workbook.Worksheets[0];
Step 2: Add a chart to the worksheet.
Chart chart = sheet.Charts.Add();
Step 3: Add oval shape to Excel chart.
var shape = chart.Shapes.AddOval(20, 60, 500,400);
Step 4: Add the text to the oval shape and set the text alignment on the shape.
shape.Text = "Oval Shape added by Spire.XLS";
shape.HAlignment = CommentHAlignType.Center;
shape.VAlignment = CommentVAlignType.Center;
Step 5: Format the color for the oval shape.
((XlsOvalShape)shape).Line.ForeColor = Color.Blue;
((XlsOvalShape)shape).Fill.ForeColor = Color.Green;
Step 6: Save the document to file.
workbook.SaveToFile("Result.xlsx",ExcelVersion.Version2010);
Effective screenshot of Oval shape added to the Excel chart:
Full codes:
using Spire.Xls;
using Spire.Xls.Core.Spreadsheet.Shapes;
using System.Drawing;
namespace AddOvalShape
{

    class Program
    {

        static void Main(string[] args)
        {
            {
                Workbook workbook = new Workbook();

                Worksheet sheet = workbook.Worksheets[0];

                Chart chart = sheet.Charts.Add();

                var shape = chart.Shapes.AddOval(20, 60, 500, 400);

                shape.Text = "Oval Shape added by Spire.XLS";

                shape.HAlignment = CommentHAlignType.Center;
                shape.VAlignment = CommentVAlignType.Center;

                ((XlsOvalShape)shape).Line.ForeColor = Color.Blue;
                ((XlsOvalShape)shape).Fill.ForeColor = Color.Green;

                workbook.SaveToFile("Result.xlsx", ExcelVersion.Version2010);

            }
        }
    }
}
How to Convert PowerPoint Document to SVG Images in C#, VB.NET
2016-10-24 08:38:01 Written by KoohjiSVG, short for scalable vector graphics, is a XML-based file format used to depict two-dimensional vector graphics. As SVG images are defined in XML text lines, they can be easily searched, indexed, scripted, and supported by most of the up to date web browsers. Therefore, office documents are often converted to SGV images for high fidelity viewing. Following sections will introduce how to convert PowerPoint documents to SVG images using Spire.Presentation in C# and VB.NET.
Code Snippet:
Step 1: Initialize an instance of Presentation class and load a sample PowerPoint document to it.
Presentation ppt = new Presentation();
ppt.LoadFromFile(@"C:\Users\Administrator\Desktop\sample.pptx");
Step 2: Convert PowerPoint document to byte array and store in a Queue object.
Queue<Byte[]> svgBytes = ppt.SaveToSVG();
Step 3: Initialize an instance of the FileStream class with the specified file path and creation mode. Dequeue the data in the Queue object and write to the stream.
int len = svgBytes.Count;
for (int i = 0; i < len; i++)
{
    FileStream fs = new FileStream(string.Format("result" + "{0}.svg", i), FileMode.Create);
    byte[] bytes = svgBytes.Dequeue();
    fs.Write(bytes, 0, bytes.Length);
}
Output:

Full Code:
using Spire.Presentation;
using System;
using System.Collections.Generic;
using System.IO;
namespace PPTtoSVG
{
    class Program
    {
        static void Main(string[] args)
        {
            Presentation ppt = new Presentation();
            ppt.LoadFromFile(@"C:\Users\Administrator\Desktop\sample.pptx");
            Queue<byte[]> svgBytes = ppt.SaveToSVG();
            int len = svgBytes.Count;
            for (int i = 0; i < len; i++)
            {
                FileStream fs = new FileStream(string.Format("result" + "{0}.svg", i), FileMode.Create);
                byte[] bytes = svgBytes.Dequeue();
                fs.Write(bytes, 0, bytes.Length);
                ppt.Dispose();
            }
        }
    }
}
Imports Spire.Presentation
Imports System.Collections.Generic
Imports System.IO
Namespace PPTtoSVG
	Class Program
		Private Shared Sub Main(args As String())
			Dim ppt As New Presentation()
			ppt.LoadFromFile("C:\Users\Administrator\Desktop\sample.pptx")
			Dim svgBytes As Queue(Of [Byte]()) = ppt.SaveToSVG()
			Dim len As Integer = svgBytes.Count
			For i As Integer = 0 To len - 1
				Dim fs As New FileStream(String.Format("result" + "{0}.svg", i), FileMode.Create)
				Dim bytes As Byte() = svgBytes.Dequeue()
				fs.Write(bytes, 0, bytes.Length)
				ppt.Dispose()
			Next
		End Sub
	End Class
End Namespace
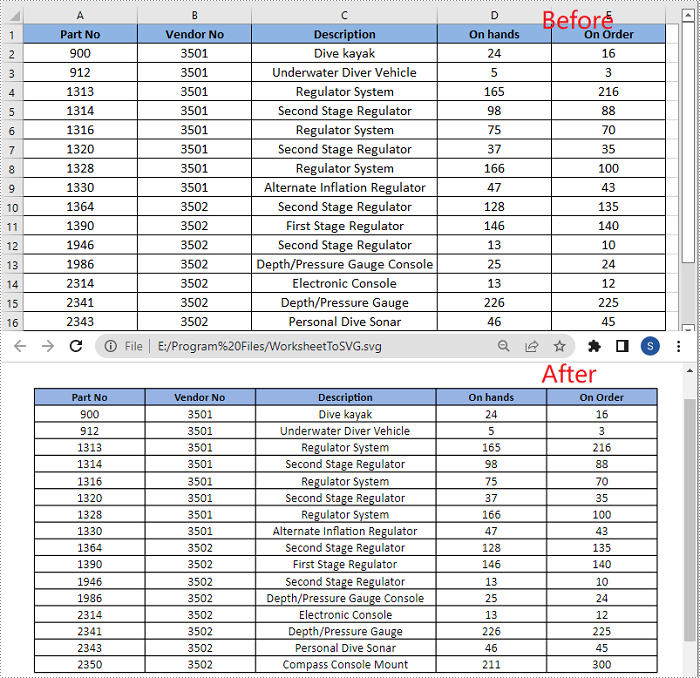
SVG, short for Scalable Vector Graphics, is a web-friendly vector image format. SVG has many advantages over other image formats. One of the most significant advantages is resolution independence, which means you can resize SVG images as needed without losing image quality. Sometimes, you may need to convert Excel files to SVG for web viewing. This article will demonstrate how to programmatically convert Excel to SVG in C# and VB.NET using Spire.XLS for .NET.
Install Spire.XLS for .NET
To begin with, you need to add the DLL files included in the Spire.XLS for .NET package as references in your .NET project. The DLL files can be either downloaded from this link or installed via NuGet.
PM> Install-Package Spire.XLS
Convert an Excel Worksheet to SVG using C# and VB.NET
Spire.XLS provides the Worksheet.SaveToSVGStream() method to convert an Excel worksheet to SVG. The detailed steps are as follows:
- Initialize an instance of the Workbook class.
- Load an Excel file using Workbook.LoadFromFile() method.
- Get a specific worksheet by its index through Workbook.Worksheets[int] property.
- Initialize an instance of the FileStream class.
- Save the worksheet to SVG using Worksheet.ToSVGStream(Stream, int, int, int, int) method.
- C#
- VB.NET
using Spire.Xls;
using System.IO;

namespace ConvertWorksheetToSVG
{
    class Program
    {
        static void Main(string[] args)
        {
            //Create an instance of Workbook class
            Workbook workbook = new Workbook();
            //Load an Excel file
            workbook.LoadFromFile("Sample1.xlsx");

            //Get the first worksheet
            Worksheet sheet = workbook.Worksheets[0];

            //Create an instance of FileStream class
            FileStream fs = new FileStream("E:\\Program Files\\WorksheetToSVG.svg", FileMode.Create);
            //Save the worksheet to SVG
            sheet.ToSVGStream(fs, 0, 0, 0, 0);
            fs.Flush();
            fs.Close();
        }
    }
}
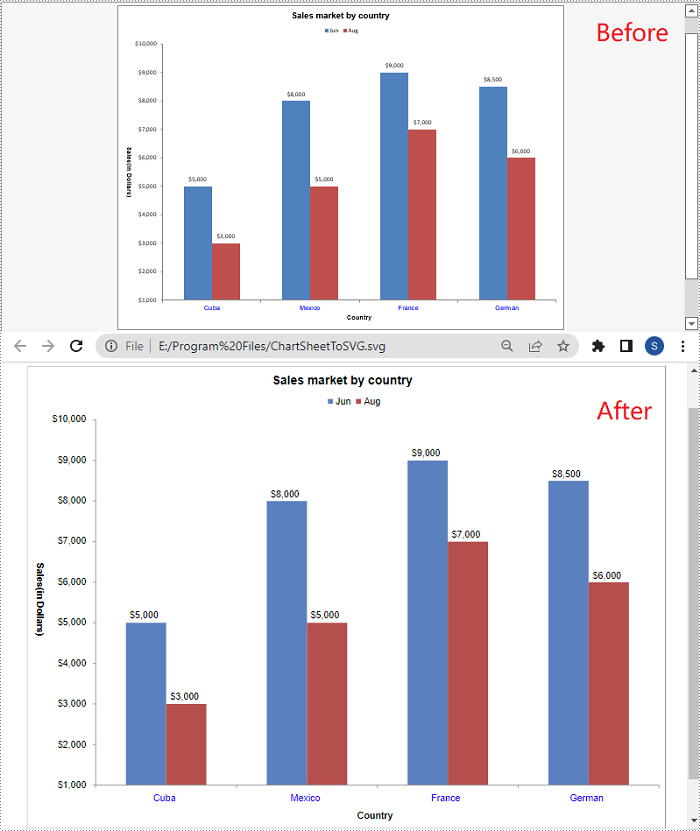
Convert an Excel Chart Sheet to SVG using C# and VB.NET
A chart sheet is a worksheet that only contains a chart. Spire.XLS allows you to convert a chart sheet to SVG by using the ChartSheet.ToSVGStream() method. The detailed steps are as follows:
- Initialize an instance of the Workbook class.
- Load an Excel file using Workbook.LoadFromFile() method.
- Get a specific chart sheet by its index through Workbook.Chartsheets[int] property.
- Initialize an instance of the FileStream class.
- Save the chart sheet to SVG using ChartSheet.ToSVGStream(Stream) method.
- C#
- VB.NET
using Spire.Xls;
using System.IO;

namespace ConvertChartSheetToSVG
{
    class Program
    {
        static void Main(string[] args)
        {
            //Create an instance of Workbook class
            Workbook workbook = new Workbook();
            //Load an Excel file
            workbook.LoadFromFile("Sample2.xlsx");

            //Get the first chart sheet
            ChartSheet chartSheet = workbook.Chartsheets[0];

            //Create an instance of FileStream class
            FileStream fs = new FileStream("E:\\ProgramFiles\\ChartSheetToSVG.svg", FileMode.Create);
            //Save the chart sheet to SVG
            chartSheet.ToSVGStream(fs);
            fs.Flush();
            fs.Close();
        }
    }
}
Apply for a Temporary License
If you'd like to remove the evaluation message from the generated documents, or to get rid of the function limitations, please request a 30-day trial license for yourself.
