
.NET (1327)
Children categories
Hyperlinks in Word documents are clickable links that allow readers to navigate to a website or another document. While hyperlinks can provide valuable supplemental information, sometimes they can also be distracting or unnecessarily annoying, so you may want to remove them. In this article, you will learn how to remove hyperlinks from a Word document in C# and VB.NET using Spire.Doc for .NET.
Install Spire.Doc for .NET
To begin with, you need to add the DLL files included in the Spire.Doc for.NET package as references in your .NET project. The DLL files can be either downloaded from this link or installed via NuGet.
PM> Install-Package Spire.Doc
Remove All the Hyperlinks in a Word Document
To delete all hyperlinks in a Word document at once, you'll need to find all the hyperlinks in the document and then create a custom method FlattenHyperlinks() to flatten them. The following are the detailed steps.
- Create a Document object.
- Load a sample Word document using Document.LoadFromFile() method.
- Find all the hyperlinks in the document using custom method FindAllHyperlinks().
- Loop through the hyperlinks and flatten all of them using custom method FlattenHyperlinks().
- Save the result document using Document.SaveToFile() method.
- C#
- VB.NET
using System.Drawing;
using Spire.Doc;
using Spire.Doc.Documents;
using System.Collections.Generic;
using Spire.Doc.Fields;


namespace removeWordHyperlink
{
    class Program
    {
        static void Main(string[] args)
        {
            //Create a Document instance
            Document doc = new Document();

            //Load a sample Word document
            doc.LoadFromFile("Hyperlink.docx");

            //Find all hyperlinks
            List<Field> hyperlinks = FindAllHyperlinks(doc);

            //Flatten all hyperlinks
            for (int i = hyperlinks.Count - 1; i >= 0; i--)
            {
                FlattenHyperlinks(hyperlinks[i]);
            }

            //Save the result document
            doc.SaveToFile("RemoveHyperlinks.docx", FileFormat.Docx);

        }

        //Create a method FindAllHyperlinks() to get all the hyperlinks from the sample document
        private static List<Field> FindAllHyperlinks(Document document)
        {
            List<Field> hyperlinks = new List<Field>();

            //Iterate through the items in the sections to find all hyperlinks
            foreach (Section section in document.Sections)
            {
                foreach (DocumentObject sec in section.Body.ChildObjects)
                {
                    if (sec.DocumentObjectType == DocumentObjectType.Paragraph)
                    {
                        foreach (DocumentObject para in (sec as Paragraph).ChildObjects)
                        {
                            if (para.DocumentObjectType == DocumentObjectType.Field)
                            {
                                Field field = para as Field;

                                if (field.Type == FieldType.FieldHyperlink)
                                {
                                    hyperlinks.Add(field);
                                }
                            }
                        }
                    }
                }
            }
            return hyperlinks;
        }

        //Create a method FlattenHyperlinks() to flatten the hyperlink field
        private static void FlattenHyperlinks(Field field)
        {
            int ownerParaIndex = field.OwnerParagraph.OwnerTextBody.ChildObjects.IndexOf(field.OwnerParagraph);
            int fieldIndex = field.OwnerParagraph.ChildObjects.IndexOf(field);
            Paragraph sepOwnerPara = field.Separator.OwnerParagraph;
            int sepOwnerParaIndex = field.Separator.OwnerParagraph.OwnerTextBody.ChildObjects.IndexOf(field.Separator.OwnerParagraph);
            int sepIndex = field.Separator.OwnerParagraph.ChildObjects.IndexOf(field.Separator);
            int endIndex = field.End.OwnerParagraph.ChildObjects.IndexOf(field.End);
            int endOwnerParaIndex = field.End.OwnerParagraph.OwnerTextBody.ChildObjects.IndexOf(field.End.OwnerParagraph);
            FormatFieldResultText(field.Separator.OwnerParagraph.OwnerTextBody, sepOwnerParaIndex, endOwnerParaIndex, sepIndex, endIndex);

            field.End.OwnerParagraph.ChildObjects.RemoveAt(endIndex);

            for (int i = sepOwnerParaIndex; i >= ownerParaIndex; i--)
            {
                if (i == sepOwnerParaIndex && i == ownerParaIndex)
                {
                    for (int j = sepIndex; j >= fieldIndex; j--)
                    {
                        field.OwnerParagraph.ChildObjects.RemoveAt(j);

                    }
                }
                else if (i == ownerParaIndex)
                {
                    for (int j = field.OwnerParagraph.ChildObjects.Count - 1; j >= fieldIndex; j--)
                    {
                        field.OwnerParagraph.ChildObjects.RemoveAt(j);
                    }

                }
                else if (i == sepOwnerParaIndex)
                {
                    for (int j = sepIndex; j >= 0; j--)
                    {
                        sepOwnerPara.ChildObjects.RemoveAt(j);
                    }
                }
                else
                {
                    field.OwnerParagraph.OwnerTextBody.ChildObjects.RemoveAt(i);
                }
            }
        }

        //Create a method FormatFieldResultText() to remove the font color and underline format of the hyperlinks
        private static void FormatFieldResultText(Body ownerBody, int sepOwnerParaIndex, int endOwnerParaIndex, int sepIndex, int endIndex)
        {
            for (int i = sepOwnerParaIndex; i <= endOwnerParaIndex; i++)
            {
                Paragraph para = ownerBody.ChildObjects[i] as Paragraph;
                if (i == sepOwnerParaIndex && i == endOwnerParaIndex)
                {
                    for (int j = sepIndex + 1; j < endIndex; j++)
                    {
                        FormatText(para.ChildObjects[j] as TextRange);
                    }

                }
                else if (i == sepOwnerParaIndex)
                {
                    for (int j = sepIndex + 1; j < para.ChildObjects.Count; j++)
                    {
                        FormatText(para.ChildObjects[j] as TextRange);
                    }
                }
                else if (i == endOwnerParaIndex)
                {
                    for (int j = 0; j < endIndex; j++)
                    {
                        FormatText(para.ChildObjects[j] as TextRange);
                    }
                }
                else
                {
                    for (int j = 0; j < para.ChildObjects.Count; j++)
                    {
                        FormatText(para.ChildObjects[j] as TextRange);
                    }
                }
            }
        }

        //Create a method FormatText() to change the color of the text to black and remove the underline
        private static void FormatText(TextRange tr)
        {
            //Set the text color to black
            tr.CharacterFormat.TextColor = Color.Black;

            //Set the text underline style to none
            tr.CharacterFormat.UnderlineStyle = UnderlineStyle.None;
        }
    }
}
Apply for a Temporary License
If you'd like to remove the evaluation message from the generated documents, or to get rid of the function limitations, please request a 30-day trial license for yourself.
SVG (Scalable Vector Graphics) is an image file format used for rendering two-dimensional images on the web. Comparing with other image file formats, SVG has many advantages such as supporting interactivity and animation, allowing users to search, index, script, and compress/enlarge images without losing quality. Occasionally, you may need to convert PDF files to SVG file format, and this article will demonstrate how to accomplish this task using Spire.PDF for .NET.
- Convert a PDF File to SVG in C#/VB.NET
- Convert Selected PDF Pages to SVG in C#/VB.NET
- Convert a PDF File to SVG with Custom Width and Height in C#/VB.NET
Install Spire.PDF for .NET
To begin with, you need to add the DLL files included in the Spire.PDF for.NET package as references in your .NET project. The DLLs files can be either downloaded from this link or installed via NuGet.
PM> Install-Package Spire.PDF
Convert a PDF File to SVG in C#/VB.NET
Spire.PDF for .NET offers the PdfDocument.SaveToFile(String, FileFormat) method to convert each page in a PDF file to a single SVG file. The detailed steps are as follows.
- Create a PdfDocument object.
- Load a sample PDF file using PdfDocument.LoadFromFile() method.
- Convert the PDF file to SVG using PdfDocument.SaveToFile(String, FileFormat) method.
- C#
- VB.NET
using Spire.Pdf;

namespace ConvertPDFtoSVG
{
    class Program
    {
        static void Main(string[] args)
        {
            //Create a PdfDocument object
            PdfDocument document = new PdfDocument();

            //Load a sample PDF file
            document.LoadFromFile("input.pdf");

            //Convert PDF to SVG
            document.SaveToFile("PDFtoSVG.svg", FileFormat.SVG);
        }
    }
}

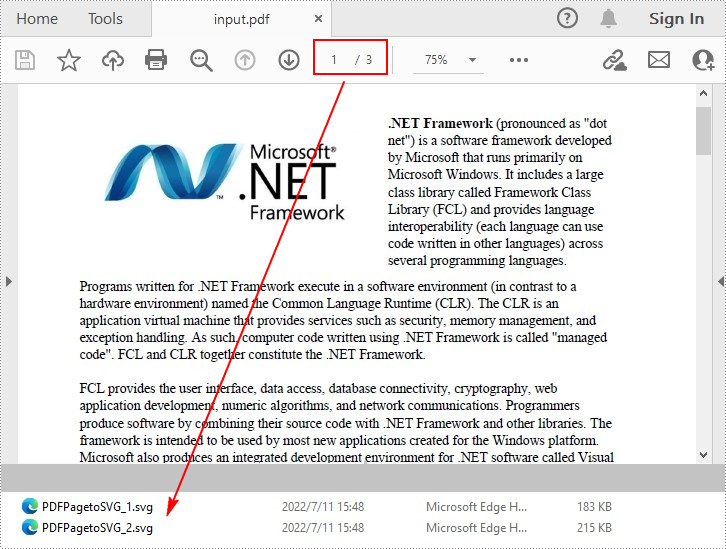
Convert Selected PDF Pages to SVG in C#/VB.NET
The PdfDocument.SaveToFile(String, Int32, Int32, FileFormat) method allows you to convert the specified pages in a PDF file to SVG files. The detailed steps are as follows.
- Create a PdfDocument object.
- Load a sample PDF file using PdfDocument.LoadFromFile() method.
- Convert selected PDF pages to SVG using PdfDocument.SaveToFile(String, Int32, Int32, FileFormat) method.
- C#
- VB.NET
using Spire.Pdf;

namespace PDFPagetoSVG
{
    class Program
    {
        static void Main(string[] args)
        {
            //Create a PdfDocument object
            PdfDocument doc = new PdfDocument();

            //Load a sample PDF file
            doc.LoadFromFile("input.pdf");

            //Convert selected PDF pages to SVG
            doc.SaveToFile("PDFPagetoSVG.svg", 1, 2, FileFormat.SVG);
        }
    }
}
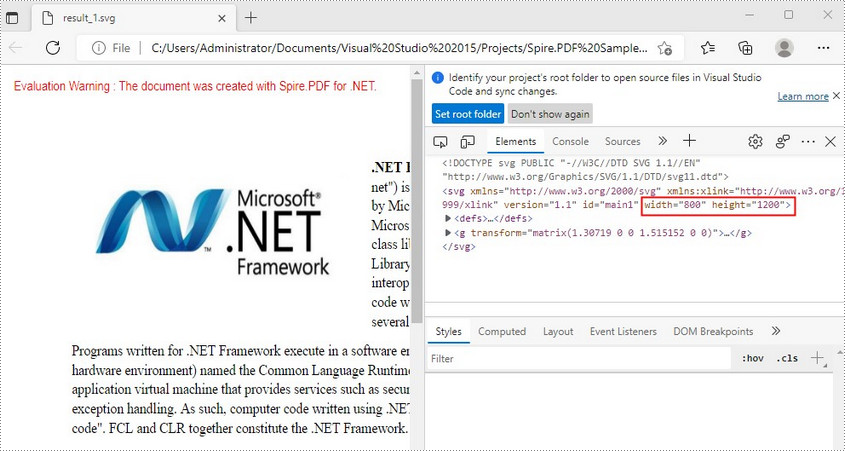
Convert a PDF File to SVG with Custom Width and Height in C#/VB.NET
The PdfConvertOptions.SetPdfToSvgOptions() method offered by Spire.PDF for .NET allows you to specify the width and height of output SVG file. The detailed steps are as follows.
- Create a PdfDocument object.
- Load a sample PDF file using PdfDocument.LoadFromFile() method.
- Set PDF convert options using PdfDocument.ConvertOptions property.
- Specify the width and height of output SVG file using PdfConvertOptions.SetPdfToSvgOptions() method.
- Convert the PDF file to SVG using PdfDocument.SaveToFile() method.
- C#
- VB.NET
using Spire.Pdf;

namespace PDFtoSVG
{
    class Program
    {
        static void Main(string[] args)
        {
            //Create a PdfDocument object
            PdfDocument document = new PdfDocument();

            //Load a sample PDF file
            document.LoadFromFile("input.pdf");

            //Specify the width and height of output SVG file
            PdfToSvgConverter converter = new PdfToSvgConverter(inputFile);
            converter.SvgOptions.ScaleX = (float)0.5;
            converter.SvgOptions.ScaleY = (float)0.5;
            converter.Convert(outputFile);


            //Convert PDF to SVG
            document.SaveToFile("result.svg", FileFormat.SVG);
        }
    }
}
Apply for a Temporary License
If you'd like to remove the evaluation message from the generated documents, or to get rid of the function limitations, please request a 30-day trial license for yourself.
In this article, we will explain how to copy an existing chart within the same PowerPoint document or between PowerPoint documents by using Spire.Presentation. Below example called a main method public IChart CreateChart(IChart baseChart, RectangleF rectangle, int nIndex).
There are three Parameters passed in this method:
- baseChart: The source chart.
- rectangle: The area that the chart will be copied to.
- nIndex: The index of the rectangle shape. For example, -1 means append it as the last shape of the slide, 0 means append as the first shape.
Now refer to the following steps:
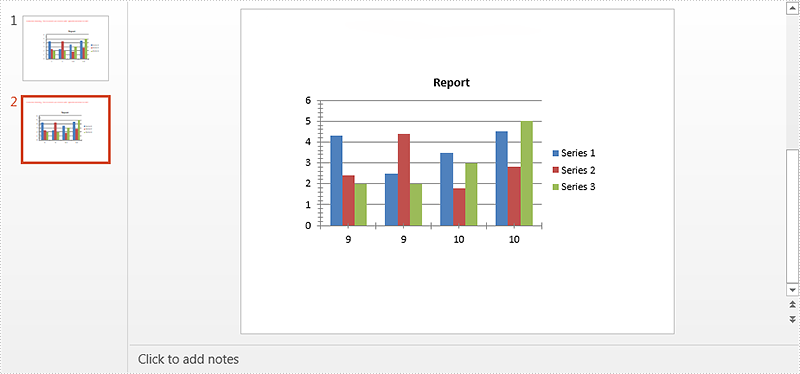
Copy chart within the same PowerPoint document
Step 1: Instantiate a Presentation object and load the PowerPoint document.
Presentation ppt = new Presentation();
ppt.LoadFromFile("Sample.pptx");
Step 2: Get the chart that is going to be copied.
IChart chart = ppt.Slides[0].Shapes[0] as IChart;
Step 3: Copy the chart from the first slide to the specified location of the second slide within the same document.
ppt.Slides[1].Shapes.CreateChart(chart, new RectangleF(100, 100, 500, 300), 0);
Step 4: Save the document.
ppt.SaveToFile("TestResult.pptx", FileFormat.Pptx2010);
Screenshot of copying chart within the same PowerPoint document:
Copy chart between PowerPoint documents
Step 1: Load the first PowerPoint document.
Presentation ppt1 = new Presentation();
ppt1.LoadFromFile("Sample.pptx");
Step 2: Get the chart that is going to be copied.
IChart chart = ppt1.Slides[0].Shapes[0] as IChart;
Step 3: Load the second PowerPoint document.
Presentation ppt2 = new Presentation();
ppt2.LoadFromFile("Dest.pptx");
Step 4: Copy chart from the first document to the specified location of the second document.
ppt2.Slides[0].Shapes.CreateChart(chart, new RectangleF(100, 100, 500, 300), -1);
Step 5: Save the second document.
ppt2.SaveToFile("TestResult2.pptx", FileFormat.Pptx2010);
Screenshot of copying chart between PowerPoint documents:
Full code:
Copy chart within the same PowerPoint document
using System.Drawing;
using Spire.Presentation;
using Spire.Presentation.Charts;

namespace Copy_Chart
{
    class Program
    {
        static void Main(string[] args)
        {
            Presentation ppt = new Presentation();
            ppt.LoadFromFile("Sample.pptx");
            IChart chart = ppt.Slides[0].Shapes[0] as IChart;
            ppt.Slides[1].Shapes.CreateChart(chart, new RectangleF(100, 100, 500, 300), 0);
            ppt.SaveToFile("TestResult.pptx", FileFormat.Pptx2010);
        }
    }
}
Copy chart between PowerPoint documents
using System.Drawing;
using Spire.Presentation;
using Spire.Presentation.Charts;

namespace Copy_Chart
{
    class Program
    {
        static void Main(string[] args)
        {
            Presentation ppt1 = new Presentation();
            ppt1.LoadFromFile("Sample.pptx");
            IChart chart = ppt1.Slides[0].Shapes[0] as IChart;
            Presentation ppt2 = new Presentation();
            ppt2.LoadFromFile("Dest.pptx");
            ppt2.Slides[0].Shapes.CreateChart(chart, new RectangleF(100, 100, 500, 300), -1);
            ppt2.SaveToFile("TestResult2.pptx", FileFormat.Pptx2010);
        }
    }
}
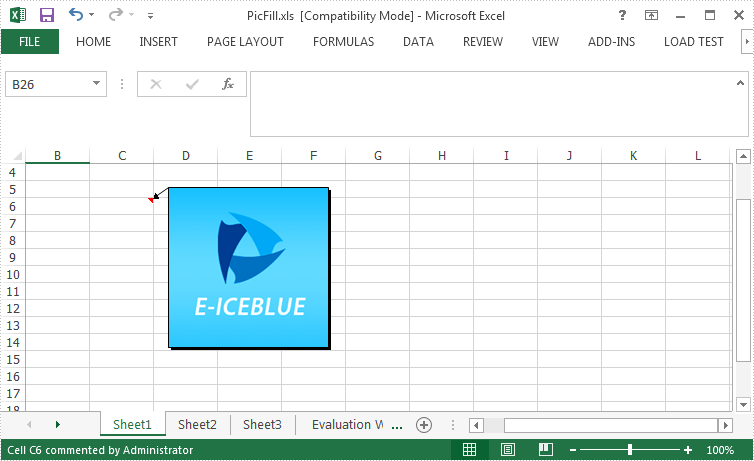
Spire.XLS enable programmers to insert, modify as well as format comments in Excel. Also, it allows users to fill a comment with solid color, gradient, pattern or a picture to change the look of the comment. This article is going to introduce how to set background image for a comment in Excel using Spire.XLS.
Code Snippet:
Step 1: Initialize an instance of Wordbook and get the first worksheet.
Workbook wb = new Workbook();
Worksheet sheet = wb.Worksheets[0];
Step 2: Fill the comment with a customized background picture.
Image image = Image.FromFile(@"C: \Users\Administrator\Desktop\logo.png");
sheet.Range["C6"].Comment.Fill.CustomPicture(image, "logo.png");
Step 3: Re-set the size of comment box.
sheet.Range["C6"].Comment.Height = image.Height;
sheet.Range["C6"].Comment.Width = image.Width;
Step 4: Save the file.
wb.SaveToFile("PicFillComment.xls", ExcelVersion.Version97to2003);
Output:
Full Code:
using Spire.Xls;
using System.Drawing;
namespace SetPictureFill
{
    class Program
    {

        static void Main(string[] args)
        {
            {

                Workbook wb = new Workbook();
                Worksheet sheet = wb.Worksheets[0];

                Image image = Image.FromFile(@"C: \Users\Administrator\Desktop\logo.png");
                sheet.Range["C6"].Comment.Fill.CustomPicture(image, "logo.png");
                sheet.Range["C6"].Comment.Height = image.Height;
                sheet.Range["C6"].Comment.Width = image.Width;

                wb.SaveToFile("PicFill.xls", ExcelVersion.Version97to2003);

            }

        }
    }
}
Imports Spire.Xls
Imports System.Drawing
Namespace SetPictureFill
	Class Program

		Private Shared Sub Main(args As String())
			If True Then

				Dim wb As New Workbook()
				Dim sheet As Worksheet = wb.Worksheets(0)

				Dim image__1 As Image = Image.FromFile("C: \Users\Administrator\Desktop\logo.png")
				sheet.Range("C6").Comment.Fill.CustomPicture(image__1, "logo.png")
				sheet.Range("C6").Comment.Height = image__1.Height
				sheet.Range("C6").Comment.Width = image__1.Width

				wb.SaveToFile("PicFill.xls", ExcelVersion.Version97to2003)

			End If

		End Sub
	End Class
End Namespace
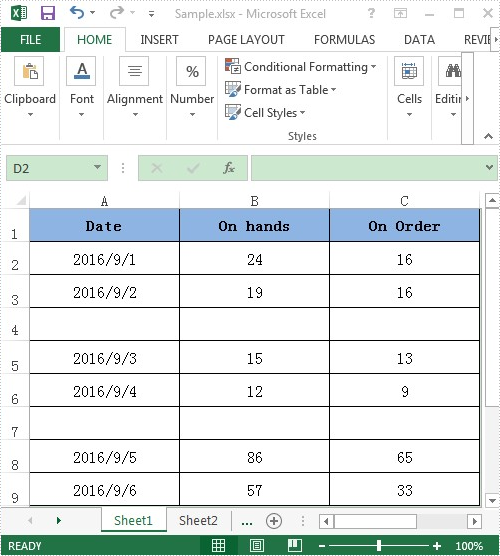
Apart from creating chart with continuous data range, Spire.XLS also supports to create chart with discontinuous data range by calling the XlsRange.AddCombinedRange(CellRange cr) method. This example explains a quick solution of how to achieve this task in C# with the help of Spire.XLS.
For demonstration, here we used a template excel document, in which you can see there are some blank rows among the data, in other words, the data range is discontinuous.
Here comes to the detail steps:
Step 1: Instantiate a Wordbook object, load the excel document and get its first worksheet.
Workbook book = new Workbook();
book.LoadFromFile("Sample.xlsx");
Worksheet sheet = book.Worksheets[0];
Step 2: Add a column chart to the first worksheet and set the position of the chart.
Chart chart = sheet.Charts.Add(ExcelChartType.ColumnClustered);
chart.SeriesDataFromRange = false;
//Set chart position
chart.LeftColumn = 5;
chart.TopRow = 1;
chart.RightColumn = 13;
chart.BottomRow = 10;
Step 3: Add two series to the chart, set data source for category labels and values of the series with discontinuous data range.
//Add the first series
var cs1 = (ChartSerie)chart.Series.Add();
//Set name of the serie
cs1.Name = sheet.Range["B1"].Value;
//Set data source for Category Labels and Values of the serie with discontinuous data range
cs1.CategoryLabels = sheet.Range["A2:A3"].AddCombinedRange(sheet.Range["A5:A6"]).AddCombinedRange(sheet.Range["A8:A9"]);
cs1.Values = sheet.Range["B2:B3"].AddCombinedRange(sheet.Range["B5:B6"]).AddCombinedRange(sheet.Range["B8:B9"]);
//Specify the serie type
cs1.SerieType = ExcelChartType.ColumnClustered;

//Add the second series
var cs2 = (ChartSerie)chart.Series.Add();
cs2.Name = sheet.Range["C1"].Value;
cs2.CategoryLabels = cs2.CategoryLabels = sheet.Range["A2:A3"].AddCombinedRange(sheet.Range["A5:A6"]).AddCombinedRange(sheet.Range["A8:A9"]);
cs2.Values = sheet.Range["C2:C3"].AddCombinedRange(sheet.Range["C5:C6"]).AddCombinedRange(sheet.Range["C8:C9"]);
cs2.SerieType = ExcelChartType.ColumnClustered;
Step 4: Save the excel document.
book.SaveToFile("Result.xlsx", FileFormat.Version2010);
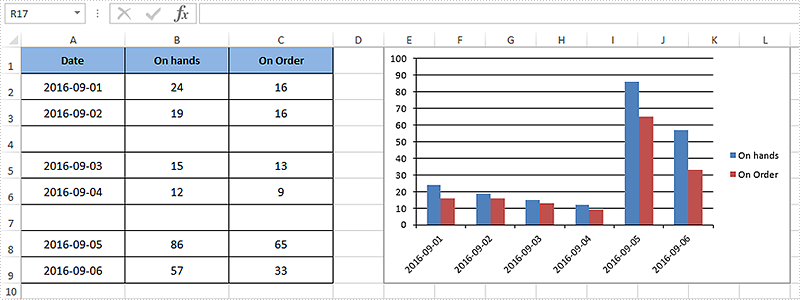
After executing the above example code, a column chart with discontinuous data range was added to the worksheet as shown below.
Full code:
using Spire.Xls;
using Spire.Xls.Charts;

namespace Assign_discontinuous_range_for_chart
{
    class Program
    {
        static void Main(string[] args)
        {
            Workbook book = new Workbook();
            book.LoadFromFile("Sample.xlsx");
            Worksheet sheet = book.Worksheets[0];

            Chart chart = sheet.Charts.Add(ExcelChartType.ColumnClustered);
            chart.SeriesDataFromRange = false;
            chart.LeftColumn = 5;
            chart.TopRow = 1;
            chart.RightColumn = 13;
            chart.BottomRow = 10;

            var cs1 = (ChartSerie)chart.Series.Add();
            cs1.Name = sheet.Range["B1"].Value;
            cs1.CategoryLabels = sheet.Range["A2:A3"].AddCombinedRange(sheet.Range["A5:A6"]).AddCombinedRange(sheet.Range["A8:A9"]);
            cs1.Values = sheet.Range["B2:B3"].AddCombinedRange(sheet.Range["B5:B6"]).AddCombinedRange(sheet.Range["B8:B9"]);
            cs1.SerieType = ExcelChartType.ColumnClustered;

            var cs2 = (ChartSerie)chart.Series.Add();
            cs2.Name = sheet.Range["C1"].Value;
            cs2.CategoryLabels = sheet.Range["A2:A3"].AddCombinedRange(sheet.Range["A5:A6"]).AddCombinedRange(sheet.Range["A8:A9"]);
            cs2.Values = sheet.Range["C2:C3"].AddCombinedRange(sheet.Range["C5:C6"]).AddCombinedRange(sheet.Range["C8:C9"]);
            cs2.SerieType = ExcelChartType.ColumnClustered;

            chart.ChartTitle = string.Empty;

            book.SaveToFile("Result.xlsx", FileFormat.Version2010);
            System.Diagnostics.Process.Start("Result.xlsx");
        }
    }
}
Set Different Header or Footer for Odd and Even Pages in Excel in C#, VB.NET
2016-09-22 00:59:10 Written by KoohjiHeaders or footers are added to a worksheet to deliver some extra information about each page. By default, the headers or footers on odd and even pages are the same. However, we are able to set different headers or footers for odd and even pages to display different information.
Following sections demonstrate how to create different odd and even page headers/footers using Spire.XLS.
Code Snippet:
Step 1: Initialize an instance of Workbook and get the first worksheet.
Workbook wb = new Workbook();
Worksheet sheet = wb.Worksheets[0];
Step 2: Set the value of DifferentOddEven as 1, which indicates that headers/footers for odd and even pages are different.
sheet.PageSetup.DifferentOddEven = 1;
Step 3: Set header and footer string for odd pages, and format the string.
sheet.PageSetup.OddHeaderString = "&\"Arial\"&12&B&KFFC000Odd_Header";
sheet.PageSetup.OddFooterString = "&\"Arial\"&12&B&KFFC000Odd_Footer";
Step 4: Set different header and footer string for even pages, and format the string with different color.
sheet.PageSetup.EvenHeaderString = "&\"Arial\"&12&B&KFF0000Even_Header";
sheet.PageSetup.EvenFooterString = "&\"Arial\"&12&B&KFF0000Even_Footer";
Step 5: Save the file.
wb.SaveToFile("OddEvenHeaderFooter.xlsx", ExcelVersion.Version2013);
Output:

Full Code:
using Spire.Xls;
namespace SetDifferentHeaderorFooter
{
    class Program
    {
        static void Main(string[] args)
        {
            Workbook wb = new Workbook();
            Worksheet sheet = wb.Worksheets[0];

            sheet.Range["A1"].Text = "Page 1";
            sheet.Range["J1"].Text = "Page 2";

            sheet.PageSetup.DifferentOddEven = 1;
            sheet.PageSetup.OddHeaderString = "&\"Arial\"&12&B&KFFC000Odd_Header";
            sheet.PageSetup.OddFooterString = "&\"Arial\"&12&B&KFFC000Odd_Footer";
            sheet.PageSetup.EvenHeaderString = "&\"Arial\"&12&B&KFF0000Even_Header";
            sheet.PageSetup.EvenFooterString = "&\"Arial\"&12&B&KFF0000Even_Footer";

            wb.SaveToFile("OddEvenHeaderFooter.xlsx", ExcelVersion.Version2013);
        }
    }
}
Imports Spire.Xls
Namespace SetDifferentHeaderorFooter
	Class Program
		Private Shared Sub Main(args As String())
			Dim wb As New Workbook()
			Dim sheet As Worksheet = wb.Worksheets(0)

			sheet.Range("A1").Text = "Page 1"
			sheet.Range("J1").Text = "Page 2"

			sheet.PageSetup.DifferentOddEven = 1
			sheet.PageSetup.OddHeaderString = "&""Arial""&12&B&KFFC000Odd_Header"
			sheet.PageSetup.OddFooterString = "&""Arial""&12&B&KFFC000Odd_Footer"
			sheet.PageSetup.EvenHeaderString = "&""Arial""&12&B&KFF0000Even_Header"
			sheet.PageSetup.EvenFooterString = "&""Arial""&12&B&KFF0000Even_Footer"

			wb.SaveToFile("OddEvenHeaderFooter.xlsx", ExcelVersion.Version2013)
		End Sub
	End Class
End Namespace
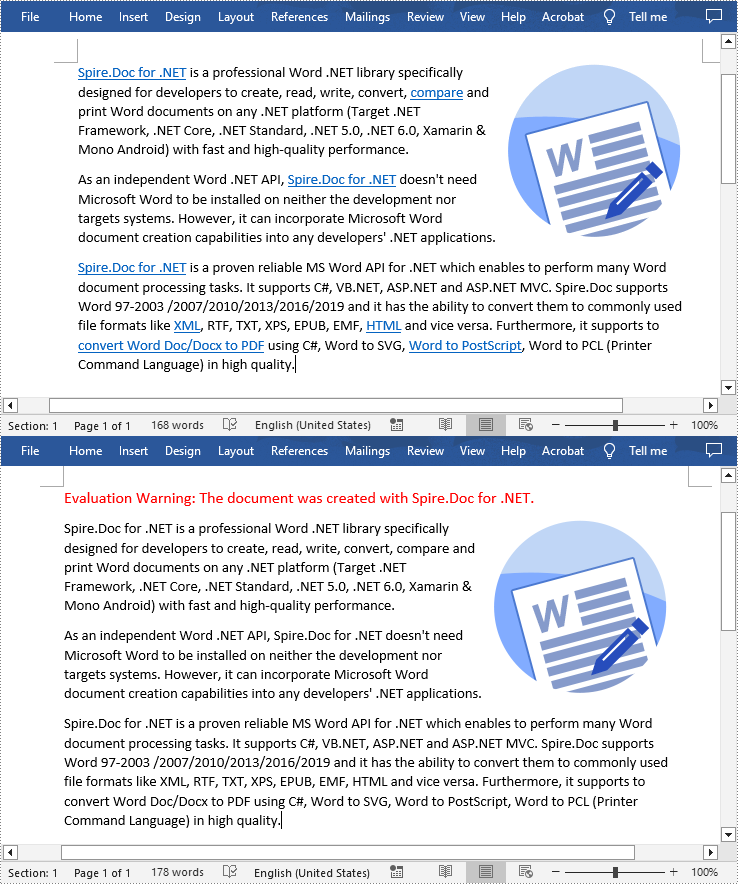
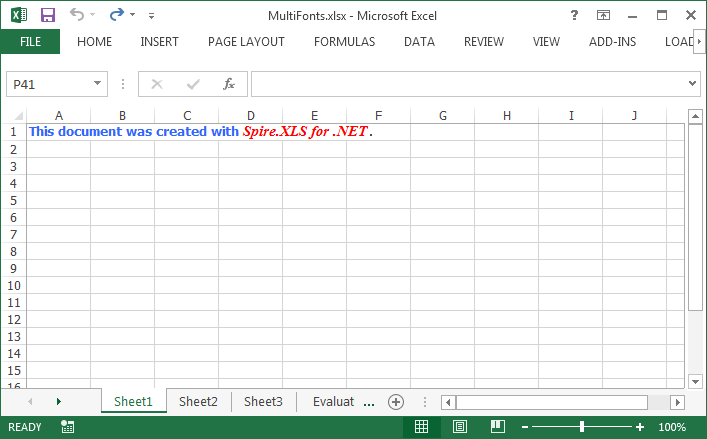
To make the text within a cell diverse, we can apply different font to different range of characters. Spire.XLS also provides the ability to apply multiple fonts in a single cell by using RichText.SetFont() method. This article presents how to create different fonts in a workbook and apply them to a certain cell in C# and VB.NET.
Code Snippet:
Step 1: Initialize an instance of Workbook class and get the first worksheet.
Workbook wb = new Workbook();
Worksheet sheet = wb.Worksheets[0];
Step 2: Create a font object in workbook, setting the font color, size and type.
ExcelFont font1 = wb.CreateFont();
font1.KnownColor = ExcelColors.LightBlue;
font1.IsBold = true;
font1.Size = 10;
Step 3: Create another font object specifying its properties.
ExcelFont font2 = wb.CreateFont();
font2.KnownColor = ExcelColors.Red;
font2.IsBold = true;
font2.IsItalic = true;
font2.FontName = "Times New Roman";
font2.Size = 11;
Step 4: Write a RichText string to the cell 'A1', and set the font for the specific range of characters using RichText.SetFont() method.
RichText richText = sheet.Range["A1"].RichText;
richText.Text = "This document was created with Spire.XLS for .NET.";
richText.SetFont(0, 29, font1);
richText.SetFont(31, 48, font2);
Step 5: Save the file.
wb.SaveToFile("MultiFonts.xlsx", ExcelVersion.Version2010);
Output:
Full Code:
using Spire.Xls;
namespace ApplyMutipleFont
{
    class Program
    {

        static void Main(string[] args)
        {
            Workbook wb = new Workbook();
            Worksheet sheet = wb.Worksheets[0];

            ExcelFont font1 = wb.CreateFont();
            font1.KnownColor = ExcelColors.LightBlue;
            font1.IsBold = true;
            font1.Size = 10;

            ExcelFont font2 = wb.CreateFont();
            font2.KnownColor = ExcelColors.Red;
            font2.IsBold = true;
            font2.IsItalic = true;
            font2.FontName = "Times New Roman";
            font2.Size = 11;

            RichText richText = sheet.Range["A1"].RichText;
            richText.Text = "This document was created with Spire.XLS for .NET.";
            richText.SetFont(0, 29, font1);
            richText.SetFont(31, 48, font2);

            wb.SaveToFile("MultiFonts.xlsx", ExcelVersion.Version2010);
        }
    }
}
Imports Spire.Xls
Namespace ApplyMutipleFont
	Class Program

		Private Shared Sub Main(args As String())
			Dim wb As New Workbook()
			Dim sheet As Worksheet = wb.Worksheets(0)

			Dim font1 As ExcelFont = wb.CreateFont()
			font1.KnownColor = ExcelColors.LightBlue
			font1.IsBold = True
			font1.Size = 10

			Dim font2 As ExcelFont = wb.CreateFont()
			font2.KnownColor = ExcelColors.Red
			font2.IsBold = True
			font2.IsItalic = True
			font2.FontName = "Times New Roman"
			font2.Size = 11

			Dim richText As RichText = sheet.Range("A1").RichText
			richText.Text = "This document was created with Spire.XLS for .NET."
			richText.SetFont(0, 29, font1)
			richText.SetFont(31, 48, font2)

			wb.SaveToFile("MultiFonts.xlsx", ExcelVersion.Version2010)
		End Sub
	End Class
End Namespace
Except for creating signature, Spire.PDF also allows us to add signature field to PDF using the PdfSignatureField class and the PdfFieldCollection.Add (PdfField field) method in Spire.Pdf.Fields namespace. Once added, we can click on the field to add signature manually to the PDF document.
This article explains how to add a signature field to the specified page of a PDF document using Spire.PDF.
Detail steps and code snippets:
Step 1: Create a new PDF document and add a page to it.
PdfDocument pdfdoc = new PdfDocument();
PdfPageBase page = pdfdoc.Pages.Add();
Step 2: Use PdfSignatureField class to add a named signature field to the specified page by passing two parameters: page and name of the signature field.
PdfSignatureField signaturefield = new PdfSignatureField(page, "Signature");
Step 3: Set border width, style, color, highlight mode and bounds for the signature field.
signaturefield.BorderWidth = 1.0f;
signaturefield.BorderStyle = PdfBorderStyle.Solid;
signaturefield.BorderColor = new PdfRGBColor(System.Drawing.Color.Black);
signaturefield.HighlightMode = PdfHighlightMode.Outline;
signaturefield.Bounds = new RectangleF(100, 100, 100, 100);
Step 4: Add the signature field to the document's root fields.
pdfdoc.Form.Fields.Add(signaturefield);
Step 5: Save the document.
pdfdoc.SaveToFile("AddSignField.pdf", FileFormat.PDF);
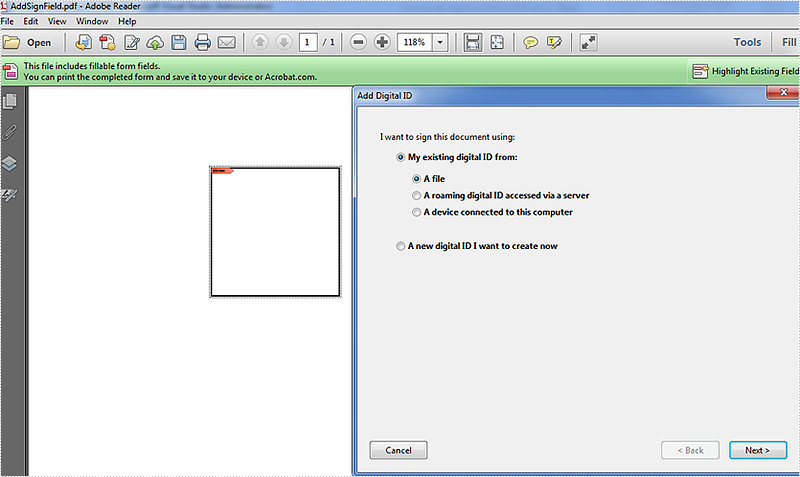
After running the code, we'll get the result PDF file with a signature field on the first page, effective screenshot as shown below:
Full codes:
using System.Drawing;
using Spire.Pdf;
using Spire.Pdf.Fields;
using Spire.Pdf.Graphics;

namespace Add_Signature_Filed_to_PDF
{
    class Program
    {
        static void Main(string[] args)
        {
            PdfDocument pdfdoc = new PdfDocument();
            PdfPageBase page = pdfdoc.Pages.Add();

            PdfSignatureField signaturefield = new PdfSignatureField(page, "Signature");
            signaturefield.BorderWidth = 1.0f;
            signaturefield.BorderStyle = PdfBorderStyle.Solid;
            signaturefield.BorderColor = new PdfRGBColor(System.Drawing.Color.Black);
            signaturefield.HighlightMode = PdfHighlightMode.Outline;
            signaturefield.Bounds = new RectangleF(100, 100, 100, 100);
            pdfdoc.Form.Fields.Add(signaturefield);
            pdfdoc.SaveToFile("AddSignField.pdf", FileFormat.PDF);
        }
    }
}
Sometimes, we need to extract the OLE Objects that are embedded in a word document. With Spire.Doc, we can easily achieve this task with a few lines of code. This article explains how to extract the embedded PDF document and Excel workbook from a word document using Spire.Doc and C#.
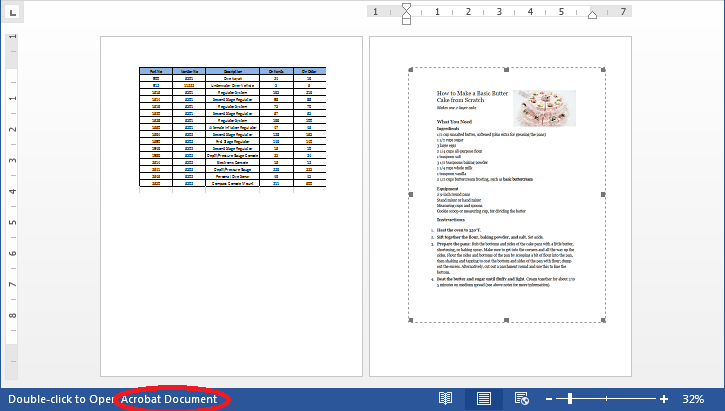
Below is the screenshot of the word document:
Detail steps:
Step 1: Instantiate a Document object and load the word document.
Document doc = new Document();
doc.LoadFromFile("OleObject.docx");
Step 2: Traverse through the word document, find the Ole Objects, then get the Object type of each Ole Object to determine if the Ole Object is PDF document or Excel workbook and write the native data of the Ole object into a new PDF document or an Excel workbook.
//Traverse through all sections of the word document
foreach (Section sec in doc.Sections)
{
    //Traverse through all Child Objects in the body of each section
    foreach (DocumentObject obj in sec.Body.ChildObjects)
    {
        if (obj is Paragraph)
        {
            Paragraph par = obj as Paragraph;
            //Traverse through all Child Objects in Paragraph
            foreach (DocumentObject o in par.ChildObjects)
            {
                //Find the Ole Objects and Extract
                if (o.DocumentObjectType == DocumentObjectType.OleObject)
                {
                    DocOleObject Ole = o as DocOleObject;
                    string s = Ole.ObjectType;
                    //If s == "AcroExch.Document.11", means it’s a PDF document
                    if (s == "AcroExch.Document.11")
                    {
                        File.WriteAllBytes("Result.pdf", Ole.NativeData);
                    }
                    //If s == " Excel.Sheet.12", means it’s an Excel workbook
                    else if (s == "Excel.Sheet.12")
                    {
                        File.WriteAllBytes("Result.xlsx", Ole.NativeData);
                    }
                }
            }
        }
    }
}
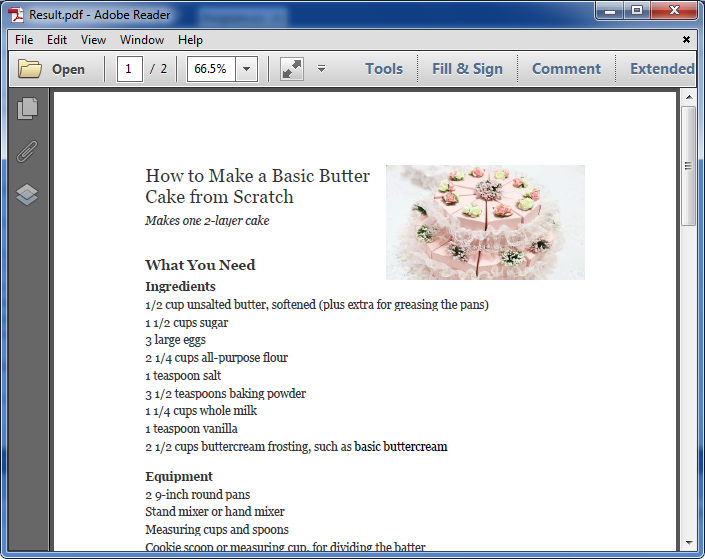
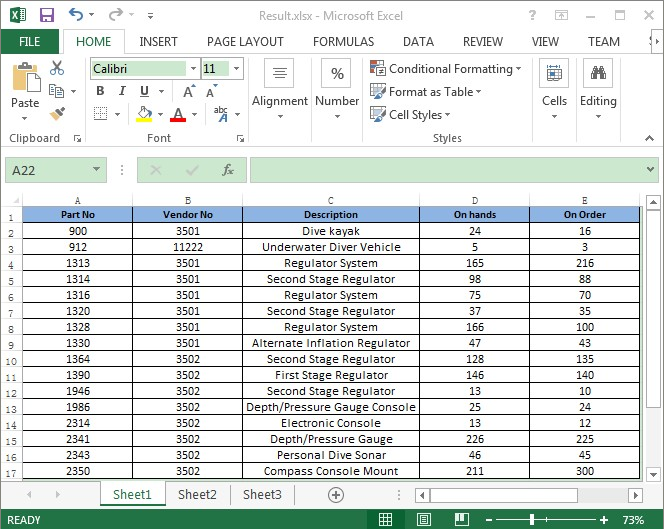
Below is the screenshot of the extracted PDF file and Excel workbook after running the code:
Full codes:
using System.IO;
using Spire.Doc;
using Spire.Doc.Documents;
using Spire.Doc.Fields;

namespace Extract_OLEObjects_from_Word
{
    class Program
    {
        static void Main(string[] args)
        {
            Document doc = new Document();
            doc.LoadFromFile("OleObject.docx");

            foreach (Section sec in doc.Sections)
            {
                foreach (DocumentObject obj in sec.Body.ChildObjects)
                {
                    if (obj is Paragraph)
                    {
                        Paragraph par = obj as Paragraph;
                        foreach (DocumentObject o in par.ChildObjects)
                        {
                            if (o.DocumentObjectType == DocumentObjectType.OleObject)
                            {
                                DocOleObject Ole = o as DocOleObject;
                                string s = Ole.ObjectType;
                                if (s == "AcroExch.Document.11")
                                {
                                    File.WriteAllBytes("Result.pdf", Ole.NativeData);
                                }
                                else if (s == "Excel.Sheet.12")
                                {
                                    File.WriteAllBytes("Result.xlsx", Ole.NativeData);
                                }
                            }
                        }
                    }
                }
            }
        }
    }
}
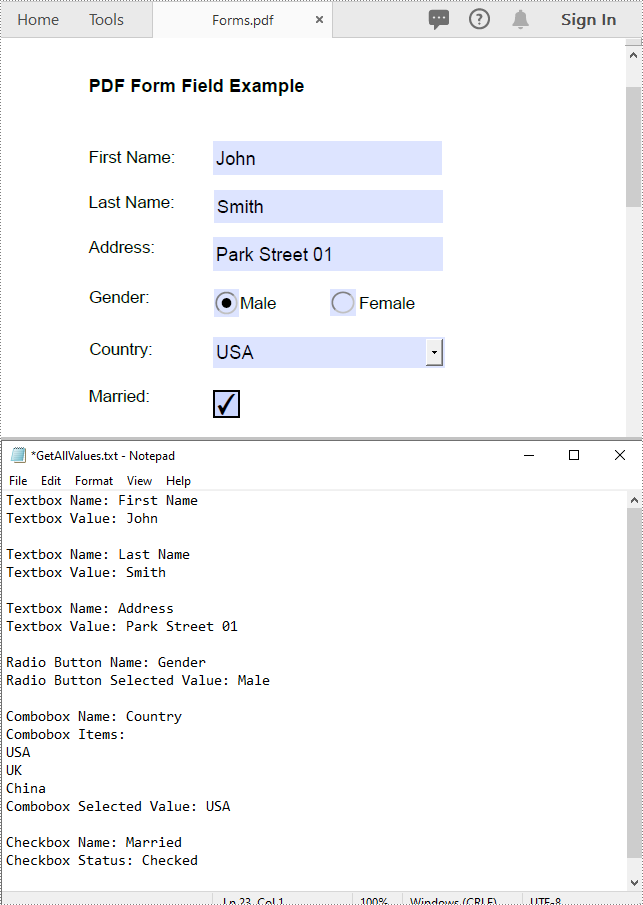
Form fields are often used in documents like surveys, registration forms, or feedback forms to collect data from users. Extracting form field values allows you to gather and consolidate the submitted data for further analysis or processing. In this article, we will demonstrate how to extract form field values from PDF documents in C# and VB.NET using Spire.PDF for .NET.
Install Spire.PDF for .NET
To begin with, you need to add the DLL files included in the Spire.PDF for.NET package as references in your .NET project. The DLLs files can be either downloaded from this link or installed via NuGet.
PM> Install-Package Spire.PDF
Extract Form Field Values from PDF in C# and VB.NET
In a PDF document, you may encounter various types of form fields, such as textboxes, checkboxes, radio buttons, list boxes, and combo boxes (drop-down lists). Before extracting form field values, it is crucial to identify the specific type of each form field. Once identified, you can utilize corresponding properties tailored for each form field type to accurately extract their values. The detailed steps are as follows:
- Initialize an instance of the PdfDocument instance.
- Load a PDF document using PdfDocument.LoadFromFile() method.
- Initialize an instance of the StringBuilder class for storing the extract form field values.
- Get the form from the document using PdfDocument.Form property.
- Iterate through all form fields in the form.
- Determine the types of the form fields, then get the names and values of the form fields using the corresponding properties and append them to the StringBuilder instance.
- Write the content of the StringBuilder instance into a text file.
- C#
- VB.NET
using Spire.Pdf;
using Spire.Pdf.Fields;
using Spire.Pdf.Widget;
using System.IO;
using System.Text;

namespace ExtractFormFieldValues
{
    internal class Program
    {
        static void Main(string[] args)
        {
            //Initialize an instance of the PdfDocument instance
            PdfDocument doc = new PdfDocument();
            //Load a PDF document
            doc.LoadFromFile(@"Forms.pdf");

            //Initialize an instance of the StringBuilder class
            StringBuilder sb = new StringBuilder();

            //Get the form from the document
            PdfFormWidget formWidget = doc.Form as PdfFormWidget;

            //Iterate through all fields in the form
            for (int i = 0; i < formWidget.FieldsWidget.List.Count; i++)
            {
                PdfField field = formWidget.FieldsWidget.List[i] as PdfField;

                //Get the name and value of textbox field
                if (field is PdfTextBoxFieldWidget)
                {
                    PdfTextBoxFieldWidget textBoxField = field as PdfTextBoxFieldWidget;
                    string name = textBoxField.Name;
                    string value = textBoxField.Text;
                    sb.Append("Textbox Name: " + name + "\r\n");
                    sb.Append("Textbox Value: " + value + "\r\n");
                }

                //Get the name, items and selected item of list box field
                if (field is PdfListBoxWidgetFieldWidget)
                {
                    PdfListBoxWidgetFieldWidget listBoxField = field as PdfListBoxWidgetFieldWidget;
                    string name = listBoxField.Name;
                    sb.Append("Listbox Name: " + name + "\r\n");
                    sb.Append("Listbox Items: \r\n");

                    PdfListWidgetItemCollection items = listBoxField.Values;

                    foreach (PdfListWidgetItem item in items)
                    {
                        sb.Append(item.Value + "\r\n");
                    }
                    string selectedValue = listBoxField.SelectedValue;
                    sb.Append("Listbox Selected Value: " + selectedValue + "\r\n");
                }

                //Get the name, items and selected item of combo box field
                if (field is PdfComboBoxWidgetFieldWidget)
                {
                    PdfComboBoxWidgetFieldWidget comBoxField = field as PdfComboBoxWidgetFieldWidget;
                    string name = comBoxField.Name;
                    sb.Append("Combobox Name: " + name + "\r\n");
                    sb.Append("Combobox Items: \r\n");
                    PdfListWidgetItemCollection items = comBoxField.Values;

                    foreach (PdfListWidgetItem item in items)
                    {
                        sb.Append(item.Value + "\r\n");
                    }
                    string selectedValue = comBoxField.SelectedValue;
                    sb.Append("Combobox Selected Value: " + selectedValue + "\r\n");

                }

                //Get the name and selected item of radio button field
                if (field is PdfRadioButtonListFieldWidget)
                {
                    PdfRadioButtonListFieldWidget radioBtnField = field as PdfRadioButtonListFieldWidget;
                    string name = radioBtnField.Name;
                    sb.Append("Radio Button Name: " + name + "\r\n");
                    string selectedValue = radioBtnField.SelectedValue;
                    sb.Append("Radio Button Selected Value: " + selectedValue + "\r\n");
                }

                //Get the name and status of checkbox field
                if (field is PdfCheckBoxWidgetFieldWidget)
                {
                    PdfCheckBoxWidgetFieldWidget checkBoxField = field as PdfCheckBoxWidgetFieldWidget;
                    string name = checkBoxField.Name;
                    sb.Append("Checkbox Name: " + name + "\r\n");
                    bool status = checkBoxField.Checked;
                    if (status)
                    {
                        sb.Append("Checkbox Status: Checked \r\n");
                    }
                    else
                    {
                        sb.Append("Checkbox Status: Unchecked \r\n");
                    }
                }

                sb.Append("\n");
            }

            //Write the content of the StringBuilder into a text file
            File.WriteAllText("GetAllValues.txt", sb.ToString());
            doc.Dispose();
        }
    }
}
Apply for a Temporary License
If you'd like to remove the evaluation message from the generated documents, or to get rid of the function limitations, please request a 30-day trial license for yourself.
