
.NET (1327)
Children categories
Generally, a hyperlink is a picture or a piece of text which contains a web link that points to another object. The object can be a website, an email address and a file, etc. By clicking on the hyperlink, readers can access the target place quickly and conveniently.
This article demonstrates how to insert hyperlink in excel for WPF Applications by using Spire.XLS for WPF.
Below is the effective screenshot:

In this sample, we added two hyperlinks: one for cell A5, another for cell D13. Now, refer to the following detail steps:
Code snippets:
Use namespace:
using System.Windows;
using Spire.Xls;
Step 1: Initialize a new instance of Workbook class and load the excel document from file, then get its first worksheet.
Workbook workbook = new Workbook();
workbook.LoadFromFile("Vendors Information.xlsx");
Worksheet sheet = workbook.Worksheets[0];
Step 2: In the first worksheet, add hyperlink to cell A5, set its display text as the existing text of cell A5, next set type and address.
HyperLink Link = sheet.HyperLinks.Add(sheet.Range["A5"]);
Link.TextToDisplay = sheet.Range["A5"].Text;
Link.Type = HyperLinkType.Url;
Link.Address = "https://en.wikipedia.org/wiki/Canada";
Step 3: Add a new hyperlink to cell D13 and set its display text, type and address.
HyperLink NewLink = sheet.HyperLinks.Add(sheet.Range["D13"]);
NewLink.TextToDisplay = "https://www.google.com";
NewLink.Type = HyperLinkType.Url;
NewLink.Address = "https://www.google.com";
Step 4: Save and launch the file.
workbook.SaveToFile("Hyperlink.xlsx", ExcelVersion.Version2010);
System.Diagnostics.Process.Start("Hyperlink.xlsx");
Full codes:
private void button1_Click(object sender, RoutedEventArgs e)
{
    Workbook workbook = new Workbook();
    workbook.LoadFromFile("Vendors Information.xlsx");
    Worksheet sheet = workbook.Worksheets[0];

    HyperLink Link = sheet.HyperLinks.Add(sheet.Range["A5"]);
    Link.TextToDisplay = sheet.Range["A5"].Text;
    Link.Type = HyperLinkType.Url;
    Link.Address = "https://en.wikipedia.org/wiki/Canada";

    HyperLink NewLink = sheet.HyperLinks.Add(sheet.Range["D13"]);
    NewLink.TextToDisplay = "https://www.google.com";
    NewLink.Type = HyperLinkType.Url;
    NewLink.Address = "https://www.google.com";

    workbook.SaveToFile("Hyperlink.xlsx", ExcelVersion.Version2010);
    System.Diagnostics.Process.Start("Hyperlink.xlsx");
}
Private Sub button1_Click(sender As Object, e As RoutedEventArgs)
	Dim workbook As New Workbook()
	workbook.LoadFromFile("Vendors Information.xlsx")
	Dim sheet As Worksheet = workbook.Worksheets(0)

	Dim Link As HyperLink = sheet.HyperLinks.Add(sheet.Range("A5"))
	Link.TextToDisplay = sheet.Range("A5").Text
	Link.Type = HyperLinkType.Url
	Link.Address = "https://en.wikipedia.org/wiki/Canada"

	Dim NewLink As HyperLink = sheet.HyperLinks.Add(sheet.Range("D13"))
	NewLink.TextToDisplay = "https://www.google.com"
	NewLink.Type = HyperLinkType.Url
	NewLink.Address = "https://www.google.com"

	workbook.SaveToFile("Hyperlink.xlsx", ExcelVersion.Version2010)
	System.Diagnostics.Process.Start("Hyperlink.xlsx")
End Sub
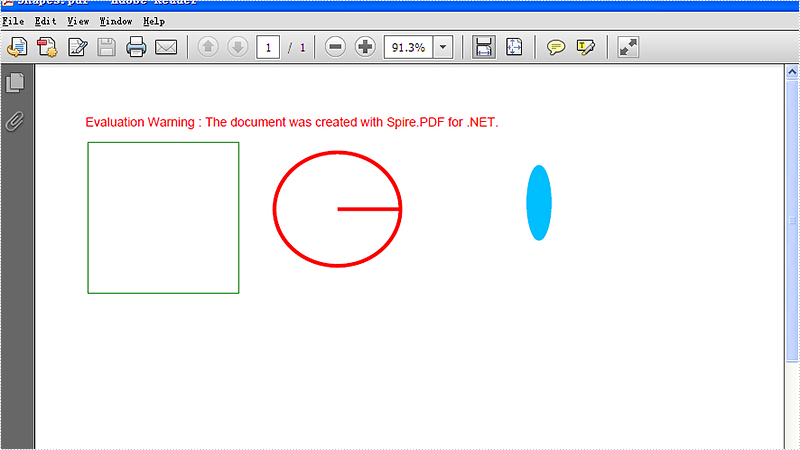
We often use shape to the PDF file to make it obvious and show the data clearly. With Spire.PDF for WPF, developers can easily use the object Spire.Pdf.PdfPageBase.Canvas to add different kind of shapes, such as rectangle, circle and Ellipse, etc. This article will demonstrate how to add shapes to PDF in C# on WPF applications.
Note: Before Start, please download the latest version of Spire.PDF and add Spire.Pdf.Wpf.dll in the bin folder as the reference of Visual Studio.
Here comes to the steps of how to add shapes to PDF file in C#:
Step 1: Create a new PDF document and add a page to it.
PdfDocument pdfDoc = new PdfDocument();
PdfPageBase page = pdfDoc.Pages.Add();
Step 2: Save graphics state.
PdfGraphicsState state = page.Canvas.Save();
Step 3: Set the color for the shapes.
PdfPen pen = new PdfPen(System.Drawing.Color.ForestGreen, 0.1f);
PdfPen pen1 = new PdfPen(System.Drawing.Color.Red, 3f);
PdfBrush brush = new PdfSolidBrush(System.Drawing.Color.DeepSkyBlue);
Step 4: Draw shapes and set the position for them.
page.Canvas.DrawRectangle(pen, new System.Drawing.Rectangle(new System.Drawing.Point(2, 22), new System.Drawing.Size(120, 120)));
page.Canvas.DrawPie(pen1, 150, 30, 100, 90, 360, 360);
page.Canvas.DrawEllipse(brush, 350, 40, 20, 60);
Step 5: Restore graphics.
page.Canvas.Restore(state);
Step 6: Save the PDF document to file.
pdfDoc.SaveToFile("Shapes.pdf");
Effective screenshots of the adding shapes to PDF file:
Full codes:
private void button1_Click(object sender, RoutedEventArgs e)
{
    PdfDocument pdfDoc = new PdfDocument();
    PdfPageBase page = pdfDoc.Pages.Add();
    PdfGraphicsState state = page.Canvas.Save();
    PdfPen pen = new PdfPen(System.Drawing.Color.ForestGreen, 0.1f);
    PdfPen pen1 = new PdfPen(System.Drawing.Color.Red, 3f);
    PdfBrush brush = new PdfSolidBrush(System.Drawing.Color.DeepSkyBlue);

    //draw rectangle
    page.Canvas.DrawRectangle(pen, new System.Drawing.Rectangle(new System.Drawing.Point(2, 22), new System.Drawing.Size(120, 120)));
    //draw circle
    page.Canvas.DrawPie(pen1, 150, 30, 100, 90, 360, 360);
    //draw ellipse
    page.Canvas.DrawEllipse(brush, 350, 40, 20, 60);

    page.Canvas.Restore(state);
    pdfDoc.SaveToFile("Shapes.pdf");
}
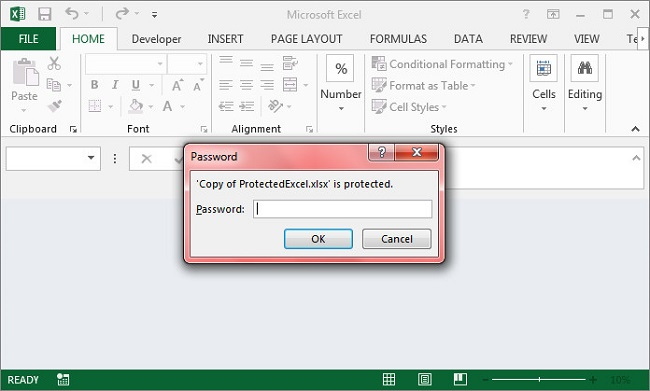
The simplest and most efficient way to keep your Excel file confidential is to encrypt the whole workbook or the specified worksheet with password. Apart from setting a password for your document, you could also choose whether to protect workbook structure or protect worksheet with a certain protection type.
In this article, I am going to introduce how to password protect a workbook or a worksheet as well as set specified permissions to control what types of changes people can make to this workbook using Spire.XLS for WPF.
Code Snippets:
Step 1: Initialize a new instance of workbook class and load an existing Excel file.
Workbook wb = new Workbook();
wb.LoadFromFile("sample.xlsx", ExcelVersion.Version2013);
Step 2: Call Workbook.Protect(string passwordToOpen, bool bIsProtectWindow, bool bIsProtectContent) to protect the workbook with password and also protect the workbook window and structure.
wb.Protect("password-1",true,true);
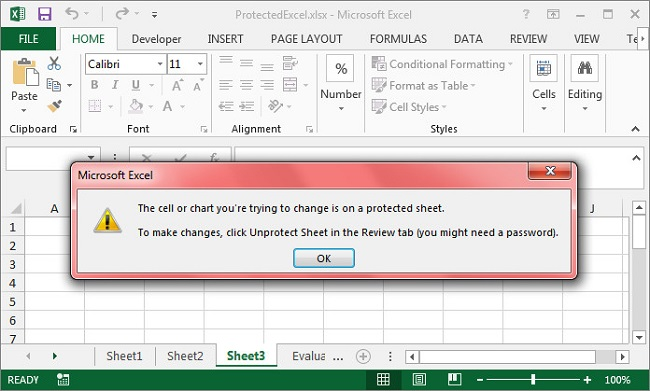
Step 3: Get the third worksheet from workbook, call protect method of XlsWorksheetBase class to encrypt the sheet with password and set the protection type as None which represents no changes are allowed in the protected sheet. Besides None, there are 17 others in SheetProtectionType enum that can help you to set different permissions to command what users can do to this worksheet.
Worksheet sheet = wb.Worksheets[2];
sheet.Protect("password-2", SheetProtectionType.None);
Step 4: Save and launch the file.
wb.SaveToFile("ProtectedExcel.xlsx");
System.Diagnostics.Process.Start("ProtectedExcel.xlsx");
Output:
Protect Workbook
Protect Worksheet
Full Code:
using Spire.Xls;
using System.Windows;

namespace WpfApplication1
{
    public partial class MainWindow : Window
    {
        public MainWindow()
        {
            InitializeComponent();
        }
        private void button1_Click(object sender, RoutedEventArgs e)
        {
            Workbook wb = new Workbook();
            wb.LoadFromFile("sample.xlsx", ExcelVersion.Version2013);

            wb.Protect("password-1", true, true);
            Worksheet sheet = wb.Worksheets[2];
            sheet.Protect("password-2", SheetProtectionType.None);

            wb.SaveToFile("ProtectedExcel.xlsx");
            System.Diagnostics.Process.Start("ProtectedExcel.xlsx");

        }
    }
}
Imports Spire.Xls
Imports System.Windows

Namespace WpfApplication1
	Public Partial Class MainWindow
		Inherits Window
		Public Sub New()
			InitializeComponent()
		End Sub
		Private Sub button1_Click(sender As Object, e As RoutedEventArgs)
			Dim wb As New Workbook()
			wb.LoadFromFile("sample.xlsx", ExcelVersion.Version2013)

			wb.Protect("password-1", True, True)
			Dim sheet As Worksheet = wb.Worksheets(2)
			sheet.Protect("password-2", SheetProtectionType.None)

			wb.SaveToFile("ProtectedExcel.xlsx")
			System.Diagnostics.Process.Start("ProtectedExcel.xlsx")

		End Sub
	End Class
End Namespace
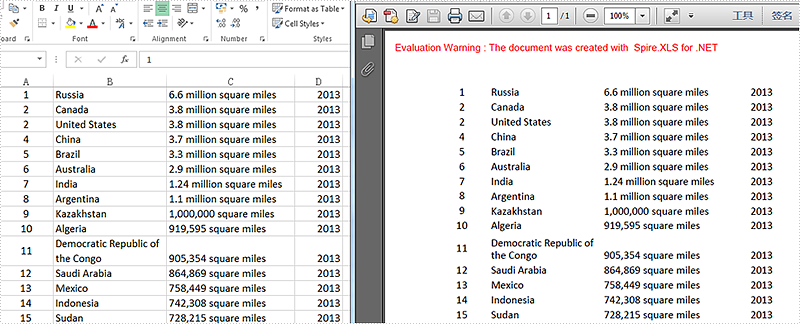
We have discussed before about converting workbook to PDF. However, in this section, we will show you a neat solution to convert the specific worksheet to PDF with C# and VB.NET in workbook. Apply Spire.Xls for .NET in your application and you can turn worksheet into PDF easily without changing the layout of worksheet.
In the following sections, we will demonstrate how to convert worksheet to PDF.
Step 1: Initialize a new instance of Workbook class and load the sample Excel file.
Workbook workbook = new Workbook();
workbook.LoadFromFile("Sample.xlsx");
Step 2: Get its first worksheet.
Worksheet sheet = workbook.Worksheets[0];
Step 3: Convert the selected worksheet to PDF and save to file.
sheet.SaveToPdf("toPDF.pdf");
Step 4: Launch the file.
System.Diagnostics.Process.Start("toPDF.pdf");
Effective screenshot:
Full codes:
using Spire.Xls;

namespace Excel_Worksheet_to_PDF
{
    class Program
    {
        static void Main(string[] args)
        {
            Workbook workbook = new Workbook();
            workbook.LoadFromFile("Sample.xlsx");

            Worksheet sheet = workbook.Worksheets[0];

            sheet.SaveToPdf("toPDF.pdf");
            System.Diagnostics.Process.Start("toPDF.pdf");
        }
    }
}
Imports Spire.Xls

Namespace Excel_Worksheet_to_PDF
	Class Program
		Private Shared Sub Main(args As String())
			Dim workbook As New Workbook()
			workbook.LoadFromFile("Sample.xlsx")

			Dim sheet As Worksheet = workbook.Worksheets(0)

			sheet.SaveToPdf("toPDF.pdf")
			System.Diagnostics.Process.Start("toPDF.pdf")
		End Sub
	End Class
End Namespace
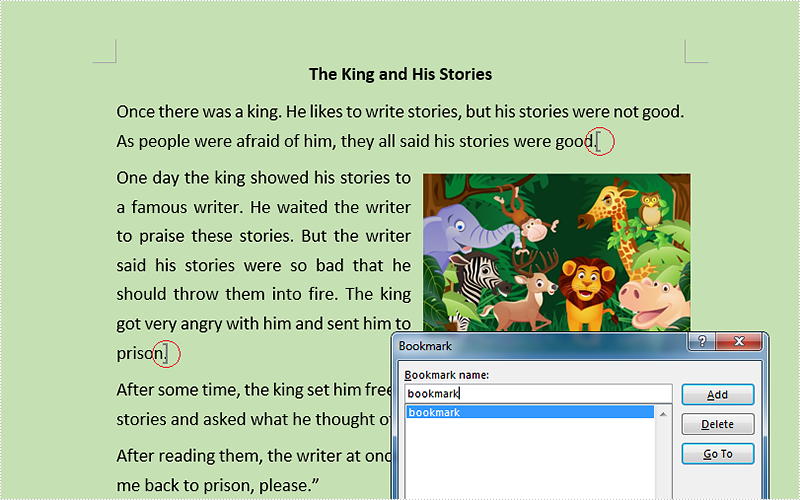
In Word, bookmark is used for positioning, it enables readers to return to the read or modified location quickly. Thus, it would be necessary for us to insert a bookmark when we are editing or reading a long word document, so that next time we can get back to the specific location in a short period.
This article will demonstrate how to insert word bookmark in WPF by using Spire.Doc for WPF.
At first, please download Spire.Doc and install it correctly, then add Spire.Doc.Wpf.dll and Spire.License.dll from the installation folder as reference.
This is the effective screenshot after inserting bookmark:
Now, follow the Detail steps below:
Use namespace:
using System.Windows;
using Spire.Doc;
Step 1: Initialize a new instance of the Document class and load the word document from file.
Document document = new Document();
document.LoadFromFile("Stories.docx");
Step 2: Get its first section and insert bookmark starts from the end of the second paragraph and ends to the third paragraph.
Section section = document.Sections[0];
section.Paragraphs[1].AppendBookmarkStart("bookmark");
section.Paragraphs[2].AppendBookmarkEnd("bookmark");
Step 3: Save and launch the file.
document.SaveToFile("Bookmark.docx", FileFormat.Docx);
System.Diagnostics.Process.Start("Bookmark.docx");
Full codes:
using Spire.Doc;
using System.Windows;

namespace WpfApplication1
{
    public partial class MainWindow : Window
    {
        public MainWindow()
        {
            InitializeComponent();
        }
        private void button1_Click(object sender, RoutedEventArgs e)
        {
            Document document = new Document();
            document.LoadFromFile("Stories.docx");

            Section section = document.Sections[0];
            section.Paragraphs[1].AppendBookmarkStart("bookmark");
            section.Paragraphs[2].AppendBookmarkEnd("bookmark");

            document.SaveToFile("Bookmark.docx", FileFormat.Docx);
            System.Diagnostics.Process.Start("Bookmark.docx");
        }


    }
}
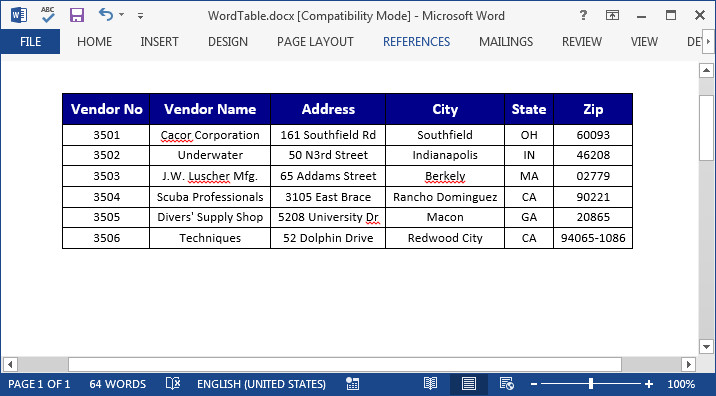
A table is a great way to display data into group, frequently used in our financial reports, academic reports and any other documents that contain a group of similar data. In this article, I am fusing on how to insert a table in Word, fill the table with data and how to format the cells using Spire.Doc for WPF with C#.
Code Snippets
Step 1: Initialize a new instance of Document class, add a section to it.
Document doc = new Document();
Spire.Doc.Section s = doc.AddSection();
Step 2: Define the data that will be filled with table.
String[] Header ={"Vendor No","Vendor Name", "Address","City","State","Zip"};
String[][] data = {
                      new String[]{"3501","Cacor Corporation","161 Southfield Rd","Southfield","OH","60093"},
                      new String[]{"3502","Underwater","50 N3rd Street","Indianapolis","IN","46208"},
                      new String[]{"3503","J.W. Luscher Mfg.","65 Addams Street","Berkely","MA","02779"},
                      new String[]{"3504","Scuba Professionals","3105 East Brace","Rancho Dominguez","CA","90221"},
                      new String[]{"3505","Divers' Supply Shop", "5208 University Dr","Macon","GA","20865"},
                      new String[]{"3506","Techniques","52 Dolphin Drive","Redwood City","CA","94065-1086"},
                  };
Step 3: Add a table with border to section, set the rows and columns number based on the data length.
Spire.Doc.Table table = s.AddTable(true);
table.ResetCells(data.Length + 1, Header.Length);
Step 4: Fill the table with the predefined data and format the cells.
Spire.Doc.TableRow FRow= table.Rows[0];
FRow.IsHeader = true;
FRow.Height = 23;
FRow.RowFormat.BackColor = System.Drawing.Color.DarkBlue;
for (int i = 0; i < Header.Length; i++)
{
    //Cell Alignment
    Paragraph p = FRow.Cells[i].AddParagraph();
    FRow.Cells[i].CellFormat.VerticalAlignment = Spire.Doc.Documents.VerticalAlignment.Middle;
    p.Format.HorizontalAlignment = Spire.Doc.Documents.HorizontalAlignment.Center;
    //Fill Header data and Format the Cells
    TextRange TR = p.AppendText(Header[i]);
    TR.CharacterFormat.FontName = "Calibri";
    TR.CharacterFormat.FontSize = 12;
    TR.CharacterFormat.TextColor = System.Drawing.Color.White;
    TR.CharacterFormat.Bold = true;
}
for (int r = 0; r < data.Length; r++)
{
    TableRow DataRow = table.Rows[r + 1];
    //Row Height
    DataRow.Height = 15;
    //C Represents Column.
    for (int c = 0; c < data[r].Length; c++)
    {
        //Cell Alignment
        DataRow.Cells[c].CellFormat.VerticalAlignment = Spire.Doc.Documents.VerticalAlignment.Middle;
        //Fill Data in Rows
        Paragraph p2 =DataRow.Cells[c].AddParagraph();
        TextRange TR2=p2.AppendText(data[r][c]);
        //Format Cells
        p2.Format.HorizontalAlignment = Spire.Doc.Documents.HorizontalAlignment.Center;
        TR2.CharacterFormat.FontName = "Calibri";
        TR2.CharacterFormat.FontSize = 10;
        TR2.CharacterFormat.TextColor = System.Drawing.Color.Black;
    }
}
Step 5: Call AutoFitBebavior() method to make the table AutoFit to Window.
table.AutoFitBehavior(AutoFitBehaviorType.wdAutoFitWindow);
Step 6: Save and launch the file.
doc.SaveToFile("WordTable.docx");
System.Diagnostics.Process.Start("WordTable.docx");
Output:
Full Code:
private void button1_Click(object sender, RoutedEventArgs e)
{
    Document doc = new Document();
    Spire.Doc.Section s = doc.AddSection();

    String[] Header ={"Vendor No","Vendor Name", "Address","City","State","Zip"};
    String[][] data = {
                          new String[]{"3501","Cacor Corporation","161 Southfield Rd","Southfield","OH","60093"},
                          new String[]{"3502","Underwater","50 N3rd Street","Indianapolis","IN","46208"},
                          new String[]{"3503","J.W. Luscher Mfg.","65 Addams Street","Berkely","MA","02779"},
                          new String[]{"3504","Scuba Professionals","3105 East Brace","Rancho Dominguez","CA","90221"},
                          new String[]{"3505","Divers' Supply Shop", "5208 University Dr","Macon","GA","20865"},
                          new String[]{"3506","Techniques","52 Dolphin Drive","Redwood City","CA","94065-1086"},
                      };
    Spire.Doc.Table table = s.AddTable(true);
    table.ResetCells(data.Length + 1, Header.Length);
    Spire.Doc.TableRow FRow= table.Rows[0];
    FRow.IsHeader = true;
    FRow.Height = 23;
    FRow.RowFormat.BackColor = System.Drawing.Color.DarkBlue;
    for (int i = 0; i < Header.Length; i++)
    {
        Paragraph p = FRow.Cells[i].AddParagraph();
        FRow.Cells[i].CellFormat.VerticalAlignment = Spire.Doc.Documents.VerticalAlignment.Middle;
        p.Format.HorizontalAlignment = Spire.Doc.Documents.HorizontalAlignment.Center;
        TextRange TR = p.AppendText(Header[i]);
        TR.CharacterFormat.FontName = "Calibri";
        TR.CharacterFormat.FontSize = 12;
        TR.CharacterFormat.TextColor = System.Drawing.Color.White;
        TR.CharacterFormat.Bold = true;
    }
    for (int r = 0; r < data.Length; r++)
    {
        TableRow DataRow = table.Rows[r + 1];
        DataRow.Height = 15;
        for (int c = 0; c < data[r].Length; c++)
        {
            DataRow.Cells[c].CellFormat.VerticalAlignment = Spire.Doc.Documents.VerticalAlignment.Middle;
            Paragraph p2 =DataRow.Cells[c].AddParagraph();
            TextRange TR2=p2.AppendText(data[r][c]);
            p2.Format.HorizontalAlignment = Spire.Doc.Documents.HorizontalAlignment.Center;
            TR2.CharacterFormat.FontName = "Calibri";
            TR2.CharacterFormat.FontSize = 10;
            TR2.CharacterFormat.TextColor = System.Drawing.Color.Black;
        }
    }
    table.AutoFitBehavior(AutoFitBehaviorType.wdAutoFitWindow);
    doc.SaveToFile("WordTable.docx");
    System.Diagnostics.Process.Start("WordTable.docx");
}
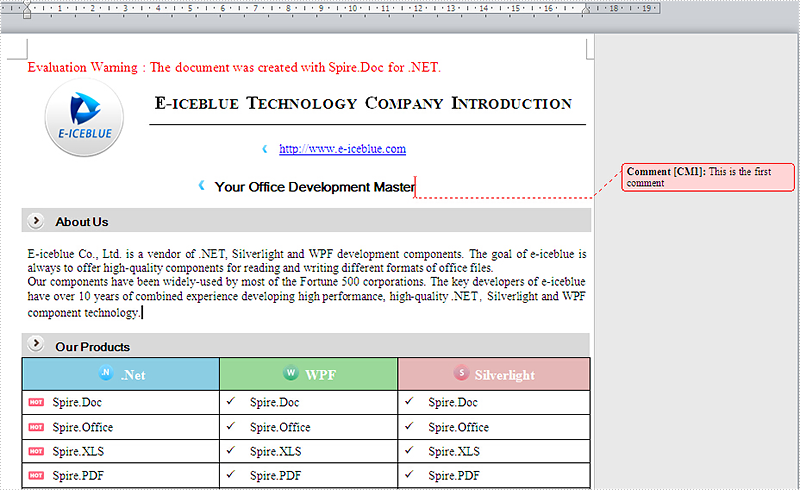
How to add comments to word documents in C# for WPF applications
2016-03-01 08:15:26 Written by KoohjiWith the help of Spire.Doc for WPF, developers can add word documents easily for their WPF applications. When we want to show opinions or additional information about words, phrases or paragraphs, we can add the comments to the word documents to give more information about the contents. Spire.Doc offers a class of Spire.Doc.Fields.Comments to enable developers to work with comments easily. This article will demonstrate how to add the comments to the word documents in C# for WPF applications.
Note: Before Start, please download the latest version of Spire.Doc and add Spire.Doc.Wpf.dll in the bin folder as the reference of Visual Studio.
Here comes to the steps of how to add comments to word documents in C#:
Step 1: Create a new word document and load the document from file.
Document document = new Document();
document.LoadFromFile("sample.docx");
Step 2: Get Paragraph to Insert Comment.
Section section = document.Sections[0];
Paragraph paragraph = section.Paragraphs[2];
Step 3: Insert the comment.
string str = "This is the first comment";
Comment comment = paragraph.AppendComment(str);
comment.Format.Author = "E-iceblue";
comment.Format.Initial = "CM";
Step 4: Save the document to file.
document.SaveToFile("Addcomment.docx", FileFormat.Docx);
System.Diagnostics.Process.Start("Addcomment.docx");
Effective screenshot of adding the word comments in C#:
Full codes:
using Spire.Doc;
using Spire.Doc.Documents;
using Spire.Doc.Fields;
using System.Windows;

namespace WpfApplication1
{
    public partial class MainWindow : Window
    {
        public MainWindow()
        {
            InitializeComponent();
            {
                Document document = new Document();
                document.LoadFromFile("sample.docx");

                Section section = document.Sections[0];
                Paragraph paragraph = section.Paragraphs[2];

                string str = "This is the first comment";
                Comment comment = paragraph.AppendComment(str);
                comment.Format.Author = "E-iceblue";
                comment.Format.Initial = "CM";

                document.SaveToFile("Addcomment.docx", FileFormat.Docx);
                System.Diagnostics.Process.Start("Addcomment.docx");

            }


        }
    }
}
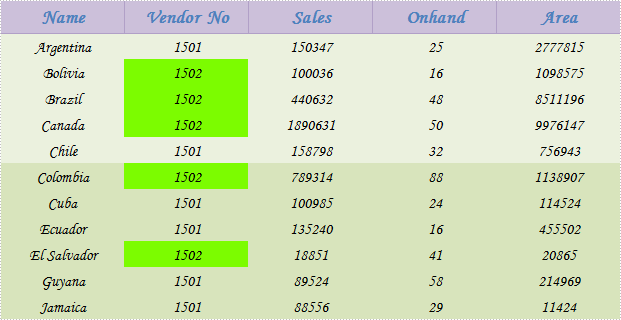
In Microsoft Excel, we can easily find the data we want by using the find function. But how to achieve this programmatically? With Spire.XLS for WPF, not only can we find the specific data in excel with high-efficiency, but also we can highlight it with different color.
In this article, we’ll demonstrate how to find and highlight excel data using Spire.XLS for WPF in C# and VB.NET.
At first, please download Spire.XLS and install it correctly, then add Spire.XLS.Wpf.dll and Spire.License.dll from the installation folder as reference.
Below is the effective screenshot:
Detail steps:
Use namespace:
using System.Windows;
using Spire.Xls;
using System.Drawing;
Step 1: Initialize a new Workbook instance and load the sample excel document from file.
Workbook workbook = new Workbook();
workbook.LoadFromFile("Sample.xlsx");
Step 2: Get its first worksheet, then find and highlight the specific number 1502 in worksheet 1.
Worksheet sheet = workbook.Worksheets[0];
foreach (CellRange range in sheet.FindAllNumber(1502,true))
{
    range.Style.Color = Color.LawnGreen;
}
Apart from finding number, Spire.XLS also supports us to find string, datetime, bool, etc.
Step 3: Save and launch the file.
workbook.SaveToFile("result.xlsx", ExcelVersion.Version2010);
System.Diagnostics.Process.Start("result.xlsx");
Full codes:
private void button1_Click(object sender, RoutedEventArgs e)
{
    //load the sample excel document from file
    Workbook workbook = new Workbook();
    workbook.LoadFromFile("Sample.xlsx");

    //find and highlight excel data
    Worksheet sheet = workbook.Worksheets[0];
    foreach (CellRange range in sheet.FindAllNumber(1502,true))
    {
        range.Style.Color = Color.LawnGreen;
    }
    //save and launch the file
    workbook.SaveToFile("result.xlsx", ExcelVersion.Version2010);
    System.Diagnostics.Process.Start("result.xlsx");
}
Private Sub button1_Click(sender As Object, e As RoutedEventArgs)
	'load the sample excel document from file
	Dim workbook As New Workbook()
	workbook.LoadFromFile("Sample.xlsx")

	'find and highlight excel data
	Dim sheet As Worksheet = workbook.Worksheets(0)
	For Each range As CellRange In sheet.FindAllNumber(1502,True)
		range.Style.Color = Color.LawnGreen
	Next
	'save and launch the file
	workbook.SaveToFile("result.xlsx", ExcelVersion.Version2010)
	System.Diagnostics.Process.Start("result.xlsx")
End Sub
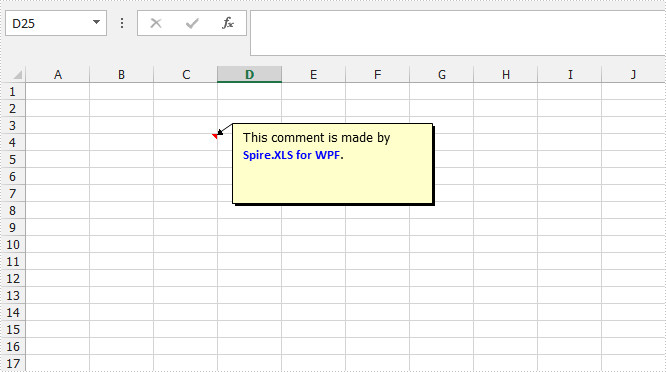
Excel comments in individual cells are extra information that explain more about the data in these cells. The information can be notes for readers, reminders for yourself, and cross-references to other reports. In this article, I am going to introduce how to add and format Excel comments using Spire.XLS for WPF.
Before start, please download Spire.XLS Pack and add the Spire.XLS.Wpf.dll and Spire.License.dll from Bin folder to reference of your WPF project.
Code Snippets:
Step 1: Initialize a new Workbook, get the first worksheet from workbook.
Workbook wb = new Workbook();
Worksheet sheet = wb.Worksheets[0];
Step 2: Create a font style that will be used to format comment.
ExcelFont font = wb.CreateFont();
font.FontName = "Calibri";
font.Color = Color.Blue;
font.Size = 10;
font.IsBold = true;
Step 3: Add a comment to C4 and set the size of comment box, set the text and set font for specified range of characters.
ExcelComment comment = sheet.Range["C4"].Comment;
comment.Height = 80;
comment.Width = 200;
comment.RichText.Text = "This comment is made by Spire.XLS for WPF.";
comment.RichText.SetFont(23, 40, font);
Step 4: Save and launch the file.
wb.SaveToFile("result.xlsx", ExcelVersion.Version2013);
System.Diagnostics.Process.Start("result.xlsx");
Output:
Full Code:
using Spire.Xls;
using System.Drawing;
using System.Windows;

namespace WpfApplication1
{
    public partial class MainWindow : Window
    {
        public MainWindow()
        {
            InitializeComponent();
        }
        private void button1_Click(object sender, RoutedEventArgs e)
        {
            Workbook wb = new Workbook();
            Worksheet sheet = wb.Worksheets[0];

            ExcelFont font = wb.CreateFont();
            font.FontName = "Calibri";
            font.Color = Color.Blue;
            font.Size = 10;
            font.IsBold = true;

            ExcelComment comment = sheet.Range["C4"].Comment;
            comment.Height = 80;
            comment.Width = 200;
            comment.RichText.Text = "This comment is made by Spire.XLS for WPF.";
            comment.RichText.SetFont(23, 40, font);

            wb.SaveToFile("result.xlsx", ExcelVersion.Version2013);
            System.Diagnostics.Process.Start("result.xlsx");

        }
    }
}
Imports Spire.Xls
Imports System.Drawing
Imports System.Windows

Namespace WpfApplication1
	Public Partial Class MainWindow
		Inherits Window
		Public Sub New()
			InitializeComponent()
		End Sub
		Private Sub button1_Click(sender As Object, e As RoutedEventArgs)
			Dim wb As New Workbook()
			Dim sheet As Worksheet = wb.Worksheets(0)

			Dim font As ExcelFont = wb.CreateFont()
			font.FontName = "Calibri"
			font.Color = Color.Blue
			font.Size = 10
			font.IsBold = True

			Dim comment As ExcelComment = sheet.Range("C4").Comment
			comment.Height = 80
			comment.Width = 200
			comment.RichText.Text = "This comment is made by Spire.XLS for WPF."
			comment.RichText.SetFont(23, 40, font)

			wb.SaveToFile("result.xlsx", ExcelVersion.Version2013)
			System.Diagnostics.Process.Start("result.xlsx")

		End Sub
	End Class
End Namespace
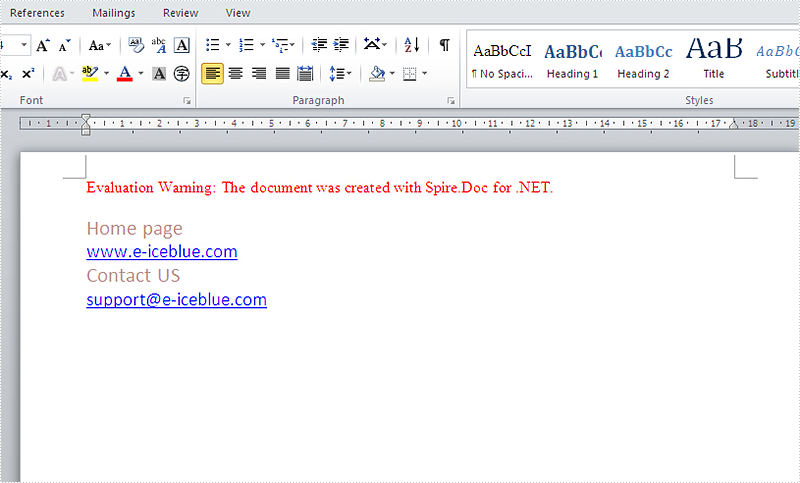
Word hyperlink gives a large amount of information of the original word and image. The text and image with hyperlinks can guides readers to a Web page, e-mail address, or the other files and documents. In this article, we’re focusing on how to insert hyperlink into the text in C# on WPF applications with the help of Spire.Doc for WPF.
Note: Before Start, please download the latest version of Spire.Doc and add Spire.Doc.Wpf.dll in the bin folder as the reference of Visual Studio.
Here comes to the code snippets:
Step 1: Create a word document and add a section and paragraph to it.
Document document = new Document();
Section Sec = document.AddSection();
Paragraph Para = Sec.AddParagraph();
Step 2: Set the styles for the text and hyperlinks on the paragraph.
ParagraphStyle txtStyle = new ParagraphStyle(document);
txtStyle.Name = "Style";
txtStyle.CharacterFormat.FontName = "Calibri";
txtStyle.CharacterFormat.FontSize = 16;
txtStyle.CharacterFormat.TextColor = System.Drawing.Color.RosyBrown;
document.Styles.Add(txtStyle);
ParagraphStyle hyperlinkstyle = new ParagraphStyle(document);
hyperlinkstyle.Name = "linkStyle";
hyperlinkstyle.CharacterFormat.FontName = "Calibri";
hyperlinkstyle.CharacterFormat.FontSize = 14;
document.Styles.Add(hyperlinkstyle);
Step 3: Add the text to the paragraph with style and link it to a web page.
Para = Sec.AddParagraph();
Para.AppendText("Home page");
Para.ApplyStyle(txtStyle.Name);
Para = Sec.AddParagraph();
Para.AppendHyperlink("HomePage", "www.e-iceblue.com",HyperlinkType.WebLink);
Para.ApplyStyle(hyperlinkstyle.Name);
Step 4: Add the text to the paragraph with style and link it to an email address.
Para = Sec.AddParagraph();
Para.AppendText("Contact US");
Para.ApplyStyle(txtStyle.Name);
Para = Sec.AddParagraph();
Para.AppendHyperlink("mailto:support@e-iceblue.com", "support@e-iceblue.com",HyperlinkType.EMailLink);
Para.ApplyStyle(hyperlinkstyle.Name);
Step 5: Save the document to file and launch to preview it.
document.SaveToFile("Hyperlink.docx", FileFormat.Docx);
System.Diagnostics.Process.Start("Hyperlink.docx");
Effective screenshot of adding hyperlinks to the word document in C#:
Full codes:
using Spire.Doc;
using Spire.Doc.Documents;
using System.Windows;

namespace WpfApplication1
{
    public partial class MainWindow : Window
    {
        public MainWindow()
        {
            InitializeComponent();
        }
        private void button1_Click(object sender, RoutedEventArgs e)
        {
            Document document = new Document();
            Section Sec = document.AddSection();
            Paragraph Para = Sec.AddParagraph();

            ParagraphStyle txtStyle = new ParagraphStyle(document);
            txtStyle.Name = "Style";
            txtStyle.CharacterFormat.FontName = "Calibri";
            txtStyle.CharacterFormat.FontSize = 16;
            txtStyle.CharacterFormat.TextColor = System.Drawing.Color.RosyBrown;
            document.Styles.Add(txtStyle);
            ParagraphStyle hyperlinkstyle = new ParagraphStyle(document);
            hyperlinkstyle.Name = "linkStyle";
            hyperlinkstyle.CharacterFormat.FontName = "Calibri";
            hyperlinkstyle.CharacterFormat.FontSize = 14;
            document.Styles.Add(hyperlinkstyle);

            Para = Sec.AddParagraph();
            Para.AppendText("Home page");
            Para.ApplyStyle(txtStyle.Name);

            Para = Sec.AddParagraph();
            Para.AppendHyperlink("www.e-iceblue.com", "www.e-iceblue.com", HyperlinkType.WebLink);
            Para.ApplyStyle(hyperlinkstyle.Name);

            Para = Sec.AddParagraph();
            Para.AppendText("Contact US");
            Para.ApplyStyle(txtStyle.Name);

            Para = Sec.AddParagraph();
            Para.AppendHyperlink("mailto:support@e-iceblue.com", "support@e-iceblue.com", HyperlinkType.EMailLink);
            Para.ApplyStyle(hyperlinkstyle.Name);

            document.SaveToFile("Hyperlink.docx", FileFormat.Docx);
            System.Diagnostics.Process.Start("Hyperlink.docx");
        }


    }
}
