
.NET (1327)
Children categories
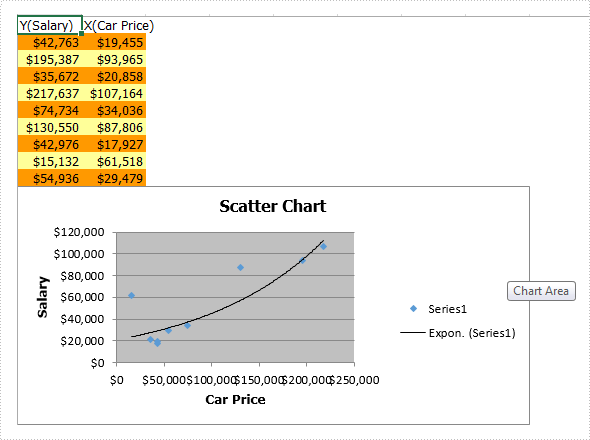
Charts are used to display series of numeric data in a graphical format to make it easier to understand large quantities of data and the relationship between different series of data. This article talks about how to create scatter chart via Spire.XLS.
To create a Scatter Chart, execute the following steps.
Step 1: Create a new Excel document and get the first sheet.
Workbook workbook = new Workbook();
workbook.CreateEmptySheets(1);
Worksheet sheet = workbook.Worksheets[0];
Step 2: Rename the first sheet and set the grid lines invisible.
sheet.Name = "Scatter Chart";
sheet.GridLinesVisible = false;
Step 3: Create a scatter chart and set data region for it.
Chart chart = sheet.Charts.Add(ExcelChartType.ScatterMarkers);
chart.DataRange = sheet.Range["B2:B10"];
chart.SeriesDataFromRange = false;
Step 4: Set position and title for the chart.
chart.LeftColumn = 1;
chart.TopRow = 6;
chart.RightColumn = 9;
chart.BottomRow = 25;

chart.ChartTitle = "Scatter Chart";
chart.ChartTitleArea.IsBold = true;
chart.ChartTitleArea.Size = 12;
Step 5: Add data to the excel range.
sheet.Range["A1"].Value = "Y(Salary)";
sheet.Range["A2"].Value = "42763";
sheet.Range["A3"].Value = "195387";
sheet.Range["A4"].Value = "35672";
sheet.Range["A5"].Value = "217637";
sheet.Range["A6"].Value = "74734";
sheet.Range["A7"].Value = "130550";
sheet.Range["A8"].Value = "42976";
sheet.Range["A9"].Value = "15132";
sheet.Range["A10"].Value = "54936";

sheet.Range["B1"].Value = "X(Car Price)";
sheet.Range["B2"].Value = "19455";
sheet.Range["B3"].Value = "93965";
sheet.Range["B4"].Value = "20858";
sheet.Range["B5"].Value = "107164";
sheet.Range["B6"].Value = "34036";
sheet.Range["B7"].Value = "87806";
sheet.Range["B8"].Value = "17927";
sheet.Range["B9"].Value = "61518";
sheet.Range["B10"].Value = "29479";
Step 6: Set style color for the range.
sheet.Range["A2:B2"].Style.KnownColor = ExcelColors.LightOrange;
sheet.Range["A3:B3"].Style.KnownColor = ExcelColors.LightYellow;
sheet.Range["A4:B4"].Style.KnownColor = ExcelColors.LightOrange;
sheet.Range["A5:B5"].Style.KnownColor = ExcelColors.LightYellow;
sheet.Range["A6:B6"].Style.KnownColor = ExcelColors.LightOrange;
sheet.Range["A7:B7"].Style.KnownColor = ExcelColors.LightYellow;
sheet.Range["A8:B8"].Style.KnownColor = ExcelColors.LightOrange;
sheet.Range["A9:B9"].Style.KnownColor = ExcelColors.LightYellow;
sheet.Range["A10:B10"].Style.KnownColor = ExcelColors.LightOrange;
Step 7: Set number format for cell ranges.
sheet.Range["A2:B10"].Style.NumberFormat = "\"$\"#,##0";
Step 8: Set data for axis x y.
chart.Series[0].CategoryLabels = sheet.Range["A2:A10"];
chart.Series[0].Values = sheet.Range["B2:B10"];
Step 9: Add a trend line.
chart.Series[0].TrendLines.Add(TrendLineType.Exponential);
Step 10: Add axis title.
chart.PrimaryValueAxis.Title = "Salary";
chart.PrimaryCategoryAxis.Title = "Car Price";
Step 11: Save and review.
workbook.SaveToFile("XYChart.xlsx", FileFormat.Version2013);
System.Diagnostics.Process.Start("XYChart.xlsx");
Screenshot:
Full code:
using Spire.Xls;
namespace CreateExcelScatterChart
{
    class Program
    {

        static void Main(string[] args)
        {
            Workbook workbook = new Workbook();
            workbook.CreateEmptySheets(1);
            Worksheet sheet = workbook.Worksheets[0];

            sheet.Name = "Scatter Chart";
            sheet.GridLinesVisible = false;

            Chart chart = sheet.Charts.Add(ExcelChartType.ScatterMarkers);
            chart.DataRange = sheet.Range["B2:B10"];
            chart.SeriesDataFromRange = false;

            chart.LeftColumn = 1;
            chart.TopRow = 6;
            chart.RightColumn = 9;
            chart.BottomRow = 25;

            chart.ChartTitle = "Scatter Chart";
            chart.ChartTitleArea.IsBold = true;
            chart.ChartTitleArea.Size = 12;

            sheet.Range["A1"].Value = "Y(Salary)";
            sheet.Range["A2"].Value = "42763";
            sheet.Range["A3"].Value = "195387";
            sheet.Range["A4"].Value = "35672";
            sheet.Range["A5"].Value = "217637";
            sheet.Range["A6"].Value = "74734";
            sheet.Range["A7"].Value = "130550";
            sheet.Range["A8"].Value = "42976";
            sheet.Range["A9"].Value = "15132";
            sheet.Range["A10"].Value = "54936";

            sheet.Range["B1"].Value = "X(Car Price)";
            sheet.Range["B2"].Value = "19455";
            sheet.Range["B3"].Value = "93965";
            sheet.Range["B4"].Value = "20858";
            sheet.Range["B5"].Value = "107164";
            sheet.Range["B6"].Value = "34036";
            sheet.Range["B7"].Value = "87806";
            sheet.Range["B8"].Value = "17927";
            sheet.Range["B9"].Value = "61518";
            sheet.Range["B10"].Value = "29479";

            sheet.Range["A2:B2"].Style.KnownColor = ExcelColors.LightOrange;
            sheet.Range["A3:B3"].Style.KnownColor = ExcelColors.LightYellow;
            sheet.Range["A4:B4"].Style.KnownColor = ExcelColors.LightOrange;
            sheet.Range["A5:B5"].Style.KnownColor = ExcelColors.LightYellow;
            sheet.Range["A6:B6"].Style.KnownColor = ExcelColors.LightOrange;
            sheet.Range["A7:B7"].Style.KnownColor = ExcelColors.LightYellow;
            sheet.Range["A8:B8"].Style.KnownColor = ExcelColors.LightOrange;
            sheet.Range["A9:B9"].Style.KnownColor = ExcelColors.LightYellow;
            sheet.Range["A10:B10"].Style.KnownColor = ExcelColors.LightOrange;

            sheet.Range["A2:B10"].Style.NumberFormat = "\"$\"#,##0";

            chart.Series[0].CategoryLabels = sheet.Range["A2:A10"];
            chart.Series[0].Values = sheet.Range["B2:B10"];

            chart.Series[0].TrendLines.Add(TrendLineType.Exponential);

            chart.PrimaryValueAxis.Title = "Salary";
            chart.PrimaryCategoryAxis.Title = "Car Price";

            workbook.SaveToFile("XYChart.xlsx", FileFormat.Version2013);
            System.Diagnostics.Process.Start("XYChart.xlsx");
        }
    }
}
A bubble chart is generally used to display the relationship between 3 parameters. For example, you can use bubble chart to show relation between Number of product, Sales volume and Market share. Unlike other charts, a bubble chart does not use a category axis - both horizontal and vertical axes are value axes.
As a powerful component, Spire.Presentation supports to insert various kinds of charts in PowerPoint including bubble chart. In this article, I made an example to show how to create bubble chart with custom data using Spire.Presentation in C#, VB.NET.
Main Steps:
Step 1: Initialize a new instance of Presentation class.
Presentation pres = new Presentation();
Step 2: Insert chart, set chart title and set the type of chart as Bubble.
RectangleF rect1 = new RectangleF(40, 40, 550, 320);
IChart chart = pres.Slides[0].Shapes.AppendChart(ChartType.Bubble, rect1, false);
chart.ChartTitle.TextProperties.Text = "Bubble Chart";
chart.ChartTitle.TextProperties.IsCentered = true;
chart.ChartTitle.Height = 30;
chart.HasTitle = true;
Step 3: Define a group of arrays.
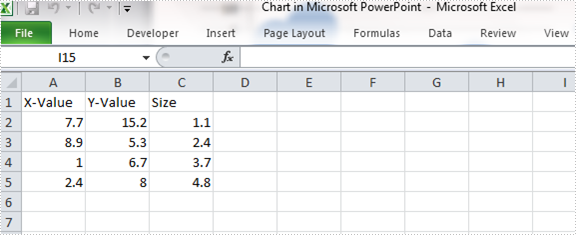
Double[] xdata = new Double[] { 7.7, 8.9, 1.0, 2.4 };
Double[] ydata = new Double[] { 15.2, 5.3, 6.7, 8 };
Double[] size = new Double[] { 1.1, 2.4, 3.7, 4.8 };
Step 4: Attach the data to chart. You can use the property chart.ChartData[rowIndex, columnIndex].Text to get/set the text value, use the property chart.ChartData[rowIndex, columnIndex].Value to get/set numeric value. Here I insert values in predefined arrays to the data chart.
chart.ChartData[0, 0].Text = "X-Value";
chart.ChartData[0, 1].Text = "Y-Value";
chart.ChartData[0, 2].Text = "Size";

for (Int32 i = 0; i < xdata.Length; ++i)
{
    chart.ChartData[i + 1, 0].Value = xdata[i];
    chart.ChartData[i + 1, 1].Value = ydata[i];
    chart.ChartData[i + 1, 2].Value = size[i];
}
Step 5: Set the Series label.
chart.Series.SeriesLabel = chart.ChartData["B1","B1"];
Step 6: Assign data to X axis, Y axis and Bubbles.
chart.Series[0].XValues = chart.ChartData["A2", "A5"];
chart.Series[0].YValues = chart.ChartData["B2", "B5"];
chart.Series[0].Bubbles.Add(chart.ChartData["C2"]);
chart.Series[0].Bubbles.Add(chart.ChartData["C3"]);
chart.Series[0].Bubbles.Add(chart.ChartData["C4"]);
chart.Series[0].Bubbles.Add(chart.ChartData["C5"]);
Step 7: Save and launch the file.
pres.SaveToFile(@"result.pptx", FileFormat.Pptx2010);
System.Diagnostics.Process.Start("result.pptx");
Output:

Chart data:
Full Code:
using Spire.Presentation;
using Spire.Presentation.Charts;
using System;
using System.Drawing;

     namespace CreateBubbleChart
{
    class Program
    {
        static void Main(string[] args)
        {
            Presentation pres = new Presentation();
            RectangleF rect1 = new RectangleF(40, 40, 550, 320);
            IChart chart = pres.Slides[0].Shapes.AppendChart(ChartType.Bubble, rect1, false);
            chart.ChartTitle.TextProperties.Text = "Bubble Chart";
            chart.ChartTitle.TextProperties.IsCentered = true;
            chart.ChartTitle.Height = 30;
            chart.HasTitle = true;

            Double[] xdata = new Double[] { 7.7, 8.9, 1.0, 2.4 };
            Double[] ydata = new Double[] { 15.2, 5.3, 6.7, 8 };
            Double[] size = new Double[] { 1.1, 2.4, 3.7, 4.8 };

            chart.ChartData[0, 0].Text = "X-Value";
            chart.ChartData[0, 1].Text = "Y-Value";
            chart.ChartData[0, 2].Text = "Size";

            for (Int32 i = 0; i < xdata.Length; ++i)
            {
                chart.ChartData[i + 1, 0].Value = xdata[i];
                chart.ChartData[i + 1, 1].Value = ydata[i];
                chart.ChartData[i + 1, 2].Value = size[i];
            }

            chart.Series.SeriesLabel = chart.ChartData["B1", "B1"];

            chart.Series[0].XValues = chart.ChartData["A2", "A5"];
            chart.Series[0].YValues = chart.ChartData["B2", "B5"];
            chart.Series[0].Bubbles.Add(chart.ChartData["C2"]);
            chart.Series[0].Bubbles.Add(chart.ChartData["C3"]);
            chart.Series[0].Bubbles.Add(chart.ChartData["C4"]);
            chart.Series[0].Bubbles.Add(chart.ChartData["C5"]);

            pres.SaveToFile(@"result.pptx", FileFormat.Pptx2010);
            System.Diagnostics.Process.Start("result.pptx");

        }
    }
}
Imports Spire.Presentation
Imports Spire.Presentation.Charts
Imports System.Drawing

Namespace CreateBubbleChart
	Class Program
		Private Shared Sub Main(args As String())
			Dim pres As New Presentation()
			Dim rect1 As New RectangleF(40, 40, 550, 320)
			Dim chart As IChart = pres.Slides(0).Shapes.AppendChart(ChartType.Bubble, rect1, False)
			chart.ChartTitle.TextProperties.Text = "Bubble Chart"
			chart.ChartTitle.TextProperties.IsCentered = True
			chart.ChartTitle.Height = 30
			chart.HasTitle = True

			Dim xdata As [Double]() = New [Double]() {7.7, 8.9, 1.0, 2.4}
			Dim ydata As [Double]() = New [Double]() {15.2, 5.3, 6.7, 8}
			Dim size As [Double]() = New [Double]() {1.1, 2.4, 3.7, 4.8}

			chart.ChartData(0, 0).Text = "X-Value"
			chart.ChartData(0, 1).Text = "Y-Value"
			chart.ChartData(0, 2).Text = "Size"

			For i As Int32 = 0 To xdata.Length - 1
				chart.ChartData(i + 1, 0).Value = xdata(i)
				chart.ChartData(i + 1, 1).Value = ydata(i)
				chart.ChartData(i + 1, 2).Value = size(i)
			Next

			chart.Series.SeriesLabel = chart.ChartData("B1", "B1")

			chart.Series(0).XValues = chart.ChartData("A2", "A5")
			chart.Series(0).YValues = chart.ChartData("B2", "B5")
			chart.Series(0).Bubbles.Add(chart.ChartData("C2"))
			chart.Series(0).Bubbles.Add(chart.ChartData("C3"))
			chart.Series(0).Bubbles.Add(chart.ChartData("C4"))
			chart.Series(0).Bubbles.Add(chart.ChartData("C5"))

			pres.SaveToFile("result.pptx", FileFormat.Pptx2010)
			System.Diagnostics.Process.Start("result.pptx")

		End Sub
	End Class
End Namespace
If you are preparing a large number of presentations, cloning slides can help you save resources. Instead of creating new slides from scratch for each presentation, it is more efficient and less time-consuming to modify existing slides. In this article, you will learn how to copy slides in PowerPoint presentations in C# using Spire.Presentation for .NET.
Install Spire.Presentation for .NET
To begin with, you need to add the DLL files included in the Spire.Presentation for.NET package as references in your .NET project. The DLL files can be either downloaded from this link or installed via NuGet.
PM> Install-Package Spire.Presentation
Copy Slides Within the Same Presentation in C#
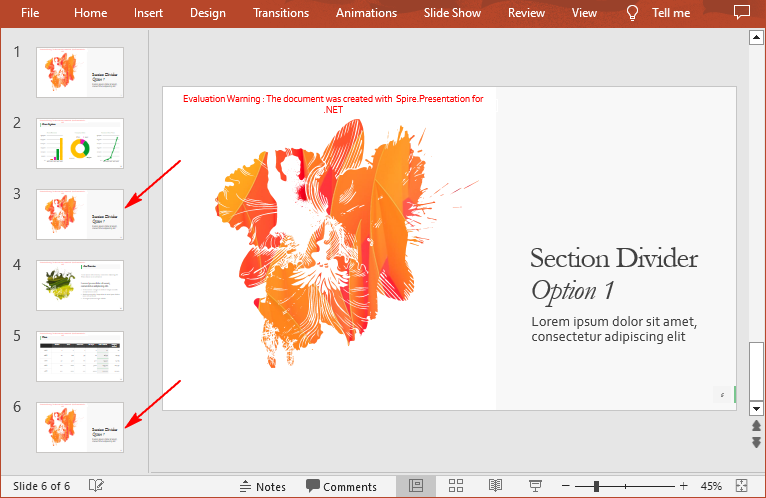
You can clone a slide either at a specified location or at the end of a PowerPoint presentation through the Presentation.Slides.Insert(intIndex, ISlide slide) or Presentation.Slides.Append(ISlide slide) methods. The following are the detailed steps.
- Create a Presentation instance.
- Load a PowerPoint presentation using Presentation.LoadFromFile() method.
- Get a specified slide using Prenstion.Slides[] property.
- Clone the slide to the end of the same presentation using Presentation.Slides.Append() method.
- Clone the slide to a specific position within the same presentation using Presentation.Slides.Insert() method.
- Save the result file using Presentation.SaveToFile() method.
- C#
using Spire.Presentation;

namespace CopySlides
{
    class Program
    {
        static void Main(string[] args)
        {
            //Create a Presentation instance
            Presentation ppt = new Presentation();

            //Load a PowerPoint presentation
            ppt.LoadFromFile("Input1.pptx");

            //Get the first slide in the presentation
            ISlide slide = ppt.Slides[0];

            //Clone the slide to the end of the presentation
            ppt.Slides.Append(slide);

            //Clone the slide to the third position within the presentation
            ppt.Slides.Insert(2, slide);

            //Save the result file
            ppt.SaveToFile("CloneSlidesWithinTheSame.pptx", FileFormat.Pptx2013);

        }
    }
}
Copy Slides to Another Presentation in C#
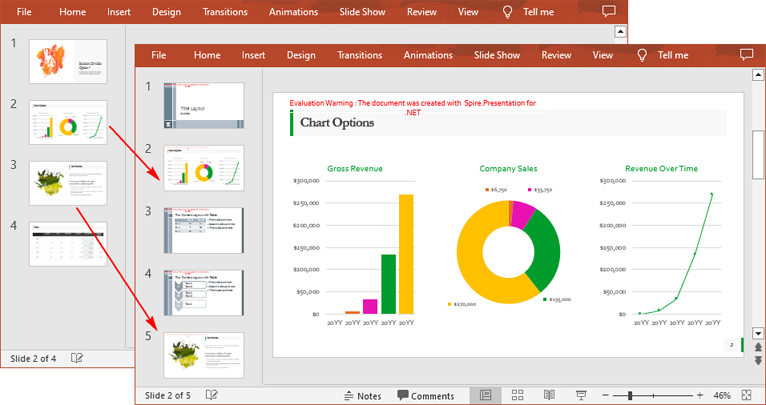
Spire.Presentation for .NET also allows you to load two PowerPoint files and then clone the slides from one presentation to another presentation. The following are the detailed steps.
- Create a Presentation instance.
- Load two PowerPoint presentations using Presentation.LoadFromFile() method.
- Get two slides in the first presentation using Prenstion.Slides[] property.
- Clone the first slide to a specific position in the second presentation using Presentation.Slides.Insert() method.
- Clone the second slide to the end of the second presentation using Presentation.Slides.Append() method.
- Save the result file using Presentation.SaveToFile() method.
- C#
using Spire.Presentation;

namespace CopySlidesToAnother
{
    class Program
    {
        static void Main(string[] args)
        {
            //Load the first PowerPoint presentation
            Presentation sourcePPT = new Presentation();
            sourcePPT.LoadFromFile("Input1.pptx");

            //Load the second PowerPoint presentation
            Presentation destPPT = new Presentation();
            destPPT.LoadFromFile("Input2.pptx");

            //Get two slides in the first presentation
            ISlide slide1 = sourcePPT.Slides[1];
            ISlide slide2 = sourcePPT.Slides[2];

            //Clone slide1 to the second position in the second presentation
            destPPT.Slides.Insert(1, slide1);

            //Clone slide2 to the end of the second presentation
            destPPT.Slides.Append(slide2);

            //Save the result file
            destPPT.SaveToFile("CloneSlidesToAnother.pptx", FileFormat.Pptx2013);

        }
    }
}
Apply for a Temporary License
If you'd like to remove the evaluation message from the generated documents, or to get rid of the function limitations, please request a 30-day trial license for yourself.
Add page numbers in different sections in Word document via Spire.Doc
2015-06-25 08:04:08 Written by KoohjiSometimes in one Word document developers need to add page numbers for different sections, for example cover, directory and content are in different sections. This article talks about how to add page numbers for different sections via Spire.Doc.
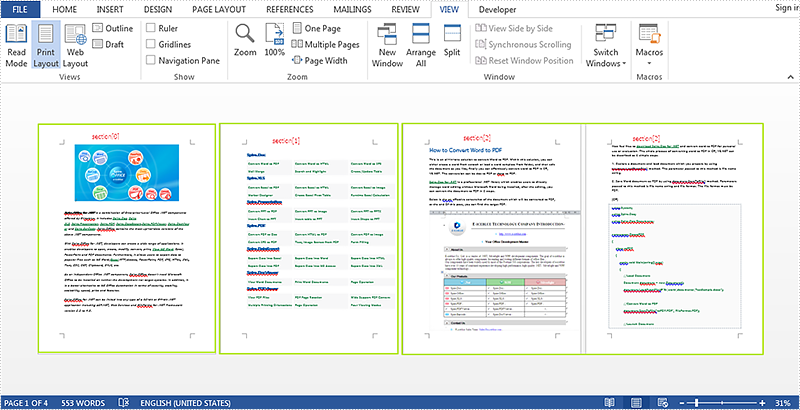
Here will import a test document within 3 sections inside as followed screenshot.
Here are the detailed steps:
Step 1: Create a new document and load the test word file.
Document document = new Document("test.docx");
Step 2: Create footer for the first section and add page number inside.
HeaderFooter footer = document.Sections[0].HeadersFooters.Footer;
Paragraph footerParagraph = footer.AddParagraph();
footerParagraph.AppendField("page number", FieldType.FieldPage);
footerParagraph.AppendText(" of ");
footerParagraph.AppendField("number of pages", FieldType.FieldSectionPages);
footerParagraph.Format.HorizontalAlignment = HorizontalAlignment.Right;
Step 3: Restart page number of next section and set the starting page number to 1.
document.Sections[1].PageSetup.RestartPageNumbering = true;
document.Sections[1].PageSetup.PageStartingNumber = 1;
Step 4: Repeat step2 and Step3 for the rest sections, so change the code with for loop.
for (int i = 0; i < 3; i++)
            {
                HeaderFooter footer = document.Sections[i].HeadersFooters.Footer;
                Paragraph footerParagraph = footer.AddParagraph();
                footerParagraph.AppendField("page number", FieldType.FieldPage);
                footerParagraph.AppendText(" of ");
                footerParagraph.AppendField("number of pages", FieldType.FieldSectionPages);
                footerParagraph.Format.HorizontalAlignment = HorizontalAlignment.Right;

                if (i == 2)
                    break;
                else
                {
                    document.Sections[i + 1].PageSetup.RestartPageNumbering = true;
                    document.Sections[i + 1].PageSetup.PageStartingNumber = 1;
                }
            }
Step 5: Save and review.
document.SaveToFile("result.docx", FileFormat.Docx);
System.Diagnostics.Process.Start("result.docx");
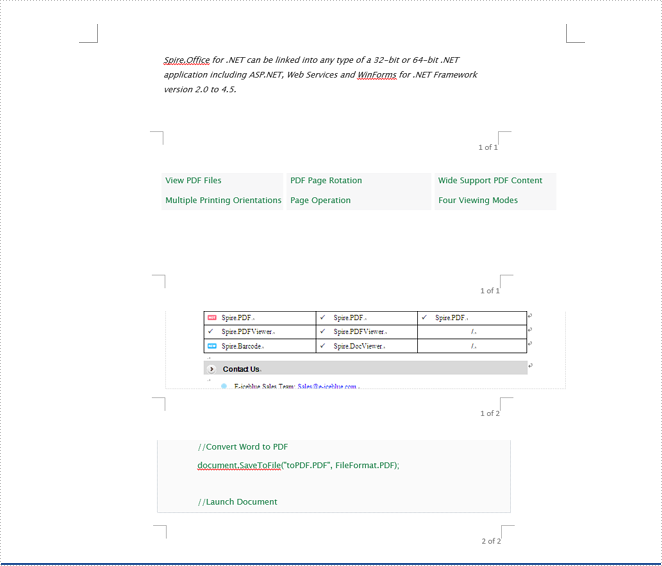
Result screenshot:
Only convert visible or hidden worksheet to image in C#
2015-06-25 07:51:18 Written by AdministratorSpire.XLS supports to convert the whole excel workbook into Image, PDF, HTML and other files formats; it also supports to hide or show the worksheet in C#. When we have hidden worksheet in the excel files, developers can also use Spire.XLS to only convert the visible or hidden excel worksheets to other file formats by judge the property of WorksheetVisibility. This article will show you how to only convert visible or hidden worksheet to image in C#.
Here comes to the steps:
Step 1: Create a new document and load from file.
Workbook book = new Workbook();
book.LoadFromFile("sample.xlsx", ExcelVersion.Version2010);
Step 2: Traverse every worksheet in the excel file.
foreach (Spire.Xls.Worksheet ws2 in book.Worksheets)
Step 3: Call the property of WorksheetVisibility to judge visible or hidden excel worksheet.
//only converts the visible sheet
if (ws2.Visibility == WorksheetVisibility.Visible)
//only converts the hidden sheet
if (ws2.Visibility == WorksheetVisibility.Hidden)
Step 4: Use SaveToImage to convert Excel worksheet to Image.
ws2.SaveToImage("result.jpg");
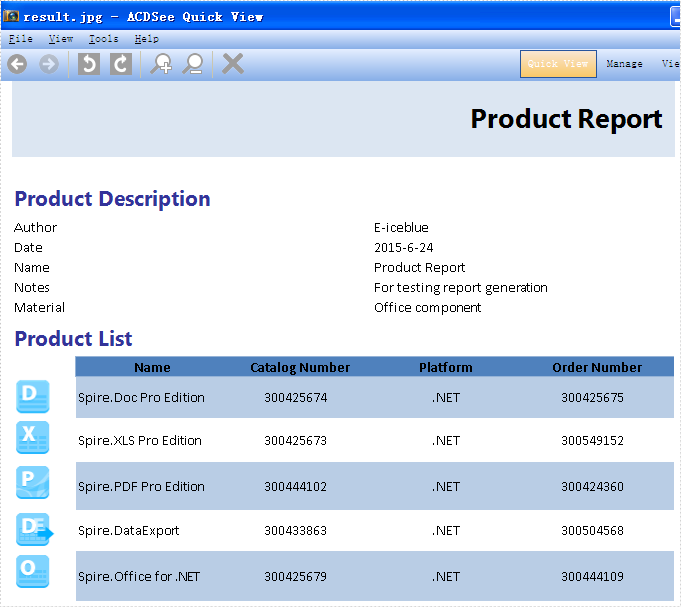
Effective screenshots:
Only convert the visible worksheet to Image in .jpg format.
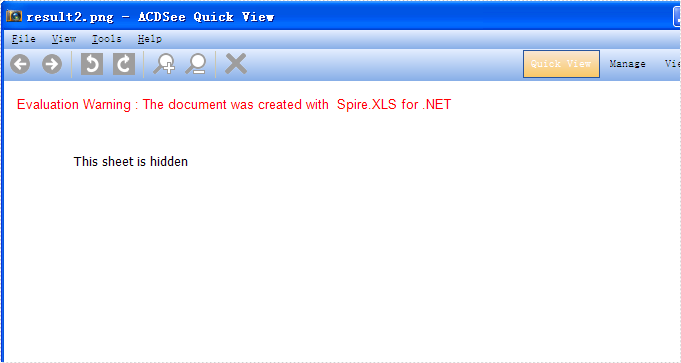
Only convert the hidden worksheet to Image in .png format.
Full codes:
using Spire.Xls;

namespace ConsoleTest
{
    class Program
    {
        static void Main(string[] args)
        {
            Workbook book = new Workbook();
            book.LoadFromFile("sample.xlsx", ExcelVersion.Version2010);

            foreach (Spire.Xls.Worksheet ws2 in book.Worksheets)
            {
                //only convert the visible sheet
                if (ws2.Visibility == WorksheetVisibility.Visible)
                    ////only convert the hidden sheet
                    //if (ws2.Visibility == WorksheetVisibility.Hidden)
                    ws2.SaveToImage("result.jpg");
            }
        }
    }
}
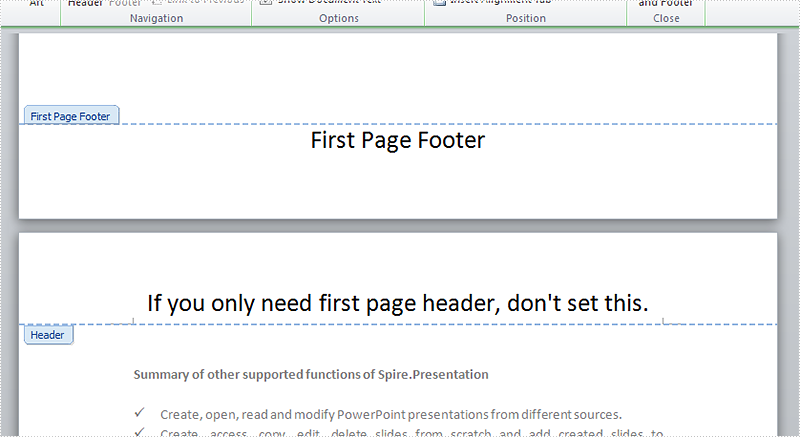
In the MS Word Header & Footer Tools options, we could choose "Different First Page" and "Different odd and even pages". The article "How to create different headers/footers for odd and even pages" introduces the method to set different odd and even pages using Spire.Doc. Spire.DOC also provides an easy and quick method to add different first page header & footer. This article is going to introduce the method to add different first page header & footer.
FYI, if you only need the first page header and footer, please just set the first page header & footer and leave the rest alone. In this way, your Word document will only have header & footer in the first page, which provides a simpler way to add a header only into the first page of a document than the method mentioned in the article "How to add a header only into the first page of a document".
Note: before start, please download the latest version of Spire.Doc and add Spire.Doc .dll in the bin folder as the reference of Visual Studio.
Step 1: Load the sample document that only contains text.
Document document = new Document();
document.LoadFromFile("T.docx");
Step 2: Get the section and set the property true.
Section section = document.Sections[0];
section.PageSetup.DifferentFirstPageHeaderFooter = true;
Step 3: Set the first page header. Here we append a picture as the header.
Paragraph paragraph1 = section.HeadersFooters.FirstPageHeader.AddParagraph();
paragraph1.Format.HorizontalAlignment = HorizontalAlignment.Right;
DocPicture headerimage = paragraph1.AppendPicture(Image.FromFile("2.bmp"));
Step 4: Set the first page footer.
Paragraph paragraph2 = section.HeadersFooters.FirstPageFooter.AddParagraph();
paragraph2.Format.HorizontalAlignment = HorizontalAlignment.Center;
TextRange FF = paragraph2.AppendText("First Page Footer");
FF.CharacterFormat.FontSize = 20;
Step 5: Set the other header & footer. If you only need the first page header & footer, don't set this.
Paragraph paragraph3 = section.HeadersFooters.Header.AddParagraph();
paragraph3.Format.HorizontalAlignment = HorizontalAlignment.Center;
TextRange NH = paragraph3.AppendText("If you only need first page header, don't set this.");
NH.CharacterFormat.FontSize = 20;

Paragraph paragraph4 = section.HeadersFooters.Footer.AddParagraph();
paragraph4.Format.HorizontalAlignment = HorizontalAlignment.Center;
TextRange NF = paragraph4.AppendText("If you only need first page footer, don't set this.");
NF.CharacterFormat.FontSize = 20;
Step 6: save the document and launch to see effects.
document.SaveToFile("R.docx", FileFormat.Docx2010);
System.Diagnostics.Process.Start("R.docx");
Effects:

Full codes:
using System;
using System.Collections.Generic;
using System.Linq;
using System.Text;
using Spire.Doc;
using Spire.Doc.Documents;
using Spire.Doc.Fields;
using System.Drawing;

namespace Mirror_Margin
{
    class Program
    {
        static void Main(string[] args)
        {
            Document document = new Document();
            document.LoadFromFile("T.docx");

            Section section = document.Sections[0];
            section.PageSetup.DifferentFirstPageHeaderFooter = true;

            Paragraph paragraph1 = section.HeadersFooters.FirstPageHeader.AddParagraph();
            paragraph1.Format.HorizontalAlignment = HorizontalAlignment.Right;
            DocPicture headerimage = paragraph1.AppendPicture(Image.FromFile("2.bmp"));

            Paragraph paragraph2 = section.HeadersFooters.FirstPageFooter.AddParagraph();
            paragraph2.Format.HorizontalAlignment = HorizontalAlignment.Center;
            TextRange FF = paragraph2.AppendText("First Page Footer");
            FF.CharacterFormat.FontSize = 20;

            Paragraph paragraph3 = section.HeadersFooters.Header.AddParagraph();
            paragraph3.Format.HorizontalAlignment = HorizontalAlignment.Center;
            TextRange NH = paragraph3.AppendText("If you only need first page header, don't set this.");
            NH.CharacterFormat.FontSize = 20;

            Paragraph paragraph4 = section.HeadersFooters.Footer.AddParagraph();
            paragraph4.Format.HorizontalAlignment = HorizontalAlignment.Center;
            TextRange NF = paragraph4.AppendText("If you only need first page footer, don't set this.");
            NF.CharacterFormat.FontSize = 20;

            document.SaveToFile("R.docx", FileFormat.Docx2010);
            System.Diagnostics.Process.Start("R.docx");
        }
    }
}
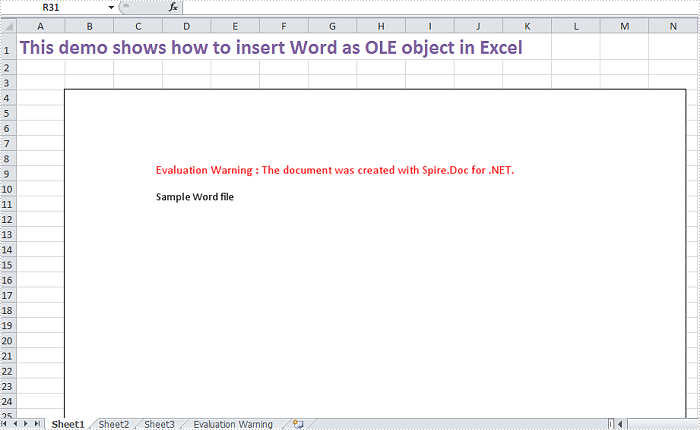
OLE object is used to make content created in one program available in another program, for instance, we can insert Word as OLE object in Excel sheet.
As a robust component, Spire.XLS supports to insert Word and PowerPoint slide as linked object or embedded object into Excel. In this article, we make an example to explain how to insert Word as OLE object into Excel using Spire.XLS and Spire.Doc. Before coding, you need to download Spire.Office and reference related the Dlls in your VS project.
Code Snippet:
Step 1: Define a GetDocImage(string doxcFile) method to get olePicture. Actually, the olePicture is an image of data information in original Word document. The image generated from the specified page will be shown in Excel sheet after inserting OLE object into it.
private static Image GetDocImage(string docxFile)
{
    Document document = new Document();
    document.LoadFromFile(docxFile);
    return document.SaveToImages(0, Spire.Doc.Documents.ImageType.Bitmap);

}
Step 2: Insert OLE object in Excel. After getting the worksheet from Excel file, we call GetDocImage(string doxcFile) method which is defined in the first step to get image source and then use the ws.OleObjects.Add(string FileName, Image image, OleLinkType linkType) method to insert the new OLE object to worksheet.
static void Main(string[] args)
{
    //load Excel file
    Workbook workbook = new Workbook();
    workbook.LoadFromFile("d:\\sample.xlsx");
    Worksheet ws = workbook.Worksheets[0];
    //insert OLE object
    string docx = "d:\\sample.docx";
    Image image = GetDocImage(docx);
    IOleObject oleObject = ws.OleObjects.Add(docx,image,OleLinkType.Embed);
    oleObject.Location=ws.Range["B4"];
    oleObject.ObjectType = OleObjectType.WordDocument;
    //save the file
    workbook.SaveToFile("result.xlsx",ExcelVersion.Version2010);
    System.Diagnostics.Process.Start("result.xlsx");
}
Result:
Full Code:
using Spire.Doc;
using Spire.Xls;
using Spire.Xls.Core;
using System.Drawing;
namespace InsertOLEObject
{
    class Program
    {
        private static Image GetDocImage(string docxFile)
        {
            Document document = new Document();
            document.LoadFromFile(docxFile);
            return document.SaveToImages(0, Spire.Doc.Documents.ImageType.Bitmap);

        }
        static void Main(string[] args)
        {
            //load Excel file
            Workbook workbook = new Workbook();
            workbook.LoadFromFile("d:\\sample.xlsx");
            Worksheet ws = workbook.Worksheets[0];
            //insert OLE object
            string docx = "d:\\sample.docx";
            Image image = GetDocImage(docx);
            IOleObject oleObject = ws.OleObjects.Add(docx, image, OleLinkType.Embed);
            oleObject.Location = ws.Range["B4"];
            oleObject.ObjectType = OleObjectType.WordDocument;
            //save the file
            workbook.SaveToFile("result.xlsx", ExcelVersion.Version2010);
            System.Diagnostics.Process.Start("result.xlsx");
        }
    }
}
Imports Spire.Doc
Imports Spire.Xls
Imports Spire.Xls.Core
Imports System.Drawing
Namespace InsertOLEObject
	Class Program
		Private Shared Function GetDocImage(docxFile As String) As Image
			Dim document As New Document()
			document.LoadFromFile(docxFile)
			Return document.SaveToImages(0, Spire.Doc.Documents.ImageType.Bitmap)

		End Function
		Private Shared Sub Main(args As String())
			'load Excel file
			Dim workbook As New Workbook()
			workbook.LoadFromFile("d:\sample.xlsx")
			Dim ws As Worksheet = workbook.Worksheets(0)
			'insert OLE object
			Dim docx As String = "d:\sample.docx"
			Dim image As Image = GetDocImage(docx)
			Dim oleObject As IOleObject = ws.OleObjects.Add(docx, image, OleLinkType.Embed)
			oleObject.Location = ws.Range("B4")
			oleObject.ObjectType = OleObjectType.WordDocument
			'save the file
			workbook.SaveToFile("result.xlsx", ExcelVersion.Version2010)
			System.Diagnostics.Process.Start("result.xlsx")
		End Sub
	End Class
End Namespace
Sometimes, you may want to hide one or more worksheets in an Excel workbook to prevent the data they contain from being viewed by others. After hiding, the data in the hidden worksheets will no longer be visible, but it can still be referenced by other worksheets. If you want to display the data again, you can show the hidden worksheets at any time. In this article, you will learn how to hide or show worksheets in Excel in C# and VB.NET using Spire.XLS for .NET library.
Install Spire.XLS for .NET
To begin with, you need to add the DLL files included in the Spire.XLS for .NET package as references in your .NET project. The DLL files can be either downloaded from this link or installed via NuGet.
PM> Install-Package Spire.XLS
Hide a Worksheet in Excel in C# and VB.NET
There can be two levels of worksheet hiding: hidden and very hidden. An end user can easily show a hidden worksheet using the unhide command of Excel, but if the worksheet is set as very hidden, he/she cannot make the sheet visible again via the Excel user interface.
In Spire.XLS for .NET, you can set a worksheet as hidden or very hidden by setting the Worksheet.Visibility property to WorksheetVisibility.Hidden or WorksheetVisibility.StrongHidden. Please note that you must leave at least one worksheet visible in an Excel workbook.
The following steps demonstrate how to set a worksheet as hidden or very hidden:
- Initialize an instance of the Workbook class.
- Load an Excel file through Workbook.LoadFromFile() method.
- Get a specific worksheet in the file by its index through Workbook.Worksheets[int] property.
- Set the worksheet as hidden or very hidden by setting the Worksheet.Visibility property to WorksheetVisibility.Hidden or WorksheetVisibility.StrongHidden.
- Save the result file using Workbook.SaveToFile() method.
- C#
- VB.NET
using Spire.Xls;

namespace HideWorksheetsInExcel
{
    class Program
    {
        static void Main(string[] args)
        {
            //Initialize an instance of the Workbook class
            Workbook workbook = new Workbook();
            //Load an Excel file
            workbook.LoadFromFile("Sample.xlsx");

            //Get the first worksheet
            Worksheet sheet1 = workbook.Worksheets[0];

            //Set the worksheet as hidden
            sheet1.Visibility = WorksheetVisibility.Hidden;

            //Get the second worksheet
            Worksheet sheet2 = workbook.Worksheets[1];

            //Set the worksheet as very hidden
            sheet2.Visibility = WorksheetVisibility.StrongHidden;

            //Save the result file
            workbook.SaveToFile("HideWorksheets.xlsx", ExcelVersion.Version2013);
        }
    }
}
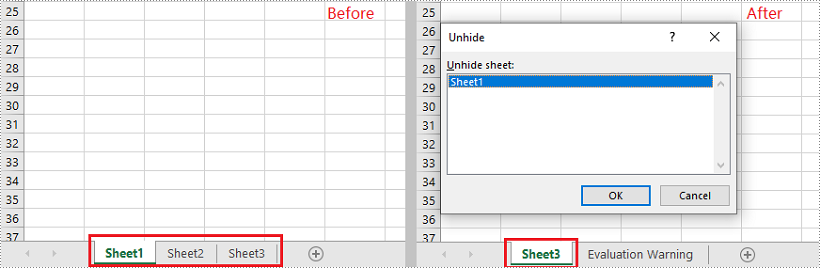
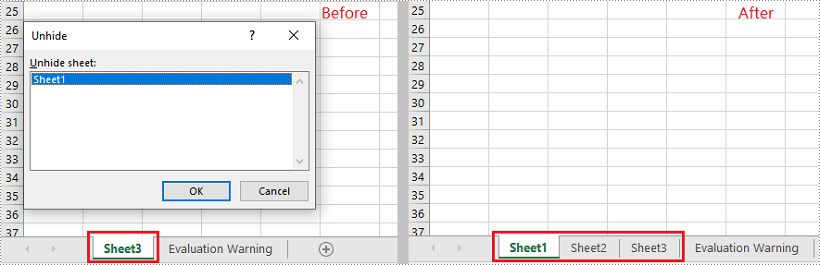
Show All Hidden Worksheets in Excel in C# and VB.NET
You can show a hidden worksheet in Excel by setting the Worksheet.Visibility property to WorksheetVisibility.Visible.
The following steps demonstrate how to show all hidden worksheets in an Excel file:
- Initialize an instance of the Workbook class.
- Load an Excel file through Workbook.LoadFromFile() method.
- Iterate through all worksheets in the Excel file.
- Find the hidden or very hidden worksheets, and then make them visible by setting the Worksheet.Visibility property to WorksheetVisibility.Visible.
- Save the result file using Workbook.SaveToFile() method.
- C#
- VB.NET
using Spire.Xls;

namespace ShowHiddenWorksheetsInExcel
{
    class Program
    {
        static void Main(string[] args)
        {
            //Initialize an instance of the Workbook class
            Workbook workbook = new Workbook();
            //Load an Excel file
            workbook.LoadFromFile("HideWorksheets.xlsx");

            //Iterate through all worksheets in the file
            foreach (Worksheet sheet in workbook.Worksheets)
            {
                //Show hidden worksheets
                if (sheet.Visibility == WorksheetVisibility.Hidden)
                {
                    sheet.Visibility = WorksheetVisibility.Visible;
                }
                //Show very hidden worksheets
                else if (sheet.Visibility == WorksheetVisibility.StrongHidden)
                {
                    sheet.Visibility = WorksheetVisibility.Visible;
                }
            }

            //Save the result file
            workbook.SaveToFile("ShowHiddenWorksheets.xlsx", ExcelVersion.Version2013);
        }
    }
}
Apply for a Temporary License
If you'd like to remove the evaluation message from the generated documents, or to get rid of the function limitations, please request a 30-day trial license for yourself.
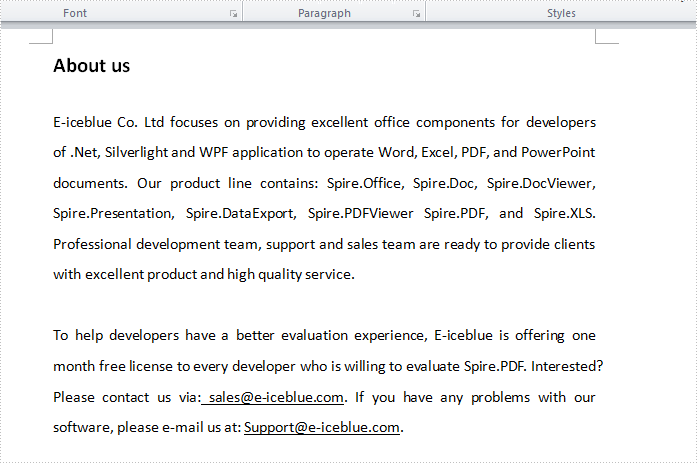
In the tutorials part of Spire.Doc, we have introduced the simple and easy method to "Replace text in Word with Table in C#" and "Replace images in Word with Texts in C#". Sometimes, we need to replace text in Word with image. Spire.Doc also provides a quick and effective solution to achieve this function with a little bit different codes. This article is going to introduce the method to replace text in Word with image.
Note: Before start, please download the latest version of Spire.Doc and add Spire.Doc .dll in the bin folder as the reference of visual studio.
Sample document:
Step 1: Load the sample Word document and the image used to replace the text.
Document document = new Document();
document.LoadFromFile("s.docx");
Image image = Image.FromFile("2.bmp");
Step 2: Find the string "E-iceblue" in the document.
TextSelection[] selections = document.FindAllString("E-iceblue", true, true);
int index = 0;
TextRange range = null;
Step 3: Remove the text and replace it with Image
foreach (TextSelection selection in selections)
            {
                DocPicture pic = new DocPicture(document);
                pic.LoadImage(image);

                range = selection.GetAsOneRange();
                index = range.OwnerParagraph.ChildObjects.IndexOf(range);
                range.OwnerParagraph.ChildObjects.Insert(index, pic);
                range.OwnerParagraph.ChildObjects.Remove(range);

            }
Step 4: Save and launch the document to see effects.
document.SaveToFile("Sample.doc", FileFormat.Doc);
System.Diagnostics.Process.Start("Sample.doc");
Effects:

Full codes:
using System;
using System.Collections.Generic;
using System.Linq;
using System.Text;
using Spire.Doc;
using Spire.Doc.Documents;
using Spire.Doc.Fields;
using System.Drawing;

namespace Replace_Text_with_Image
{
    class Program
    {
        static void Main(string[] args)
        {
            Document document = new Document();
            document.LoadFromFile("s.docx");
            Image image = Image.FromFile("2.bmp");

            TextSelection[] selections = document.FindAllString("E-iceblue", true, true);
            int index = 0;
            TextRange range = null;

            foreach (TextSelection selection in selections)
            {
                DocPicture pic = new DocPicture(document);
                pic.LoadImage(image);

                range = selection.GetAsOneRange();
                index = range.OwnerParagraph.ChildObjects.IndexOf(range);
                range.OwnerParagraph.ChildObjects.Insert(index, pic);
                range.OwnerParagraph.ChildObjects.Remove(range);

            }

            document.SaveToFile("Sample.doc", FileFormat.Doc);
            System.Diagnostics.Process.Start("Sample.doc");

        }
    }
}
PowerPoint presentations are a fundamental tool for communication across various fields. As these presentations grow in size and complexity, managing them effectively becomes crucial. One practical solution is to split larger presentations into smaller and more manageable ones. Whether for adapting presentations to specific audiences, breaking down training modules, or optimizing file sizes for distribution, the ability to split PowerPoint presentations using C# in .NET significantly enhances workflow efficiency. This article will show how to split PowerPoint presentations by slides, slide ranges, and sections with C# using Spire.Presentation for .NET.
- Split PowerPoint Presentations by Slides using C#
- Split PowerPoint Presentations by Slide Ranges using C#
- Split PowerPoint Presentations by Sections using C#
Install Spire.Presentation for .NET
To begin with, you need to add the DLL files included in the Spire.Presentation for.NET package as references in your .NET project. The DLL files can be either downloaded from this link or installed via NuGet.
PM> Install-Package Spire.Presentation
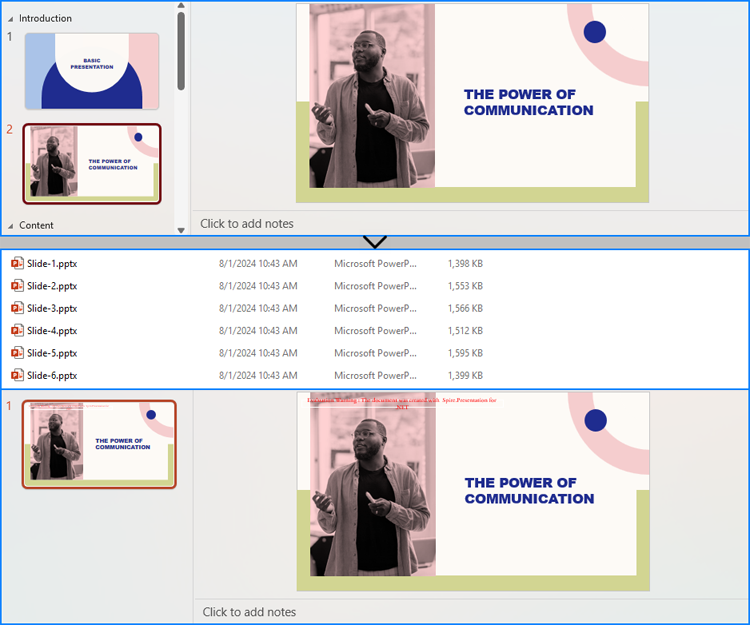
Split PowerPoint Presentations by Slides using C#
Using Spire.Presentation for .NET, developers can split a presentation into individual slide presentations by iterating through the slides in the original presentation, adding each slide to a new presentation, and then saving it.
Here are the detailed steps:
- Create an instance of Presentation class.
- Load a PowerPoint file using Presentation.LoadFromFile() method.
- Iterate through the slides in the presentation:
- Get a slide through Presentation.Slides[] property.
- Create a new instance of Presentation class and remove the default slide using Presentation.Slides.RemoveAt(0) method.
- Append the slide to the new presentation using Presentation.Slides.Append() method.
- Save the new presentation using ISlide.SaveToFile() method.
- C#
using Spire.Presentation;

namespace SplitPresentationSlide
{
    class Program
    {
        static void Main(string[] args)
        {
            // Create an instance of Presentation class
            Presentation presentation = new Presentation();

            // Load a PowerPoint presentation
            presentation.LoadFromFile("Sample.pptx");

            // Iterate through all slides
            for (int i = 0; i < presentation.Slides.Count; i++)
            {
                // Get a slide
                ISlide slide = presentation.Slides[i];
                // Create a new presentation and remove the default slide
                Presentation newPresentation = new Presentation();
                newPresentation.Slides.RemoveAt(0);
                // Append the slide to the new presentation
                newPresentation.Slides.Append(slide);
                // Save the new presentation
                newPresentation.SaveToFile("output/Presentations/Slide-" + (i +1).ToString() + ".pptx", FileFormat.Pptx2013);
                newPresentation.Dispose();
            }
            presentation.Dispose();
        }
    }
}
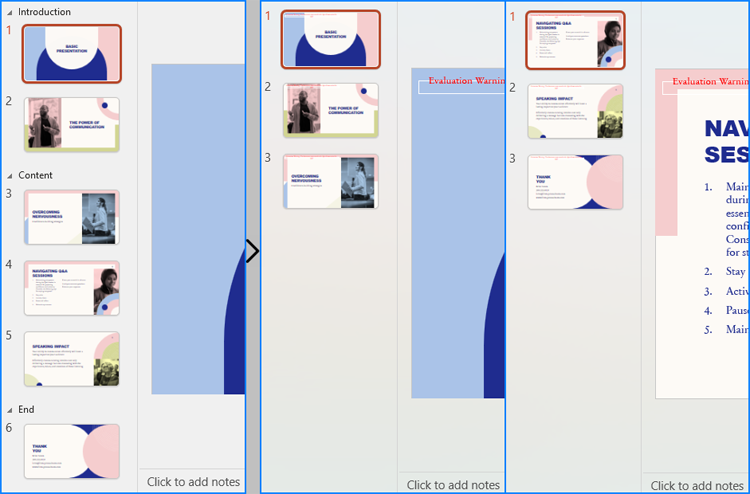
Split PowerPoint Presentations by Slide Ranges using C#
In addition to splitting PowerPoint presentations into individual slide presentations, developers can also split presentations into slide ranges by copying specified ranges of slides to new presentations and saving them.
Here are the detailed steps:
- Create an instance of Presentation class.
- Load a PowerPoint presentation using Presentation.LoadFromFile() method.
- Create new instances of Presentation class and remove the default slides.
- Append specified ranges of slides to the new presentations using Presentation.Slides.Append() method.
- Save the new presentations using Presentation.SaveToFile() method.
- C#
using Spire.Presentation;

namespace SplitPresentationSlide
{
    class Program
    {
        static void Main(string[] args)
        {
            // Create an instance of Presentation class
            Presentation presentation = new Presentation();

            // Load the original PowerPoint presentation
            presentation.LoadFromFile("Sample.pptx");

            // Create two new instances of Presentation class
            Presentation presentation1 = new Presentation();
            Presentation presentation2 = new Presentation();

            // Remove the default blank slides
            presentation1.Slides.RemoveAt(0);
            presentation2.Slides.RemoveAt(0);

            // Append specific ranges of slides to the new presentations
            for (int i = 0; i < 3; i++)
            {
                presentation1.Slides.Append(presentation.Slides[i]);
            }
            for (int i = 3; i < presentation.Slides.Count; i++)
            {
                presentation2.Slides.Append(presentation.Slides[i]);
            }

            // Save the new presentation
            presentation1.SaveToFile("output/Presentations/SLideRange1.pptx", FileFormat.Pptx2013);
            presentation2.SaveToFile("output/Presentations/SLideRange2.pptx", FileFormat.Pptx2013);

            presentation1.Dispose();
            presentation2.Dispose();
            presentation.Dispose();
        }
    }
}
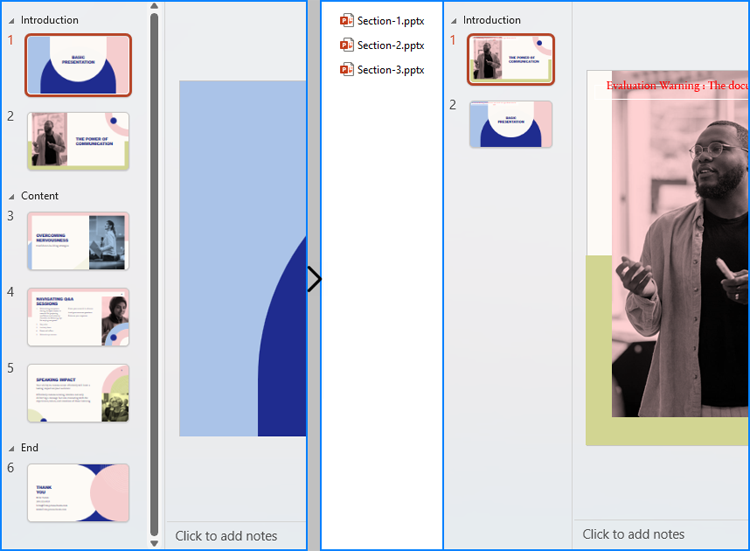
Split PowerPoint Presentations by Sections using C#
Developers also can split a presentation into sections by iterating through the sections in the presentation, adding each slide within those sections to a new PowerPoint presentation, and then saving it.
Here are the detailed steps:
- Create an instance of Presentation class and load a PowerPoint presentation using Presentation.LoadFromFile() method.
- Iterate through the sections in the presentation:
- Get a section through Presentation.SectionList[] property.
- Create a new Presentation instance and remove the default slide.
- Add a section to the new presentation with the same name using Presentation.SectionList.Append() method.
- Get the slides in the original section using Section.GetSlides() method.
- Iterate through the slides and add them to the new section using Presentation.SectionList[].Insert() method.
- Save the new presentation using Presentation.SaveToFile() method.
- C#
using Spire.Presentation;

namespace SplitPresentationSlide
{
    class Program
    {
        static void Main(string[] args)
        {
            // Create an instance of Presentation class
            Presentation presentation = new Presentation();

            // Load a PowerPoint presentation
            presentation.LoadFromFile("Sample.pptx");

            for (int i = 0; i < presentation.SectionList.Count; i++)
            {
                // Get the current section
                Section section = presentation.SectionList[i];
                // Create a new instance of Presentation class and remove the default slide
                Presentation newPresentation = new Presentation();
                newPresentation.Slides.RemoveAt(0);
                // Add a section to the new presentation
                newPresentation.SectionList.Append(section.Name);
                // Get the slides in the section
                ISlide[] slides = section.GetSlides();
                foreach (ISlide slide in slides)
                {
                    // Insert the slide to the new section in the new presentation
                    newPresentation.SectionList[0].Insert(0, slide);
                }
                // Save the new presentation
                newPresentation.SaveToFile("output/Presentations/Section-" + (i + 1).ToString() + ".pptx", FileFormat.Pptx2019);
                newPresentation.Dispose();
            }
            presentation.Dispose();
        }
    }
}
Apply for a Temporary License
If you'd like to remove the evaluation message from the generated documents, or to get rid of the function limitations, please request a 30-day trial license for yourself.
